
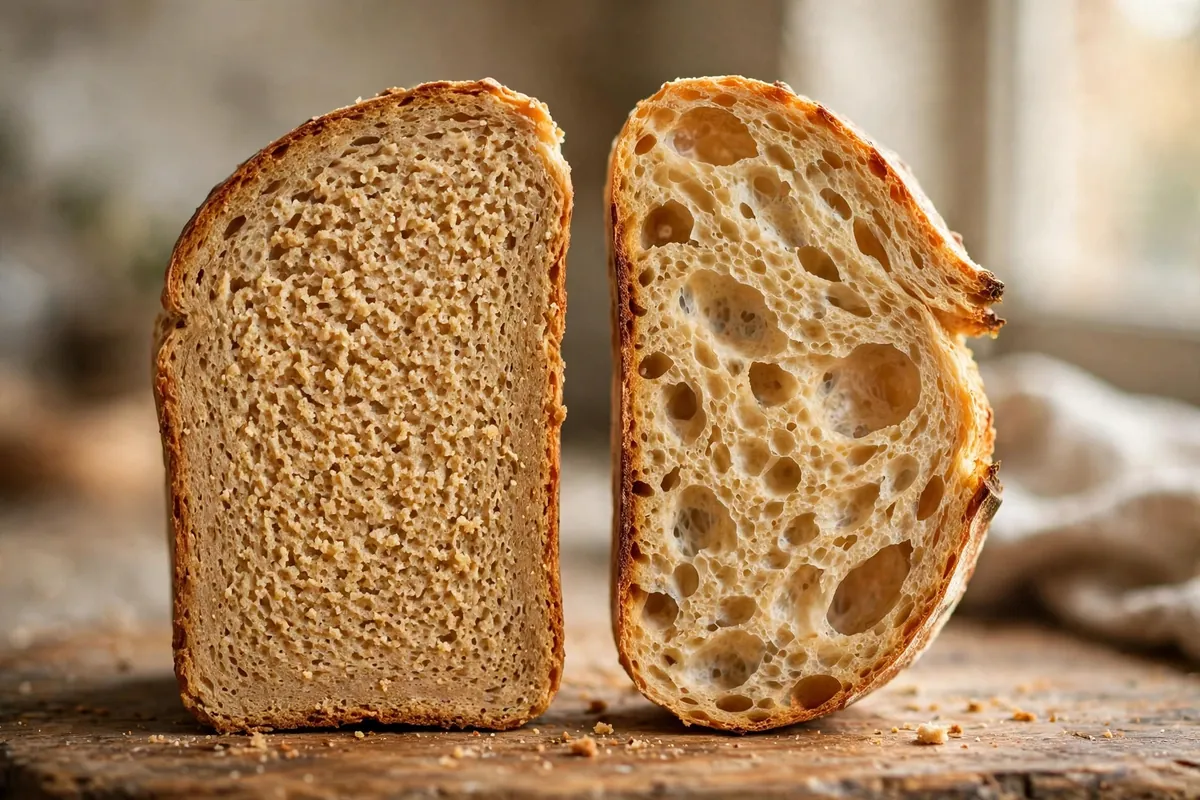
Quick diagnosis: 9 out of 10 dense loaves come down to two things: a gluten network that never fully developed, or fermentation that was cut short. If your dough failed the windowpane test and never roughly doubled during its rise, start with causes #1 and #3.
Bread’s open crumb comes from gas bubbles trapped in a strong gluten network. When the network is weak or the gas never forms, the crumb collapses dense. Work through the nine causes in order — the first match is almost certainly your answer.
1. The dough was under-kneaded
The most common cause, full stop. Kneading develops gluten — the elastic protein network that stretches around gas bubbles like tiny balloons. Under-kneaded dough has a weak, ragged network that can’t hold gas, so bubbles escape and the crumb sets dense.
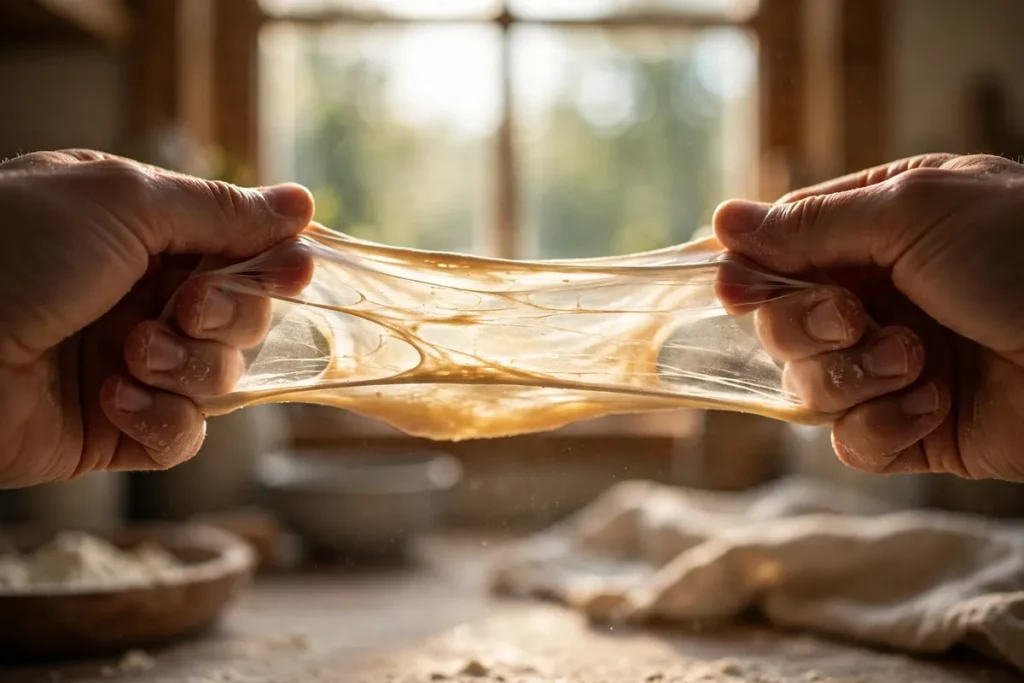
How to tell: Tear off a golf-ball-sized piece and stretch it gently. If you can stretch it thin enough to see light through it without tearing — the windowpane test — gluten is developed. If it rips immediately, it needs more work.
The fix: Knead 10–12 minutes by hand (6–8 in a stand mixer on medium-low) until smooth, elastic, and passing the windowpane test. An under-kneaded batch comes out like a brick; the same recipe properly kneaded gives an open crumb.
2. Too much flour was added
Extra flour makes a stiff dough that yeast gas can’t push apart. The usual culprit: scooping flour straight from the bag with a cup. A scooped cup can weigh 150g versus the standard 120g — that’s 25% too much flour without you realizing it.
How to tell: The dough felt firm and dry rather than soft and slightly tacky, and resisted stretching during shaping.
The fix: Weigh flour at 120g per cup. Hold back the last ¼ cup during mixing, adding it only if the dough is genuinely sticky once kneading begins — proper dough feels soft and tacky, not stiff.
3. The rise was cut short
Yeast needs time to produce the carbon dioxide that leavens bread. Shape and bake before fermentation finishes, and there simply isn’t enough gas in the dough — dense crumb guaranteed.
How to tell: The poke test. Press a floured finger half an inch into the risen dough. Springs back immediately and fills in? Under-proofed — give it more time. Springs back slowly, leaving a slight indent? Ready to bake.
The fix: Let the first rise go until roughly doubled — typically 1–2 hours at 75–80°F (24–27°C). Watch the dough, not the clock: in a cold kitchen the same recipe can take nearly twice as long as in warm conditions.
4. The yeast was weak or dead
Dead yeast produces no gas; weak yeast produces too little. Yeast dies from heat and slowly loses strength past its expiry — an opened packet in a warm cupboard for months is a prime suspect.
How to tell: Proof it first. Stir 2¼ teaspoons yeast and 1 teaspoon sugar into ¼ cup warm water (100–110°F / 37–43°C). Foamy and bubbling within 5–10 minutes means alive. Nothing happens? It’s dead — no amount of extra rising time will save that dough.
The fix: Proof any yeast you’re unsure about. Store opened yeast airtight in the fridge or freezer, and respect expiry dates.

5. The kitchen was too cold
Yeast activity roughly doubles with every 15°F (8°C) within its working range. Dough rising at 65°F (18°C) can take twice as long as at 78°F (26°C) — shape on your usual schedule and you’ve baked an under-fermented loaf.
How to tell: The dough barely moved in the expected time and the room felt cool.
The fix: Find 75–80°F (24–27°C): inside the oven with just the light on, on top of the fridge, or near a radiator. Above 90°F (32°C) the rise gets too fast and flavor suffers; above 140°F (60°C) yeast dies.
6. Too much salt, or salt directly on the yeast
Salt is essential — it tightens gluten and builds flavor — but concentrated salt draws water out of yeast cells and stalls them. Dumping it directly onto undissolved yeast is the worst version.
How to tell: You salted heavily, or sprinkled it straight onto the yeast.
The fix: Use about 2% salt by flour weight (10g per 500g flour, roughly 2 teaspoons table salt). Mix it evenly through the flour before the yeast goes in. At the right percentage, salt improves crumb structure.
7. The dough over-proofed and collapsed
Over-proofed dough can also bake up dense: the yeast exhausts its food, the gluten overstretches and tears, gas escapes, and the loaf collapses into a dense layer — often with a pale, wrinkled crust.
How to tell: The poke-test indent doesn’t spring back at all; the dough looks puffy but fragile and smells strongly alcoholic.
The fix: If caught early, gently reshape and give a short 20–30 minute second proof. If fully collapsed, pan-bake it as a fallback or repurpose for flatbread — and next time, proof by the poke test, not the clock.
8. The oven wasn’t hot enough, or the loaf was under-baked
Oven spring — the final burst of rise in the first 10 minutes — needs fierce initial heat. A cool oven means weak spring. And an under-baked loaf never sets its structure; the interior stays heavy.
How to tell: Pale soft crust, a loaf that feels heavy for its size, and a dull thud (not hollow) when you tap the bottom.
The fix: Preheat a full 20–30 minutes — most ovens lie about being ready. Bake until a thermometer through the bottom reads 190–210°F (88–99°C) — the most reliable doneness test; crust color alone will fool you.

9. You sliced it too soon
Fresh from the oven, the crumb is full of steam and the starches haven’t set. Early slicing lets steam escape and the soft interior compresses under the knife — dense, sometimes gummy slices.
How to tell: Cut within 30 minutes of baking; the crumb looked steamy or compressed.
The fix: Wait at least 1 hour — 2 for large or sourdough loaves. The bread finishes cooking from residual heat during the rest. Hardest instruction in baking; most impactful.
The 5-minute pre-bake checklist
Windowpane passed → flour weighed → yeast proofed or fresh → dough roughly doubled (poke test: slow spring-back) → oven preheated 20–30 min → thermometer ready for 190–210°F → rack cleared for a 1-hour rest. Hit all seven and dense bread becomes very hard to produce.
Frequently asked questions
Can I fix dense bread after baking?
No — the structure is set. But dense bread makes outstanding toast, croutons, breadcrumbs, French toast, and bread pudding, where a tight crumb is an advantage.
Does bread flour matter versus all-purpose?
Yes — its 12–14% protein (vs 10–12% in all-purpose) builds a stronger gluten network that holds gas better. Switching flour is one of the highest-impact single changes for chronic density.
How do I know I’ve kneaded enough?
The windowpane test in cause #1 — binary and reliable. When in doubt, knead 2–3 minutes more; over-kneading by hand is far rarer than under-kneading.
Is dense bread safe to eat?
Yes, if fully baked — verify 190–210°F (88–99°C) internal temp. Dense but raw in the middle is unpleasant, so finish the bake properly.
Why is my no-knead bread dense?
No-knead trades kneading for very long fermentation (12–18 hours). Dense results mean the ferment was too short, too cold, or the dough over-floured. Give it the full time at room temp and keep the dough wet and shaggy.
Related troubleshooting: Why Didn’t My Bread Rise? · Why Is My Sourdough Gummy Inside? · Bread Crust Too Hard or Too Soft