Category: Bread

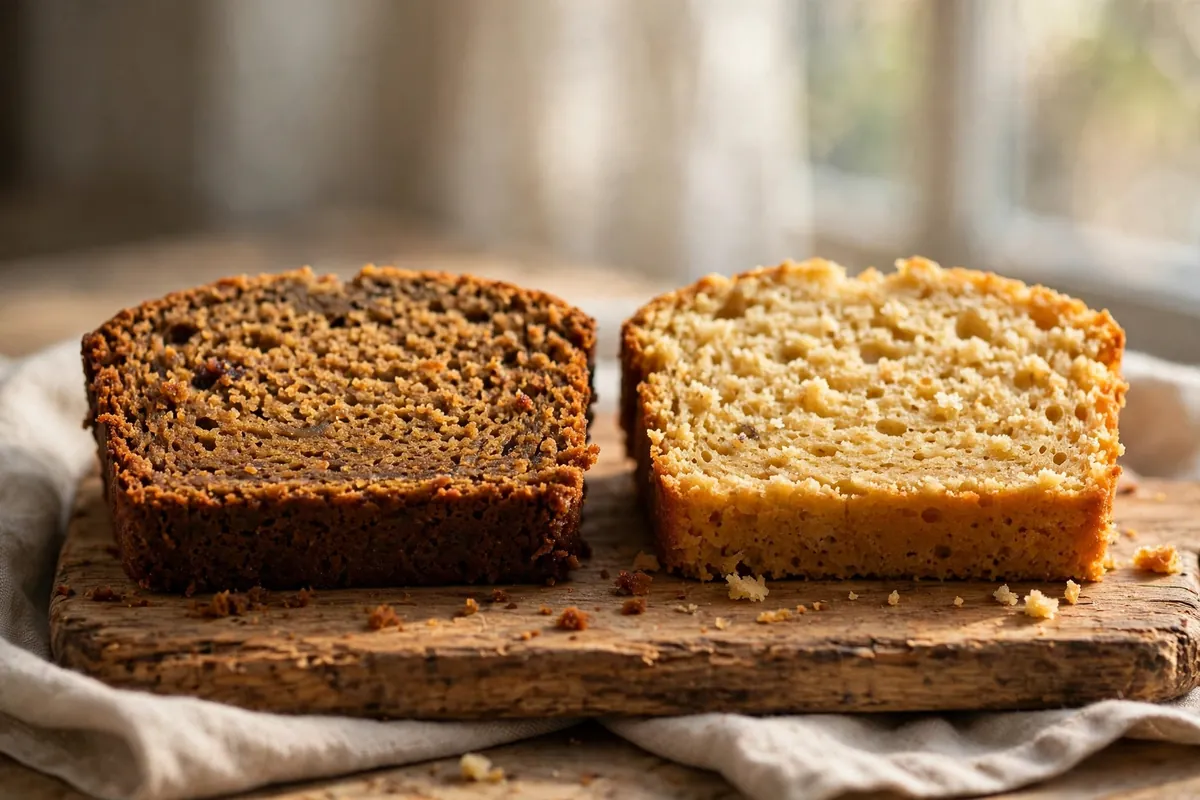
  • Why Is My Banana Bread Dense? Quick Bread Fixes

    Why Is My Banana Bread Dense? Quick Bread Fixes

    You sliced into the loaf expecting a tender crumb and got something closer to a brick — heavy, tight, maybe gummy in the middle. Banana bread is a quick bread, so the rules differ from yeasted bread: no gluten network to blame, just batter chemistry. Six causes explain nearly every dense loaf, in this order.

    Quick diagnosis: Dense banana bread is overmixed batter first, too much banana second, and dead leavening third. If you stirred the batter until it was smooth, used four or five bananas, or your baking soda has been open since last year — you’ve found it. Fix those three and the next loaf comes out tender.

    1. The batter was overmixed

    The number one cause, by a wide margin. Banana bread batter contains flour and liquid, and the moment they meet, gluten starts forming. Stir too long and you build a strong gluten network — exactly what you want in bread, exactly what ruins a quick bread. The crumb turns tough, dense, and rubbery.

    How to tell: The batter looked smooth and stretchy rather than lumpy, and the baked loaf has a tough, chewy texture with tunnels running through it.

    The fix: Stir until the flour just disappears — 10 to 12 strokes with a spatula, no more. Lumps are not the enemy here; they’re proof you stopped in time. Mix the wet and dry ingredients in separate bowls first, then combine with a light hand. This single habit fixes more dense banana bread than everything else on this list combined. (The same principle wrecks muffins — see Why Are My Muffins Tough?.)

    2. Too much banana

    Banana bread needs banana — but there’s a ceiling. Three medium bananas (about 1 to 1¼ cups mashed) is the sweet spot for a standard 9×5 loaf. Push past that and the extra moisture and weight overwhelm the batter’s structure: the crumb can’t set around all that wet fruit, so it bakes up dense and gummy, especially in the center.

    How to tell: You used four, five, or “however many were going brown.” The center of the loaf stayed wet-looking even after a full bake, and the texture is heavy rather than just moist.

    The fix: Measure the mash — 1 to 1¼ cups. If you have extra bananas, freeze them for smoothies instead of cramming them into the batter. And use them very ripe: black-spotted, soft, fragrant. Under-ripe bananas add starch without the sugars that make banana bread taste like banana bread.
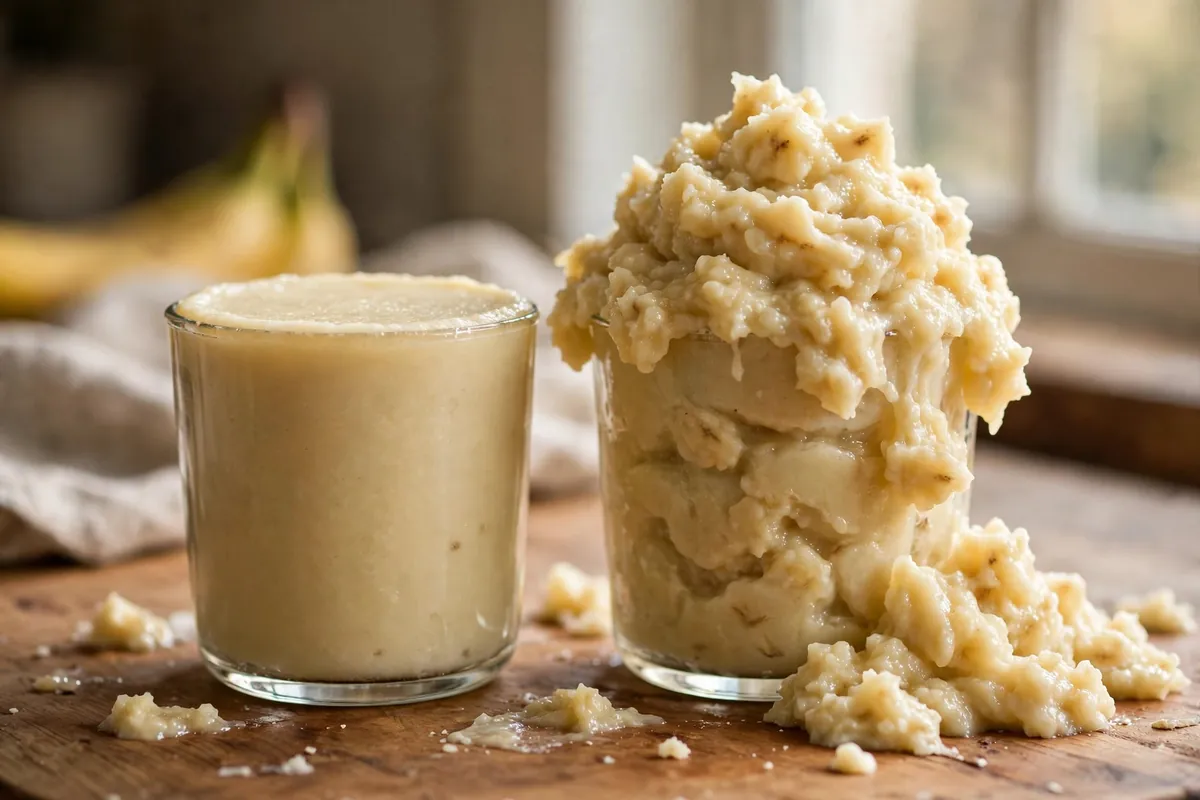
    measuring mashed banana in a cup measure — 1 cup level vs an overflowing heap
    measuring mashed banana in a cup measure — 1 cup level vs an overflowing heap

    3. The leavening was dead or wrong

    Banana bread rises on baking soda (sometimes plus baking powder), and both lose strength with age. Baking soda that’s been open six months in a humid kitchen is a coin flip. Without working leavening, the batter never gets its lift — dense loaf, guaranteed.

    How to tell: The loaf barely rose — flat top, no dome, same height going in and coming out. If your baking soda has no “opened” date you can remember, suspect it.

    The fix: Drop half a teaspoon into vinegar — vigorous fizzing means alive, a lazy bubble means replace it. Use about 1 teaspoon per 2 cups of flour, and check the acid balance: baking soda needs an acid (brown sugar, buttermilk, the bananas) to activate. White sugar plus soda with no acid under-rises.

    4. Too much flour (the scooped cup strikes again)

    A scooped cup of flour can weigh 150g against the 120g the recipe assumed — 25% extra flour, silently absorbing moisture meant for the crumb. In banana bread, where the wet-to-dry balance is already delicate, that extra flour turns tender into dense.

    How to tell: The batter looked thick and stiff rather than pourable, and you scooped the cup straight from the bag.

    The fix: Weigh flour at 120g per cup, every time. No scale? Spoon it into the cup and level off. (For the full case against scooping, see Why Is My Cake Dry? — same culprit, different victim.)
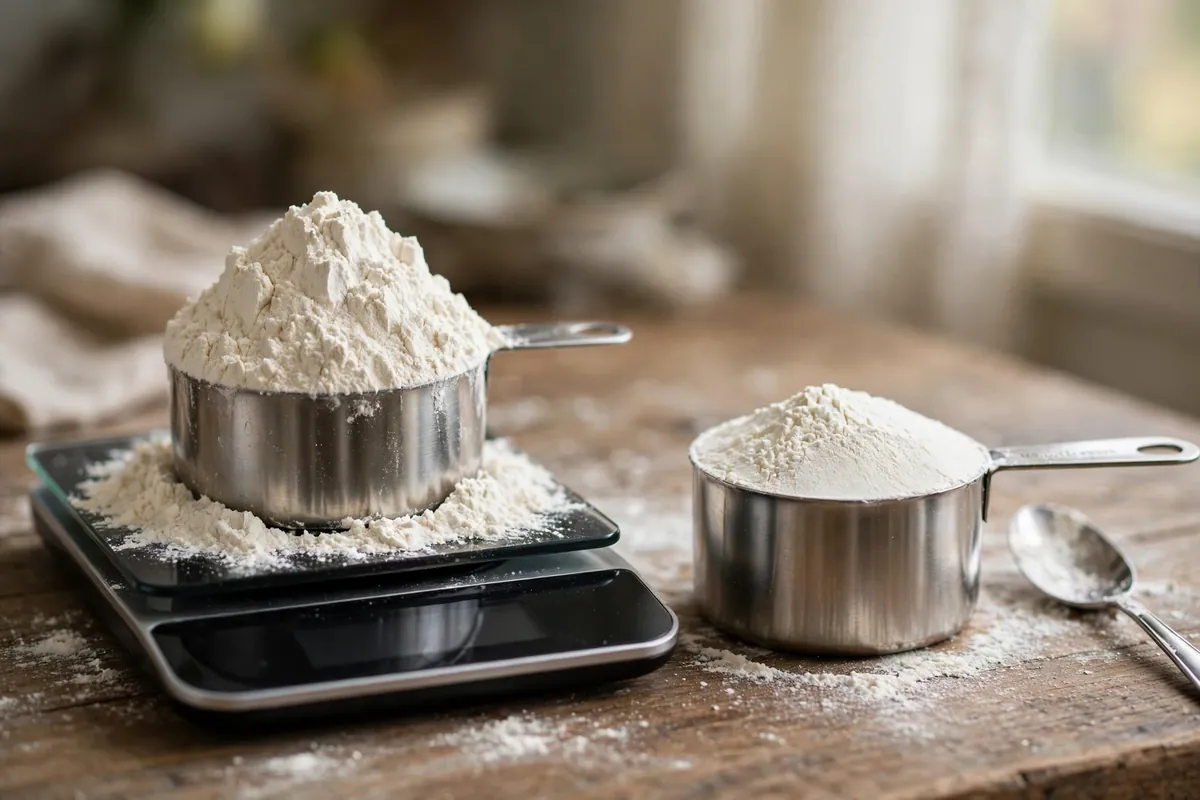
    scooped flour cup on a scale reading 150g beside a spooned-and-leveled cup reading 120g
    scooped flour cup on a scale reading 150g beside a spooned-and-leveled cup reading 120g

    5. It was underbaked in the middle

    Banana bread is thick, wet, and baked in a deep pan — the center is the last thing to set. Pull it too early and the middle stays gummy and dense while the outside looks done. This one fools people because the top browns beautifully while the interior is still raw.

    How to tell: The center slice is wet, gummy, or sunken — the toothpick showed wet batter and you called it done anyway.

    The fix: Bake 55–65 minutes at 350°F (175°C) in a 9×5 pan. A toothpick should show a few moist crumbs — not wet batter, not bone dry — or better, 200–205°F (93–96°C) on a thermometer. Tent with foil if the top browns early, and cool 10 minutes in the pan before turning out; slicing hot compresses the crumb.

    6. The oven ran cool

    A cool oven stretches the bake without setting the structure — the leavening exhausts itself before the crumb firms up, leaving a pale, dense loaf. If everything you bake takes longer than the recipe says, check with an oven thermometer (most run 15–25°F off): banana bread wants a true 350°F (175°C), full preheat, center rack.

    The dense-banana-bread checklist (next loaf)

    1. Weigh flour: 120g per cup.
    2. Mash and measure: 1 to 1¼ cups, very ripe bananas.
    3. Fresh baking soda: 1 teaspoon, fizz-tested.
    4. Stir 10–12 strokes — lumps are fine.
    5. Bake 55–65 minutes at a true 350°F (175°C); toothpick shows moist crumbs.
    6. Cool 10 minutes in the pan, then on a rack. Don’t slice hot.
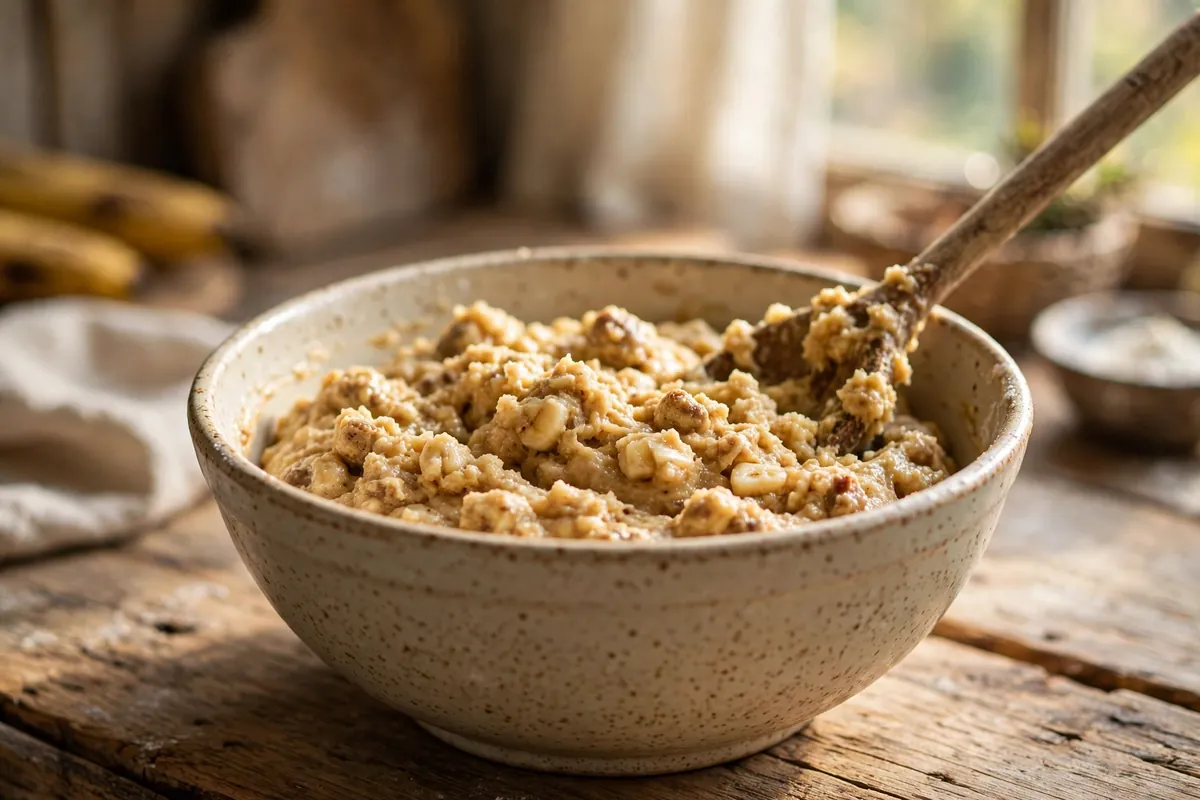
    the checklist in action — batter with visible lumps in the bowl before baking
    the checklist in action — batter with visible lumps in the bowl before baking

    Frequently asked questions

    Can I fix dense banana bread after baking?
    Not really — density is structural, set during the bake. But you can rescue the eating experience: toast thick slices (heat firms the crumb and adds texture), serve warm with butter, or cube it for banana bread pudding or trifle, where custard does the moistening work. Next loaf, follow the checklist above.

    Is dense banana bread safe to eat?
    Yes, as long as it’s fully baked through. Density alone isn’t a safety issue. The exception is a raw, wet center — if the middle is genuinely underbaked batter rather than just dense, that’s undercooked flour and egg, and it should go back in the oven, not onto a plate.

    Why is my banana bread gummy in the middle but done on the edges?
    Classic underbake in a deep pan. The edges set while the wet center lags. Give it the full 55–65 minutes, verify 200–205°F (93–96°C) in the center, and tent with foil if the top browns early. Also check your banana quantity — excess mash makes the center nearly impossible to set.

    Should banana bread batter be lumpy?
    Yes. Lumpy batter means you stopped stirring before gluten developed. Smooth batter means you kept going — and that’s the dense loaf. Ten to twelve strokes, flour just disappeared, walk away.

    Can I use frozen bananas?
    Absolutely — thaw them fully first and drain off the excess liquid they release (or measure the mash after draining). Frozen-then-thawed bananas are actually ideal: freezing ruptures the cell walls, making them sweeter and easier to mash.

    Does the pan matter?
    Yes. A 9×5 loaf pan is the standard; a smaller or deeper pan needs more time, and a dark pan browns faster (reduce heat 25°F / 15°C). Glass pans bake slower — add 5–10 minutes. For the full breakdown, see Glass vs Metal vs Dark Pans.

    Related troubleshooting: Why Is My Bread Dense? · Why Are My Muffins Tough? · Why Is My Cake Dry?
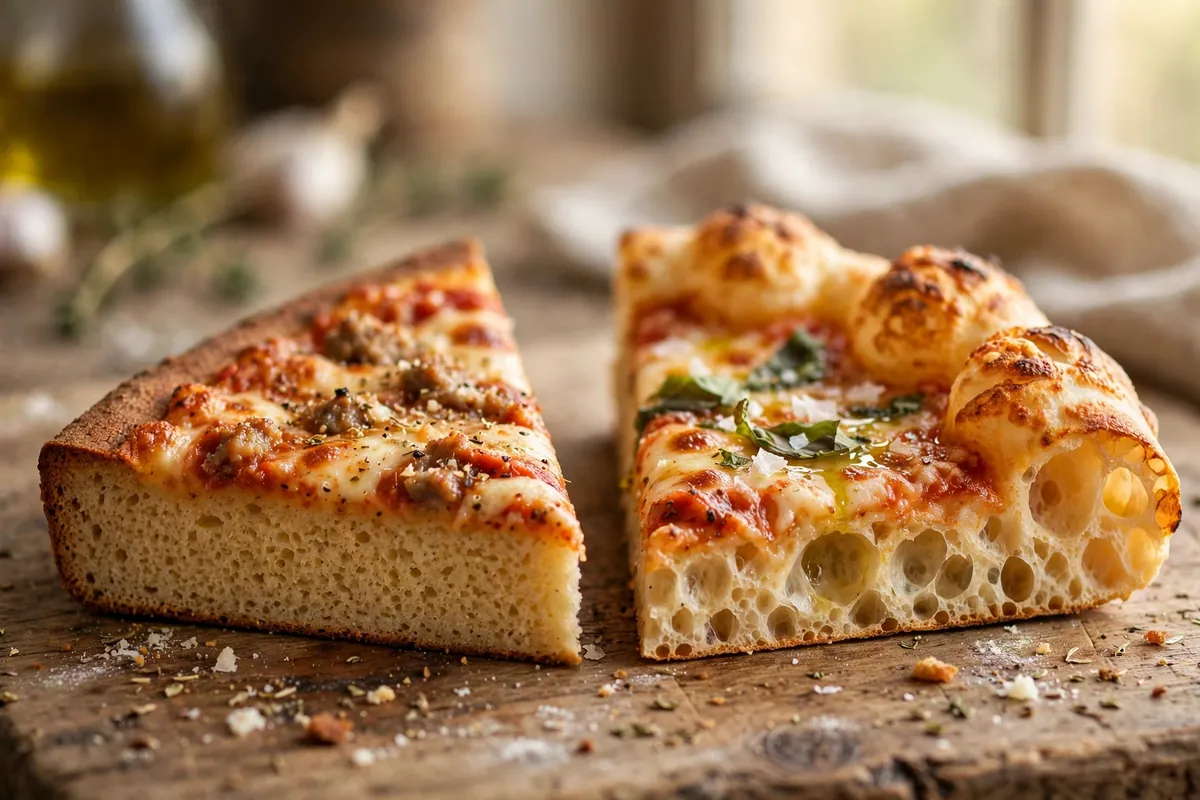
  • Why Is My Pizza Dough Tough? (Gluten Management)

    Why Is My Pizza Dough Tough? (Gluten Management)

    Tough pizza is a particular heartbreak: you did everything that makes bread good — kneaded it well, gave it time — and got a crust you have to fight with your jaw. Here’s the truth: pizza dough is not bread dough. Bread wants maximum gluten and a long bake. Pizza wants restrained gluten, high hydration, and a violent blast of heat. Treat pizza dough like a baguette and you get tough, chewy, dense.

    Quick diagnosis: Tough crust is usually under-rested dough baked too cool for too long: tense dough fights stretching and bakes up tight (cause #2), and an oven below 500°F (260°C) dries the crust before it can puff (cause #4). Fix the rest and the heat first.

    Toughness is gluten misbehaving — overdeveloped and rubbery, or never relaxed and springy — plus low heat drying the crust before the interior steams itself open.

    1. You over-kneaded it — pizza is not bread

    Bread dough gets 10–15 minutes of kneading for maximum gluten. Pizza needs only 5–8 — enough to come together smooth, not the full development of a loaf. Over-kneaded pizza dough bakes up with a tight, bagel-like chew instead of a tender pull. The gluten network is simply too strong.

    How to tell: The dough felt tight even after resting, sprang back aggressively when stretched, and the baked crust is uniformly chewy with a fine even crumb — no big air holes.

    The fix: Knead just until smooth and elastic — stretchable without immediately tearing, but no perfect windowpane required. Five minutes on low-medium is plenty — then let a long cold ferment build flavor and extensibility without more kneading. (Flour-strength background: Bread Flour vs All-Purpose: When It Actually Matters.)

    2. It didn’t rest long enough — the gluten never relaxed

    The cause I see most in home kitchens. Fresh gluten is elastic — a just-kneaded ball springs back when stretched. Given time it becomes extensible: it stretches thin without fighting, and in the oven expands into big bubbles instead of contracting into toughness. Dough stretched while tense bakes up tight no matter how hot the oven.

    How to tell: The dough sprang back every time you stretched it and the rim baked thick and bready instead of puffy.

    The fix: Minimum 1–2 hours at room temperature after balling — but the real magic is a cold ferment of 24 to 72 hours in the refrigerator. It relaxes gluten completely and builds the complex flavor separating great pizza from flat pizza. Pull balls out 1–2 hours before baking; fridge-cold dough still fights you. If dough springs back mid-shape, stop, cover, walk away 20 minutes — rest is a legitimate technique. (Timelines: Make-Ahead Bread Dough: Fridge Fermentation Timelines.)

    3. The hydration was too low — dry dough can’t puff

    Pizza wants 60–65% hydration — wetter than most beginners expect. At 55% or below, the dough is stiff, gluten can’t move freely, and there’s too little internal steam to blow the crumb open. Low hydration makes crackers, not airy pizza.

    How to tell: The dough felt firm and dry rather than soft and slightly tacky, was suspiciously easy to handle, and the crust is dense and cracker-like.

    The fix: Weigh ingredients and target 62% — 310g water per 500g flour. The dough should feel soft and lightly tacky, sticking to hands but releasing from the bowl. Don’t flour your way out of stickiness when shaping; use a light bench dusting of flour or semolina only. Wetter dough is harder to handle but bakes dramatically better.

    4. Your oven wasn’t hot enough — low heat makes leather

    Pizza needs a violent blast: 500–550°F (260–290°C), your oven’s maximum, for 7–10 minutes. Intense heat sets the exterior fast while the interior steams, and trapped steam inflates the crumb into open bubbles. At 400–425°F the crust dries gradually before it can puff — baked-cracker texture.

    How to tell: The pizza took 15+ minutes to brown, the cheese browned before the crust puffed, and the crust is uniformly hard, not crisp-outside-airy-inside.

    The fix: Preheat at maximum for 45–60 minutes with a steel, stone, or inverted heavy sheet inside — thermal mass matters as much as air temperature. A pizza steel is the single best upgrade: stored heat blasts the bottom and slashes bake time. Launch onto the screaming-hot surface and bake until the cornicione is puffed and leopard-spotted. Top finishing first? Lower rack next time. Bottom burning first? Go up.

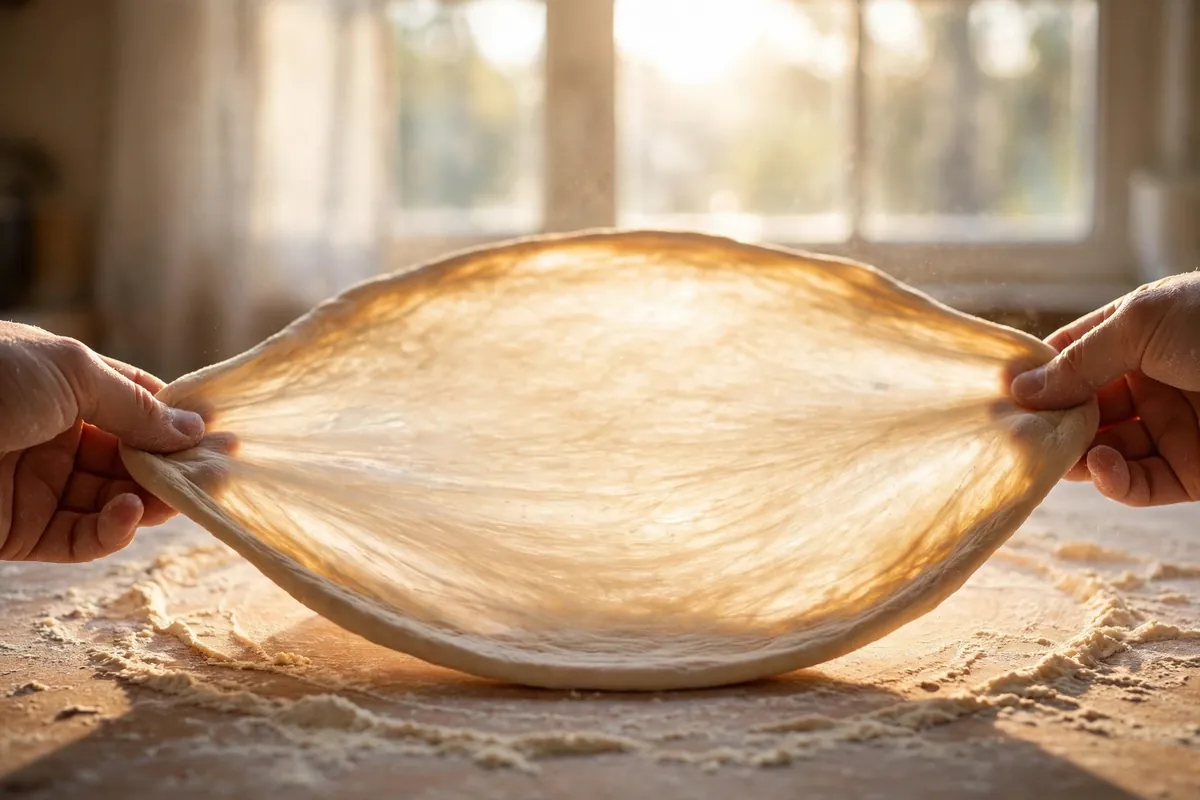
    hands stretching pizza dough thin, showing extensible dough
    hands stretching pizza dough thin, showing extensible dough

    5. You pressed all the air out shaping it

    Even perfect dough turns tough if manhandled. Rolling pins, aggressive palm-pressing, or re-rolling scraps compress the gas bubbles fermentation built — those bubbles are your future air pockets. Degassed dough bakes dense regardless of hydration or heat.

    How to tell: You used a rolling pin or pressed flat with your palms, and the rim is flat and dense instead of puffy.

    The fix: Hands only: press from center outward with fingertips, leaving a 1-inch untouched rim — that’s your cornicione, and it needs its gas. Drape over knuckles, let gravity stretch, rotate. Never a rolling pin on pizza dough. The rim should look alive and pillowy before it sees the oven.

    Can you fix an already-baked tough pizza?

    Barely — toughness sets in the bake. Reheat slices on a preheated steel or lidded hot skillet for 2 minutes to re-crisp. Leftover tough crust makes excellent garlic bread or panzanella. The real fix is the next dough: longer rest, wetter dough, hotter oven.

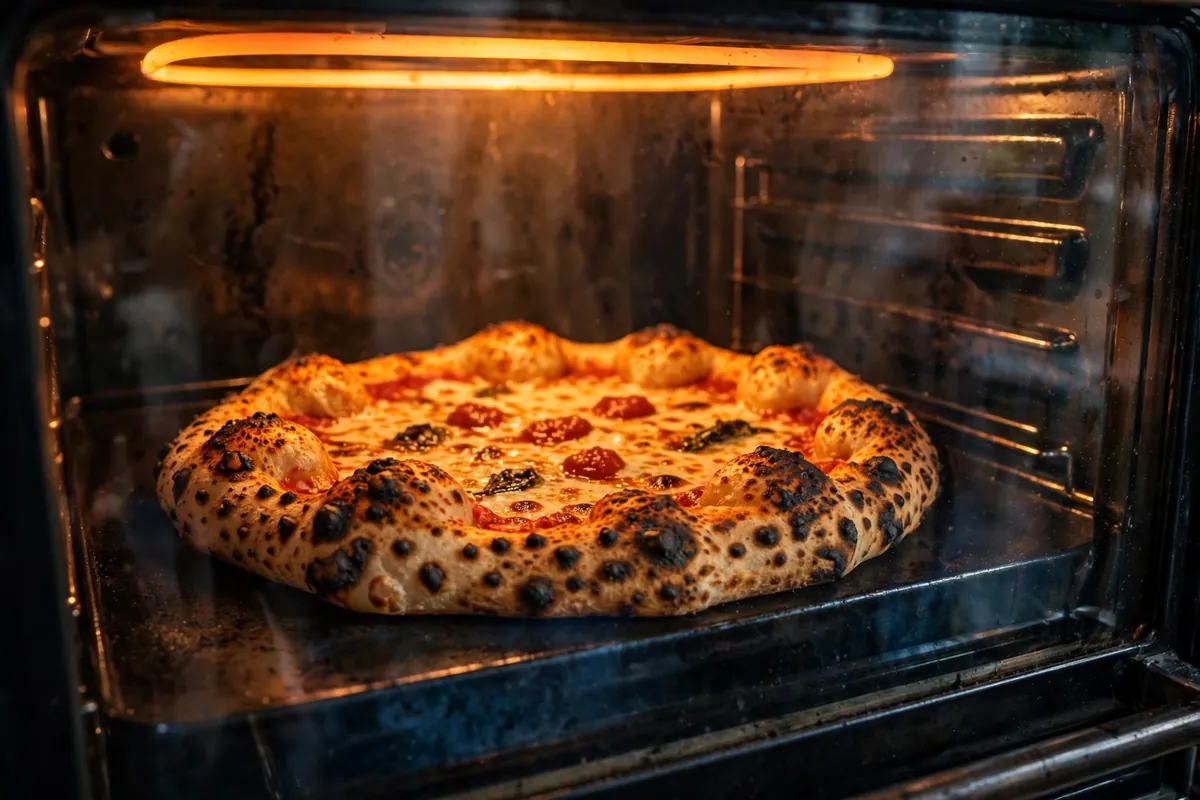
    pizza baking on a steel in a very hot home oven
    pizza baking on a steel in a very hot home oven

    The tender-crust formula

    62% hydration. Five minutes of kneading. Forty-eight hours in the fridge. Two hours at room temperature before shaping. Hand-stretched with an untouched rim, launched onto a steel at your oven’s absolute maximum. The cold ferment alone transforms more tough-crust complaints than any other single change — time relaxes gluten in a way no technique can shortcut.

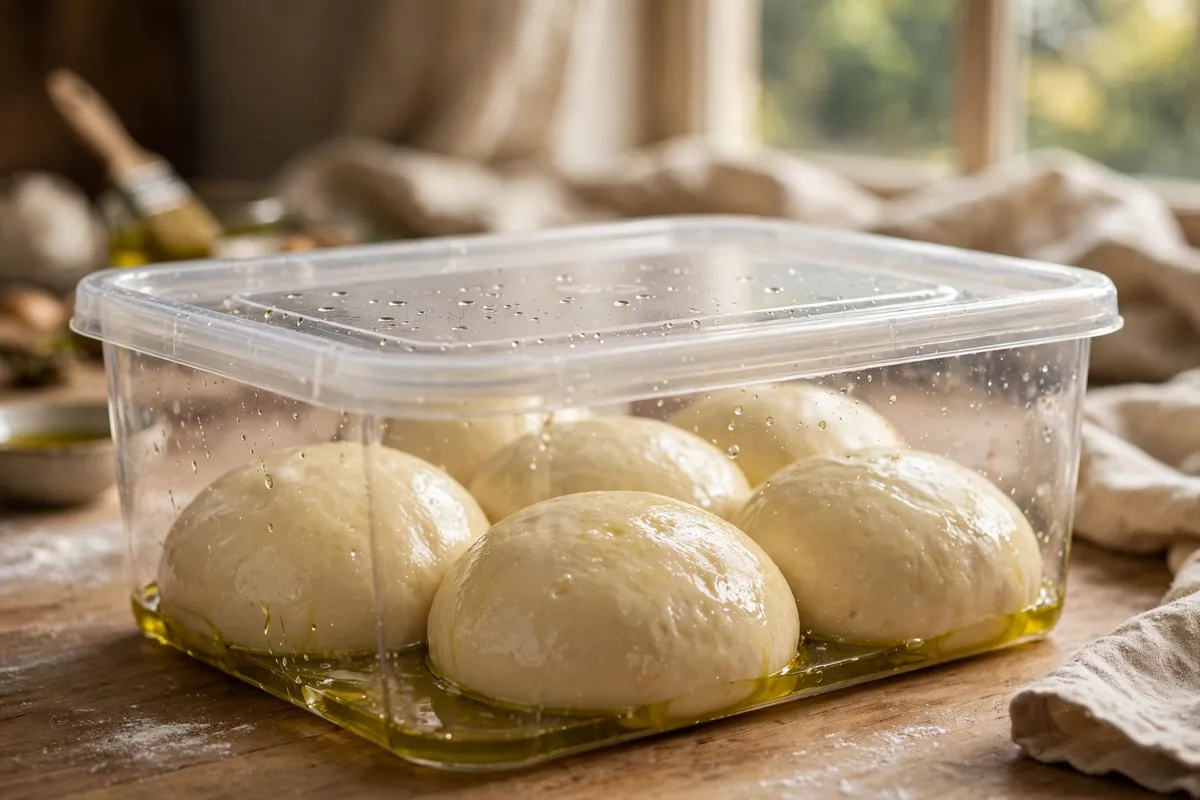
    dough balls cold-fermenting in a covered container
    dough balls cold-fermenting in a covered container

    FAQ

    Is tough pizza dough safe to eat?
    Yes — toughness is purely texture. As long as the crust baked through, it’s completely safe. Reheat on a hot steel or skillet to improve it, or repurpose leftovers as garlic bread.

    Can I fix pizza dough that’s already tough after baking?
    Not really — the texture is set. Reheating on a preheated steel or covered hot skillet for 2 minutes helps by re-crisping the base. The genuine fix is preventive: rest longer, raise hydration, bake hotter next time.

    How long should pizza dough rest?
    Minimum 1–2 hours at room temperature after balling; ideally 24–72 hours refrigerated. The cold ferment fully relaxes gluten and builds flavor. Always give refrigerated dough 1–2 hours at room temperature before stretching — cold dough fights back.

    What hydration should pizza dough be?
    60–65%, with 62% the sweet spot — 310g water per 500g flour. Soft and slightly tacky is right; below 60% bakes dense and cracker-like.

    What temperature should I bake pizza at?
    Your oven’s maximum — typically 500–550°F (260–290°C) — preheated 45–60 minutes with a steel or stone inside. Under 475°F the crust dries into leather before it can puff.

    Does bread flour make pizza tough?
    Not by itself — bread flour (12–14% protein) is the standard pizza flour and gives the best chew. Toughness comes from over-kneading it, under-resting it, or baking too cool. All-purpose works too but yields a slightly softer, less chewy crust.

    Related troubleshooting: Why Is My Focaccia Flat? High-Hydration Dough Fixes · Bread Flour vs All-Purpose: When It Actually Matters · Make-Ahead Bread Dough: Fridge Fermentation Timelines

  • What to Do With Sourdough Discard: 7 Uses Worth Your Time

    What to Do With Sourdough Discard: 7 Uses Worth Your Time

    Every sourdough feeding leaves you holding half a jar of discard — perfectly good flour, water, and wild yeast, destined for the bin. Throwing it away feels wrong because it is wrong: discard is an ingredient, one with a tangy flavor and tenderizing power that bought-and-paid-for ingredients can’t match. I’ve cooked with discard for years, and these seven uses are the ones that earned permanent places in my rotation — ranked by how much they reward the (minimal) effort.

    Quick diagnosis: The best discard uses don’t ask it to leaven anything — discard isn’t vigorous enough to raise bread on its own. The winners are crackers, pancakes, flatbread, and quick breads, where discard contributes flavor and tenderness while baking powder, soda, or a hot skillet does the lifting.

    First, the ground rules. Discard is safe — it’s the same flour, water, and microbes as your starter, just hungry. It keeps sealed in the fridge up to 2 weeks; sniff before using (pleasantly sour is fine; pink, orange, or fuzzy means the jar goes). And discard’s yeast is sluggish, so every recipe below pairs it with another leavener or none at all. Don’t bake a loaf with discard alone — that’s what a healthy, fed starter is for.

    1. Crackers — the single best use

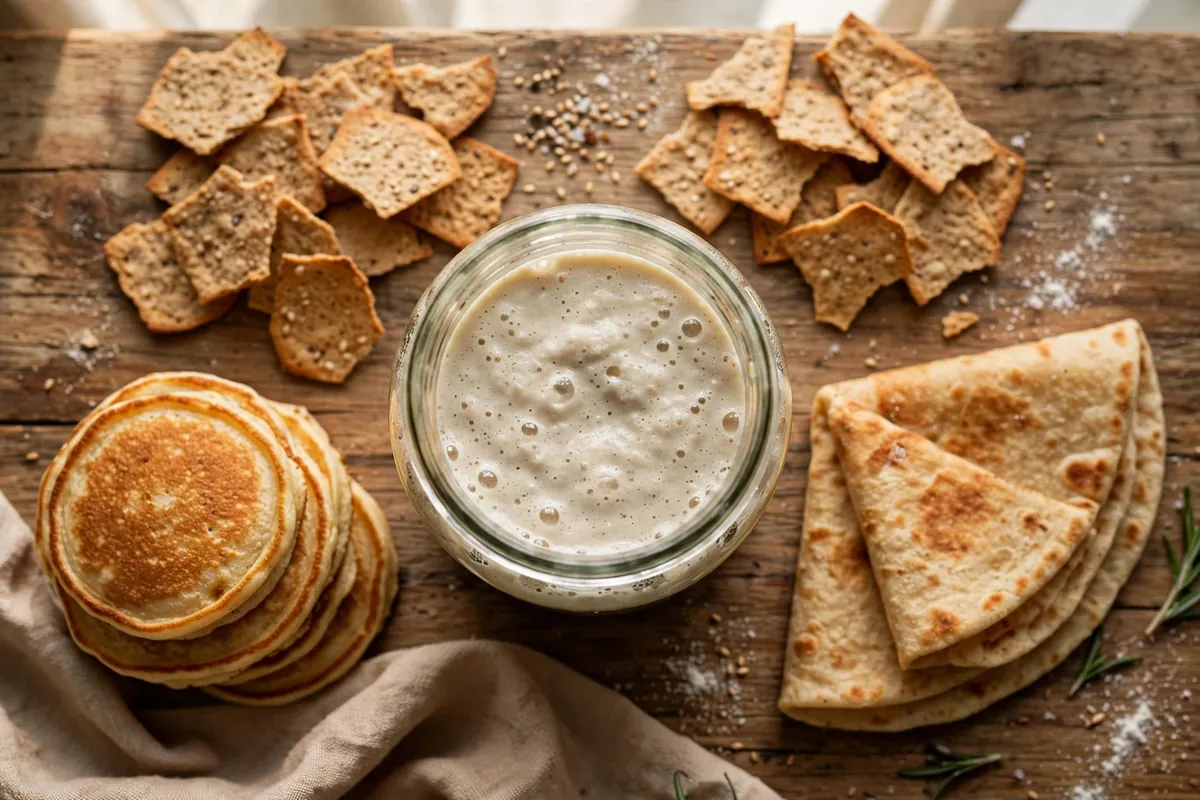
    If you make nothing else from this list, make crackers. Discard crackers are the highest reward-to-effort ratio in all of sourdough baking: the discard’s acidity creates unmatched crispness, and the whole project takes 30 minutes.

    How: Mix 1 cup (240g) discard with ¼ cup olive oil or melted butter, ½ teaspoon salt, and enough flour (about ¾ cup / 90g) to form a firm dough. Roll paper-thin — 1/16 inch — directly on a parchment-lined baking sheet (thin is the entire secret; thick discard crackers are chewy, not crisp). Dock with a fork, sprinkle with flaky salt and whatever you like (sesame, rosemary, everything seasoning), and bake at 350°F (175°C) for 20–25 minutes until deep golden. Cool on the sheet; they crisp further as they cool.

    Why it works: Low moisture + high heat + acidity = shattering crispness. The discard’s tang reads as sophisticated, not sour.

    2. Pancakes and waffles — the weekend upgrade

    Discard in pancake batter is transformative: the acidity tenderizes the crumb and adds a buttermilk-like tang that plain batter can’t touch. These are objectively better than regular pancakes, not just “good for discard.”

    How: Replace half the flour in your usual pancake recipe with discard (by weight — 120g discard stands in for roughly a cup of flour’s flour-plus-water, so reduce the milk slightly). Keep the recipe’s baking powder; the discard is flavoring here, not leavening. For waffles, same swap — the tang plus the iron’s crisping is exceptional.

    3. Flatbread and pizza crust — the no-wait bread

    A ripping-hot skillet plus discard equals flatbread in minutes — no kneading, no proofing, no planning. This is my most-made discard recipe by a wide margin.

    How: Pour ½ cup discard straight into a lightly oiled, screaming-hot cast iron skillet, spread thin with the back of a spoon, and cook 2–3 minutes per side until blistered and golden. That’s it — the whole recipe. For pizza: spread 1–1½ cups discard in an oiled cast iron skillet, par-bake at 450°F (230°C) for 10 minutes, then top and bake 10 more. The crust won’t be Neapolitan — it’ll be tangy, chewy-crisp, and ready in 25 minutes, which is the point.

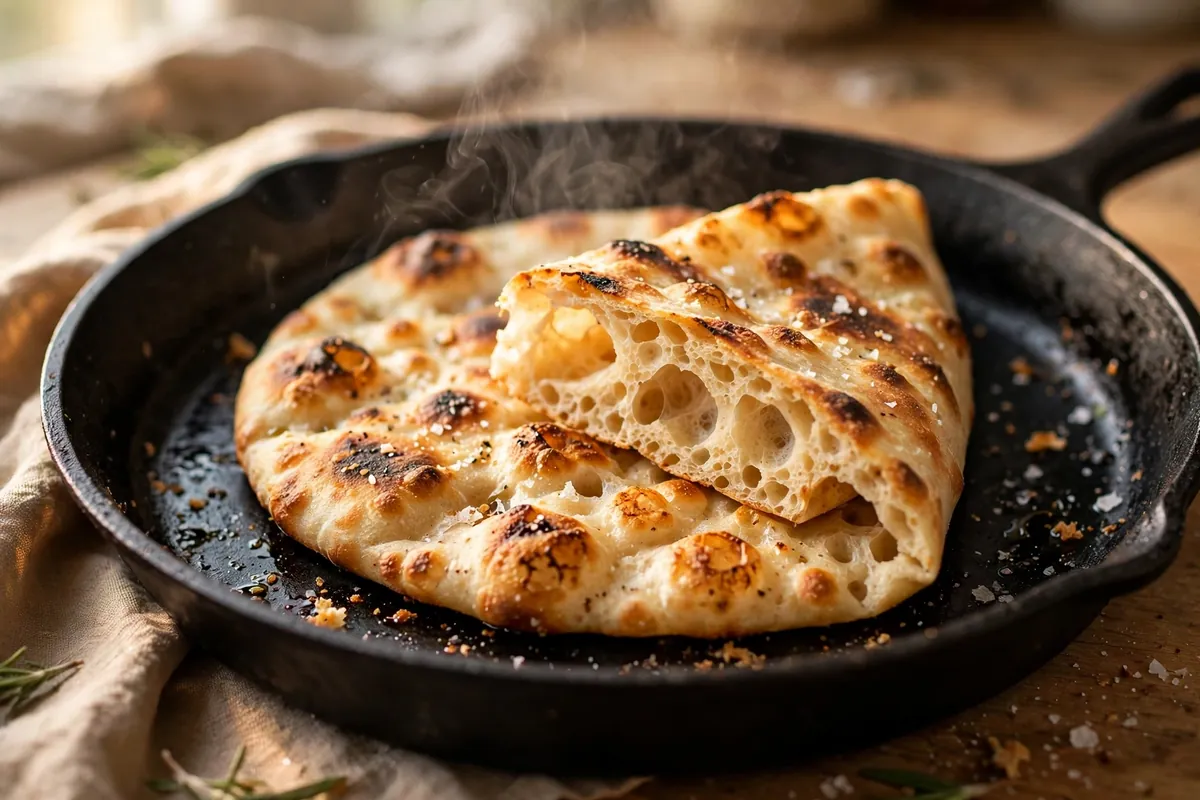
    discard flatbread blistering in a cast iron skillet, one piece folded showing the airy interior
    discard flatbread blistering in a cast iron skillet, one piece folded showing the airy interior

    4. Banana bread and quick breads — the moisture play

    Discard’s acidity and hydration make quick breads more tender and longer-keeping. It slides into any quick-bread recipe invisibly.

    How: Replace ½ cup of the flour with ½ cup (120g) discard and reduce another liquid by 2 tablespoons. Keep the recipe’s baking soda — in fact, the discard’s acidity supercharges it, giving a better rise than the original. Banana bread is the classic pairing (the tang balances the sweetness); zucchini bread and pumpkin bread work equally well. For the full quick-bread science, the eggless cake post covers how acidity interacts with leaveners.

    5. Soft pretzels — the chewy showpiece

    Discard pretzels have a depth of flavor that straight-dough pretzels lack — the long, slow acids in the discard read as complexity. They’re a project, but a rewarding one.

    How: Combine 1 cup (240g) discard with 2½ cups (300g) bread flour, 1 tablespoon sugar, 2¼ teaspoons instant yeast (the discard flavors; the commercial yeast leavens — this is the honest pairing), and 1 teaspoon salt. Knead 8 minutes, rest 1 hour, shape, and give the classic baking-soda bath (⅔ cup soda per 10 cups water, 30 seconds per pretzel) before baking at 425°F (220°C) for 12–14 minutes. Salt generously while wet.

    6. Biscuits and scones — the flaky tang

    Discard replaces some of the buttermilk in biscuit dough, adding tenderness and a subtle tang that reads as “bakery” rather than “sourdough.”

    How: Replace half the buttermilk/milk with discard (equal weight). Keep everything cold — frozen grated butter, cold discard — and handle minimally: pat, fold, cut, no kneading. The acidity tenderizes the crumb exactly the way buttermilk does, which makes sense: it’s doing the same chemical job. Bake hot at 425°F (220°C).

    7. Frying batter — the crisp secret

    The least obvious and maybe the most fun: discard thinned with a little water or beer makes a superb frying batter. The acidity inhibits gluten just enough for a shatteringly crisp, tempura-like crust.

    How: Thin 1 cup discard with ¼–½ cup cold water or lager until it coats a spoon thinly. Season boldly (salt, pepper, paprika, garlic powder). Dip vegetables, onion rings, or fish, and fry at 350–375°F (175–190°C) until deep golden. The batter fries up lighter and crisper than flour-and-water, with a faint tang that cuts richness.

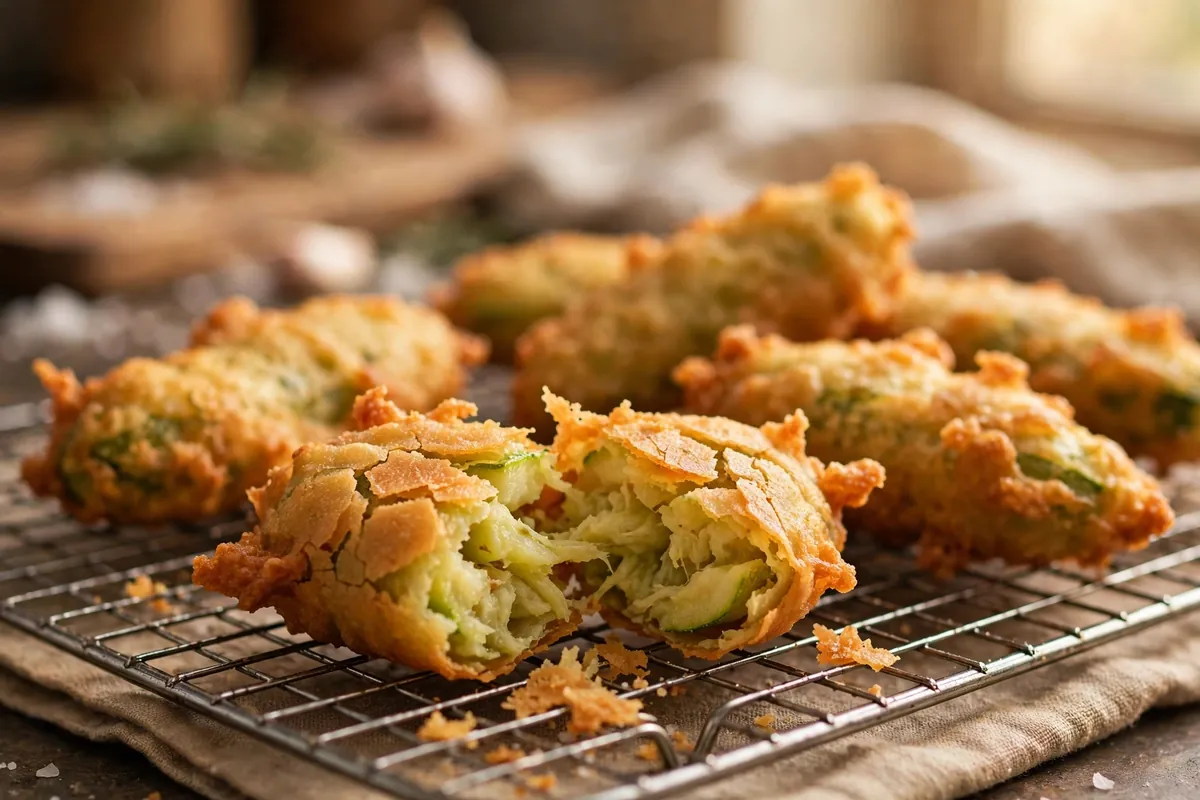
    golden fried vegetables on a wire rack, one broken open showing the crisp shell
    golden fried vegetables on a wire rack, one broken open showing the crisp shell

    Storing and managing discard

    Keep a dedicated discard jar in the fridge and add to it at every feeding. Use within 2 weeks — older discard gets sharply acidic (fine for crackers, too aggressive for pancakes). If a dark liquid (hooch) forms on top, stir it in or pour it off; it’s harmless. Never add discard to the jar if you see pink, orange, or fuzzy spots — that jar is contaminated, full stop.

    Frequently Asked Questions

    Is sourdough discard safe to eat?
    Yes — it’s the same flour, water, and microbes as your starter, just unfed. The microbes are the same ones in the bread you already bake. Discard any jar showing pink, orange, or fuzzy mold, but normal sour-smelling discard is completely safe.

    Can I bake bread with discard instead of active starter?
    Not a proper loaf — discard’s yeast is too sluggish. Every recipe above pairs discard with another leavener or uses none. For real sourdough loaves, feed your starter first.

    How long does discard last in the fridge?
    Up to 2 weeks in a sealed jar. It gets more acidic with age — great for crackers, less ideal for delicate pancakes. When in doubt, sniff: pleasantly sour is fine, anything off or colorful is not.

    Do I need to feed discard before using it?
    No — that’s the point. Discard is used unfed, straight from the fridge (let it warm 15–20 minutes for even mixing). Feeding it would just turn it back into starter.

    Why do discard recipes always add baking powder or soda?
    Because discard contributes flavor and tenderness, not lift. Its yeast is dormant; the chemical leaveners do the rising. The discard’s acidity actually boosts baking soda, so the combination rises better than either alone.

    Can I freeze sourdough discard?
    Yes — freeze in portions up to 3 months; thaw overnight in the fridge. The microbes won’t all survive, but since you’re not relying on them for leavening, it doesn’t matter.

    Related troubleshooting: Sourdough Starter Smells Like Acetone · Why Is My Sourdough Gummy Inside? · No-Knead Bread for Beginners

  • Why Is My Stollen Dry? (Moist Fruit Bread Fixes)

    Why Is My Stollen Dry? (Moist Fruit Bread Fixes)

    Dry stollen is almost always a moisture-theft problem, not a recipe problem. Unsoaked dried fruit pulls water out of the crumb as it bakes, overbaking drives off what little moisture an enriched dough holds, and skipping the traditional butter-and-sugar seal lets the loaf stale in days instead of improving over weeks. Get those three right and stollen practically takes care of itself.

    Quick diagnosis: Your dried fruit wasn’t soaked (it stole moisture from the crumb — most common), you overbaked it, or you skipped the melted-butter brush and tight wrapping that keeps stollen moist for weeks. Fix next time: soak fruit 12–24 hours, bake to 190°F (88°C) internal, brush with butter and wrap airtight while warm.

    My tested baseline: 500g bread flour, 75g sugar, 2¼ tsp instant yeast, 1 tsp salt, 200g soft butter, 2 eggs, 150ml warm milk; 300g mixed dried fruit soaked overnight in 100ml dark rum; 200g marzipan log in the center. Baked at 350°F (175°C) for 55 minutes to 190°F (88°C) internal, brushed with 60g melted butter, rolled in sugar, wrapped in plastic then foil, aged 10 days.

    1. The fruit wasn’t soaked — it drank your crumb’s moisture

    This is the number-one cause of dry stollen. Dried fruit is hygroscopic: unsoaked raisins spend the entire bake pulling water out of the surrounding crumb. You end up with plump fruit embedded in dry bread — exactly backwards.

    How to tell: The fruit looks plump and glossy but the crumb around it is dry and crumbly; you added the fruit straight from the bag.

    The fix: Soak the fruit 12–24 hours in rum, brandy, or orange juice. Drain well and toss in a spoonful of flour before folding in so pieces don’t sink. Properly soaked fruit gives moisture back to the crumb instead of stealing it.

    2. You overbaked it — enriched doughs dry out fast past 190°F

    Stollen is a dense, heavy loaf, and dense loaves lie: the outside looks done long before the center finishes, so bakers leave it in “to be safe” — and overshoot. Past 190°F (88°C) internal, the crumb tightens and squeezes out moisture with every extra degree.

    How to tell: The crust is thick and deeply browned; the crumb is dry all the way through; the thermometer read over 195°F (91°C), or you baked purely by time.

    The fix: Bake at 350°F (175°C), checking from 45 minutes. Pull at 190°F (88°C) internal, thermometer in the center avoiding the marzipan. Tent with foil after 30 minutes if the top colors fast. Trust the thermometer over the clock — same rule as telling when bread is done.

    3. You skipped the butter seal — stollen’s moisture lock

    The melted-butter brush and sugar coating aren’t decoration — they’re engineering. Brushing the hot loaf with 50–60g of melted butter and rolling it in sugar creates a fat-and-sugar barrier that locks moisture in during the aging weeks. Skip it and the loaf stales in days.

    How to tell: The surface is dry and matte rather than buttery; delicious on day one, stale by day three.

    The fix: While the loaf is still warm, brush generously with the full 50–60g of melted butter, then roll thickly in granulated sugar (plus powdered sugar once cool). Non-negotiable for stollen that keeps.

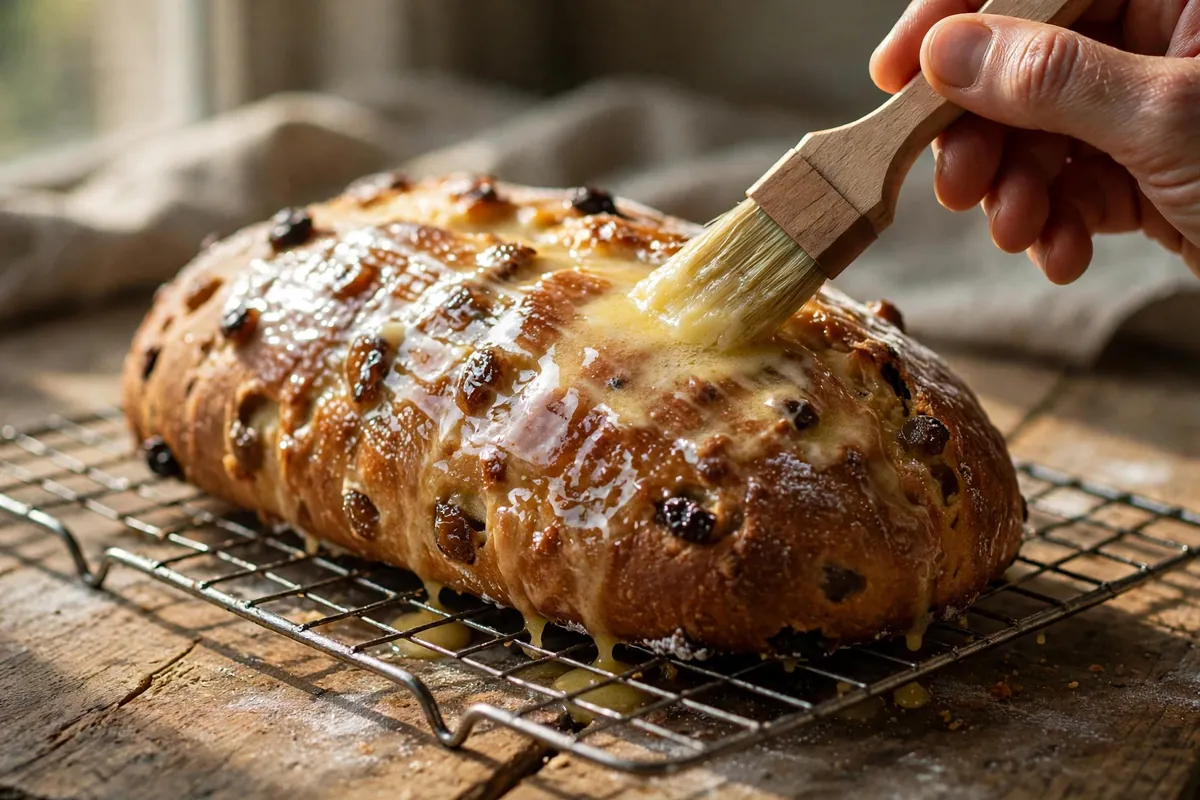
    hands brushing a warm stollen loaf generously with melted butter before sugaring
    hands brushing a warm stollen loaf generously with melted butter before sugaring

    4. It wasn’t wrapped tightly — air is stollen’s enemy

    Stollen is designed to age: wrapped airtight, moisture redistributes, flavors meld, and texture improves over 1–3 weeks. Loosely covered, it just stales.

    How to tell: It dried from the outside in; cut surfaces went leathery; it was stored in a bread bag or loosely in foil.

    The fix: Once fully cool, wrap in two tight layers of plastic wrap pressed against the surface, then foil. Store at cool room temperature — never the fridge, which accelerates staling. Slice only what you’ll eat and rewrap immediately. See How to Store Homemade Bread So It Stays Fresh for Days for the general principles.

    5. The dough was under-enriched — stollen needs its butter

    Enrichment is moisture insurance: fat coats flour proteins, shortens gluten strands, and keeps the crumb tender for weeks. A stollen with too little butter has no such insurance and dries out regardless of technique.

    How to tell: The crumb is bready and lean rather than rich and tender; the recipe used well under the classic 180–200g butter per 500g flour.

    The fix: Don’t skimp on the butter. Use bread flour for structure (the long aging needs it) and knead well — a developed dough holds the heavy fruit load without tearing. Same enriched-dough logic as brioche that stays moist.

    6. The marzipan dried out — seal it inside

    The marzipan log is a moisture reservoir in the loaf’s center — but exposed at the ends, or dry and cracked going in, it contributes nothing and can wick moisture out.

    How to tell: Marzipan visible at the cut ends looks dry or cracked; the center around it is the driest part.

    The fix: Knead the marzipan until pliable, roll a smooth log slightly shorter than the dough, and seal the dough completely around it — pinch the ends shut. Old, stiff marzipan? Knead in a few drops of almond extract or rum first.

    Can you fix dry stollen after the fact?

    Partially. Warm the slices — 10 seconds in the microwave or a quick toast — and serve with good butter; heat plus fat masks most dryness. For a whole dry loaf, brush cut surfaces with warm rum syrup, rewrap tightly, and rest overnight. The real rescue is strategic: slice it, toast it, and make French toast or bread pudding — added custard solves dryness completely, and stollen makes an extraordinary base for both.

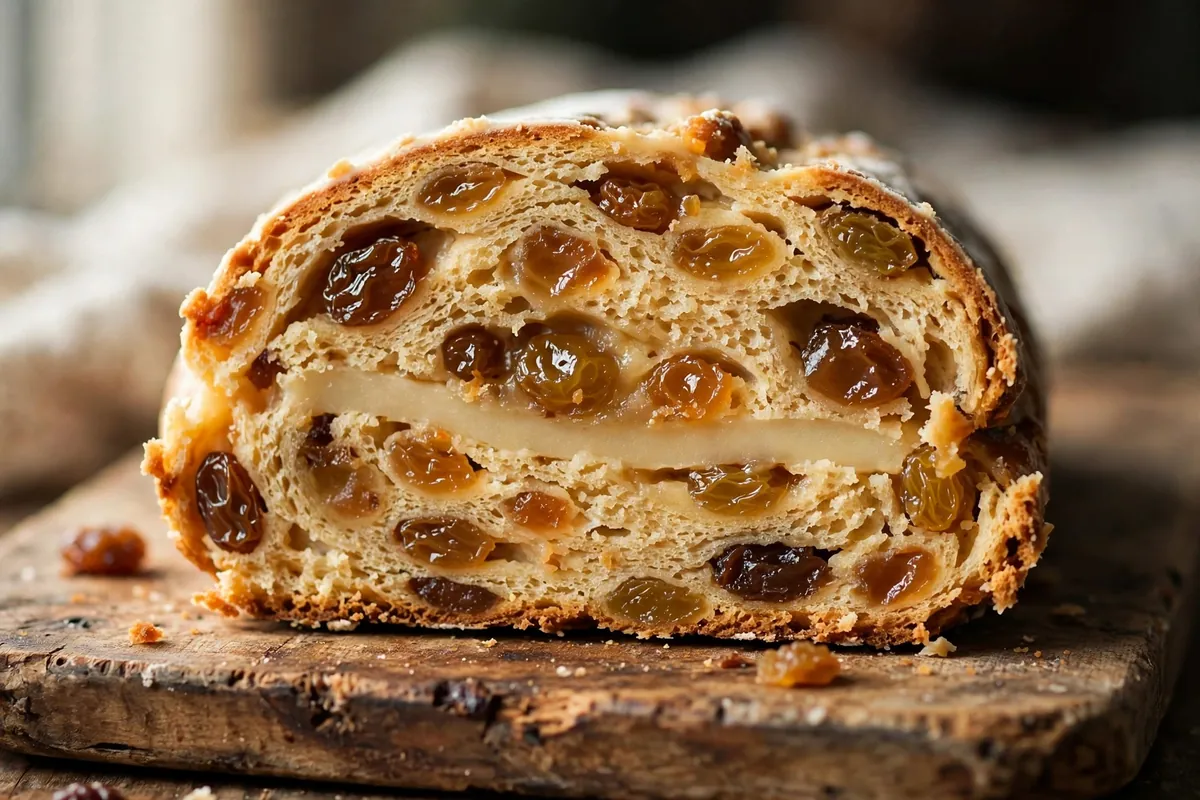
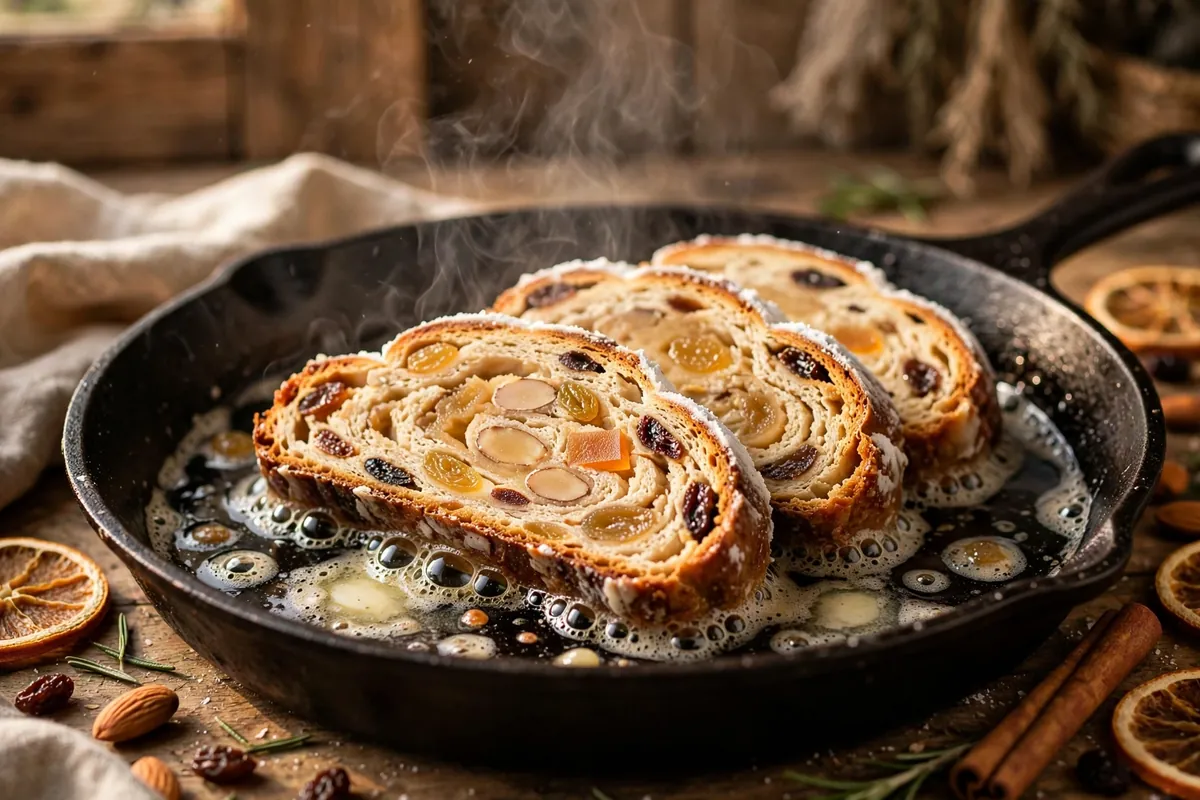
    thick slices of stollen toasting in a pan with melting butter, edges turning golden
    thick slices of stollen toasting in a pan with melting butter, edges turning golden

    FAQ

    Is dry stollen safe to eat?
    Yes — dryness is a texture issue, not a safety one. If it was stored reasonably and shows no mold, it’s fine — and excellent toasted or repurposed into bread pudding.

    How long does stollen last?
    Butter-sealed and tightly wrapped: 3–4 weeks at cool room temperature, improving over the first two. Once sliced, rewrap and eat within a week.

    Should stollen be refrigerated?
    No. Refrigeration speeds up starch retrogradation — bread stales faster in the fridge than at room temperature. Cool room temp, airtight wrapping, done.

    Can I make stollen ahead for Christmas?
    That’s the traditional way — bake 2–3 weeks ahead and let it age wrapped. The flavor deepens and the crumb evens out. Just don’t slice in early “to check.”

    Why did my stollen crack on top?
    The dough rose faster than the heavy, fruit-laden structure could stretch, or the oven was too hot initially. Slash the top before baking to give it a controlled place to expand.

    Can I freeze stollen?
    Yes — plastic plus foil, up to 3 months. Thaw wrapped at room temperature overnight. Do the butter-and-sugar coating before freezing; refresh with powdered sugar after thawing.

    Related troubleshooting: Why Did My Brioche Come Out Dry? Enriched Dough Fixes · Hot Cross Buns Troubleshooting: Dense, Pale, Vanishing Crosses · How to Store Homemade Bread So It Stays Fresh for Days

  • Hot Cross Buns Troubleshooting: Dense, Pale, Vanishing Crosses

    Hot Cross Buns Troubleshooting: Dense, Pale, Vanishing Crosses

    Hot cross buns fail in threes: dense as hockey pucks, pale as dinner rolls, the signature cross melted into a ghost of itself. Each fault has its own cause, but they share a root — enriched, spiced dough is slower and fussier than plain bread dough, and it punishes every shortcut. Once you understand what the enrichment is doing, all three faults fix themselves.

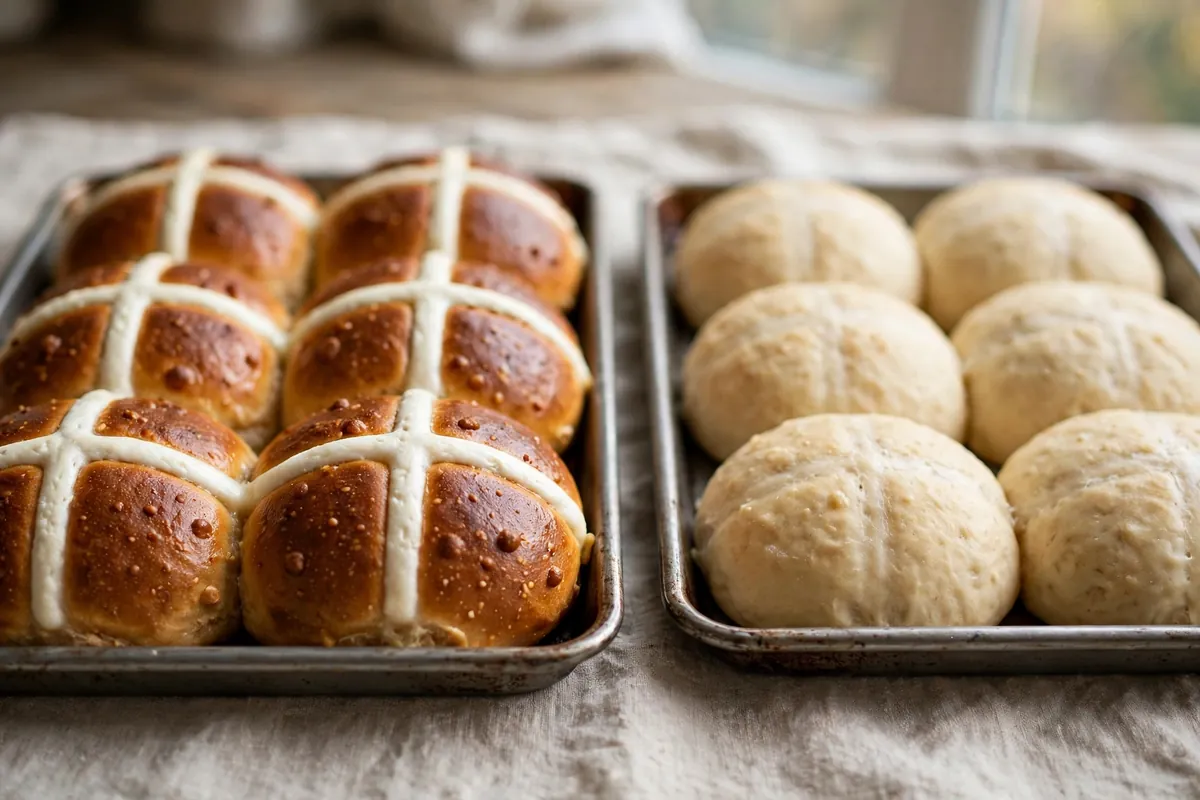
    Quick diagnosis: Dense buns mean under-proofed enriched dough — it rises slower than lean dough, so give it time and a warm spot, and judge by the poke test, not the clock. Pale tops mean missing or thin egg wash. Vanishing crosses mean your flour paste was too thin — toothpaste-thick, piped after the egg wash. Bake at 375–400°F (190–200°C).

    My tested baseline: 500g bread flour, 7g instant yeast, 60g sugar, 10g salt, 2 tsp cinnamon, ½ tsp allspice, ¼ tsp nutmeg, 1 egg plus 200ml warm milk, 60g soft butter, 150g raisins soaked 20 minutes and patted dry. Divide into 12 buns (~85g each), proof until puffy and touching, egg-wash twice, pipe crosses, bake at 375°F (190°C) for 18–22 minutes. Glaze: 3 tbsp apricot jam warmed with 1 tbsp water, brushed on hot.

    1. Dense buns — you under-proofed enriched dough

    Fat, sugar, and eggs all slow yeast down — the price of a tender crumb. Enriched dough can take twice as long to rise as lean dough, and bakers on plain-bread timing shape and bake far too early. An under-proofed bun has no air network to expand; it bakes into a dense lump no matter how hot the oven is.

    How to tell: Tight, even crumb with no airiness; buns barely grew in the oven; dough felt firm when shaped rather than puffy.

    The fix: Proof somewhere warm — 75–80°F (24–27°C), like the oven with the light on. Shaped buns should look visibly puffy, nearly doubled and touching, before baking; in a cool kitchen that’s 60–90 minutes, not 30. Poke test: a gentle press should spring back slowly, leaving a slight indent. Fast spring-back means wait. Too much kneading flour also compacts the crumb — the dough should be soft and slightly tacky. (Proofing fundamentals: Why Didn’t My Bread Rise? A Step-by-Step Diagnosis.)

    2. Pale tops — the egg wash was missing, thin, or single-coated

    Burnished mahogany tops come from egg wash, full stop. Without it, the same bake gives a matte, anemic crust — and the flour-paste cross has nothing to contrast against. A thin or single coat gives patchy color; milk-only washes barely brown.

    How to tell: Uniformly pale, dull tops after a full bake; crosses invisible for lack of contrast; crust soft and floury, not glossy.

    The fix: Beat 1 whole egg with 1 tablespoon of milk and brush on gently — then a second coat right before baking. Two thin coats beat one thick one (thick pools and streaks). The milk thins the egg so it spreads evenly. For extra shine, brush hot buns with warmed apricot jam the moment they leave the oven. And bake at a true 375°F (190°C) — too cool an oven never browns enriched dough, however good the wash.

    3. The crosses vanished — your flour paste was too thin

    The traditional cross is flour-and-water paste piped on before baking. Mixed too wet, it spreads and melts into the crust in the oven’s heat — by serving time there’s a pale smear where the cross should be. The most common hot cross bun complaint I hear, and a two-minute fix.

    How to tell: Faint blurry lines or nothing at all; paste spread wider than piped; crosses look “absorbed.”

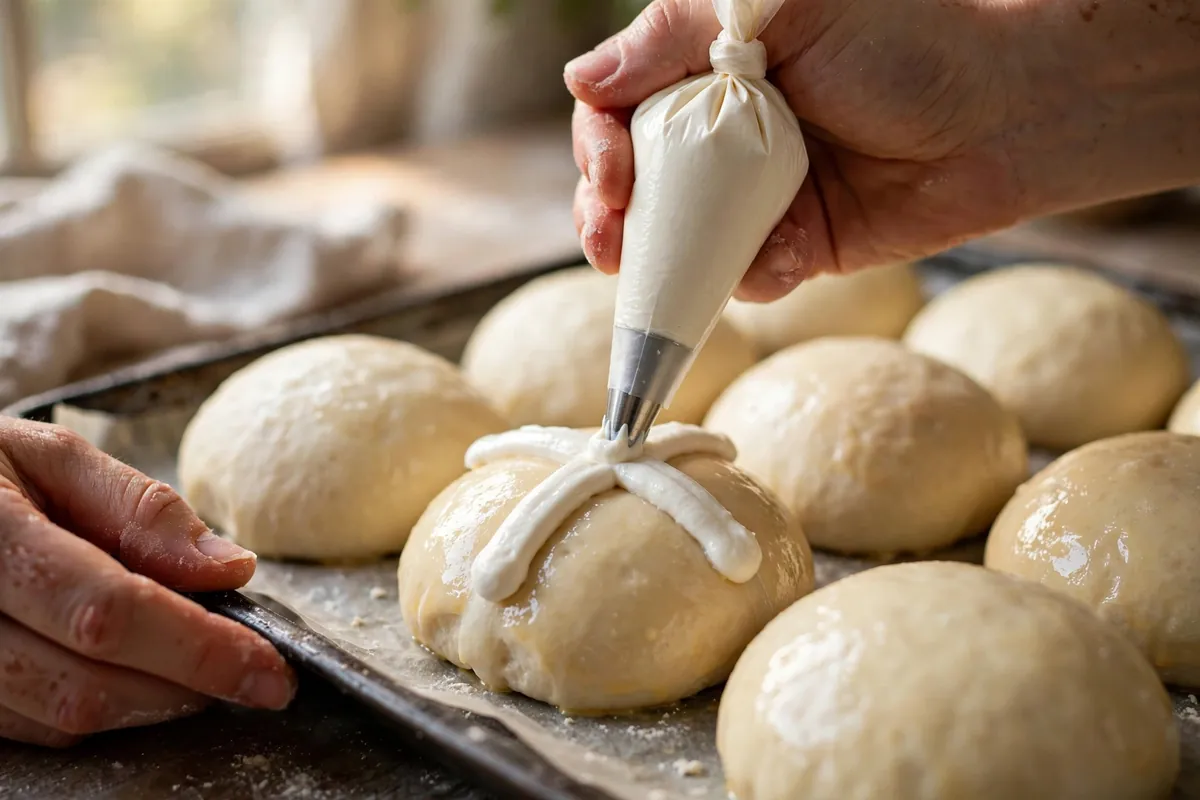
    The fix: Mix 60g flour with just enough water — about 4 tablespoons — for a toothpaste-thick paste that holds its shape on a spoon. Pipe through a small bag in confident lines, after the egg wash (the wash helps it grip), keeping lines thin — they spread slightly in the heat. Shortcut: skip the baked cross and pipe icing crosses onto cooled buns. Not traditional, but it never vanishes.

    hands piping thick flour-paste crosses onto egg-washed buns, the paste holding sharp lines
    hands piping thick flour-paste crosses onto egg-washed buns, the paste holding sharp lines

    4. Burnt bottoms, raw middles — wrong rack, hot oven

    Spiced, sugared dough browns fast, and surface fruit chars faster. Buns baked too low or in a hot-running oven get scorched bases with doughy centers — sugar caramelizes aggressively on the hot pan while the middle lags.

    How to tell: Near-black bottoms with pale sides; doughy centers; raisins on top turned bitter and hard.

    The fix: Middle rack, always. Verify a true 375°F (190°C) — many home ovens run 25°F hot, the difference between golden and scorched here. Line the pan with parchment; it insulates the bottoms just enough. Tops browning before centers finish? Tent loosely with foil for the last 5 minutes. Tuck surface raisins slightly into the dough when shaping so fewer sit exposed.

    5. Dry fruit and harsh spice — hydrate the fruit, measure the spice

    Two flavor faults that read as dryness. Unsoaked raisins pull moisture from surrounding dough as they bake, leaving dry pockets and turning themselves into hard, bitter pellets. And unmeasured spice — a heavy hand with cloves or allspice — gives a harsh, medicinal edge.

    How to tell: Hard, dark raisins; a dry halo of crumb around each piece; spice that’s sharp rather than warm.

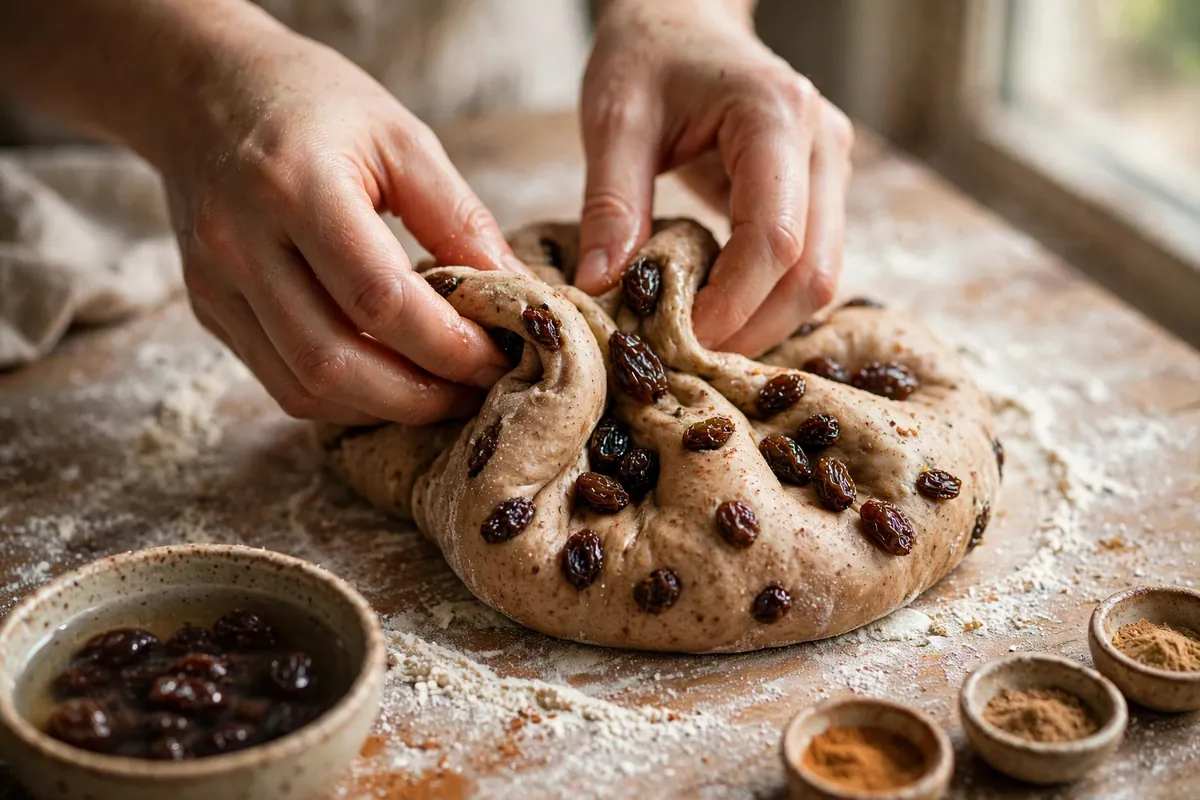
    The fix: Soak 150g raisins in warm water (or orange juice) 20 minutes, pat dry, then knead in — they’ll stay plump and jammy. Measure: per 500g flour, 2 tsp cinnamon, ½ tsp allspice, ¼ tsp nutmeg — warm and present, never harsh. Add fruit late in kneading so it doesn’t tear the gluten network; a torn network can’t hold gas, which circles back to density.

    plump soaked raisins being folded into spiced bun dough, with a small bowl of measured spices beside
    plump soaked raisins being folded into spiced bun dough, with a small bowl of measured spices beside

    Frequently asked questions

    Can I still eat dense hot cross buns?
    Yes — dense buns are safe, just heavy. Split and toast them; the toaster does what the oven didn’t. Slathered with butter while hot, an under-proofed bun is still a good bun.

    Can I pipe the crosses on after baking instead?
    Absolutely. Icing crosses — powdered sugar with a little milk — piped onto fully cooled buns are the modern shortcut and look sharp every time. Purists use flour paste, but nobody at the table will object.

    Can I make hot cross bun dough the night before?
    Yes, and it’s better for it. Refrigerate after kneading (8–12 hours); shape cold the next morning — cold dough portions easier — then give the buns their full warm proof. The slow ferment deepens flavor noticeably.

    Why did my raisins burn on top?
    Exposed fruit chars. Tuck raisins just under the dough surface when shaping, and soak them first — hydrated fruit scorches far slower. A few darkened ones are traditional; black and bitter means fully exposed.

    Can I freeze hot cross buns?
    Yes — freeze baked and cooled up to 2 months in a zip bag. Refresh from frozen at 325°F (165°C) for 10–12 minutes, or split and toast straight from frozen.

    Related troubleshooting: Why Didn’t My Bread Rise? A Step-by-Step Diagnosis · Why Did My Cinnamon Rolls Unravel? Shaping and Proofing Fixes · Why Did My Brioche Come Out Dry? Enriched Dough Fixes

  • Why Did My Brioche Come Out Dry? Enriched Dough Fixes

    Why Did My Brioche Come Out Dry? Enriched Dough Fixes

    You did the hard part — the long knead, the butter worked in piece by piece, the slow rise. Then the loaf came out dry and cottony, nothing like the buttery, pull-apart brioche you were promised. Dry brioche is frustrating because the ingredient list looks rich — but richness on paper and moisture in the crumb are different things.

    Quick diagnosis: Dry brioche is almost always overbaked (cause #1) — enriched doughs dry out fast past 190°F (88°C) internal — or under-kneaded so the butter leaked out instead of staying emulsified in the crumb (cause #2). Check your thermometer first.

    Brioche is roughly half butter by flour weight, plus eggs and sugar — tender only if the gluten holds the fat and you stop the bake before the moisture escapes.

    1. You overbaked it — the #1 killer of enriched doughs

    A lean artisan loaf is done at 200–210°F (93–99°C) internal. Brioche is done at 190°F (88°C). That ten-degree gap is enormous in an enriched dough: butter and egg proteins tighten and squeeze out moisture fast past their set point. Five extra minutes that would barely register on a baguette turns brioche cottony.

    How to tell: The crust is deeply browned, the crumb is dry all the way through, and you baked by time or color instead of temperature.

    The fix: Bake at 350–375°F (175–190°C) and start checking early — a loaf-pan brioche is often done at 25–30 minutes. Pull it the moment the center reads 190°F (88°C), tent with foil if the top browns first, and remember carryover adds a few degrees on the counter. Switching from “bake until golden” to “bake until 190°F” fixes more dry brioche than every other change combined. (Same thermometer-first habit works for lean loaves: How to Tell When Bread Is Done.)

    2. The gluten was underdeveloped — so the butter leaked out

    Brioche needs a fully developed gluten network before the butter goes in, and more kneading after. Gluten is the scaffolding that holds fat suspended in the crumb. If it’s weak, butter melts during baking and runs out instead of staying emulsified — dry crumb, sometimes a greasy pan.

    How to tell: Butter visibly leaked into the pan, the crumb is dry but greasy at the bottom, and the dough tore instead of stretching thin when tested.

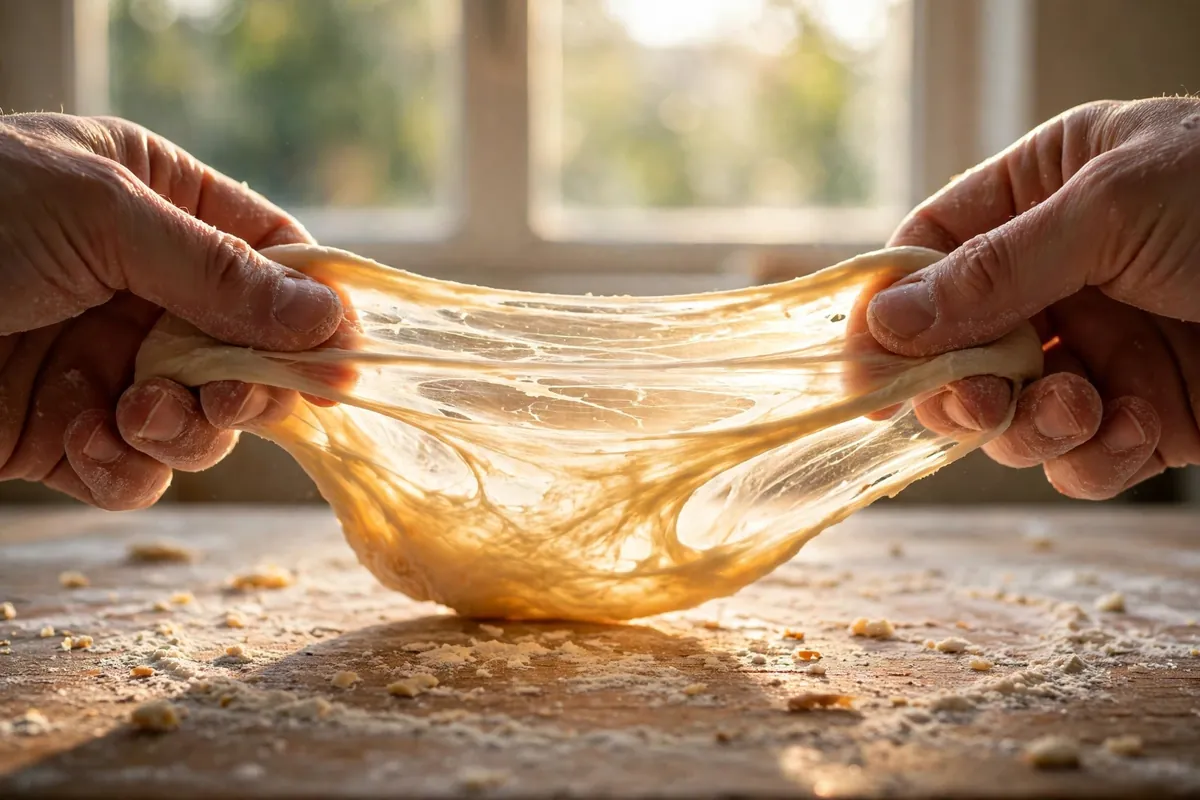
    The fix: Knead the base dough (flour, eggs, sugar, yeast, salt, milk) to a full windowpane first — a translucent membrane that stretches without tearing — then add soft (not melted, not cold) butter a tablespoon at a time. The dough will look broken halfway through; that’s normal. Keep going — 25 to 30 minutes in a stand mixer is typical — until smooth, elastic, and passing the windowpane again. Testing the windowpane twice, before and after the butter, stopped my brioche leaking entirely.

    hands stretching brioche dough into a translucent windowpane
    hands stretching brioche dough into a translucent windowpane

    3. There wasn’t enough fat — the enrichment was too lean

    True brioche runs 50% butter to flour by weight — 250g butter per 500g flour. Many “brioche” recipes cut that to 25–30%, and at that point you’re baking a slightly rich sandwich bread. It will never have shreddable, buttery tenderness no matter how perfect your technique is.

    How to tell: The recipe’s butter was under ~40% of flour weight, the dough was quick and easy to knead, and the crumb is bread-like rather than cake-like.

    The fix: Check the ratio before blaming technique: for 500g flour, use at least 200g butter (40%), ideally 250g (50%). Don’t cut the butter to lighten the recipe — in brioche, the butter is the moisture system. Use real butter, not oil: its milk solids and solid-at-room-temperature structure are part of what makes the crumb tender. (More on when fat and flour choices matter: Bread Flour vs All-Purpose: When It Actually Matters.)

    4. The oven ran too hot — set crust, dry center

    Brioche’s sugar and milk solids brown fast. In an oven running hot — most home ovens are 15–25°F off — the crust sets and darkens before the center finishes, so you either pull a pale-centered loaf or leave it in until the whole thing dries out.

    How to tell: The top browned deeply well before the timer ended and the center is dry even though the loaf looked done early.

    The fix: Verify with an oven thermometer and bake at a true 350°F (175°C). Tent loosely with foil once the top reaches the color you want, usually around the two-thirds mark, and use the lower-third rack so bottom heat drives the center done.

    5. You sliced too soon — or stored it wrong

    Brioche finishes setting as it cools. Slicing warm lets steam escape that would otherwise settle back into the crumb as moisture. And enriched breads stale faster than lean ones uncovered — a brioche left out is noticeably drier by morning.

    How to tell: The loaf seemed fine at first and dried out over hours, or you cut the first slice warm and the crumb felt gummy, then dry.

    The fix: Cool completely — a full 2 hours — before slicing. Store cut-side down on day one, then sealed in a bag or bread box; skip the refrigerator, which accelerates staling. Brioche freezes beautifully up to 3 months: slice first, wrap tight, refresh at 300°F (150°C) for 5 minutes. (Full playbook: How to Store Homemade Bread So It Stays Fresh for Days.)

    The checklist for next time

    50% butter to flour. Full windowpane before and after the butter goes in. True 350°F (175°C) oven. Pull at 190°F (88°C) internal. Cool 2 hours before slicing. And if you want to split the work, a slow fridge ferment improves both flavor and texture — timelines are in Make-Ahead Bread Dough: Fridge Fermentation Timelines.

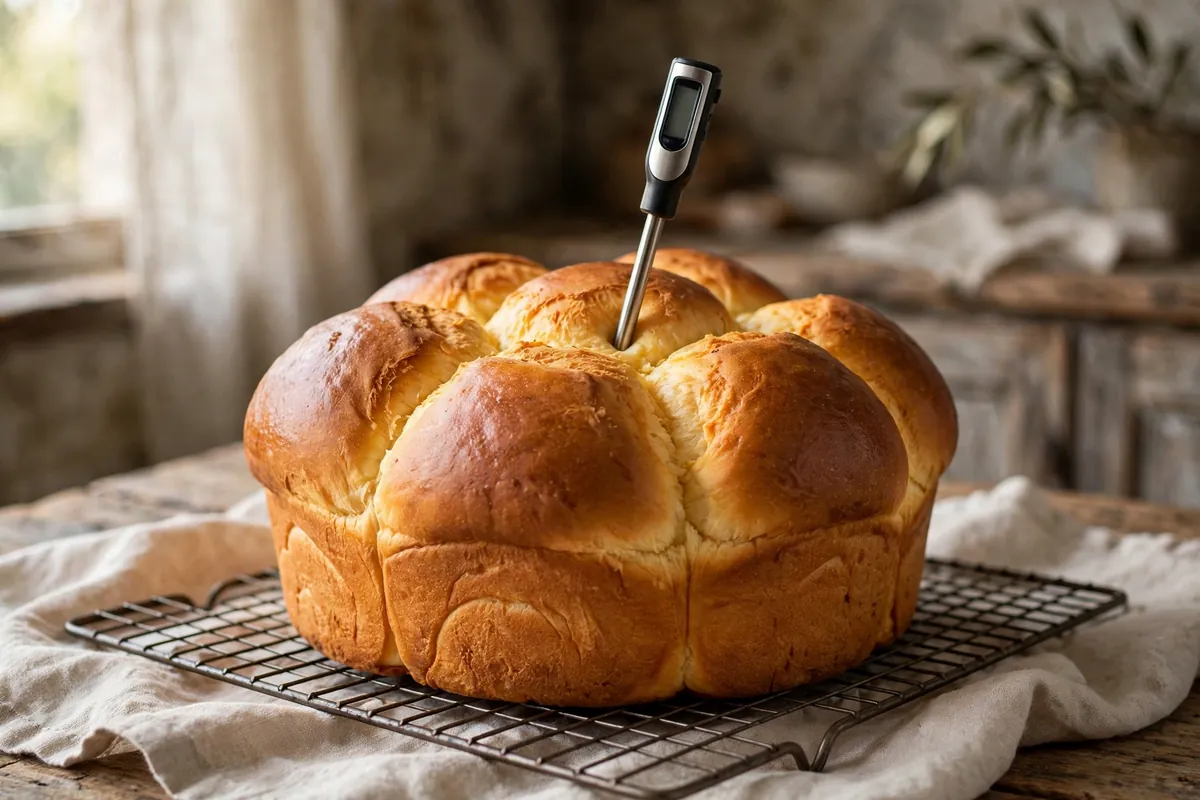
    instant-read thermometer in the center of a golden brioche loaf
    instant-read thermometer in the center of a golden brioche loaf

    FAQ

    Is dry brioche safe to eat?
    Yes — dryness is a texture defect, not a safety issue. As long as the loaf baked through with no raw center and was stored normally, it’s fine. Repurpose it as French toast, bread pudding, or breadcrumbs, where dryness becomes an advantage.

    Can I fix brioche that’s already baked dry?
    You can’t restore the original tender crumb, but you can make it delicious. Brush slices with warm simple syrup and heat briefly, use thick slices for French toast (dry crumb absorbs custard beautifully), or cube it for bread pudding. Warming slices also perceptibly softens a dry crumb.

    How much butter should brioche actually have?
    At least 40% of flour weight; 50% is the classic benchmark — 250g butter per 500g flour. Below 40% you’re making enriched sandwich bread, and no technique produces true brioche tenderness. The fat is the moisture system — don’t cut it.

    What internal temperature is brioche done at?
    190°F (88°C) — notably lower than lean breads at 200–210°F (93–99°C). Enriched doughs dry out fast past 190°F as egg and butter proteins tighten and expel moisture. Start checking early and tent with foil if the top browns first.

    Why did butter leak out of my brioche while baking?
    Weak gluten. The dough must pass the windowpane test before the butter goes in and after it’s incorporated — about 25–30 minutes of mixer kneading total. Add butter soft, a tablespoon at a time; don’t stop when the dough looks broken midway, since it comes back together.

    Can I use oil instead of butter in brioche?
    You can, but it won’t be brioche in texture — oil gives a soft but slicker, less shreddable crumb. Butter’s milk solids add the signature flavor and help the crumb set tender.

    Related troubleshooting: Why Is My Bread Dense? 9 Causes and How to Fix Each One · How to Tell When Bread Is Done · Make-Ahead Bread Dough: Fridge Fermentation Timelines

  • Why Did My Cinnamon Rolls Unravel? Shaping and Proofing Fixes

    Why Did My Cinnamon Rolls Unravel? Shaping and Proofing Fixes

    Opening the oven to find your cinnamon rolls sprung open like uncoiling party favors — the spiral gaping, filling oozing — is a special heartbreak. The fix is almost entirely in the shaping: unraveling is a mechanical failure, not a recipe failure. The spiral has to be rolled tight, sealed shut, and proofed correctly, and each of those steps has a specific technique.

    Quick diagnosis: Unraveling comes down to loose rolling (cause #1) or a bad seam seal (cause #2) more than anything else. If the rolls opened during baking with the filling leaking out, you rolled too loosely. If they popped open at the seam specifically, the seal failed. Over-proofing (cause #3) makes both worse.

    Why spirals unravel (the mechanics)

    A cinnamon roll is a rolled sheet of enriched dough with a fat-sugar layer inside. During proofing and baking, the dough expands — and expanding dough pushes outward in every direction, including along the spiral. Three things resist it: roll tightness (tension holds layers together), the sealed seam (outer edge glued shut), and snug pan neighbors (adjacent rolls brace each other). Unraveling means at least one failed — work through them in order.

    1. You rolled too loosely — the spiral had no tension

    This is the number one cause. A proper cinnamon roll is rolled with firm, even tension — each turn of the spiral pulled snug against the last, like rolling a sleeping bag. Most home bakers roll gently, afraid of squeezing out the filling or tearing the dough, and the result is a loose spiral with air gaps between layers. Those gaps are where unraveling starts: expanding dough follows the path of least resistance, and a loose spiral gives it room to spring open.

    How to tell: Wide gaps between spiral layers with filling leaked into them — the roll looks puffy and separated rather than compact.

    The fix: Roll with confidence. After spreading the filling (leaving a 1-inch / 2.5cm border clean along the far edge), start from the edge nearest you and roll away, pulling each turn taut against the roll — firm enough that you feel resistance, not so hard the dough tears. Tuck the roll toward you slightly with each turn to build tension. When I stopped being gentle and started rolling like I meant it, unraveling stopped. Enriched dough is stronger than you think.

    2. The seam wasn’t sealed — the outer edge let go

    Even a tightly rolled log will uncoil if the final edge isn’t glued down. Dough edges don’t stick to dough on their own — flour on the surface actively prevents sticking. An unsealed seam is a zipper waiting to be pulled, and oven spring pulls it.

    How to tell: The rolls opened along one line — the outer seam — with the “flap” of the outer layer visibly lifted.

    The fix: Seal deliberately. Brush the clean border with water or beaten egg, finish the roll, and press the seam firmly shut. Place every roll seam-side down — gravity becomes your backup seal. I use egg wash on the border for sweet rolls; it’s stickier than water and the seal survives even aggressive oven spring.

    3. Over-proofed — the structure gave up before baking

    Proofing matters as much as shaping. An over-proofed roll has exhausted its yeast energy and its gluten structure is stretched to the limit — in the oven, instead of a controlled spring, the weakened structure slumps and the layers separate. Over-proofed rolls also tend to be the ones that uncoil most dramatically, because the dough is at its most fragile exactly when oven spring hits hardest.

    How to tell: The rolls looked huge and puffy going in — more than doubled, pillowy, fragile — and may have merged, then collapsed or separated in the heat.

    The fix: Proof to about 1.5 times their original size, not doubled — roughly 45–60 minutes in a warm spot for most enriched doughs. Poke-test it: a slow, partial spring-back means ready; no spring-back means over-proofed — bake immediately and accept a flatter batch. Slightly under-proofed beats over-proofed: oven spring finishes the job. (Same principle behind collapsed enriched breads — see Why Didn’t My Bread Rise?.)

    4. Too much filling — the roll couldn’t grip itself

    There’s a filling sweet spot, and exceeding it causes unraveling two ways: the excess fat lubricates the layers so they slide instead of gripping, and the bulk of the filling physically prevents tight rolling. If your filling layer is a quarter-inch thick, no amount of rolling tension will hold it.

    How to tell: Filling oozed out during rolling, the log felt slippery, and pools of melted cinnamon-sugar surround the baked rolls.

    The fix: Measure the filling. For a standard 12-roll batch (dough rolled to roughly 12×16 inches / 30×40cm), use about 75g soft butter, 100g brown sugar, and 1 tablespoon cinnamon — a thin, even layer, not a thick schmear. Use soft butter, not melted — melted butter lubricates instead of gripping. And keep the sealing border clean; filling on it guarantees seal failure.

    5. The pan was too big — no neighbors to brace against

    Cinnamon rolls are team players: packed snugly in the pan, each roll braces its neighbors, and that mutual support physically prevents uncoiling. Rolls baked with an inch of space between them have nothing holding them in — they’re free to spring open in every direction.

    How to tell: Visible gaps between rolls in the pan, or space around each on a sheet tray — the rolls spread outward and unraveled into the empty space.

    The fix: Pack them touching. A 9×13-inch (23×33cm) pan fits 12 standard rolls with the sides just kissing — that’s the arrangement that holds. They should look slightly crowded going in — they’ll proof into each other and bake as one connected pull-apart batch. That’s the design, not a flaw.

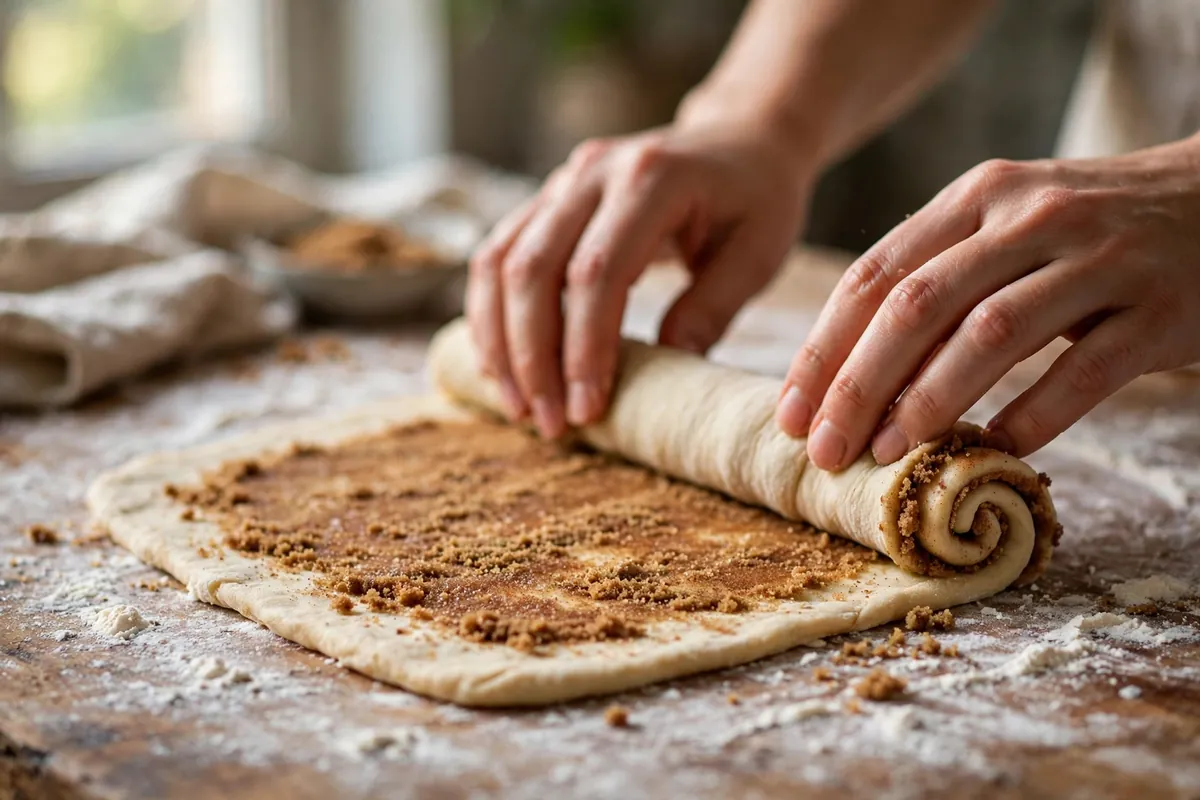
    hands rolling cinnamon roll dough into a tight log, filling visible
    hands rolling cinnamon roll dough into a tight log, filling visible

    6. Slicing crushed the log — use floss, not a knife

    A bonus failure that mimics unraveling: sawing the log with a knife compresses and drags the spiral, loosening layers before baking. The damaged spiral separates in the oven.

    How to tell: The spiral looked distorted or squashed right after slicing, before proofing.

    The fix: Slide unflavored dental floss under the log, cross the ends over the top, and pull — a clean cut with zero compression. It’s the professional bakery method and it takes ten seconds to learn. A sharp serrated knife with a single firm press (no sawing) is the backup option.

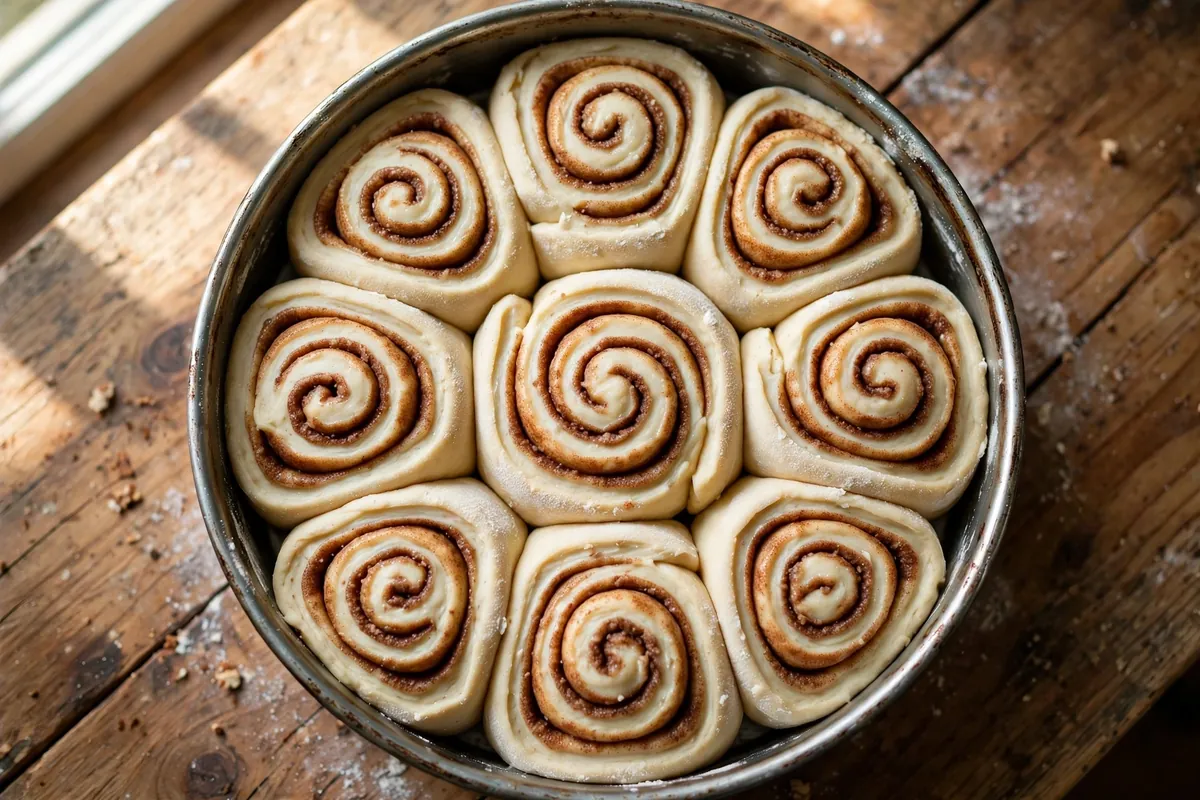
    overhead of snugly packed cinnamon rolls in a pan before baking, rolls touching
    overhead of snugly packed cinnamon rolls in a pan before baking, rolls touching

    Frequently asked questions

    Can I fix unraveled cinnamon rolls after baking?
    Not structurally — but serve warm with extra glaze, which covers a multitude of sins. Nobody complains about a messy cinnamon roll that tastes right.

    Why do my cinnamon rolls fall apart when I pick them up?
    Underbaked centers or over-proofing. Center rolls need the full bake — check 190°F (88°C) in the middle; a paring knife into the center roll tells the truth.

    Is it safe to eat underbaked cinnamon rolls?
    Doughy centers should go back in the oven — raw enriched dough isn’t ideal. Fully baked but unraveled rolls are perfectly safe; it’s purely cosmetic.

    Should the filling go edge to edge?
    No — leave a 1-inch (2.5cm) clean border on the far edge for the seal, plus small side borders. Edge-to-edge filling guarantees leaks.

    Can I prepare cinnamon rolls the night before?
    Yes — assemble, slice, pan snugly, cover tightly, refrigerate overnight. Bake from the fridge with 10–15 extra minutes. The cold retard improves flavor. (Overnight method details: Make-Ahead Bread Dough.)

    Why did my rolls rise in the oven and then collapse?
    Over-proofed, or the oven wasn’t fully preheated — the weak structure couldn’t hold the spring. Proof less, preheat fully.

    Related troubleshooting: Why Didn’t My Bread Rise? · Fix Over-Salted Dough · Make-Ahead Bread Dough

  • Why Did My Millionaire’s Shortbread Layers Separate? (Layer Adhesion)

    Why Did My Millionaire’s Shortbread Layers Separate? (Layer Adhesion)

    Millionaire’s shortbread fails at the joints. Each layer is easy alone, but stacked, physics takes over: smooth shortbread gives caramel nothing to grip, soft caramel slides under chocolate, a thick chocolate cap shears off. Separated bars were assembled, not bonded.

    Quick diagnosis: The caramel was undercooked (too soft to grip — most common), the shortbread surface was too smooth and glassy, or you skipped the chill between layers. Fix: cook the caramel to 240°F (115°C), prick and slightly roughen the shortbread, and chill 30 minutes between every layer.

    My tested baseline: shortbread — 225g flour, 150g cold butter, 75g sugar, baked 20–25 minutes at 350°F (175°C) in a 20cm lined pan until golden at the edges. Caramel — 175g butter, 150g light brown sugar, 1 can (397g) sweetened condensed milk, cooked to 240°F (115°C). Chocolate — 200g dark chocolate + 1 tablespoon neutral oil, spread thin. Chill 30 minutes between layers; cut with a hot dry knife.

    1. The caramel was undercooked — soft caramel is a lubricant

    This is the number-one cause of separating layers. At 225–230°F (107–110°C), caramel is a flowing sauce — great on ice cream, useless as glue. Under the chocolate it migrates and layers hydroplane apart. At firm-ball stage, 240–245°F (115–118°C), caramel bonds: firm enough to hold, soft enough to bite.

    How to tell: The caramel oozes when you cut; bars slump sideways in the pan; the caramel layer looks glossy and fluid rather than matte and set.

    The fix: Cook to 240°F (115°C), stirring constantly — 8–12 minutes at a steady bubble. No thermometer? Cold-water test: a spoonful should form a firm, pliable ball that holds shape but flattens when pressed. Undercooked caramel can’t be fixed once layered.

    2. The shortbread surface was too smooth — the caramel had nothing to grip

    A smooth, glassy shortbread top is beautiful and structurally useless — caramel bonds mechanically and needs texture to key into. I roughen the surface deliberately now; base-layer separation dropped to zero.

    How to tell: The caramel lifts off the shortbread in one clean sheet; the shortbread top is smooth and shiny where the caramel sat.

    The fix: While the shortbread is still warm from the oven, prick it all over with a fork (docking also prevents puffing) and lightly score the surface with the fork tines. Pour the hot caramel over the warm — not cold — shortbread; warmth on both sides helps the layers meld. Some bakers brush the warm shortbread with a whisper of the hot caramel first as a “primer” — it works.

    3. You skipped the chill between layers — warm layers never bond

    Each layer must set before the next goes on. Chocolate over warm caramel softens it further; the boundary never forms cleanly and shears later. Chill 30 minutes after caramel (firm to a light touch), 20–30 after chocolate.

    How to tell: The layers look marbled or blended at the boundary rather than distinct; the chocolate slid while you were spreading it.

    The fix: Caramel layer: refrigerate 30 minutes until it dents but doesn’t stick when pressed lightly. Then pour the melted chocolate (cooled to about 90°F / 32°C, just warm) and spread gently — don’t press down. Refrigerate again 30+ minutes until the chocolate is fully set. Distinct, clean boundaries in the finished bar mean the chills worked.

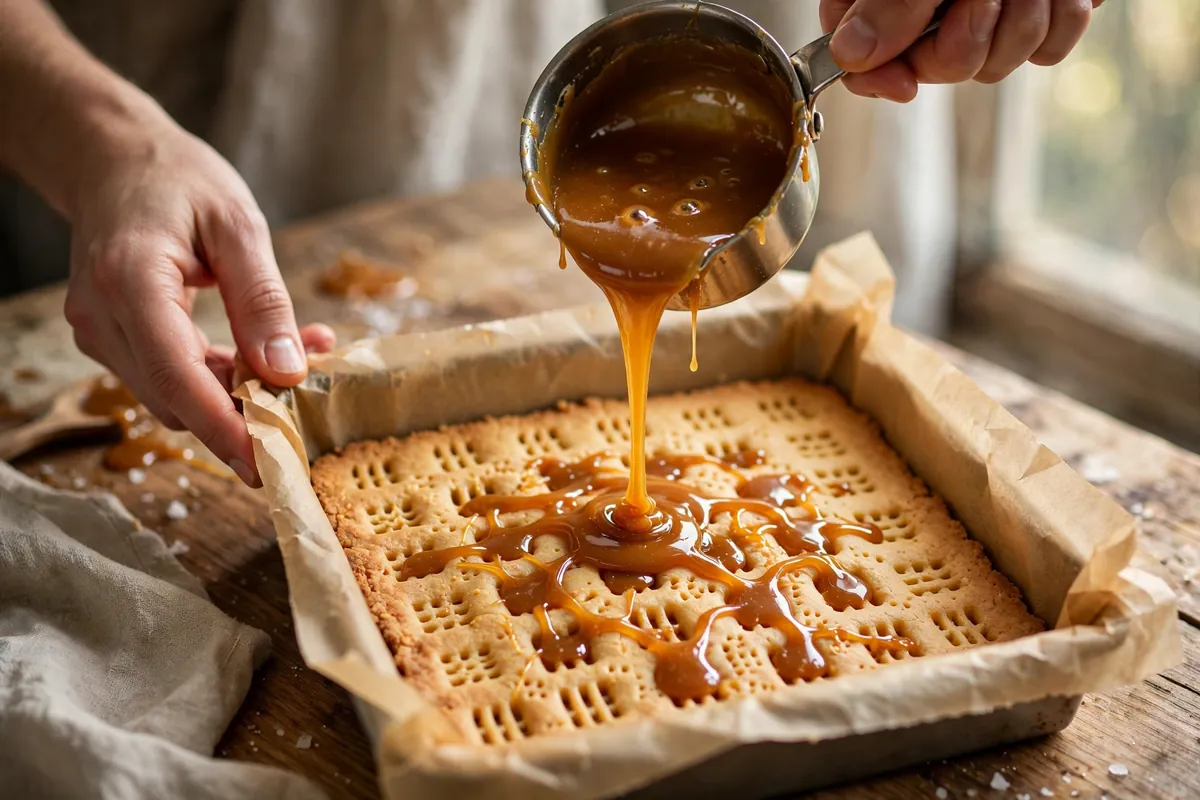
    hands pouring glossy hot caramel over warm pricked shortbread in a lined square pan, caramel flowing into the fork holes
    hands pouring glossy hot caramel over warm pricked shortbread in a lined square pan, caramel flowing into the fork holes

    4. The chocolate layer is too thick — a heavy cap shears off

    300g+ of chocolate on a 20cm pan contracts into a rigid plate with no flex; the slightest pressure pops it off in one sheet. 150–200g flexes with the bar instead of fighting it. This is the same plate-shear failure as a too-thick glaze on opera cake.

    How to tell: The chocolate comes off in large clean shards; the underside of the chocolate is perfectly smooth with no caramel clinging to it.

    The fix: Use 150–200g chocolate for a 20cm pan, spread to 2–3mm. Add 1 tablespoon of neutral oil or butter per 200g chocolate — it keeps the chocolate slightly pliable and less snap-prone. Score the chocolate lightly with a knife 10 minutes into the final chill (when it’s set but not hard) to guide clean cuts later.

    5. You cut the bars cold and straight from the fridge — thermal shock splits layers

    Fridge-cold chocolate is brittle; a room-temperature knife fractures the cap along the caramel boundary. The layers were bonded — the cutting broke them. I ruined a perfect batch before learning the hot knife.

    How to tell: The bars looked perfect in the pan but separated during cutting; the breaks are clean fractures, not slides.

    The fix: Let the slab sit 10 minutes at room temperature, then cut with a long sharp knife dipped in hot water and wiped dry between every cut. Press straight down — no sawing. The hot blade melts through the chocolate instead of fracturing it, and the brief tempering keeps the caramel from cracking.

    6. The shortbread was underbaked — a soft base can’t anchor anything

    Underbaked shortbread is pale, soft, and slightly steamy inside. Caramel poured over it sinks into the damp crumb instead of sitting on top, and the whole base layer turns to flavored mush that releases the caramel as it cools. The bar separates from the bottom up.

    How to tell: The shortbread layer is pale and soft rather than golden and crisp; it crumbles damply instead of snapping; the base tastes slightly raw.

    The fix: Bake the shortbread until the edges are golden and the center looks set and matte — 20–25 minutes at 350°F (175°C) for a 20cm pan. It firms as it cools, so pull it when the center still looks a touch soft but the edges are clearly golden. A crisp base is a structural member, not just a flavor layer.

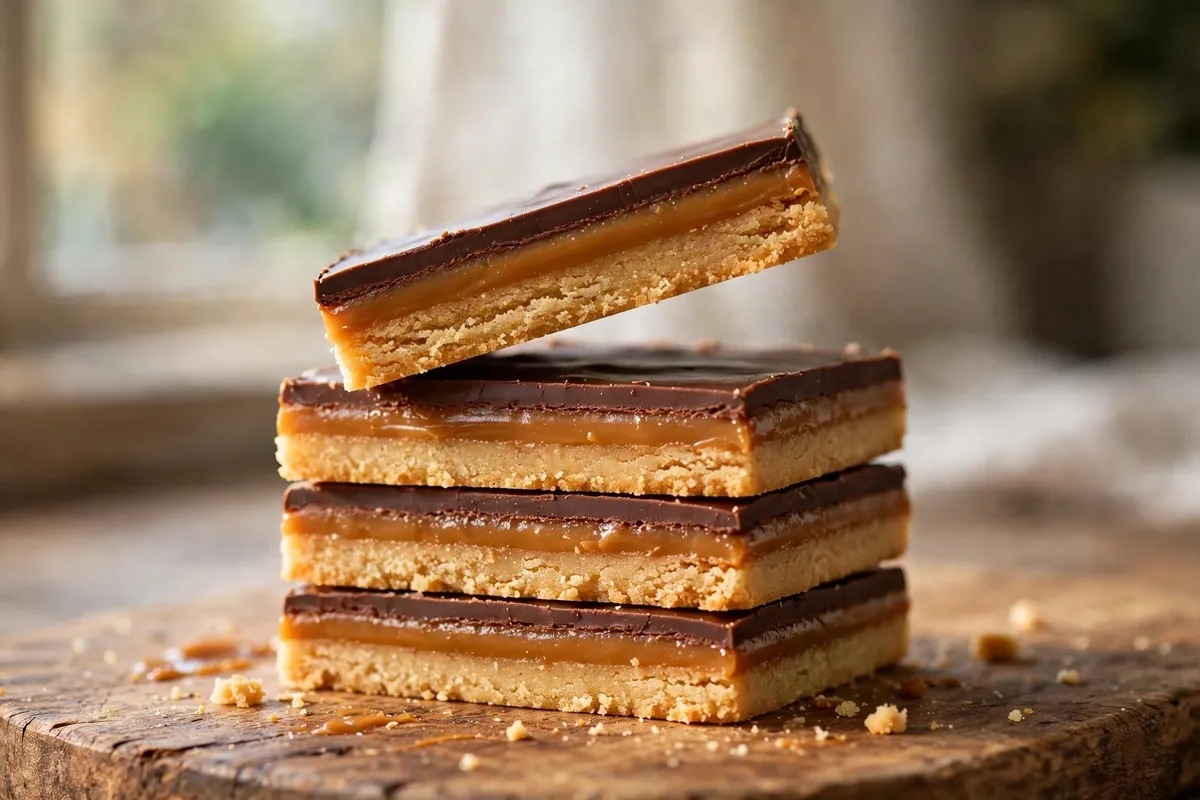
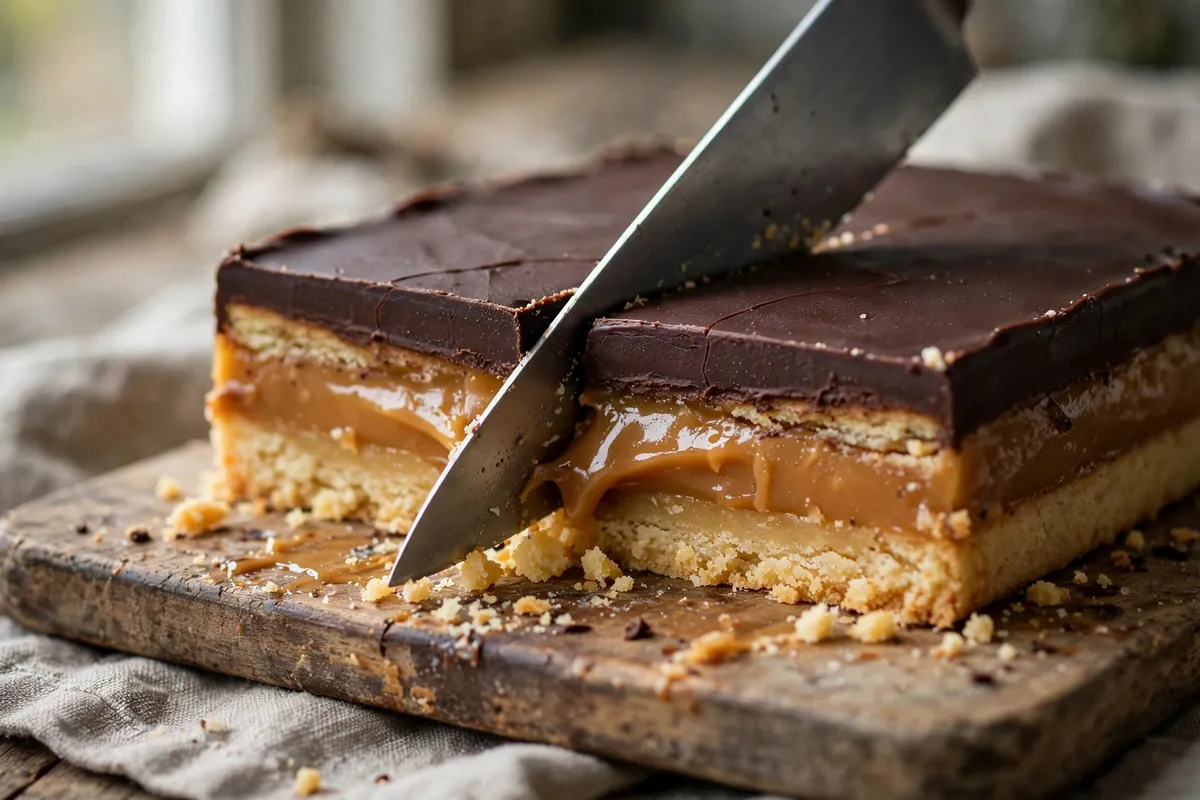
    a hot knife slicing cleanly through a chilled slab of millionaire's shortbread, showing three distinct bonded layers in the cut face
    a hot knife slicing cleanly through a chilled slab of millionaire's shortbread, showing three distinct bonded layers in the cut face

    FAQ

    Is it safe to eat separated millionaire’s shortbread?
    Completely — this is a texture and structure issue, not a food safety one. The layers taste exactly as intended; serve the pieces as-is or crumble them over ice cream.

    Can I re-stick layers that separated?
    Not really — cut layers won’t re-bond. Salvage it: warm pieces slightly, press together, re-chill. They’ll hold for serving.

    Why is my caramel grainy instead of smooth?
    The sugar crystallized — from stirring too early or crystals on the pan walls. Wash sides down with a wet brush, don’t stir until fully boiling. A tablespoon of golden syrup also inhibits it.

    Can I use store-bought caramel or dulce de leche?
    Dulce de leche works as a shortcut but it’s softer than proper 240°F caramel — expect slightly less structural hold. If you use it, cook it down a few minutes to thicken, or accept softer bars and chill them well.

    How long do millionaire’s shortbread bars keep?
    5–7 days airtight at cool room temperature; 2 weeks refrigerated. Fridge bloom (white streaks) is harmless. Don’t freeze — caramel texture suffers on thawing.

    Can I make these gluten-free?
    Yes — swap the flour for a 1:1 gluten-free blend in the shortbread and bake 2–3 minutes longer. The caramel and chocolate layers are naturally gluten-free. The adhesion fixes above apply identically.

    Related troubleshooting: Why Did My Opera Cake Layers Slide? · Fixing Grainy Fudge · Fixing Seized Chocolate

  • Rye Bread Troubleshooting: Dense, Gummy, or Bitter — Fixed

    Rye Bread Troubleshooting: Dense, Gummy, or Bitter — Fixed

    Rye plays by different rules — that’s why it fails in ways wheat bread never does. If white-bread instincts gave you a dense brick, gummy interior, or bitter aftertaste, nothing is wrong with your instincts; they’re just the wrong ones for this grain. Rye has almost no gluten. Instead, its structure comes from pentosans (gummy carbohydrates that absorb enormous amounts of water), and its starches are attacked by unusually aggressive amylase enzymes.

    Quick diagnosis: Gummy rye is almost always sliced too soon or underbaked (rye needs far longer to set than wheat — causes #1 and #2). Dense rye usually means too high a rye percentage (cause #3). Bitterness: overbaked dark rye or stale flour (cause #5).

    Why rye is weird (the chemistry you need)

    Wheat bread’s structure is gluten; rye flour has very little gluten-forming protein. Instead, rye relies on pentosans, which absorb up to 8 times their weight in water and form a viscous gel. That gel holds the loaf together — and it’s why rye dough feels sticky and the crumb can turn gummy: you’re managing a gel, not gluten.

    Second quirk: rye is loaded with amylase enzymes that chop starches into sugars. Unchecked, they liquefy the crumb’s starch structure during baking — the infamous gummy, pasty interior. The traditional defense is acidity — sourdough fermentation or added acids inhibit amylase. Real rye bread is sour because the sourness is structural engineering, not just flavor.

    1. Gummy crumb — you sliced it too soon

    The number one rye complaint and the easiest fix: rye’s pentosan gel needs many hours to set after baking — far longer than wheat. Slice warm and the crumb turns wet, gummy, and pasty even in a perfectly baked loaf. It isn’t underbaked; it’s unfinished.

    How to tell: Crust and shape look right and the full bake time elapsed, but the interior is damp and gummy when sliced within hours of baking.

    The fix: Wait. A full 12–24 hours before slicing — I know, it’s agonizing. Wrap the cooled loaf in a clean towel or paper bag (not plastic, which softens the crust) and leave it overnight — the crumb firms up and the gumminess resolves into the moist, even texture rye should have. Wait a full day and the “gummy rye problem” vanishes.

    2. Gummy crumb — underbaked, because rye lies about doneness

    Rye underbakes easily: the dark color makes visual cues useless — it looks “done” long before it is — and the dense crumb conducts heat slowly. It needs 205–210°F (96–99°C) internally, hotter than most wheat breads.

    How to tell: Heavy and damp even after a full day’s rest, with a wet (not just moist) center that never firms up.

    The fix: Bake longer and hotter than your instincts say. For a 1.5-pound (700g) rye loaf, expect 50–65 minutes at 400–425°F (200–220°C) to reach 205–210°F (96–99°C) in the center. Combine with the full rest from cause #1 — both are required. (General doneness principles: How to Tell When Bread Is Done.)

    3. Dense brick — too much rye for the structure

    100% rye is a legitimate traditional style (think German vollkornbrot), but dense by design — no gluten means no open crumb, ever. If you expected a light sandwich loaf, the recipe didn’t fail; the expectation did. For beginners, anything above 60–70% rye gets progressively denser and harder to handle.

    How to tell: Uniformly dense with a tight crumb — not gummy, just heavy. You used mostly or entirely rye flour.

    The fix: A 40–50% rye / 50–60% bread-flour blend gives real rye flavor with a genuinely light crumb — my recommended starting point. Wheat supplies the gluten network; rye supplies flavor and moisture. Raise the rye percentage gradually as you learn the sticky dough. Handle gently: no windowpane test, no kneading — mix until combined, shape with wet hands, proof only until slightly risen (rye over-proofs fast).

    4. Dense and pasty — the amylase ran wild (not enough acidity)

    Without enough acidity, rye’s amylases stay active deep into the bake, liquefying starches into gummy paste instead of set crumb. Traditional rye breads are sourdoughs for exactly this reason — fermentation acids shut the amylases down.

    How to tell: The crumb is dense AND wet-pasty with a sticky mouthfeel even after full cooling — and you used commercial yeast with no added acid.

    The fix: The authentic route: a rye sourdough starter — even a hybrid (starter for acidity, commercial yeast for lift) transforms the crumb. The quick route: 1 tablespoon vinegar or a quarter teaspoon citric acid per 500g flour — it inhibits amylase exactly like fermentation acids do. My straight-yeast rye went from pasty to properly set with that one tablespoon.

    5. Bitter aftertaste — overbaked dark rye or stale flour

    A pleasant tang is one thing; outright bitterness has two usual sources. First, dark rye baked too hot or too long — the bran over-caramelizes (dark rye browns faster than you expect). Second, old rye flour: its natural oils go rancid faster than wheat’s, tasting bitter and cardboard-like no matter how well you bake.

    How to tell: Bitterness in the crust only means overbaking; throughout the loaf means the flour. Rancid rye smells sharp and stale rather than sweet and grainy — check age and smell.

    The fix: For overbaking: drop 25°F and tent with foil if the crust darkens early — rye’s color lies about doneness (cause #2). Buy rye flour you’ll use within 2–3 months, store airtight and cool (fridge for whole rye), and smell before baking — fresh rye smells faintly sweet and earthy. Check caraway too: over 1 tablespoon per loaf turns bitter-medicinal, and old ground caraway goes harsh.

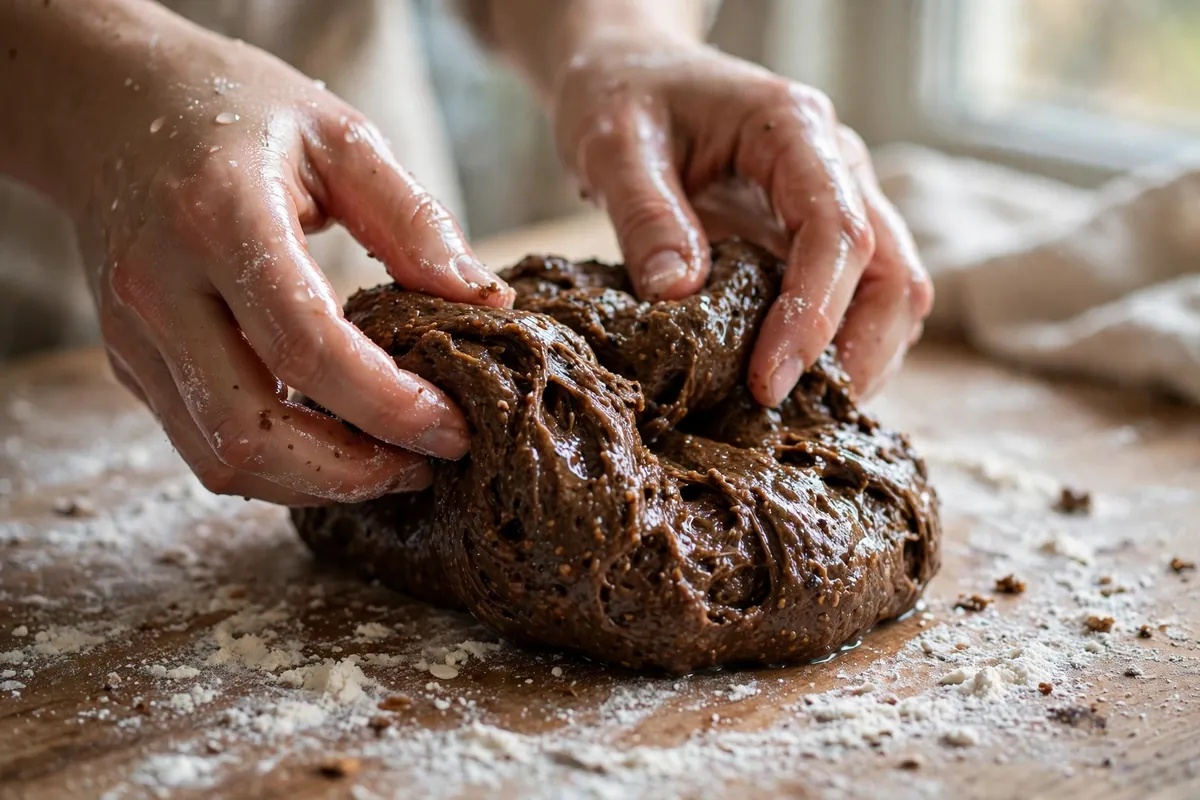
    hands shaping sticky rye dough with wet hands on a floured surface
    hands shaping sticky rye dough with wet hands on a floured surface

    6. The loaf spread into a pancake — shaping and proofing

    Without gluten, rye dough can’t hold a tall shape — high-percentage rye loaves naturally bake flatter and wider. A true pancake means over-proofing or too much water. Rye ferments fast (those amylase-liberated sugars feed yeast quickly) and over-proofed rye collapses rather than springing.

    How to tell: The dough rose then flattened in the oven or spread sideways proofing, with a dense crumb and sour-alcoholic smell (over-fermented).

    The fix: Proof rye by time discipline, not by doubling — 60–75% rise is plenty for high-rye doughs. Use a loaf pan above 60% rye — the pan supplies the structure missing gluten can’t. Keep hydration moderate: rye feels wetter than same-hydration wheat dough because pentosans hold water differently — trust the recipe’s numbers over your wheat-trained hands.

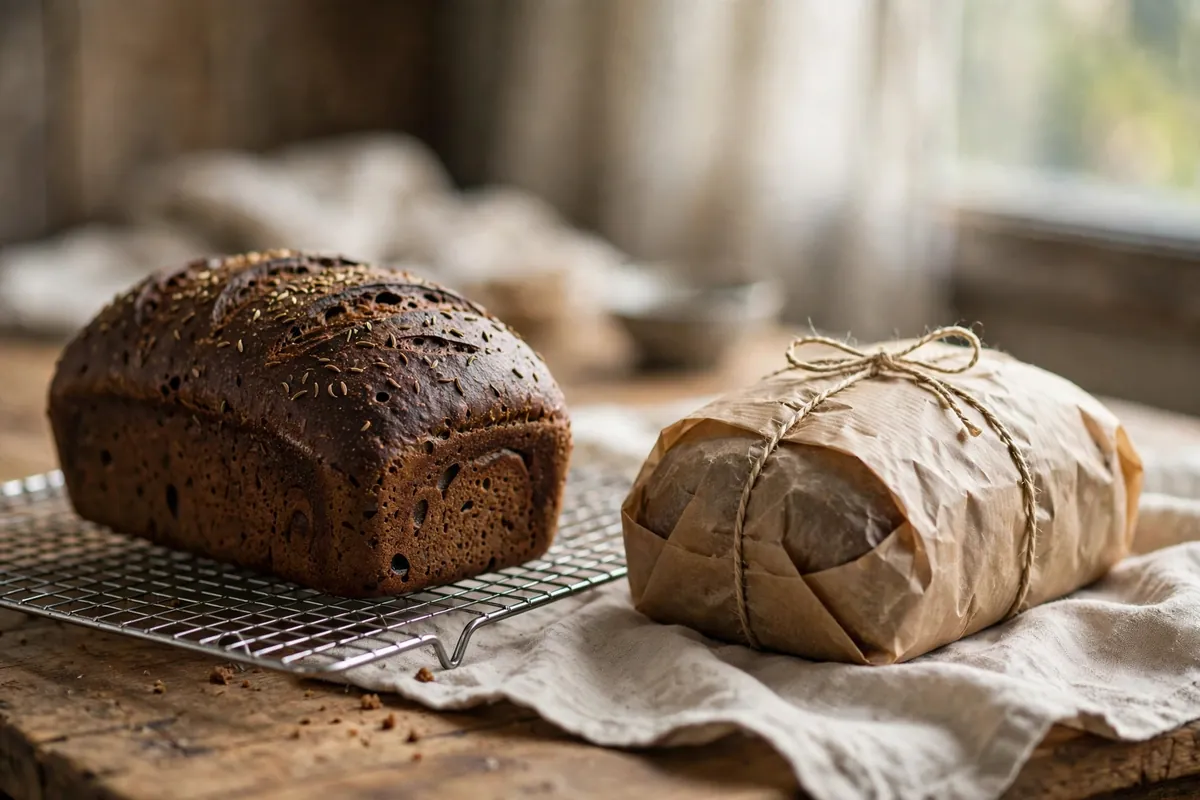
    rye loaf cooling on a wire rack, wrapped loaf resting overnight beside it
    rye loaf cooling on a wire rack, wrapped loaf resting overnight beside it

    Frequently asked questions

    Can I fix gummy rye bread after baking?
    If just sliced too soon, yes — wrap it and wait the full 12–24 hours. Underbaked rye can go back in (whole loaf, 350°F / 175°C, 10–15 minutes). Amylase-damaged crumb can’t be fixed, but it toasts well.

    Why does rye bread need sourdough?
    Not strictly — but acidity inhibits rye’s aggressive amylases, preventing gummy crumb. Sourdough is traditional; vinegar or citric acid works the same chemically.

    Is dense rye bread safe to eat?
    Yes — as long as the loaf hit 205–210°F (96–99°C) internally. Density is texture, not safety; gummy-but-baked rye is safe, just unpleasant.

    Can I use bread flour techniques like stretch-and-fold on rye?
    No — there’s almost no gluten to develop, so kneading and folding accomplish nothing. Mix until combined and leave it alone. Over-handling just makes rye dough stickier.

    Why is my rye bread sour even without sourdough starter?
    Mild tang is normal — rye produces some acidity in any ferment. Strong sourness means a long or warm ferment; shorten or cool it for milder flavor.

    How long does rye bread keep?
    5–7 days at room temperature — better than wheat bread, thanks to acidity and moisture retention. Freezes excellently for 3 months. (Storage basics: How to Store Homemade Bread.)

    Related troubleshooting: Why Is My Bread Dense? · Why Didn’t My Bread Rise? · How to Tell When Bread Is Done

  • Why Did My Babka Come Out Dry? Swirl Bread Fixes

    Why Did My Babka Come Out Dry? Swirl Bread Fixes

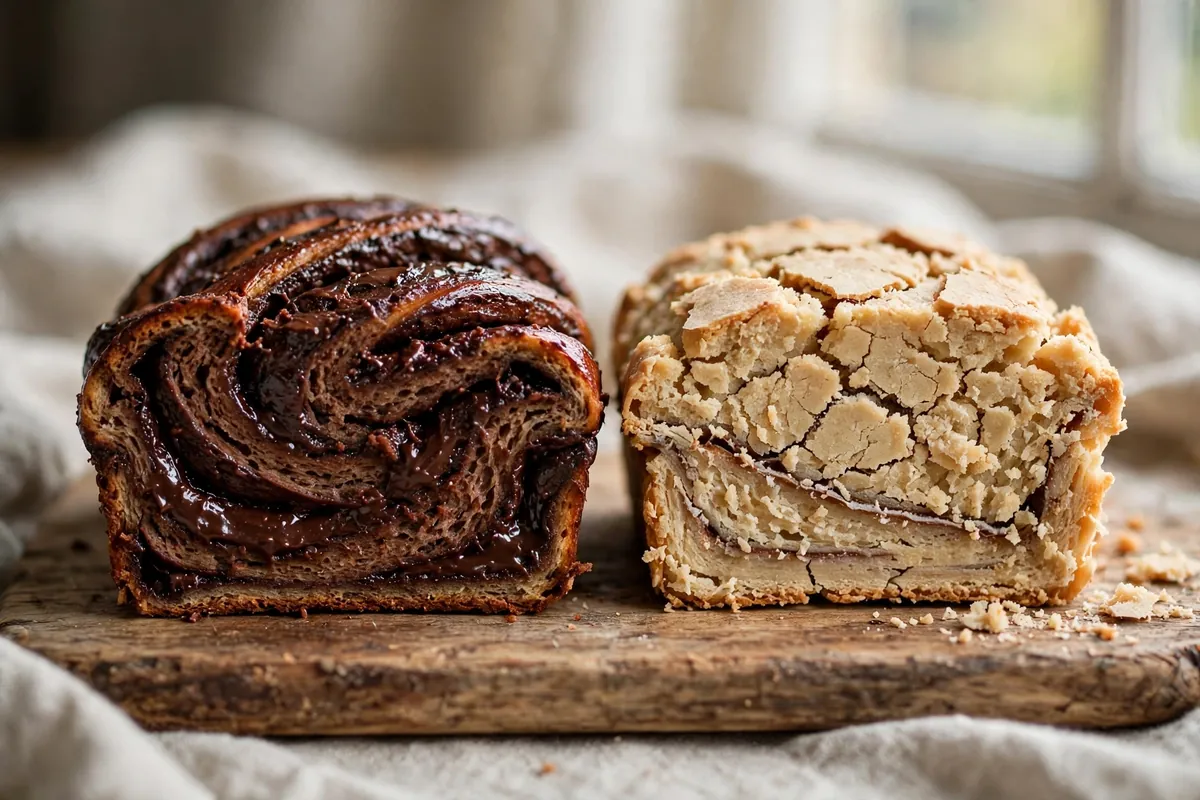
    Babka should be the opposite of dry bread: enriched dough, a thick ribbon of chocolate, a glossy syrup glaze. When you cut in and find a parched, crumbly slice instead, the cause is almost never the ingredient list — it’s one of five handling mistakes, most of them invisible until the loaf cools.

    Quick diagnosis: You probably overbaked it — the swirl insulates the center, so the outside looks done before the inside finishes. Or the filling was too lean, the roll too loose (air pockets dry out), or you skipped the syrup soak classic babka depends on. Check 190–195°F (88–90°C) internal and brush hot loaves with sugar syrup.

    My tested baseline: 500g bread flour, 7g instant yeast, 80g sugar, 10g salt, 2 eggs plus 1 yolk, 120ml warm milk, 100g soft unsalted butter. Filling: 170g dark chocolate, 60g butter, 2 tbsp cocoa, 50g sugar, pinch of salt. Bake in a 9×5-inch pan at 350°F (175°C) for 35–45 minutes. Syrup: 100g sugar in 100ml water, boiled 2 minutes, brushed on hot.

    1. You baked past the point of no return — the swirl lies to you

    The number one cause, and it’s structural: the chocolate swirl insulates. The outside browns and looks done while the dense center is still catching up, so you give it “five more minutes” — and those minutes take the crumb from moist to dry.

    How to tell: Dark crust, light-feeling loaf, crumb that tears instead of stretching, swirl dull rather than glossy.

    The fix: Start checking at 32 minutes, not 40. A probe in the center (avoiding the chocolate) should read 190–195°F (88–90°C). The skewer test lies with babka — melted chocolate coats the skewer — so trust temperature. Tent with foil at 25 minutes if the top browns fast, and pull when the center reads done; carryover heat finishes the job.

    2. Your filling was too lean — chocolate needs fat to stay molten

    A filling of cocoa and sugar alone bakes into a dry ribbon that wicks moisture from the surrounding crumb. It has to stay soft and fudgy after baking, and only fat does that: real chocolate plus butter, spreadable when warm, sliceable when cool.

    How to tell: The swirl is matte, crumbly, and separates from the dough; the dough touching it is drier than the rest.

    The fix: My ratio per loaf: 170g dark chocolate melted with 60g butter, then 2 tbsp cocoa and 50g sugar stirred in — it should spread like thick peanut butter, edge to edge. A bare border becomes dry, filling-less crust. For cinnamon babka: 80g soft butter, 100g brown sugar, 2 tbsp cinnamon — the butter is the moisture, not optional.

    3. You rolled it loose — air pockets bake into dry gaps

    A loose roll leaves air channels through the swirl. They let steam escape during baking, drying the crumb from inside, and create gaps where filling pulls away from dough, leaving dry surfaces that stale fast.

    How to tell: Tunnels and gaps around the swirl instead of tight ribbons; the loaf feels oddly light for its size.

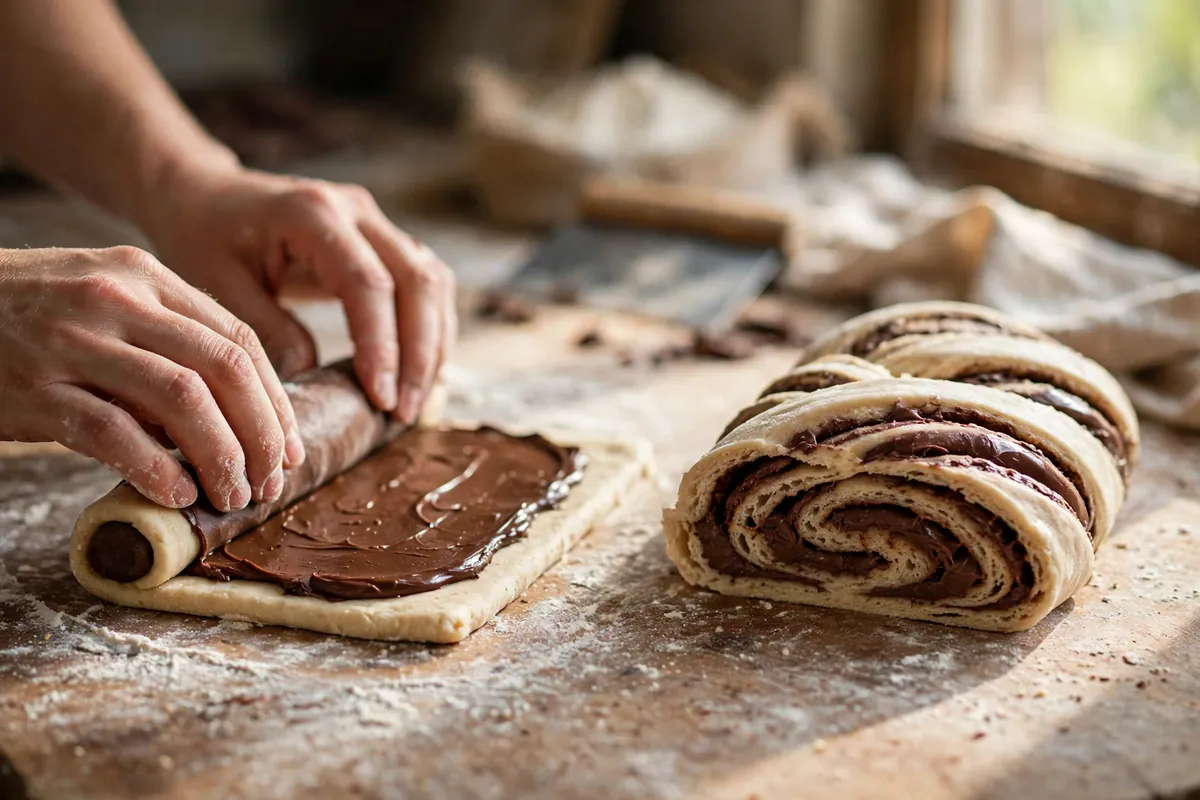
    The fix: Roll firmly from the long edge, tucking as you go, and pinch the seam. Then the classic twist: halve the log lengthwise and twist the halves together, cut sides up. The twist presses filling against dough and eliminates the loose middle. (Same rolling discipline as Why Did My Cinnamon Rolls Unravel? Shaping and Proofing Fixes.)

    hands rolling a chocolate-filled babka log tightly on a floured counter, then the lengthwise cut showing filling layers
    hands rolling a chocolate-filled babka log tightly on a floured counter, then the lengthwise cut showing filling layers

    4. You skipped the syrup soak — babka’s built-in insurance policy

    Classic babka gets drenched in sugar syrup the moment it leaves the oven, and it isn’t decoration. The hot crumb drinks it deep, replacing oven-lost moisture and giving the signature shine. Many formulas are written leaner than they look because the syrup is assumed — skip it and you’ve removed the moisture reserve.

    How to tell: Matte crust, crumb drying within hours, loaf stale by next morning even wrapped.

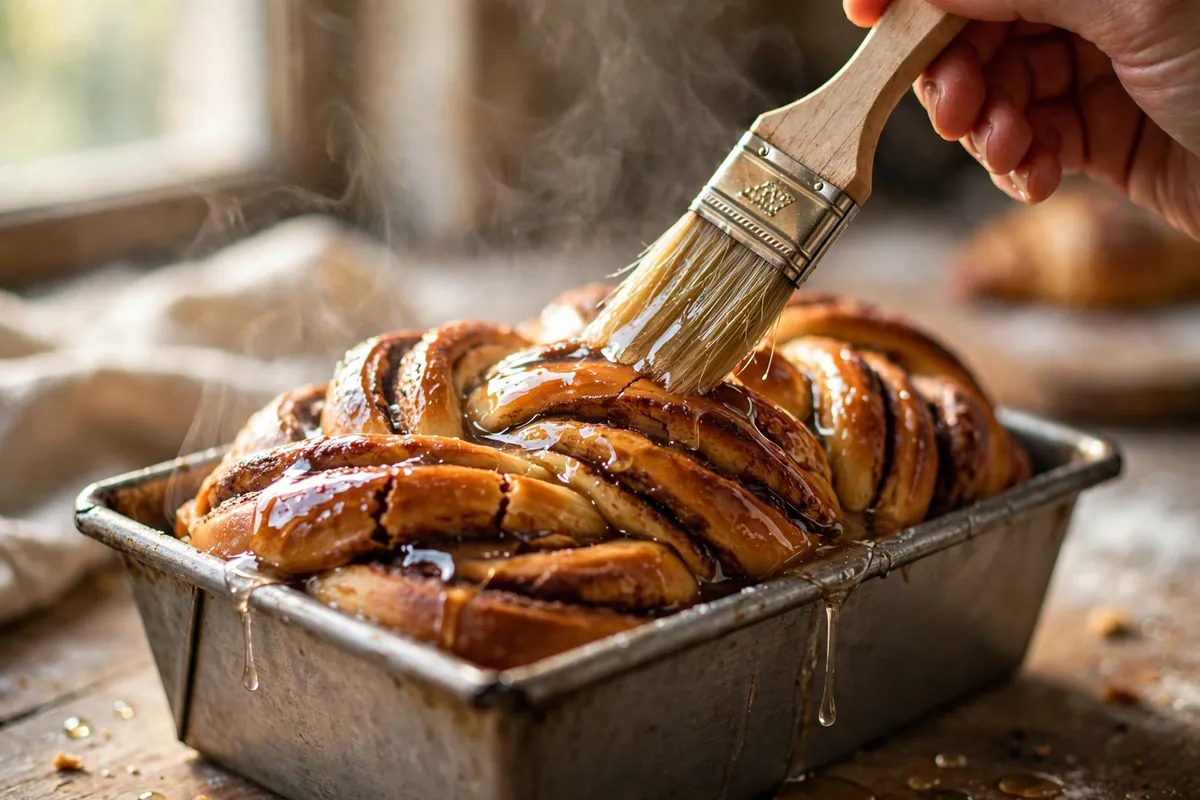
    The fix: While it bakes, boil 100g sugar with 100ml water for 2 minutes. The second the loaf comes out, brush half the syrup over the top, letting it pool into the cracks; add the rest after 5 minutes. Use it all — it looks like too much, and it isn’t. Unmold after 15 minutes, while the syrup is still fluid enough to release.

    5. The dough was under-enriched or under-proofed — dry crumb starts here

    Two quieter causes. Cutting the butter or eggs “to be safe” gives a lean dough wearing a rich filling’s name — the fat is structure, not garnish. And under-proofing: a dense, under-risen crumb reads as dry on the tongue even at correct moisture, because there’s no airy network to feel soft.

    How to tell: Tight, bread-like crumb rather than soft and shreddable; the loaf barely rose in the pan before baking.

    The fix: Don’t cut the butter or eggs — enriched dough forgives extra fat better than less. (Same lesson as Why Did My Brioche Come Out Dry? Enriched Dough Fixes.) Proof the shaped loaf until visibly puffy, about ¾ above the pan rim — a gentle press should spring back slowly, leaving a faint indent. In a cool kitchen that’s 60–90 minutes; the look matters, not the clock.

    brushing sugar syrup over a hot babka loaf, syrup pooling into the swirl cracks
    brushing sugar syrup over a hot babka loaf, syrup pooling into the swirl cracks

    Frequently asked questions

    Is dry babka safe to eat?
    Yes — dryness is a texture failure, not a safety one. If the center baked through with no raw streaks, it’s completely fine. Toast slices and butter them, or turn the loaf into French toast or bread pudding, where custard erases the dryness entirely.

    Can I fix a dry babka after baking?
    Partly. Brush warm slices with simple syrup, or repurpose the loaf — babka makes outstanding French toast because the enriched crumb soaks up custard without falling apart. You can’t re-moisturize the crumb itself, but you can make nobody care.

    Why is my chocolate filling leaking out instead of staying in the swirl?
    The filling was too hot or too thin when spread, or you overfilled. Let it cool to lukewarm — spreadable, not pourable — and pinch the seam firmly shut.

    Can I make babka dough ahead?
    Yes. After kneading, refrigerate overnight (up to 24 hours), then roll, fill, and shape straight from the fridge — cold dough rolls thinner and easier. Give the shaped loaf its full room-temperature second rise before baking.

    How long does babka stay fresh?
    With the syrup soak, 2–3 days wrapped airtight at room temperature; without it, one day. Slice and freeze up to 2 months; refresh at 300°F (150°C) for 8 minutes. Never refrigerate — it stales faster.

    Related troubleshooting: Why Did My Cinnamon Rolls Unravel? Shaping and Proofing Fixes · Why Did My Brioche Come Out Dry? Enriched Dough Fixes · Why Is My Cake Dry? Moisture Science for Home Bakers