Category: Baking Basics

  • Dairy-Free Frosting That Holds Its Shape

    Dairy-Free Frosting That Holds Its Shape

    Dairy-Free Frosting That Holds Its Shape

    Here’s the problem nobody warns you about: most dairy-free frostings are fine as a spread and a disaster as a decoration. They look promising in the bowl, then slump off the cake, weep at the edges, and melt your piped rosettes into sad puddles by the time guests arrive. I’ve scraped enough collapsed dairy-free frosting off cake stands to know exactly why it happens — and how to prevent it.

    The whole game is fat structure. Butter works in frosting because it’s solid at room temperature: roughly 80% fat, 16% water, and firm enough to trap air and hold a peak. Most dairy-free swaps fail because they get this wrong — tub margarine is too soft and too watery, coconut oil melts at 76°F (24°C). Get the fat right and everything else follows.

    Quick diagnosis: For frosting that pipes and holds, use vegan butter STICKS (not tub spread) beaten with powdered sugar at roughly a 1:2 ratio by weight, plus a pinch of salt and a splash of plant milk. Sticks have the high fat and low water content that mimics butter; tub spreads weep and slump. Keep the finished cake at 70°F (21°C) or below, and chill piped decorations 15 minutes before serving.

    Why Dairy-Free Frosting Fails (The Fat Problem)

    Buttercream is a fat-continuous system: tiny air bubbles and sugar crystals suspended in solid fat. The firmness of that fat at serving temperature is what holds a swirl upright. Dairy butter is solid up to about 90°F (32°C) — it softens gradually, giving you a wide working window.

    Now look at the common substitutes:

    • Tub margarine/spread: 50–60% fat, lots of water, soft even refrigerated. It makes frosting that tastes okay for about ten minutes and then collapses. This is the #1 cause of dairy-free frosting failure.
    • Coconut oil: 100% fat and beautifully firm below 76°F (24°C) — then it liquefies almost instantly above it. Fine for a cool kitchen in winter; a puddle at a summer party.
    • Liquid oils: No structure at all. That’s a glaze, not a frosting.

    The fix is matching butter’s properties, not just its role: high fat percentage, low water, solid at room temp. Two options do this well.

    The Two Fats That Actually Work

    Option 1: Vegan butter sticks — the closest match

    Stick-form vegan butters (not tubs) are formulated to behave like dairy butter: ~79% fat, firm when cool, sliceable. In blind texture tests, stick-based vegan buttercream is indistinguishable from dairy buttercream in firmness and piping.

    Brands that work: any stick-form plant butter — look for “sticks” or “baking sticks” on the package, with coconut or soy oil bases. Avoid anything labeled “spread,” “light,” or “whipped.”

    Method: 225g (2 sticks) vegan butter at cool room temperature — not soft, not melty, just pliable — beaten 2 minutes until creamy. Add 450g powdered sugar in three additions, beating well between each. Add 1/4 tsp fine salt, 2 tsp vanilla, and 1–2 tbsp unsweetened plant milk only if needed for consistency.

    Option 2: Refined coconut oil — the firm-weather choice

    Method: 200g refined coconut oil (solid, below 76°F/24°C), beaten with 400g sifted powdered sugar, pinch of salt, vanilla. Refined — not virgin — because virgin tastes like coconut.

    The catch: this frosting has a narrow temperature window. Below 70°F (21°C) it’s beautifully firm, even crusting slightly like classic American buttercream. Above 76°F (24°C) it softens fast. I use this one for winter cakes and indoor events, never for summer outdoor parties.
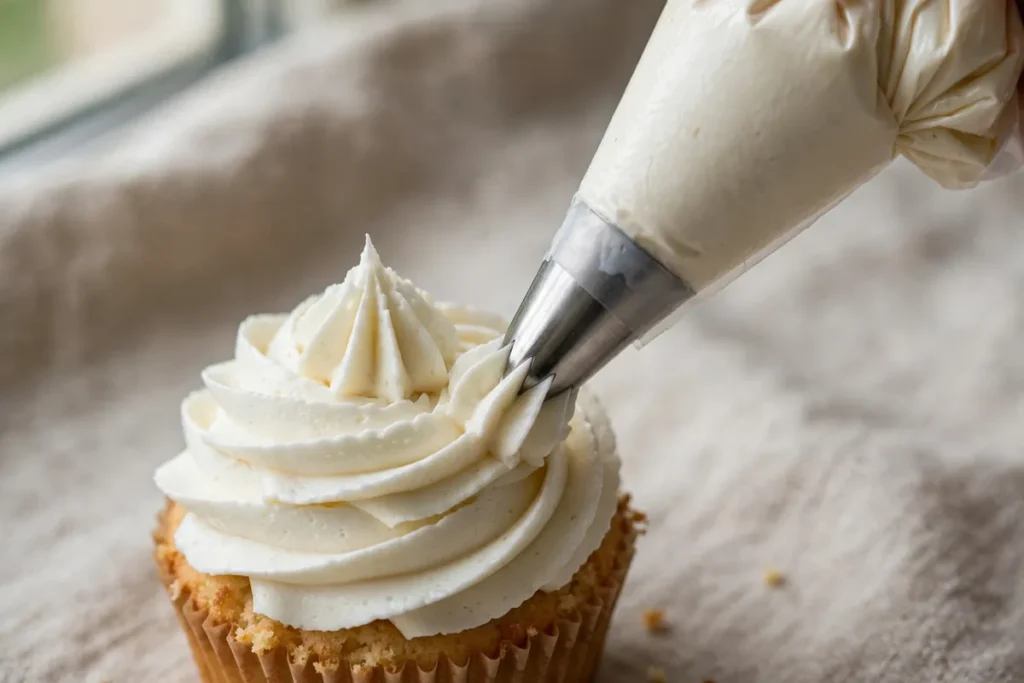
    Piping bag mid-swirl on a cupcake, dairy-free rosette holding a sharp peak
    a piping bag mid-swirl on a cupcake, dairy-free rosette holding a sharp peak

    The Stability Rules (Whatever Fat You Use)

    Sift the powdered sugar. Lumps in vegan buttercream don’t smooth out the way they do in dairy versions — the lower water content means less dissolving. Sift. Every time.

    Add cornstarch. 1–2 tablespoons of cornstarch per 450g powdered sugar absorbs free moisture and firms the set. This is the quiet professional trick; it also helps the frosting crust lightly, which protects decorations.

    Salt is non-negotiable. 1/4 tsp fine salt per batch. Vegan fats taste flatter than butter — salt restores the flavor balance and kills any waxy or oily aftertaste.

    Chill in stages. After crumb-coating, chill the cake 20 minutes. After final coat, chill 15 minutes before piping decorations. Cold frosting pipes sharper, and decorations set before they can slump.

    Mind the room. 70°F (21°C) or cooler for serving. If the venue is warm, coconut-oil frosting stays home — bring the vegan-butter-stick version, and keep the cake refrigerated until 30 minutes before serving.

    Flavor Variations That Stay Stable

    • Chocolate: Replace 60g of the powdered sugar with 60g Dutch-process cocoa. Cocoa’s starch actually improves stability, and the deep flavor masks any coconut or plant-butter notes completely.
    • Lemon: 1 tbsp lemon zest + 1 tsp lemon juice (not more — excess liquid softens). The zest carries the flavor without the water.
    • Coffee/mocha: 2 tbsp instant espresso dissolved in 1 tsp hot water, cooled. Adds depth; the tiny liquid amount won’t destabilize.
    • Peanut butter: Replace 75g of the fat with natural-style peanut butter (stirred well). The protein firms the frosting further — this one pipes like a dream.
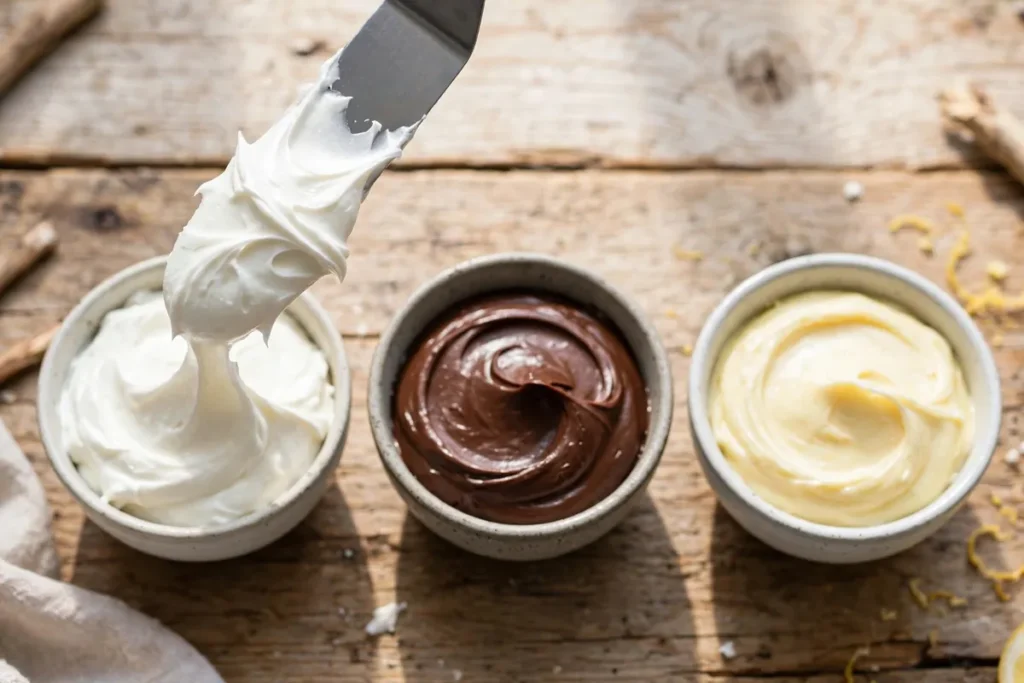
    Three bowls of plain, chocolate, and lemon dairy-free frosting with a spatula lift
    three small bowls showing plain, chocolate, and lemon dairy-free frostings with a spatula lift showing texture

    Aquafaba Swiss Meringue — The Advanced Option

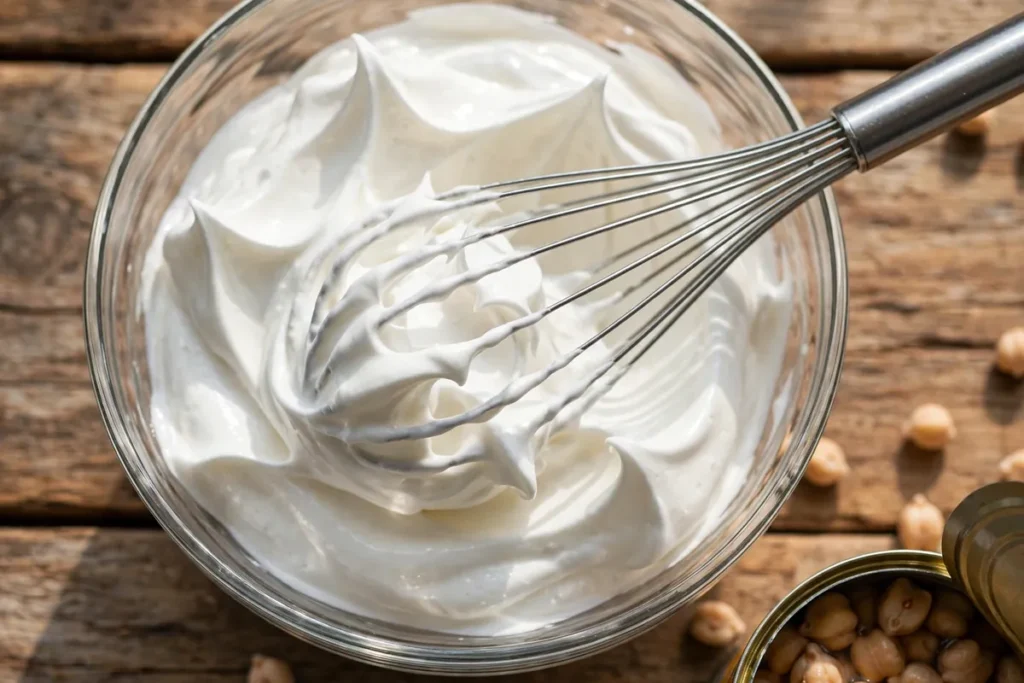
    If you want the silkiest dairy-free frosting possible, make a Swiss meringue with aquafaba: whisk 120ml aquafaba with 200g sugar over a bain-marie to 160°F (71°C), whip to stiff glossy peaks, then beat in 225g vegan butter sticks piece by piece. It’s more work, but the result is the least sweet, most buttercream-like dairy-free frosting I’ve ever made — stable, pipeable, and genuinely elegant. (Aquafaba is the same chickpea liquid that rescues eggless cakes — see Eggless Cake That Actually Works.)

    What About Store-Bought?

    Most canned “vegan” frostings are essentially flavored shortening and sugar — stable, yes, but with a waxy mouthfeel and a sweetness that overwhelms. If you must use one, whip it for 3 minutes with a pinch of salt and a teaspoon of vanilla; it improves dramatically. But homemade with sticks takes ten minutes and tastes twice as good.
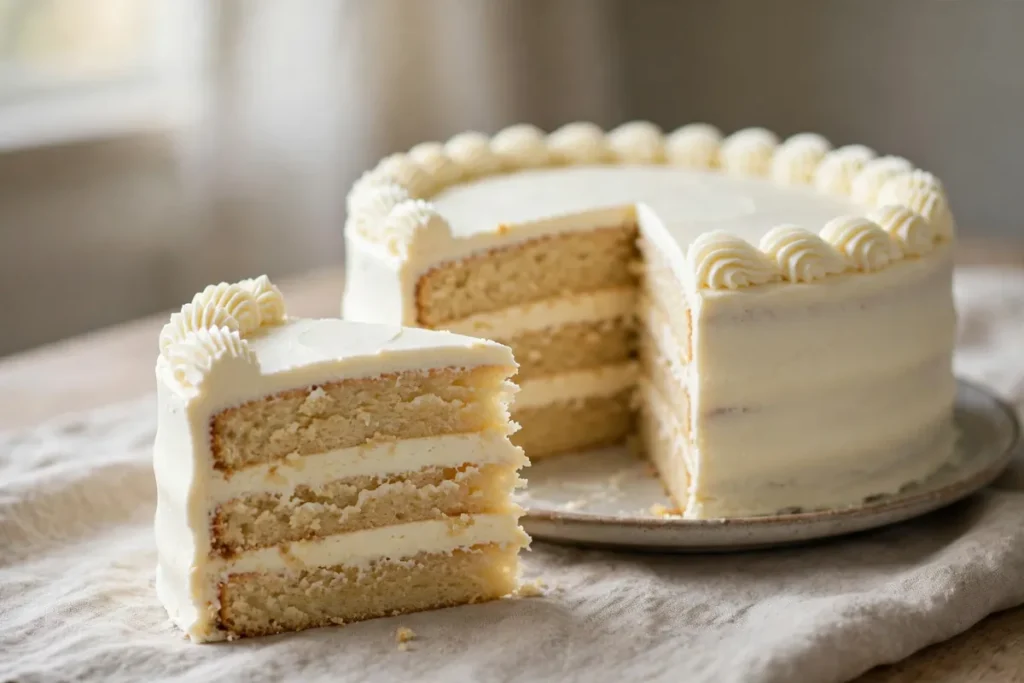
    Frosted layer cake with piped border, sliced to show clean layers and frosting dams
    a fully frosted layer cake with piped border, sliced to show clean layers and frosting dams holding

    Frequently Asked Questions

    Can I use margarine from a tub for frosting?
    Technically yes, practically no — not for anything that needs to hold shape. Tub spreads are ~50% water and stay soft. If it’s all you have, use it only as a thin filling between layers, never for piping or exterior decorating.

    Why is my dairy-free frosting grainy?
    Unsifted powdered sugar, almost always. Vegan fats have less water than butter, so sugar crystals don’t dissolve as readily. Sift the sugar, beat a full 3–4 minutes, and add plant milk one teaspoon at a time.

    How far ahead can I make it?
    5 days refrigerated in an airtight container, or 3 months frozen. Re-whip for 2 minutes after thawing — it comes right back. Frosted cakes keep 3 days refrigerated; bring to cool room temp 30 minutes before serving.

    Is dairy-free frosting safe at room temperature all day?
    For serving, yes — a few hours at 70°F (21°C) or below is fine. Vegan butter frostings are actually more food-safe than dairy ones (no milk proteins to spoil). Coconut-oil versions need cooler rooms. When in doubt, refrigerate and temper before serving.

    Can I color dairy-free frosting?
    Yes — gel colors work best (no added water). Add them at the end of beating. Natural colors (beet powder, turmeric, matcha) work too but can subtly flavor the frosting; taste as you go.

    My frosting tastes waxy — what went wrong?
    Usually too much shortening or a low-quality vegan butter. Switch to stick-form plant butter, make sure you added the salt, and try the chocolate variation — cocoa covers a multitude of sins.

    Related troubleshooting: Eggless Cake That Actually Works: Tested Replacements · Why Did My Cupcakes Overflow? · Why Did My Cake Sink in the Middle?
  • Panna Cotta Troubleshooting: Won’t Set or Rubbery (Gelatin Fixes)

    Panna Cotta Troubleshooting: Won’t Set or Rubbery (Gelatin Fixes)

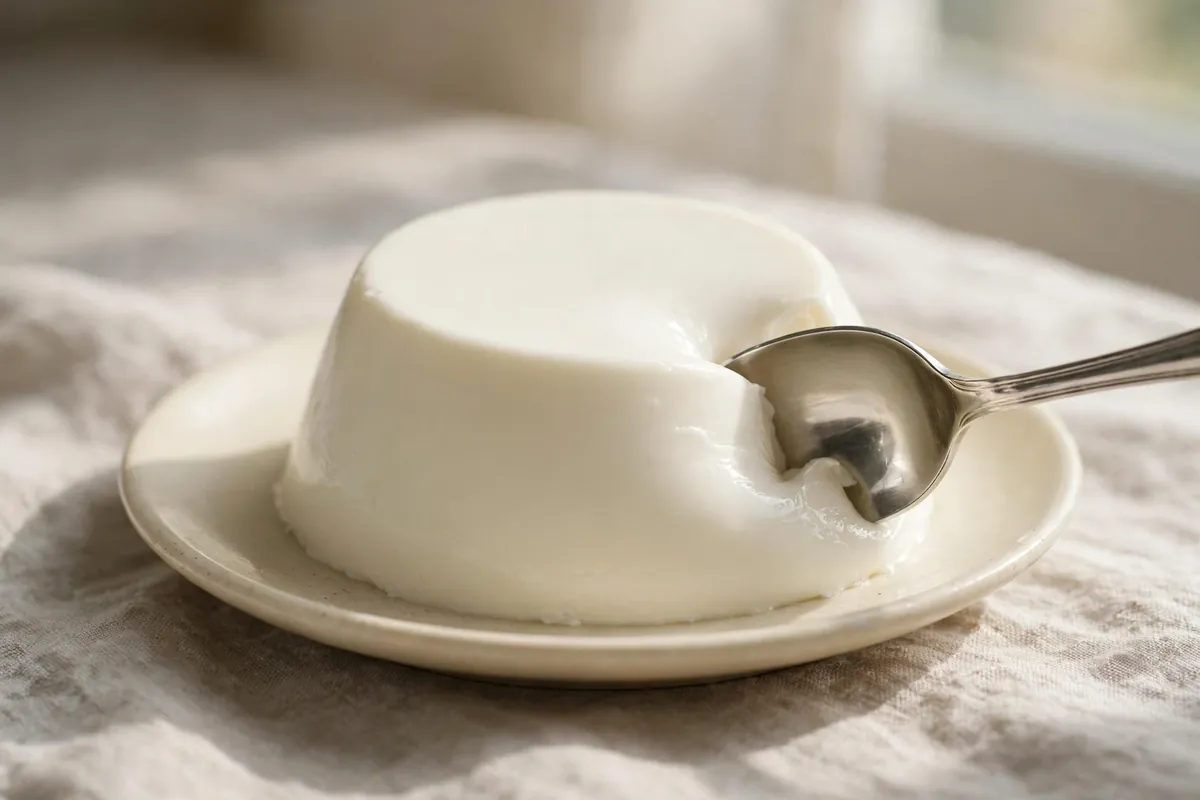
    Panna cotta has exactly one structural ingredient — gelatin — so every setting failure traces back to it: too little (soupy), too much (rubbery), boiled (dead), unbloomed (grainy), sabotaged by fresh fruit enzymes, or simply not chilled long enough. The ratios are precise and forgiving once you know them, and both failures are rescuable.

    Quick diagnosis: Soupy panna cotta = too little gelatin, gelatin added to boiling liquid, or fresh pineapple/kiwi/papaya enzymes digesting it. Rubbery = too much gelatin. Fix: 2¼ tsp (7g) powdered gelatin per 2 cups (480ml) liquid, bloom 5 minutes in cold water, melt into warm — never boiling — cream, chill 4–6 hours minimum.

    My tested baseline: 2¼ tsp (one 7g packet) powdered gelatin sprinkled over 3 tbsp cold water, bloomed 5 minutes. 2 cups (480ml) heavy cream plus ⅓ cup (65g) sugar heated until steaming — never boiling — then off the heat. Bloomed gelatin stirred in until dissolved, 1 tsp vanilla added. Six ½-cup ramekins, chilled 6 hours. Result: holds its shape unmolded, trembles when nudged, melts on the tongue.

    1. Too little gelatin — the classic soupy failure

    The standard ratio is 2¼ teaspoons (one 7g packet) of powdered gelatin per 2 cups (480ml) of total liquid. Below that — a short-measured teaspoon, a “light” version with extra milk — there isn’t enough protein network to trap the liquid, and the result pours rather than wobbles.

    How to tell: Refrigerated 6+ hours and still flows like thick cream; tilting the ramekin sends it sliding.

    The fix: Measure properly — level teaspoons, or a scale: 7g per 480ml. Halving a recipe means halving the gelatin exactly; eyeballing small gelatin quantities is where most failures start. Sugar and alcohol slightly weaken the set, so boozy or very sweet versions need the full measure, not less.

    2. You boiled the gelatin — heat kills its setting power

    Gelatin is a protein, and prolonged boiling denatures it. Cream brought to a rolling boil with gelatin in it loses much of its gelling strength — the panna cotta half-sets: spoonable, but never unmoldable.

    How to tell: The cream boiled vigorously with gelatin in it; it set softly but collapses on unmolding no matter how long you chill.

    The fix: Heat the cream only until steaming and the sugar dissolves — small bubbles at the edges, never a boil — then take it off the heat before stirring in the bloomed gelatin. Residual heat around 140–160°F (60–70°C) dissolves gelatin fully without damage. Boiled gelatin can’t be revived, but the batch can be rescued (see below).

    3. You skipped the bloom — grainy, weak set

    Powdered gelatin sprinkled directly into hot cream clumps on contact: each clump’s surface hydrates instantly and seals dry powder inside — the same physics as lumpy batter. Those clumps never fully dissolve, so you get a weaker set plus grainy specks.

    How to tell: Tiny translucent grains in the finished dessert; it set softer than the ratio says it should.

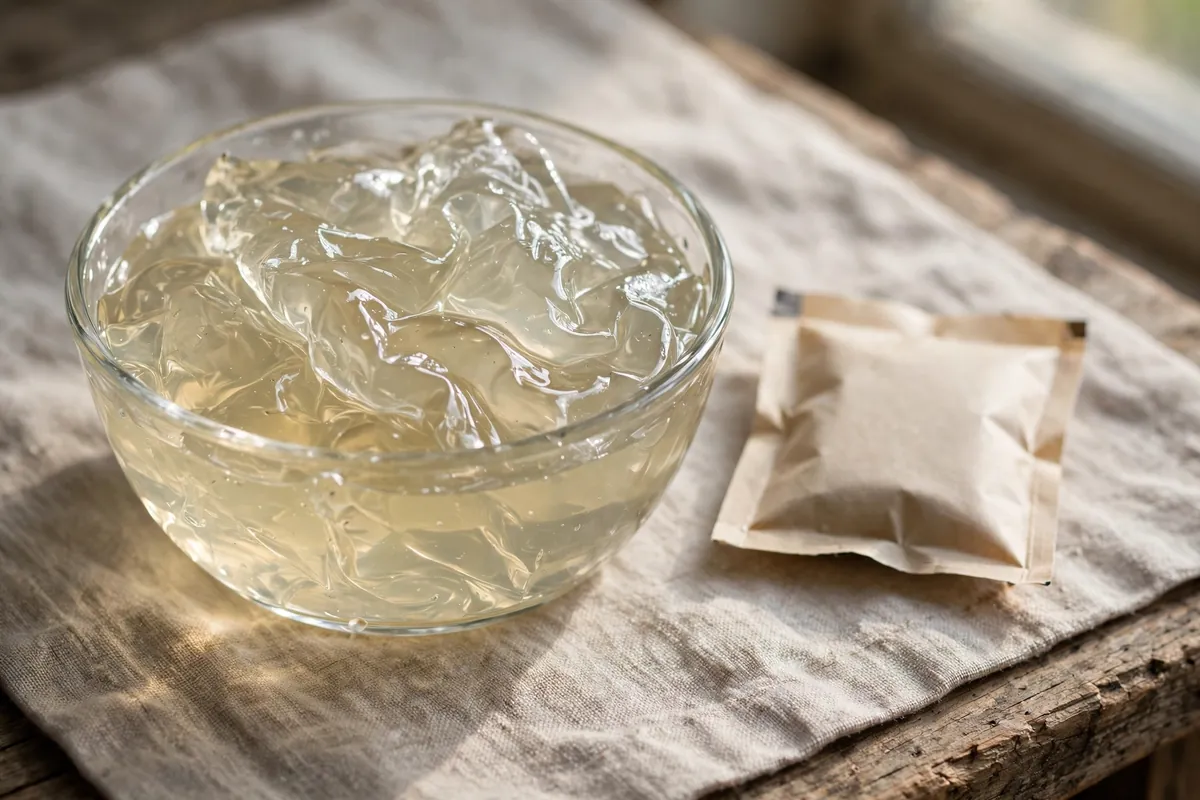
    The fix: Bloom every time: sprinkle gelatin evenly over 3 tablespoons of cold water, wait 5–10 minutes until it looks like wet sand, then melt into the warm cream. With sheet gelatin, soak 5 minutes in cold water and squeeze dry before melting in.

    small glass bowl of bloomed gelatin with wrinkled texture next to a gelatin packet
    small glass bowl of bloomed gelatin with wrinkled texture next to a gelatin packet

    4. Too much gelatin — the rubbery, bouncy failure

    More gelatin isn’t “extra safe” — it’s bouncy. Double it and panna cotta stops being delicate cream and becomes dessert-flavored rubber: it bounces when tapped, squeaks on the teeth, and won’t melt in the mouth. The most common overcorrection after one soupy batch.

    How to tell: Unmolds perfectly but jiggles like firm jelly; texture is chewy; you used more than 2¼ tsp per 2 cups.

    The fix: Respect the ratio — 7g per 480ml. If nervous, chill a spoonful 20 minutes as a test before portioning: it should just barely hold a soft shape. The ideal trembles when nudged and dissolves on the tongue.

    5. Fresh tropical fruit sabotaged it — enzyme attack

    Fresh pineapple, kiwi, papaya, mango, and guava contain protease enzymes (bromelain, actinidin, papain) that digest protein — including your gelatin network. Fold fresh pineapple into panna cotta and it will never set, however perfect everything else was.

    How to tell: Technique and ratios were right, but the batch with fresh fruit stayed liquid while a plain batch set fine.

    The fix: Heat destroys these enzymes — canned fruit works because it’s heat-processed; simmering fresh fruit 2–3 minutes does the same. Use cooked or canned tropical fruit, never raw. Citrus, berries, stone fruit, and melon are safe fresh.

    6. You didn’t chill it long enough — gelatin sets slowly

    Gelatin firms gradually: at 2 hours it’s softly thickened, at 4 sliceable, at 6+ fully set. Unmolded at 3 hours it slumps — not a ratio problem, just an unfinished network. Warm fridge spots and deep ramekins slow it further.

    How to tell: Thick but not firm; holds shape in the ramekin, collapses on unmolding; chilled under 4 hours.

    The fix: Chill 4–6 hours minimum; overnight is ideal. Keep ramekins on a cold shelf, not the door. To unmold: dip in warm (not hot) water 5–10 seconds, run a thin knife around the edge, invert. If it resists, 5 more seconds in the water — patience, not force.

    Can you fix panna cotta after the fact?

    Yes — one of the most rescuable desserts in baking. Soupy: gently rewarm until just fluid (don’t boil), bloom extra gelatin (1 tsp per 2 cups of mixture), stir in until dissolved, re-portion, chill 6 hours. Rubbery: you can’t remove gelatin, but serve in glasses layered with macerated fruit or tart coulis — the texture reads as intentional — or melt it into hot chocolate. Grainy: rewarm gently, stir until smooth, strain through a fine sieve, re-chill. The only lost cause is enzyme-sabotaged gelatin: remelt, add fresh gelatin, and keep the raw fruit as a topping.

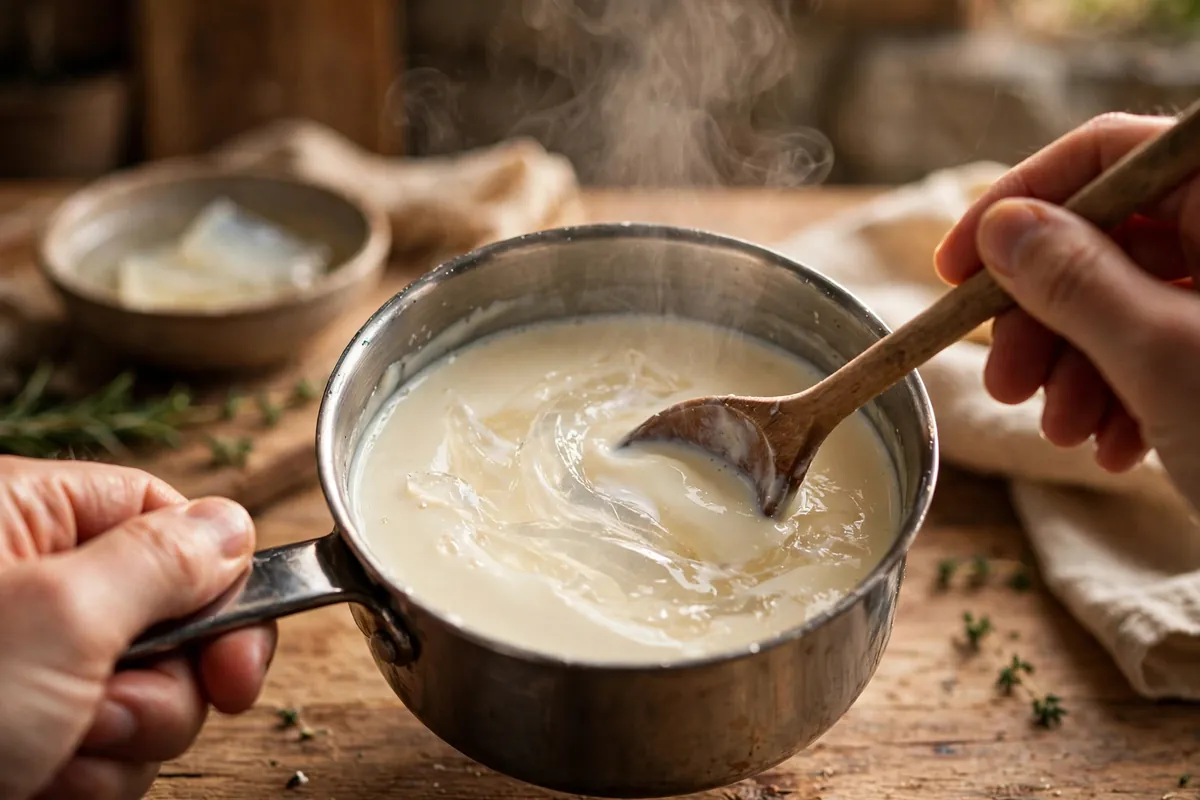
    hands rewarming panna cotta mixture in a saucepan while bloomed gelatin melts in
    hands rewarming panna cotta mixture in a saucepan while bloomed gelatin melts in

    FAQ

    Is unset panna cotta safe to eat?
    Yes — it’s heated, refrigerated sweetened cream; a failed set is a texture problem only. Serve in glasses as “panna cotta cream” with fruit.

    Can I use agar instead of gelatin?
    Yes, but the texture differs: agar sets firmer, less creamy, at room temperature. Use ~1 tsp agar powder per 2 cups liquid, boiled 2 minutes to activate (agar needs boiling; gelatin must never boil).

    Why is my panna cotta grainy?
    Unbloomed gelatin clumped instead of dissolving. Bloom 5–10 minutes in cold water next time. For the current batch, rewarm gently and strain through a fine sieve.

    How do I know if my gelatin is still good?
    Sealed, cool, and dry, powdered gelatin lasts years. If an old packet fails twice on a correct recipe, replace it — but rule out technique errors first; dead gelatin is rare.

    Can I make panna cotta without dairy?
    Yes — coconut cream sets beautifully at the same ratio. Almond or oat milk give a softer set; add an extra ½ tsp gelatin per 2 cups.

    Why did my panna cotta separate into layers?
    It was portioned too warm and fat rose before the gelatin network formed. Cool to room temperature, stirring occasionally, before filling ramekins, then chill promptly.

    Related troubleshooting: How to Fix a Split Custard (And Why It Curdled) · Why Did My Tiramisu Turn Watery? · How to Fix Lumpy Batter

  • No-Yeast Bread: How It Works and When to Use It

    No-Yeast Bread: How It Works and When to Use It

    No-Yeast Bread: How It Works and When to Use It

    The yeast is dead, expired, or simply missing from your cupboard. Or you’ve got 40 minutes, not four hours. Either way, you want bread — and here’s what most bakers learn late: you don’t need yeast to make real bread. You need gas, and yeast is only one way to get it.

    No-yeast breads rise on chemistry instead of biology: baking soda or baking powder reacting with acids to release carbon dioxide, right there in the bowl. Irish soda bread, baking-powder biscuits, beer bread, and every banana bread ever baked all work this way. The result is genuinely bread — just a different kind of bread, with its own rules. All of them work — here’s the chemistry and when to reach for each. Here’s how the chemistry works and when to reach for it.

    Quick diagnosis: No-yeast bread rises via chemical leaveners (baking soda + an acid like buttermilk, or double-acting baking powder) instead of fermentation. It works brilliantly when you’re out of yeast, short on time (ready in under an hour), or your yeast keeps failing you. It will NOT give you chewy artisan texture or fermented flavor — for baguettes and sourdough-style loaves, yeast is irreplaceable. Match the method to the craving.

    How Yeast Bread Works vs. How No-Yeast Bread Works

    To understand the substitute, understand the original. In yeast bread, living yeast consumes sugars in the dough and exhales carbon dioxide slowly, over hours. That long, slow gas production does two things at once: it inflates the dough and it develops flavor — alcohols, organic acids, the complex taste we call “bready.” Time is an ingredient.

    No-yeast bread skips the biology. The moment baking soda meets an acid (buttermilk, yogurt, lemon juice, molasses), they react and release CO2 immediately. Double-acting baking powder does it in two waves: once when wet, again when heated. All the gas arrives in minutes instead of hours — the advantage and the limitation in one.

    The Main Types of No-Yeast Bread (and What Each Is Good For)

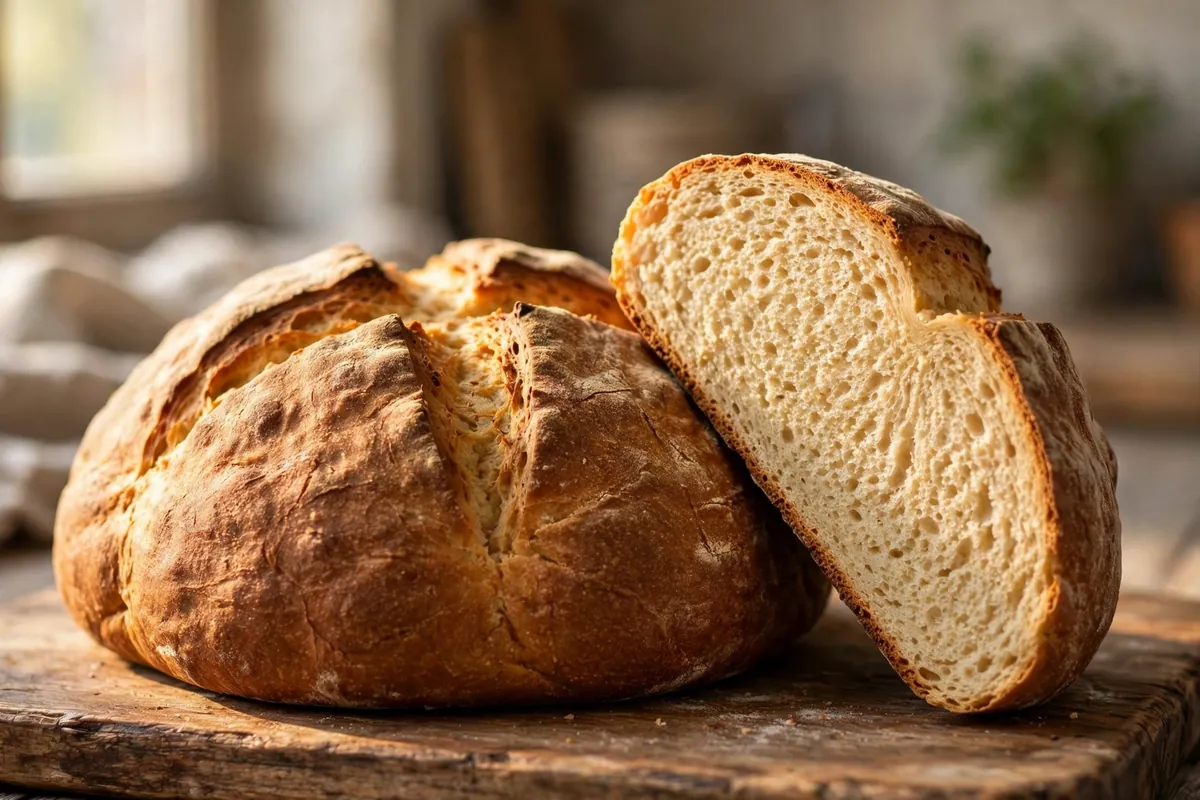
    Soda bread. Buttermilk + baking soda + flour + salt. A dense, hearty loaf with a tight crumb, ready in about 40 minutes — the weeknight hero. Score a cross on top (not decorative; it lets heat reach the center).

    Baking-powder biscuits and scones. Flour, cold fat, baking powder, milk. Flaky, tender, tall — the fat does as much work as the leavening here. The non-negotiable rule: keep everything cold and handle the dough as little as possible.

    Beer bread. Flour + beer + a little sugar and baking powder. The beer’s carbonation and its own yeast contribute lift, and the malt flavor is genuinely delicious. Three ingredients, one bowl, no kneading. This is the recipe I give to people who’ve never baked bread.

    Quick loaves. Banana bread, zucchini bread, pumpkin bread. Baking soda/powder leavened, moist, cake-like crumb. Technically bread by method, dessert by spirit.

    Flatbreads. Tortillas, chapati, pita (pita uses a hot oven for steam puff, no leavening at all). Unleavened by design — the oldest breads on earth never needed yeast.

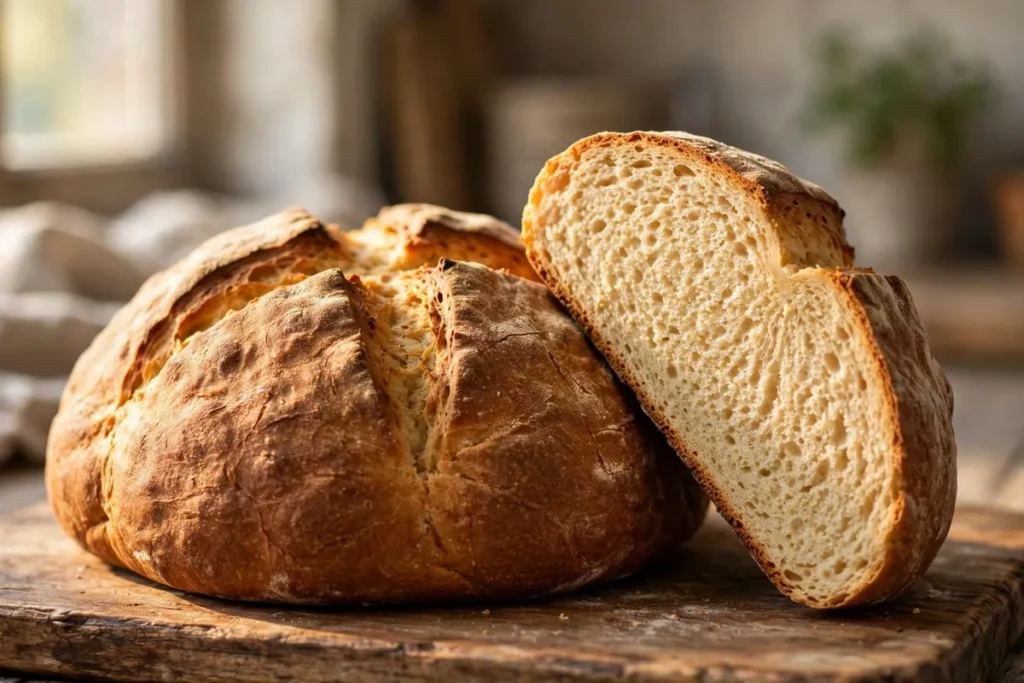
    Sliced soda bread showing tight crumb beside the whole scored loaf
    a sliced soda bread loaf showing the tight crumb next to the whole scored loaf

    The Rules That Make or Break No-Yeast Bread

    Chemical leavening is less forgiving than yeast in specific ways. These rules are the difference between a proud loaf and a doorstop:

    1. Get it in the oven fast. The gas reaction starts the second liquid hits the dry ingredients. With single-acting soda, you have minutes, not hours. Have the oven fully preheated before you mix. I shape soda bread while the oven finishes heating — never the reverse.

    2. Don’t overmix. Without a long fermentation to relax the gluten, every extra stir makes the crumb tougher. Mix until the flour just disappears — lumps are fine, even desirable, in biscuits and quick breads. This is the #1 reason homemade soda bread turns out dense in the bad way (see Why Is My Bread Dense? for the full diagnosis).

    3. Measure leavening precisely. Too little soda and the loaf won’t rise; too much leaves a soapy, yellow-tinged crumb with a metallic bite. Level your teaspoons. The standard ratio: about 1 teaspoon baking soda per 250g flour when paired with enough acid (a cup of buttermilk comfortably covers it).

    4. Respect the acid. Baking soda needs acid to work — buttermilk, yogurt, lemon juice, brown sugar, molasses, cocoa. If a recipe has none of these and calls for soda alone, something is wrong. Baking powder brings its own acid, which is why it works in neutral batters.

    5. Eat it fresh. No-yeast breads stale faster — no fermentation-produced acidity and alcohol to preserve them. Day one is prime time; day two wants toasting.

    When No-Yeast Bread Is the Right Call

    • The yeast failed you. If your last two loaves didn’t rise, stop fighting and bake soda bread tonight — then troubleshoot the yeast problem separately with Why Didn’t My Bread Rise?.
    • You’re out of time. Soda bread: 10 minutes mixing, 35 minutes baking. Done.
    • It’s hot. Summer kitchens over-proof yeast doughs in a flash. Chemical leaveners don’t care about room temperature.
    • You’re a beginner. Fewer variables, faster feedback loop. Every failed quick bread teaches you something in under an hour.
    • You want the flavor. Buttermilk soda bread and beer bread taste like themselves — hearty, malty, wheaty. That’s a feature, not a compromise.
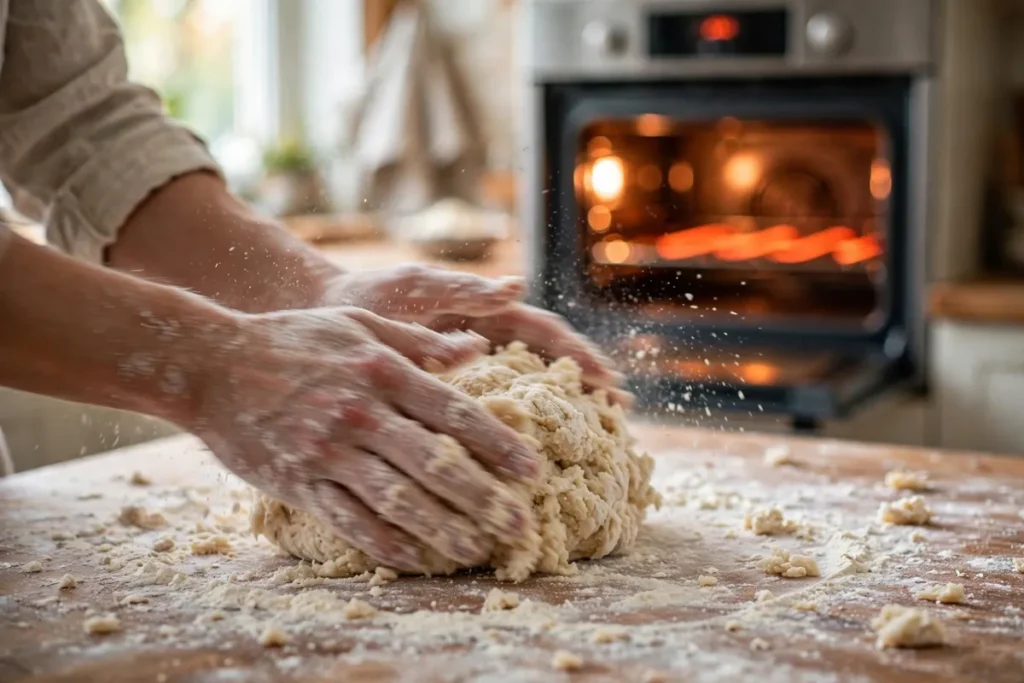
    Hands shaping shaggy soda bread dough on a floured counter, oven glowing behind
    hands quickly shaping a shaggy soda bread dough on a floured counter, oven glowing in background

    When Yeast Is Irreplaceable (Be Honest With Yourself)

    No-yeast methods cannot produce: open artisan crumb, genuine sourdough tang, chewy bagel or pizza crust, or deep overnight-ferment flavor. If that’s what you’re craving, the answer isn’t a substitute method — it’s fixing your yeast technique.

    My Go-To Emergency Loaf (Soda Bread, 45 Minutes)

    500g all-purpose flour, 1 tsp fine salt, 1 tsp baking soda (level), 400ml buttermilk. Whisk dry, stir in buttermilk until shaggy, shape roughly, score a deep cross, bake at 425°F (220°C) for 30–35 minutes until deep golden and hollow underneath. Cool 20 minutes before slicing — the interior finishes setting as it cools (same reason sourdough needs its rest: Why Is My Sourdough Gummy Inside?).

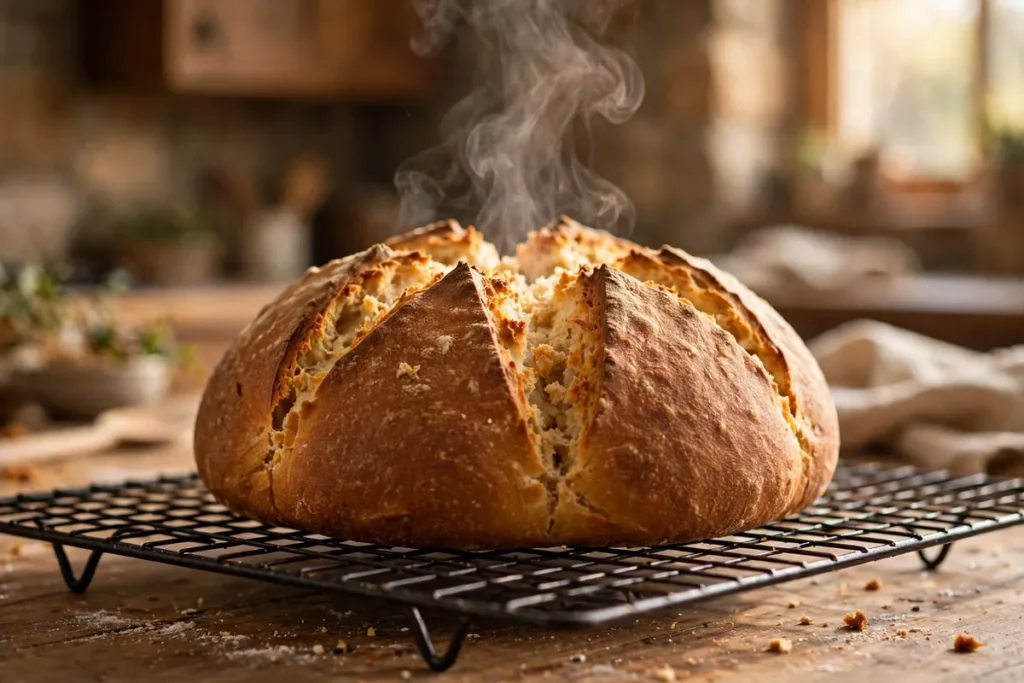
    Finished soda bread cooling on a wire rack, cross split open showing steam
    the finished soda bread cooling on a wire rack, cross split open showing steam

    Frequently Asked Questions

    Can I make no-yeast bread taste like sourdough?
    Not really. You can fake some tang with extra buttermilk or a spoonful of vinegar, and it reads as pleasant sourness — but true sourdough flavor comes from days of bacterial fermentation. Different beast.

    Why did my soda bread come out with yellow spots and a soapy taste?
    Too much baking soda, or it wasn’t mixed evenly through the flour. Always whisk the soda thoroughly into the dry ingredients before adding liquid, and level that teaspoon.

    Can I use baking powder instead of baking soda in soda bread?
    You can, but use roughly three times the amount (1 tsp soda ≈ 1 tbsp powder) and expect a milder flavor and slightly less browning. The classic buttermilk-and-soda pairing exists for a reason.

    Is no-yeast bread healthier than yeast bread?
    It’s bread — flour, water, salt, leavening. Neither is a health food or a health hazard. Don’t let anyone sell you “yeast-free” as a wellness claim; yeast is a single-celled fungus, not a toxin.

    Can I still eat it if the center is a bit doughy?
    A slightly underbaked quick bread is safe to eat (no raw egg concerns in most recipes), but the texture is unpleasant. If the center is wet, slice and toast it — toasting rescues almost every underbaked quick bread.

    Does no-yeast bread work for sandwiches?
    Soda bread and beer bread make excellent toast and open sandwiches. For soft sandwich slices, a baking-powder loaf pan bread works — just slice it thick, since the crumb is more fragile than yeast bread.

    Related troubleshooting: Why Didn’t My Bread Rise? · Why Is My Bread Dense? · Eggless Cake That Actually Works: Tested Replacements

  • How to Fix Grainy Fudge (Sugar Crystallization Science)

    How to Fix Grainy Fudge (Sugar Crystallization Science)

    Grainy fudge is one of the most fixable failures in candy making — and one of the most misunderstood. That sandy texture isn’t bad chocolate or a bad recipe. It’s sugar chemistry: your sucrose formed crystals too large, and large crystals feel gritty while tiny ones feel smooth. The entire game of fudge is controlling when and how big those crystals grow.

    Quick diagnosis: Grainy fudge is a crystallization-timing problem: you almost certainly stirred the syrup while it cooled (cause #1) or cooked it to the wrong temperature (cause #2). The good news: grainy fudge can be fully rescued by reheating and redoing it correctly.

    The 30-second science

    Fudge is a supersaturated sugar solution — more sugar dissolved than the water can comfortably hold at room temperature. As it cools, the sugar wants to crystallize. Your job is to force millions of microscopic crystals (smooth) instead of a few large ones (grainy). Two levers control this: temperature (sets the sugar-to-water ratio) and agitation timing (decides when crystallization starts).

    1. You stirred it while it cooled — the classic mistake

    Cause #1 by a wide margin. Once fudge syrup comes off the heat, it must cool completely undisturbed — no stirring, no scraping the pan, no jiggling the thermometer — down to about 110°F (43°C). Stirring hot supersaturated syrup seeds crystallization early, and early crystals grow large in the warm, mobile syrup. One impatient stir at 180°F can grain the whole batch.

    How to tell: You stirred, scraped, or “checked” the fudge during cooling, or started beating while it was still warm to the touch.

    The fix: After the syrup hits temperature, leave the pan undisturbed until it reads 110°F (43°C) — lukewarm, about 45–60 minutes. Then beat vigorously until it thickens and loses its gloss. Beating at the right moment shatters forming crystals into tiny ones. The rule is absolute: hot syrup, hands off; cool syrup, beat hard. When I stopped “helping” my fudge during cooling, the grain stopped.

    2. You cooked it to the wrong temperature

    Fudge must reach soft-ball stage: 234–238°F (112–114°C). Undercook it and too much water remains — it won’t set. Overcook it past ~240°F and too much water boils off — the sugar concentration is so high that crystals form aggressively, turning the fudge dry, crumbly, and grainy. A few degrees matter enormously.

    How to tell: Undercooked fudge is soft and won’t hold shape; overcooked is hard and dry as well as grainy. No thermometer at all? This is very likely your cause.

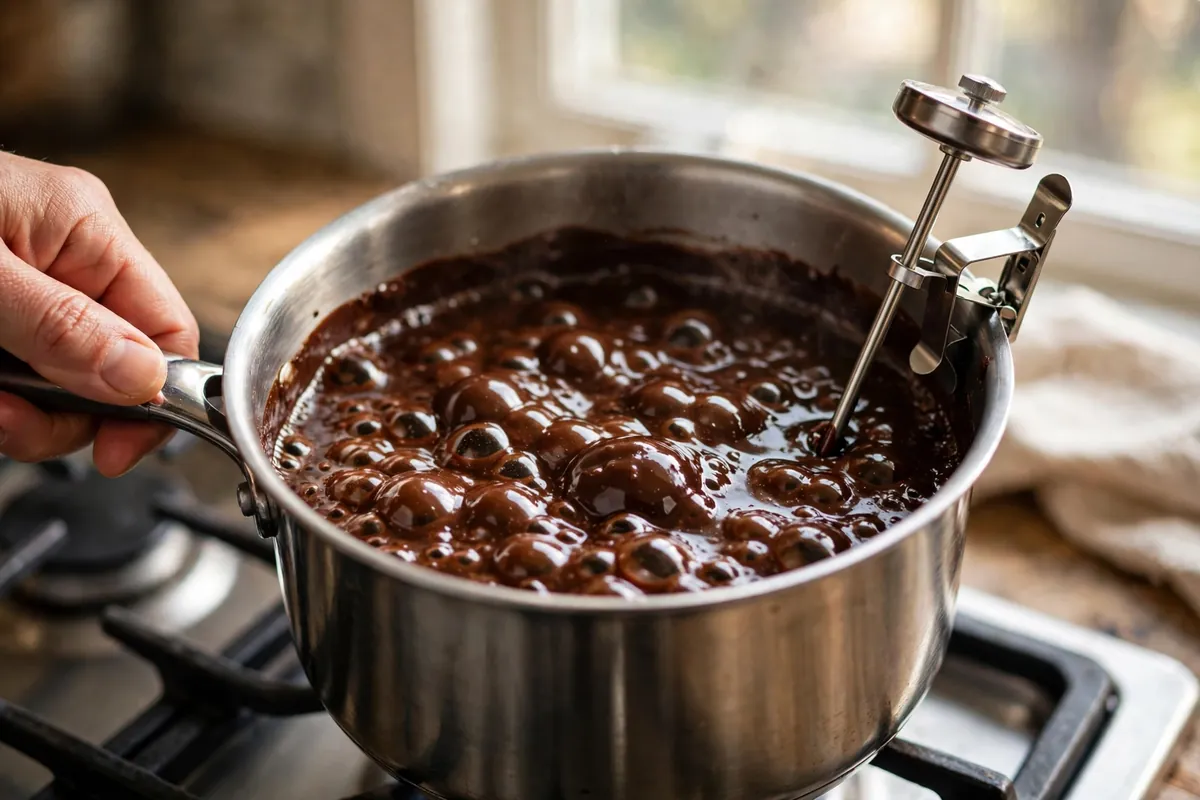
    The fix: Use a calibrated candy thermometer — test in boiling water first (should read 212°F/100°C at sea level; adjust targets by the difference). Clip it so the bulb sits in the syrup, not touching the pan bottom. Pull at 236°F (113°C), the middle of the range. Learn the cold-water backup: a spoonful dropped in ice water should form a soft ball that flattens in your fingers.

    candy thermometer clipped to a saucepan of bubbling fudge syrup
    candy thermometer clipped to a saucepan of bubbling fudge syrup

    3. No interfering agent — nothing stopping big crystals

    Good recipes include an “interfering agent” — 1–2 tablespoons corn syrup or ¼ teaspoon cream of tartar per batch. These molecules physically block sucrose crystals from growing large. Skip them and you’re relying purely on technique, which works but leaves zero margin for error.

    How to tell: Your recipe had no corn syrup, cream of tartar, or glucose, and the fudge grained despite decent temperature and stirring discipline.

    The fix: Add 2 tablespoons light corn syrup per batch with the sugar and liquid — too little to taste, enough to insure against large crystals. Butter dotted on top during cooling (not stirred in) helps too: its milk proteins and fat interfere with crystal growth.

    4. Sugar crystals from the pan sides seeded the batch

    Undissolved crystals clinging to the pan walls are seeds — each can trigger a cascade of large crystals through the batch. Scraping the sides down into the syrup planted them yourself.

    How to tell: You saw crusty sugar on the pan walls, or scraped the sides while bringing the syrup up to temperature.

    The fix: Stir only until the sugar fully dissolves — then stop stirring for the rest of the boil. Wash the sides with a wet pastry brush, or put the lid on for 2 minutes once it boils: trapped steam washes the walls clean by itself. Hands off from then until it hits temperature.

    5. Humidity or a lying thermometer

    On humid days the syrup absorbs airborne moisture, effectively undercooking itself — and an uncalibrated thermometer can be off 5°F, the entire difference between silky and sandy. If it failed on a rainy day despite good technique, or your thermometer never met boiling water, make fudge on dry days, calibrate every thermometer, and trust the cold-water test over a suspect reading.

    Yes, you can rescue grainy fudge

    Chop it up, return it to the pan with 2–3 tablespoons of milk or cream per pound, and melt gently over low heat until completely smooth. Then treat it as a fresh batch: back to 234–238°F (112–114°C) without stirring once boiling, cool undisturbed to 110°F (43°C), beat until it loses its gloss. The second attempt almost always comes out smooth — I’ve rescued every grainy batch I’ve made this way.

    hands beating cooled fudge in a pan as it loses its gloss
    hands beating cooled fudge in a pan as it loses its gloss

    The smooth-fudge checklist

    Dissolve sugar fully. Wash down sides. Boil undisturbed to 236°F (113°C). Cool untouched to 110°F (43°C). Beat until the gloss disappears; pour immediately. Add corn syrup for insurance, calibrate your thermometer, pick a dry day. Nail the cooling-then-beating sequence and the rest is detail — that single discipline separates silky from sandy.

    saucepan with lid on, steam washing down the pan sides
    saucepan with lid on, steam washing down the pan sides

    FAQ

    Is grainy fudge safe to eat?
    Completely — graininess is oversized sugar crystals, a texture defect, not spoilage. It tastes the same, just sandy. And it’s fully fixable: reheat with a little milk and redo the process correctly.

    Can I fix fudge that’s already grainy?
    Yes. Chop it, melt gently with 2–3 tablespoons milk or cream per pound, bring back to 234–238°F (112–114°C), cool undisturbed to 110°F (43°C), then beat until it loses its gloss. Rescued batches routinely come out smoother than most first attempts.

    Why can’t I stir fudge while it cools?
    Cooling syrup is supersaturated — holding more dissolved sugar than it stably can. Agitation seeds crystallization while it’s still hot, and hot crystals grow large, which reads as grainy. Waiting until 110°F (43°C) then beating forces millions of tiny crystals instead — tiny feels smooth.

    What temperature is soft-ball stage?
    234–238°F (112–114°C). Below it, fudge won’t set; above it, it turns dry and crumbly. Aim for 236°F (113°C) with a calibrated thermometer, and confirm with the cold-water test: a spoonful in ice water should form a soft ball that flattens in your fingers.

    Can I make smooth fudge without corn syrup?
    Yes, but you lose your safety net. Corn syrup (or ¼ teaspoon cream of tartar) blocks large crystal formation. Without it, temperature and no-stir discipline must be perfect. If fudge keeps graining, 2 tablespoons of corn syrup per batch is the easiest fix.

    Why is my fudge soft AND grainy?
    Undercooking plus early crystallization: the syrup never reached soft-ball (too much water, won’t set) and got agitated warm (large crystals). Reheat to the full 236°F (113°C) and cool undisturbed this time.

    Related troubleshooting: How to Fix Broken Buttercream (Curdled, Soupy, Too Sweet) · Why Is My Cake Dry? Moisture Science for Home Bakers

  • Eggless Cake That Actually Works: Tested Replacements

    Eggless Cake That Actually Works: Tested Replacements

    Eggless Cake That Actually Works: Tested Replacements

    You’re halfway through a cake recipe and the egg carton is empty. Or eggs are off the menu — an allergy, a vegan household, a dietary choice. Either way, you need a cake that rises, sets, and tastes like cake, not a sweet brick.

    The encouraging part: some beloved chocolate cakes never contained an egg. But the wrong substitute in the wrong cake gives gummy centers and flat tops. Every common replacement behaves differently in real batters — here’s what works.

    Quick diagnosis: Replace each egg with 60g (1/4 cup) plain yogurt + 1/4 tsp extra baking soda (best all-rounder), 60g (1/4 cup) unsweetened applesauce (moist, mild), or 3 tbsp aquafaba, whipped (lightest texture, best for sponge cakes). Don’t replace more than 2–3 eggs — beyond that, bake a recipe designed eggless from the start.

    What Eggs Actually Do in a Cake (Read This Before Substituting)

    You can’t pick the right replacement until you know which job the egg was doing. In cake batter, eggs do four things:

    1. Structure. Egg proteins coagulate in the heat and set the crumb — they’re part of the scaffolding that keeps the cake from collapsing after the leavening gases escape.
    2. Leavening. Beaten eggs trap air; the egg’s moisture converts to steam in the oven. In foam cakes (sponge, chiffon), this is the primary lift.
    3. Moisture and tenderness. The yolk’s fat shortens gluten strands, and lecithin in the yolk emulsifies fat and liquid into a smooth, even batter.
    4. Flavor and color. Richness and that golden crumb.

    No single substitute does all four jobs. So match the substitute to the job your cake needs most: a dense chocolate cake mostly needs moisture and binding (easy); a tall vanilla sponge mostly needs structure and lift (harder).

    The 7 Replacements I Trust (Each Tested in Real Batters)

    1. Plain yogurt — the best all-rounder

    Ratio: 60g (1/4 cup) plain whole-milk yogurt per egg. Add 1/4 tsp extra baking soda if the recipe doesn’t already call for it.

    Why it works: Protein for structure, fat for tenderness, acidity that supercharges baking soda. In side-by-side tests, yogurt vanilla cakes were nearly indistinguishable from the egg version.

    Best for: Vanilla, yellow, and chocolate layer cakes.

    Watch out: Plain only — thin Greek yogurt with a tablespoon of milk. Skip if the eater is dairy-free too.

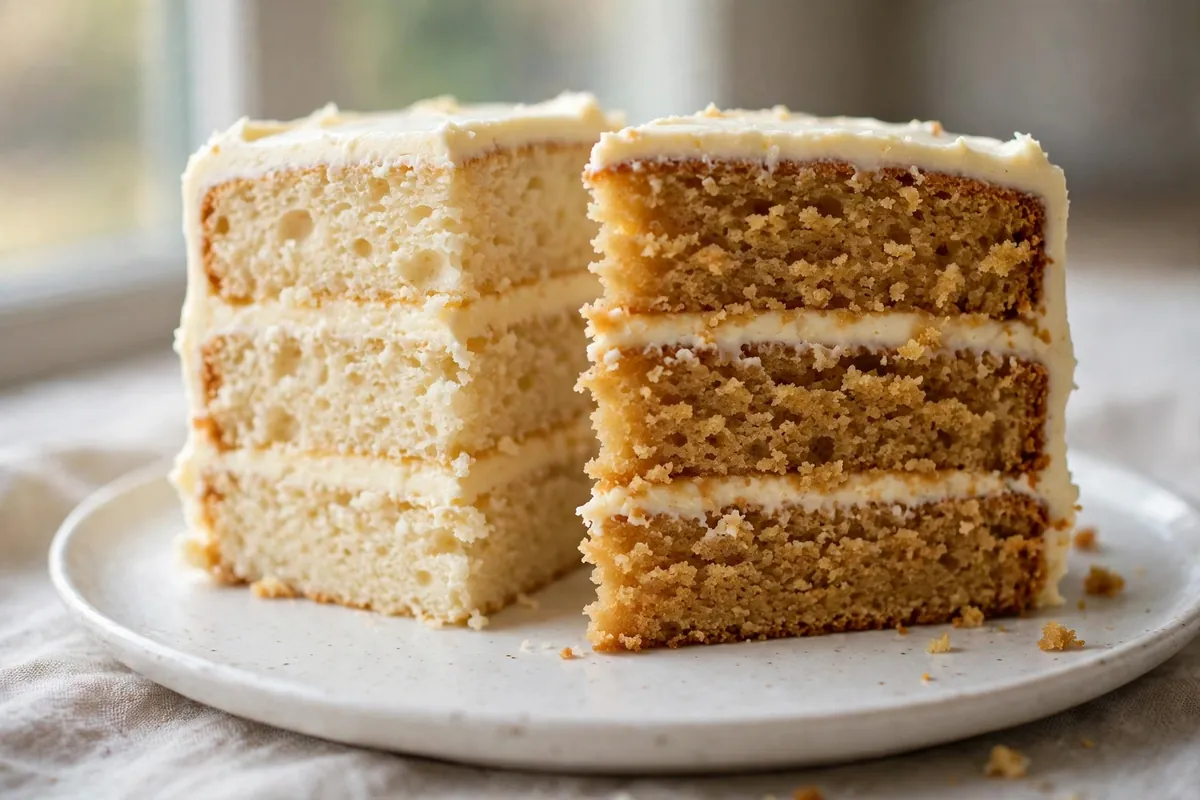
    Two slices of vanilla cake side by side — one made with egg, one with yogurt replacement
    two slices of vanilla cake side by side, one made with egg and one with yogurt replacement

    2. Unsweetened applesauce — the moisture play

    Ratio: 60g (1/4 cup) unsweetened applesauce per egg.

    Why it works: Moisture and gentle binding from fruit pectin. No lift — but in cakes with solid leavening already, it keeps the crumb tender for days. My applesauce spice cakes stay fresher longer than the egg versions.

    Best for: Spice cakes, carrot cake, chocolate cake, muffins — anything dense and moist where fruit flavor fits.

    Watch out: It adds sweetness — cut sugar 1–2 tablespoons per egg if using sweetened. Don’t use it in delicate white cakes; the flavor shows.

    3. Mashed banana — the dense-cake specialist

    Ratio: 60g (1/4 cup) well-mashed ripe banana (about half a banana) per egg.

    Why it works: Starches and sugars bind, moisture keeps things tender. Banana bread exists for a reason — this is that principle applied to cake.

    Best for: Banana cake, chocolate cake, dense snacking cakes.

    Watch out: The flavor is not subtle — never in vanilla or lemon cake. It also densifies the crumb: the opposite of a sponge’s needs.

    4. Aquafaba — the light-texture secret

    Ratio: 3 tablespoons aquafaba (the liquid from a can of chickpeas) per whole egg; 2 tablespoons per egg white. Whip to soft peaks for maximum lift.

    Why it works: Chickpea proteins whip into a foam remarkably like egg whites. Folded into chiffon batter, my aquafaba cake rose within half an inch of the egg version. Nothing else here can do that.

    Best for: Sponge, chiffon, angel-food-style cakes, meringue toppings — anywhere the egg’s foaming mattered most.

    Watch out: It must be whipped; unwhipped it’s just bean water. Use unsalted liquid — the smell bakes off completely.

    Aquafaba whipped to soft peaks in a glass bowl beside an open chickpea can
    aquafaba whipped to soft peaks in a glass bowl next to the open chickpea can

    5. Baking soda + vinegar — the leavening booster

    Ratio: 1 teaspoon baking soda + 1 tablespoon white vinegar per egg (in addition to the recipe’s existing leavening).

    Why it works: It replaces the egg’s lift, not its structure or moisture — a burst of CO2 as the batter hits the oven. Best used alongside another replacer (applesauce for moisture + soda/vinegar for lift).

    Best for: Pairing with options 1–3 in cakes that need extra rise.

    Watch out: Work fast — the reaction starts on contact, so get the pan in the oven within minutes. A tablespoon of vinegar per egg is the ceiling; more leaves a tang.

    6. Ground flaxseed — the binder

    Ratio: 1 tablespoon ground flaxseed + 3 tablespoons water per egg. Stir and rest 5 minutes until gel-like (“flax egg”).

    Why it works: Soluble fiber forms a gel that binds like egg protein — the most reliable pure binder here.

    Best for: Brownies, dense chocolate cakes, hearty muffins.

    Watch out: Dark specks, faint nutty flavor, almost no leavening — pair with the soda/vinegar booster when height matters. Grind fresh; whole seeds do nothing.

    7. Buttermilk — the tender-crumb classic

    Ratio: 60ml (1/4 cup) buttermilk per egg. Reduce another liquid in the recipe by the same amount.

    Why it works: Acidity tenderizes gluten and activates baking soda — the backbone of Southern layer cakes for a century, with an exceptionally fine, soft crumb.

    Best for: Layer cakes, sheet cakes, coffee cakes.

    Watch out: None on hand? 60ml milk + 1 teaspoon lemon juice, rested 5 minutes — nearly as good.

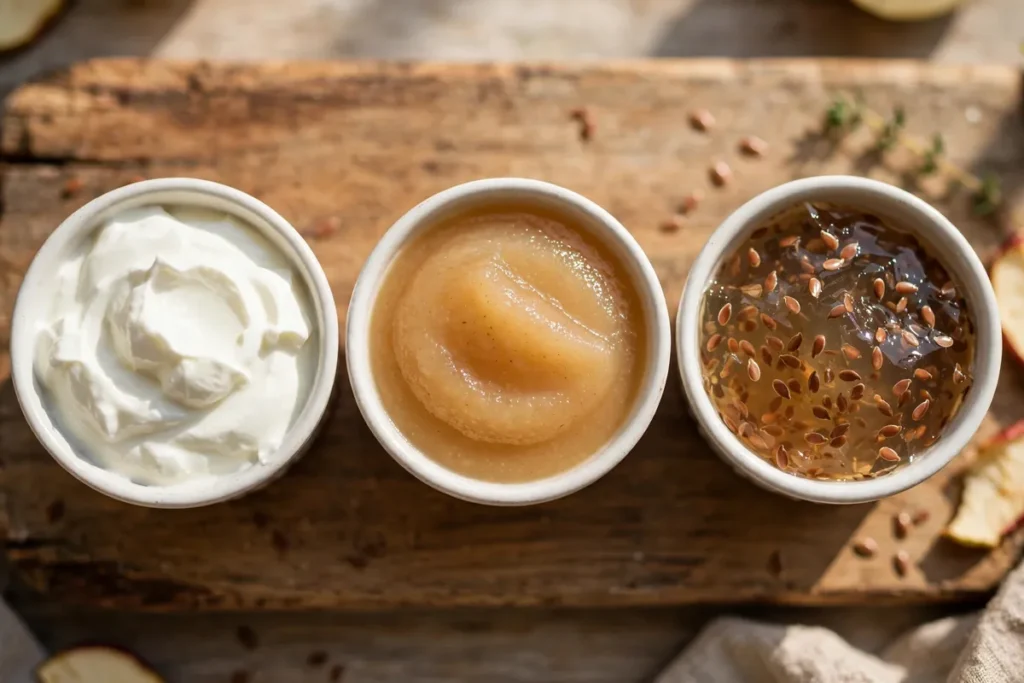
    Three ramekins with yogurt, applesauce, and flax egg substitutes side by side
    three small ramekins showing yogurt, applesauce, and flax egg side by side with labels

    Which Replacement for Which Cake

    Cake type Best picks Avoid
    Chocolate layer cake Yogurt, buttermilk, applesauce Banana (unless you want the flavor)
    Vanilla/yellow cake Yogurt, aquafaba (whipped) Banana, flax (specks show)
    Carrot/spice cake Applesauce, banana Aquafaba (unnecessary)
    Light sponge/chiffon Aquafaba (whipped) Banana, flax, applesauce (too heavy)
    Brownies/blondies Flax egg, banana Aquafaba (too airy for fudgy)
    Muffins/quick breads Applesauce, yogurt, banana — (all work)

    The Rule of Three: When to Stop Substituting

    Here’s the honest limit: don’t replace more than 2–3 eggs in a single recipe. Each substitution is an approximation, and the errors compound. One or two eggs? Any option above gets you 90%+ of the way there. Five eggs in a rich pound cake or tall chiffon — that cake is built on eggs, and no combination of substitutes rebuilds the architecture. Past three eggs, bake a recipe engineered eggless from the start.

    Frequently Asked Questions

    Can I just leave the egg out without replacing it?
    For a single egg in a sturdy recipe, sometimes — add 2–3 tablespoons of extra milk or water. But the cake will be denser and more crumbly. A proper substitute always beats omission.

    Is eggless cake safe for someone with an egg allergy?
    Yes, if every ingredient is egg-free — check baking powder, frosting, and mix-ins, and guard against cross-contamination for severe allergies. These substitutes contain no egg protein.

    Which egg replacer is best for vegan cake?
    Aquafaba for light cakes, flax or applesauce for dense ones — plus dairy-free fat and milk. For the frosting, see Dairy-Free Frosting That Holds Its Shape.

    Can I use store-bought egg replacer powder?
    Yes — follow the package ratio (usually 1 tablespoon powder + 2–3 tablespoons water per egg). Best in cookies, muffins, and brownies; for cakes I still prefer yogurt or aquafaba.

    Will eggless cake taste different?
    Banana and flax add noticeable flavor; the rest are essentially neutral. In blind tastings, nobody identified the yogurt and applesauce cakes as eggless.

    Related troubleshooting: Dairy-Free Frosting That Holds Its Shape · Why Did My Cake Sink in the Middle? · Why Is My Cake Dry?
  • How to Fix Lumpy Batter (Mixing Science That Actually Works)

    How to Fix Lumpy Batter (Mixing Science That Actually Works)

    Lumps in batter are tiny flour time-capsules: dry pockets sealed inside a shell of hydrated flour. They form when liquid hits flour too fast, and the fix depends on what you’re making — pancake and muffin lumps are harmless and should be left alone, while cake batter lumps need smoothing out. Knowing which is which saves you from the real enemy: overmixing.

    Quick diagnosis: Lumps form when liquid is added to flour too quickly. For pancakes and muffins, leave small lumps alone — overmixing makes them tough. For cake batter, smooth them by pressing lumps against the bowl with a whisk, straining through a sieve, or resting the batter 10 minutes so lumps hydrate on their own.

    My tested baseline: a standard vanilla cake batter — 250g flour whisked with 200g sugar, 2 tsp baking powder, ½ tsp salt; 115g melted butter, 2 eggs, 240ml milk at room temperature. Dry ingredients whisked together first, then wet added in three additions, mixed just until smooth — about 45 seconds of whisking total after the last addition.

    1. You added the liquid all at once — the number-one cause

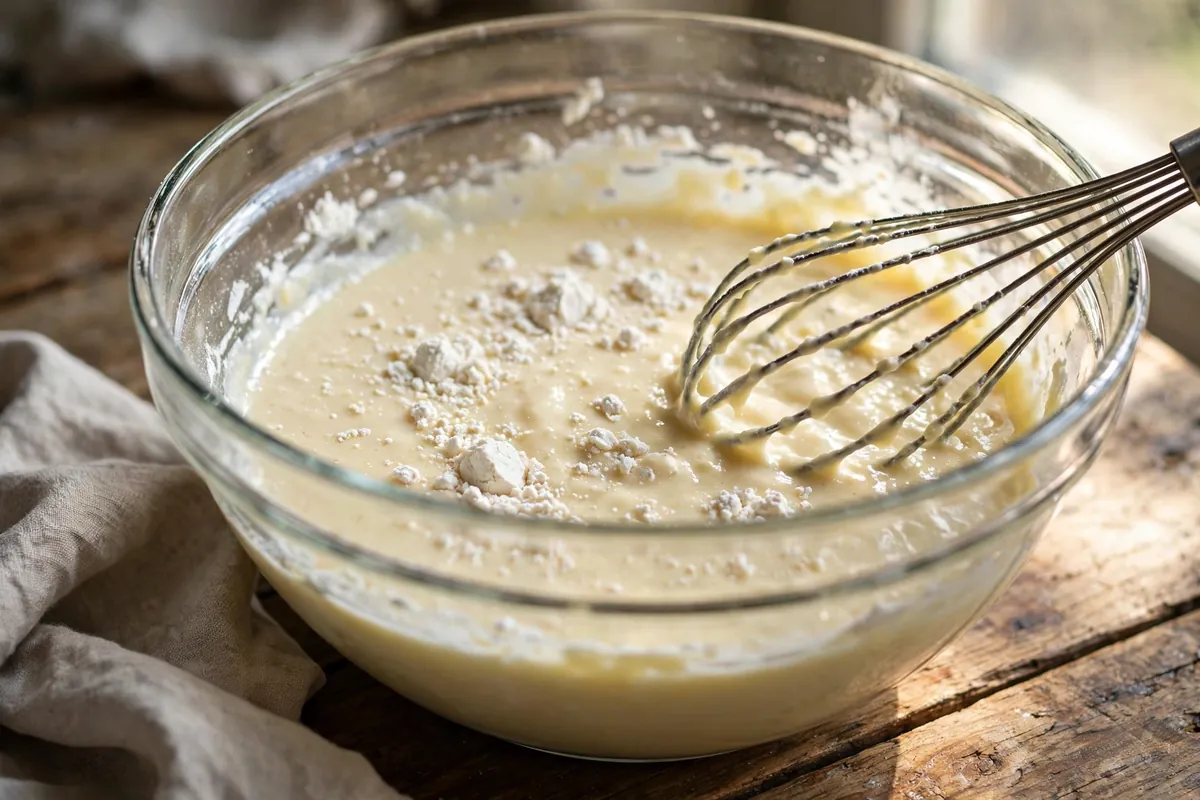
    Flour hydrates from the outside in. Dump all the milk in at once and each flour particle’s surface instantly turns to sticky paste, sealing a core of dry flour inside. Those sealed pockets are your lumps, and once formed, they’re stubborn — stirring just pushes them around.

    How to tell: The lumps appeared the moment liquid hit flour; they’re dry and powdery inside when you break one open; the batter went from floury to lumpy in seconds.

    The fix: Add liquid in three to four additions, whisking each until mostly absorbed before adding the next. Better yet, make a well in the center of the dry ingredients and pour the first addition of liquid into it, gradually pulling flour in from the edges — the classic technique exists precisely to prevent lumps.

    2. You didn’t sift or whisk the dry ingredients first

    Flour compacts in the bag, and baking powder and salt distribute unevenly. Un-sifted flour goes into the bowl in clumps that are already half-formed lumps, and pockets of baking powder create uneven rise later.

    How to tell: Lumps were visible in the dry mixture before any liquid was added; the flour had visible compacted chunks when you measured it.

    The fix: Whisk the dry ingredients together in the bowl for 20–30 seconds before adding anything wet — this aerates the flour and distributes leaveners evenly. A fine-mesh sieve is even better for cocoa powder, which lumps worse than flour. This single step prevents most lumps before they start.

    3. Rest the batter — lumps hydrate themselves in 10 minutes

    This is the lowest-effort fix and it works beautifully for pancakes, waffles, and muffins: walk away. Given 5–10 minutes, liquid migrates into the dry cores and most small lumps dissolve on their own, no extra mixing required. I rest every pancake batter I make — the texture improves and the lumps vanish.

    How to tell: The lumps are small (pea-sized or less); the batter is for pancakes, waffles, or muffins rather than a fine-crumbed cake.

    The fix: Cover the bowl and rest 10 minutes, then give one gentle stir. For pancakes this is the entire solution. Don’t use this as an excuse to overmix afterward — the resting did the work, so stir minimally. This pairs with the core rule of tough muffins: small lumps are fine, overmixing is not.

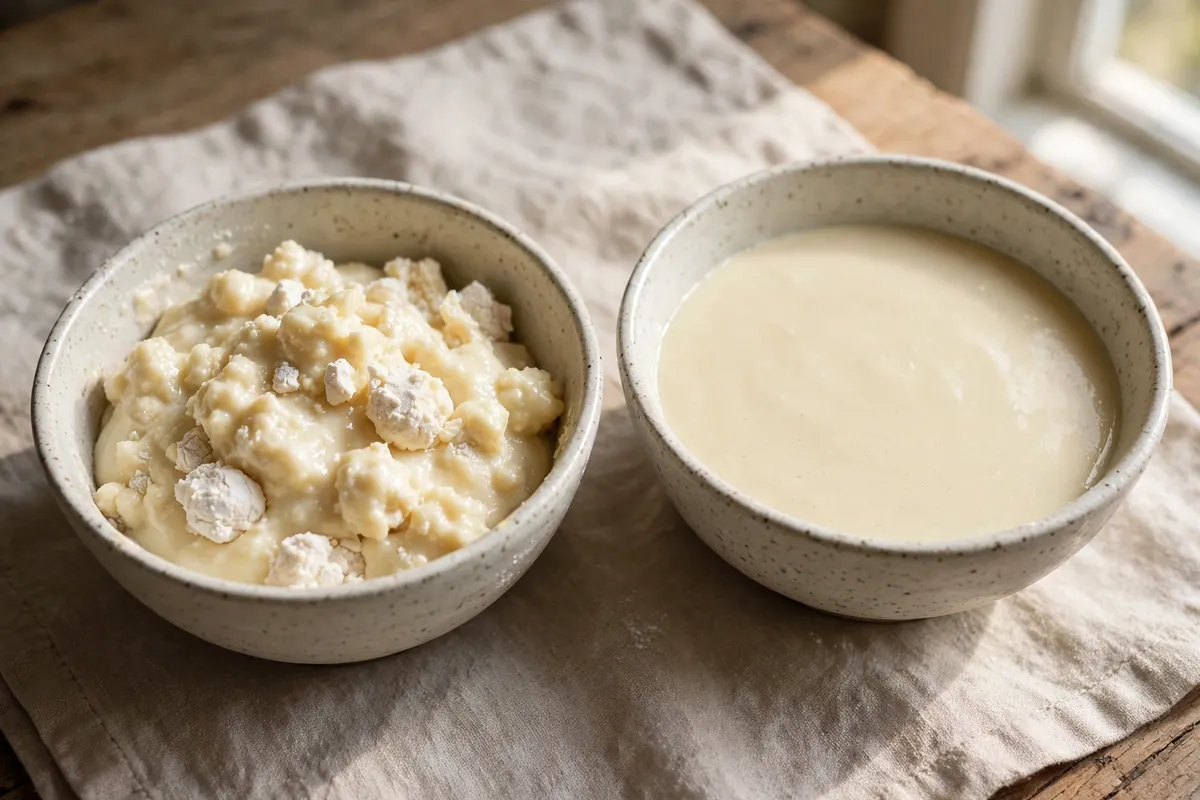
    two small bowls of pancake batter side by side, one freshly mixed with lumps, one rested and smooth
    two small bowls of pancake batter side by side, one freshly mixed with lumps, one rested and smooth

    4. Press lumps out against the bowl — the whisk technique

    For cake batter, where you do want smoothness, the technique matters more than force. Switch to a whisk (not a spoon), tilt the bowl, and press the lumps against the side of the bowl with the wires, crushing them outward. This breaks lumps mechanically without the prolonged beating that develops gluten.

    How to tell: The batter is for cake or cupcakes where a fine, even crumb matters; lumps survived the initial mixing.

    The fix: Whisk in a figure-eight motion, deliberately dragging the whisk against the bowl’s side to crush lumps. Work quickly — 30–45 seconds after the last liquid addition is enough. Stop the moment the batter looks smooth; every extra minute of beating tightens the crumb, which is exactly how cakes end up sinking or tough (see Why Did My Cake Sink in the Middle?).

    5. Strain it — the guaranteed rescue for badly lumpy batter

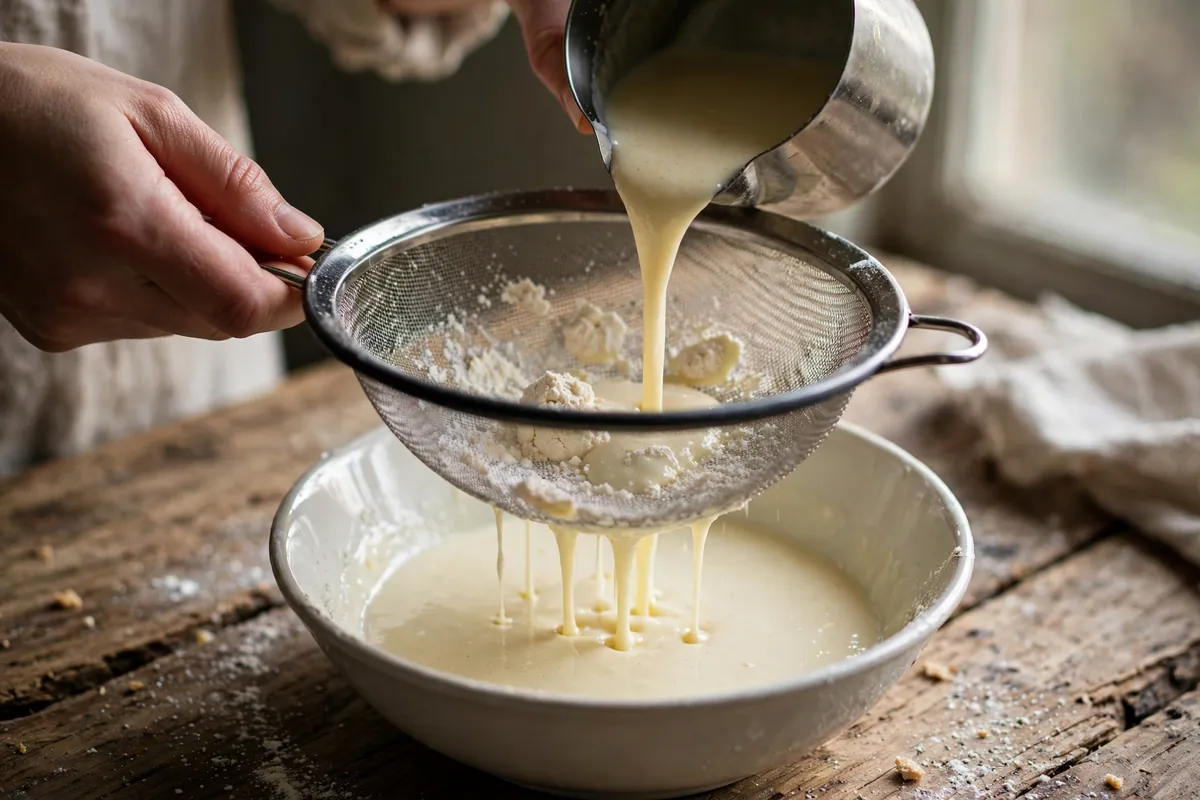
    When lumps are large, numerous, or the batter is for something unforgiving like crêpes or a smooth layer cake, don’t fight them: pour the batter through a fine-mesh sieve into a clean bowl, pressing the lumps through with a spatula. What comes out is perfectly smooth, every time.

    How to tell: Lumps are large (chickpea-sized or bigger); there are too many to crush individually; the batter is thin enough to pour (works for crêpe, pancake, and most cake batters).

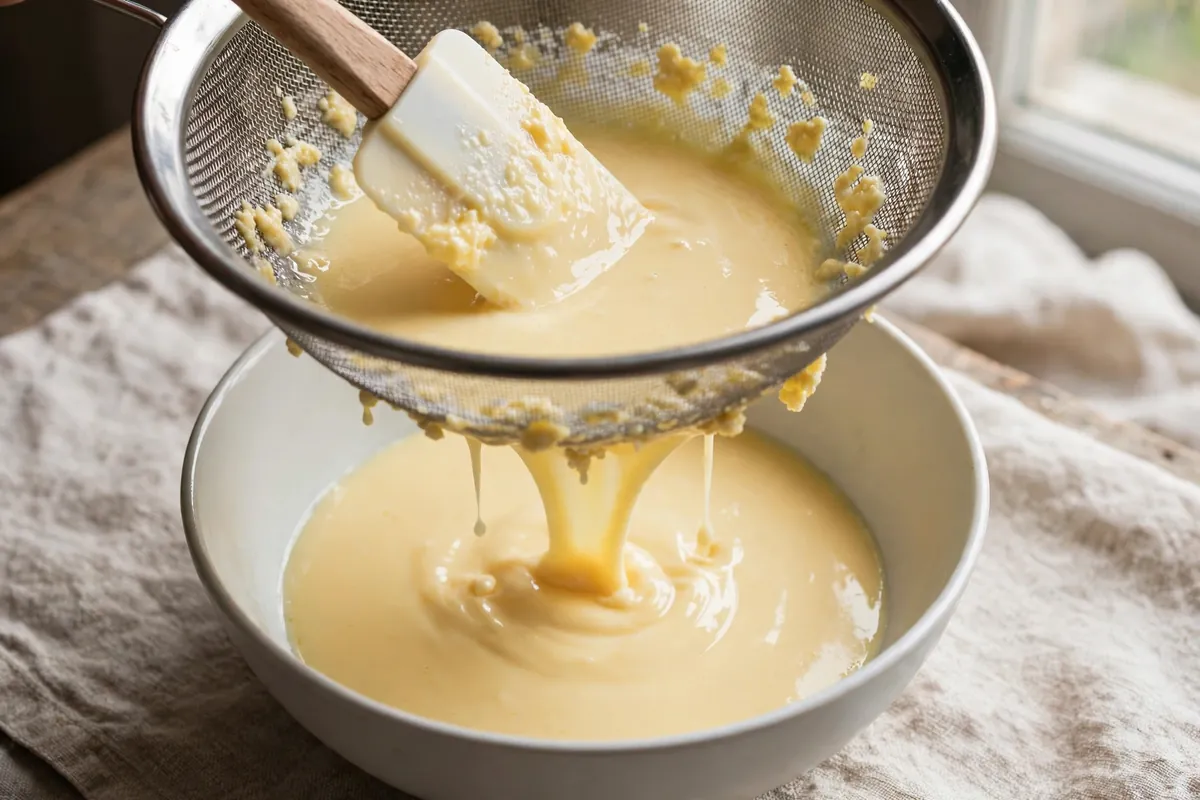
    The fix: Set a fine-mesh sieve over a bowl, pour the batter through, and push remaining lumps through with a rubber spatula or the back of a ladle. Discard any truly dry bits that won’t pass. This adds two minutes and rescues any batter — I do it automatically for crêpes, where even one lump ruins the thin spread.

    Can you fix lumpy batter after it’s already in the pan?

    No — once it’s baking, the lumps are locked in. Small ones in pancakes and muffins will hydrate in the heat and be undetectable; large dry lumps in cake will bake into unpleasant floury pockets. If you catch it before the oven, strain or rest the batter. If it’s already baked, chalk it up to experience: tiny lumps in rustic bakes are invisible in the eating, and the lesson (add liquid gradually) applies to every batter you’ll ever make.

    batter being poured through a fine-mesh sieve into a clean bowl, lumps caught in the mesh
    batter being poured through a fine-mesh sieve into a clean bowl, lumps caught in the mesh

    FAQ

    Is it safe to eat lumpy batter?
    Yes — lumps are just unhydrated flour, completely safe. The only downside is texture: dry, floury pockets in the finished bake. Small lumps in pancakes are undetectable once cooked.

    Should pancake batter be lumpy or smooth?
    Slightly lumpy is correct. The golden rule of pancakes: mix until just combined, with small lumps remaining. Smoothing them out requires overmixing, which develops gluten and makes pancakes rubbery instead of tender.

    Why is my cake batter lumpy but my pancake batter isn’t?
    Cake batters have more flour relative to liquid and often include softened butter that must emulsify — more opportunities for lumps. Pancake batter is thinner and more forgiving. The gradual-liquid technique matters most for thick cake batters.

    Can I use a blender to fix lumpy batter?
    For pancakes, waffles, and crêpes — yes, a few pulses work. For cake or muffin batter — no. A blender develops gluten aggressively and will give you a tough, dense crumb. Strain or whisk those instead.

    Does sifting flour really prevent lumps?
    Whisking dry ingredients together prevents most lumps; true sifting matters most for cocoa powder and powdered sugar, which clump far worse than flour. For plain flour, 30 seconds with a whisk in the bowl is enough.

    Why do my lumps come back after I smooth the batter?
    They don’t reform — what you’re seeing is probably small butter pieces (if using the reverse-creaming method) or air bubbles, both harmless. True flour lumps, once hydrated or strained out, stay gone.

    Related troubleshooting: Why Are My Muffins Tough? The Muffin Method Explained · Why Did My Cake Sink in the Middle? 7 Causes, Tested Fixes · How to Fix Overwhipped Cream (Before It Becomes Butter)
  • Bread Flour vs All-Purpose: When It Actually Matters

    Bread Flour vs All-Purpose: When It Actually Matters

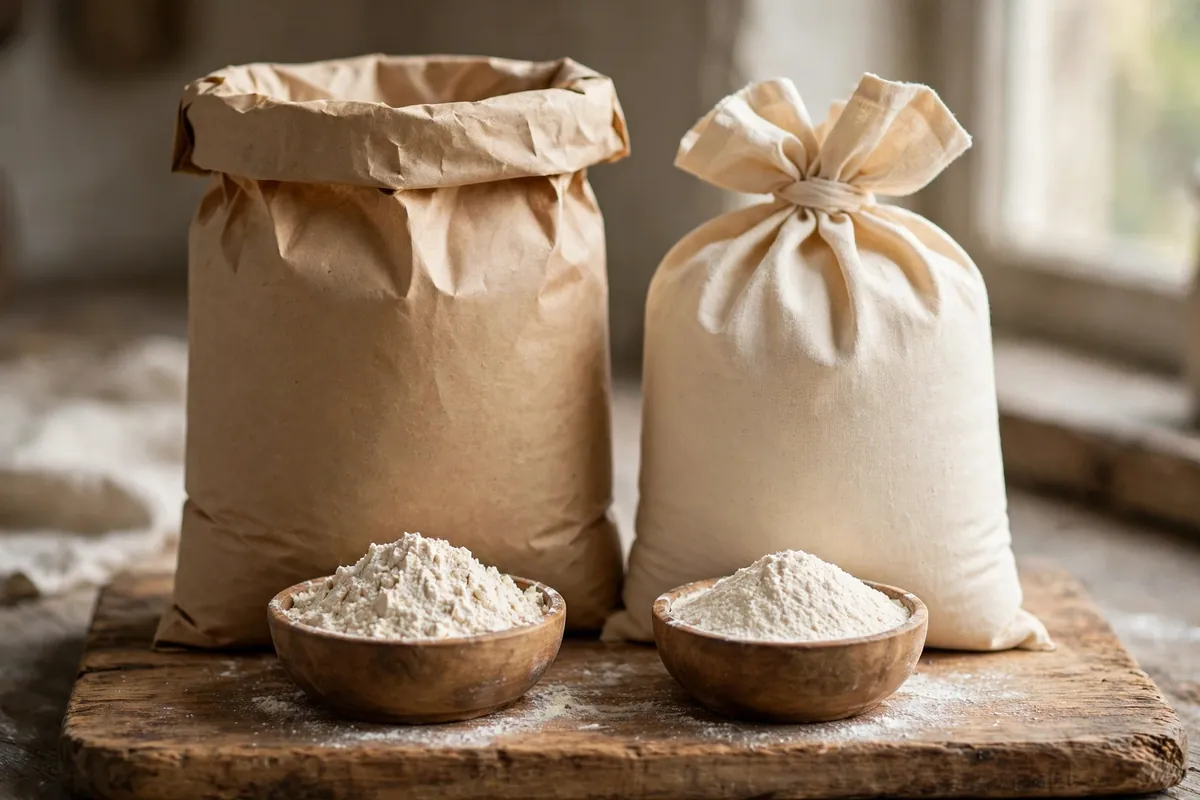
    Walk into any baking aisle and the flour choice looks simple: bread flour for bread, all-purpose for everything else. But every experienced baker has a story of the “wrong” flour working fine — chewy cookies from bread flour, perfectly good loaves from all-purpose. So when does it actually matter? The same recipes with both flours, side by side, give the honest answer: it matters enormously in some bakes, barely at all in others, and knowing which is which saves you both money and disappointment.

    Quick diagnosis: The difference is protein: bread flour runs 12–14%, all-purpose 10–12%. More protein = more gluten = chewier, stronger structure. It matters most in lean yeast breads and pizza (use bread flour), matters least in cookies and quick breads (all-purpose is fine), and reverses for cakes (all-purpose beats bread flour — never use bread flour for cake).

    What the numbers actually mean

    Protein percentage is the whole story. When flour meets water, two proteins (glutenin and gliadin) link into gluten — the elastic network that traps gas in bread and gives chew to pizza. More protein means more gluten potential:

    Flour Protein Best for
    Bread flour 12–14% Lean breads, pizza, bagels — maximum chew and structure
    All-purpose flour 10–12% The middle ground — works for most things, ideal for few
    Cake flour 7–9% Tender cakes — minimal gluten by design
    Whole wheat ~13–14% Hearty flavor, but bran cuts gluten strands (behaves weaker than its number)

    Note the overlap: a strong all-purpose at 11.5% (like King Arthur’s) is closer to bread flour than to a soft Southern all-purpose at 9%. Brand matters as much as label — check the nutrition panel: protein grams per 30g serving × 3.33 ≈ protein percentage.

    When bread flour wins (use it here)

    Lean yeast breads and sourdough. This is bread flour’s home turf. At 70%+ hydration, the dough needs maximum gluten strength to hold its shape and trap gas — all-purpose at high hydration goes slack and spreads (the focaccia problem: Why Is My Focaccia Flat?). For bagels, which need extreme chew, bread flour isn’t optional, it’s the recipe (see Why Do My Bagels Deflate?).

    Pizza dough. Chew is the entire point of good pizza crust — that pull, that char-spotted cornicione. Bread flour’s extra gluten gives you the extensibility for thin stretching without tearing and the chew after a hot bake. All-purpose pizza is fine; bread-flour pizza is better in a way you can taste.

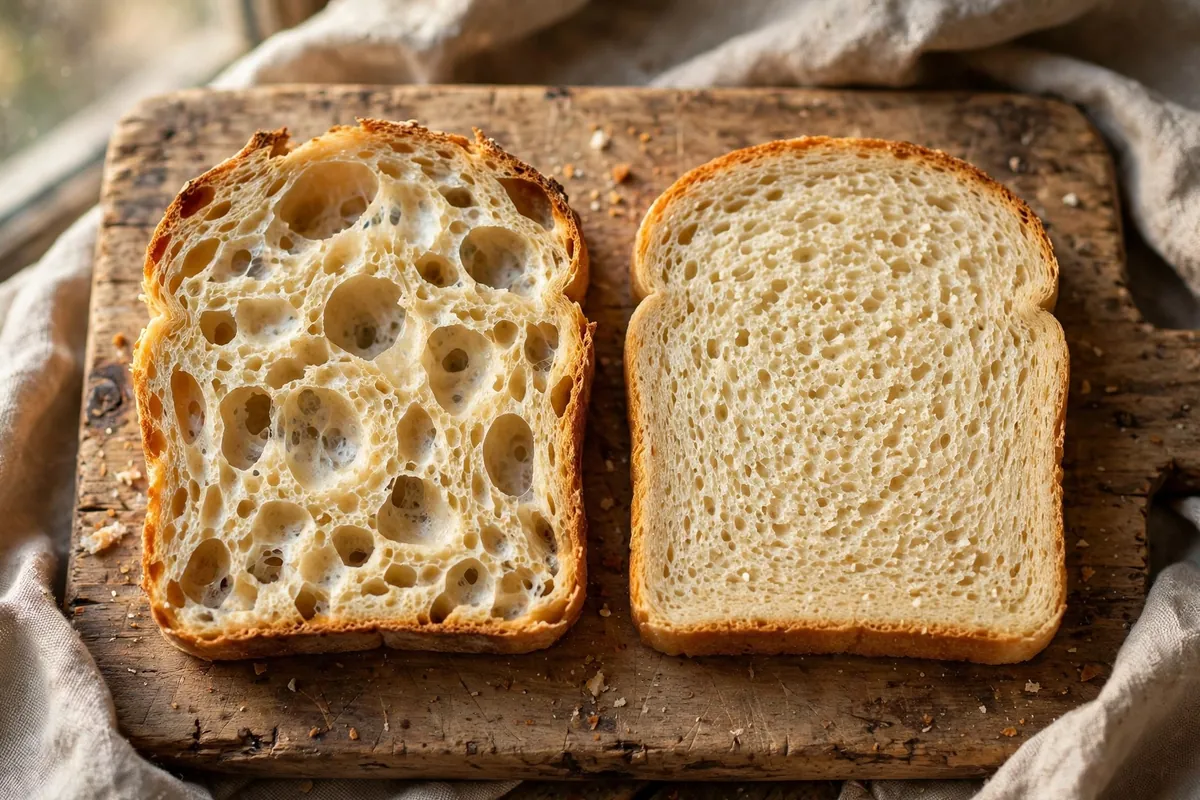
    Why it works: more gluten = stronger gas-trapping net = taller rise, chewier crumb, better structure. In my side-by-side sourdough tests, the bread-flour loaf consistently rose 15–20% higher with a more open crumb than the identical all-purpose loaf.

    When all-purpose wins (bread flour hurts here)

    Cakes. This is the big reversal. Cake wants tenderness — minimal gluten. Bread flour in cake builds a strong, elastic network that reads as tough, rubbery, dry crumb. It’s the fastest way to ruin a cake’s texture. Use all-purpose (or cake flour for the most delicate cakes). Never use bread flour for cake — there is no recipe where it’s the right call. (Tough crumb has many causes beyond flour: Why Is My Cake Dry?.)

    Pie crust and biscuits. Flaky pastry wants gluten development kept to a minimum — that’s the whole game of cutting in cold fat and handling gently. Bread flour fights you: tougher dough, less flake, more shrinkage. All-purpose is correct here, full stop.

    How to tell you’ve used the wrong one: the crumb is tough and bready in something meant to be tender, or the dough fought back excessively during gentle handling.

    cross-section comparison — chewy open bread crumb from bread flour vs tighter crumb from all-purpose, same recipe
    cross-section comparison — chewy open bread crumb from bread flour vs tighter crumb from all-purpose, same recipe

    When it barely matters (save your money)

    Cookies. Most cookie recipes are low-moisture, high-fat, short-mix affairs — there’s barely enough gluten development for the flour choice to register. In blind tests, bread-flour vs all-purpose chocolate chip cookies are distinguishable (the bread-flour version is slightly chewier) but both are delicious. If chew is your goal, bread flour is actually a legitimate cookie hack — many “chewy cookie” recipes specify it deliberately.

    Quick breads and muffins. Banana bread, zucchini bread, muffins — the batter is mixed briefly, the fat is high, and the texture goal is tender-moist, not chewy. All-purpose is the default and bread flour gains you nothing (arguably risks toughness if overmixed — but the mixing, not the flour, is the real variable: Why Are My Muffins Tough?).

    Pancakes and waffles. Same logic: minimal gluten development, high fat/liquid. All-purpose always.

    The substitution rules

    All-purpose → bread flour (need chew, have AP): works in most bread recipes with slightly less rise and chew. For pizza and lean breads, expect ~10–15% less volume. Bump hydration down 1–2% if the dough feels slack.

    Bread flour → all-purpose (recipe calls for bread flour): the most common real-world swap. Works fine for enriched breads (brioche, sandwich loaves), rolls, and no-knead bread (the long ferment compensates). For bagels and high-hydration sourdough, expect a real quality drop — this is where buying the right bag matters.

    The vital wheat gluten trick: 1 tablespoon of vital wheat gluten per cup of all-purpose flour ≈ converts it to bread flour (adds ~2–3% protein). If you bake bread occasionally and don’t want a second bag, this is the economical answer. Mix it thoroughly into the dry flour before adding liquid. Worked example: 3 cups all-purpose flour (360g) + 3 tablespoons vital wheat gluten gives you roughly the protein of bread flour — close enough for sandwich loaves, pizza, and no-knead bread. For bagels, still buy the real thing.

    What about “00” flour? Italian “00” refers to grind fineness, not protein — 00 pizza flour (like Caputo) is typically 12–13% protein and excellent for pizza; 00 pastry flour is low-protein. Read the protein, not the 00.

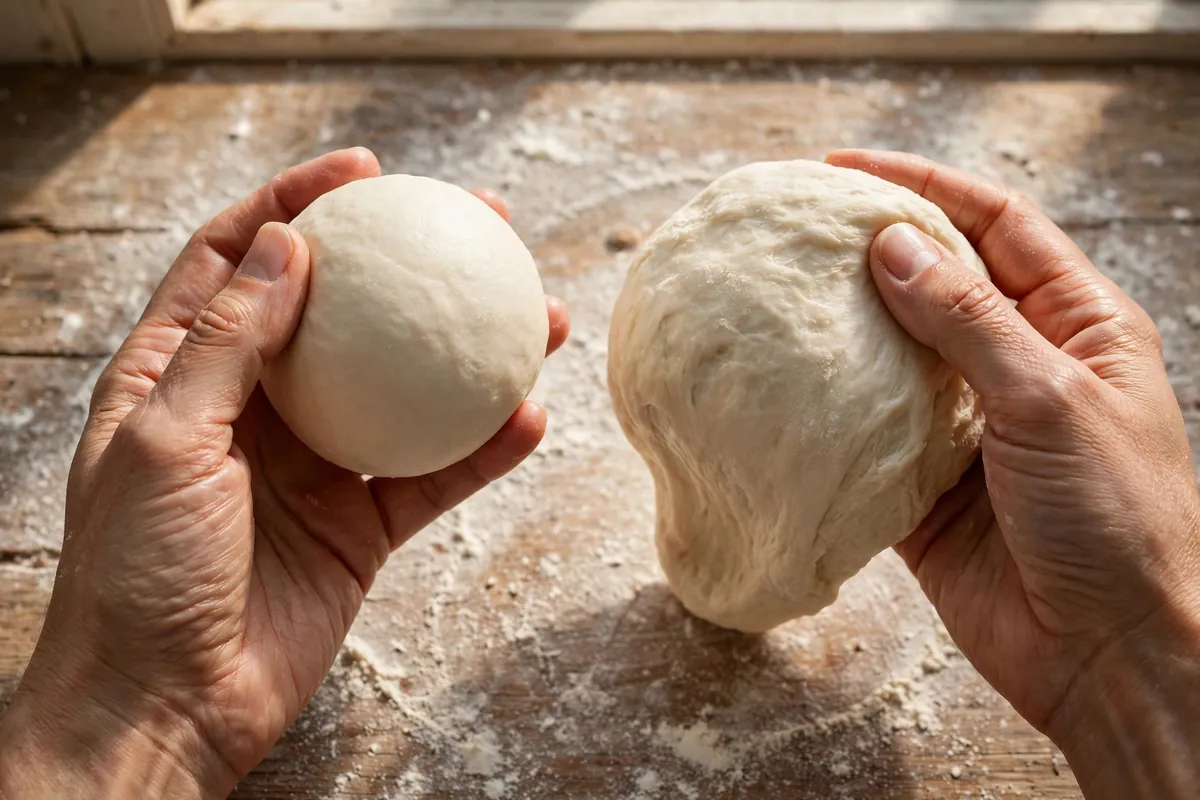
    hands holding two dough balls — one smooth elastic bread-flour dough, one softer all-purpose dough — showing the texture difference
    hands holding two dough balls — one smooth elastic bread-flour dough, one softer all-purpose dough — showing the texture difference

    Frequently asked questions

    Can I use bread flour for cookies?
    Yes — and for chewy-style cookies it’s arguably better. Expect slightly thicker, chewier results. For crisp thin cookies, stick with all-purpose. Either way, measure by weight (120g per cup).

    Why did my bread-flour cake turn out tough?
    The extra protein built too much gluten — exactly what bread flour is designed to do, and exactly wrong for cake. There’s no fix after baking; for next time, use all-purpose or cake flour. (More cake texture rescue: Overbaked Cake? 5 Rescue Methods.)

    Is King Arthur all-purpose basically bread flour?
    Close — at 11.7% protein it’s the strongest widely available AP and performs near bread-flour level in most breads. Many bakers use it as their only flour. But true bread flour (12.7%+) still wins for bagels and high-hydration sourdough.

    Does flour go bad? Which should I store?
    White flour keeps 6–8 months at cool room temperature, a year+ in the freezer. Whole wheat goes rancid faster (3 months room temp — the oils in the bran oxidize). If you bake bread weekly, keep bread flour; if occasionally, keep all-purpose + a bag of vital wheat gluten.

    Can I mix bread flour and all-purpose?
    Absolutely — a 50/50 blend gives you ~11.5–12% protein, a fine middle ground for everyday bread. Many bakeries blend for specific products. There’s no rule against it.

    Is it safe to eat raw flour?
    No — raw flour can carry bacteria (it’s the reason cookie-dough warnings exist as much as the eggs). Heat-treat flour for edible cookie dough: microwave to 165°F (74°C) or bake 5 minutes at 350°F (175°C).

    Related troubleshooting: Why Is My Bread Dense? · Why Do My Cookies Spread Flat? · Why Is My Focaccia Flat?

  • Make-Ahead Thanksgiving Desserts: A Baker’s Timeline

    Make-Ahead Thanksgiving Desserts: A Baker’s Timeline

    Thanksgiving dessert is a logistics problem disguised as baking. The oven is occupied by a turkey for hours, the fridge is full, and everything needs to land on the table Thursday afternoon looking effortless. I’ve hosted enough Thanksgivings to know the real secret: almost everything can be made ahead — if you know what holds, what fades, and what’s genuinely unsafe to leave out. Here’s the timeline I use.

    Quick plan: One week out: freeze pie dough, make cranberry sauce. Three days out: bake pecan pie and cheesecake. Two days out: bake pumpkin pie (refrigerate — it’s custard). One day out: bake apple pie, stabilize the whipped cream. Day of: reheat, whip, serve. Meringue toppings and unstabilized whipped cream are day-of only.

    The rules of make-ahead (read before you plan)

    Three principles govern everything below:

    1. Custard is a refrigerator food. Pumpkin pie, custard tarts, anything egg-and-dairy-set must be refrigerated within 2 hours of baking and kept cold. Never leave pumpkin pie out overnight. This is food safety, not preference.
    2. Crisp and creamy age differently. Fruit pies (apple, pecan) hold at room temperature for 2 days. Custards need the fridge. Meringue weeps within hours — always day-of.
    3. The freezer is your best prep cook. Unbaked pie dough freezes for 3 months. Baked fruit pies freeze well. Cheesecake freezes beautifully. Use it.

    One week ahead: dough and cranberry sauce

    Pie dough: Make your full batch, divide into discs, wrap tightly in two layers of plastic wrap, and freeze. It keeps 3 months. Move it to the fridge the night before you need it — slow thawing keeps the butter layers intact for flakiness.

    Cranberry sauce: It keeps 2 weeks refrigerated (sugar and acid are natural preservatives). Make it now and forget it.

    Toast nuts: Toast pecans and walnuts for pies and toppings, cool completely, and freeze in zip-top bags. Toasting now saves oven time later.

    wrapped discs of pie dough labeled with dates in the freezer
    wrapped discs of pie dough labeled with dates in the freezer

    Three days ahead (Monday): pecan pie + cheesecake

    Pecan pie is the best make-ahead pie in the Thanksgiving canon. The sugary filling is a preservative environment — it holds at room temperature for 2 days or refrigerated for 4–5. Bake it Monday, cool completely, and refrigerate.

    Cheesecake needs a full 24 hours of chilling to set properly anyway, so baking early isn’t a compromise — it’s the recipe working as designed. Bake Monday (water bath, staged cooling — see Why Did My Cheesecake Crack?), refrigerate, and don’t even slice until Thursday. Cheesecake also freezes for 2–3 months if you want to go earlier: freeze unsliced, thaw overnight in the fridge.

    Two days ahead (Tuesday): pumpkin pie

    Pumpkin pie is custard, so it bakes Tuesday and lives in the fridge — never the counter overnight. The good news: pumpkin pie genuinely improves with a day or two of chilling. The spices meld, the filling firms to a clean slice, and you’re not fighting oven space on Thursday.

    The food-safety line: refrigerate within 2 hours of leaving the oven. A pumpkin pie left on the counter overnight is a discard, not a serve — custard is a bacterial playground at room temperature.

    sliced pumpkin pie showing clean firm slices on a plate
    sliced pumpkin pie showing clean firm slices on a plate

    One day ahead (Wednesday): apple pie + whipped cream base

    Apple pie is the most forgiving pie on the table: fruit filling, no custard, happy at room temperature for 2 days. Bake it Wednesday. If you want that fresh-baked warmth Thursday, reheat slices at 350°F (175°C) for 10 minutes — or bake it Thursday morning if your oven schedule allows.

    Whipped cream: Plain whipped cream deflates within hours. For make-ahead, stabilize it: whip 1 cup heavy cream with 2 tablespoons powdered sugar and 1 tablespoon mascarpone (or 1 teaspoon gelatin bloomed in 1 tablespoon cold water, then melted). Stabilized cream holds its shape 24 hours refrigerated. Make it Wednesday evening, dollop Thursday.

    Day of (Thursday): reheat and serve

    Your only jobs: move the cheesecake from fridge to counter 30–45 minutes before serving (cold cheesecake mutes flavor), reheat apple pie slices if desired, and whip any last-minute cream. Everything else is done. This is the payoff of the timeline — you actually get to enjoy the meal.

    Thursday oven schedule (the other half of the plan)

    Dessert timing means nothing if the oven is hostage to the turkey. Work backward from serving time: the turkey needs 30–45 minutes of resting after roasting — that’s your dessert window. Reheat apple pie slices during the rest (350°F / 175°C, 10 minutes). If anything needs a hot oven Thursday morning, bake it before the turkey goes in; most ovens recover temperature in 15 minutes, so a 9 AM pie bake and an 11 AM turkey start coexist fine. Write the schedule on paper and tape it to the fridge — Thanksgiving is no time for mental math.

    handwritten oven schedule taped to a fridge door
    handwritten oven schedule taped to a fridge door

    What NOT to make ahead

    • Meringue toppings (lemon meringue pie, baked Alaska): meringue weeps and shrinks within hours. Always day-of — see Why Is My Meringue Weeping?.
    • Unstabilized whipped cream: hours, not days.
    • Anything meant to be served warm from the oven: plan the oven schedule, not the calendar.
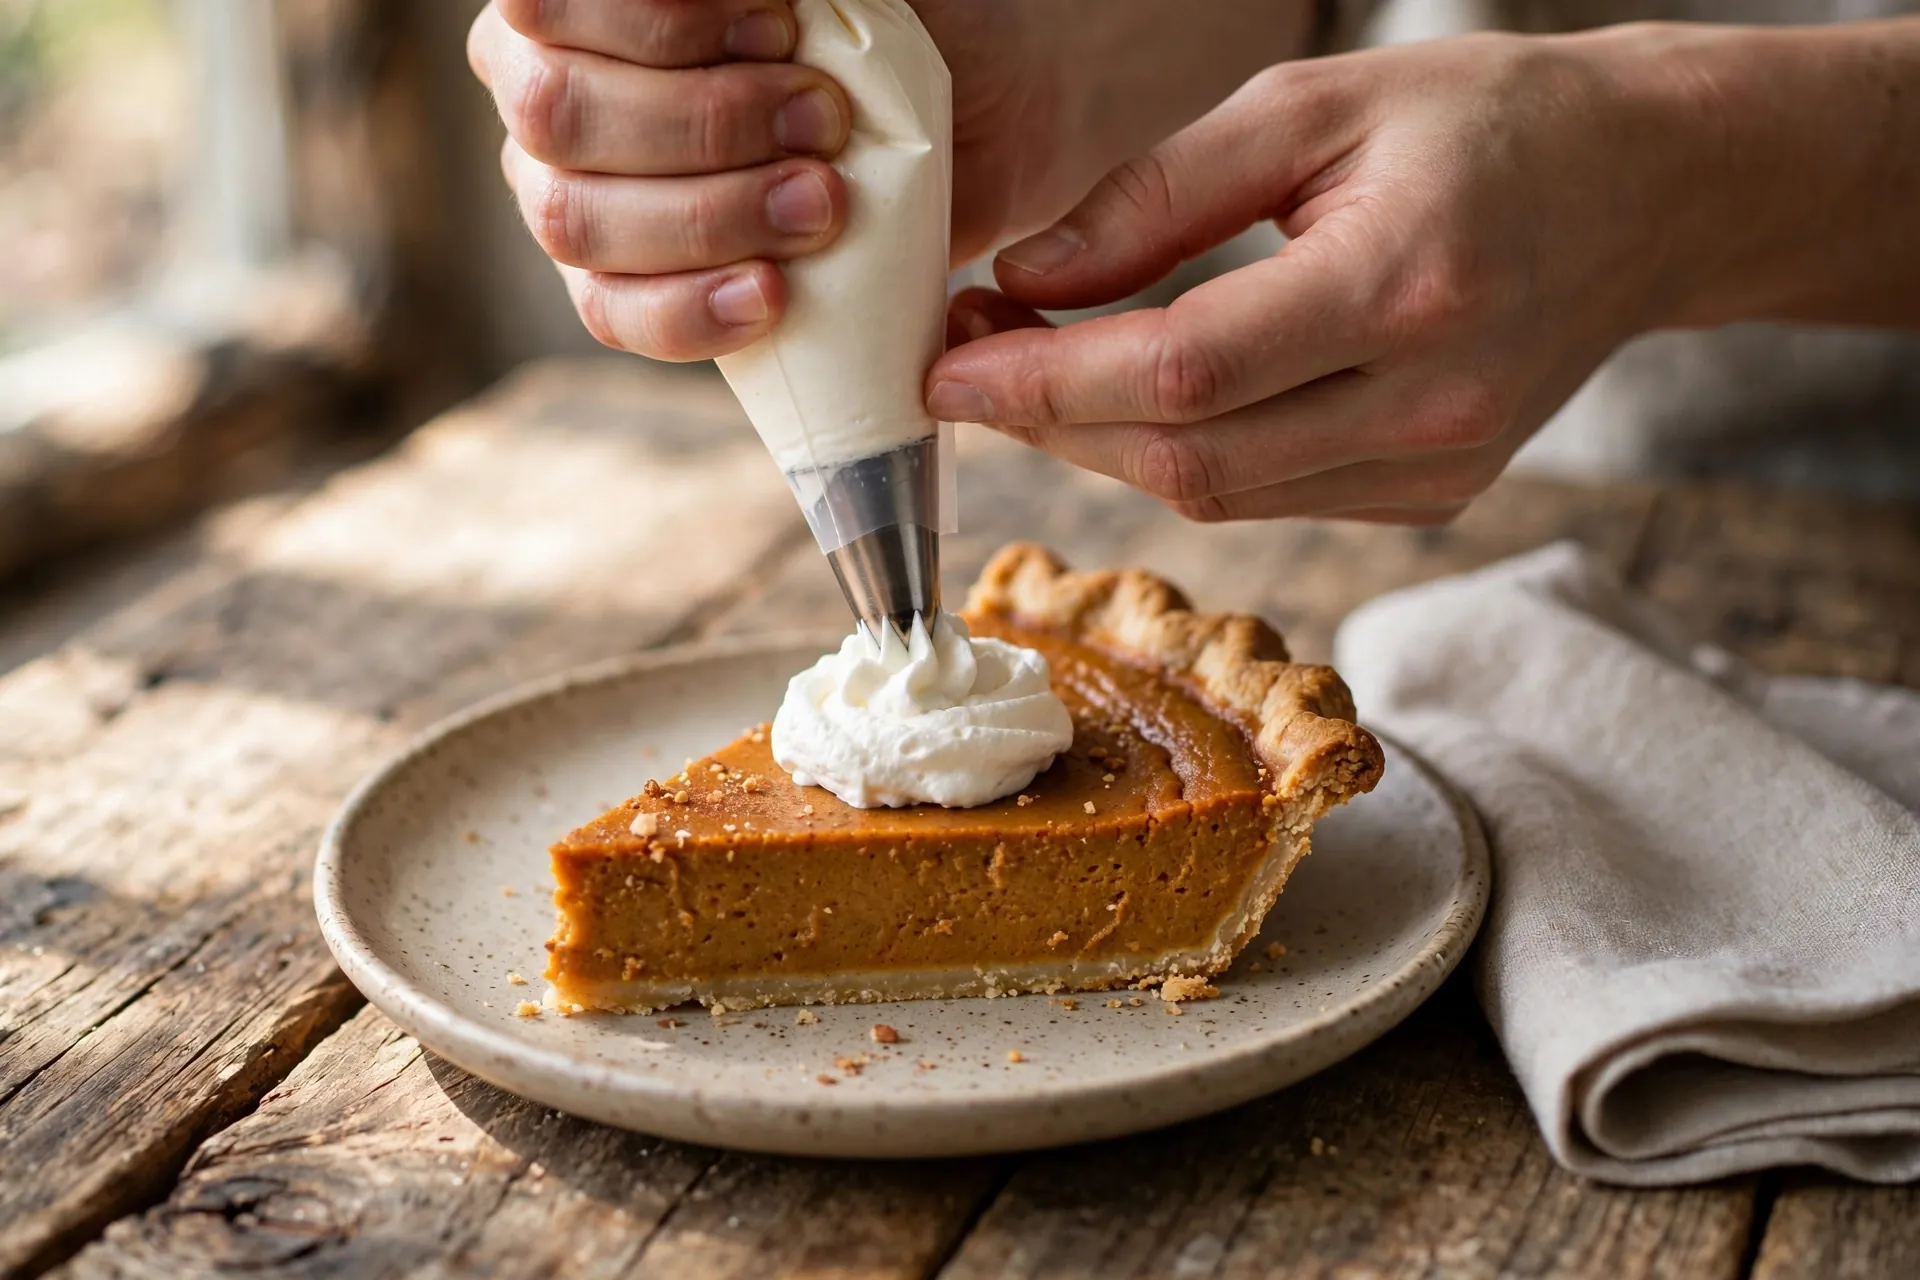
    hands dolloping stabilized whipped cream onto a slice of pie
    hands dolloping stabilized whipped cream onto a slice of pie

    Frequently asked questions

    Can I freeze pumpkin pie?
    Technically yes, but I don’t recommend it — custard fillings weep and turn grainy when thawed. The fridge gives you 3–4 days of perfect quality, which covers any Thanksgiving timeline. Freeze the unbaked dough instead and bake fresh.

    How long does pecan pie keep?
    2 days at room temperature (cool, covered), 4–5 days refrigerated. The high-sugar filling is inhospitable to bacteria, which is why it’s the most make-ahead-friendly pie on the table.

    Can I make pie dough further ahead?
    Yes — 3 months in the freezer, wrapped airtight. Thaw overnight in the fridge, never on the counter (the butter layers melt and you lose flakiness).

    Is it really unsafe to leave pumpkin pie out overnight?
    Yes. Pumpkin pie is an egg-and-dairy custard. The food-safety rule is 2 hours at room temperature, then refrigerate. An overnight counter pie goes in the bin, however painful that feels.

    Can I freeze cheesecake?
    Beautifully — up to 2–3 months. Freeze it unsliced on a board, then wrap tightly in two layers of plastic plus foil. Thaw overnight in the fridge, never on the counter. The texture is essentially identical to fresh.

    What about dinner rolls and bread?
    Different post, same principle: par-bake rolls ahead and finish Thursday, or bake fully Wednesday and refresh in a hot oven. See Make-Ahead Bread Dough for the full method.

    Related troubleshooting: Why Did My Cheesecake Crack? (And the Water Bath Fix) · Soggy Bottom Pie: How to Get a Crisp Base

  • How to Fix a Split Custard (And Why It Curdled)

    How to Fix a Split Custard (And Why It Curdled)

    One minute your custard is a silky, spoon-coating sauce; the next it’s grainy, weeping liquid, with the unmistakable look of sweet scrambled eggs. A split custard feels like a disaster, but it’s one of the most fixable failures in baking — if you catch how far it went. I’ve rescued custards that looked completely lost — and learned to recognize the ones past saving.

    Quick diagnosis: Your custard split because the egg proteins got too hot — stirred custards curdle above about 185°F (85°C). If it’s only slightly grainy, an ice bath plus vigorous whisking (or a 20-second blender blitz, then a strain) will usually save it. If it looks like fully scrambled eggs, the proteins are set — strain it and repurpose the liquid.

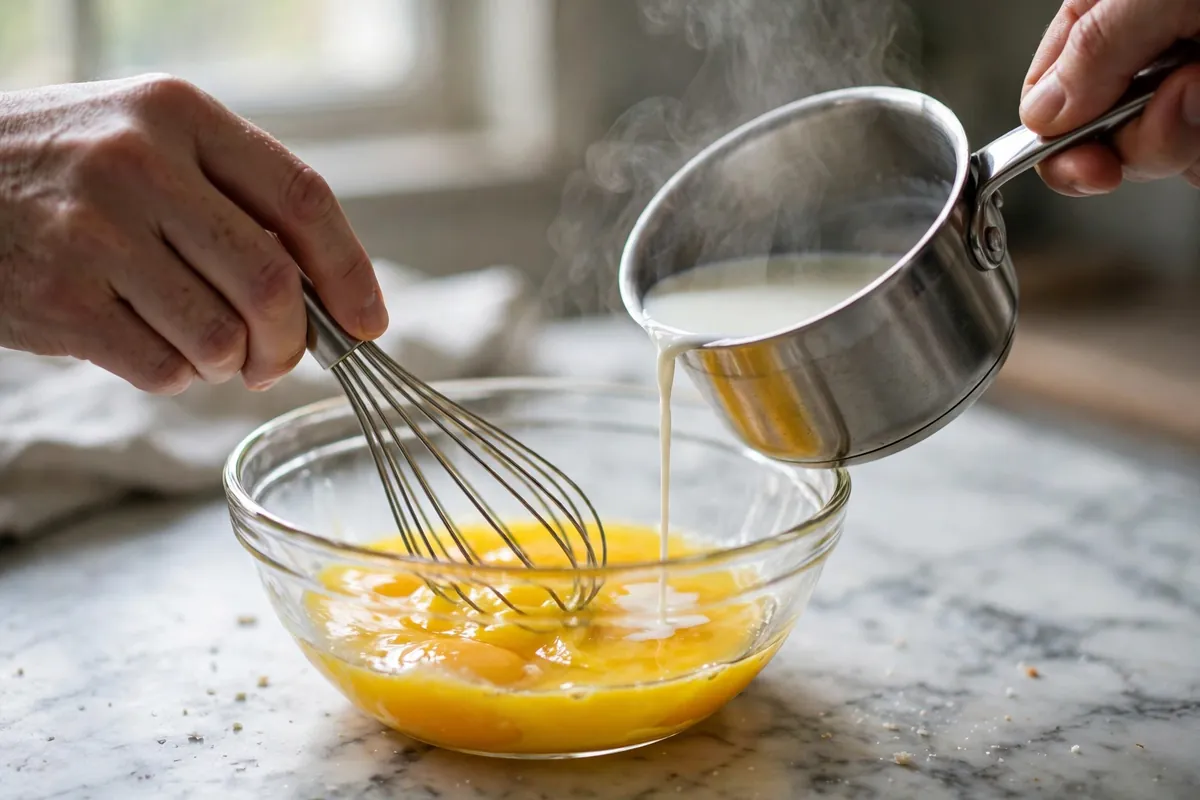
    My tested baseline, crème anglaise: 500ml (2 cups) whole milk or half-and-half, 1 vanilla bean or 2 teaspoons vanilla, 5 large yolks (about 90g), 75g sugar (⅓ cup + 1 tablespoon), pinch of salt. Heat the milk to steaming. Whisk yolks and sugar, then temper: drizzle in a third of the hot milk while whisking constantly, pour back into the pan, and cook over medium-low heat, stirring constantly, until it reaches 175–180°F (80–82°C) and coats the spoon — the nappé stage, where a finger drawn across the back of the spoon leaves a clean line. Never let it boil.

    1. You boiled it — heat is the #1 custard killer

    Yolk proteins begin setting around 150°F (65°C) and tighten into curds as temperature climbs; by 185°F (85°C) a stirred custard is in real danger, and a boil guarantees scrambled texture. Silky to split can be thirty seconds of inattention — a heavy pan, constant stirring, and a thermometer are the entire defense.

    How to tell: The custard thickened suddenly, then turned grainy; you may have seen it bubble or felt the spoon drag. The classic “I looked away for a minute” split.

    The fix: If only lightly grainy: off the heat, into an ice bath, whisk hard for a full minute. The cold stops the cooking; the whisking breaks early clumps before they set. Still grainy? Blitz 15–20 seconds with an immersion blender, then strain through a fine-mesh sieve. (Same emulsion-rescue logic as How to Fix Curdled Ganache: Emulsion Rescue.)

    2. Your tempering was too aggressive — hot milk shocked the yolks

    Tempering brings yolks up gradually. Pour hot milk in too fast, or into ice-cold yolks, and proteins at the contact point seize into tiny curds before the pan is on the heat. The custard starts faintly grainy and only gets worse.

    How to tell: Graininess appeared during tempering, before the custard went back on the stove; small cooked-egg flecks visible in the mixture.

    The fix: Temper with room-temperature yolks and milk at a bare simmer, not a rolling boil. Drizzle in the first few tablespoons while whisking hard, then increase to a steady stream once the yolks are warm. If the yolks and the first milk addition are within about 30°F (17°C) of each other, you’re safe. Once tempered curds form, only the strainer saves you.

    hands tempering custard, drizzling hot milk into whisked egg yolks
    hands tempering custard, drizzling hot milk into whisked egg yolks

    3. Acid or alcohol curdled it — lemon and liqueurs are protein magnets

    Acid lowers the temperature at which egg proteins coagulate — that’s why lemon custard, wine sabayon, or custard with a slug of rum splits at temperatures perfectly safe for plain vanilla. Adding citrus juice to the hot custard, or cooking after the addition, is asking for curds.

    How to tell: The split happened at a temperature you know was safe, right after adding lemon juice, wine, or spirits; the curdling is fine-grained and uniform rather than lumpy.

    The fix: Add acids and alcohol off the heat, at the very end, below 160°F (70°C). For lemon custard, use a starch-stabilized pastry cream (below) — starch physically blocks protein clumping and buys real insurance. If acid already split it, the blender-and-strain rescue still works for mild cases.

    4. You needed a sturdier custard — pastry cream vs. crème anglaise

    Crème anglaise has no starch — pure egg thickening, delicate. Pastry cream (crème pâtissière) includes cornstarch or flour, which thickens and physically gets between egg proteins so they can’t clump. A starch custard can be boiled a minute or two — in fact it must be, to cook out raw starch taste and deactivate the amylase enzyme in yolks that would otherwise thin it overnight.

    How to tell: You needed a sturdy custard for éclairs, tarts, or trifle layers but made anglaise-style; or your pastry cream thinned in the fridge overnight — that’s amylase, and it needed a full boil.

    The fix: For anything baked, chilled overnight, or mixed with acid, use pastry cream: 500ml milk, 4 yolks, 100g sugar, 30g cornstarch, vanilla. Whisk yolks, sugar, and starch; temper; return to the heat and whisk through the lumpy stage until it boils glossy — 1 to 2 minutes at a full bubble. It looks split when the starch first hits the heat; keep whisking. Strain, press wrap on the surface, chill. (Starch behavior: Why Is My Pie Filling Runny? Starch and Fruit Fixes.)

    5. You held it too long or reheated it — custard has a short fuse

    A finished custard kept warm on the stove keeps cooking — residual heat creeps past the safe zone, and twenty minutes of “holding” does what a boil does in one. Reheating is worse: microwaves heat unevenly, curdling hot spots while the rest stays cool.

    How to tell: Perfect off the heat, grainy after sitting — or split during reheating the next day.

    The fix: Serve promptly or chill fast: bowl, wrap on the surface, fridge within an hour. Reheat gently — double boiler or very low heat, constant stirring, never past 170°F (77°C). Most stirred custards are best at room temp or cold; plan for that.

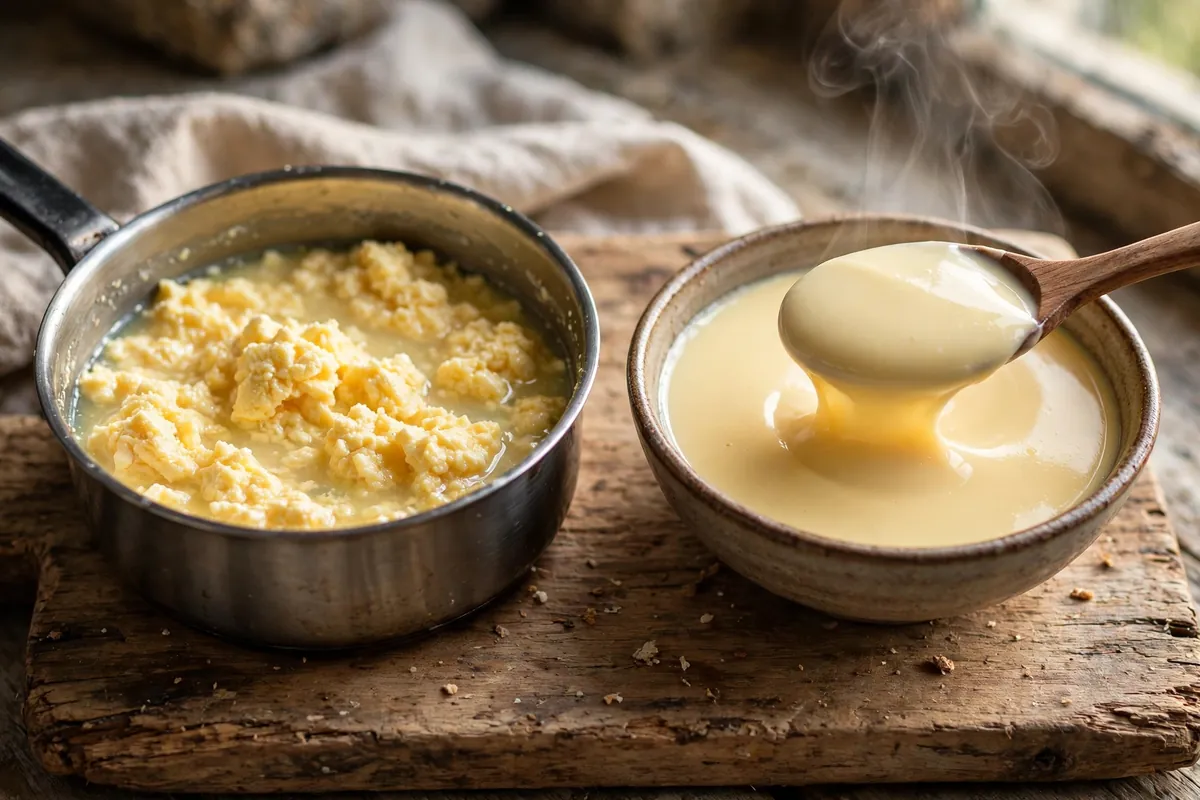
    custard being strained through a fine-mesh sieve into a clean bowl
    custard being strained through a fine-mesh sieve into a clean bowl

    Frequently asked questions

    Is split custard safe to eat?
    Yes — curdling is a texture failure, not a safety one, as long as it was cooked properly and refrigerated promptly. Same rule as any dairy: don’t leave it out more than 2 hours, refrigerate leftovers within an hour.

    Can I fix custard that looks like fully scrambled eggs?
    No — once proteins fully set into distinct curds, no blending makes it silky again. Strain out the solids and repurpose the liquid: still sweet vanilla milk, good for bread pudding or a milkshake base.

    Why did my custard split in the fridge overnight?
    Usually not heat curdling — it’s syneresis, the gel weeping liquid as it sits, or amylase thinning in under-boiled pastry cream. Whisk smooth before serving. If it thinned dramatically, it needed that full boil (see section 4).

    Can I make custard without a thermometer?
    You can, with the nappé test: draw a finger across the back of the dipped spoon — if the line holds, it’s done (about 175–180°F / 80–82°C). But a $15 thermometer removes the guesswork that splits custard.

    Why does my custard taste eggy?
    Overcooking — the sulfurous note comes from yolks held too hot too long. Vanilla and a pinch of salt mask it; next time, pull at 175°F (80°C) sharp.

    Can I freeze custard?
    Stirred custard (anglaise) freezes poorly — it splits on thawing. Starch-based pastry cream freezes acceptably up to a month; thaw in the fridge and whisk vigorously. For anglaise, make it fresh — it takes fifteen minutes.

    Related troubleshooting: How to Fix Curdled Ganache: Emulsion Rescue · How to Fix Broken Buttercream (Curdled, Soupy, Too Sweet) · Why Did My Tres Leches Turn Soggy? Soak Ratios That Work

  • Why Did My Tres Leches Turn Soggy? Soak Ratios That Work

    Why Did My Tres Leches Turn Soggy? Soak Ratios That Work

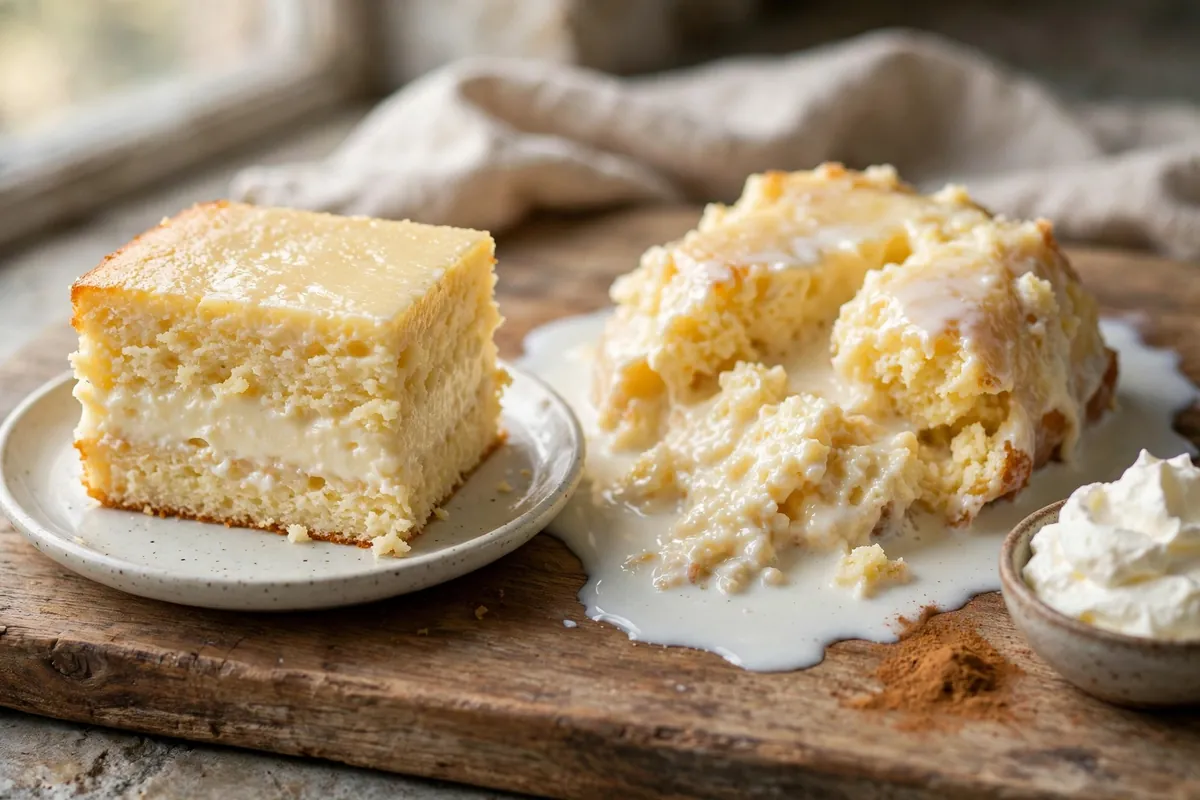
    Tres leches should slice like a cloud and eat like custard — moist to the center, holding its shape, no puddle underneath. When it fails, it’s a sweet, milky swamp. Every waterlogged tres leches traces back to one of five failures: the wrong sponge, too much soak, a rushed pour, not enough rest, or a sugar-heavy soak mix.

    Quick diagnosis: Your tres leches is soggy because the sponge was too dense to absorb the milk (a proper whipped-egg sponge is cause #1), or you used too much soak for the pan. Bake a true sponge, measure about 3½–4 cups of milk mixture for a 9×13-inch cake, pour it in two stages, and rest at least 4 hours — overnight is better.

    My tested baseline, 9×13-inch (23×33 cm): 6 large room-temperature eggs, 200g (1 cup) sugar, 1 teaspoon vanilla, 180g (1½ cups) flour sifted with 1½ teaspoons baking powder and ¼ teaspoon salt, 80ml (⅓ cup) whole milk. Whip eggs and sugar 8–10 minutes to thick ribbon stage — ribbons that sit on the surface for 3 seconds. Fold in the dries in three additions, then the milk. Bake at 350°F (175°C) for 25–30 minutes, until springy and a toothpick comes out clean. Soak: one 12-oz can evaporated milk, one 14-oz can sweetened condensed milk, 1 cup (240ml) heavy cream — roughly 4 cups total.

    1. You baked the wrong cake — a dense crumb can’t absorb the soak

    This is the #1 cause, and it’s structural. A proper tres leches sponge is an egg-foam cake — open, springy crumb that drinks the milk. A butter cake, pound cake, or under-whipped sponge has a tight crumb with nowhere for liquid to go: the milk pools in the pan, the bottom disintegrates, the top stays dry.

    How to tell: The cake felt heavy before soaking; slices show a tight, even crumb rather than an airy sponge; milk pools in the pan corners within an hour of pouring.

    The fix: Whip to a true ribbon stage — don’t stop at “frothy.” Stop folding the moment the last flour streak disappears; every extra stroke deflates the foam and tightens the crumb. (Same foam-structure logic as Why Did My Pavlovas Crack? Meringue Shell Science.)

    2. You drowned it — the soak volume exceeded what the pan could hold

    Even a perfect sponge has a finite appetite. A 9×13 holds about 3½–4 cups of milk mixture; past that, the excess pools at the bottom and turns the lower third into porridge. Some recipes call for 5+ cups — “more milk” feels generous, but the cake can only drink so much.

    How to tell: A pool of milk in the pan that never absorbs, even overnight; bottom slices translucent and falling apart while the top looks fine.

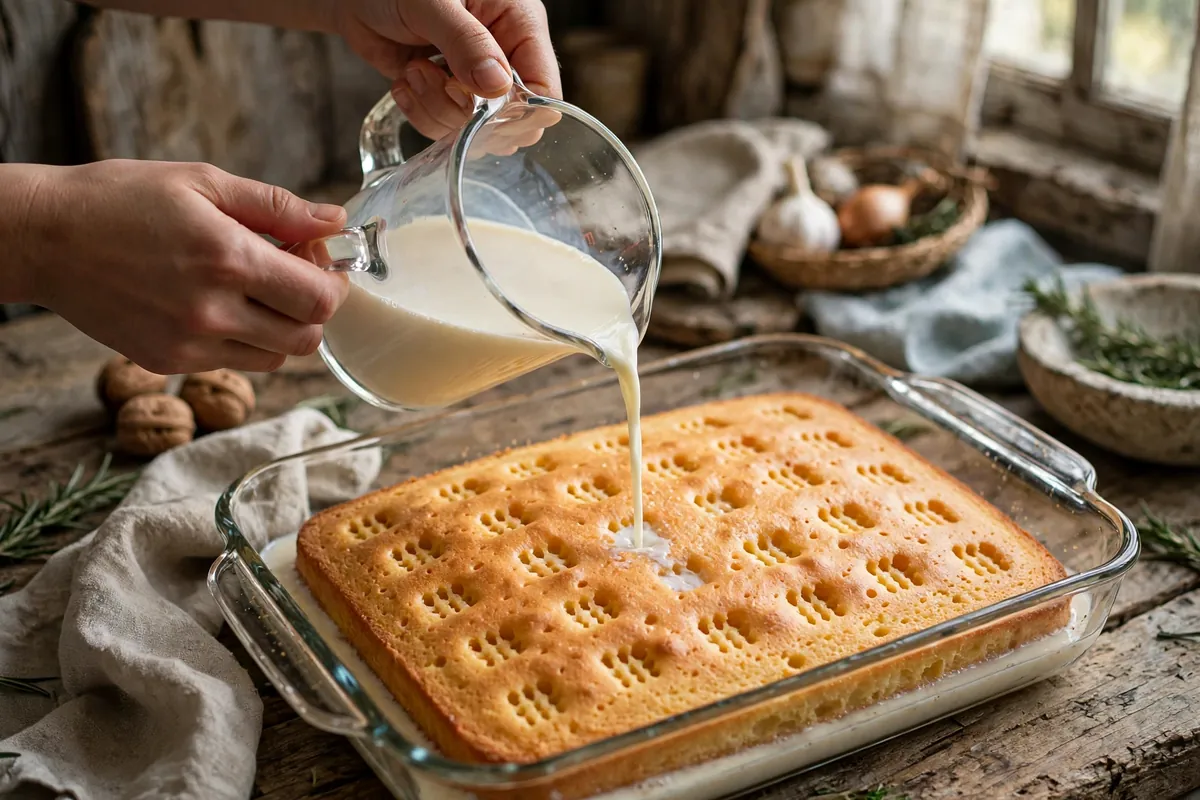
    The fix: Stick to about 4 cups for a 9×13; reserve extra for pouring at the table. Pour in two stages — half, wait 20 minutes, then the rest; the second absorbs far better than one flood.

    hands pouring milk mixture over a poked sponge cake in a glass baking dish
    hands pouring milk mixture over a poked sponge cake in a glass baking dish

    3. You poured it wrong — hot cake, no holes, all at once

    A hot sponge is full of steam — pour cold milk over it and the condensing steam collapses the crumb before the milk soaks in. No holes means the milk sheets off instead of wicking down, and dumping the whole batch at once overwhelms the crumb.

    How to tell: The top looks pale and washed-out, the soak ran off into the pan corners, and the interior is unevenly soaked — wet patches next to dry ones.

    The fix: Cool the cake completely — 30–40 minutes on a rack, still in the pan. Poke all over with a fork, holes an inch apart, nearly to the bottom. Pour slowly in a thin stream across the whole surface, pausing halfway. Room-temperature soak on a cool cake is the sweet spot. (Same even-absorption principle as Overbaked Cake? 5 Rescue Methods That Actually Work.)

    4. You cut it too soon — the milk needs time to become the cake

    Tres leches isn’t done when the milk disappears from the surface. The liquid needs hours to distribute through the crumb and set around the starches — that’s what turns “wet cake” into “custardy cake.” Cut at two hours and you’ll get weeping slices.

    How to tell: The cake looked fine in the pan but released a puddle on the plate within minutes of slicing; the crumb near the cut looks wet rather than custardy.

    The fix: Rest covered in the fridge at least 4 hours — overnight is genuinely better; my overnight cakes sliced with zero weeping, 2-hour cakes always shed liquid. Serve cold, not room temperature. Cut early? Return the pan to the fridge uncovered for an hour — it firms up noticeably.

    a clean slice of tres leches being lifted from the pan, showing set custardy layers
    a clean slice of tres leches being lifted from the pan, showing set custardy layers

    5. Your soak mix was too heavy on condensed milk

    Sweetened condensed milk is the flavor backbone, but it’s dense sugar syrup — slow to absorb. A soak that’s mostly condensed milk coats the crumb instead of soaking in, giving a gummy, cloying layer. The evaporated milk and cream carry liquid deep; the condensed milk is the seasoning.

    How to tell: The cake tastes intensely sweet but the center still seems under-soaked; the crumb is sticky and almost candied rather than milky.

    The fix: Keep one can of condensed milk balanced by the evaporated milk and cream. Want it sweeter? Sweeten the whipped cream topping instead of the soak. (For the broader moisture picture, see Why Is My Cake Dry? Moisture Science for Home Bakers.)

    Frequently asked questions

    Can I fix a tres leches that’s already soggy?
    Partly. Pour off pooled liquid; refrigerate uncovered 2–3 hours to firm the crumb. If the bottom has disintegrated, scoop the salvageable cake into glasses with whipped cream and fruit as a tres leches trifle. Nobody will know it was a rescue.

    Is soggy tres leches safe to eat?
    The sogginess itself is harmless — just excess milk. The risk is temperature: the soak is dairy, so refrigerate the cake and don’t leave it out more than 2 hours. Sat out all afternoon at a party? Discard it.

    Why is my tres leches dry in the middle instead?
    Usually too little soak, or a cake that wasn’t poked enough for the milk to reach the center. Next time, poke deeper holes and pour in two stages. Rescue a dry one by warming a cup of soak mixture and spooning it over individual slices.

    Can I use a boxed cake mix for tres leches?
    You can — many bakeries do. Pick plain white or yellow mix and reduce the soak by half a cup, since box mixes absorb less. Add the milk in stages and stop when the surface stays glossy instead of pooling.

    Can I make tres leches two days ahead?
    Yes — it improves on day two as the soak fully sets. Keep covered in the fridge up to 3 days. Add whipped cream on serving day, or it weeps into the cake. Freezing is a last resort; thawed tres leches is never as good.

    Why did my tres leches crack on top?
    The sponge overbaked — the top dried hard, then cracked as the interior absorbed liquid and expanded. Bake to just-done (toothpick clean, top springy) rather than deeply golden.

    Related troubleshooting: How to Fix a Split Custard (And Why It Curdled) · Why Is My Banana Cake Gummy? Mixing and Moisture Fixes