Author: Ali Ramzan

  • Why Did My Danish Braid Leak? (Sealing & Filling Fixes)

    Why Did My Danish Braid Leak? (Sealing & Filling Fixes)

    A leaking Danish braid is a containment failure with three usual suspects: filling too wet (it boils and forces its way out), edges poorly sealed (it finds the gap), or dough too warm going into the oven (butter layers melt before the structure sets). Fix all three and the filling stays put.

    Quick diagnosis: Your filling was too wet or too abundant (most common), the braid edges weren’t sealed with egg wash and a firm pinch, or you skipped the pre-bake chill. Fix: thicken fruit filling with cornstarch until a spoon stands in it, seal every seam with egg wash, chill the shaped braid 20–30 minutes before baking.

    My tested baseline: dough from 500g bread flour, 7g instant yeast, 60g sugar, 1 tsp salt, 250ml cold milk, 1 egg, 280g cold butter laminated in with 3 letter folds and 30-minute chills between. Filling: 300g frozen cherries cooked with 60g sugar and 2 tbsp cornstarch until a spoon stands upright, cooled completely. Shaped braid, egg-washed seams, chilled 25 minutes, baked at 375°F (190°C) for 25 minutes to deep golden.

    1. The filling was too wet — boiling fruit blows out the seams

    Wet filling is the number-one leaker. In a 375°F (190°C) oven, excess liquid turns to steam and boils — pressurized liquid looking for an exit. It finds your weakest seam, forces it open, and erupts onto the pan, where the sugars burn black.

    How to tell: The leaked material spread wide and burned dark; the filling inside tastes good but loose; you used fresh juicy fruit, thin jam, or un-thickened pie filling.

    The fix: The filling must be thick enough that a spoon stands upright in it when cool. Cook fruit down with sugar, thicken with 1–2 tbsp cornstarch per cup of fruit — full boil for 1 minute to activate the starch — then cool completely before filling. (Warm filling melts the dough’s butter layers on contact.) Thick jam from a jar is the safe lazy option.

    2. The seams weren’t sealed — egg wash is the glue

    A braid looks sealed when merely folded, but oven heat is a lie detector: any seam held by hope alone springs open as the dough puffs. Without an adhesive, layers separate exactly where you need them joined.

    How to tell: The leak came from a specific seam or end that visibly opened; the filling’s consistency is fine.

    The fix: Brush every seam and edge with beaten egg wash before pressing — egg is the glue. Press firmly, crimp or fold edges under, and pinch again. Tuck both ends tightly underneath; ends are the most common blowout point. Rest the shaped braid 10 minutes so the egg wash gets tacky before chilling.

    3. You skipped the chill — warm dough can’t hold anything

    Danish is laminated dough: alternating layers of dough and solid butter. If the shaped braid goes in warm, the butter melts before the starches set — layers fuse, the braid slumps, and the filling pours out of the collapsing structure. The chill is structural, not optional.

    How to tell: The braid spread flat and wide instead of baking tall; butter pooled on the pan; layers look merged, not flaky.

    The fix: Chill the shaped braid 20–30 minutes in the fridge (10–15 in the freezer) until firm and cold to the touch. Bake straight from the fridge into a fully preheated 375°F (190°C) oven. Cold butter hitting hot air makes steam between layers — that’s the flakiness — while the dough sets around the filling. Same lamination discipline as dense croissants.
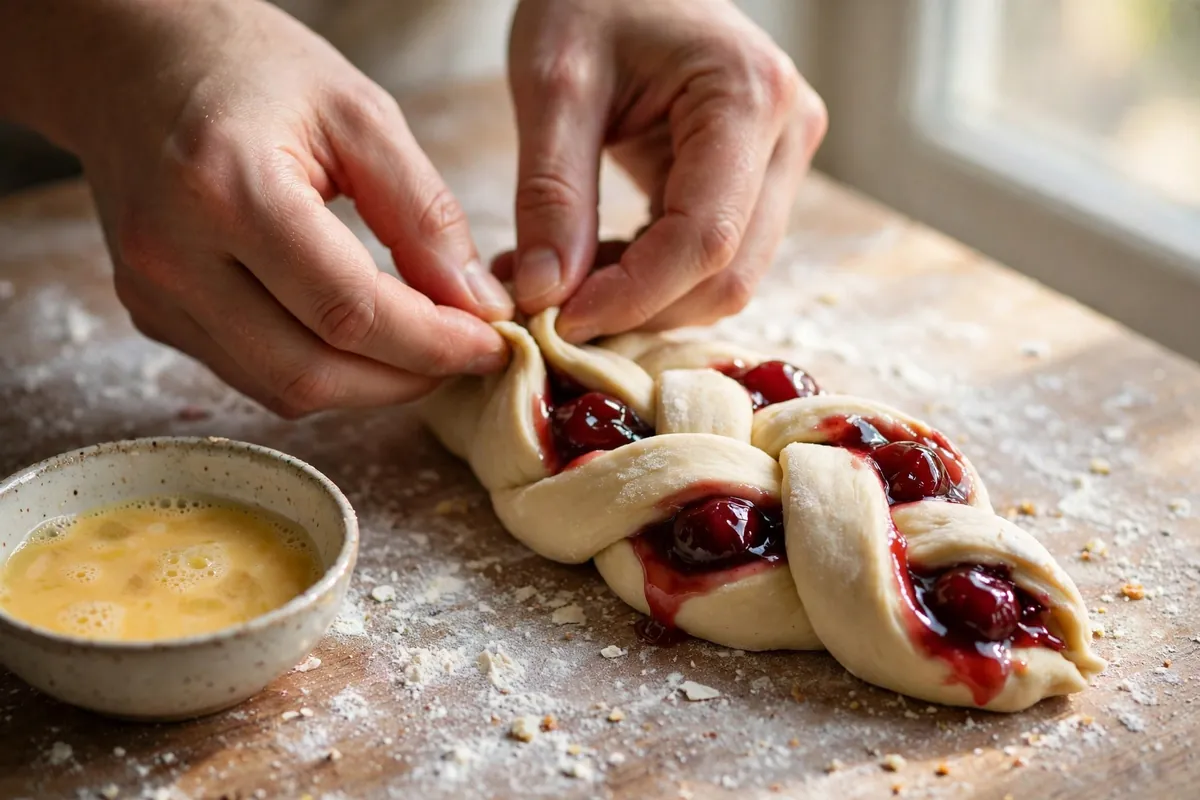
    hands tucking and pinching the end seam of a filled Danish braid closed, small bowl of egg wash nearby
    hands tucking and pinching the end seam of a filled Danish braid closed, small bowl of egg wash nearby

    4. You overfilled it — there has to be room to seal

    A braid has fixed capacity: overfill and the seams can’t close over the mound, the dough can’t contain the volume as it puffs, and the excess has nowhere to go but out.

    How to tell: Filling mounded above the dough before braiding; seams wouldn’t meet without stretching.

    The fix: About 1 to 1¼ cups of filling per large (12-inch) braid — a generous layer down the center with a 1-inch border of bare dough on all sides for sealing. Doubling filling “for flavor”? Make two braids instead. The border is sacred: it’s what the egg wash glues to.

    5. The vents were cut too deep — slashes became escape hatches

    Top slashes vent steam — but cut through to the filling and you’ve built it a chimney. Filling bubbles up through deep cuts exactly as it would through a failed seam.

    How to tell: Filling erupted through the top slashes rather than the seams; the cuts look deep and wide after baking.

    The fix: Slash shallow — just the top dough layer, 3–4mm, never into the filling. The braid’s natural gaps already vent plenty of steam; extra slashes are decorative, so keep them cosmetic.

    6. The oven was too hot — violent boiling vs gentle bubbling

    Above 400°F (200°C), filling doesn’t just bubble — it boils violently, and violent boiling finds exits. Danish needs heat high enough to set the laminated structure fast, but not so fierce the filling erupts.

    How to tell: The braid browned very fast while the filling exploded; the oven was above 375°F (190°C); leaked filling looks scorched.

    The fix: Bake at 375°F (190°C) — verified with a thermometer — middle rack, 20–25 minutes to deeply golden. If the top colors early, tent with foil rather than pulling early; underbaked Danish has a doughy layer under the filling, a cousin of the soggy galette problem.

    Can you fix a leaked Danish braid after the fact?

    The filling can’t go back in, but the braid is rarely ruined. While warm, trim blackened, bitter bits with a knife or shears — scorched sugars taste acrid. Dust generously with powdered sugar: it hides a multitude of sins and looks intentional. Serve warm — a warm Danish with a little escaped filling reads as “rustic,” especially with coffee.
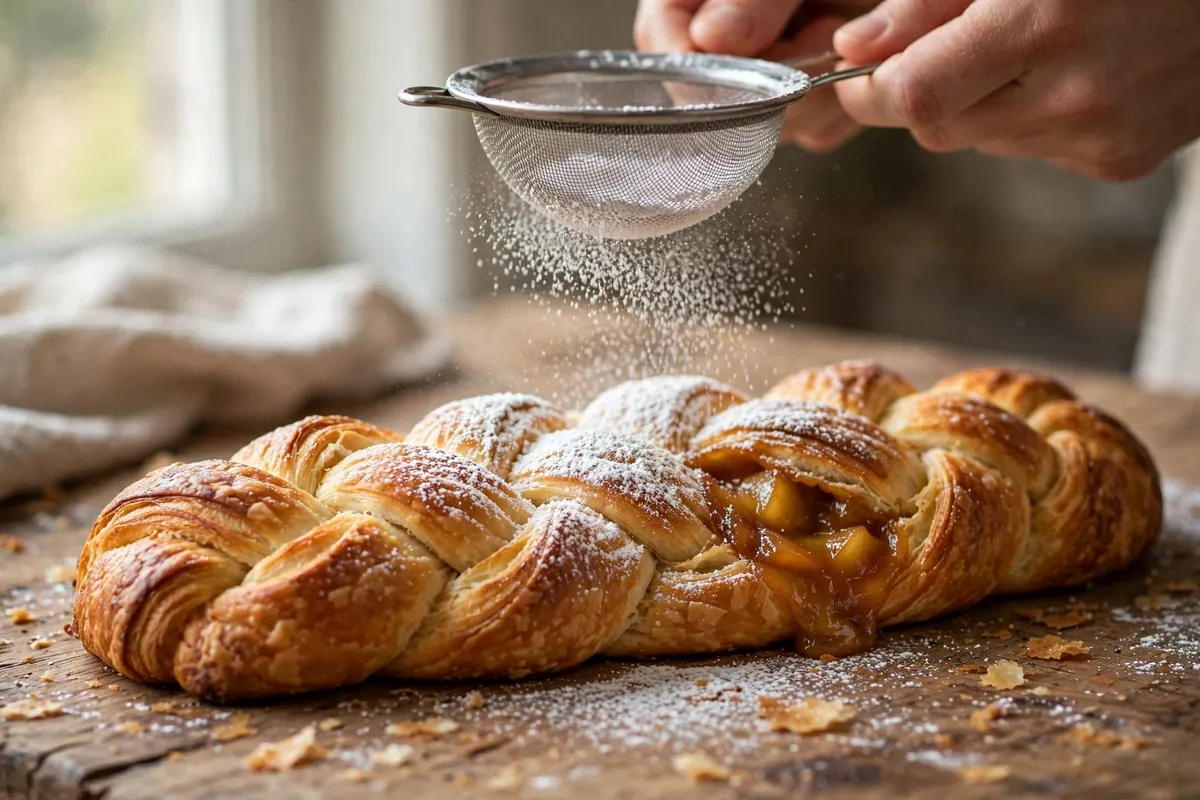
    baked Danish braid with a little golden filling at one seam, being dusted with powdered sugar
    baked Danish braid with a little golden filling at one seam, being dusted with powdered sugar

    FAQ

    Is it safe to eat a Danish braid that leaked?
    Yes — leaked filling is just baked fruit and sugar. Trim any blackened, bitter bits; the rest is delicious.

    Why did my Danish braid leak cream cheese filling?
    The filling was too loose. Use full-fat block cream cheese (never tub spread), an egg yolk to set it, minimal sugar. If it pours rather than mounds, add another yolk or 1 tbsp flour.

    Should Danish dough be cold going into the oven?
    Yes — firm and cold after 20–30 minutes in the fridge. Cold laminated dough in a hot oven is the mechanism of flakiness; warm dough is the mechanism of leaks.

    Can I use canned pie filling?
    Yes — it’s pre-thickened, one of the safest options. If it’s loose in the can, simmer 5 minutes with 1 tbsp cornstarch per cup and cool before using.

    Why did my braid unravel as well as leak?
    Under-sealed seams plus no chill: strands weren’t glued with egg wash and warm dough relaxed open. Seal with egg wash, tuck ends under, chill before baking — the same fixes solve both. (See also cinnamon rolls and rugelach.)

    How do I keep the bottom from getting soggy?
    Bake on a preheated sheet or stone so the base sets fast, don’t overfill, and keep the filling thick — watery filling soaks the base. A dusting of flour or fine breadcrumbs under the filling absorbs stray moisture.

    Related troubleshooting: Why Did My Croissants Come Out Dense? Lamination Fixes · Kouign-Amann Troubleshooting: Leaked Butter and Burnt Sugar, Fixed · Galette Troubleshooting: Soggy, Leaky, Cracked (Free-Form Pie Fixes)
  • How to Fix Overwhipped Cream (Before It Becomes Butter)

    How to Fix Overwhipped Cream (Before It Becomes Butter)

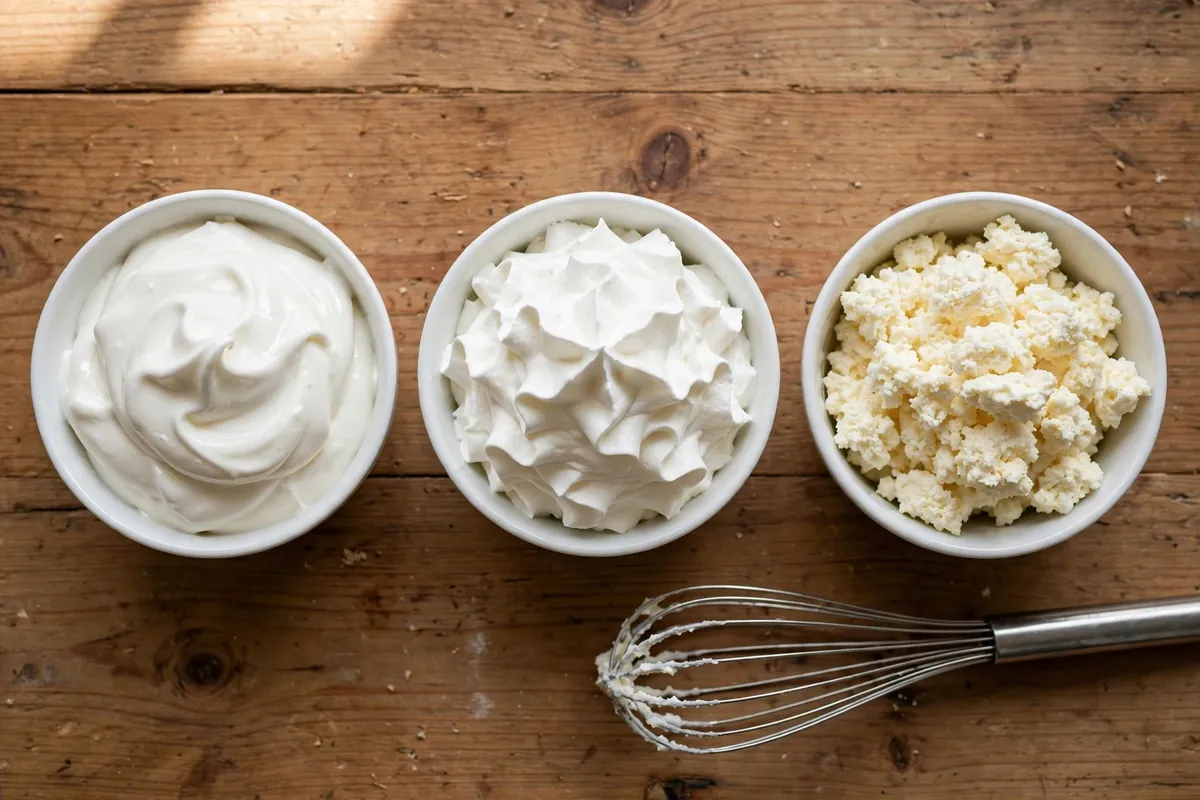
    Overwhipping happens in seconds. One moment you have glossy soft peaks, you turn to grab the vanilla, and you come back to something grainy and sad. The good news: truly overwhipped cream is rare. Most of what looks ruined is just over-stiff, and it can be rescued in under a minute. The fix is almost embarrassingly simple — more cream.

    Quick diagnosis: If it’s just grainy and stiff but still one mass, fold in 1–2 tablespoons of cold unwhipped cream per cup and stop the moment it’s smooth — rescued. If liquid has visibly separated out and yellow clumps are floating in it, that’s butter now; make compound butter instead.

    My tested baseline: 1 cup (240ml) heavy cream, minimum 36% fat, straight from the fridge. Whip with 2 tablespoons powdered sugar added at the soft-peak stage. It goes: soft peaks (2–3 min) → medium peaks (30 sec later) → stiff peaks (another 30 sec) → grainy (15 sec past stiff) → butter (30–60 sec past stiff).

    1. Understand what went wrong — the emulsion broke

    Whipped cream is a foam: air bubbles trapped in a network of partially coalesced fat globules, all suspended in water. Whipping builds that network. Overwhipping keeps building it past the point of usefulness — the fat globules clump too tightly, squeeze out the water between them, and the foam collapses into curds. Push further and the clumps merge completely: butterfat separates from buttermilk, and you have sweet butter.

    Still one mass but grainy = fixable. Yellow lumps in thin liquid = butter now.

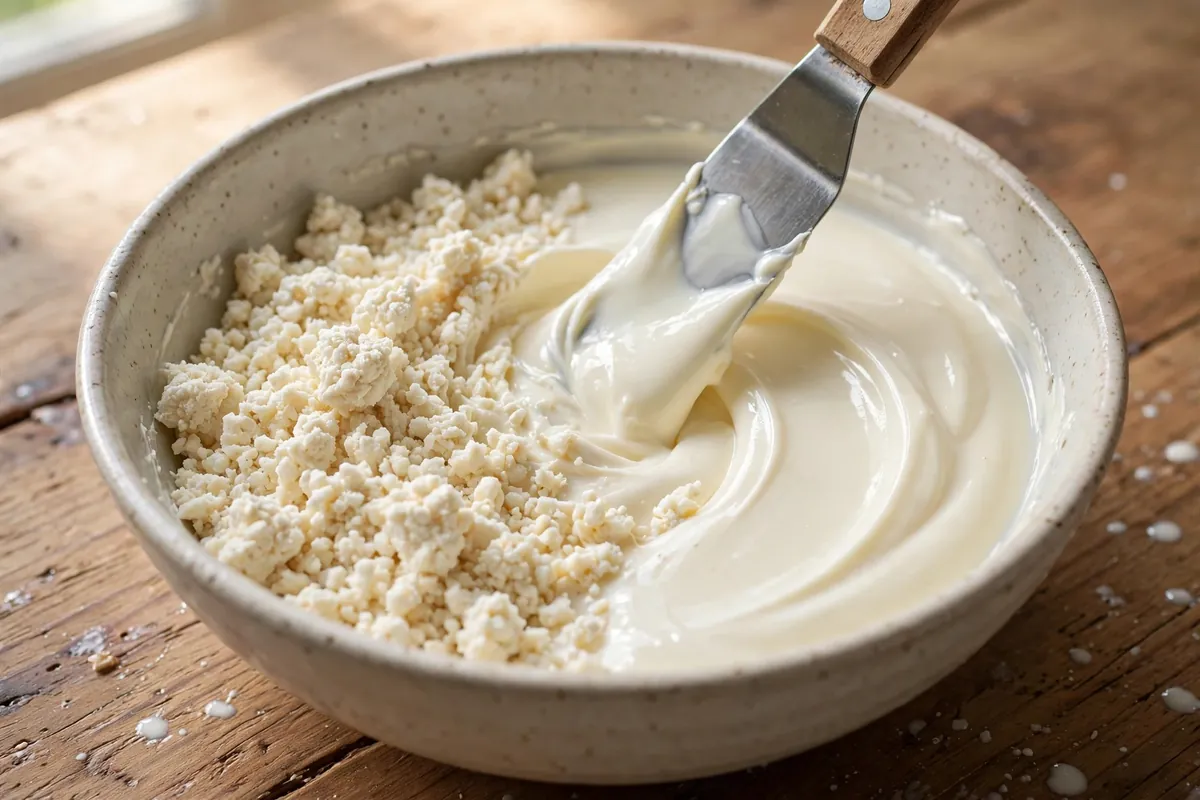
    The fix for the fixable stage: Stop the mixer immediately. Pour 1–2 tablespoons of cold unwhipped heavy cream over the surface per cup of whipped cream, and fold gently with a spatula — not the mixer — until just smooth. The fresh liquid cream reintroduces the water phase and loosens the over-tightened fat network. Fold a few strokes, check, and repeat — it looks hopeless until it suddenly comes right. Stop the instant it’s smooth; every extra fold heads back toward butter.

    2. Know when it’s officially butter — and pivot

    If liquid has pooled and the solids have gone distinctly yellow and clumpy, folding in cream won’t re-emulsify it — the fat has fully coalesced. This is not a failure; it’s just an unplanned product change. You’ve made sweet cream butter, which is genuinely good.

    How to tell: Thin milky liquid (buttermilk) visibly separated from yellow clumps; no amount of gentle folding brings it back together.

    The fix: Keep the mixer running 1–2 minutes more until fully separated. Rinse the butter under cold water, kneading gently to wash out remaining buttermilk. Knead in a pinch of salt, shape, and refrigerate. (Save that real buttermilk for Why Is My Carrot Cake Dense? — oil cakes love it.)

    3. Prevent it — the last 60 seconds are everything

    Overwhipping is a vigilance problem, not a skill problem. Cream whips slowly for minutes and then changes state in seconds. Every overwhipped bowl I’ve ever made happened because I walked away, answered a message, or assumed I had more time than I did.

    How to tell you’re entering the zone: The whisk starts leaving distinct trails, the surface goes from glossy to matte, and the cream looks slightly rough instead of silky.

    The fix: Whip on medium, not high, for the last minute. Stop at medium-firm peaks for most uses; cream firms up slightly as it sits, and stiff peaks at the mixer become over-stiff on the cake. When in doubt, stop 30 seconds early and finish the last few strokes by hand with a whisk — hand-whisking gives you instant feedback no mixer can. Cold cream, bowl, and beaters (10 minutes in the freezer) whip faster and more evenly.

    4. Sweeten at the right moment — sugar timing matters

    Adding granulated sugar at the start slows whipping slightly and gives you a wider window — but add it too early in large amounts and it weighs down the foam. Powdered sugar, with its cornstarch, lightly stabilizes the finished cream and buys you a little insurance against both overwhipping and weeping.

    How to tell it mattered: Cream sweetened from the start took noticeably longer to reach peaks (more control); cream with powdered sugar held its shape hours longer in the fridge.

    The fix: My standard: start whipping plain cream, add 2 tablespoons powdered sugar per cup at the soft-peak stage, add vanilla then too.

    hands folding a spoonful of liquid cream into grainy overwhipped cream with a spatula, mid-rescue
    hands folding a spoonful of liquid cream into grainy overwhipped cream with a spatula, mid-rescue

    5. Don’t try to fix it with the mixer — folding only

    The instinct when cream goes grainy is to keep beating, hoping it smooths out. It never does — the mixer is what broke the emulsion, and more mixer only drives it further toward butter.

    How to tell: Cream that was grainy-but-whole became visibly separated and yellow after “just a few more seconds” of beating.

    The fix: Mixer off, spatula in hand. Fold the rescue cream in with 4–6 gentle strokes, assess, and repeat if needed. If you’re making frosting or a folded dessert, slightly under-rescue: the cream will get more agitation when you fold it into the other components.

    6. Choose the right cream — fat percentage is your safety margin

    This is the quiet variable. “Heavy cream” at 36–40% fat whips fast, holds peaks proudly, and overwhips in a blink. “Whipping cream” at 30–36% whips more slowly, makes softer peaks, and forgives inattention — but never gets as firm.

    How to tell: Your cream raced to stiff peaks in under 2 minutes (high fat, narrow window) or took forever and stayed soft (lower fat, wide window).

    The fix: For beginners or multitaskers, 35%-ish whipping cream is the forgiving choice. For piping and layer cakes that must hold, 38–40% heavy cream — but stay at the mixer for the entire last minute. Check the label: anything below 30% fat won’t whip at all.

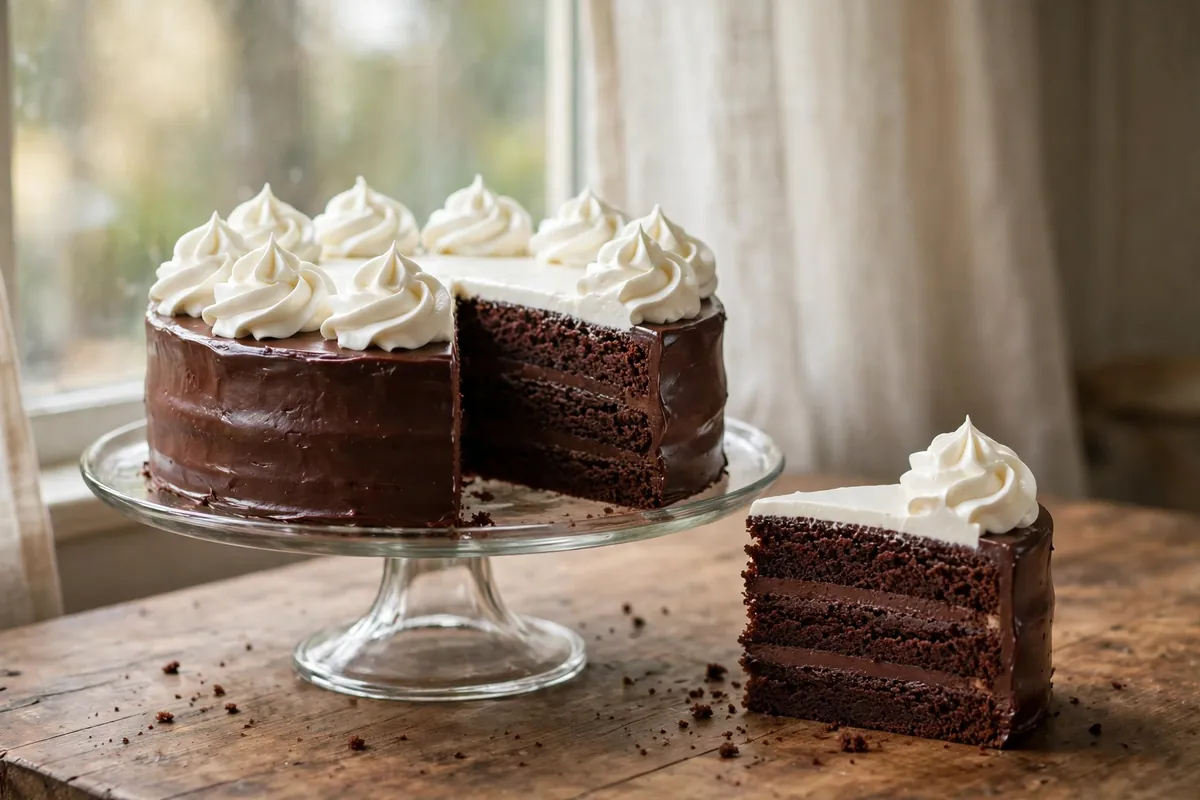
    piped rosettes of perfectly rescued whipped cream on a chocolate cake, glossy and smooth
    piped rosettes of perfectly rescued whipped cream on a chocolate cake, glossy and smooth

    Frequently asked questions

    Is overwhipped cream safe to eat?
    Yes, completely. It’s the same cream, same fat, just a different structure. Grainy cream tastes fine — the issue is texture, not safety. Even fully separated butter and buttermilk are perfectly safe.

    How can you tell the exact moment to stop whipping?
    Watch the surface: glossy and smooth with soft folds = keep going; trails holding their shape with a slight sheen = medium peaks, stop here for most uses; matte, rough, and craggy = you’ve gone 15 seconds too far — rescue immediately.

    Can I re-whip cream that turned to butter back into whipped cream?
    No. Once the fat has fully coalesced and the buttermilk separated, the emulsion can’t be rebuilt by beating. Make butter, and start a fresh batch of cream.

    Why does my whipped cream weep liquid after a few hours?
    That’s a different problem — under-stabilized cream, not overwhipped. The foam slowly releases water as it sits. Fix it next time with powdered sugar (the cornstarch helps) added at soft peaks, and keep the finished cream refrigerated.

    Can I use overwhipped cream in frosting?
    Grainy cream makes grainy frosting. Rescue it first with the fold-in method until smooth, then use it — or fold the rescued cream into a fresh batch whipped to proper peaks. Your Fix Broken Buttercream: Emulsion Rescue Guide uses the same principle: gentle re-emulsification beats force.

    Related troubleshooting: Fix Broken Buttercream: Emulsion Rescue Guide · Why Does My Frosting Taste Like Butter? · How to Fix Curdled Ganache

  • Galette Troubleshooting: Soggy, Leaky, Cracked (Free-Form Pie Fixes)
    Galette Troubleshooting: Soggy, Leaky, Cracked (Free-Form Pie Fixes)

    The galette is supposed to be the forgiving pastry — no pie plate, no crimping. Until it isn’t: juice pooling where the bottom crust should be, fruit leaking through the folds, a crust cracking like dry earth. All three have mechanical causes and fixes — a galette is a pie without a pan, so every problem is moisture management and dough handling.

    Quick diagnosis: Soggy bottoms mean the filling’s juice never got hot enough, fast enough — bake on a preheated steel at 400–425°F (200–220°C) with a thickener. Leaks mean the folds weren’t overlapped and sealed. Cracks mean the dough was too cold or too dry when folded.

    Soggy bottom: the filling steamed the crust

    A galette bottom goes soggy when fruit juice pools under the dough faster than heat drives it off — the dough boils in fruit syrup instead of crisping.

    Why it happens: Oven not hot enough, galette launched onto a room-temperature sheet (which insulates the bottom), juicy fruit with no thickener, or the assembled galette sat before baking while fruit macerated into raw dough.

    The fixes, in order of impact:

    1. Bake on a preheated steel or stone. The single biggest upgrade. A 45-minute preheat at 425°F (220°C) means the bottom hits screaming heat on landing — the crust sets before juice soaks in. A preheated dark heavy sheet is the budget version. Never launch onto a cool sheet.
    2. Thicken the filling. Toss fruit with 1–2 tablespoons cornstarch (or 2–3 of flour) plus sugar. The starch must actually boil to gel — another reason the hot oven matters. You want the filling visibly bubbling in the center, not just at the edges.
    3. Add a moisture barrier. A thin layer of frangipane, fine breadcrumbs, or semolina under the fruit absorbs juice from below while adding flavor. The French bakery trick is frangipane; the farmhouse trick is breadcrumbs.
    4. Assemble and bake immediately. Once fruit hits raw dough, juice migrates instantly. Have the oven fully preheated and the steel screaming hot before you roll out the dough.

    Done looks like: the bottom is golden-brown and crisp when you lift an edge — not pale, floppy, or translucent.

    Leaking: the folds weren’t a seal

    Juice escaping through the folds and caramelizing into a bitter puddle is a construction failure. Galette folds look casual but do structural work — they’re all that stands between a pound of juicy fruit and your oven floor.

    Why it happens: Folds too small or barely overlapping, no egg-wash seal, fruit piled too close to the edge, or the galette went in warm so the folds slumped open.

    The fixes:

    1. Fold generously and overlap. Leave a full 2-inch border, fold up and over in pleats overlapping at least an inch, like shingles. Skimpy half-inch folds look rustic and leak like sieves.
    2. Egg-wash the folds into place. Brush the border with beaten egg, press each pleat to seal — the proteins glue layers as they bake — then egg-wash the whole border for color.
    3. Chill before baking. Fifteen to twenty minutes in the refrigerator firms the butter so folds hold instead of slumping in the oven’s first minutes. Cold dough, hot oven — the eternal pastry rule.
    4. Pile, don’t spread. Mound fruit tall in the center rather than flat toward the edges — less fruit pressing against the folds, gravity working with you.

    Leaking mid-bake? Don’t open the oven — the temperature drop worsens sogginess. Let it finish; a leaked galette still tastes excellent.

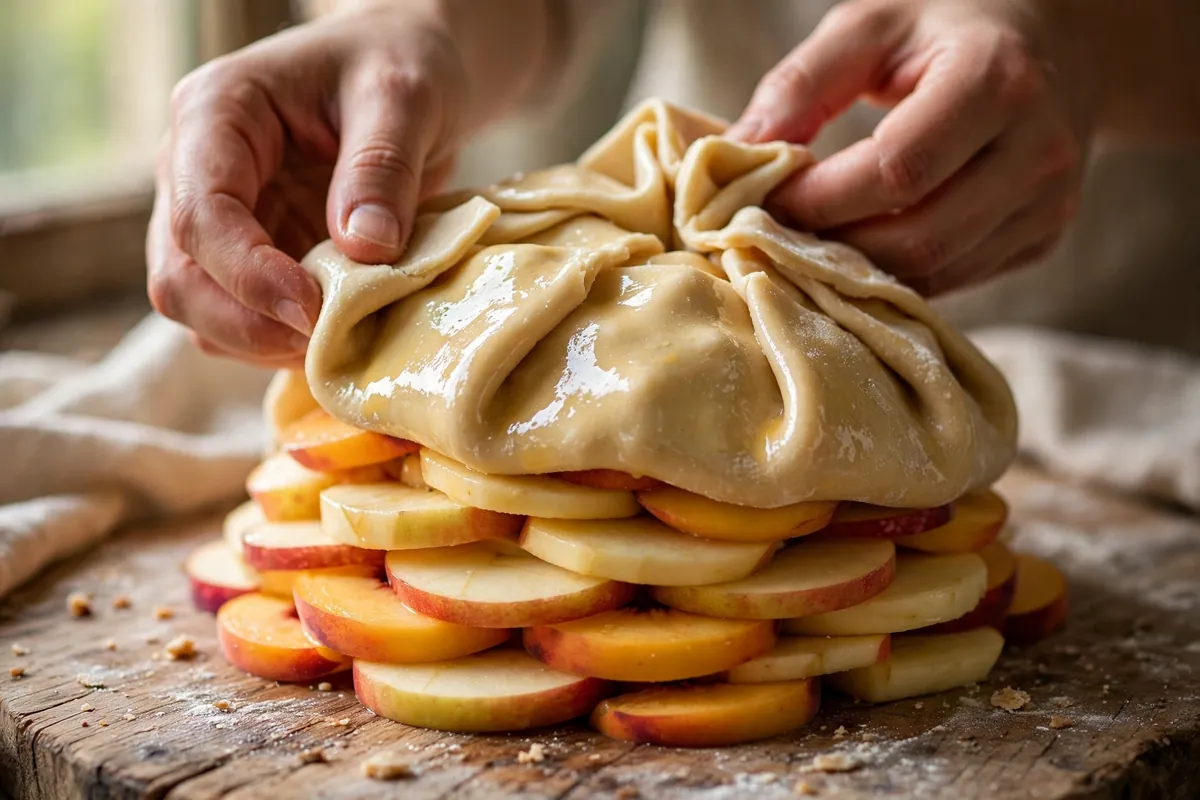
    hands folding a galette edge in overlapping pleats over mounded fruit
    hands folding a galette edge in overlapping pleats over mounded fruit

    Cracked crust: dough too cold, too dry, or both

    Cracks in the folded border are a dough-condition problem. Pastry cracks when bent cold (rigid butter, no pliability) or when too dry (too little water to hold flour together under stress). The fold is the highest-stress point, so weakness shows there.

    Why it happens: Rolled and folded straight from the refrigerator, under-hydrated from the start, or dried out during rolling (too much bench flour, too long on the counter).

    The fixes:

    1. Temper before folding. Let the rolled dough sit 5–10 minutes at cool room temperature until pliable — if edges crack when lifted, it’s still too cold. Don’t let it go warm and greasy; there’s a window, and you’ll feel it.
    2. Patch, don’t panic. Press a dough scrap over the crack with a dab of water as glue, smooth with a finger, egg-wash over it. After baking the patch is invisible — pros patch galettes constantly.
    3. Hydrate properly next time. Chronically cracking dough needs slightly more water — it should just hold together when squeezed, no dry crumbly bits. A teaspoon of vodka or vinegar replacing water also helps: less gluten forms, so the dough stays tender and pliable. Rest a full hour (or overnight) after mixing so flour fully hydrates.

    The bake: hot, bottom-heavy, patient

    Oven at 400–425°F (200–220°C) — 425°F (220°C) for juicy fruit, 400°F (200°C) for delicate — steel preheated 45 minutes, galette assembled fast and chilled 15 minutes, baked 35–45 minutes until the filling bubbles visibly in the center and the crust is deeply golden. The bubbling center is your doneness signal, not the timer: starch-thickened juice must boil to set. Tent the edges with foil if they brown too fast.

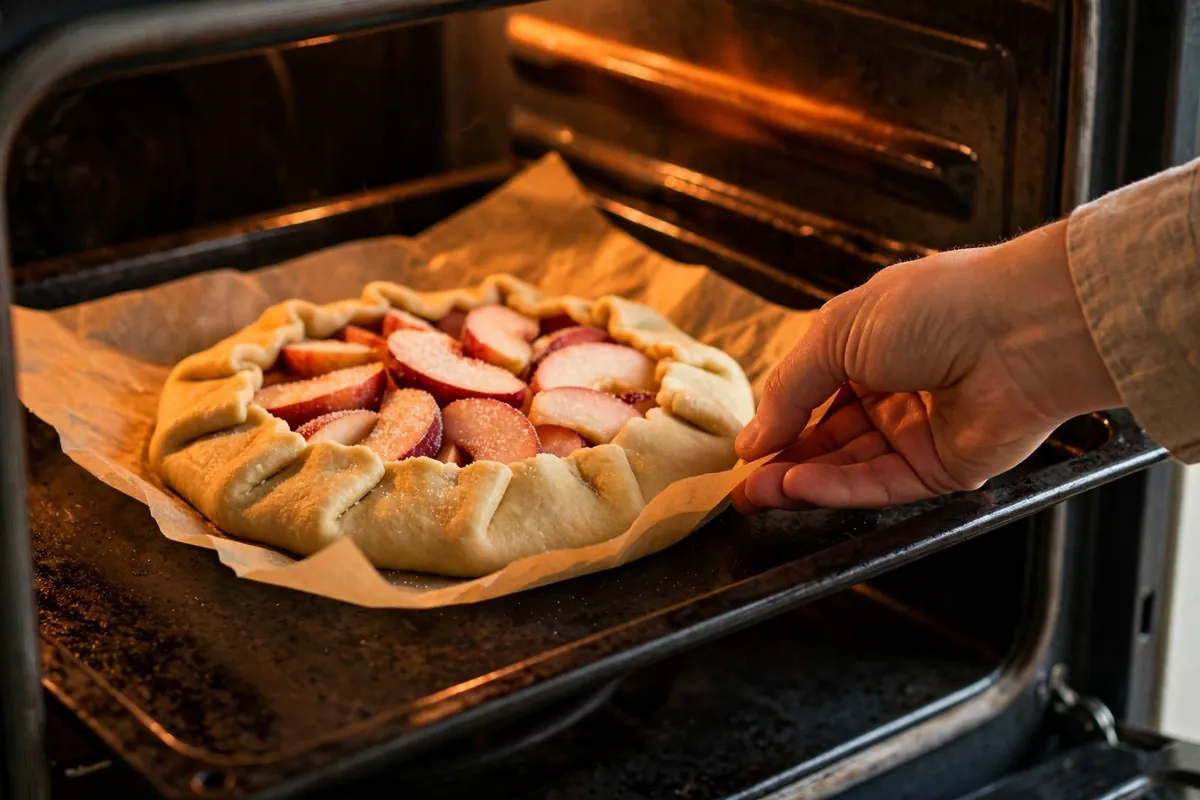
    galette on a preheated steel going into a hot oven
    galette on a preheated steel going into a hot oven

    What about the failed galette on your counter?

    A soggy galette is still safe and delicious warm — serve in bowls with juices spooned over like a pandowdy. Trim bitter burnt-juice bits off a leaker; serve a cracked one with confidence, since cracks are cosmetic. Every failure reheats well: 10 minutes at 375°F (190°C) re-crisps the bottom noticeably.

    lifting a galette edge with a spatula to show a crisp golden bottom
    lifting a galette edge with a spatula to show a crisp golden bottom

    FAQ

    Is a soggy galette safe to eat?
    Yes — sogginess is texture, not safety, as long as the filling cooked through. Serve warm in bowls with the juices, or re-crisp 10 minutes at 375°F (190°C).

    Can I fix a galette that’s leaking in the oven?
    Mostly no — opening the door drops the temperature and worsens the accompanying sogginess. Let it finish, then trim bitter burnt-juice bits before serving. Prevent it with generous overlapping folds sealed in egg wash and a 15-minute chill before baking.

    Why did my galette dough crack when I folded it?
    Too cold or too dry. Cold butter makes pastry rigid — temper the rolled dough 5–10 minutes until pliable. Chronically cracking dough needs slightly more water, or a spoonful of vodka/vinegar replacing water for tenderness. Patch cracks with scraps and water; they bake invisible.

    How do I stop fruit making my galette soggy?
    Four defenses: preheated steel or stone at 425°F (220°C), 1–2 tablespoons cornstarch tossed with the fruit, a frangipane or breadcrumb moisture barrier, and assembling right before baking. The preheated steel is the single biggest fix.

    Can I make galette dough ahead?
    Yes — up to 3 days refrigerated or 3 months frozen; the rest improves pliability as flour hydrates. Thaw overnight in the fridge, temper 10–15 minutes before rolling so it folds without cracking.

    What temperature do I bake a galette at?
    400–425°F (200–220°C): 425°F (220°C) for juicy berries and stone fruit, 400°F (200°C) for apple or pear. Bake 35–45 minutes until the filling bubbles in the center — that bubbling is the doneness signal, since the starch must boil to set.

    Related troubleshooting: Soggy Bottom Pie? How to Get a Crisp Base Every Time · Pie Crust Shrinking in the Oven · Why Did My Éclairs Collapse? Choux Pastry Science

  • Why Is My Banana Bread Dense? Quick Bread Fixes

    Why Is My Banana Bread Dense? Quick Bread Fixes

    You sliced into the loaf expecting a tender crumb and got something closer to a brick — heavy, tight, maybe gummy in the middle. Banana bread is a quick bread, so the rules differ from yeasted bread: no gluten network to blame, just batter chemistry. Six causes explain nearly every dense loaf, in this order.

    Quick diagnosis: Dense banana bread is overmixed batter first, too much banana second, and dead leavening third. If you stirred the batter until it was smooth, used four or five bananas, or your baking soda has been open since last year — you’ve found it. Fix those three and the next loaf comes out tender.

    1. The batter was overmixed

    The number one cause, by a wide margin. Banana bread batter contains flour and liquid, and the moment they meet, gluten starts forming. Stir too long and you build a strong gluten network — exactly what you want in bread, exactly what ruins a quick bread. The crumb turns tough, dense, and rubbery.

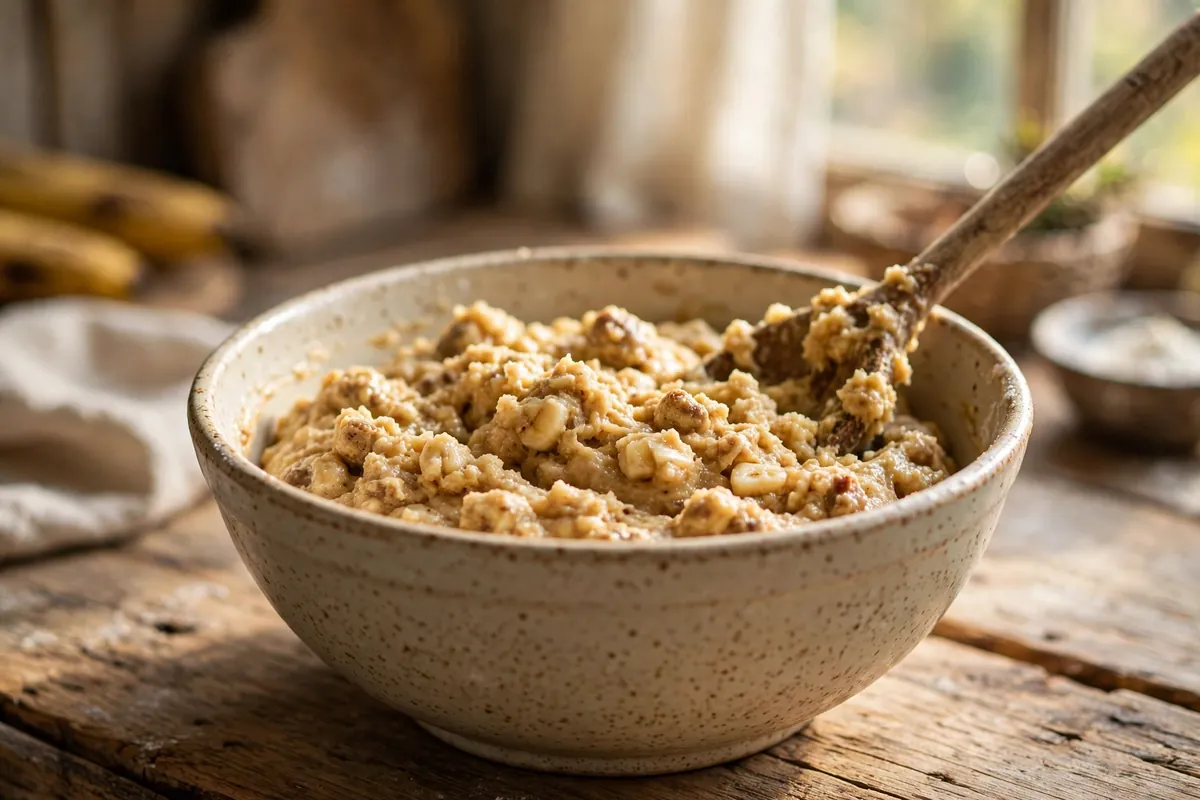
    How to tell: The batter looked smooth and stretchy rather than lumpy, and the baked loaf has a tough, chewy texture with tunnels running through it.

    The fix: Stir until the flour just disappears — 10 to 12 strokes with a spatula, no more. Lumps are not the enemy here; they’re proof you stopped in time. Mix the wet and dry ingredients in separate bowls first, then combine with a light hand. This single habit fixes more dense banana bread than everything else on this list combined. (The same principle wrecks muffins — see Why Are My Muffins Tough?.)

    2. Too much banana

    Banana bread needs banana — but there’s a ceiling. Three medium bananas (about 1 to 1¼ cups mashed) is the sweet spot for a standard 9×5 loaf. Push past that and the extra moisture and weight overwhelm the batter’s structure: the crumb can’t set around all that wet fruit, so it bakes up dense and gummy, especially in the center.

    How to tell: You used four, five, or “however many were going brown.” The center of the loaf stayed wet-looking even after a full bake, and the texture is heavy rather than just moist.

    The fix: Measure the mash — 1 to 1¼ cups. If you have extra bananas, freeze them for smoothies instead of cramming them into the batter. And use them very ripe: black-spotted, soft, fragrant. Under-ripe bananas add starch without the sugars that make banana bread taste like banana bread.

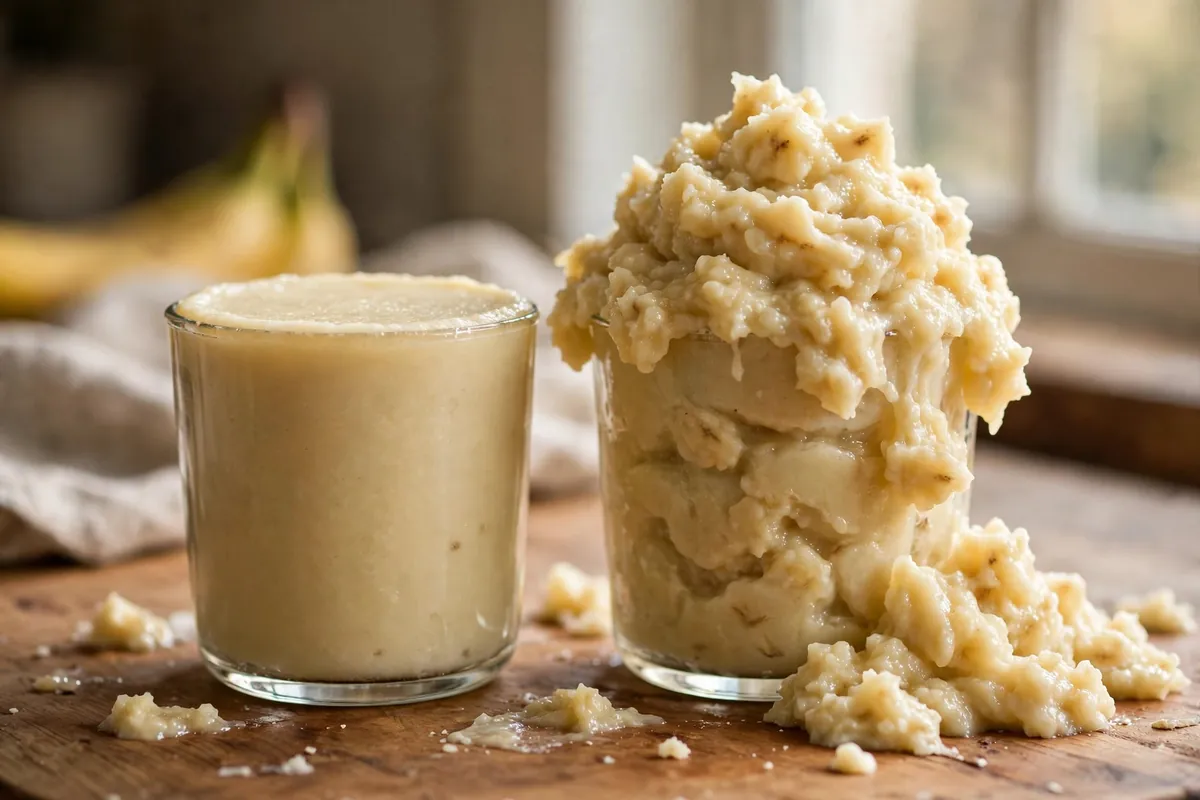
    measuring mashed banana in a cup measure — 1 cup level vs an overflowing heap
    measuring mashed banana in a cup measure — 1 cup level vs an overflowing heap

    3. The leavening was dead or wrong

    Banana bread rises on baking soda (sometimes plus baking powder), and both lose strength with age. Baking soda that’s been open six months in a humid kitchen is a coin flip. Without working leavening, the batter never gets its lift — dense loaf, guaranteed.

    How to tell: The loaf barely rose — flat top, no dome, same height going in and coming out. If your baking soda has no “opened” date you can remember, suspect it.

    The fix: Drop half a teaspoon into vinegar — vigorous fizzing means alive, a lazy bubble means replace it. Use about 1 teaspoon per 2 cups of flour, and check the acid balance: baking soda needs an acid (brown sugar, buttermilk, the bananas) to activate. White sugar plus soda with no acid under-rises.

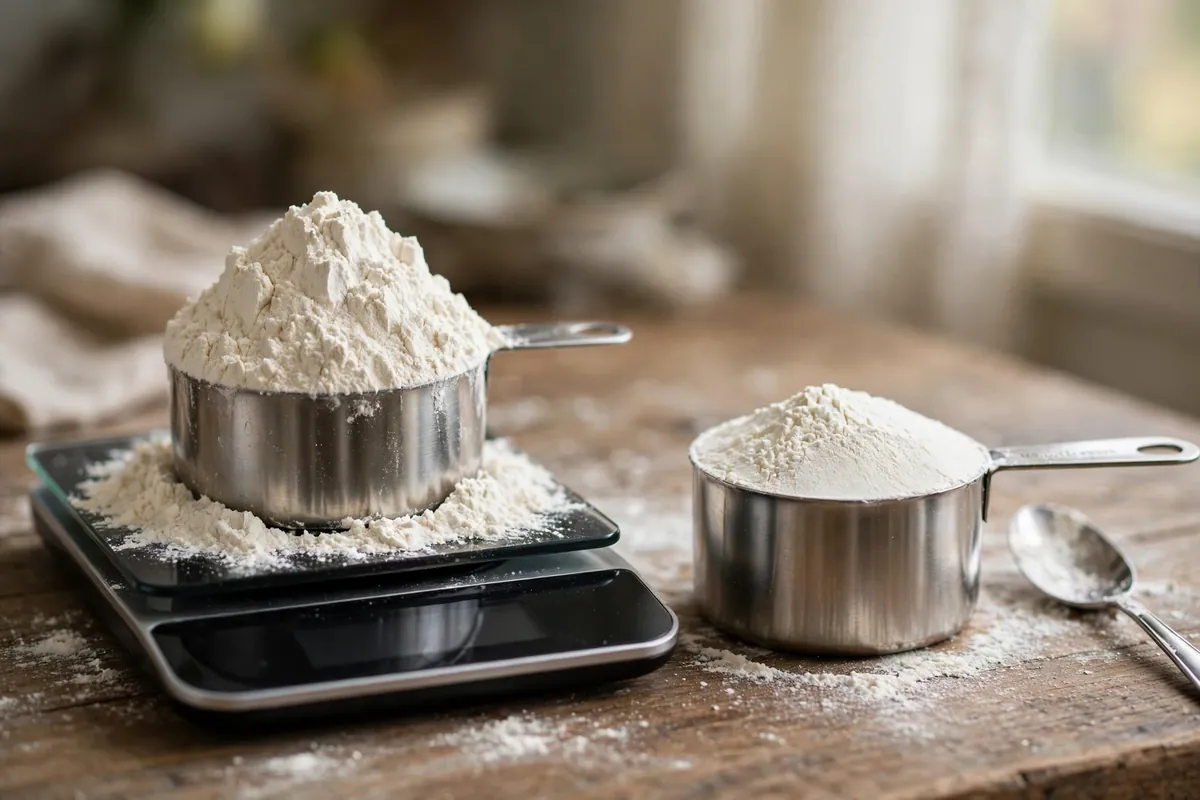
    4. Too much flour (the scooped cup strikes again)

    A scooped cup of flour can weigh 150g against the 120g the recipe assumed — 25% extra flour, silently absorbing moisture meant for the crumb. In banana bread, where the wet-to-dry balance is already delicate, that extra flour turns tender into dense.

    How to tell: The batter looked thick and stiff rather than pourable, and you scooped the cup straight from the bag.

    The fix: Weigh flour at 120g per cup, every time. No scale? Spoon it into the cup and level off. (For the full case against scooping, see Why Is My Cake Dry? — same culprit, different victim.)

    scooped flour cup on a scale reading 150g beside a spooned-and-leveled cup reading 120g
    scooped flour cup on a scale reading 150g beside a spooned-and-leveled cup reading 120g

    5. It was underbaked in the middle

    Banana bread is thick, wet, and baked in a deep pan — the center is the last thing to set. Pull it too early and the middle stays gummy and dense while the outside looks done. This one fools people because the top browns beautifully while the interior is still raw.

    How to tell: The center slice is wet, gummy, or sunken — the toothpick showed wet batter and you called it done anyway.

    The fix: Bake 55–65 minutes at 350°F (175°C) in a 9×5 pan. A toothpick should show a few moist crumbs — not wet batter, not bone dry — or better, 200–205°F (93–96°C) on a thermometer. Tent with foil if the top browns early, and cool 10 minutes in the pan before turning out; slicing hot compresses the crumb.

    6. The oven ran cool

    A cool oven stretches the bake without setting the structure — the leavening exhausts itself before the crumb firms up, leaving a pale, dense loaf. If everything you bake takes longer than the recipe says, check with an oven thermometer (most run 15–25°F off): banana bread wants a true 350°F (175°C), full preheat, center rack.

    The dense-banana-bread checklist (next loaf)

    1. Weigh flour: 120g per cup.
    2. Mash and measure: 1 to 1¼ cups, very ripe bananas.
    3. Fresh baking soda: 1 teaspoon, fizz-tested.
    4. Stir 10–12 strokes — lumps are fine.
    5. Bake 55–65 minutes at a true 350°F (175°C); toothpick shows moist crumbs.
    6. Cool 10 minutes in the pan, then on a rack. Don’t slice hot.
    the checklist in action — batter with visible lumps in the bowl before baking
    the checklist in action — batter with visible lumps in the bowl before baking

    Frequently asked questions

    Can I fix dense banana bread after baking?
    Not really — density is structural, set during the bake. But you can rescue the eating experience: toast thick slices (heat firms the crumb and adds texture), serve warm with butter, or cube it for banana bread pudding or trifle, where custard does the moistening work. Next loaf, follow the checklist above.

    Is dense banana bread safe to eat?
    Yes, as long as it’s fully baked through. Density alone isn’t a safety issue. The exception is a raw, wet center — if the middle is genuinely underbaked batter rather than just dense, that’s undercooked flour and egg, and it should go back in the oven, not onto a plate.

    Why is my banana bread gummy in the middle but done on the edges?
    Classic underbake in a deep pan. The edges set while the wet center lags. Give it the full 55–65 minutes, verify 200–205°F (93–96°C) in the center, and tent with foil if the top browns early. Also check your banana quantity — excess mash makes the center nearly impossible to set.

    Should banana bread batter be lumpy?
    Yes. Lumpy batter means you stopped stirring before gluten developed. Smooth batter means you kept going — and that’s the dense loaf. Ten to twelve strokes, flour just disappeared, walk away.

    Can I use frozen bananas?
    Absolutely — thaw them fully first and drain off the excess liquid they release (or measure the mash after draining). Frozen-then-thawed bananas are actually ideal: freezing ruptures the cell walls, making them sweeter and easier to mash.

    Does the pan matter?
    Yes. A 9×5 loaf pan is the standard; a smaller or deeper pan needs more time, and a dark pan browns faster (reduce heat 25°F / 15°C). Glass pans bake slower — add 5–10 minutes. For the full breakdown, see Glass vs Metal vs Dark Pans.

    Related troubleshooting: Why Is My Bread Dense? · Why Are My Muffins Tough? · Why Is My Cake Dry?

  • Dairy-Free Frosting That Holds Its Shape

    Dairy-Free Frosting That Holds Its Shape

    Dairy-Free Frosting That Holds Its Shape

    Here’s the problem nobody warns you about: most dairy-free frostings are fine as a spread and a disaster as a decoration. They look promising in the bowl, then slump off the cake, weep at the edges, and melt your piped rosettes into sad puddles by the time guests arrive. I’ve scraped enough collapsed dairy-free frosting off cake stands to know exactly why it happens — and how to prevent it.

    The whole game is fat structure. Butter works in frosting because it’s solid at room temperature: roughly 80% fat, 16% water, and firm enough to trap air and hold a peak. Most dairy-free swaps fail because they get this wrong — tub margarine is too soft and too watery, coconut oil melts at 76°F (24°C). Get the fat right and everything else follows.

    Quick diagnosis: For frosting that pipes and holds, use vegan butter STICKS (not tub spread) beaten with powdered sugar at roughly a 1:2 ratio by weight, plus a pinch of salt and a splash of plant milk. Sticks have the high fat and low water content that mimics butter; tub spreads weep and slump. Keep the finished cake at 70°F (21°C) or below, and chill piped decorations 15 minutes before serving.

    Why Dairy-Free Frosting Fails (The Fat Problem)

    Buttercream is a fat-continuous system: tiny air bubbles and sugar crystals suspended in solid fat. The firmness of that fat at serving temperature is what holds a swirl upright. Dairy butter is solid up to about 90°F (32°C) — it softens gradually, giving you a wide working window.

    Now look at the common substitutes:

    • Tub margarine/spread: 50–60% fat, lots of water, soft even refrigerated. It makes frosting that tastes okay for about ten minutes and then collapses. This is the #1 cause of dairy-free frosting failure.
    • Coconut oil: 100% fat and beautifully firm below 76°F (24°C) — then it liquefies almost instantly above it. Fine for a cool kitchen in winter; a puddle at a summer party.
    • Liquid oils: No structure at all. That’s a glaze, not a frosting.

    The fix is matching butter’s properties, not just its role: high fat percentage, low water, solid at room temp. Two options do this well.

    The Two Fats That Actually Work

    Option 1: Vegan butter sticks — the closest match

    Stick-form vegan butters (not tubs) are formulated to behave like dairy butter: ~79% fat, firm when cool, sliceable. In blind texture tests, stick-based vegan buttercream is indistinguishable from dairy buttercream in firmness and piping.

    Brands that work: any stick-form plant butter — look for “sticks” or “baking sticks” on the package, with coconut or soy oil bases. Avoid anything labeled “spread,” “light,” or “whipped.”

    Method: 225g (2 sticks) vegan butter at cool room temperature — not soft, not melty, just pliable — beaten 2 minutes until creamy. Add 450g powdered sugar in three additions, beating well between each. Add 1/4 tsp fine salt, 2 tsp vanilla, and 1–2 tbsp unsweetened plant milk only if needed for consistency.

    Option 2: Refined coconut oil — the firm-weather choice

    Method: 200g refined coconut oil (solid, below 76°F/24°C), beaten with 400g sifted powdered sugar, pinch of salt, vanilla. Refined — not virgin — because virgin tastes like coconut.

    The catch: this frosting has a narrow temperature window. Below 70°F (21°C) it’s beautifully firm, even crusting slightly like classic American buttercream. Above 76°F (24°C) it softens fast. I use this one for winter cakes and indoor events, never for summer outdoor parties.

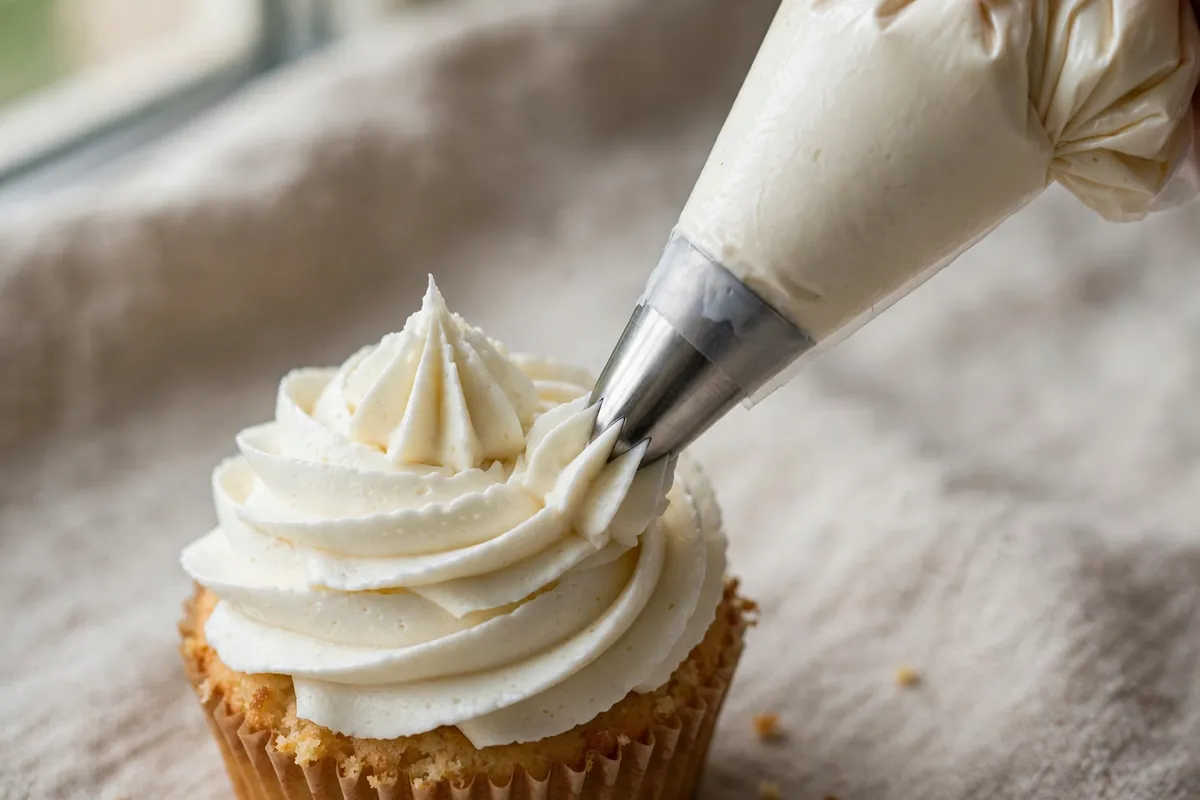
    Piping bag mid-swirl on a cupcake, dairy-free rosette holding a sharp peak
    a piping bag mid-swirl on a cupcake, dairy-free rosette holding a sharp peak

    The Stability Rules (Whatever Fat You Use)

    Sift the powdered sugar. Lumps in vegan buttercream don’t smooth out the way they do in dairy versions — the lower water content means less dissolving. Sift. Every time.

    Add cornstarch. 1–2 tablespoons of cornstarch per 450g powdered sugar absorbs free moisture and firms the set. This is the quiet professional trick; it also helps the frosting crust lightly, which protects decorations.

    Salt is non-negotiable. 1/4 tsp fine salt per batch. Vegan fats taste flatter than butter — salt restores the flavor balance and kills any waxy or oily aftertaste.

    Chill in stages. After crumb-coating, chill the cake 20 minutes. After final coat, chill 15 minutes before piping decorations. Cold frosting pipes sharper, and decorations set before they can slump.

    Mind the room. 70°F (21°C) or cooler for serving. If the venue is warm, coconut-oil frosting stays home — bring the vegan-butter-stick version, and keep the cake refrigerated until 30 minutes before serving.

    Flavor Variations That Stay Stable

    • Chocolate: Replace 60g of the powdered sugar with 60g Dutch-process cocoa. Cocoa’s starch actually improves stability, and the deep flavor masks any coconut or plant-butter notes completely.
    • Lemon: 1 tbsp lemon zest + 1 tsp lemon juice (not more — excess liquid softens). The zest carries the flavor without the water.
    • Coffee/mocha: 2 tbsp instant espresso dissolved in 1 tsp hot water, cooled. Adds depth; the tiny liquid amount won’t destabilize.
    • Peanut butter: Replace 75g of the fat with natural-style peanut butter (stirred well). The protein firms the frosting further — this one pipes like a dream.
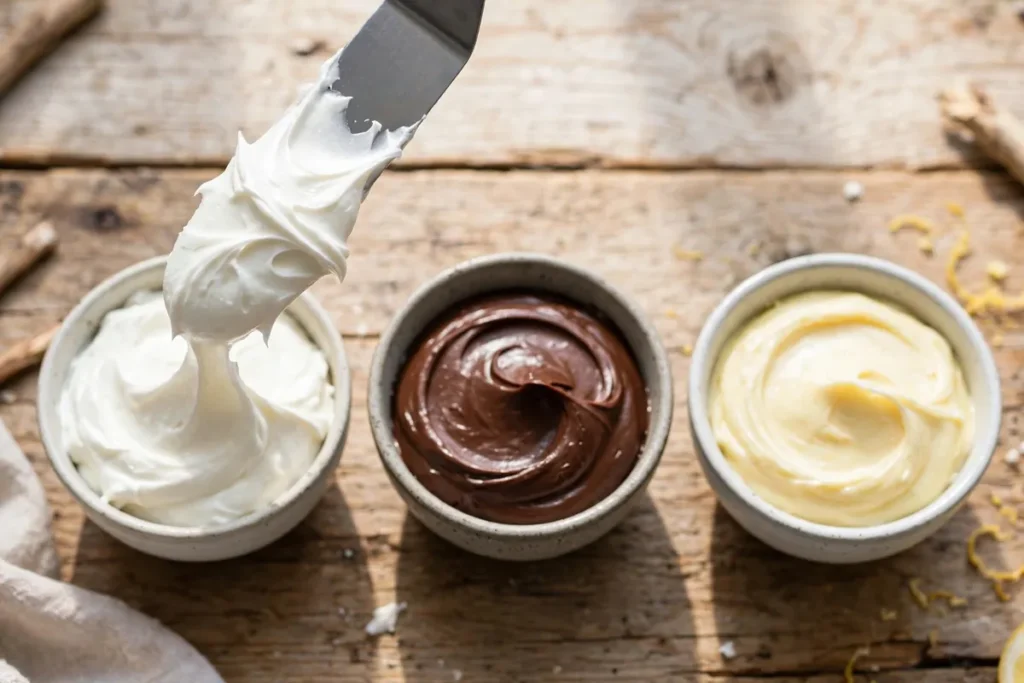
    Three bowls of plain, chocolate, and lemon dairy-free frosting with a spatula lift
    three small bowls showing plain, chocolate, and lemon dairy-free frostings with a spatula lift showing texture

    Aquafaba Swiss Meringue — The Advanced Option

    If you want the silkiest dairy-free frosting possible, make a Swiss meringue with aquafaba: whisk 120ml aquafaba with 200g sugar over a bain-marie to 160°F (71°C), whip to stiff glossy peaks, then beat in 225g vegan butter sticks piece by piece. It’s more work, but the result is the least sweet, most buttercream-like dairy-free frosting I’ve ever made — stable, pipeable, and genuinely elegant. (Aquafaba is the same chickpea liquid that rescues eggless cakes — see Eggless Cake That Actually Works.)

    What About Store-Bought?

    Most canned “vegan” frostings are essentially flavored shortening and sugar — stable, yes, but with a waxy mouthfeel and a sweetness that overwhelms. If you must use one, whip it for 3 minutes with a pinch of salt and a teaspoon of vanilla; it improves dramatically. But homemade with sticks takes ten minutes and tastes twice as good.

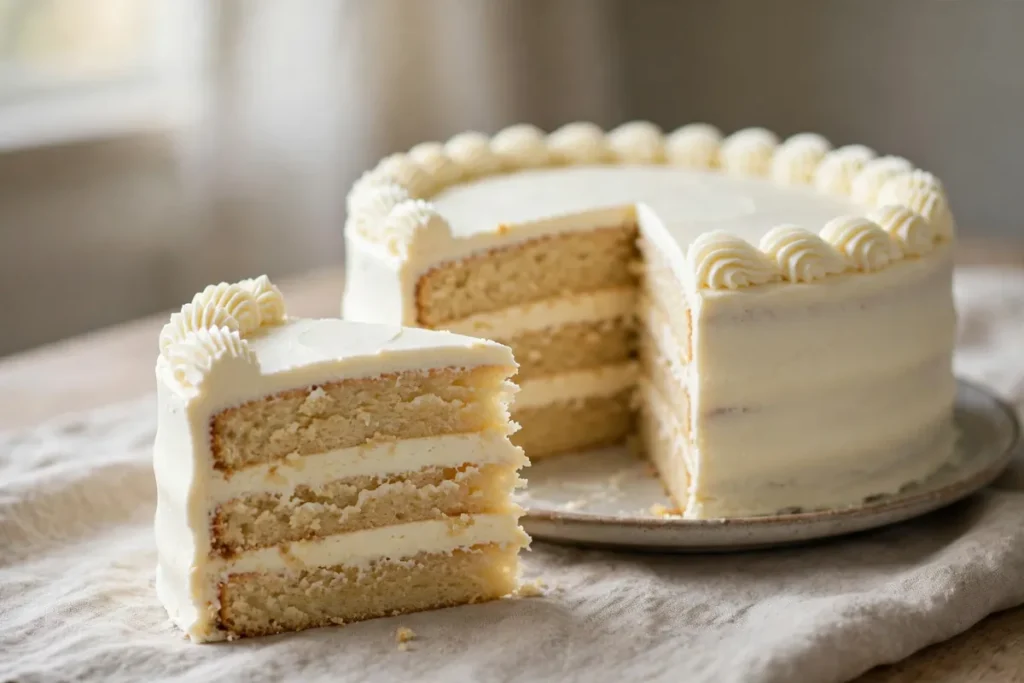
    Frosted layer cake with piped border, sliced to show clean layers and frosting dams
    a fully frosted layer cake with piped border, sliced to show clean layers and frosting dams holding

    Frequently Asked Questions

    Can I use margarine from a tub for frosting?
    Technically yes, practically no — not for anything that needs to hold shape. Tub spreads are ~50% water and stay soft. If it’s all you have, use it only as a thin filling between layers, never for piping or exterior decorating.

    Why is my dairy-free frosting grainy?
    Unsifted powdered sugar, almost always. Vegan fats have less water than butter, so sugar crystals don’t dissolve as readily. Sift the sugar, beat a full 3–4 minutes, and add plant milk one teaspoon at a time.

    How far ahead can I make it?
    5 days refrigerated in an airtight container, or 3 months frozen. Re-whip for 2 minutes after thawing — it comes right back. Frosted cakes keep 3 days refrigerated; bring to cool room temp 30 minutes before serving.

    Is dairy-free frosting safe at room temperature all day?
    For serving, yes — a few hours at 70°F (21°C) or below is fine. Vegan butter frostings are actually more food-safe than dairy ones (no milk proteins to spoil). Coconut-oil versions need cooler rooms. When in doubt, refrigerate and temper before serving.

    Can I color dairy-free frosting?
    Yes — gel colors work best (no added water). Add them at the end of beating. Natural colors (beet powder, turmeric, matcha) work too but can subtly flavor the frosting; taste as you go.

    My frosting tastes waxy — what went wrong?
    Usually too much shortening or a low-quality vegan butter. Switch to stick-form plant butter, make sure you added the salt, and try the chocolate variation — cocoa covers a multitude of sins.

    Related troubleshooting: Eggless Cake That Actually Works: Tested Replacements · Why Did My Cupcakes Overflow? · Why Did My Cake Sink in the Middle?

  • Panna Cotta Troubleshooting: Won’t Set or Rubbery (Gelatin Fixes)

    Panna Cotta Troubleshooting: Won’t Set or Rubbery (Gelatin Fixes)

    Panna cotta has exactly one structural ingredient — gelatin — so every setting failure traces back to it: too little (soupy), too much (rubbery), boiled (dead), unbloomed (grainy), sabotaged by fresh fruit enzymes, or simply not chilled long enough. The ratios are precise and forgiving once you know them, and both failures are rescuable.

    Quick diagnosis: Soupy panna cotta = too little gelatin, gelatin added to boiling liquid, or fresh pineapple/kiwi/papaya enzymes digesting it. Rubbery = too much gelatin. Fix: 2¼ tsp (7g) powdered gelatin per 2 cups (480ml) liquid, bloom 5 minutes in cold water, melt into warm — never boiling — cream, chill 4–6 hours minimum.

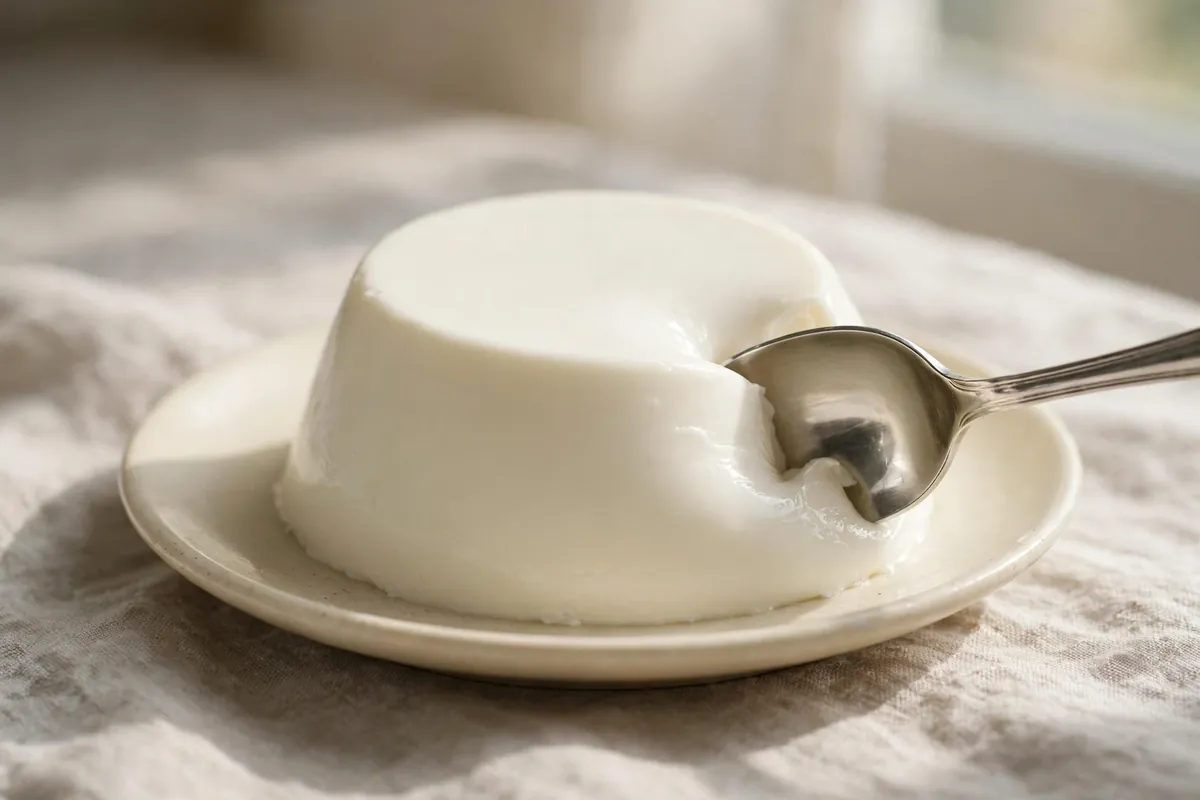
    My tested baseline: 2¼ tsp (one 7g packet) powdered gelatin sprinkled over 3 tbsp cold water, bloomed 5 minutes. 2 cups (480ml) heavy cream plus ⅓ cup (65g) sugar heated until steaming — never boiling — then off the heat. Bloomed gelatin stirred in until dissolved, 1 tsp vanilla added. Six ½-cup ramekins, chilled 6 hours. Result: holds its shape unmolded, trembles when nudged, melts on the tongue.

    1. Too little gelatin — the classic soupy failure

    The standard ratio is 2¼ teaspoons (one 7g packet) of powdered gelatin per 2 cups (480ml) of total liquid. Below that — a short-measured teaspoon, a “light” version with extra milk — there isn’t enough protein network to trap the liquid, and the result pours rather than wobbles.

    How to tell: Refrigerated 6+ hours and still flows like thick cream; tilting the ramekin sends it sliding.

    The fix: Measure properly — level teaspoons, or a scale: 7g per 480ml. Halving a recipe means halving the gelatin exactly; eyeballing small gelatin quantities is where most failures start. Sugar and alcohol slightly weaken the set, so boozy or very sweet versions need the full measure, not less.

    2. You boiled the gelatin — heat kills its setting power

    Gelatin is a protein, and prolonged boiling denatures it. Cream brought to a rolling boil with gelatin in it loses much of its gelling strength — the panna cotta half-sets: spoonable, but never unmoldable.

    How to tell: The cream boiled vigorously with gelatin in it; it set softly but collapses on unmolding no matter how long you chill.

    The fix: Heat the cream only until steaming and the sugar dissolves — small bubbles at the edges, never a boil — then take it off the heat before stirring in the bloomed gelatin. Residual heat around 140–160°F (60–70°C) dissolves gelatin fully without damage. Boiled gelatin can’t be revived, but the batch can be rescued (see below).

    3. You skipped the bloom — grainy, weak set

    Powdered gelatin sprinkled directly into hot cream clumps on contact: each clump’s surface hydrates instantly and seals dry powder inside — the same physics as lumpy batter. Those clumps never fully dissolve, so you get a weaker set plus grainy specks.

    How to tell: Tiny translucent grains in the finished dessert; it set softer than the ratio says it should.

    The fix: Bloom every time: sprinkle gelatin evenly over 3 tablespoons of cold water, wait 5–10 minutes until it looks like wet sand, then melt into the warm cream. With sheet gelatin, soak 5 minutes in cold water and squeeze dry before melting in.

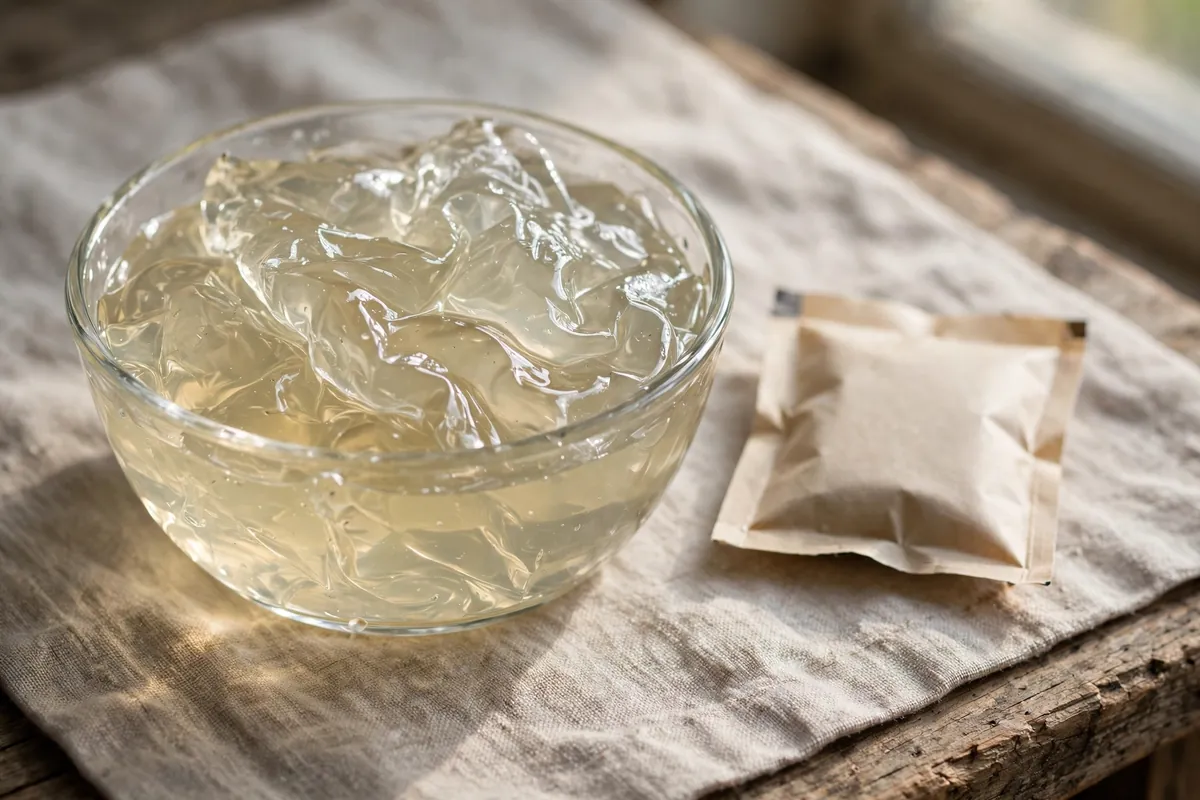
    small glass bowl of bloomed gelatin with wrinkled texture next to a gelatin packet
    small glass bowl of bloomed gelatin with wrinkled texture next to a gelatin packet

    4. Too much gelatin — the rubbery, bouncy failure

    More gelatin isn’t “extra safe” — it’s bouncy. Double it and panna cotta stops being delicate cream and becomes dessert-flavored rubber: it bounces when tapped, squeaks on the teeth, and won’t melt in the mouth. The most common overcorrection after one soupy batch.

    How to tell: Unmolds perfectly but jiggles like firm jelly; texture is chewy; you used more than 2¼ tsp per 2 cups.

    The fix: Respect the ratio — 7g per 480ml. If nervous, chill a spoonful 20 minutes as a test before portioning: it should just barely hold a soft shape. The ideal trembles when nudged and dissolves on the tongue.

    5. Fresh tropical fruit sabotaged it — enzyme attack

    Fresh pineapple, kiwi, papaya, mango, and guava contain protease enzymes (bromelain, actinidin, papain) that digest protein — including your gelatin network. Fold fresh pineapple into panna cotta and it will never set, however perfect everything else was.

    How to tell: Technique and ratios were right, but the batch with fresh fruit stayed liquid while a plain batch set fine.

    The fix: Heat destroys these enzymes — canned fruit works because it’s heat-processed; simmering fresh fruit 2–3 minutes does the same. Use cooked or canned tropical fruit, never raw. Citrus, berries, stone fruit, and melon are safe fresh.

    6. You didn’t chill it long enough — gelatin sets slowly

    Gelatin firms gradually: at 2 hours it’s softly thickened, at 4 sliceable, at 6+ fully set. Unmolded at 3 hours it slumps — not a ratio problem, just an unfinished network. Warm fridge spots and deep ramekins slow it further.

    How to tell: Thick but not firm; holds shape in the ramekin, collapses on unmolding; chilled under 4 hours.

    The fix: Chill 4–6 hours minimum; overnight is ideal. Keep ramekins on a cold shelf, not the door. To unmold: dip in warm (not hot) water 5–10 seconds, run a thin knife around the edge, invert. If it resists, 5 more seconds in the water — patience, not force.

    Can you fix panna cotta after the fact?

    Yes — one of the most rescuable desserts in baking. Soupy: gently rewarm until just fluid (don’t boil), bloom extra gelatin (1 tsp per 2 cups of mixture), stir in until dissolved, re-portion, chill 6 hours. Rubbery: you can’t remove gelatin, but serve in glasses layered with macerated fruit or tart coulis — the texture reads as intentional — or melt it into hot chocolate. Grainy: rewarm gently, stir until smooth, strain through a fine sieve, re-chill. The only lost cause is enzyme-sabotaged gelatin: remelt, add fresh gelatin, and keep the raw fruit as a topping.

    hands rewarming panna cotta mixture in a saucepan while bloomed gelatin melts in
    hands rewarming panna cotta mixture in a saucepan while bloomed gelatin melts in

    FAQ

    Is unset panna cotta safe to eat?
    Yes — it’s heated, refrigerated sweetened cream; a failed set is a texture problem only. Serve in glasses as “panna cotta cream” with fruit.

    Can I use agar instead of gelatin?
    Yes, but the texture differs: agar sets firmer, less creamy, at room temperature. Use ~1 tsp agar powder per 2 cups liquid, boiled 2 minutes to activate (agar needs boiling; gelatin must never boil).

    Why is my panna cotta grainy?
    Unbloomed gelatin clumped instead of dissolving. Bloom 5–10 minutes in cold water next time. For the current batch, rewarm gently and strain through a fine sieve.

    How do I know if my gelatin is still good?
    Sealed, cool, and dry, powdered gelatin lasts years. If an old packet fails twice on a correct recipe, replace it — but rule out technique errors first; dead gelatin is rare.

    Can I make panna cotta without dairy?
    Yes — coconut cream sets beautifully at the same ratio. Almond or oat milk give a softer set; add an extra ½ tsp gelatin per 2 cups.

    Why did my panna cotta separate into layers?
    It was portioned too warm and fat rose before the gelatin network formed. Cool to room temperature, stirring occasionally, before filling ramekins, then chill promptly.

    Related troubleshooting: How to Fix a Split Custard (And Why It Curdled) · Why Did My Tiramisu Turn Watery? · How to Fix Lumpy Batter

  • Why Did My Linzer Cookies Crack? Nut Dough Fixes

    Why Did My Linzer Cookies Crack? Nut Dough Fixes

    Linzer cookies look sturdy in the bakery case, but the dough underneath is one of the most fragile in all of cookie baking. Ground hazelnuts or almonds replace a big share of the flour, and with them goes the gluten network that holds ordinary cookies together. What you get instead is a short, buttery, delicious dough that cracks if you look at it wrong. Every crack traces back to temperature or handling — the fixes below are all about keeping the dough cold, calm, and barely touched.

    Quick diagnosis: The dough was too warm when you rolled it, or too cold and stiff. Linzer dough cracks both ways. Chill it 30–60 minutes until firm, let it sit 5–10 minutes before rolling so it relaxes, roll between parchment to ⅛-inch, and chill the cut cookies 15–20 minutes before they hit the oven.

    My tested baseline: 100g ground hazelnuts (or almonds), 200g all-purpose flour, 150g cold butter cubed, 70g powdered sugar, 1 egg yolk, 1 tsp cinnamon, pinch of salt. Rub or pulse to a crumbly dough, press into a disc, and chill 1 hour. Roll to ⅛-inch (3mm), cut equal numbers of solid bases and windowed tops, chill cut shapes 20 minutes, and bake at 325°F (165°C) for 10–12 minutes until the edges just set. Cool fully, spread ½ teaspoon of raspberry jam on each base, and cap with a powdered-sugar-dusted top.

    1. You rolled warm dough — the number one cause of cracks

    Nut dough has almost no gluten to forgive rough handling. When it’s warm, the butter softens, the dough goes slack, and every lift, transfer, or cutter press drags and tears it. How to tell: Dough stuck to the work surface, edges tore when lifting, cutters dragged instead of cutting clean, shapes distorted on the tray.

    The fix: Chill the disc until firm — 30 to 60 minutes, not 10. Roll it cold between two sheets of parchment. If it starts to soften and stick mid-roll, slide the whole parchment sandwich onto a tray and chill 10 minutes, then continue. Cold dough cuts like clay; warm dough tears like paper. (Same temperature discipline as Why Did My Rugelach Unravel? — chilled dough is structural dough.)

    2. You rolled it too cold — over-chilled dough cracks too

    This is the trap on the other side. Dough straight from a long fridge stay is stiff, and the first roll press sends cracks spidering across the sheet. Both extremes crack; the working window is firm but pliable.

    How to tell: Cracks appeared the moment the rolling pin touched down; the disc felt like a hockey puck; edges crumbled instead of smoothing.

    The fix: Let the chilled disc sit at room temperature 5–10 minutes before rolling — press it with your palm; it should give slightly without cracking. Roll from the center outward with light, even pressure, rotating the parchment 90 degrees every few passes for an even sheet. If edge cracks appear, pinch them closed while the dough is still cool and re-roll gently; small cracks heal, big ones don’t.

    3. Your thickness was off — too thin snaps, too thick breaks

    ⅛-inch (3mm) is the target for a reason. Thinner than that, and the windowed tops have almost no structure around the cut-out — they snap lifting off the tray and crumble at the first bite. Thicker than ¼-inch, the cookie bakes up cakey, the top and base don’t match in texture, and the thick tops crack around the window as they cool and contract.

    The fix: Use rolling guides, stacked rulers, or two ⅛-inch dowels flanking the dough — eyeballing thickness is how batches go inconsistent. If you only have one guide set, roll all the dough at once rather than re-rolling scraps thinner.

    4. You overworked it — warm hands and endless re-rolls

    Third-generation scraps — the dough you’ve gathered, re-rolled, and re-cut twice — bakes up tough and crack-prone no matter how carefully you started. Pressing cutters with a twist also seals and drags the edges instead of cutting them.

    How to tell: First-cut cookies were fine; later re-rolled batches cracked and baked up hard; cutter edges looked compressed and wavy.

    The fix: Cut shapes close together to minimize scraps, press cutters straight down and lift straight up, dipping cutters in flour between cuts. Gather scraps once, press into a disc, chill 20 minutes, and roll one final time. Work quickly and let the fridge, not your hands, do the temperature control.

    5. You assembled them wrong — jam mistakes crack and sog the sandwich

    Assembly is where finished linzers die. Spreading jam on warm cookies melts it into the crumb, and the steam softens the base until it splits under the top cookie. Too much jam squeezes out the sides and welds the sandwich into a sticky mess. And jam that’s too thin or watery migrates into the cookie within hours, turning crisp shells soggy — soggy linzers crack when lifted because the structure has dissolved.

    How to tell: Jam oozed out the sides, bases went soft within a day, tops slid off, cookies stuck to the storage container.

    The fix: Cool cookies completely — stone cold — before assembly. Warm seedless raspberry jam just enough to spread — ½ teaspoon per cookie, reaching almost to the edge. Thick, high-fruit jam stays put; thin jelly migrates. Dust the windowed tops with powdered sugar BEFORE placing them on the jam — sugaring after means sugar dissolving into wet jam. Press gently; the sandwich should hold by contact, not force.

    hands spreading a thin layer of raspberry jam on a cooled linzer base, tops dusted with powdered sugar waiting nearby
    hands spreading a thin layer of raspberry jam on a cooled linzer base, tops dusted with powdered sugar waiting nearby

    6. You stored them assembled too long — jam moisture always wins eventually

    Even perfect linzers have a clock. Jam is wet; cookies are dry; moisture migrates from one to the other every hour they sit together. Day one: crisp shell, bright jam. It’s physics — but storing them wrong accelerates it dramatically.

    How to tell: Day-two linzers were noticeably softer than day one; jam bled into the cookie; powdered sugar tops turned pink and sticky.

    The fix: For maximum crispness, store baked unfilled cookies airtight at room temperature up to a week, keep jam separate, and assemble the day of serving — or up to 24 hours ahead.

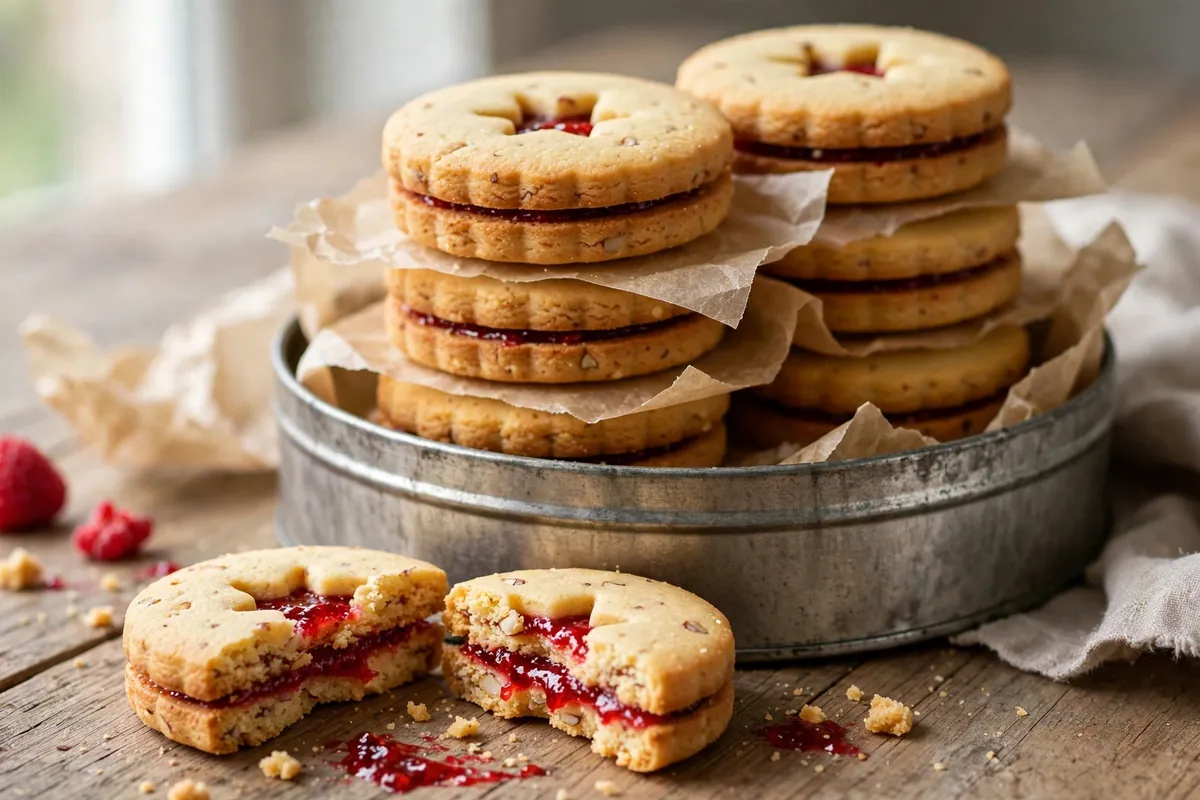
    finished linzer sandwich cookies stacked in a tin with parchment layers, one broken open showing the jam layer
    finished linzer sandwich cookies stacked in a tin with parchment layers, one broken open showing the jam layer

    Frequently asked questions

    Are cracked linzer cookies safe to eat?
    Completely. Cracks are a texture and appearance issue, never a safety one. Broken linzer pieces are excellent crumbled over ice cream or folded into whipped cream — the hazelnut flavor doesn’t care about the shape.

    Can I fix linzer dough that’s already cracking as I roll it?
    Yes, if you catch it early: gather it gently, press into a disc, chill 20 minutes, then let it temper 5–10 minutes before rolling again. Don’t keep fighting cracked dough — rest fixes what force can’t.

    Why did my linzers spread and lose the window shape?
    The dough was too warm going into the oven, or the butter was too soft when mixed. Chill cut shapes 15–20 minutes before baking and check your oven is a true 325°F (165°C). Sharp windows need cold dough and a fully preheated oven.

    How far ahead can I make linzer cookies?
    Bake the unfilled cookies up to a week ahead (airtight, room temperature) or freeze them up to 2 months. Assemble with jam within 24 hours of serving for the signature crisp-then-jammy contrast.

    Related troubleshooting: Why Did My Rugelach Unravel? · Fix Overbaked Cookies: When They’re Actually Still Good · Freeze Cookie Dough the Right Way

  • Why Is My Pizza Dough Tough? (Gluten Management)

    Why Is My Pizza Dough Tough? (Gluten Management)

    Tough pizza is a particular heartbreak: you did everything that makes bread good — kneaded it well, gave it time — and got a crust you have to fight with your jaw. Here’s the truth: pizza dough is not bread dough. Bread wants maximum gluten and a long bake. Pizza wants restrained gluten, high hydration, and a violent blast of heat. Treat pizza dough like a baguette and you get tough, chewy, dense.

    Quick diagnosis: Tough crust is usually under-rested dough baked too cool for too long: tense dough fights stretching and bakes up tight (cause #2), and an oven below 500°F (260°C) dries the crust before it can puff (cause #4). Fix the rest and the heat first.

    Toughness is gluten misbehaving — overdeveloped and rubbery, or never relaxed and springy — plus low heat drying the crust before the interior steams itself open.

    1. You over-kneaded it — pizza is not bread

    Bread dough gets 10–15 minutes of kneading for maximum gluten. Pizza needs only 5–8 — enough to come together smooth, not the full development of a loaf. Over-kneaded pizza dough bakes up with a tight, bagel-like chew instead of a tender pull. The gluten network is simply too strong.

    How to tell: The dough felt tight even after resting, sprang back aggressively when stretched, and the baked crust is uniformly chewy with a fine even crumb — no big air holes.

    The fix: Knead just until smooth and elastic — stretchable without immediately tearing, but no perfect windowpane required. Five minutes on low-medium is plenty — then let a long cold ferment build flavor and extensibility without more kneading. (Flour-strength background: Bread Flour vs All-Purpose: When It Actually Matters.)

    2. It didn’t rest long enough — the gluten never relaxed

    The cause I see most in home kitchens. Fresh gluten is elastic — a just-kneaded ball springs back when stretched. Given time it becomes extensible: it stretches thin without fighting, and in the oven expands into big bubbles instead of contracting into toughness. Dough stretched while tense bakes up tight no matter how hot the oven.

    How to tell: The dough sprang back every time you stretched it and the rim baked thick and bready instead of puffy.

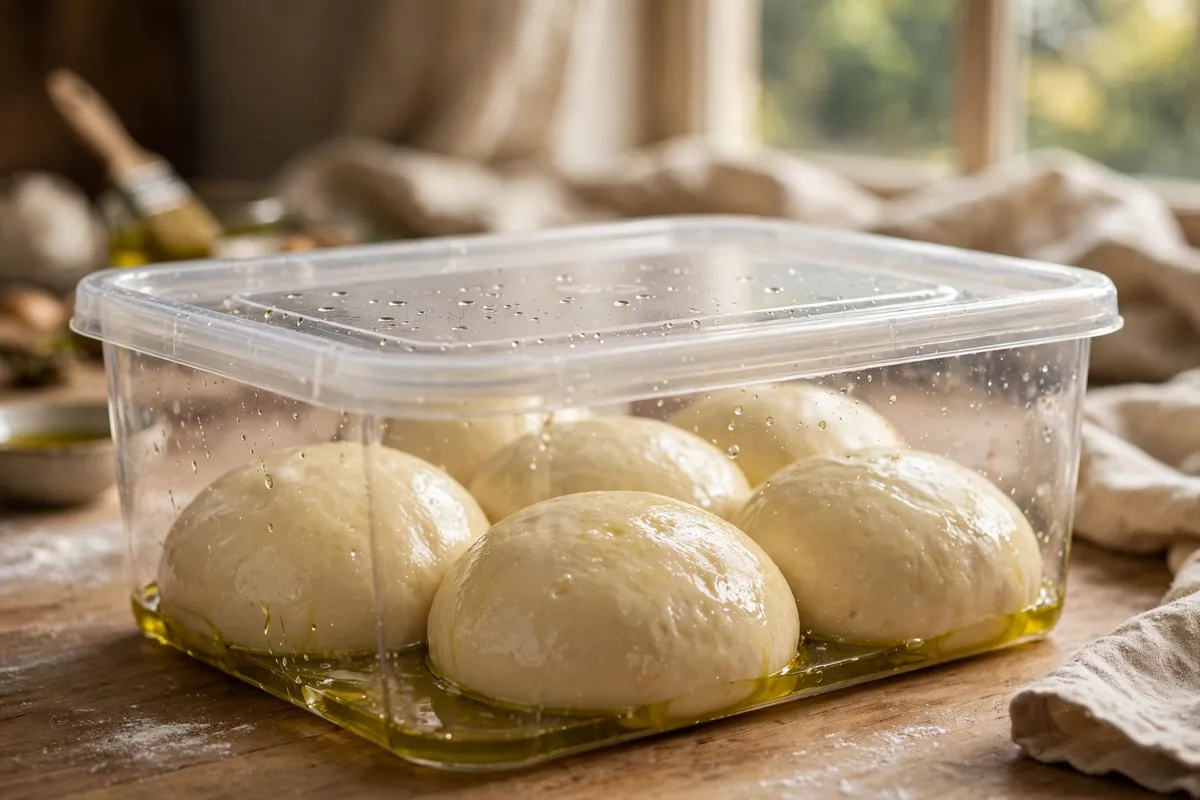
    The fix: Minimum 1–2 hours at room temperature after balling — but the real magic is a cold ferment of 24 to 72 hours in the refrigerator. It relaxes gluten completely and builds the complex flavor separating great pizza from flat pizza. Pull balls out 1–2 hours before baking; fridge-cold dough still fights you. If dough springs back mid-shape, stop, cover, walk away 20 minutes — rest is a legitimate technique. (Timelines: Make-Ahead Bread Dough: Fridge Fermentation Timelines.)

    3. The hydration was too low — dry dough can’t puff

    Pizza wants 60–65% hydration — wetter than most beginners expect. At 55% or below, the dough is stiff, gluten can’t move freely, and there’s too little internal steam to blow the crumb open. Low hydration makes crackers, not airy pizza.

    How to tell: The dough felt firm and dry rather than soft and slightly tacky, was suspiciously easy to handle, and the crust is dense and cracker-like.

    The fix: Weigh ingredients and target 62% — 310g water per 500g flour. The dough should feel soft and lightly tacky, sticking to hands but releasing from the bowl. Don’t flour your way out of stickiness when shaping; use a light bench dusting of flour or semolina only. Wetter dough is harder to handle but bakes dramatically better.

    4. Your oven wasn’t hot enough — low heat makes leather

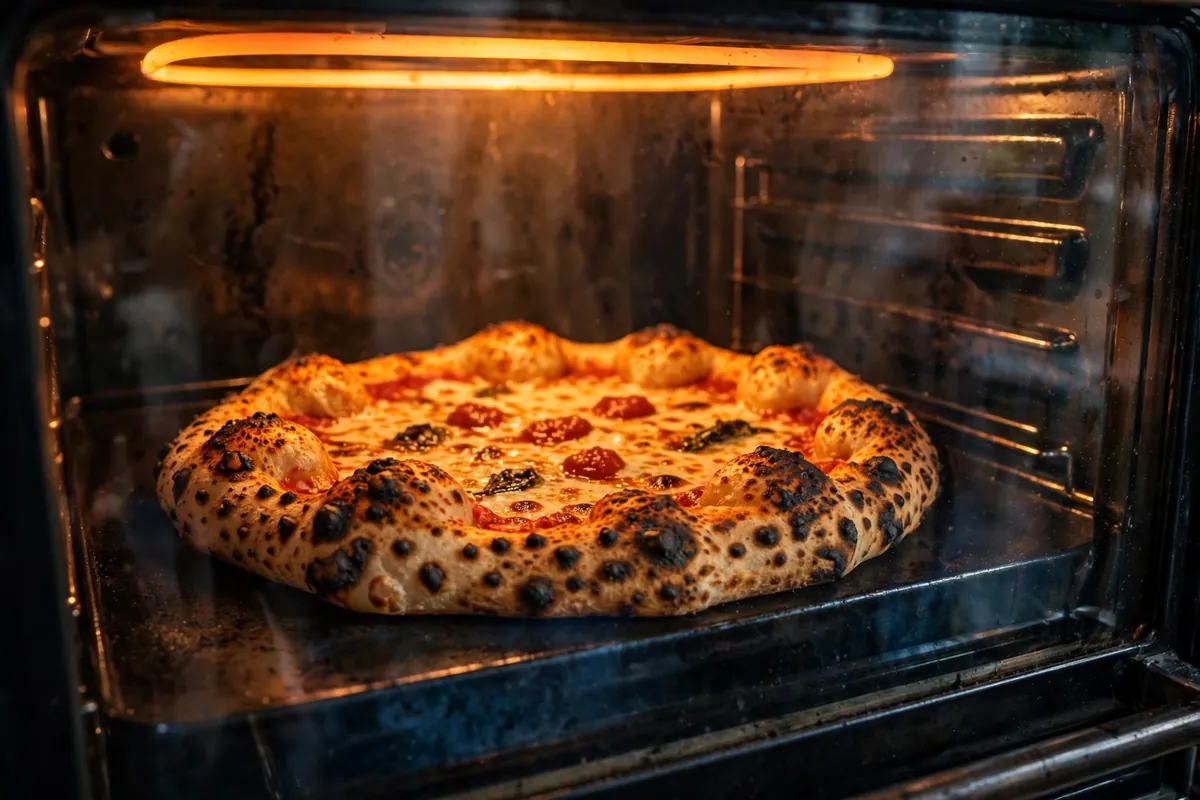
    Pizza needs a violent blast: 500–550°F (260–290°C), your oven’s maximum, for 7–10 minutes. Intense heat sets the exterior fast while the interior steams, and trapped steam inflates the crumb into open bubbles. At 400–425°F the crust dries gradually before it can puff — baked-cracker texture.

    How to tell: The pizza took 15+ minutes to brown, the cheese browned before the crust puffed, and the crust is uniformly hard, not crisp-outside-airy-inside.

    The fix: Preheat at maximum for 45–60 minutes with a steel, stone, or inverted heavy sheet inside — thermal mass matters as much as air temperature. A pizza steel is the single best upgrade: stored heat blasts the bottom and slashes bake time. Launch onto the screaming-hot surface and bake until the cornicione is puffed and leopard-spotted. Top finishing first? Lower rack next time. Bottom burning first? Go up.

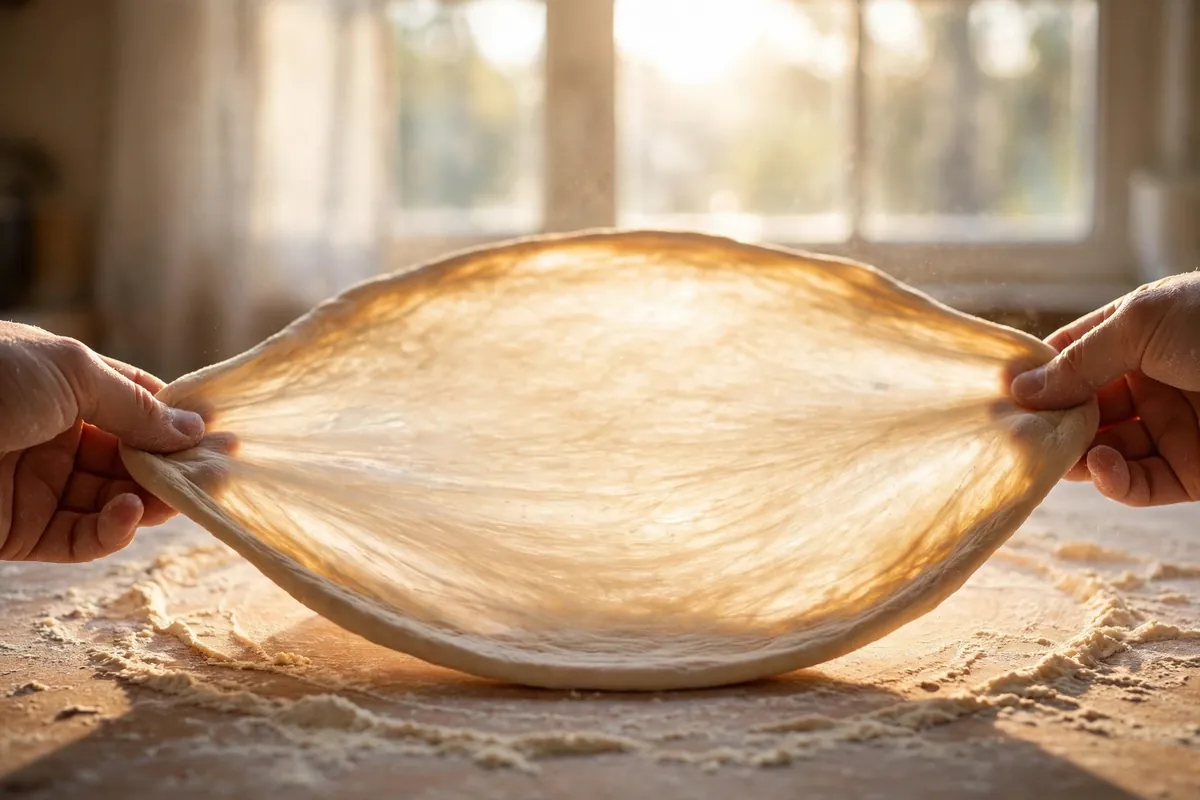
    hands stretching pizza dough thin, showing extensible dough
    hands stretching pizza dough thin, showing extensible dough

    5. You pressed all the air out shaping it

    Even perfect dough turns tough if manhandled. Rolling pins, aggressive palm-pressing, or re-rolling scraps compress the gas bubbles fermentation built — those bubbles are your future air pockets. Degassed dough bakes dense regardless of hydration or heat.

    How to tell: You used a rolling pin or pressed flat with your palms, and the rim is flat and dense instead of puffy.

    The fix: Hands only: press from center outward with fingertips, leaving a 1-inch untouched rim — that’s your cornicione, and it needs its gas. Drape over knuckles, let gravity stretch, rotate. Never a rolling pin on pizza dough. The rim should look alive and pillowy before it sees the oven.

    Can you fix an already-baked tough pizza?

    Barely — toughness sets in the bake. Reheat slices on a preheated steel or lidded hot skillet for 2 minutes to re-crisp. Leftover tough crust makes excellent garlic bread or panzanella. The real fix is the next dough: longer rest, wetter dough, hotter oven.

    pizza baking on a steel in a very hot home oven
    pizza baking on a steel in a very hot home oven

    The tender-crust formula

    62% hydration. Five minutes of kneading. Forty-eight hours in the fridge. Two hours at room temperature before shaping. Hand-stretched with an untouched rim, launched onto a steel at your oven’s absolute maximum. The cold ferment alone transforms more tough-crust complaints than any other single change — time relaxes gluten in a way no technique can shortcut.

    dough balls cold-fermenting in a covered container
    dough balls cold-fermenting in a covered container

    FAQ

    Is tough pizza dough safe to eat?
    Yes — toughness is purely texture. As long as the crust baked through, it’s completely safe. Reheat on a hot steel or skillet to improve it, or repurpose leftovers as garlic bread.

    Can I fix pizza dough that’s already tough after baking?
    Not really — the texture is set. Reheating on a preheated steel or covered hot skillet for 2 minutes helps by re-crisping the base. The genuine fix is preventive: rest longer, raise hydration, bake hotter next time.

    How long should pizza dough rest?
    Minimum 1–2 hours at room temperature after balling; ideally 24–72 hours refrigerated. The cold ferment fully relaxes gluten and builds flavor. Always give refrigerated dough 1–2 hours at room temperature before stretching — cold dough fights back.

    What hydration should pizza dough be?
    60–65%, with 62% the sweet spot — 310g water per 500g flour. Soft and slightly tacky is right; below 60% bakes dense and cracker-like.

    What temperature should I bake pizza at?
    Your oven’s maximum — typically 500–550°F (260–290°C) — preheated 45–60 minutes with a steel or stone inside. Under 475°F the crust dries into leather before it can puff.

    Does bread flour make pizza tough?
    Not by itself — bread flour (12–14% protein) is the standard pizza flour and gives the best chew. Toughness comes from over-kneading it, under-resting it, or baking too cool. All-purpose works too but yields a slightly softer, less chewy crust.

    Related troubleshooting: Why Is My Focaccia Flat? High-Hydration Dough Fixes · Bread Flour vs All-Purpose: When It Actually Matters · Make-Ahead Bread Dough: Fridge Fermentation Timelines

  • What to Do With Sourdough Discard: 7 Uses Worth Your Time

    What to Do With Sourdough Discard: 7 Uses Worth Your Time

    Every sourdough feeding leaves you holding half a jar of discard — perfectly good flour, water, and wild yeast, destined for the bin. Throwing it away feels wrong because it is wrong: discard is an ingredient, one with a tangy flavor and tenderizing power that bought-and-paid-for ingredients can’t match. I’ve cooked with discard for years, and these seven uses are the ones that earned permanent places in my rotation — ranked by how much they reward the (minimal) effort.

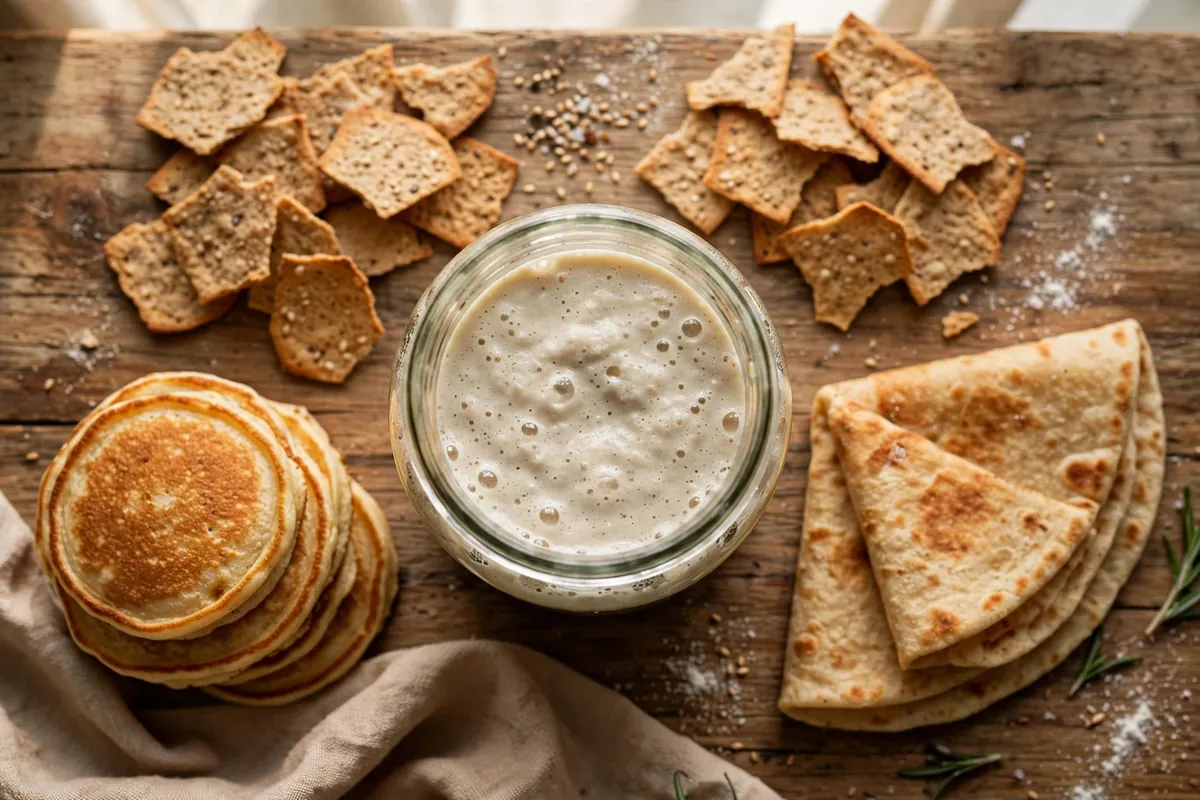
    Quick diagnosis: The best discard uses don’t ask it to leaven anything — discard isn’t vigorous enough to raise bread on its own. The winners are crackers, pancakes, flatbread, and quick breads, where discard contributes flavor and tenderness while baking powder, soda, or a hot skillet does the lifting.

    First, the ground rules. Discard is safe — it’s the same flour, water, and microbes as your starter, just hungry. It keeps sealed in the fridge up to 2 weeks; sniff before using (pleasantly sour is fine; pink, orange, or fuzzy means the jar goes). And discard’s yeast is sluggish, so every recipe below pairs it with another leavener or none at all. Don’t bake a loaf with discard alone — that’s what a healthy, fed starter is for.

    1. Crackers — the single best use

    If you make nothing else from this list, make crackers. Discard crackers are the highest reward-to-effort ratio in all of sourdough baking: the discard’s acidity creates unmatched crispness, and the whole project takes 30 minutes.

    How: Mix 1 cup (240g) discard with ¼ cup olive oil or melted butter, ½ teaspoon salt, and enough flour (about ¾ cup / 90g) to form a firm dough. Roll paper-thin — 1/16 inch — directly on a parchment-lined baking sheet (thin is the entire secret; thick discard crackers are chewy, not crisp). Dock with a fork, sprinkle with flaky salt and whatever you like (sesame, rosemary, everything seasoning), and bake at 350°F (175°C) for 20–25 minutes until deep golden. Cool on the sheet; they crisp further as they cool.

    Why it works: Low moisture + high heat + acidity = shattering crispness. The discard’s tang reads as sophisticated, not sour.

    2. Pancakes and waffles — the weekend upgrade

    Discard in pancake batter is transformative: the acidity tenderizes the crumb and adds a buttermilk-like tang that plain batter can’t touch. These are objectively better than regular pancakes, not just “good for discard.”

    How: Replace half the flour in your usual pancake recipe with discard (by weight — 120g discard stands in for roughly a cup of flour’s flour-plus-water, so reduce the milk slightly). Keep the recipe’s baking powder; the discard is flavoring here, not leavening. For waffles, same swap — the tang plus the iron’s crisping is exceptional.

    3. Flatbread and pizza crust — the no-wait bread

    A ripping-hot skillet plus discard equals flatbread in minutes — no kneading, no proofing, no planning. This is my most-made discard recipe by a wide margin.

    How: Pour ½ cup discard straight into a lightly oiled, screaming-hot cast iron skillet, spread thin with the back of a spoon, and cook 2–3 minutes per side until blistered and golden. That’s it — the whole recipe. For pizza: spread 1–1½ cups discard in an oiled cast iron skillet, par-bake at 450°F (230°C) for 10 minutes, then top and bake 10 more. The crust won’t be Neapolitan — it’ll be tangy, chewy-crisp, and ready in 25 minutes, which is the point.

    discard flatbread blistering in a cast iron skillet, one piece folded showing the airy interior
    discard flatbread blistering in a cast iron skillet, one piece folded showing the airy interior

    4. Banana bread and quick breads — the moisture play

    Discard’s acidity and hydration make quick breads more tender and longer-keeping. It slides into any quick-bread recipe invisibly.

    How: Replace ½ cup of the flour with ½ cup (120g) discard and reduce another liquid by 2 tablespoons. Keep the recipe’s baking soda — in fact, the discard’s acidity supercharges it, giving a better rise than the original. Banana bread is the classic pairing (the tang balances the sweetness); zucchini bread and pumpkin bread work equally well. For the full quick-bread science, the eggless cake post covers how acidity interacts with leaveners.

    5. Soft pretzels — the chewy showpiece

    Discard pretzels have a depth of flavor that straight-dough pretzels lack — the long, slow acids in the discard read as complexity. They’re a project, but a rewarding one.

    How: Combine 1 cup (240g) discard with 2½ cups (300g) bread flour, 1 tablespoon sugar, 2¼ teaspoons instant yeast (the discard flavors; the commercial yeast leavens — this is the honest pairing), and 1 teaspoon salt. Knead 8 minutes, rest 1 hour, shape, and give the classic baking-soda bath (⅔ cup soda per 10 cups water, 30 seconds per pretzel) before baking at 425°F (220°C) for 12–14 minutes. Salt generously while wet.

    6. Biscuits and scones — the flaky tang

    Discard replaces some of the buttermilk in biscuit dough, adding tenderness and a subtle tang that reads as “bakery” rather than “sourdough.”

    How: Replace half the buttermilk/milk with discard (equal weight). Keep everything cold — frozen grated butter, cold discard — and handle minimally: pat, fold, cut, no kneading. The acidity tenderizes the crumb exactly the way buttermilk does, which makes sense: it’s doing the same chemical job. Bake hot at 425°F (220°C).

    7. Frying batter — the crisp secret

    The least obvious and maybe the most fun: discard thinned with a little water or beer makes a superb frying batter. The acidity inhibits gluten just enough for a shatteringly crisp, tempura-like crust.

    How: Thin 1 cup discard with ¼–½ cup cold water or lager until it coats a spoon thinly. Season boldly (salt, pepper, paprika, garlic powder). Dip vegetables, onion rings, or fish, and fry at 350–375°F (175–190°C) until deep golden. The batter fries up lighter and crisper than flour-and-water, with a faint tang that cuts richness.

    golden fried vegetables on a wire rack, one broken open showing the crisp shell
    golden fried vegetables on a wire rack, one broken open showing the crisp shell

    Storing and managing discard

    Keep a dedicated discard jar in the fridge and add to it at every feeding. Use within 2 weeks — older discard gets sharply acidic (fine for crackers, too aggressive for pancakes). If a dark liquid (hooch) forms on top, stir it in or pour it off; it’s harmless. Never add discard to the jar if you see pink, orange, or fuzzy spots — that jar is contaminated, full stop.

    Frequently Asked Questions

    Is sourdough discard safe to eat?
    Yes — it’s the same flour, water, and microbes as your starter, just unfed. The microbes are the same ones in the bread you already bake. Discard any jar showing pink, orange, or fuzzy mold, but normal sour-smelling discard is completely safe.

    Can I bake bread with discard instead of active starter?
    Not a proper loaf — discard’s yeast is too sluggish. Every recipe above pairs discard with another leavener or uses none. For real sourdough loaves, feed your starter first.

    How long does discard last in the fridge?
    Up to 2 weeks in a sealed jar. It gets more acidic with age — great for crackers, less ideal for delicate pancakes. When in doubt, sniff: pleasantly sour is fine, anything off or colorful is not.

    Do I need to feed discard before using it?
    No — that’s the point. Discard is used unfed, straight from the fridge (let it warm 15–20 minutes for even mixing). Feeding it would just turn it back into starter.

    Why do discard recipes always add baking powder or soda?
    Because discard contributes flavor and tenderness, not lift. Its yeast is dormant; the chemical leaveners do the rising. The discard’s acidity actually boosts baking soda, so the combination rises better than either alone.

    Can I freeze sourdough discard?
    Yes — freeze in portions up to 3 months; thaw overnight in the fridge. The microbes won’t all survive, but since you’re not relying on them for leavening, it doesn’t matter.

    Related troubleshooting: Sourdough Starter Smells Like Acetone · Why Is My Sourdough Gummy Inside? · No-Knead Bread for Beginners

  • No-Yeast Bread: How It Works and When to Use It

    No-Yeast Bread: How It Works and When to Use It

    No-Yeast Bread: How It Works and When to Use It

    The yeast is dead, expired, or simply missing from your cupboard. Or you’ve got 40 minutes, not four hours. Either way, you want bread — and here’s what most bakers learn late: you don’t need yeast to make real bread. You need gas, and yeast is only one way to get it.

    No-yeast breads rise on chemistry instead of biology: baking soda or baking powder reacting with acids to release carbon dioxide, right there in the bowl. Irish soda bread, baking-powder biscuits, beer bread, and every banana bread ever baked all work this way. The result is genuinely bread — just a different kind of bread, with its own rules. All of them work — here’s the chemistry and when to reach for each. Here’s how the chemistry works and when to reach for it.

    Quick diagnosis: No-yeast bread rises via chemical leaveners (baking soda + an acid like buttermilk, or double-acting baking powder) instead of fermentation. It works brilliantly when you’re out of yeast, short on time (ready in under an hour), or your yeast keeps failing you. It will NOT give you chewy artisan texture or fermented flavor — for baguettes and sourdough-style loaves, yeast is irreplaceable. Match the method to the craving.

    How Yeast Bread Works vs. How No-Yeast Bread Works

    To understand the substitute, understand the original. In yeast bread, living yeast consumes sugars in the dough and exhales carbon dioxide slowly, over hours. That long, slow gas production does two things at once: it inflates the dough and it develops flavor — alcohols, organic acids, the complex taste we call “bready.” Time is an ingredient.

    No-yeast bread skips the biology. The moment baking soda meets an acid (buttermilk, yogurt, lemon juice, molasses), they react and release CO2 immediately. Double-acting baking powder does it in two waves: once when wet, again when heated. All the gas arrives in minutes instead of hours — the advantage and the limitation in one.

    The Main Types of No-Yeast Bread (and What Each Is Good For)

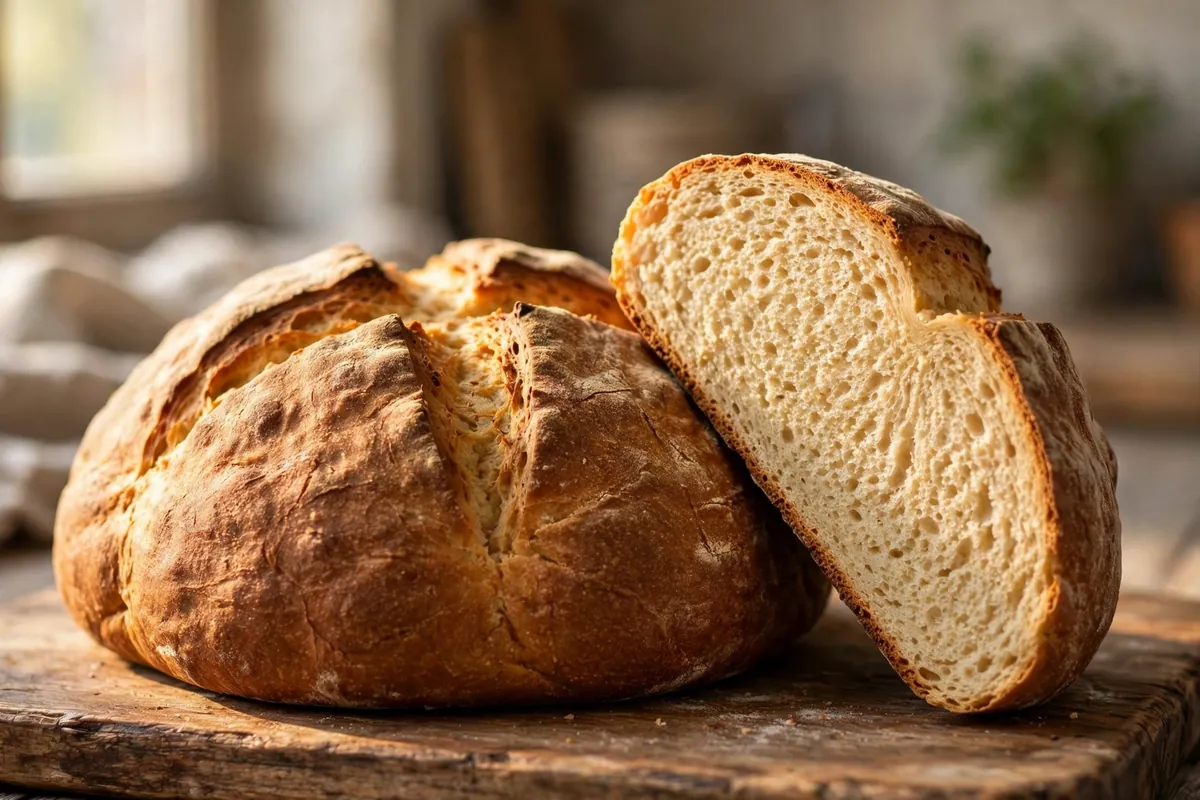
    Soda bread. Buttermilk + baking soda + flour + salt. A dense, hearty loaf with a tight crumb, ready in about 40 minutes — the weeknight hero. Score a cross on top (not decorative; it lets heat reach the center).

    Baking-powder biscuits and scones. Flour, cold fat, baking powder, milk. Flaky, tender, tall — the fat does as much work as the leavening here. The non-negotiable rule: keep everything cold and handle the dough as little as possible.

    Beer bread. Flour + beer + a little sugar and baking powder. The beer’s carbonation and its own yeast contribute lift, and the malt flavor is genuinely delicious. Three ingredients, one bowl, no kneading. This is the recipe I give to people who’ve never baked bread.

    Quick loaves. Banana bread, zucchini bread, pumpkin bread. Baking soda/powder leavened, moist, cake-like crumb. Technically bread by method, dessert by spirit.

    Flatbreads. Tortillas, chapati, pita (pita uses a hot oven for steam puff, no leavening at all). Unleavened by design — the oldest breads on earth never needed yeast.

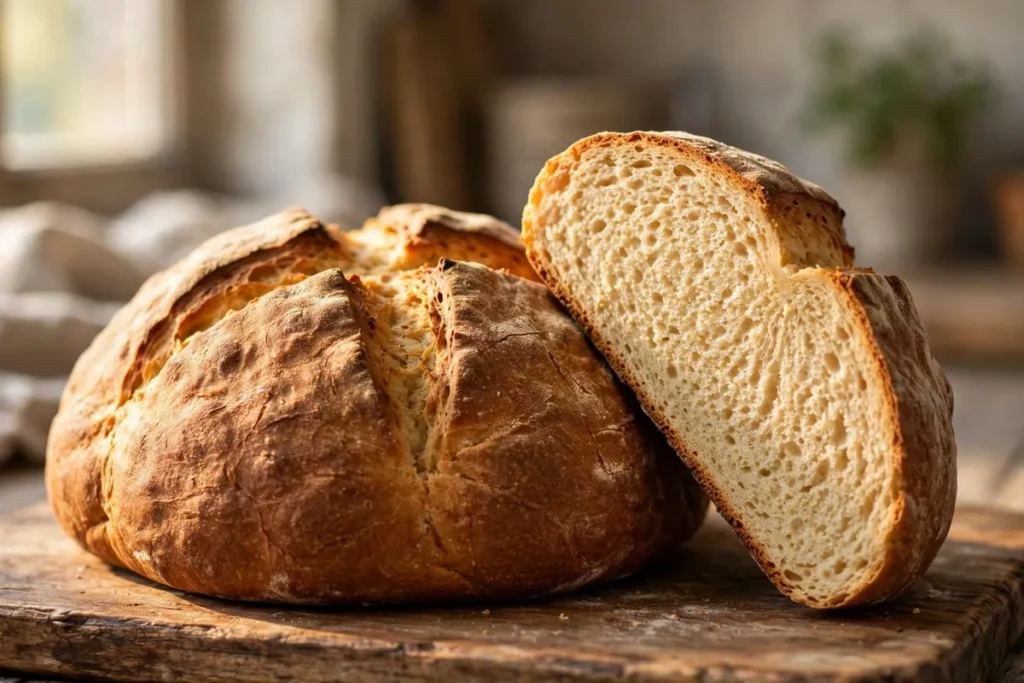
    Sliced soda bread showing tight crumb beside the whole scored loaf
    a sliced soda bread loaf showing the tight crumb next to the whole scored loaf

    The Rules That Make or Break No-Yeast Bread

    Chemical leavening is less forgiving than yeast in specific ways. These rules are the difference between a proud loaf and a doorstop:

    1. Get it in the oven fast. The gas reaction starts the second liquid hits the dry ingredients. With single-acting soda, you have minutes, not hours. Have the oven fully preheated before you mix. I shape soda bread while the oven finishes heating — never the reverse.

    2. Don’t overmix. Without a long fermentation to relax the gluten, every extra stir makes the crumb tougher. Mix until the flour just disappears — lumps are fine, even desirable, in biscuits and quick breads. This is the #1 reason homemade soda bread turns out dense in the bad way (see Why Is My Bread Dense? for the full diagnosis).

    3. Measure leavening precisely. Too little soda and the loaf won’t rise; too much leaves a soapy, yellow-tinged crumb with a metallic bite. Level your teaspoons. The standard ratio: about 1 teaspoon baking soda per 250g flour when paired with enough acid (a cup of buttermilk comfortably covers it).

    4. Respect the acid. Baking soda needs acid to work — buttermilk, yogurt, lemon juice, brown sugar, molasses, cocoa. If a recipe has none of these and calls for soda alone, something is wrong. Baking powder brings its own acid, which is why it works in neutral batters.

    5. Eat it fresh. No-yeast breads stale faster — no fermentation-produced acidity and alcohol to preserve them. Day one is prime time; day two wants toasting.

    When No-Yeast Bread Is the Right Call

    • The yeast failed you. If your last two loaves didn’t rise, stop fighting and bake soda bread tonight — then troubleshoot the yeast problem separately with Why Didn’t My Bread Rise?.
    • You’re out of time. Soda bread: 10 minutes mixing, 35 minutes baking. Done.
    • It’s hot. Summer kitchens over-proof yeast doughs in a flash. Chemical leaveners don’t care about room temperature.
    • You’re a beginner. Fewer variables, faster feedback loop. Every failed quick bread teaches you something in under an hour.
    • You want the flavor. Buttermilk soda bread and beer bread taste like themselves — hearty, malty, wheaty. That’s a feature, not a compromise.
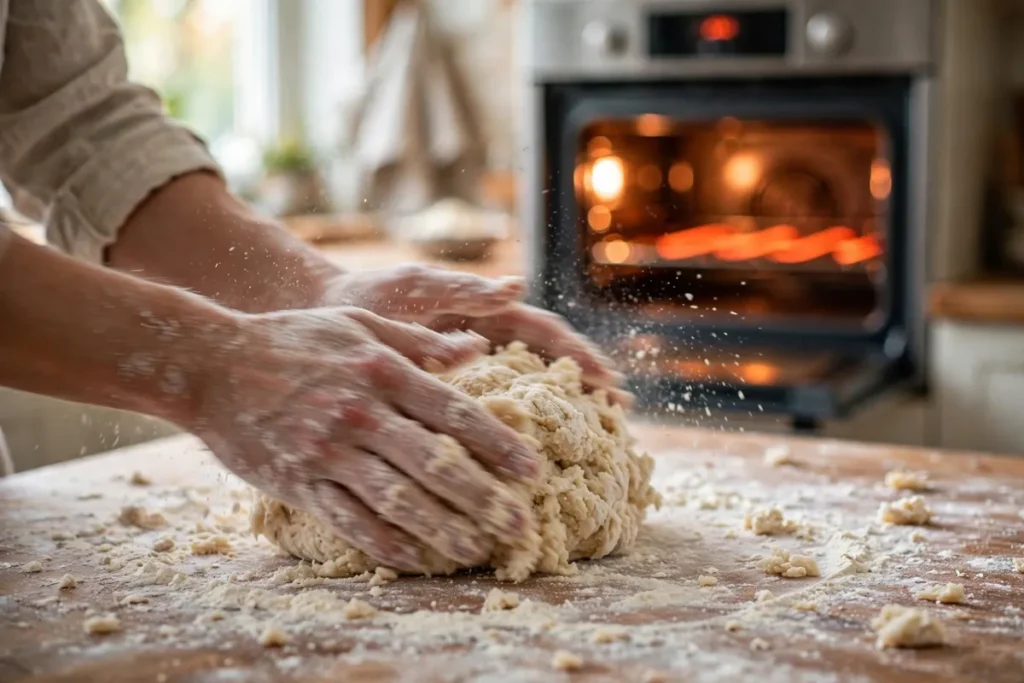
    Hands shaping shaggy soda bread dough on a floured counter, oven glowing behind
    hands quickly shaping a shaggy soda bread dough on a floured counter, oven glowing in background

    When Yeast Is Irreplaceable (Be Honest With Yourself)

    No-yeast methods cannot produce: open artisan crumb, genuine sourdough tang, chewy bagel or pizza crust, or deep overnight-ferment flavor. If that’s what you’re craving, the answer isn’t a substitute method — it’s fixing your yeast technique.

    My Go-To Emergency Loaf (Soda Bread, 45 Minutes)

    500g all-purpose flour, 1 tsp fine salt, 1 tsp baking soda (level), 400ml buttermilk. Whisk dry, stir in buttermilk until shaggy, shape roughly, score a deep cross, bake at 425°F (220°C) for 30–35 minutes until deep golden and hollow underneath. Cool 20 minutes before slicing — the interior finishes setting as it cools (same reason sourdough needs its rest: Why Is My Sourdough Gummy Inside?).

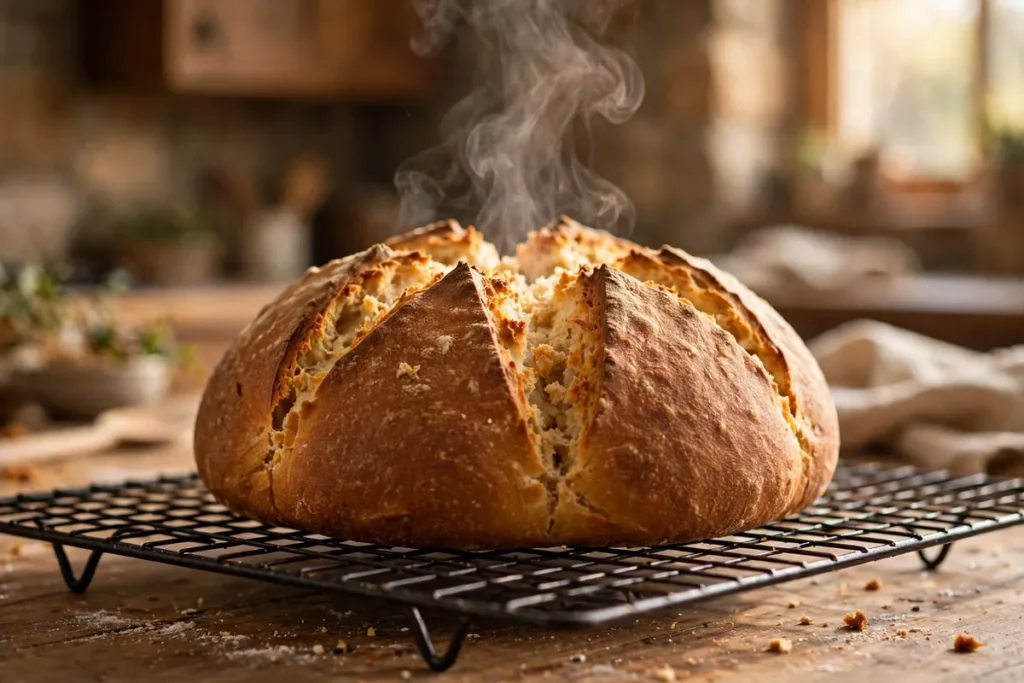
    Finished soda bread cooling on a wire rack, cross split open showing steam
    the finished soda bread cooling on a wire rack, cross split open showing steam

    Frequently Asked Questions

    Can I make no-yeast bread taste like sourdough?
    Not really. You can fake some tang with extra buttermilk or a spoonful of vinegar, and it reads as pleasant sourness — but true sourdough flavor comes from days of bacterial fermentation. Different beast.

    Why did my soda bread come out with yellow spots and a soapy taste?
    Too much baking soda, or it wasn’t mixed evenly through the flour. Always whisk the soda thoroughly into the dry ingredients before adding liquid, and level that teaspoon.

    Can I use baking powder instead of baking soda in soda bread?
    You can, but use roughly three times the amount (1 tsp soda ≈ 1 tbsp powder) and expect a milder flavor and slightly less browning. The classic buttermilk-and-soda pairing exists for a reason.

    Is no-yeast bread healthier than yeast bread?
    It’s bread — flour, water, salt, leavening. Neither is a health food or a health hazard. Don’t let anyone sell you “yeast-free” as a wellness claim; yeast is a single-celled fungus, not a toxin.

    Can I still eat it if the center is a bit doughy?
    A slightly underbaked quick bread is safe to eat (no raw egg concerns in most recipes), but the texture is unpleasant. If the center is wet, slice and toast it — toasting rescues almost every underbaked quick bread.

    Does no-yeast bread work for sandwiches?
    Soda bread and beer bread make excellent toast and open sandwiches. For soft sandwich slices, a baking-powder loaf pan bread works — just slice it thick, since the crumb is more fragile than yeast bread.

    Related troubleshooting: Why Didn’t My Bread Rise? · Why Is My Bread Dense? · Eggless Cake That Actually Works: Tested Replacements