Category: Cakes

  • How to Fix Overwhipped Cream (Before It Becomes Butter)

    How to Fix Overwhipped Cream (Before It Becomes Butter)

    Overwhipping happens in seconds. One moment you have glossy soft peaks, you turn to grab the vanilla, and you come back to something grainy and sad. The good news: truly overwhipped cream is rare. Most of what looks ruined is just over-stiff, and it can be rescued in under a minute. The fix is almost embarrassingly simple — more cream.

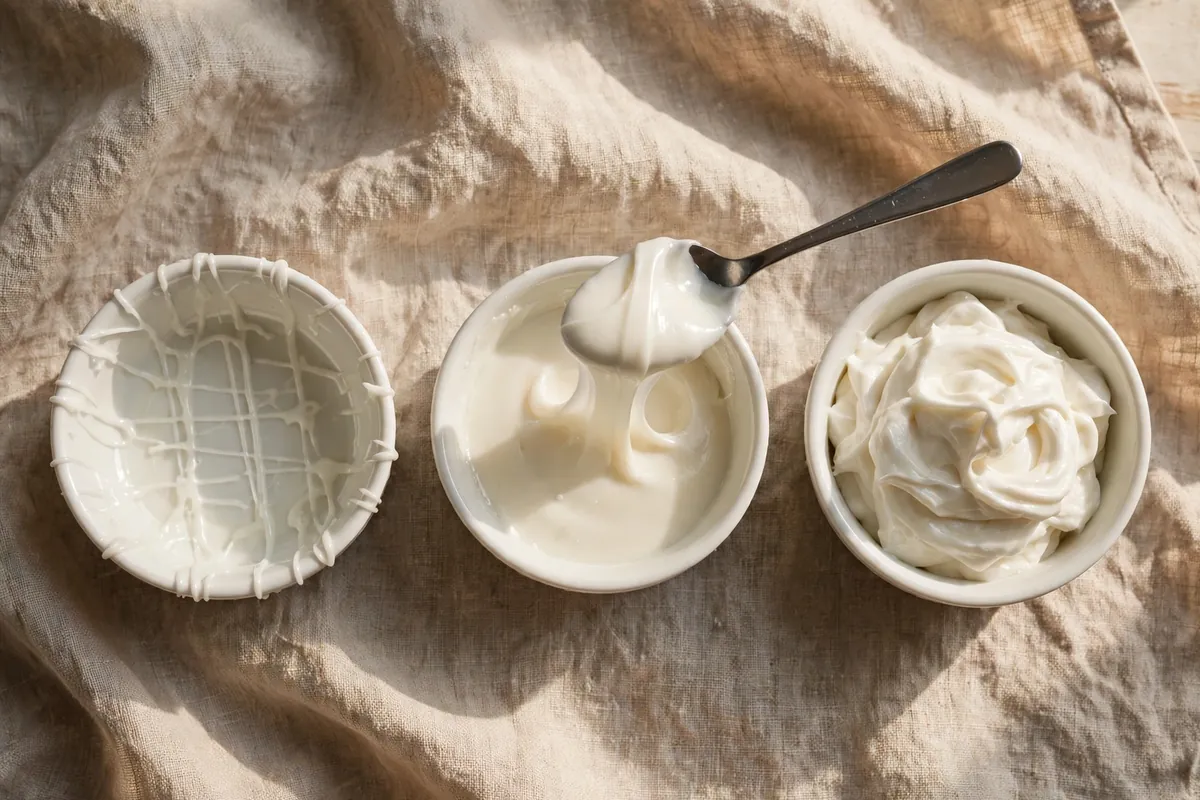
    Quick diagnosis: If it’s just grainy and stiff but still one mass, fold in 1–2 tablespoons of cold unwhipped cream per cup and stop the moment it’s smooth — rescued. If liquid has visibly separated out and yellow clumps are floating in it, that’s butter now; make compound butter instead.

    My tested baseline: 1 cup (240ml) heavy cream, minimum 36% fat, straight from the fridge. Whip with 2 tablespoons powdered sugar added at the soft-peak stage. It goes: soft peaks (2–3 min) → medium peaks (30 sec later) → stiff peaks (another 30 sec) → grainy (15 sec past stiff) → butter (30–60 sec past stiff).

    1. Understand what went wrong — the emulsion broke

    Whipped cream is a foam: air bubbles trapped in a network of partially coalesced fat globules, all suspended in water. Whipping builds that network. Overwhipping keeps building it past the point of usefulness — the fat globules clump too tightly, squeeze out the water between them, and the foam collapses into curds. Push further and the clumps merge completely: butterfat separates from buttermilk, and you have sweet butter.

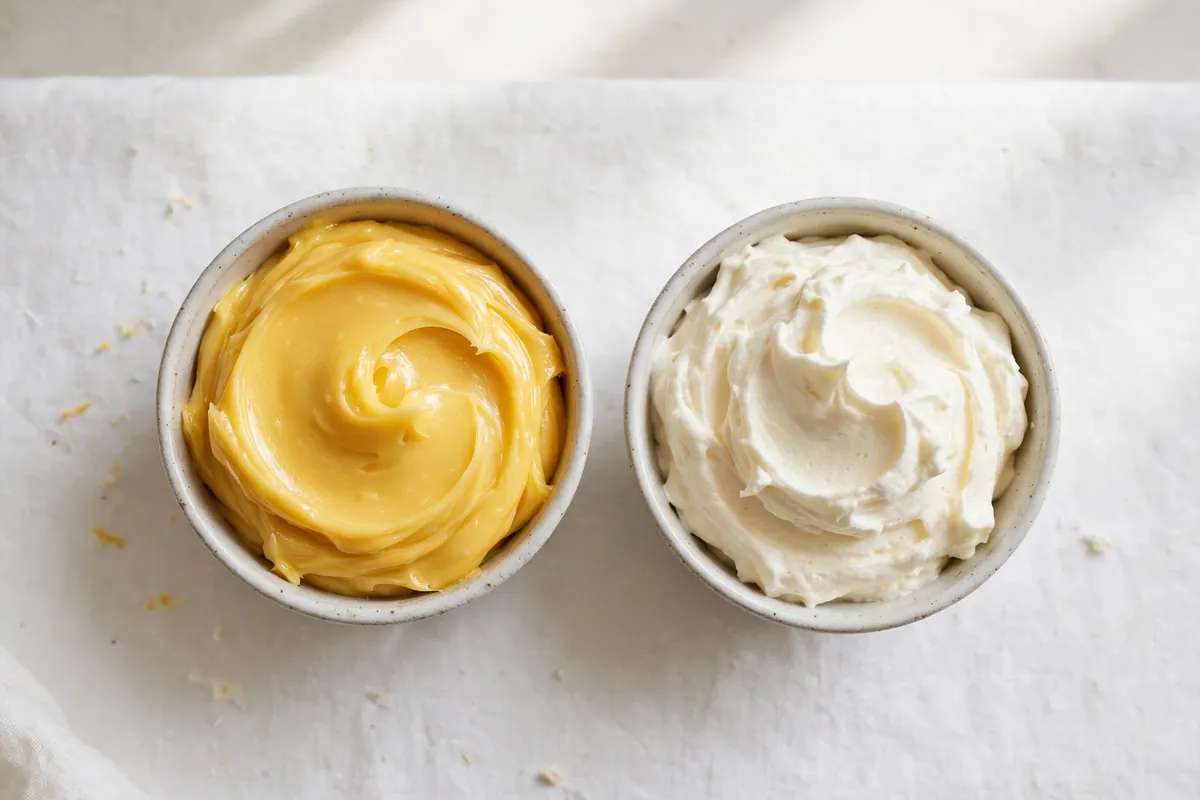
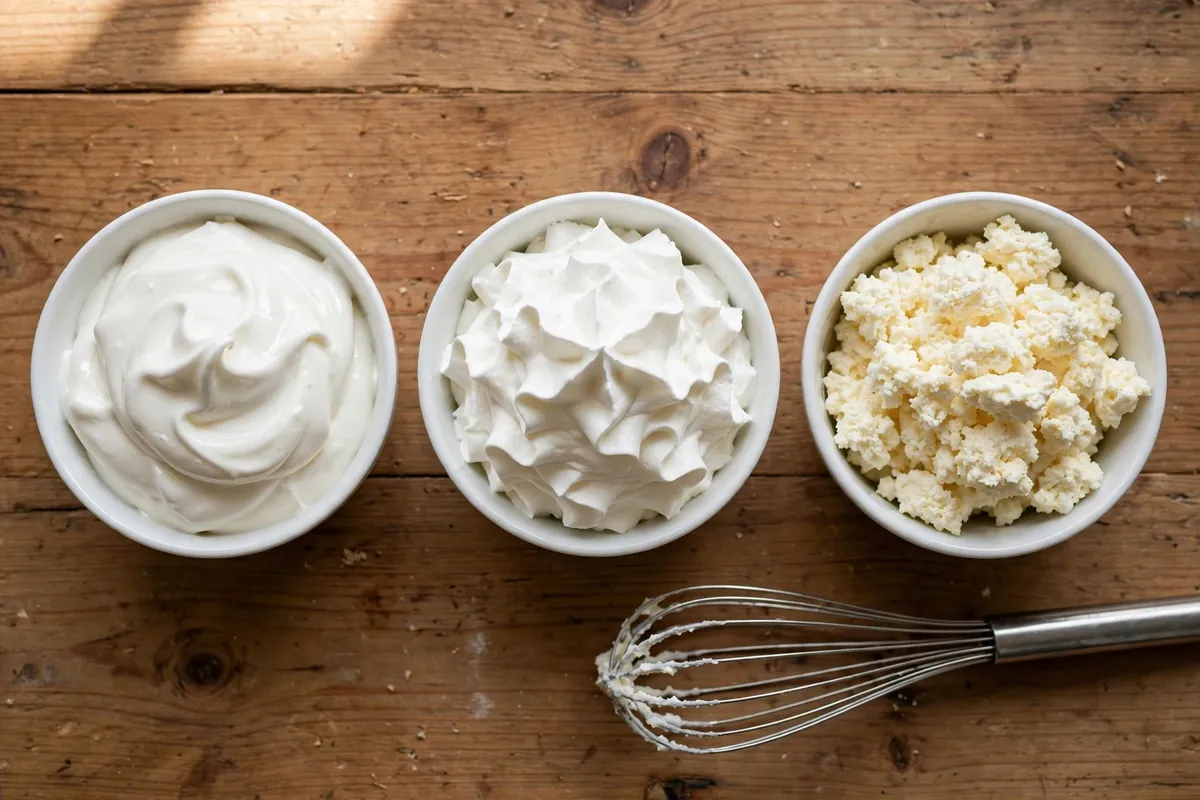
    Still one mass but grainy = fixable. Yellow lumps in thin liquid = butter now.

    The fix for the fixable stage: Stop the mixer immediately. Pour 1–2 tablespoons of cold unwhipped heavy cream over the surface per cup of whipped cream, and fold gently with a spatula — not the mixer — until just smooth. The fresh liquid cream reintroduces the water phase and loosens the over-tightened fat network. Fold a few strokes, check, and repeat — it looks hopeless until it suddenly comes right. Stop the instant it’s smooth; every extra fold heads back toward butter.

    2. Know when it’s officially butter — and pivot

    If liquid has pooled and the solids have gone distinctly yellow and clumpy, folding in cream won’t re-emulsify it — the fat has fully coalesced. This is not a failure; it’s just an unplanned product change. You’ve made sweet cream butter, which is genuinely good.

    How to tell: Thin milky liquid (buttermilk) visibly separated from yellow clumps; no amount of gentle folding brings it back together.

    The fix: Keep the mixer running 1–2 minutes more until fully separated. Rinse the butter under cold water, kneading gently to wash out remaining buttermilk. Knead in a pinch of salt, shape, and refrigerate. (Save that real buttermilk for Why Is My Carrot Cake Dense? — oil cakes love it.)

    3. Prevent it — the last 60 seconds are everything

    Overwhipping is a vigilance problem, not a skill problem. Cream whips slowly for minutes and then changes state in seconds. Every overwhipped bowl I’ve ever made happened because I walked away, answered a message, or assumed I had more time than I did.

    How to tell you’re entering the zone: The whisk starts leaving distinct trails, the surface goes from glossy to matte, and the cream looks slightly rough instead of silky.

    The fix: Whip on medium, not high, for the last minute. Stop at medium-firm peaks for most uses; cream firms up slightly as it sits, and stiff peaks at the mixer become over-stiff on the cake. When in doubt, stop 30 seconds early and finish the last few strokes by hand with a whisk — hand-whisking gives you instant feedback no mixer can. Cold cream, bowl, and beaters (10 minutes in the freezer) whip faster and more evenly.

    4. Sweeten at the right moment — sugar timing matters

    Adding granulated sugar at the start slows whipping slightly and gives you a wider window — but add it too early in large amounts and it weighs down the foam. Powdered sugar, with its cornstarch, lightly stabilizes the finished cream and buys you a little insurance against both overwhipping and weeping.

    How to tell it mattered: Cream sweetened from the start took noticeably longer to reach peaks (more control); cream with powdered sugar held its shape hours longer in the fridge.

    The fix: My standard: start whipping plain cream, add 2 tablespoons powdered sugar per cup at the soft-peak stage, add vanilla then too.
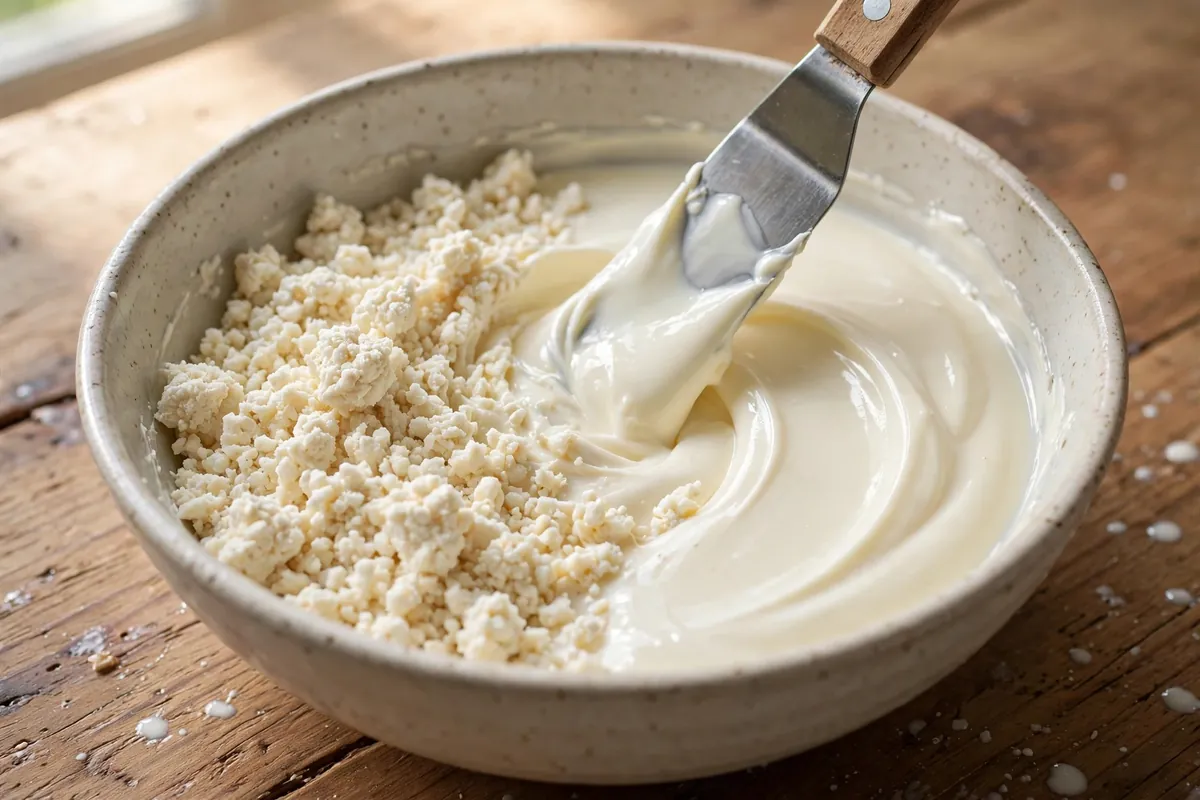
    hands folding a spoonful of liquid cream into grainy overwhipped cream with a spatula, mid-rescue
    hands folding a spoonful of liquid cream into grainy overwhipped cream with a spatula, mid-rescue

    5. Don’t try to fix it with the mixer — folding only

    The instinct when cream goes grainy is to keep beating, hoping it smooths out. It never does — the mixer is what broke the emulsion, and more mixer only drives it further toward butter.

    How to tell: Cream that was grainy-but-whole became visibly separated and yellow after “just a few more seconds” of beating.

    The fix: Mixer off, spatula in hand. Fold the rescue cream in with 4–6 gentle strokes, assess, and repeat if needed. If you’re making frosting or a folded dessert, slightly under-rescue: the cream will get more agitation when you fold it into the other components.

    6. Choose the right cream — fat percentage is your safety margin

    This is the quiet variable. “Heavy cream” at 36–40% fat whips fast, holds peaks proudly, and overwhips in a blink. “Whipping cream” at 30–36% whips more slowly, makes softer peaks, and forgives inattention — but never gets as firm.

    How to tell: Your cream raced to stiff peaks in under 2 minutes (high fat, narrow window) or took forever and stayed soft (lower fat, wide window).

    The fix: For beginners or multitaskers, 35%-ish whipping cream is the forgiving choice. For piping and layer cakes that must hold, 38–40% heavy cream — but stay at the mixer for the entire last minute. Check the label: anything below 30% fat won’t whip at all.
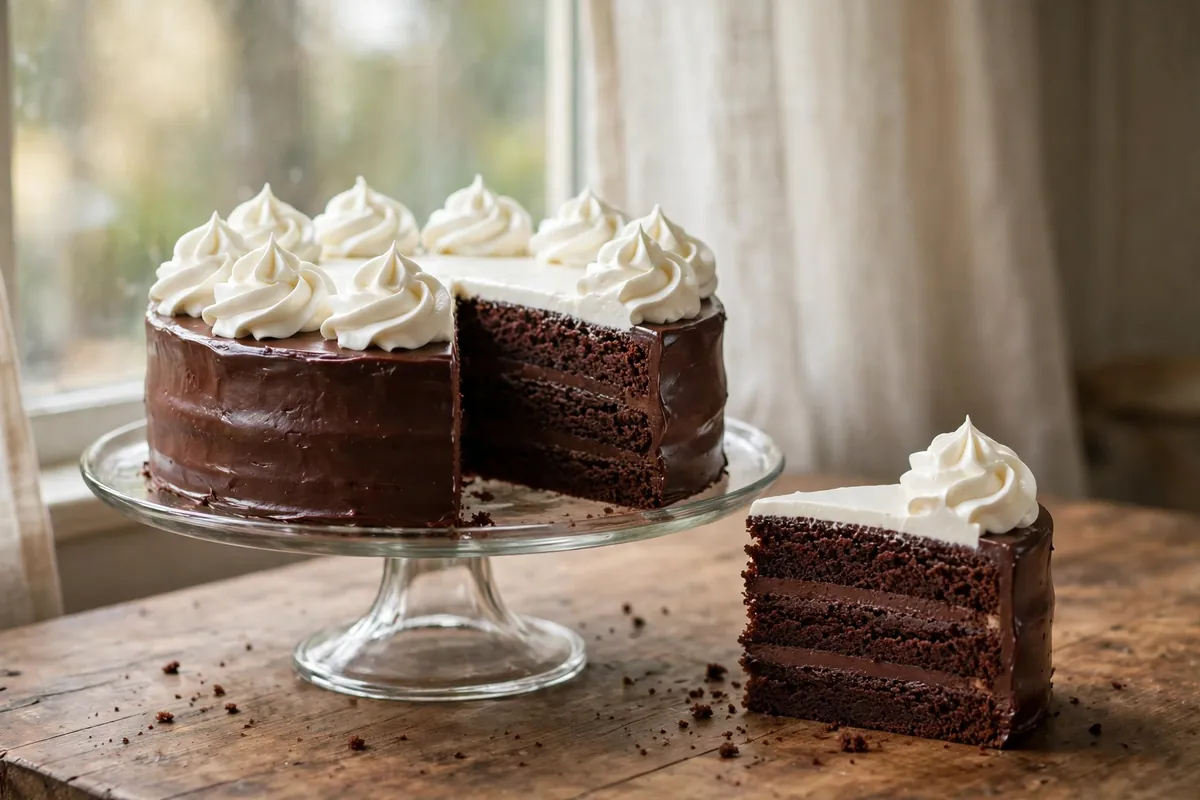
    piped rosettes of perfectly rescued whipped cream on a chocolate cake, glossy and smooth
    piped rosettes of perfectly rescued whipped cream on a chocolate cake, glossy and smooth

    Frequently asked questions

    Is overwhipped cream safe to eat?
    Yes, completely. It’s the same cream, same fat, just a different structure. Grainy cream tastes fine — the issue is texture, not safety. Even fully separated butter and buttermilk are perfectly safe.

    How can you tell the exact moment to stop whipping?
    Watch the surface: glossy and smooth with soft folds = keep going; trails holding their shape with a slight sheen = medium peaks, stop here for most uses; matte, rough, and craggy = you’ve gone 15 seconds too far — rescue immediately.

    Can I re-whip cream that turned to butter back into whipped cream?
    No. Once the fat has fully coalesced and the buttermilk separated, the emulsion can’t be rebuilt by beating. Make butter, and start a fresh batch of cream.

    Why does my whipped cream weep liquid after a few hours?
    That’s a different problem — under-stabilized cream, not overwhipped. The foam slowly releases water as it sits. Fix it next time with powdered sugar (the cornstarch helps) added at soft peaks, and keep the finished cream refrigerated.

    Can I use overwhipped cream in frosting?
    Grainy cream makes grainy frosting. Rescue it first with the fold-in method until smooth, then use it — or fold the rescued cream into a fresh batch whipped to proper peaks. Your Fix Broken Buttercream: Emulsion Rescue Guide uses the same principle: gentle re-emulsification beats force.

    Related troubleshooting: Fix Broken Buttercream: Emulsion Rescue Guide · Why Does My Frosting Taste Like Butter? · How to Fix Curdled Ganache
  • Why Are My Muffins Tough? The Muffin Method Explained

    Why Are My Muffins Tough? The Muffin Method Explained

    Tough muffins are the quietest baking failure — no dramatic collapse, no visible flaw, just a muffin that chews like bread dough and sits heavy. I’ve pulled batches from the oven that looked perfect and ate like rubber. The cause is almost always the same, and it’s the single most misunderstood technique in home baking: how you mix the batter. Master the muffin method once and tough muffins leave your kitchen permanently.

    Quick diagnosis: Tough muffins come down to one thing in nearly every case: the batter was overmixed. If you stirred until smooth, beat out every lump, or used an electric mixer on the batter, start with cause #1 — it’s the answer 9 times out of 10.

    1. You overmixed the batter

    This is the cause, full stop, for the overwhelming majority of tough muffins. The moment liquid meets flour, gluten starts forming. Every additional stir develops it further. Stir a muffin batter until smooth and you’ve built a bread-dough gluten network in a batter that was supposed to stay tender — the result is chewiness, tunnels (long air channels where gas forced through the elastic network), and sometimes peaked, ugly tops.

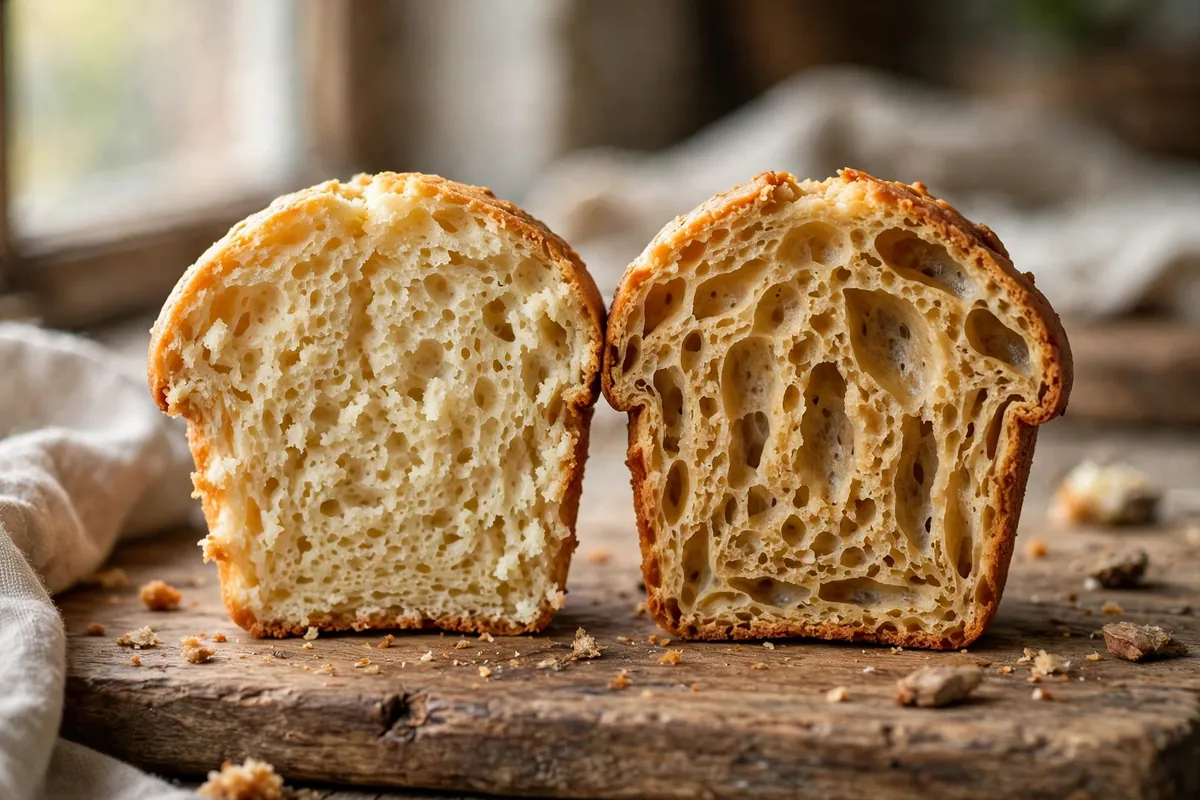
    How to tell: Cut one open. Tunnels — elongated holes running through the crumb — are the fingerprint of overmixing. The texture is chewy or rubbery rather than soft, and the tops may have peaked into odd points instead of doming smoothly.

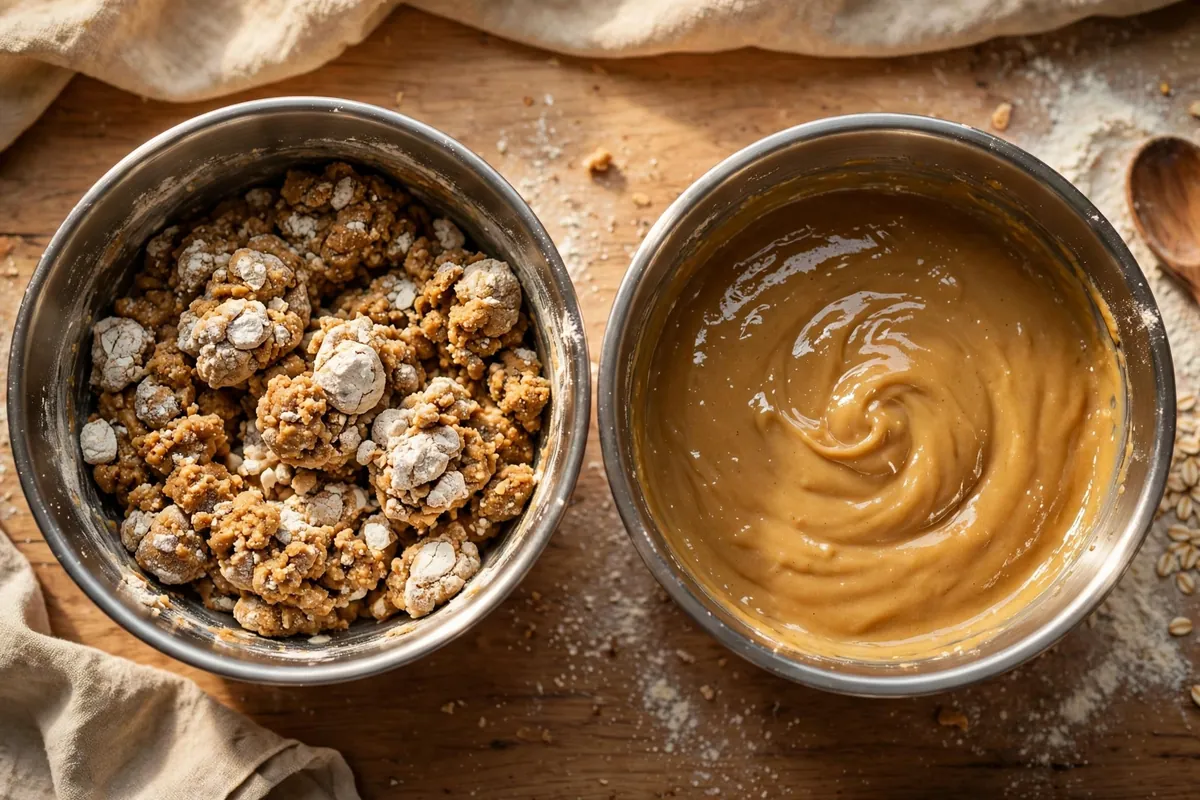
    The fix: Learn the mantra: lumps are fine. The muffin method is: whisk dry ingredients in one bowl, whisk wet in another, pour wet into dry, and stir with a spatula just until the flour disappears — 10 to 12 strokes, no more. The batter should look lumpy and rough. It will feel wrong. It is right. Those lumps hydrate in the oven’s heat and vanish, leaving tender crumb. Never use an electric mixer on muffin batter after the flour goes in — a mixer overdevelops gluten in seconds.

    2. You didn’t actually use the muffin method

    Many recipes say “mix” without explaining the order of operations, and the order matters enormously. The muffin method exists for a reason: combining wet and dry separately, then uniting them with minimal stirring, limits the time flour and liquid spend being agitated together. Dumping everything in one bowl and stirring until combined maximizes it.

    How to tell: You mixed all ingredients in a single bowl, or added flour to already-beaten wet ingredients and kept beating.

    The fix: Two bowls, always. Bowl one: flour, sugar, leavening, salt, spices — whisked. Bowl two: eggs, milk, oil or melted butter, vanilla — whisked. Pour bowl two into bowl one, 10–12 strokes, done. If the recipe includes mix-ins (berries, chocolate chips, nuts), toss them in the dry bowl first — the flour coating keeps them suspended instead of sinking — and count their addition in your stroke budget.

    3. The wrong fat (or the wrong handling of it)

    Fat’s job in muffins is tenderness: it coats flour proteins and physically blocks gluten formation. Oil does this best — it’s liquid at room temperature and coats evenly. Melted butter works nearly as well. But creamed solid butter (the cake method) is wrong for muffins: creaming develops structure and traps air for a fine, firm crumb — the opposite of muffin tenderness.

    How to tell: You creamed butter and sugar together before adding the rest, or used the cake-mixing method out of habit.

    The fix: Use oil or melted (not creamed) butter, whisked into the wet bowl. If flavor matters more than maximum tenderness — it often does — melted butter is the sweet spot: nearly the tenderness of oil with real butter flavor. Never cream solid butter for muffins.

    two batters side by side — one lumpy and rough (correct), one smooth and overmixed
    two batters side by side — one lumpy and rough (correct), one smooth and overmixed

    4. Too much flour (the measuring problem again)

    The flour-scooping problem strikes muffins exactly as it strikes cake and bread: a scooped cup can weigh 150g against the standard 120g, adding 25% more flour — and therefore 25% more gluten potential — without you knowing. In muffins, where tenderness is the entire goal, that hidden extra flour is devastating.

    How to tell: The batter was thick and stiff rather than pourable, and the baked muffins are dense as well as tough.

    The fix: Weigh flour at 120g per cup, or spoon-and-level. This one habit, repeated across every post on this site, fixes more baking failures than any other single change.

    5. Overbaked (even slightly)

    Muffins are small and lean — they go from perfect to dry in about three minutes, and dry reads as tough. A muffin baked to a clean toothpick is overbaked; the carryover heat finishes the job after you pull them.

    How to tell: The edges are dark, the tops are firm and dry rather than springy, and the toothpick came out completely clean.

    The fix: Start checking 3–4 minutes before the recipe’s earliest time. Pull when a toothpick shows a few moist crumbs. Most standard muffins bake at 375–400°F (190–200°C) for 18–22 minutes — but verify with your oven, and cool in the pan only 5 minutes before moving to a rack (the pan’s residual heat keeps baking them).

    6. The batter sat too long — or not at all (the nuance)

    Here’s the subtle one. A brief rest — 20 to 30 minutes after mixing — actually helps: flour hydrates fully, and hydrated flour bakes into a more tender, even crumb. But an hour-plus rest at room temperature lets the chemical leaveners (baking powder especially) spend their first reaction, so the muffins rise less and bake denser — which reads as tough.

    How to tell: You mixed the batter well ahead and baked later, or you always rest and your muffins are consistently a bit dense.

    The fix: If you rest, keep it to 20–30 minutes, and use double-acting baking powder (its second reaction happens in the oven’s heat, so a short rest costs you nothing). For the most reliable results, mix and bake promptly.

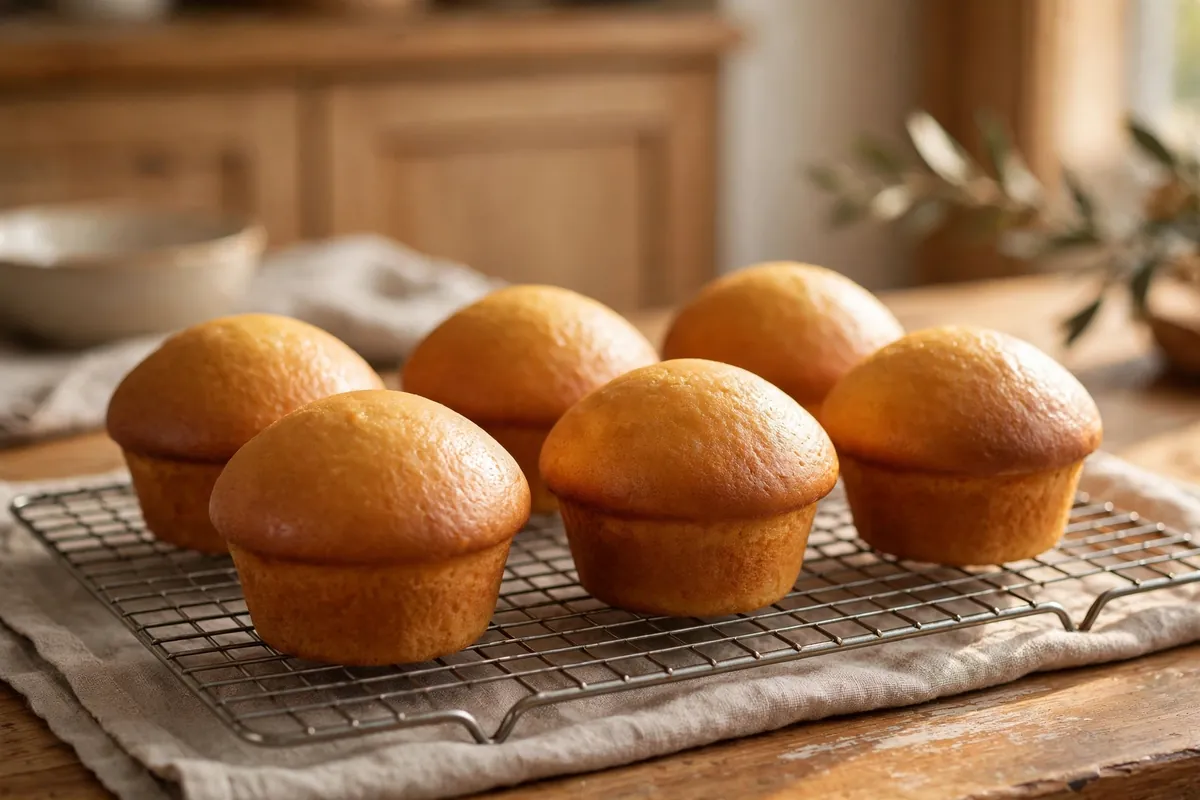
    a tray of perfectly domed muffins cooling on a wire rack, tops golden
    a tray of perfectly domed muffins cooling on a wire rack, tops golden

    Frequently Asked Questions

    What is the muffin method in baking?
    Whisk dry ingredients in one bowl and wet ingredients in another, pour wet into dry, and stir just until combined — 10 to 12 strokes, lumps remaining. Minimal stirring limits gluten development, which is what keeps muffins tender instead of tough.

    Why do my muffins have tunnels inside?
    Tunnels are the classic sign of overmixing. Excess stirring builds an elastic gluten network; expanding gases then force channels through it instead of distributing evenly. Stir less — lumpy batter is correct batter.

    Are dense muffins safe to eat?
    Completely — toughness is a texture issue, not a safety one. (Though if they’re truly inedible, cube them for bread pudding — the rescue logic is identical.)

    Should muffin batter be lumpy or smooth?
    Lumpy, always. Smooth muffin batter is overmixed batter. Ten to twelve strokes with a spatula, flour just disappeared, visible lumps — that’s the target. They bake out.

    Can I use an electric mixer for muffins?
    Only for the wet ingredients, before flour is added. Once flour meets liquid, switch to a spatula and hand-stir. A mixer develops gluten far too efficiently for muffin batter.

    Why are my muffins dry as well as tough?
    Overbaking compounds overmixing — dry and tough usually means both. Fix the mixing first (lumps!), then pull 3–4 minutes earlier with a moist-crumb toothpick test. Either fix alone improves things; both together transform them.

    Related troubleshooting: Why Is My Cake Dry? · Why Is My Bread Dense? · Why Do My Cookies Spread Flat?

  • Overbaked Cake? 5 Rescue Methods That Actually Work

    Overbaked Cake? 5 Rescue Methods That Actually Work

    The toothpick came out clean — five minutes too late. The edges are dark, the crumb is cottony, and the cake you needed for tonight tastes like a sweet sponge. I’ve rescued more overbaked cakes than I care to admit: you can’t un-bake a cake, but you can absolutely make it delicious again. Here are the five rescues that work, in order of effort.

    Quick diagnosis: A dry, overbaked cake needs moisture added back or a complete transformation. For a cake that’s just a little dry, the simple-syrup soak (method #1) fixes it in ten minutes. For a genuinely parched cake, stop trying to serve it as cake — turn it into trifle, cake pops, or bread pudding (methods #3–5) and nobody will ever know.

    Method 1: The simple-syrup soak (10 minutes, best for mildly dry cake)

    This is the professional bakery’s everyday fix — most commercial cake layers get syruped as a matter of routine, not emergency. The syrup adds back exactly what overbaking drove out: water and sugar, in the ratio cake crumb absorbs best.

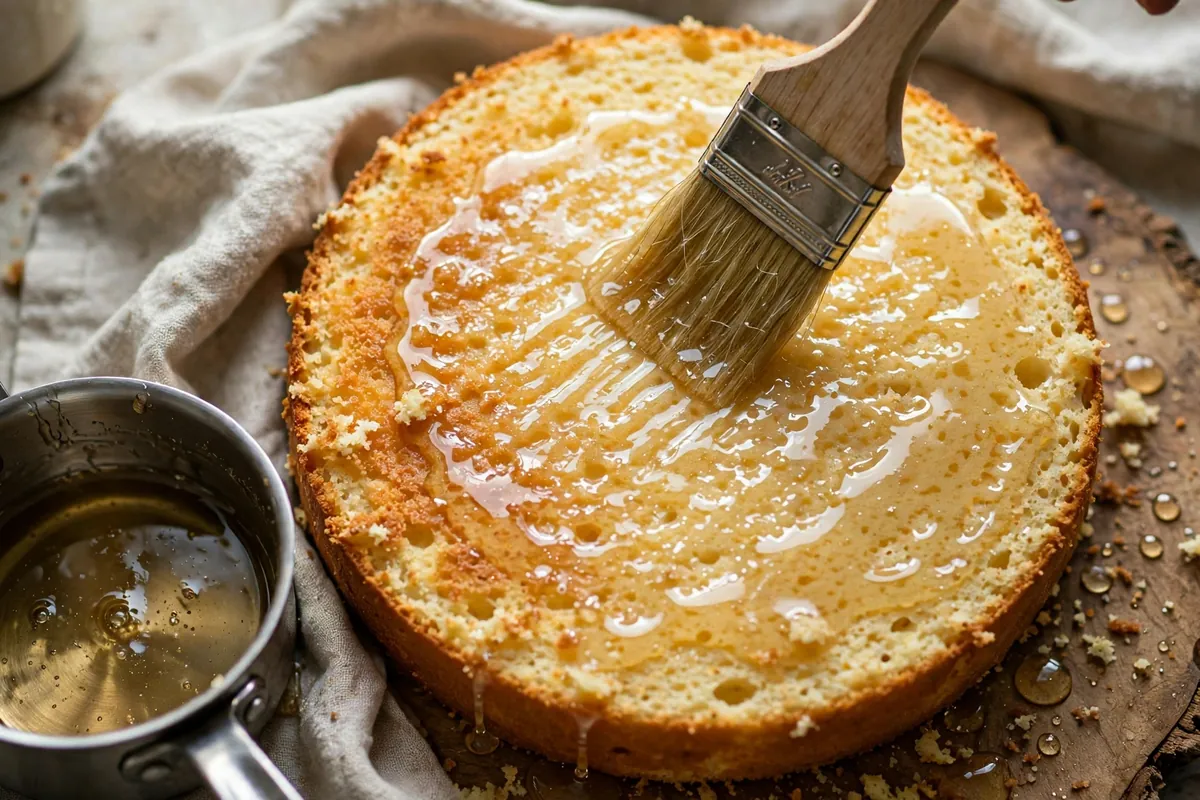
    How: Combine equal parts sugar and water (½ cup each covers two layers). Simmer, stirring, until dissolved, then cool fully — warm syrup melts frosting. Poke the layers all over with a skewer, going halfway through. Brush on 2–3 tablespoons per 8-inch layer, letting it absorb. The crumb should look moist, not soggy.

    Flavor it: Swap the water for brewed coffee (chocolate cake) or orange juice (vanilla cake), or add a teaspoon of vanilla, rum, or almond extract to the cooled syrup. A flavored soak adds a layer the original recipe never had — which is how a rescue becomes an upgrade.

    When it works: Cake that’s dry but structurally sound — intact crumb, no burnt edges. If the edges are actually burnt (bitter, black), trim them off first with a serrated knife; syrup can’t fix carbon.

    Method 2: Frost heavy and seal it in (15 minutes)

    Frosting is a moisture barrier. A dry cake served naked stays dry; the same cake under a generous coat of frosting reads as “sturdy” rather than parched, because every bite includes the frosting’s fat and sugar. This is why bakery sheet cakes — often baked a day ahead — taste fine: they’re sealed.

    How: Level the layers, then apply frosting generously — don’t skimp. A crumb coat first (thin layer, chill 20 minutes), then the full coat. The crumb coat traps loose crumbs and starts sealing moisture immediately. Fill between layers thickly too; the filling is doing rescue work, not just flavor work.

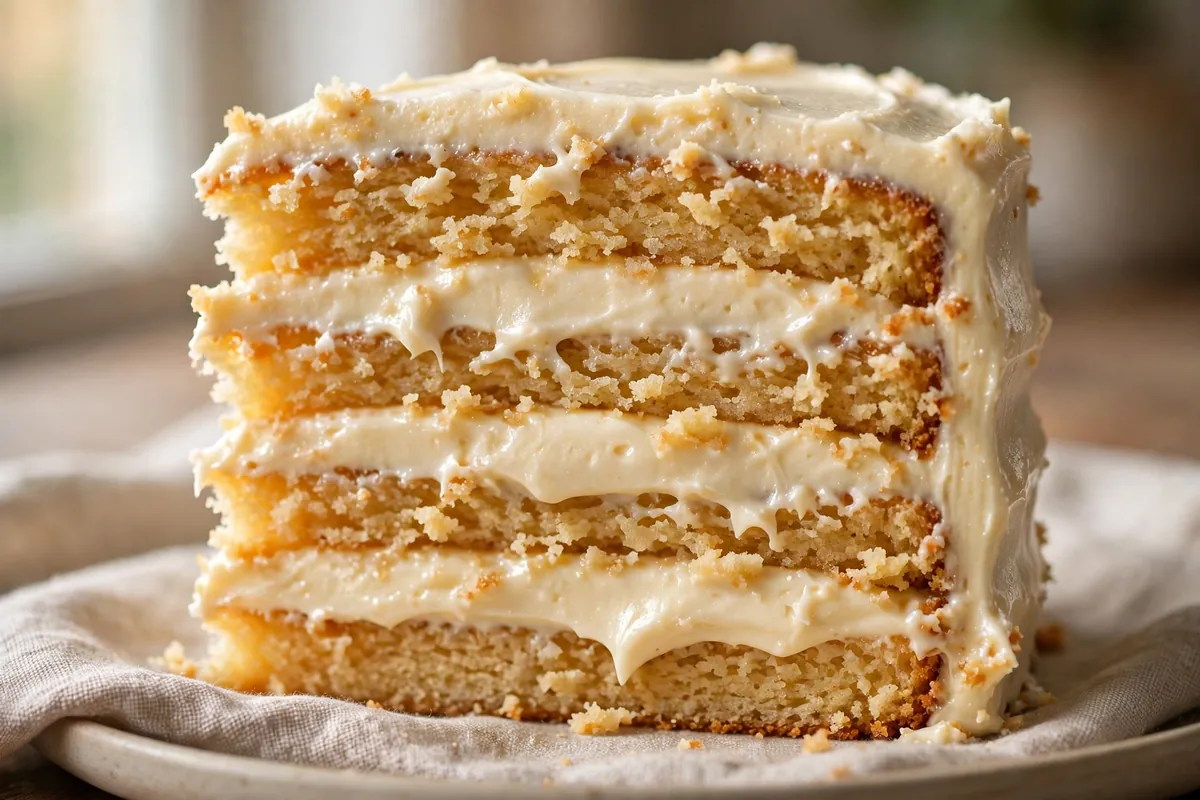
    cross-section of a frosted layer cake showing thick frosting sealing the layers
    cross-section of a frosted layer cake showing thick frosting sealing the layers

    Best for: Layer cakes that are dry but not crumbly — the structure holds, the eating experience needs help. Pair with method #1 (syrup first, then frost) for the full treatment.

    Method 3: Turn it into trifle (20 minutes, the crowd-pleaser)

    This is the rescue with the highest success rate, because trifle doesn’t ask the cake to be good cake — it asks it to be a sponge for custard, fruit, and cream, which is exactly what dry cake does brilliantly. Dry crumb absorbs custard better than moist crumb does. Your failure is now a feature.

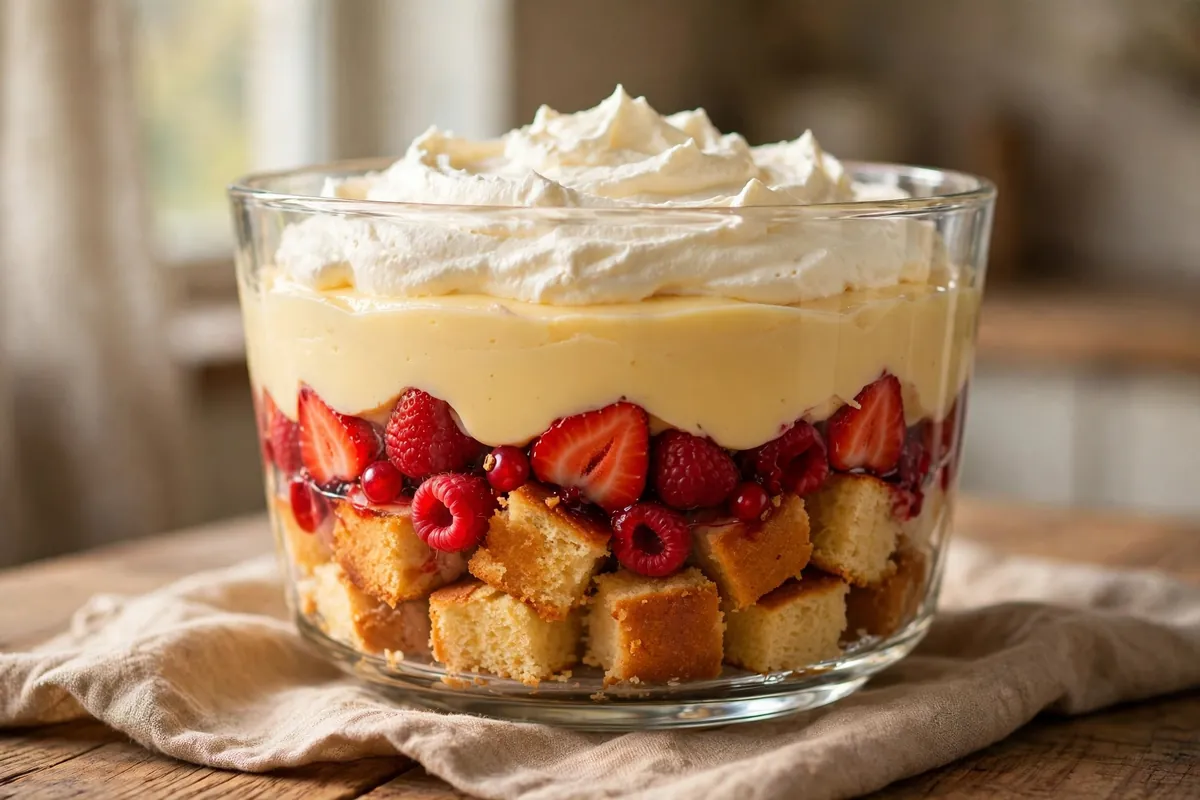
    How: Cube the cake into 1-inch pieces. Layer in a glass bowl: cake cubes, macerated fruit or jam, custard or vanilla pudding, whipped cream. Repeat. Chill at least 2 hours (overnight is better) so the layers meld. The cake cubes drink up the custard and turn meltingly tender.

    Best for: Genuinely parched or crumbly cake, cake with trimmed burnt edges — anything too far gone for the syrup soak. Chocolate cake + raspberries + custard is the classic; vanilla cake + lemon curd + berries is the elegant one.

    a glass trifle bowl showing distinct layers of cake cubes, berries, custard, and cream
    a glass trifle bowl showing distinct layers of cake cubes, berries, custard, and cream

    Method 4: Cake pops and rum balls (30 minutes, the fun one)

    Dry cake is the ideal base for cake pops — the standard recipe literally starts with crumbled cake plus frosting. You’re not hiding the dryness; you’re exploiting it, because dry crumbs absorb the binder perfectly and hold their shape.

    How: Crumble the cake finely. Mix in frosting 1 tablespoon at a time until the mixture holds when squeezed — usually 3–4 tablespoons per 2 cups of crumbs. Roll into 1-inch balls, chill 30 minutes, then dip in melted chocolate. For rum balls: swap the frosting for a splash of dark rum plus a spoonful of jam, roll in cocoa or chopped nuts.

    Best for: Cake that’s too dry or crumbly to slice presentably. Kids’ parties, bake sales, gifts — nobody has ever guessed a cake pop’s origin story.

    Method 5: Bread pudding / tres leches transformation (40 minutes, the total rebuild)

    The nuclear option, and honestly the most delicious one. Bread pudding was invented for stale, dry baked goods — custard soaks in, the oven sets it, and what emerges is a different dessert entirely, one where dryness was a prerequisite.

    How: Cube the cake, place in a buttered baking dish. Whisk together 2 cups milk or half-and-half, 3 eggs, ½ cup sugar, 1 teaspoon vanilla, and a pinch of salt. Pour over the cubes, press to submerge, rest 20 minutes. Bake at 350°F (175°C) for 35–45 minutes until set and golden. For tres leches: skip the eggs, soak in evaporated milk, sweetened condensed milk, and heavy cream, and serve chilled with whipped cream.

    Best for: The worst cases — the cake that’s beyond syrup, beyond frosting. Also the best-tasting rescue on this list; I’ve had guests request “that bread pudding” without knowing it began as a failed layer cake.

    What NOT to do

    • Don’t put it back in the oven. More heat is how you got here. Every rescue on this list adds moisture or transforms the cake — none of them involve rebaking the cake itself.
    • Don’t microwave it. Thirty seconds of microwave makes dry cake briefly soft, then tougher than before as it cools. It’s a party trick, not a fix.
    • Don’t serve it plain and hope. Guests notice. The ten minutes a syrup soak takes is always worth it.

    Frequently Asked Questions

    Can you really fix an overbaked cake?
    You can’t reverse the baking, but you can fix the eating experience completely. A syrup soak restores moisture to mildly dry cake; for badly overbaked cake, trifle, cake pops, or bread pudding transform it into a dessert nobody will recognize as a rescue.

    How do you moisten a dry cake after baking?
    Poke holes with a skewer and brush on simple syrup — equal parts sugar and water, simmered and cooled — 2–3 tablespoons per 8-inch layer. Flavor the syrup with coffee, citrus juice, or extract to match the cake.

    Is it safe to eat overbaked cake?
    Completely — overbaking is a texture problem, not a safety one. The only exception is genuinely burnt (black, bitter) portions; trim those off, as burnt flavors permeate and taste acrid.

    Can I rebake a dry cake with more moisture?
    No — returning a baked cake to the oven only drives out more moisture. All real rescues work by adding moisture (syrup, custard, frosting) or repurposing the crumb, never by reheating the cake itself.

    What’s the best rescue for a dry layer cake needed tonight?
    The syrup soak plus generous frosting — 25 minutes total, and the cake serves as intended. If it’s too far gone, trifle: 20 minutes of assembly, 2 hours chilling, and it’s the best dessert on the table.

    How do I stop overbaking cakes in the first place?
    Start checking 5–8 minutes before the recipe’s earliest time, pull when a toothpick shows moist crumbs (not clean), and verify your oven with a thermometer — most ovens run 15–25°F off. Full prevention guide: Why Is My Cake Dry?

    Related troubleshooting: Why Is My Cake Dry? · Why Did My Cake Sink in the Middle? · Why Is My Pie Filling Runny?

  • Why Did My Basque Cheesecake Burn? (High-Heat Cheesecake Fixes)

    Why Did My Basque Cheesecake Burn? (High-Heat Cheesecake Fixes)

    That near-black top on your Basque cheesecake is probably not a mistake — it’s the entire point of the dessert. Basque cheesecake bakes deliberately hot so the surface caramelizes deep and dark while the center stays soft and custardy. The real question isn’t whether it’s dark, but whether it’s caramelized (bitter-sweet, delicious) or carbonized (acrid, ashy, actually burnt).

    Quick diagnosis: A deeply browned, almost-black top is normal and correct — taste it before panicking. Truly burnt (bitter, ashy) comes from an oven running hot, a rack too close to the top element, or baking too long. If only the surface is overdone, shave it off with a serrated knife — the inside is almost always fine.

    Tested baseline: 900g (2 lb) full-fat cream cheese at room temperature, 300g sugar, 6 large eggs, 480ml heavy cream, 30g flour, 1 tsp vanilla, 1 tsp fine salt. 10-inch springform lined with pleated parchment sticking above the rim. Baked at 425°F (220°C), middle rack, 55 minutes — deeply browned top, a 2–3 inch jiggle in the center. Cooled 1 hour, chilled 6 hours before slicing.

    1. The dark top is the recipe — don’t confuse caramelized with burnt

    This is the number-one “problem” with Basque cheesecake, and it isn’t one. The dessert was born in San Sebastián baked at fierce heat; the scorched-looking top is its signature, with bitter caramel notes balancing the sweet, creamy interior. If yours looks like crème brûlée’s darker cousin, you nailed it.

    How to tell: Caramelized tops smell like toffee and taste pleasantly bitter-sweet. The color is uneven — mahogany in spots, near-black in others. Truly burnt tops smell acrid, taste ashy, and the blackness is uniform and dull.

    The fix: Taste the top before doing anything drastic. Bitter-sweet and delicious means serving it proudly. Genuinely ashy means shaving off the blackened 2–3mm with a long serrated knife — what’s underneath is almost always perfect.

    2. Your oven runs hot — the most common real cause

    Home ovens routinely run 25–50°F (15–30°C) hotter than the dial says, and at 425°F (220°C) that margin is the difference between caramelized and carbonized. A cheesecake that was perfect at a friend’s house can scorch in your oven from this alone.

    How to tell: Everything you bake browns faster than recipes say; the top went from golden to black in the last 10 minutes.

    The fix: Put an oven thermometer on the middle rack and trust it, not the dial. If yours runs hot, set 400°F (200°C) instead and add 5–10 minutes. Start checking color at 40 minutes — you can always add time, but you can’t un-burn a top.

    3. The rack was too high — the top element scorched it

    Most ovens heat from the top element during baking, and Basque cheesecake rises dramatically — the domed top can end up inches from the element even from a safe starting position.

    How to tell: The very center of the top is darkest; sides and bottom are fine; the rise brought the surface up toward the heat.

    The fix: Bake on the middle rack or one notch below, never the top third. If the top colors too fast mid-bake, lay a loose sheet of foil over it — tented, not touching — for the remaining time. Same rescue as overbaked cakes.

    4. You baked too long chasing a set center — the jiggle is correct

    The classic Basque error: the center still wobbles at 55 minutes, so you give it “just 15 more” — and the top goes from dark to destroyed. The center should jiggle like set gelatin when you pull it; it finishes setting during 4–6 hours of chilling. A fully firm center out of the oven means a dry, overbaked cheesecake.

    How to tell: You baked past 70 minutes; the top is black and the texture is firm and cakey rather than creamy.

    The fix: Pull it when a 2–3 inch circle in the center still jiggles and the edges are puffed and set. Chill 6 hours minimum, overnight if you can. A properly baked Basque slices like a firm custard.

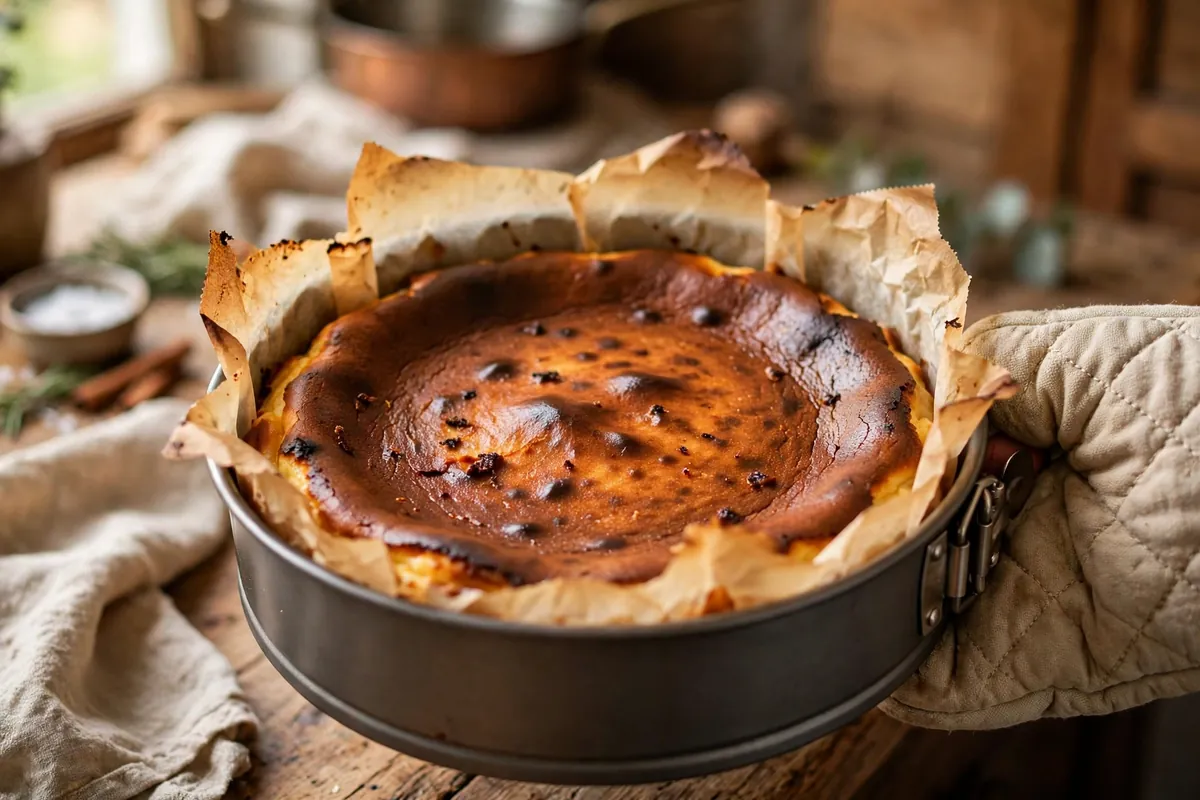
    oven-mitted hand pulling a Basque cheesecake from the oven showing a dark top with a visibly jiggly center
    oven-mitted hand pulling a Basque cheesecake from the oven showing a dark top with a visibly jiggly center

    5. A dark pan or sugared top accelerated the browning

    Dark nonstick pans absorb and radiate more heat than light aluminum — the same batter browns 10–15 minutes faster. Extra sugar on the surface (some recipes call for it) caramelizes harder and crosses into burnt sooner.

    How to tell: Bottom and edges are darker than the interior too; the recipe had you sprinkle sugar on top.

    The fix: Use a light-colored pan, or drop the temperature 25°F (15°C) with dark nonstick. Skip surface sugar — the batter has plenty. Always line with parchment: it insulates slightly and makes the tall, rustic sides easy.

    6. You used the broiler for color and walked away

    Some recipes suggest a minute under the broiler for extra char. A broiler takes a cheesecake top from perfect to cremated in under 60 seconds — the fastest way to genuinely burn one.

    How to tell: The burn happened in the final moments; the top is black but the interior is underdone.

    The fix: Skip the broiler — 425°F (220°C) gives all the color you need. If you must, watch without blinking, door cracked, 60–90 seconds max. The broiler isn’t worth the risk.

    Can you fix a burnt Basque cheesecake after the fact?

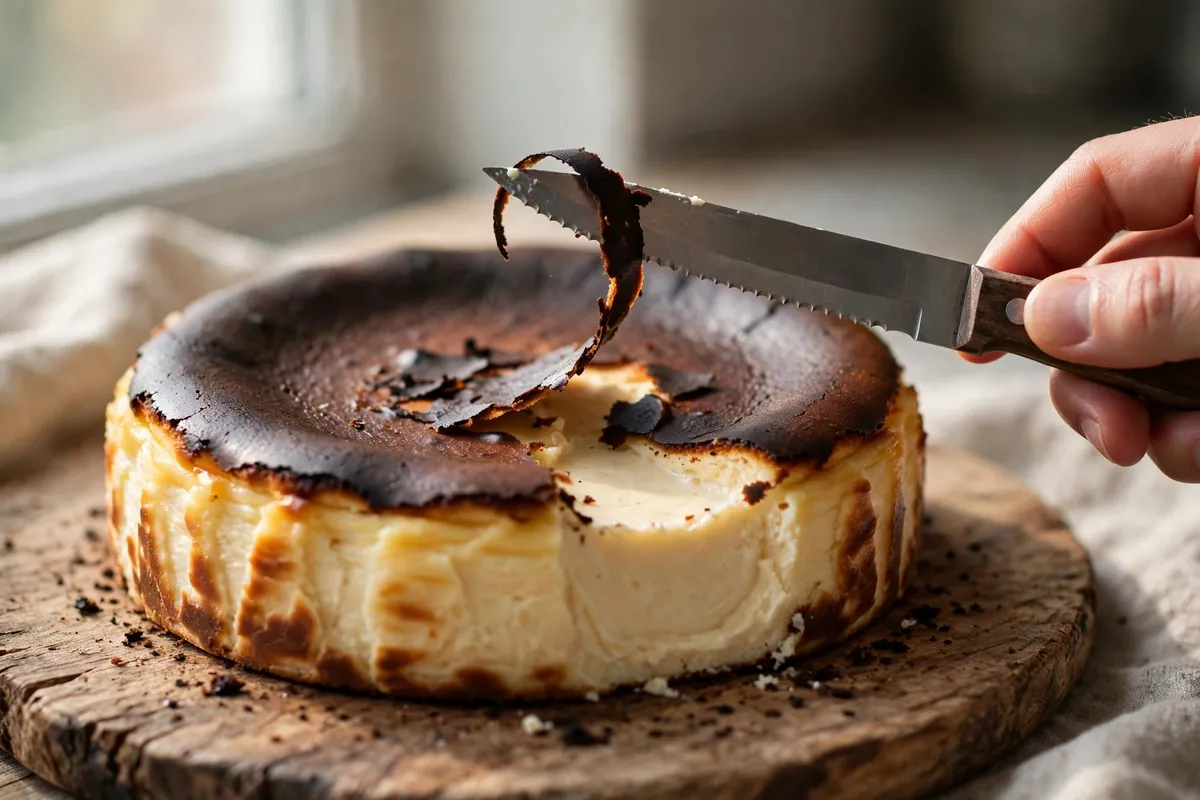
    Usually, yes. Cool it completely, then shave the blackened layer off with a serrated knife — the creamy interior underneath is almost always untouched. Taste as you go; stop when the bitterness is gone. Serve at room temperature (cold mutes the creamy texture) with something that complements the caramel notes: macerated berries or good coffee. If the whole cheesecake tastes ashy through and through, it can’t be saved — but that’s rare; surface burning is the norm.

    serrated knife shaving a thin blackened layer off the top of a cooled Basque cheesecake
    serrated knife shaving a thin blackened layer off the top of a cooled Basque cheesecake

    FAQ

    Is a burnt-looking top on Basque cheesecake safe to eat?
    Yes. The dark top is caramelized sugar and milk proteins — the intended flavor, not anything harmful. Only discard it if it tastes acrid throughout, which is a flavor problem, not a safety one.

    Why is my Basque cheesecake burnt on top but raw inside?
    Too much heat from above — rack too high or oven too hot. The top scorched before the interior set. Use the middle rack, verify temperature with a thermometer, and tent with foil if the top darkens early.

    Should the center of Basque cheesecake jiggle?
    Yes — a 2–3 inch wobble is exactly right out of the oven. It sets during chilling. A fully firm center means overbaked and dry rather than custardy.

    Can I prevent the top from getting too dark?
    Tent loosely with foil once it reaches your preferred color, bake at 400°F (200°C) instead of 425°F (220°C), and use the middle rack. But don’t aim for pale — deep color is where the flavor lives.

    How long should Basque cheesecake chill before serving?
    Minimum 4–6 hours, ideally overnight, for the custardy center to set sliceable. Serve at room temperature — take it out 30 minutes before slicing.

    Why did my Basque cheesecake sink in the middle?
    Some settling is normal — it puffs dramatically and falls as it cools. A dramatic crater means underbaked; give it 5 more minutes next time.

    Related troubleshooting: Why Did My Cheesecake Crack? (And the Water Bath Fix) · Overbaked Cake? 5 Rescue Methods That Actually Work · Panna Cotta Troubleshooting: Won’t Set, Rubbery

  • Why Is My Pound Cake Gummy? Dense Butter Cake Fixes

    Why Is My Pound Cake Gummy? Dense Butter Cake Fixes

    A perfect pound cake crumb is fine, even, velvety — slicing cleanly, feeling light for its richness. Gummy pound cake is the opposite: wet streaks, a gluey band near the bottom, a crumb that clumps. It almost always traces to one of six causes — most commonly a center that never finished baking, hidden by a browned crust. (Top splitting, not texture? Why Did My Pound Cake Crack on Top? Rich Batter Fixes.)

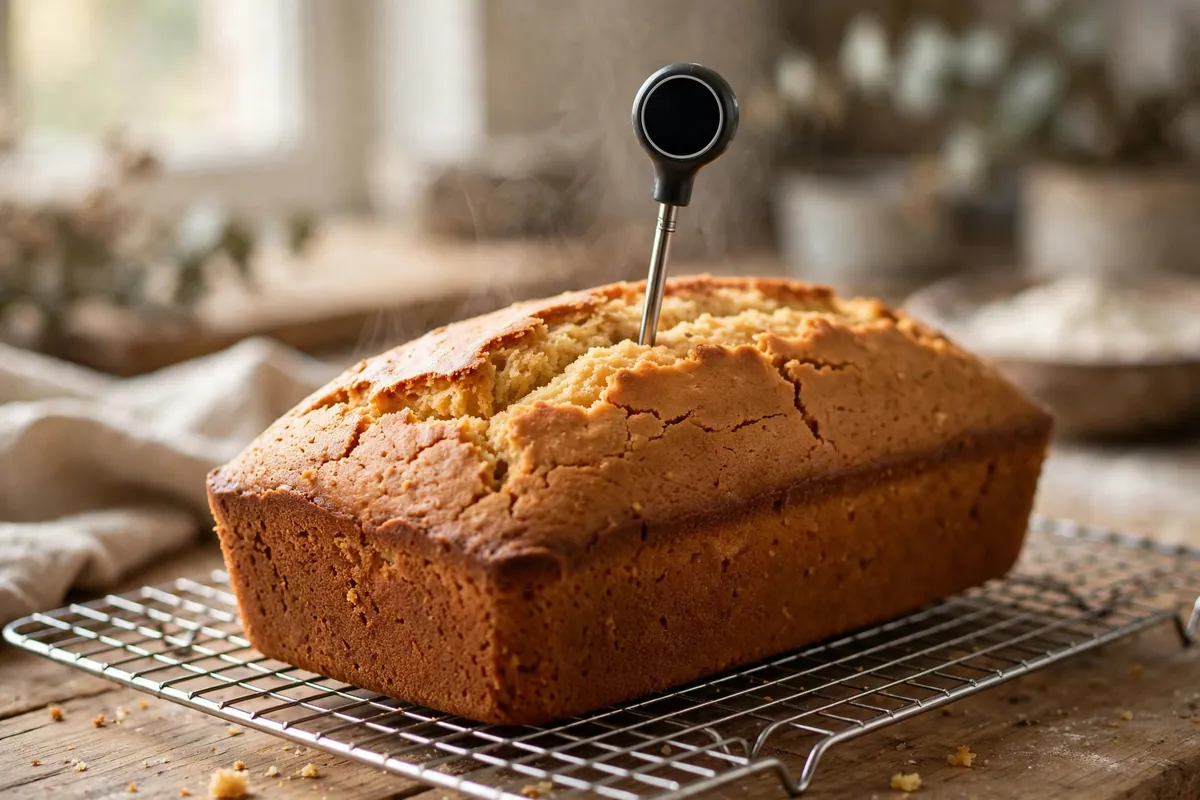
    Quick diagnosis: The center underbaked — dense batter insulates, so the crust browns long before the middle sets. Or you overmixed after adding flour (gluten = gumminess), used too deep a pan, or sliced it warm. Bake to 200–210°F (93–99°C) internal, mix flour in gently, cool fully before slicing.

    My tested baseline: 250g each of unsalted butter, sugar, eggs (about 5), and all-purpose flour — the classic equal-weight pound — plus 1 tsp baking powder, ½ tsp salt, 1 tsp vanilla, 2 tbsp milk. Cream butter and sugar 4–5 minutes until pale. 9×5-inch loaf pan, greased and floured, filled no more than ⅔. Bake at 325°F (165°C) for 60–75 minutes.

    1. The center never finished baking — dense batter lies about doneness

    The cause behind most gummy pound cakes. Pound batter is heavy, and it insulates its own center: the crust sets and browns at 45 minutes while the middle is still a slow-cooking custard. Pull it when the top “looks done” and the interior collapses into a gummy layer as it cools.

    How to tell: Wet, translucent streak through the middle or bottom; crumb sticks to the knife; center tastes doughy while edges are fine.

    The fix: Bake by temperature, not color: a center probe should read 200–210°F (93–99°C), and the skewer should come out truly clean and dry. Start checking at 60 minutes but expect 70–75. Top browning early? Tent with foil and keep baking — color is not doneness. (Also the classic cause of Why Did My Cake Sink in the Middle? 7 Causes, Tested Fixes.)

    2. You overmixed after the flour went in — gluten makes gumminess

    Pound cake wants long, vigorous creaming of butter and sugar — but the moment flour enters, the rules flip. Every extra stroke develops gluten, and gluten in rich batter doesn’t make it chewy; it makes it tough and gluey, reading exactly like underbaking even in a fully baked cake.

    How to tell: Uniformly dense and slightly rubbery edge to edge, not streaky-wet in the center.

    The fix: Add flour in three additions, alternating with the milk, on the lowest speed just until each disappears — then stop. Finish with a spatula. The batter should look slightly uneven rather than perfectly smooth; perfectly smooth means overmixed. (Same gluten discipline as Why Is My Banana Cake Gummy? Mixing and Moisture Fixes.)

    3. Your pan was the wrong size — batter too deep never sets

    A 9×5-inch pan filled ⅔ bakes through in about 70 minutes. The same batter in an 8×4-inch pan sits significantly deeper, and the center can stay 20°F cooler than the crust at normal pull time. Too deep, and no reasonable bake time fixes it without burning the outside.

    How to tell: Gummy band at the very bottom center; excessive doming; long bake with a still-pale top when you pulled it.

    The fix: Use the pan the recipe was built for — usually 9×5-inch, filled no more than ⅔, batter at least an inch below the rim. With only a smaller pan, split the batter between two pans rather than overfilling one. (Pan geometry changes everything — see Glass vs Metal vs Dark Pans: What Changes in Your Bake.)

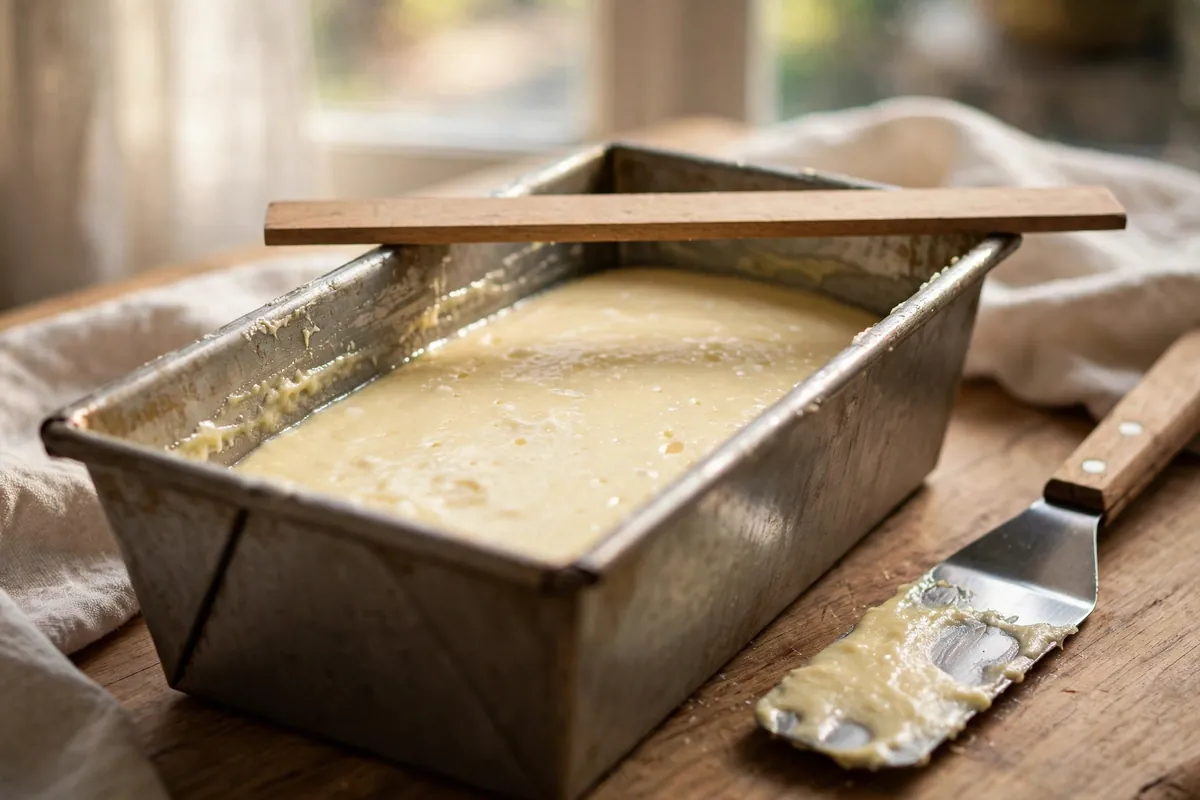
    pound cake batter in a 9x5 loaf pan filled to two-thirds, with a ruler or finger showing the fill line
    pound cake batter in a 9×5 loaf pan filled to two-thirds, with a ruler or finger showing the fill line

    4. The oven ran hot — the crust set before the interior could

    The mirror image: an oven running 25°F hot browns the crust fast, sealing the loaf while the center is still raw batter. Steam gets trapped, the interior effectively steams instead of baking, and you get a gummy core under a perfect crust. Dark pans make it worse.

    How to tell: Deep brown crust at 50 minutes with a raw, wet center; the top cracked hard and early.

    The fix: Verify a true 325°F (165°C) with an oven thermometer — pound cake wants gentle heat. If your oven runs hot, drop to 315°F (160°C) and extend the time. Light-colored metal browns slowest and gives the center the most time; in dark or glass pans, reduce 25°F as standard.

    5. Too much liquid for the flour — the ratios drifted

    The traditional pound is equal weights of butter, sugar, eggs, and flour — engineered so the structure supports the fat. Every “moist pound cake” addition — extra milk, a cup of sour cream, another egg — tips that balance. A little enrichment is fine; a lot overwhelms the flour, and the excess moisture never bakes out.

    How to tell: Generous wet additions beyond the classic four; batter looked thin or pourable rather than thick and scoopable; uniformly damp crumb, not streaky.

    The fix: Weigh the four core ingredients and keep them close to equal. Added sour cream or yogurt? Keep it to 60–80g and reduce the milk. Pound batter should plop off the spatula in thick ribbons, not pour. Rich batter forgives fat but not water — butter is fine, extra milk is the risk.

    6. You sliced it warm — the crumb hadn’t set yet

    Fresh from the oven, the crumb is fragile — starches gelatinized but not set, steam still migrating out. Slice at 20 minutes and the knife drags through semi-set crumb, compressing it into a gummy smear that looks exactly like underbaking. The cake was fine; the slicing wasn’t.

    How to tell: First slices looked gummy but the loaf improved as it sat; damage at the cut faces, not through the crumb.

    The fix: Cool in the pan 15 minutes, turn out, and cool at least 1 hour — fully room temperature — before slicing. Use a long serrated knife with a gentle sawing motion, not a chef’s knife pressed straight down.

    a probe thermometer reading the center of a golden pound cake loaf, steam rising, on a cooling rack
    a probe thermometer reading the center of a golden pound cake loaf, steam rising, on a cooling rack

    Frequently asked questions

    Is gummy pound cake safe to eat?
    If the center baked through — no raw streaks, just dense and moist — yes, completely safe. Raw, doughy pockets? Toast the slices to golden; they’re safe and genuinely delicious.

    Can I fix a gummy pound cake after baking?
    You can’t re-bake it — the oven dries the outside without fixing the inside. But repurpose it: toast thick slices in butter until crisp-edged, cube it for trifle, or make pound cake bread pudding.

    Why is only the bottom of my pound cake gummy?
    The classic underbake-plus-deep-pan signature: the bottom center is the last place heat reaches. Verify pan size, bake to 200–210°F (93–99°C) internal, and center the oven rack so heat circulates underneath.

    How do I know pound cake is done without a thermometer?
    Three checks together: a skewer comes out clean and dry, the top springs back when lightly pressed, and the edges just start pulling from the pan. Any one alone can lie; all three rarely do.

    Can I freeze pound cake?
    Yes — up to 2 months. Cool completely, wrap tightly in plastic then foil, thaw unwrapped at room temperature. Freeze unsliced for best texture, or pre-slice with parchment between slices.

    Related troubleshooting: Why Did My Pound Cake Crack on Top? Rich Batter Fixes · Why Is My Banana Cake Gummy? Mixing and Moisture Fixes · Why Did My Cake Sink in the Middle? 7 Causes, Tested Fixes

  • How to Fix Icing That’s Too Thin (Glaze Consistency Guide)

    How to Fix Icing That’s Too Thin (Glaze Consistency Guide)

    Thin icing is a special frustration: it looked fine in the bowl, then slid straight off the cake into a puddle on the plate. The good news is that runny icing is one of the easiest baking failures to fix — you almost never start over. Whatever the type, it comes down to the sugar-to-liquid ratio and the temperature of everything involved.

    Quick diagnosis: Too much liquid for the sugar. For a basic glaze, start with 1 cup (120g) powdered sugar and add liquid one teaspoon at a time — you can always thin it, but thickening takes much more sugar. If it’s buttercream, the butter was too warm: chill the bowl 15–20 minutes and rewhip. Never add liquid by the tablespoon.

    My tested baseline for a pourable glaze: 120g (1 cup) sifted powdered sugar, 1 tablespoon milk, then liquid added 1 teaspoon at a time until it ribbons off the spoon. For spreadable frosting: 230g (2 cups) powdered sugar, 115g soft butter, 1–2 tablespoons milk. Humidity and ingredient temperature move these around — the spoon test overrules the numbers.

    1. Your sugar-to-liquid ratio was off — measure the liquid, not the sugar

    Nearly every thin glaze comes from dumping in the liquid. Powdered sugar forgives in one direction only: too little liquid needs a few more drops, but too much liquid demands a disproportionate amount of sugar to recover. Two extra tablespoons of milk can need half a cup of additional sugar to balance.

    How to tell: The glaze runs off a spoon in a fast stream instead of a slow ribbon; it pools flat on a plate within seconds.

    The fix: Sugar in the bowl first, then liquid one teaspoon at a time, whisking between additions. Stop when a drizzled spoonful holds its shape 2–3 seconds before melting in. Already too thin? Whisk in powdered sugar one tablespoon at a time — sifted, to avoid lumps. Expect to add more than feels reasonable; that’s normal.

    2. You used the wrong sugar — granulated can’t do this job

    Powdered (confectioners’) sugar dissolves into a smooth suspension because it’s ground ultra-fine with a little cornstarch. Granulated sugar stays gritty no matter how long you stir, and weeps liquid as it sits — the glaze looks thin because the sugar never joined the liquid.

    How to tell: Gritty texture, a watery layer separating on top after minutes, sweetness that tastes “separate” from the liquid.

    The fix: Powdered sugar only — and sift it. Unsifted lumps read as thickness in the bowl, then dissolve on the cake and release trapped air, and the icing thins mysteriously after application. Sifting takes 30 seconds and removes a whole category of surprise.

    3. Your buttercream was too warm, not too thin — chill it, don’t sugar it

    Soft, soupy buttercream tempts you to add more powdered sugar, which makes it sweeter and stiffer without fixing the real problem: butter too warm to hold air. Over-sugared warm buttercream tastes like sweet grease. The fix is temperature.

    How to tell: Glossy, slightly separated, sliding rather than spreading; the bowl feels room-temperature or warm rather than cool.

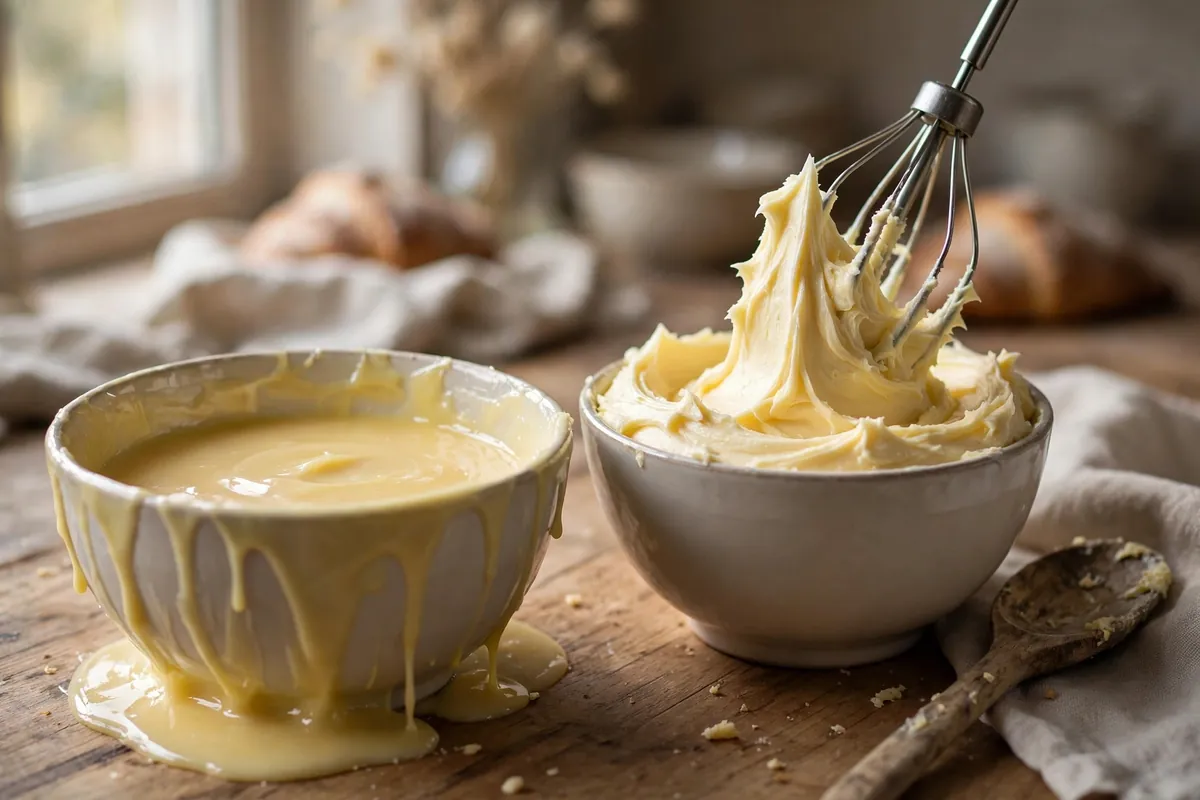
    The fix: Refrigerate 15–20 minutes until the edges look matte and firm, then rewhip 1–2 minutes — it comes back thick, smooth, and pale. Truly broken (curdled, split) is a different failure: How to Fix Broken Buttercream (Curdled, Soupy, Too Sweet). If the balance tastes off at the right texture, see Why Does My Frosting Taste Like Butter? Fixing Buttercream Balance.

    a bowl of soupy buttercream next to the same buttercream after chilling and rewhipping, beater lifted showing stiff peaks
    a bowl of soupy buttercream next to the same buttercream after chilling and rewhipping, beater lifted showing stiff peaks

    4. Cream cheese icing turned to soup — cold cheese, minimal beating

    The runniest offender in the icing family, always the same two mistakes: low-fat or tub-style cream cheese (too much water), and overbeating, which warms and loosens the cheese until the bowl slumps.

    How to tell: It was thick when you started and got thinner the longer you beat it; tastes fine but won’t hold a swirl.

    The fix: Full-fat block cream cheese, cold from the fridge — never the spreadable tub. Beat butter and sugar first, add the cold cream cheese last, and beat only until just combined, 30–45 seconds. Already soupy? Chill 30 minutes, then whisk in powdered sugar 2 tablespoons at a time. A teaspoon of cornstarch per cup of powdered sugar stabilizes it without much sweetness change.

    5. You glazed a warm cake — heat thins everything

    A perfect-bowl glaze turns into a translucent slide on a warm cake. Residual heat melts the sugar’s structure on contact; the icing runs off before it sets, leaving a sticky plate and a nearly naked cake. Buttercream melts on anything above room temperature too.

    How to tell: The icing looked right in the bowl but turned watery within a minute of touching the cake; it pooled at the base.

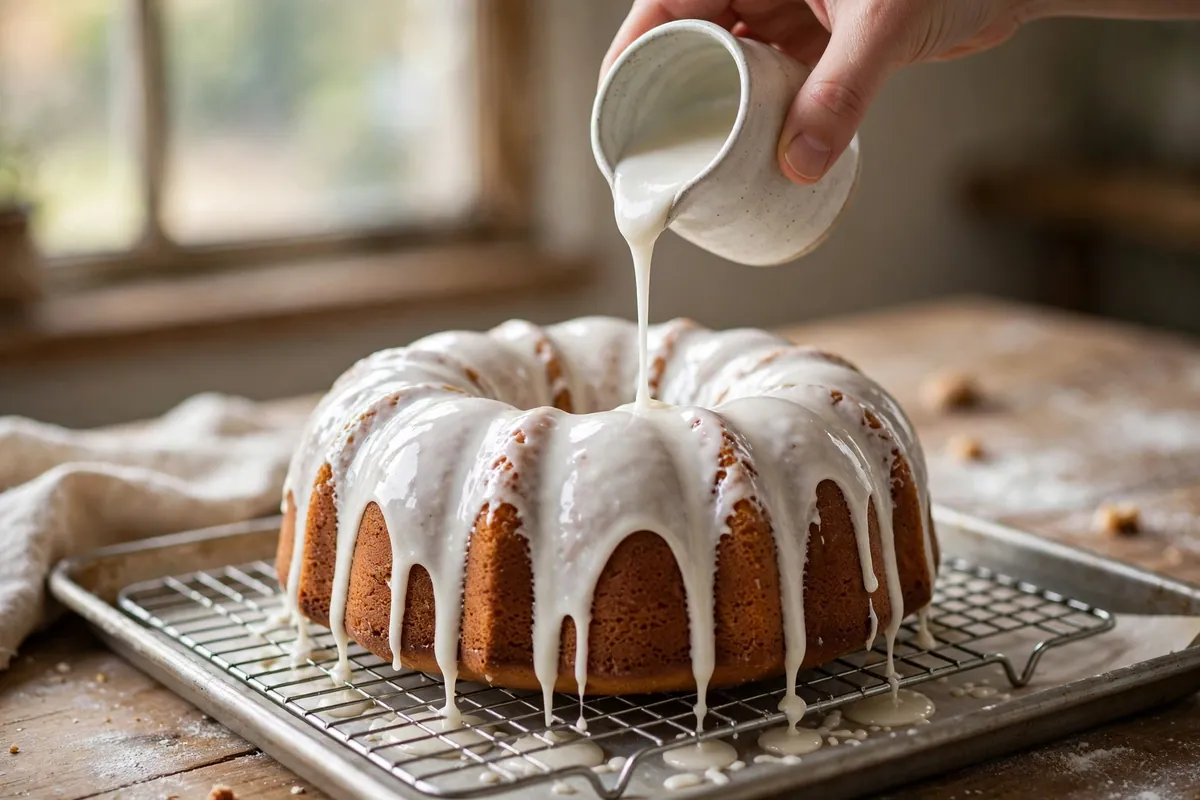
    The fix: Cool the cake completely — to the touch all the way through, not “mostly cool.” For layer cakes, 2 hours at room temperature or 30 minutes in the fridge after crumb-coating. Test the glaze on a cool plate first: drizzle a spoonful and watch 30 seconds. If it holds, the cake was the variable, not the glaze.

    glaze being poured over a fully cooled bundt cake, coating thickly and setting with clean drips at the edges
    glaze being poured over a fully cooled bundt cake, coating thickly and setting with clean drips at the edges

    6. Match the consistency to the job — “too thin” depends on the use

    Sometimes the icing isn’t wrong; the expectation is. A drip glaze should flow. A pipeable frosting should hold a stiff peak. Judge against the job: drizzle coats the back of a spoon thinly; spreadable holds soft peaks; pipeable stands in firm peaks.

    How to tell: It works for one purpose but fails at another — great for drizzling, useless for piping.

    The fix: Decide the job first. Drips: thin is correct — spoon at the rim and let gravity work. Spreading: the ribbon stage. Piping: chill 20 minutes after mixing; cold firms butter-based icings dramatically. Write down the ratio that worked — humidity shifts it batch to batch, and your notes are the real recipe.

    Frequently asked questions

    Is thin icing safe to eat?
    Yes — purely a texture and appearance issue. The only caution is storage: cream cheese or butter-based icings still need refrigeration, thin or not.

    Can I fix icing that’s already on the cake?
    Yes. Chill the cake 30 minutes to set what’s there, then apply a second, thicker coat — the chilled base gives the new layer grip. For pooled glaze at the bottom, let it set, then drizzle a thicker batch over the top.

    Can I thicken icing with cornstarch instead of more sugar?
    In small amounts — 1 teaspoon per cup of powdered sugar firms a glaze without adding sweetness. More tastes chalky and sets matte. For buttercream, extra powdered sugar is still the better fix.

    How long does glaze take to set?
    15–30 minutes at room temperature; humidity can double that. It’s set when the surface is dry to a light touch. Don’t refrigerate to speed it — condensation makes it weep.

    Can I save leftover thinned glaze?
    Yes — refrigerate up to a week sealed. It thickens cold; rewhisk at room temperature and adjust with drops of liquid. If separated, whisk 30 seconds before judging — it usually comes back.

    Related troubleshooting: How to Fix Broken Buttercream (Curdled, Soupy, Too Sweet) · Why Does My Frosting Taste Like Butter? Fixing Buttercream Balance · Dairy-Free Frosting That Holds Its Shape

  • Why Does My Frosting Taste Like Butter? Fixing Buttercream Balance

    Why Does My Frosting Taste Like Butter? Fixing Buttercream Balance

    You followed the recipe exactly — butter, powdered sugar, a splash of milk — and the result tastes like sweetened butter rather than frosting. The problem isn’t your palate. It’s a balance problem, and buttercream balance is fixable with a short list of adjustments that professionals use every day.

    Quick diagnosis: Butter-forward frosting comes down to three things in nearly every case: the butter-to-sugar ratio skewed buttery, no salt to frame the sweetness, and butter that was too warm when mixed. If you used equal parts butter and sugar by volume, skipped the salt, and the butter was soft and shiny — start with fixes #1, #2, and #3.

    Buttercream is an emulsion of fat, sugar, and a little liquid. When the fat shouts and the sugar whispers, you taste butter. Every fix below turns down the fat’s volume or turns up everything else.

    1. The ratio skewed buttery

    American buttercream lives or dies on ratio. The classic working ratio is roughly 1 part butter to 2 parts powdered sugar by weight — for example, 225g (2 sticks / 1 cup) butter to 450g (about 3¾ cups spooned) powdered sugar. Many home recipes drift buttery: “1 cup butter, 2 cups sugar” by volume is far less sugar than it sounds, because powdered sugar is light — 2 volume cups is only about 250g. That’s nearly 1:1 by weight, and at 1:1 you taste butter with sugar in it, not frosting.

    How to tell: Compare your recipe by weight, not volume. If butter and sugar are close to equal in grams, the ratio is the problem.

    The fix: Rebalance to 1:2 by weight. If the frosting is already made, beat in sifted powdered sugar ¼ cup at a time until the butter recedes — taste after each addition. You’re done when sweetness leads and butter supports.

    2. You skipped the salt

    Salt doesn’t make frosting salty — at the right dose, it makes frosting taste more like itself. A pinch of salt suppresses the flat, fatty perception of butter and sharpens sweetness, the same way salted caramel reads sweeter than plain caramel. Unsalted butter plus no added salt is the double fault behind most butter-bomb frostings.

    How to tell: The frosting tastes rich and coating but oddly bland — buttery without brightness.

    The fix: Add ¼ teaspoon fine salt per batch (per ~450g sugar), beat 30 seconds, and taste. The change is immediate: the butter steps back, the vanilla and sweetness step forward. If you used salted butter, skip this — but most recipes (correctly) call for unsalted.

    3. The butter was too warm

    Butter at 65–68°F (18–20°C) creams into a fluffy, aerated base. Butter that’s soft, shiny, or greasy — 75°F+ (24°C+) — can’t hold air. It mixes into a dense, slick paste that coats the tongue with fat instead of melting into sweetness. Warm-butter frosting always tastes more buttery because, physically, more of it is liquid fat on your palate.

    How to tell: The butter looked glossy or slumped before mixing, and the finished frosting feels greasy rather than fluffy.

    The fix: If it’s already made, chill the bowl 15–20 minutes, then re-whip — cold firms the fat and whipping re-aerates it. Next time, use butter that’s cool to the touch and holds its shape when pressed. (The same temperature discipline that keeps cookies from spreading flat keeps frosting fluffy.)

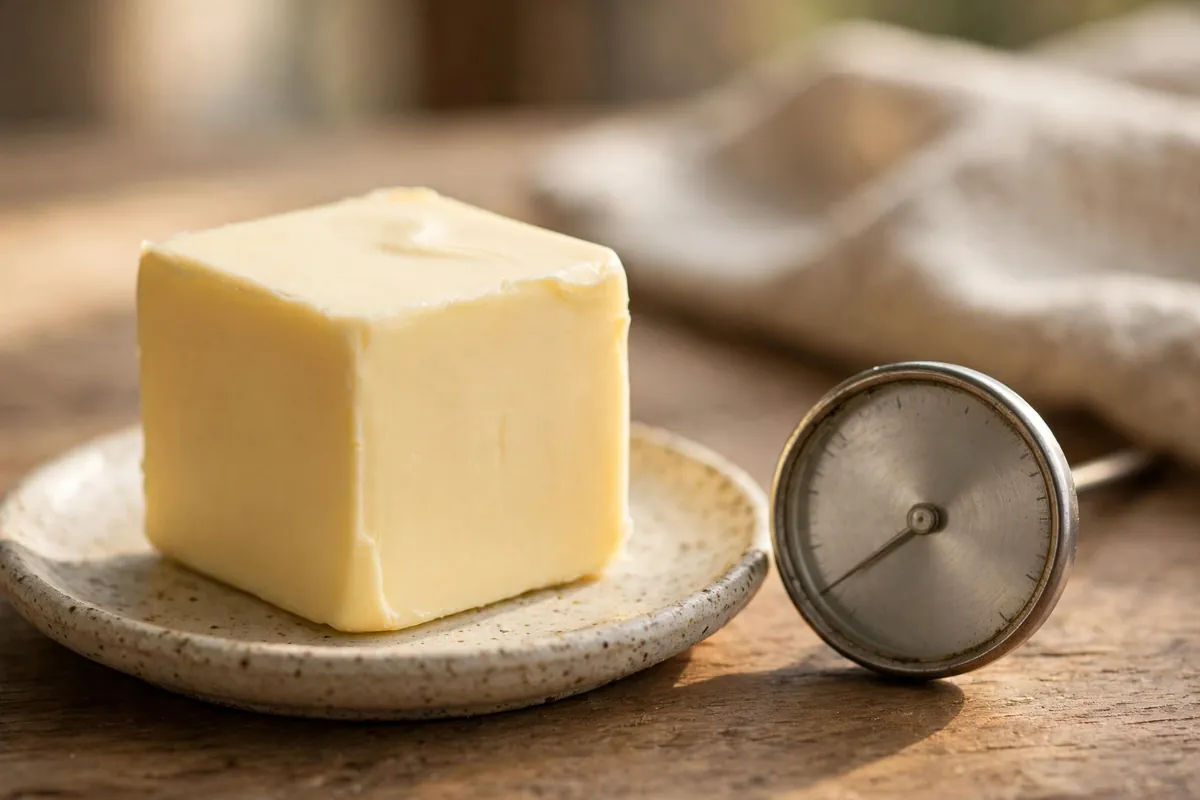
    butter at the right temperature — firm cube holding its shape with a slight give
    butter at the right temperature — firm cube holding its shape with a slight give

    4. Not enough liquid or flavoring

    Buttercream needs a small amount of liquid — 1–2 tablespoons of heavy cream or milk per batch — and real flavoring. Without them, there’s nothing in the bowl except butter and sugar, and butter wins that fight. Vanilla extract (1–2 teaspoons) doesn’t just add vanilla notes; its alcohol carries aroma and its flavor complexity distracts from pure fat.

    How to tell: The ingredient list is three lines long and the frosting tastes one-dimensional.

    The fix: Beat in 1 tablespoon heavy cream and 1 teaspoon vanilla, then taste. Cream adds milk solids and water that lighten the fat’s grip; vanilla adds the aromatic top notes your nose reads as “frosting.” Cocoa powder works the same way for chocolate buttercream — ¼ to ½ cup sifted cocoa transforms the balance entirely, which is why chocolate frosting rarely has this problem.

    5. It wasn’t beaten long enough

    Under-beaten buttercream is dense, and dense reads as fatty. Proper beating — 3–5 minutes after the sugar is incorporated, on medium-high — whips microscopic air into the emulsion. Air is flavorless, which is exactly the point: it dilutes the butter’s presence on the tongue and turns the texture from paste to cloud.

    How to tell: The frosting is smooth but heavy, with no lightness when you lift the beater.

    The fix: Beat it longer. Seriously — most home bakers stop a full two minutes early. The frosting should visibly lighten in color (pale ivory, not yellow) and hold soft, billowy peaks. If it was made with warm butter, chill first (fix #3), then beat.

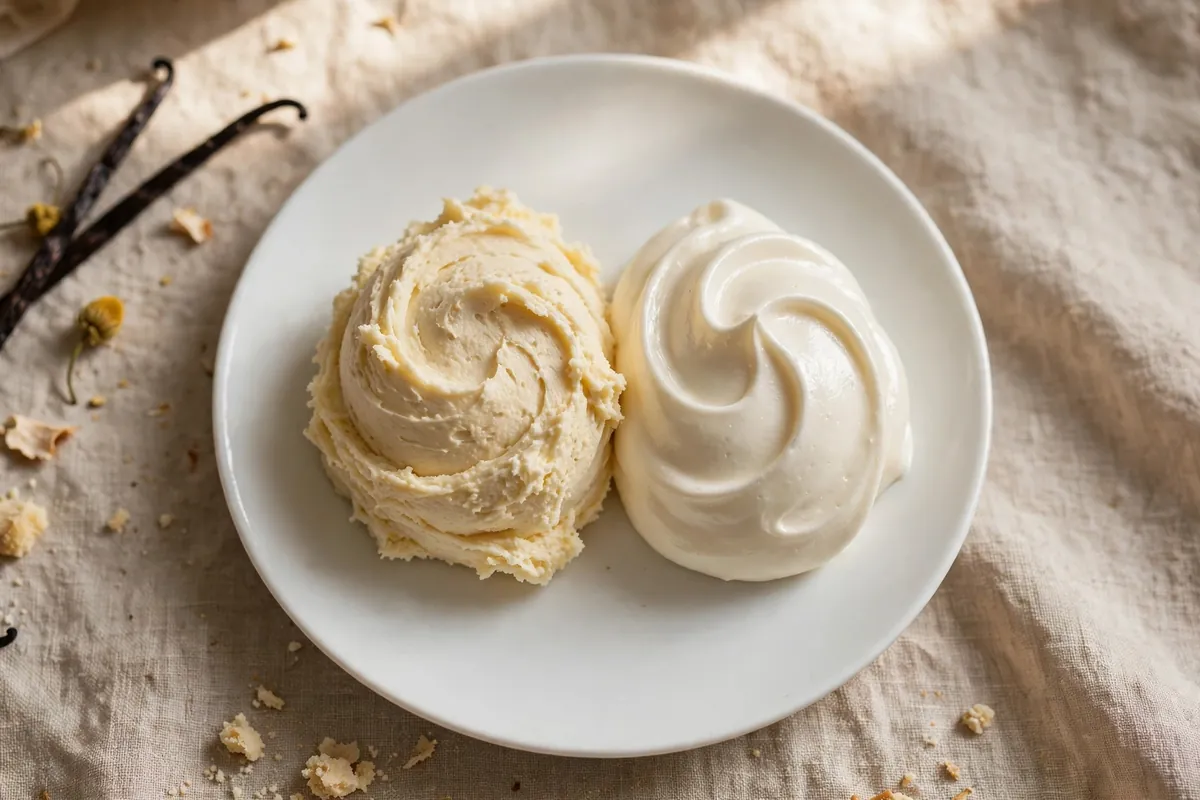
    side-by-side swirls of American buttercream and Swiss meringue buttercream on a plate
    side-by-side swirls of American buttercream and Swiss meringue buttercream on a plate

    6. Consider a less buttery style

    If you’ve fixed the ratio, salt, temperature, and beating and it still tastes too buttery for your liking, the issue may be the style itself. American buttercream is the most butter-forward frosting in existence by design. Two alternatives:

    • Swiss meringue buttercream: egg whites and sugar heated to 160°F (71°C), whipped to meringue, then butter beaten in. The meringue structure means less butter per bite and a silkier, less fatty mouthfeel. More work, completely different eating experience.
    • Cream cheese frosting: the tang of cream cheese cuts through butterfat like nothing else. For anyone who finds plain buttercream cloying, this is usually the real answer — which is also why dairy-free frosting recipes lean on tangy or chocolate bases rather than pure fat.

    Frequently Asked Questions

    Can I fix frosting that’s already made and tastes like butter?
    Yes — beat in sifted powdered sugar ¼ cup at a time, add ¼ teaspoon salt and 1 teaspoon vanilla, and re-whip for 2–3 minutes. If it was made with warm butter, chill the bowl 15–20 minutes first. These three moves rescue nearly every butter-bomb batch.

    Does using less butter and more sugar make it too sweet?
    It can, which is why salt matters so much — salt lets you carry more sugar without the frosting reading as cloying. The 1:2 butter-to-sugar ratio by weight with ¼ teaspoon salt is the tested sweet spot: sweet-led, buttery-supported, not saccharine.

    Why does my frosting taste buttery even though I followed the recipe?
    Most likely the recipe measured by volume, where “1 cup butter, 2 cups sugar” is nearly 1:1 by weight — far more butter-forward than it looks on paper. Convert to weight (225g butter : 450g sugar) and the problem usually disappears.

    Is European-style butter worse for frosting?
    It has more butterfat (82–86% vs ~80%), so yes — it tastes more buttery in American buttercream. It’s wonderful for flavor in cakes and pastry, but for frosting where butter is already the risk, standard butter gives you more control.

    Should frosting be served cold or room temperature?
    Room temperature, always. Cold firms the butterfat, which mutes sweetness and emphasizes the fatty mouthfeel — the exact problem you’re fixing. Pull the frosted cake from the fridge 30–60 minutes before serving.

    Can I just use all shortening instead of butter?
    You can, and it eliminates butter flavor entirely — but shortening has its own waxy mouthfeel and no flavor of its own, so the frosting tastes purely of sugar. A half-butter, half-shortening split is the common compromise: butter flavor present but restrained, with better heat stability.

    Related troubleshooting: Dairy-Free Frosting That Holds Its Shape · Why Are My Cookies Cakey Instead of Chewy? · Why Does My Frosting Taste Like Butter?

  • Why Did My Brownies Turn Out Cakey? Fudgy vs Cakey Science

    Why Did My Brownies Turn Out Cakey? Fudgy vs Cakey Science

    You wanted dense, fudgy, truffle-like brownies. You got something that eats like chocolate cake. I’ve made both by accident and on purpose enough times to know: the difference isn’t luck, it’s five specific variables, and every one of them is controllable. Here’s the actual science.

    Quick diagnosis: Cakey brownies come from too much flour and too much air. If you scooped your flour, used three eggs, creamed the butter, or added baking powder, that’s your answer — probably in combination. Fudgy brownies are built the opposite way: weighed flour, two eggs, melted butter, little or no leavening.

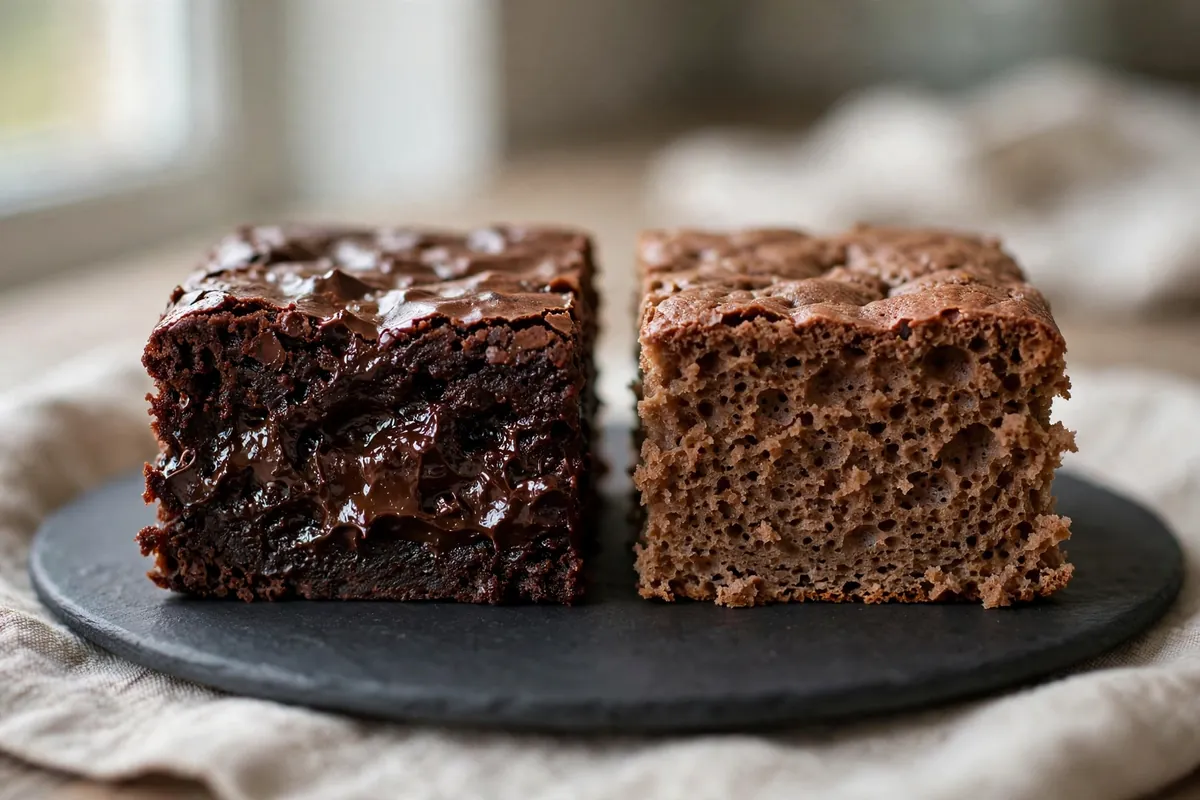
    Fudgy vs cakey: the actual science

    Five variables decide the texture, in rough order of impact:

    Variable Fudgy Cakey
    Fat-to-flour ratio High (more butter/chocolate, less flour) Low (more flour relative to fat)
    Eggs Fewer (2) — less structure, less lift More (3+) — protein sets a cake-like crumb
    Leavening None or a whisper Baking powder — literally makes cake
    Mixing method Melted butter, stirred — minimal air Creamed butter — deliberately aerated
    Bake Slightly underbaked, carryover finishes Baked through — dries and sets firmly

    Every cakey batch fails on at least two of these. Run through them.

    1. Too much flour

    Flour is structure. More flour relative to fat = more crumb = more cake. And the usual delivery mechanism is the scooped cup: 150g scooped versus 120g weighed is 25% extra structure you never intended. Two extra tablespoons can visibly shift a brownie from fudgy toward cakey.

    How to tell: The batter looked thick and dough-like rather than glossy and pourable. The baked brownie is tall and bread-like.

    The fix: Weigh flour at 120g per cup. Fudgy brownie recipes typically use less flour than you expect — around 3/4 to 1 cup for an 8×8 pan. If your recipe calls for more than that plus multiple eggs plus leavening, it’s a cake recipe wearing a brownie costume.

    brownie batter being poured — glossy and flowing vs thick and stiff, side by side
    brownie batter being poured — glossy and flowing vs thick and stiff, side by side

    2. Too many eggs (or the wrong handling)

    Eggs are the main structural protein in brownies. Two eggs in an 8×8 batch gives richness with a dense set. Three eggs — especially beaten hard — builds a protein network that reads as cake. This is the single most common recipe-level cause I see.

    How to tell: Your recipe called for 3+ eggs, or you whisked them vigorously into foam before adding.

    The fix: Two large eggs for a standard 8×8 fudgy batch. Beat them in gently — just until combined. You’re hydrating, not aerating. (Making them egg-free instead? Flax eggs actually work beautifully in brownies — see Eggless Cake That Actually Works.)

    3. Baking powder — the cake-ifier

    Baking powder’s entire job is making cake rise. In brownies, even a teaspoon creates lift and airiness — the opposite of fudgy density. Many all-purpose brownie recipes include it as insurance; fudgy recipes omit it deliberately.

    How to tell: Your recipe listed baking powder (or worse, baking soda and powder).

    The fix: For fudgy brownies, use none — or at most 1/4 teaspoon if the recipe needs a slight lift for a thick pan. Read the leavening line of any new recipe before you commit: it’s the fastest texture predictor on the page.

    4. Overbaked — the silent killer

    Brownies continue cooking in the hot pan after leaving the oven (carryover), and the line between fudgy and dry-cakey is about three minutes. A toothpick emerging completely clean means overbaked — for fudgy brownies, you want moist crumbs clinging to it.

    How to tell: The edges are hard and dark, the center is fully firm with no wobble, the toothpick came out clean.

    The fix: Start checking 5 minutes before the recipe’s earliest time. Pull when the edges are set but the center still looks slightly underdone and a toothpick shows moist crumbs. It firms as it cools — trust the carryover. This is the same carryover principle as cheesecake (see Why Did My Cheesecake Crack?).

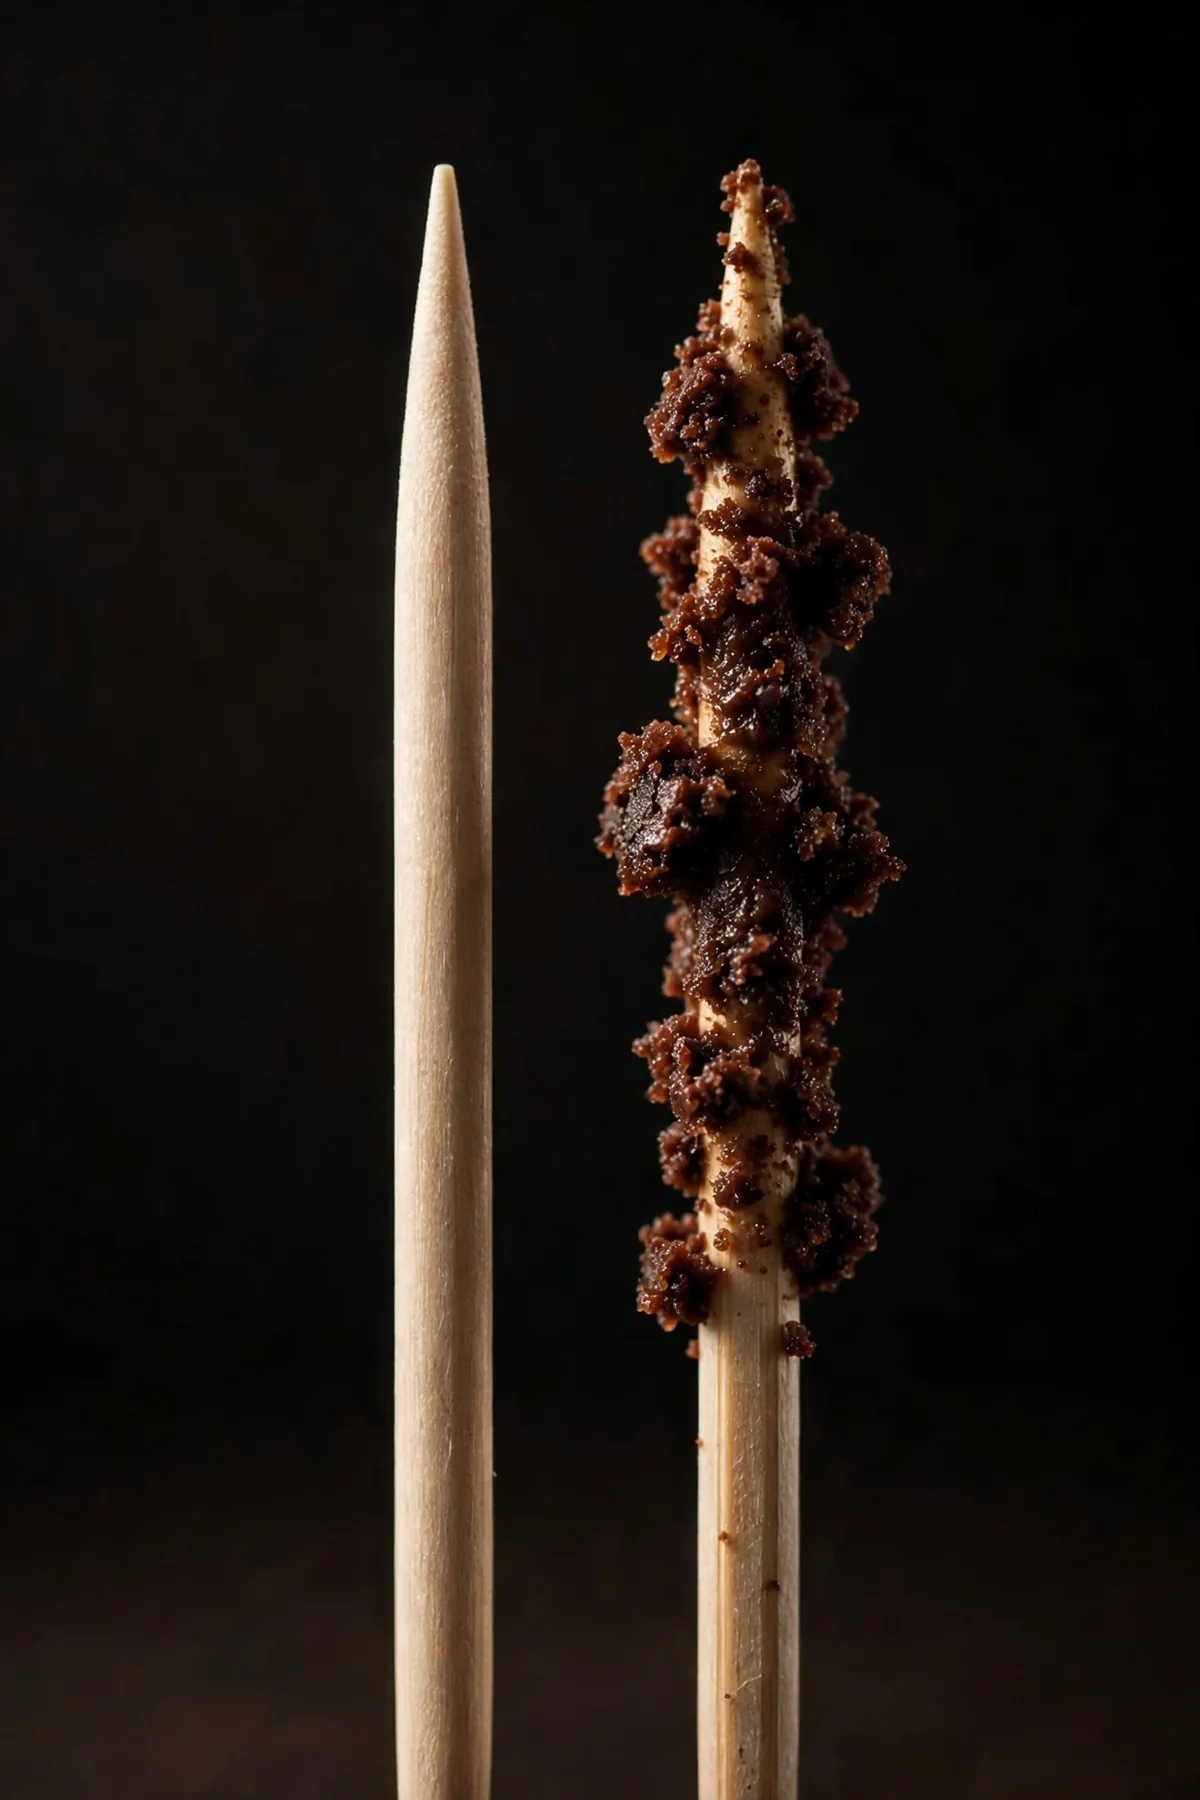
    toothpick test showing moist crumbs clinging vs clean
    toothpick test showing moist crumbs clinging vs clean

    5. Wrong pan size

    A recipe developed for an 8×8 pan baked in a 9×13 spreads thin — thin batter overbakes in the time meant for thick batter, and thin brownies can’t be fudgy. Pan size is bake time.

    How to tell: Your brownies came out noticeably thinner than the recipe photo, or you scaled the pan up “because it was all I had.”

    The fix: Match the recipe’s pan. For thick fudgy brownies, 8×8 metal is the standard. Glass and ceramic bake slower than metal — if substituting, drop the temp 25°F and watch closely.

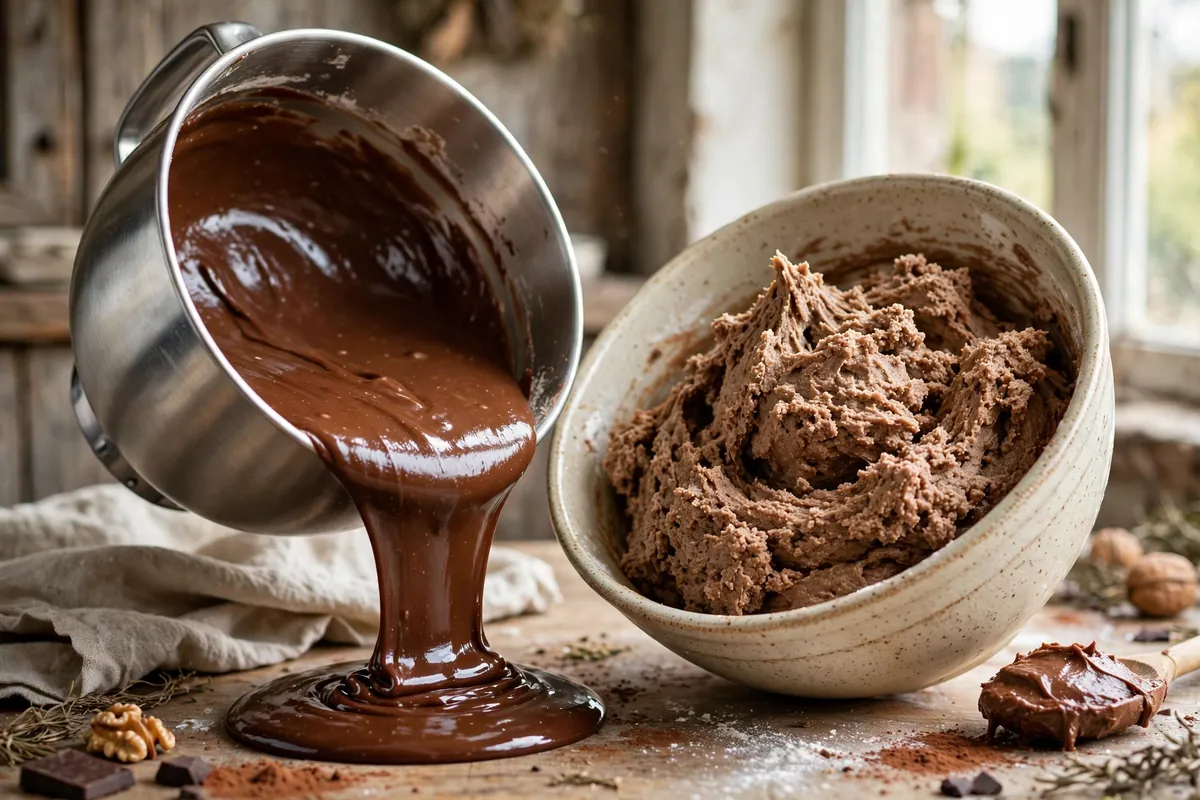
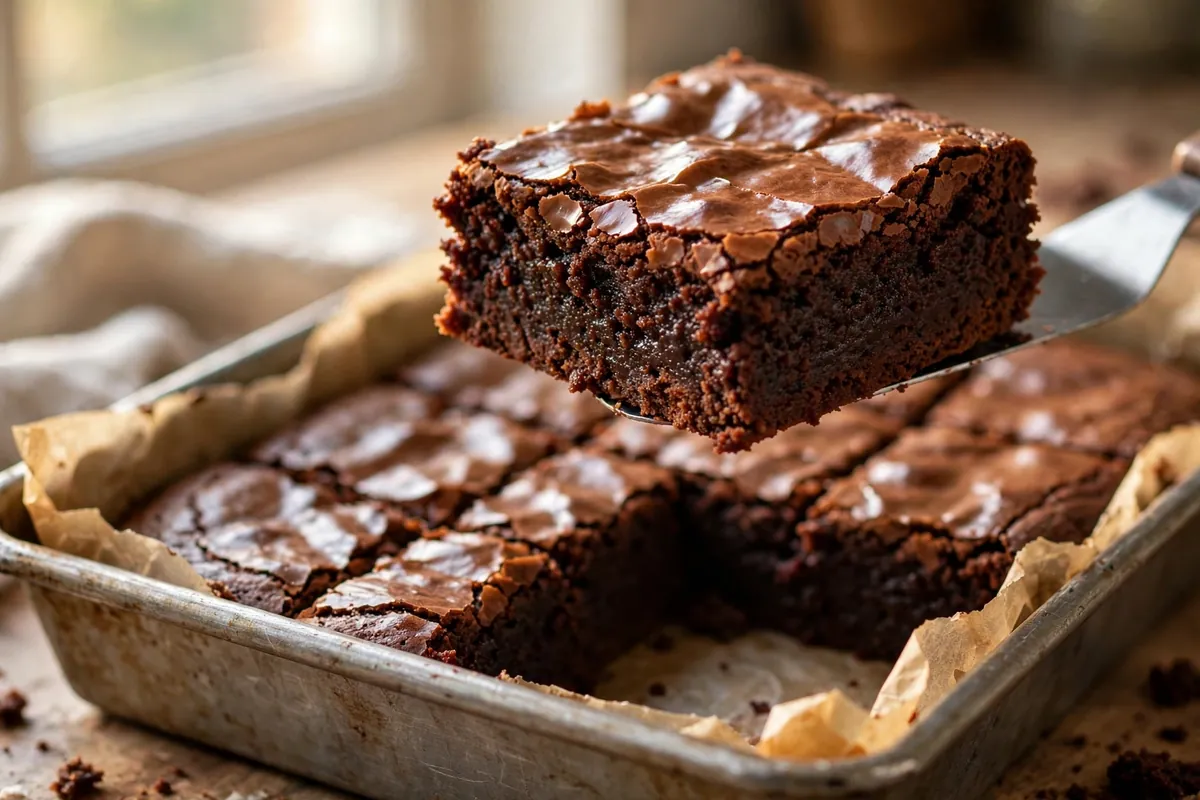
    thick fudgy brownie square being lifted from an 8x8 pan
    thick fudgy brownie square being lifted from an 8×8 pan

    The fudgy formula (memorize this)

    Melted butter + chopped dark chocolate (not just cocoa — the cocoa butter matters), 2 eggs stirred gently, ~3/4 cup weighed flour, a pinch of salt, little or no leavening, 8×8 pan, pulled at moist crumbs. That’s the whole architecture. Everything else is flavoring.

    Frequently asked questions

    Are cakey brownies safe to eat?
    Yes — this is purely a texture preference, not a safety issue. And cakey brownies have their fans; serve them warm with ice cream and nobody complains. You’re fixing a preference, not a failure.

    Can I fix cakey brownies after baking?
    The texture is set — you can’t un-bake structure. But you can serve around it: warm them and add ice cream or hot fudge, which reads as intentional dessert. Or cube them for a trifle, where cakey crumb is actually an asset.

    Fudgy vs chewy — aren’t they the same?
    Related but distinct. Fudgy = dense, moist, truffle-like (high fat, minimal structure). Chewy = dense with pull — slightly more gluten development and often brown sugar’s moisture. A brownie can be both, but the levers differ: chew comes from rest time and sugar type as much as fat ratio.

    Why are my brownies dry AND cakey?
    Overbaked plus too much flour — the two compound each other. Dry-cakey is the most common brownie complaint I see, and it’s always this pair. See Why Is My Cake Dry? for the full moisture science; it applies directly.

    Butter vs oil for fudgy brownies?
    Butter for flavor, oil for a softer room-temperature texture (oil doesn’t firm up when cool the way butter does). Both make fudgy brownies if the ratios are right — the fat amount matters more than the fat type. I use butter for the flavor and accept slightly firmer cold brownies; ten seconds in the microwave fixes that.

    Related troubleshooting: Why Is My Cake Dry? Moisture Science for Home Bakers · Eggless Cake That Actually Works: Tested Replacements

  • How to Fix Frosting That’s Too Sweet (Rebalancing Guide)

    How to Fix Frosting That’s Too Sweet (Rebalancing Guide)

    Too-sweet frosting isn’t failed — it’s unbalanced. Sweetness is perception, and perception shifts: salt suppresses sweet receptors, acid brightens, fat rounds the edges, cold mutes sweetness outright. You don’t need to start over; you need to rebalance.

    Quick diagnosis: Your butter-to-sugar ratio is off, or you’re tasting it warm. First, chill the frosting 20 minutes and taste again. Then add ¼ teaspoon fine salt per 3 cups of frosting, a teaspoon of lemon juice, or 2–3 tablespoons of cream cheese — taste after each addition and stop when it balances.

    My tested baseline: 225g (2 sticks) unsalted butter beaten 3–4 minutes until pale; 360g (3 cups) powdered sugar in three additions; 2 tablespoons cream; 1 teaspoon vanilla; ¼ teaspoon fine salt. Roughly 1:1.6 butter-to-sugar — noticeably less sweet than the classic 1:2.

    1. Add salt — the single fastest fix

    Salt doesn’t make frosting salty at these levels; it suppresses your sweetness receptors. Most too-sweet frostings were simply under-salted. I add ¼ teaspoon of fine sea salt per 3 cups of finished frosting as standard, and for an already-sweet batch, that’s the first thing I reach for.

    How to tell: The frosting tastes flat and one-dimensionally sweet, with no other flavor note; the recipe called for “a pinch” of salt or none at all.

    The fix: Beat in ¼ teaspoon fine salt, taste, and repeat once if needed — but stop at ½ teaspoon total per batch, past which salt becomes its own flavor. Use fine salt, not flaky: it dissolves instantly into the fat. If you used salted butter, you still likely need more — salted butter only carries about ¼ teaspoon per stick.

    2. Add acid — lemon juice or a splash of vinegar

    Acid is the other great sweetness counterweight. A teaspoon of fresh lemon juice per 3 cups of frosting brightens the whole batch; the sourness gives your palate something to do besides register sugar. In chocolate frosting, a teaspoon of white vinegar or instant espresso works the same way without a lemony note.

    How to tell: The frosting tastes sweet and slightly heavy or cloying; it coats the mouth without any lift.

    The fix: Beat in 1 teaspoon lemon juice (vanilla) or white vinegar / instant espresso dissolved in the cream (chocolate). Taste and repeat once. Acid thins frosting slightly — if yours is already soft, add a tablespoon of powdered sugar to compensate; the acid’s work is done.

    3. Beat in cream cheese or mascarpone — tang plus fat

    Two to three tablespoons of full-fat cream cheese does double duty: lactic tang cuts sweetness, extra fat rounds texture. It’s my favorite rescue — the frosting tastes more expensive. Mascarpone works the same, milder.

    How to tell: You want the frosting less sweet but don’t want to change its character much; the batch is large enough to absorb extra volume.

    The fix: Beat 2–3 tablespoons of room-temperature cream cheese into the finished frosting until completely smooth. Don’t add more than 4 tablespoons per 3 cups — beyond that you’re making cream cheese frosting, which is softer and needs refrigeration. Note the finished frosting now needs to stay refrigerated, like any cream cheese frosting.

    two small bowls of buttercream side by side, one plain pale, one with cream cheese beaten in, showing the slightly tangier matte finish
    two small bowls of buttercream side by side, one plain pale, one with cream cheese beaten in, showing the slightly tangier matte finish

    4. Add more butter — dilute the sugar

    The bluntest fix: at 1 part butter to 2+ parts sugar, the frosting is candy with butter in it. Adding 2–4 tablespoons of soft butter dilutes the sugar and adds fat your palate reads as richness, not raw sweetness. This is distinct from the frosting that tastes like butter problem — there, the butter flavor dominates; here, sugar dominates and butter is the diluent.

    How to tell: The frosting is gritty-sweet, almost like eating powdered sugar with a spoon; the recipe used 4+ cups of sugar to 1 cup of butter.

    The fix: Beat in 2–4 tablespoons of soft (not melted) unsalted butter, one tablespoon at a time, tasting as you go. The frosting will get softer — if it’s for piping, chill 20 minutes afterward to firm it back up. This also works beautifully combined with the salt fix: salt plus extra butter together rebalance most American buttercreams.

    5. You’re tasting it warm — chill it first

    Sweetness perception drops with temperature. Buttercream at 72°F (22°C) from the mixing bowl always reads sweeter than the same frosting on a chilled cake. Before “fixing” anything, refrigerate 20 minutes and taste cold.

    How to tell: The frosting seemed fine in your head but overwhelming on the spoon; the kitchen is warm; the batch was just mixed.

    The fix: Chill the bowl 20 minutes, then taste. If it still needs help, apply fixes 1–4. And remember this at serving time: frosted cakes taste less sweet served cool (60–65°F / 16–18°C) than at full room temperature. For very sweet frostings, I deliberately serve the cake slightly cool.

    6. Change the frosting type next time — the ratio is the recipe

    If every batch fights you, the recipe is the problem. American buttercream is the sweetest style by construction. Swiss meringue — whites and sugar heated to 160°F (71°C), whipped, then butter beaten in — uses roughly half the sugar. German (pastry cream + butter) and ermine (flour-milk roux + butter) are even less sweet.

    How to tell: Every batch of this recipe tastes too sweet no matter what you adjust; you’ve added salt and acid and it’s still candy.

    The fix: For the current batch, use fixes 1–5. For the next cake, switch styles: Swiss meringue buttercream needs about 200g sugar for 225g butter versus 400g+ in American — the single biggest sweetness lever available. My broken buttercream rescue covers the technique if the meringue base intimidates you.

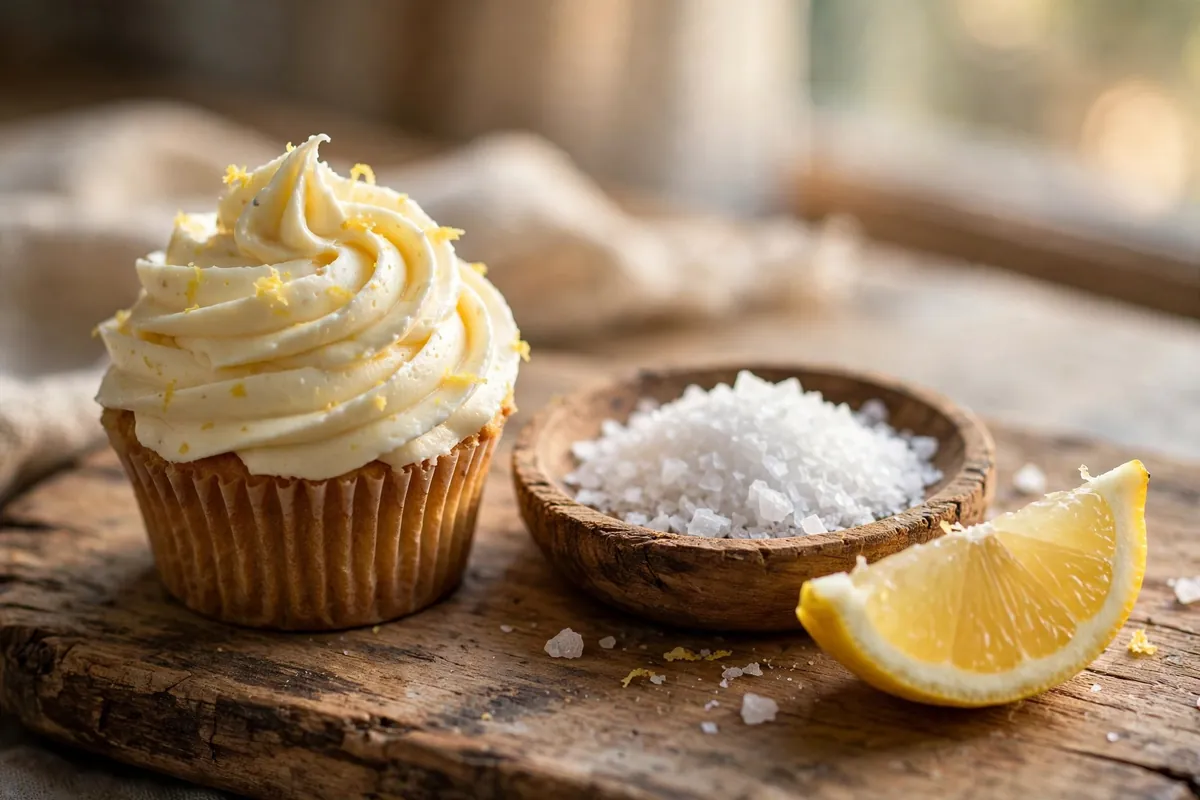
    a cupcake frosted with swirled buttercream next to an identical cupcake, one labeled in the scene by a lemon wedge and salt dish to suggest the fix
    a cupcake frosted with swirled buttercream next to an identical cupcake, one labeled in the scene by a lemon wedge and salt dish to suggest the fix

    FAQ

    Can I fix too-sweet frosting without changing the flavor?
    Salt — ¼ teaspoon per 3 cups suppresses sweetness with no identifiable flavor. Extra butter dilutes sweetness while keeping the flavor profile.

    How much salt can I add to frosting before it tastes salty?
    Up to ½ teaspoon of fine salt per 3 cups of frosting stays in the “balanced” zone for most palates. Past that, salt becomes a distinct flavor. Add in ¼-teaspoon increments and taste each time.

    Does powdered sugar vs granulated sugar change sweetness?
    Same sweetness, but powdered sugar’s cornstarch adds a raw, chalky note. Sift it and beat a full 3–4 minutes to reduce that edge.

    Is it safe to eat frosting with raw egg whites?
    American buttercream has no eggs, so there’s no concern. If you switch to Swiss or Italian meringue buttercream, the whites are heated to 160°F (71°C), which makes them food-safe.

    Can I reduce the sugar in American buttercream directly?
    Cut up to 25% before structure suffers — below that it won’t hold piping. For more, switch to Swiss meringue or ermine.

    Why does store-bought frosting taste less sweet than mine?
    Commercial frostings use shortening plus calibrated salt, acids, and flavorings. The salt and acid fixes above get homemade close — no shortening needed.

    Related troubleshooting: Why Does My Frosting Taste Like Butter? · How to Fix Broken Buttercream · Fixing Thin Icing

  • Why Is My Meringue Weeping? Sugar, Humidity, and Heat Fixes

    Why Is My Meringue Weeping? Sugar, Humidity, and Heat Fixes

    You pulled a gorgeous lemon meringue pie from the oven — tall golden peaks — and an hour later it’s crying amber tears onto the filling. I’ve watched it happen in real time and it’s maddening. The good news: weeping has exactly three root causes, and all three are controllable. Here’s the full breakdown.

    Quick diagnosis: Weeping is almost always undissolved sugar, humidity, or both. If you added the sugar all at once and baked on a humid day, those two explain it. Rub a bit of the raw meringue between your fingers next time — any grit means the sugar wasn’t dissolved, and grit always weeps.

    Weeping (technically syneresis) is sugar syrup escaping the foam. Meringue is a sugar-stabilized protein foam; anything that destabilizes the sugar or the foam lets liquid go. The five causes below cover every case.

    1. The sugar never fully dissolved

    The number one cause. Undissolved sugar crystals sit in the foam like tiny time bombs — in the oven’s heat they melt and leak out as syrup beads. This is why dumping all the sugar in at once is the classic mistake.

    How to tell: The weeping started as the pie cooled. You added sugar quickly, or used coarse granulated sugar straight from the bag.

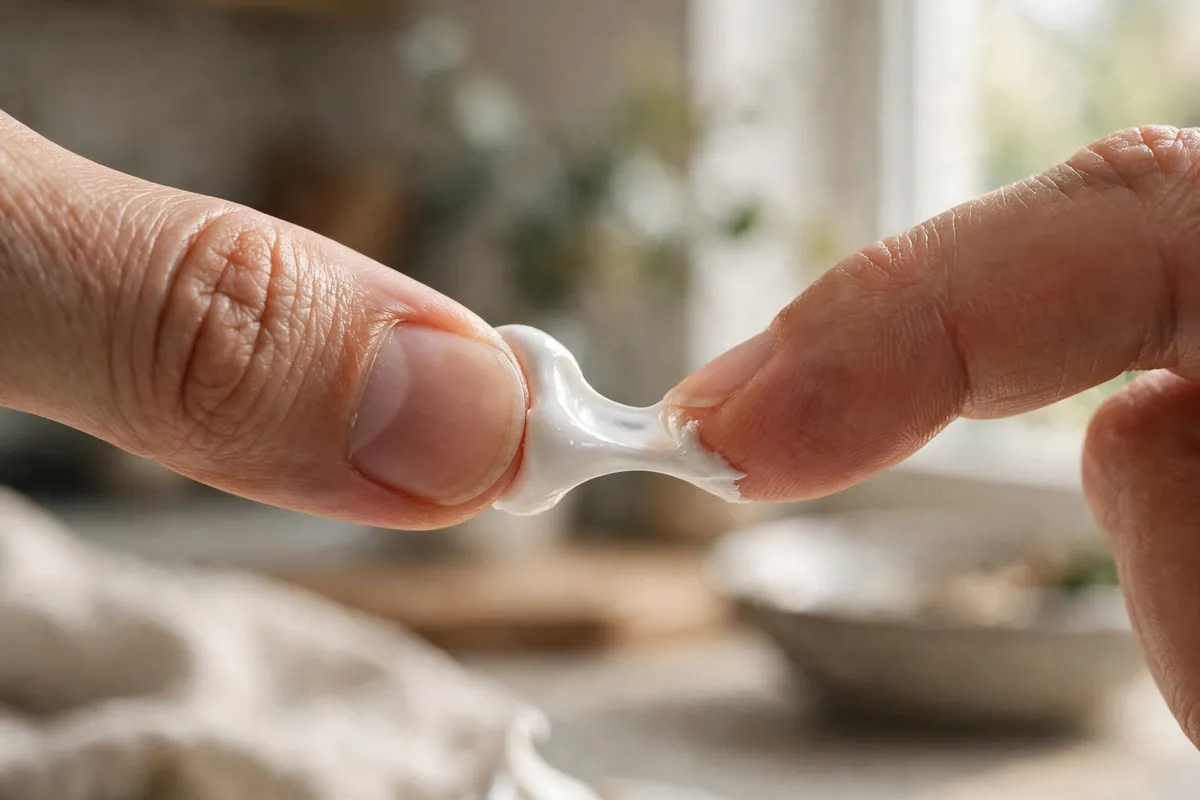
    The fix: Add sugar one tablespoon at a time, beating 20–30 seconds between additions. Use superfine (caster) sugar — it dissolves dramatically faster. The test: rub a dab of meringue between thumb and forefinger. Perfectly smooth with zero grit? Ready. Any graininess? Keep beating. This single habit eliminates most weeping.

    fingers rubbing a dab of meringue, showing the texture test
    fingers rubbing a dab of meringue, showing the texture test

    2. Humidity got to it

    Sugar is hygroscopic — it pulls moisture straight out of the air. On a humid or rainy day, the meringue absorbs ambient moisture faster than the oven can drive it off, and the surface weeps. This is also why refrigerating a meringue pie uncovered is a mistake: fridge air is humid.

    How to tell: It was a rainy or muggy day. Or the pie went into the fridge uncovered and came out beaded.

    The fix: Don’t bake meringue on high-humidity days if you can avoid it — check the forecast the way you’d check it for candy-making. Cool the pie away from steam and drafts. If you must refrigerate, do it only after the pie is fully cool, and even then, serve within hours. Meringue pies are same-day desserts; the fridge is a holding cell, not storage.

    3. It was underbaked

    An underbaked meringue never fully sets its structure — the interior stays soft and unstable, and liquid migrates out as it sits. Pale, soft peaks that look barely kissed by heat are the giveaway.

    How to tell: The meringue was white or barely golden, soft to the touch, and weeping started within the hour.

    The fix: Bake at 350°F (175°C) for 12–15 minutes, until the peaks are genuinely golden-brown — color is structure. The tips should feel dry and crisp, not soft. Don’t fear browning; fear paleness.

    4. The meringue went onto cold filling (and wasn’t sealed)

    Two related errors. Spreading meringue onto a cold filling traps condensation underneath — liquid forms between the layers as the pie bakes. And meringue that doesn’t touch the crust edge shrinks back as it cools, leaving a gap that fills with syrup.

    How to tell: The liquid pooled under the meringue rather than beading on top, or there’s a visible gap between meringue and crust.

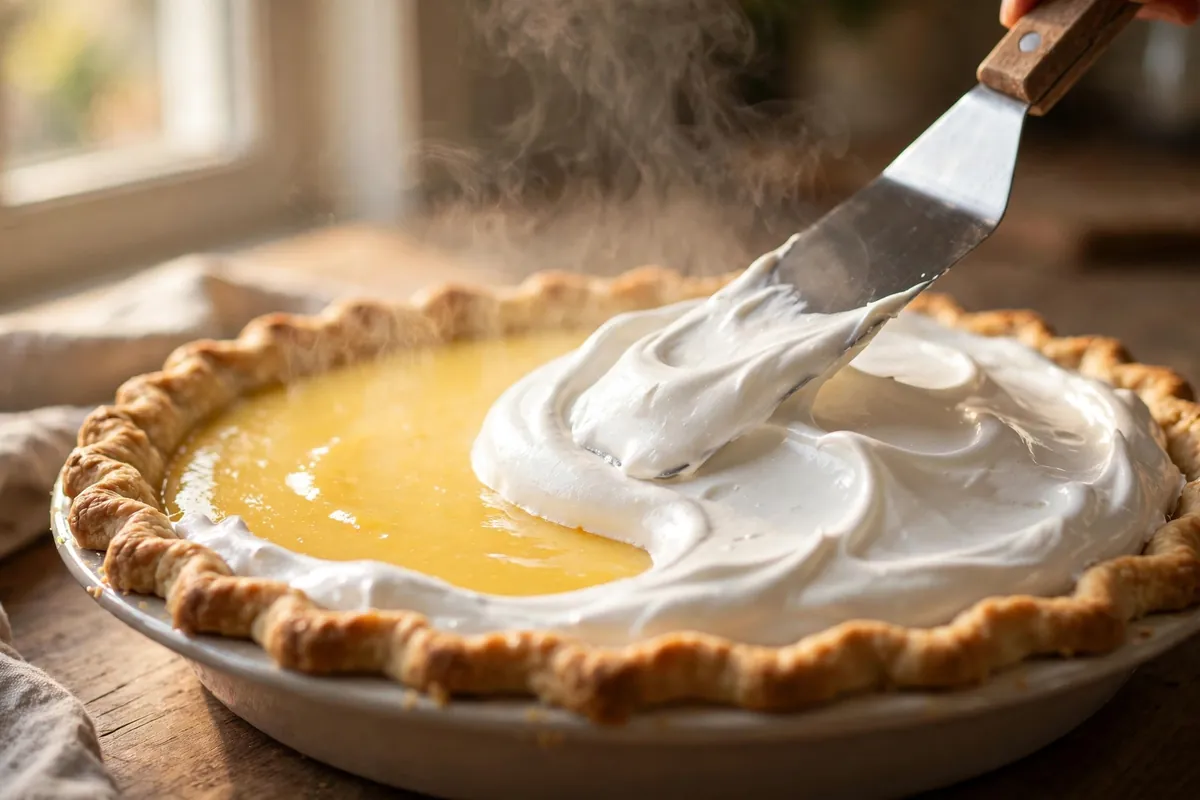
    The fix: Spread the meringue over hot filling — straight from the stove, still steaming. And seal it: push the meringue all the way to the crust edge so it touches pastry all around, with no gaps. The seal anchors the meringue against shrinkage. Make small decorative peaks with the back of a spoon while you’re at it — they brown beautifully.

    spreading meringue over steaming-hot lemon filling, sealing it to the crust edge
    spreading meringue over steaming-hot lemon filling, sealing it to the crust edge

    5. It sat too long

    Even a perfect meringue is a short-lived structure. After several hours — and certainly overnight — the foam gradually relaxes and releases moisture. An overnight meringue pie is a weeping meringue pie; that’s physics, not failure.

    How to tell: It looked perfect for hours, then wept by the next day.

    The fix: Time your bake so the pie is served within 4–6 hours. For next-level stability, use Swiss meringue (whites + sugar heated to 160°F / 71°C over simmering water, then whipped) — the pre-dissolved sugar and cooked proteins hold significantly longer. A teaspoon of cream of tartar per 3 whites (or a tablespoon of cornstarch) added during whipping also strengthens the foam against weeping.

    tall stable meringue peaks on a pie, golden-brown tips, no weeping
    tall stable meringue peaks on a pie, golden-brown tips, no weeping

    Frequently asked questions

    Is weeping meringue safe to eat?
    Yes — the beads are just sugar syrup, completely harmless. It’s a cosmetic and textural issue, not a safety one. Blot the beads gently with a paper towel if they bother you, but the pie underneath is fine.

    Can I fix weeping after it happens?
    Mostly no — once the syrup has escaped, you can’t push it back in. You can blot the surface and return the pie to a 350°F (175°C) oven for a few minutes to dry it slightly, but prevention (dissolved sugar, low humidity, proper bake) is the real fix. Next time, start dry.

    Does cream of tartar actually prevent weeping?
    It helps meaningfully. Cream of tartar (about 1/4 teaspoon per egg white) acidifies the foam, which strengthens the protein network and makes it more resistant to collapsing and releasing liquid. It’s cheap insurance — I use it in every meringue destined for a pie.

    Why did my meringue shrink away from the crust?
    It wasn’t sealed to the edge, and possibly cooled in a draft. Meringue contracts as it cools; if it’s anchored to the crust all the way around, it has nowhere to go. Seal it fully and cool away from open windows and AC vents.

    Can I make meringue pie a day ahead?
    I don’t recommend it. Even a well-made meringue degrades overnight — slight weeping, softening peaks. If you must, Swiss meringue holds best. But the honest answer: meringue pies are bake-and-serve-day desserts, which is why they’re in the “day of” column of my Thanksgiving timeline.

    Aquafaba meringue — does it weep too?
    Yes, and often worse — chickpea liquid foams beautifully but the foam is less stable than egg-white foam. Same rules apply, more strictly: superfine sugar, full dissolution, serve fast. See Eggless Cake That Actually Works for the aquafaba technique.

    Related troubleshooting: Make-Ahead Thanksgiving Desserts: A Baker’s Timeline · Eggless Cake That Actually Works: Tested Replacements