
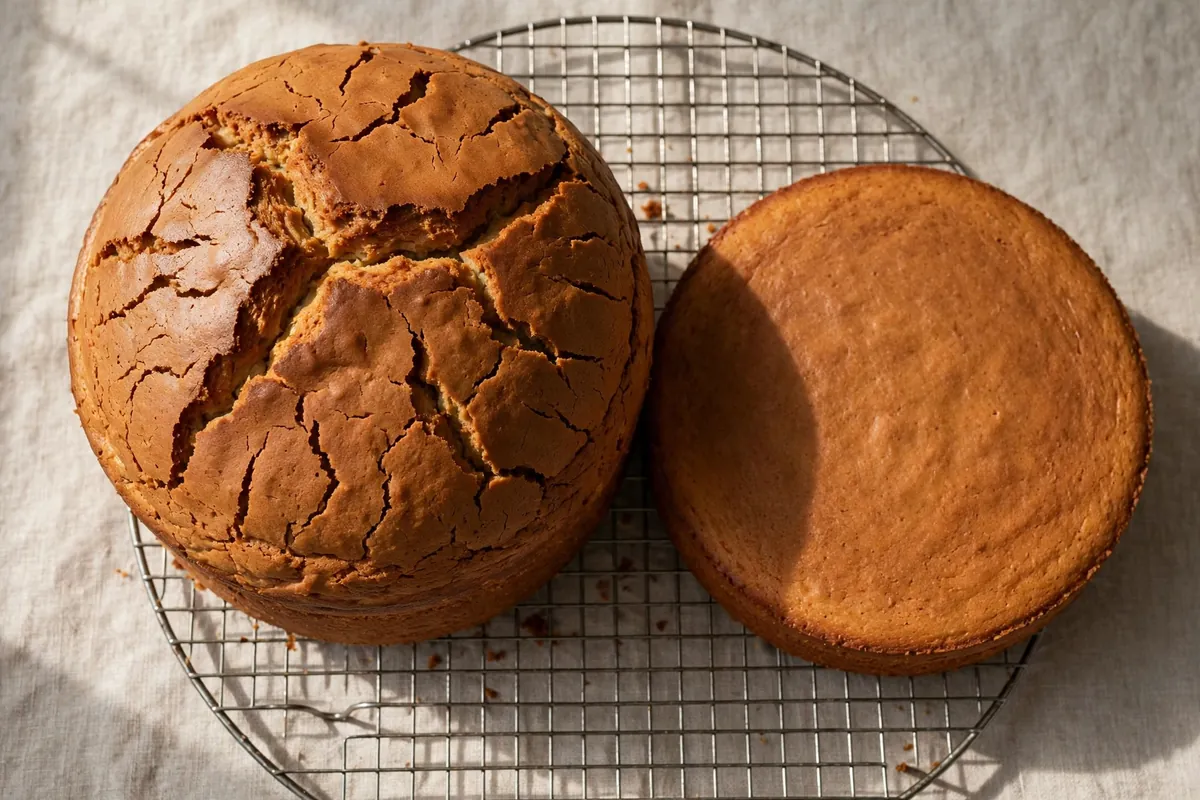
Cake Domed and Cracked on Top — Oven Temp and Pan Fixes
Quick diagnosis: A dome with a crack means the edges set before the center finished rising — almost always an oven running too hot, the wrong rack position, or no insulation on the pan sides. Drop the temperature 25°F (15°C) and move to the center rack first; that fixes most cases.

Here’s the mechanism: batter at the edges of the pan heats first and sets into a firm ring. The center stays fluid longer and keeps rising on leavening gases — pushing up through the path of least resistance, which is the still-soft middle. The faster the edges set relative to the center, the bigger the dome; push it far enough and the stretched surface splits. Every fix below slows the edges down or cools the whole bake so the cake rises evenly.
1. The oven was too hot
The single biggest cause. At high heat the outer inch of batter sets within minutes while the middle is still raw and expanding. The center has nowhere to go but up, and the already-firm top crust cracks under the pressure. Bake the same vanilla batter at 375°F (190°C) versus 325°F (163°C): the hot bake domes nearly an inch; the cooler bake comes out nearly level.
How to tell: Big dome, deep crack, dark or thick crust on the sides. The cake may also have a slightly dry edge (see Why Is My Cake Dry?).
The fix: Verify your actual temperature with an oven thermometer — most home ovens are off by 25°F (15°C). Bake at a true 325–350°F (163–175°C) for most butter cakes, on the center rack. Lower and slower gives the center time to rise with the edges instead of against them.
2. Wrong rack position
Heat in a home oven is not even: the top runs hotter (especially with an upper element or in small ovens), the bottom runs hotter near the lower element. A cake on the top rack gets blasted from above — the surface sets early into a crust, then the still-rising middle shoves straight through it.
How to tell: The top browned fast and formed a firm skin early, while the middle kept visibly rising underneath it.
The fix: Center rack, always, for cakes — it gives the most even top-to-bottom heat. If your oven has a noticeable hot spot (one side always browns first), rotate the pan once, quickly, at the three-quarter mark.
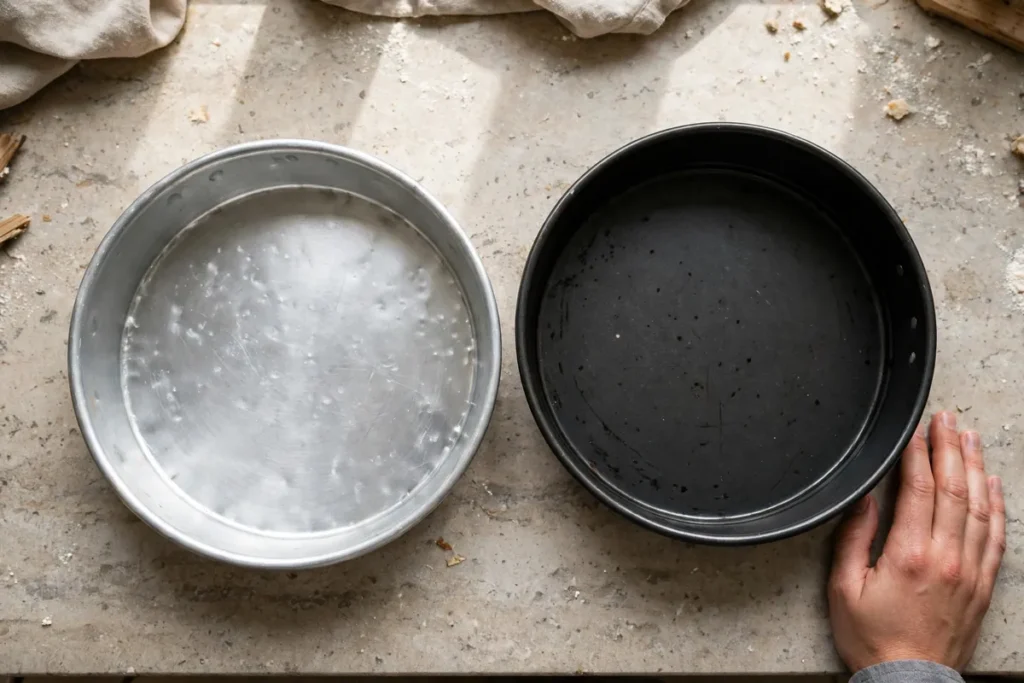
3. Dark or nonstick pans
Dark metal absorbs radiant heat far more aggressively than light aluminum — the edges of the batter can run 25°F (15°C) hotter than the center. Nonstick coatings are usually dark for the same reason. That extra edge heat sets the perimeter fast and the dome follows.
How to tell: You’re using dark gray/black or nonstick pans, and the sides of your cakes are noticeably darker and thicker-crusted than the tops.
The fix: Drop the oven temperature by 25°F (15°C) when using dark or nonstick pans, or switch to light-colored aluminum — the professional standard for even baking. Either way works; just don’t bake a dark pan at the recipe’s light-pan temperature.
4. Too much batter in the pan
A pan filled to the brim leaves the batter with enormous vertical room to climb. Deep batter also bakes unevenly — the same depth problem that sinks centers (see Why Did My Cake Sink in the Middle?) pushes domes upward instead when the oven is hot.
How to tell: The batter was near the rim before baking, or the dome rose well above the pan’s edge.
The fix: Fill pans one-half to two-thirds full. More than that and you’re fighting physics. Split deep batters across two pans for layer cakes — thinner layers bake flatter and more evenly anyway.
5. Too much leavening
Excess baking powder or soda generates more gas than the batter structure can gracefully contain. The center, being last to set, takes the full force of that extra lift. This is the same over-leavening that collapses cakes when the structure can’t keep up — here it domes them when the oven is hot enough to set the top mid-rise.
How to tell: Dramatic rise, coarse open texture near the dome, sometimes a soapy aftertaste.
The fix: About 1 teaspoon baking powder per cup (120g) of flour, leveled with proper measuring spoons. Replace baking powder older than 6–12 months instead of compensating with extra.
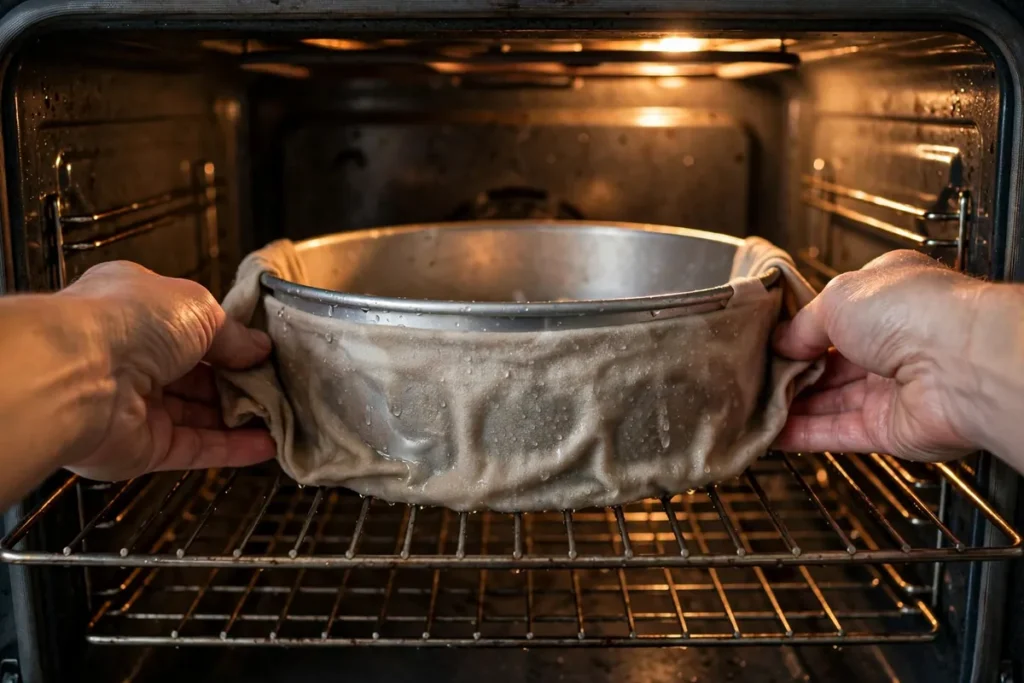
6. No insulation on the pan sides (baking strips)
This is the professional fix most home bakers never hear about. A wet fabric baking strip wrapped around the pan insulates the sides, so the edges heat at nearly the same rate as the center. The whole cake rises as one level sheet instead of edges-first. In side-by-side tests, the stripped pan consistently produces the flatter cake.
How to tell: You’ve fixed temperature, rack, and pans, and still get a mild dome — or you just want reliably level layers for stacking.
The fix: Buy reusable baking strips (soak in water, wring lightly, wrap and pin around the pan), or DIY: fold wet paper towels into a strip, wrap in foil, and secure around the pan. They add a few minutes to the bake — start checking at the normal time and expect up to 5 extra.
What to do with a domed cake right now
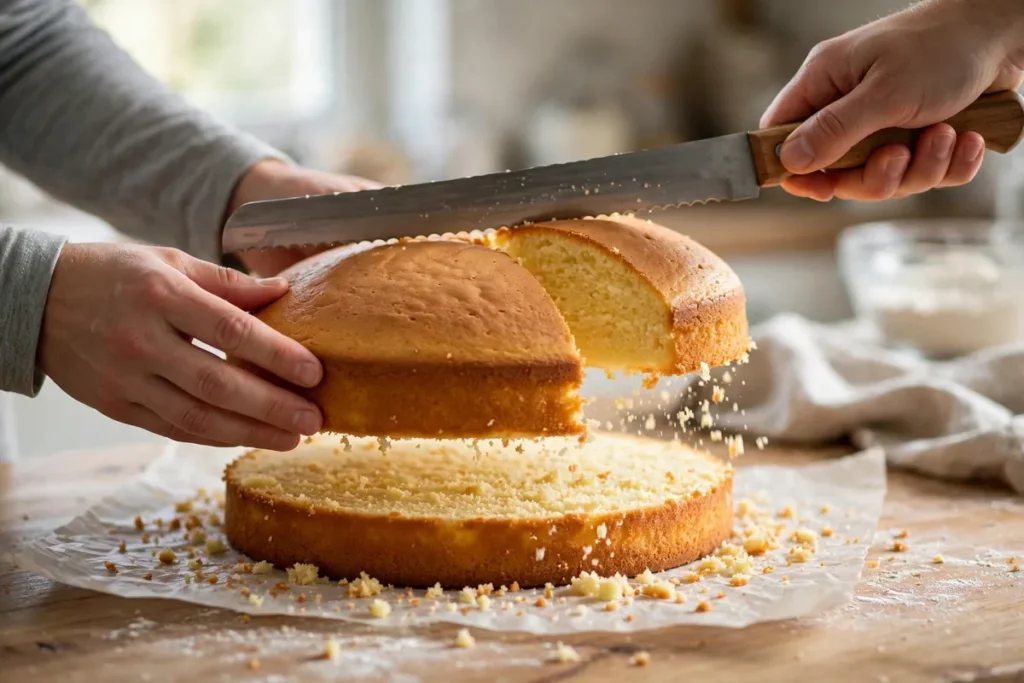
Level it. A long serrated knife (or a cake leveler) sawn gently across the top takes the dome off in one pass — let the knife do the work, don’t press down. Save the trimmings: domed tops are baker’s snacks, or blitz them into cake crumbs for trifles and cake pops. And here’s the secret professionals won’t admit: nearly every tall layer cake in a bakery started with a dome. Level layers actually stack better than “perfect” ones because the cut surface grips frosting.
Frequently asked questions
Is a cracked cake ruined?
No — it’s a cosmetic issue. The crack is on top, which gets leveled or becomes the bottom layer. Flavor and texture are unaffected. Level it, frost it, and nobody will ever know.
Why does my cake dome in the middle but the recipe photo is flat?
Recipe photos are styled — and often leveled before shooting. But the technical answer is even heat: test kitchens use calibrated ovens, light aluminum pans, and correct batter depth. Match those three and your cakes will come out nearly as flat.
Can I prevent doming without buying baking strips?
Yes: true 325–350°F (163–175°C) on the center rack, light-colored pans, batter filled two-thirds max. That combination prevents most doming. Strips are the upgrade for reliably dead-flat layers, not a requirement.
Should I cut the dome off while warm or after cooling?
After cooling — a warm cake crumbles and tears under the knife. Cool the layer completely (or chill 30 minutes), then level with a long serrated knife using a gentle sawing motion.
Does a dome mean my cake will taste bad?
Not at all. Doming is about heat distribution, not flavor. The crumb under a dome is usually perfectly good — sometimes the dome itself is the tastiest part, with its caramelized top.
Related troubleshooting: Why Did My Cake Sink in the Middle? · Why Is My Cake Dry? · Why Is My Bread Dense?