Category: Bread

  • Why Do My Bagels Deflate? Shaping and Boiling Fixes

    Why Do My Bagels Deflate? Shaping and Boiling Fixes

    You shaped beautiful rings and pulled flat discs from the oven — bagels in outline only, with none of the tall, chewy bite that defines them. Deflation is the classic home-bagel failure, and it comes down to structure: the dough couldn’t hold its shape through boiling and baking. Here’s the full diagnosis.

    Quick diagnosis: Bagels deflate from weak structure: over-proofed dough (the #1 cause — do the float test), under-kneaded dough or weak flour, or a bad boil. Fix the proof first; it’s the culprit in most flat batches.

    Why bagels deflate (the mechanism)

    A bagel must survive a boiling-water bath then bake at high heat while holding a ring shape — that takes a strong gluten network and correct fermentation. Weak gluten (under-kneaded, low-protein flour) or over-fermentation means the network can’t support the dough through the boil: it slumps, spreads, and sets flat.

    1. The bagels were over-proofed

    The single most common cause. An over-proofed bagel has a gluten network that’s already stretched to its limit and yeast that’s exhausted its food. It looks puffy and promising on the counter — then hits the boiling water and collapses, because there’s no strength left to hold the shape through the shock.

    How to tell: The shaped bagels looked very puffy, maybe doubled, before boiling. They may have felt fragile or airy when you lifted them. In the water they flattened within seconds.

    The fix: Use the float test — it’s the bagel proofing standard for a reason. Drop one shaped bagel into a bowl of cool water: if it floats within 10 seconds, it’s ready to boil. If it sinks like a stone, it needs more time. If it floats high and looks bloated, it’s over-proofed — and unfortunately, there’s no rescue; reshape and re-proof won’t restore the spent structure. Proof at cool room temperature and check early: shaped bagels typically need 20–40 minutes, not hours. (Over-proofing ruins all bread the same way — see Why Didn’t My Bread Rise? for the mirror image.)

    the float test — a bagel floating in a bowl of water beside a sunken one
    the float test — a bagel floating in a bowl of water beside a sunken one

    2. The dough was under-kneaded

    Bagel dough is stiff and low-hydration (typically 50–57%), and it needs full gluten development to hold its shape. Under-kneaded dough has a ragged, weak network — fine for a soft dinner roll, fatal for a boiled bagel. The rings look okay shaped, then relax and spread in the water.

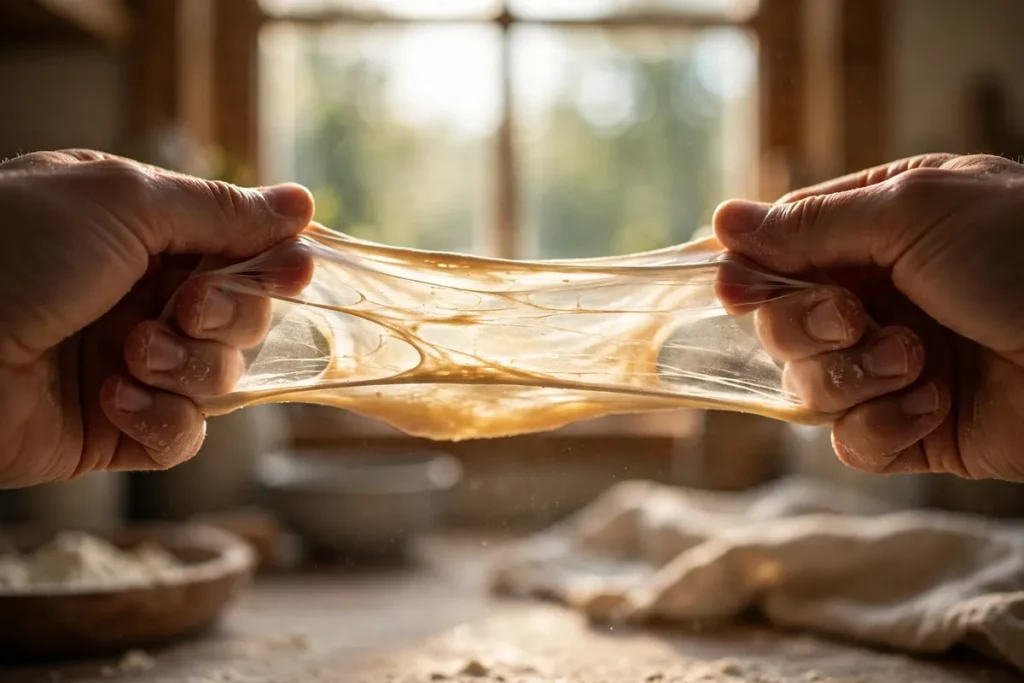
    How to tell: The dough tore when pulled, never passed the windowpane test, or felt rough after kneading.

    The fix: Knead 10–12 minutes by hand (8–10 in a mixer with a dough hook) until smooth, firm, and elastic — it should pass a rough windowpane test. High-protein flour helps enormously (see cause #3).

    3. The flour was too weak

    All-purpose flour (10–12% protein) makes a tender bagel — tender being the problem. Bagels need chew, and chew needs protein: bread flour at 12.7% or higher is the minimum, and high-gluten flour at 14% is the professional standard. Weak flour means weak gluten means flat bagels, no matter how well you knead.

    How to tell: You used all-purpose, the dough felt soft and extensible rather than firm and springy, and the baked bagels are bready-soft instead of chewy.

    The fix: Switch to bread flour or high-gluten flour. If all-purpose is all you have, you can still make bagels — knead thoroughly and handle gently — but expect a softer, less chewy result. This is one of the few cases where flour choice alone decides the outcome.

    4. The boil was wrong

    The boil does two jobs: it sets the crust (gelatinizing the starches on the surface, which is what gives bagels their shine and chew) and it finishes the rise with a final burst of oven spring. Get it wrong and the structure fails at the worst moment.

    Too timid: a bare simmer doesn’t set the crust fast enough — the bagel softens and spreads. Too long: past a minute per side, the crust over-gelatinizes into a thick, tough skin.

    How to tell: Spreading in the water means too timid; thick, wrinkled skins mean too long.

    The fix: A full rolling boil, 30–60 seconds per side. Add malt syrup or honey (a tablespoon per quart) for crust color and flavor. Use a wide pot so the boil recovers quickly, don’t crowd, flip once, and get them into the hot oven promptly.

    bagels boiling — some floating high and holding shape, water at a rolling boil
    bagels boiling — some floating high and holding shape, water at a rolling boil

    5. The shaping lacked surface tension

    A bagel holds its shape because the dough skin is pulled tight around it — surface tension. A loosely shaped ring with a slack skin relaxes the moment it hits hot water, spreading outward instead of holding tall.

    How to tell: The rings looked a bit lumpy or uneven before proofing, the holes closed up or went ragged, and the bagels spread rather than rising.

    The fix: Shape with tension. The poke method: roll each portion into a smooth ball first (tucking edges underneath to build a tight skin), then poke a floured finger through the center and stretch the hole to about 2 inches — it shrinks back as it proofs. Or the rope method: roll into a 9-inch rope, overlap the ends, and roll the seam to seal. Either way, the surface should look smooth and taut, not slack. Rest the shaped rings 5 minutes before the final stretch so the gluten relaxes just enough to hold the shape.

    The bagel structure checklist

    1. High-protein flour: bread flour (12.7%+) or high-gluten (14%).
    2. Knead to smooth and elastic — rough windowpane.
    3. Shape with a tight skin; 2-inch holes.
    4. Proof to the float test — 10 seconds, not bloated.
    5. Rolling boil, malted water, 30–60 seconds per side.
    6. Into a 425°F (220°C) oven immediately; bake 20–25 minutes until deep golden.
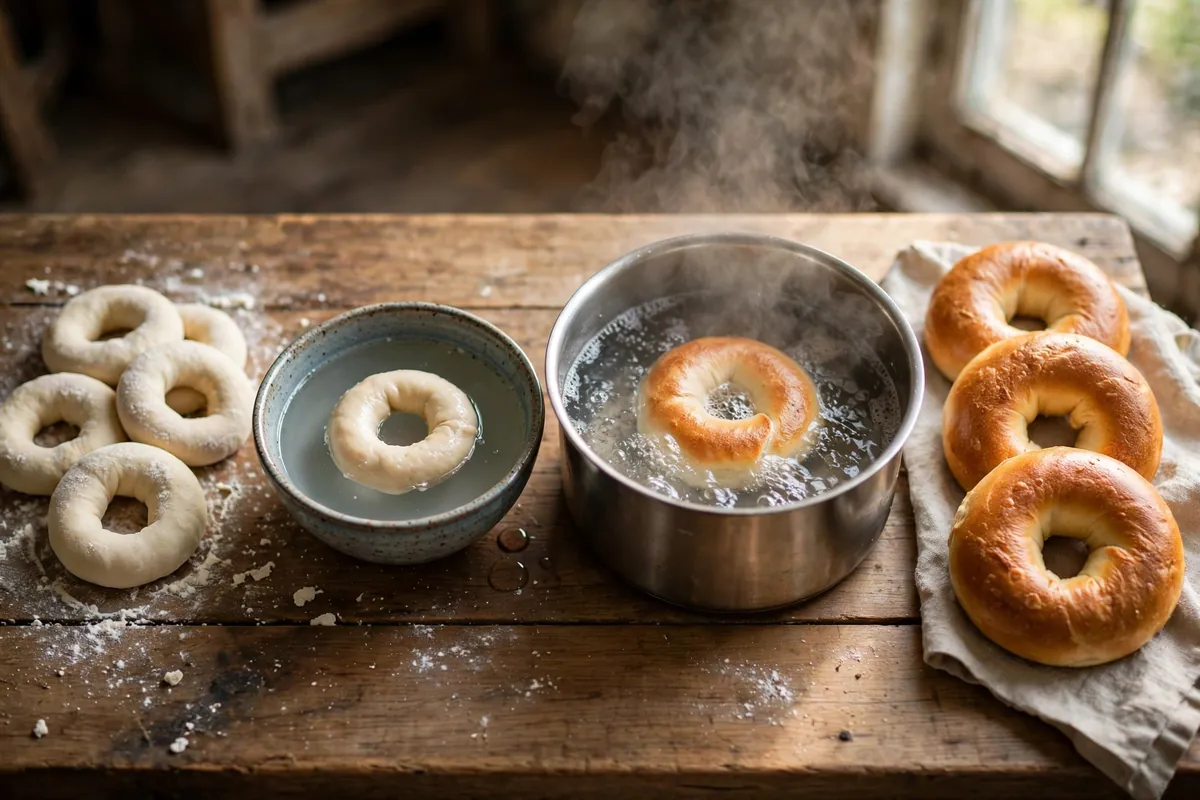
    the full sequence — shaped rings, float test, boiling, baked bagels — as a four-frame progression
    the full sequence — shaped rings, float test, boiling, baked bagels — as a four-frame progression

    Frequently asked questions

    Can I rescue bagels that already deflated in the boil?
    Not really — once the structure collapses in the water, baking sets the flat shape permanently. But don’t throw them out: flat bagels still taste like bagels. Slice and toast them, and they’re excellent. Next batch, watch the proof with the float test.

    Why do my bagels look fine before boiling but flat after?
    That’s the signature of over-proofing or a weak boil. The shaped rings look promising because the gas is still in them; the boiling water is a stress test, and weak structure fails it. Float-test every batch and keep the boil rolling.

    Should bagel dough be sticky?
    No — proper bagel dough is stiff and firm, noticeably drier than bread dough (50–57% hydration). If your dough is soft and tacky, the flour absorbed less water than expected or the formula is off. A stiff dough is a feature: it’s what builds chew.

    Can I make bagels without malt syrup?
    Yes — honey, brown sugar, or plain water all work for the boil. Malt gives the most authentic flavor and deepest color, but the boil’s structural job (setting the crust) happens regardless of what’s dissolved in it.

    Why did the holes close up?
    Under-stretched holes plus over-proofing. Stretch to a full 2 inches — they shrink dramatically — and don’t let the proof run long. A closed hole is cosmetic; the bagel still eats fine.

    Is it safe to eat a dense, flat bagel?
    Completely — flat is a texture failure, not a safety issue, as long as it baked through (deep golden crust, hollow-ish sound when tapped). Dense bagels toast beautifully.

    Related troubleshooting: Why Didn’t My Bread Rise? · Why Is My Bread Dense? · No-Knead Bread for Beginners
  • Why Didn’t My Bread Rise? A Step-by-Step Diagnosis

    Why Didn’t My Bread Rise? A Step-by-Step Diagnosis

    Why Didn’t My Bread Rise? A Step-by-Step Diagnosis

    Quick diagnosis: A dough that won’t rise is almost always a yeast problem or a temperature problem. Start here: proof your yeast (2¼ tsp yeast + 1 tsp sugar + ¼ cup water at 100–110°F — foamy in 10 minutes means alive). If the yeast is alive, your kitchen is probably too cold or you haven’t waited long enough. Walk the steps below in order.

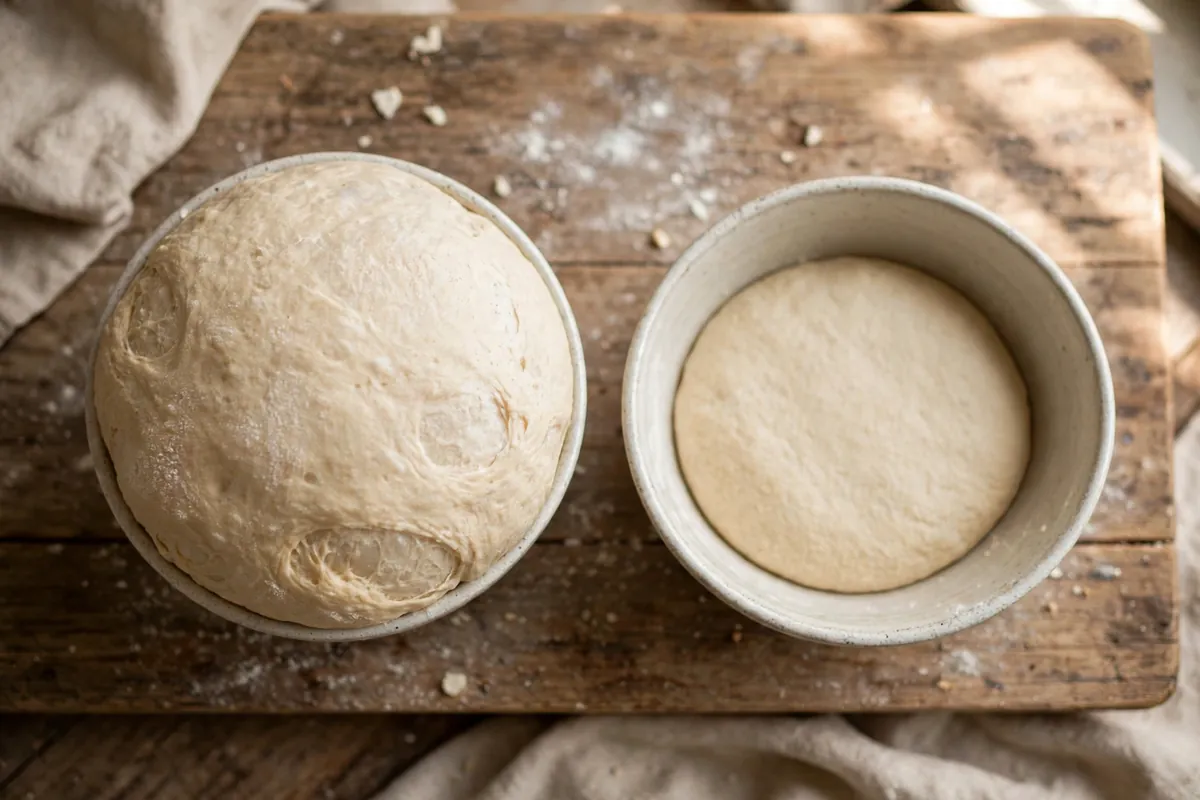
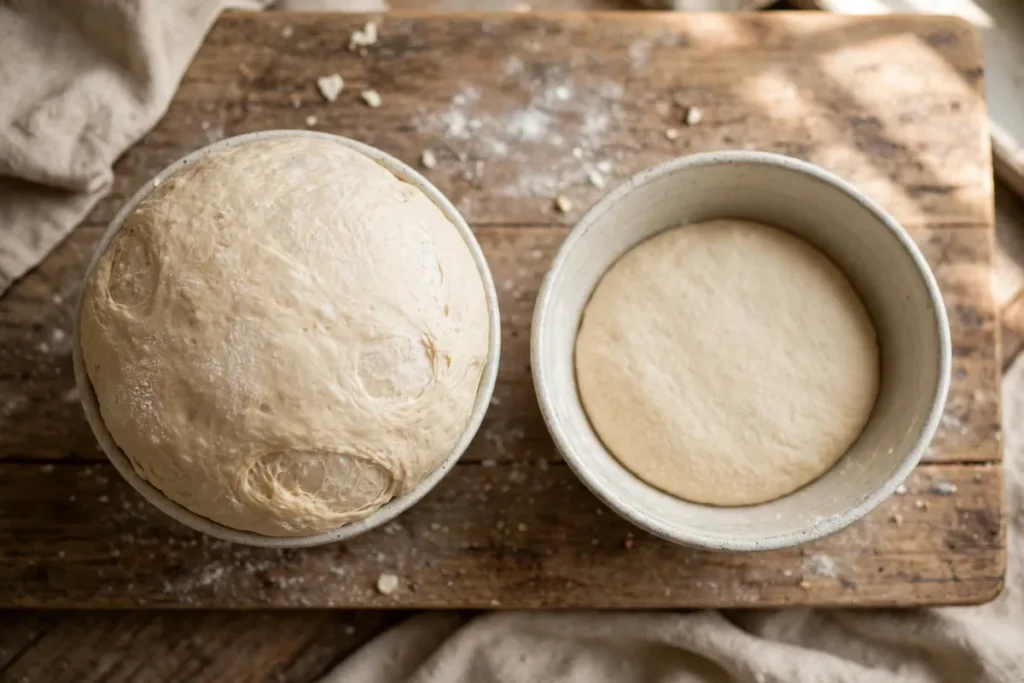
    Doubled risen dough beside flat unrisen dough in bowls
    a bowl of dough that has clearly doubled next to a bowl of flat, unrisen dough

    A dough that hasn’t moved after two hours is disheartening — but a failed rise is one of baking’s most diagnosable problems, because only a handful of variables control fermentation. Work through these seven steps in order; they build on each other.

    Step 1: Check whether your yeast is alive

    Everything else is irrelevant if the yeast is dead. Yeast is a living organism; it dies from heat, old age, and poor storage. An opened packet that’s been sitting in a warm cupboard for six months is the most common culprit I see.

    The test: Dissolve 2¼ teaspoons of yeast and 1 teaspoon of sugar in ¼ cup (60ml) of warm water at 100–110°F (37–43°C). Wait 10 minutes. Vigorous foam and a yeasty, beery smell means it’s alive and ready. Flat water with a few sad granules at the bottom means it’s dead — discard it and start over with fresh yeast. No rescue exists for dead yeast; the dough can’t be saved as bread.

    Prevention: Store opened yeast airtight in the fridge (3–4 months) or freezer (6+ months). Check expiry dates — unopened packets last about a year past packaging in cool storage, far less in warmth.

    Step 2: Check your water temperature

    Water above 140°F (60°C) kills yeast on contact; 120–130°F badly stresses it. Below 70°F (21°C) won’t kill yeast, but fermentation will crawl.

    The test: You should be able to hold your finger in the water comfortably — it should feel like warm bath water, not hot. If you don’t own a thermometer, err on the cooler side: 100–110°F (37–43°C) is the sweet spot for active dry yeast. Instant yeast is more temperature-tolerant and can be mixed directly into dry ingredients, which removes this variable entirely.

    If you suspect you killed it: There’s no revival. But before you throw the dough out, give it the full proof test from Step 1 using yeast from the same batch — if that yeast is dead too, the diagnosis is confirmed.

    Thermometer in warm water for the yeast temperature test
    hand testing water temperature in a bowl, thermometer showing ~105°F

    Step 3: Check the salt

    Salt in normal bread quantities (about 2% of flour weight — 10g per 500g flour) slows yeast slightly but won’t stop a rise. Problems start when salt is heavily over-measured or dumped directly onto undissolved yeast, where the concentrated salt draws water out of the yeast cells and damages them before mixing even begins.

    The test: Did you measure the salt, or shake it in freely? Did it go directly onto the yeast?

    The fix: Always mix salt evenly through the flour first, then add yeast — or add salt after the initial mix comes together. At 2%, salt actually strengthens the gluten network and improves the final crumb.

    Step 4: Check the room temperature and the clock

    This is the step most people skip, and it’s the answer more often than anyone expects. Yeast activity is intensely temperature-dependent: at 65°F (18°C), a rise can take twice as long as at 78°F (26°C). If your recipe says “rise 1 hour” and your kitchen is cool, your dough may simply need 2–3 hours.

    The test: Is the dough showing any signs of life — slight puffiness, a few bubbles when you peek underneath, a yeasty smell? Any activity at all means the yeast is working and you just need patience and warmth.

    The fix: Move the dough to 75–80°F (24–27°C) — oven with just the light on, top of the fridge, or microwave beside a mug of boiled water (door closed). Judge by the dough, not the clock: roughly doubled, and the poke test shows a slow spring-back leaving a slight indent.

    Step 5: Check the flour quantity

    Too much flour makes a stiff dough that expanding gas can’t push apart — the yeast may be working fine, but the dough is too heavy to show it. This is the classic result of scooping flour with a measuring cup instead of weighing it.

    The test: Is the dough firm, dry, and resistant when you poke it, rather than soft and pillowy?

    The fix for next time: Weigh flour at 120g per cup. For the current dough, you can try working in a tablespoon or two of warm water and giving it more time in warmth — it sometimes recovers, though the crumb won’t be perfect. For details on flour’s role in texture, see Why Is My Bread Dense?.

    Step 6: Check for rise-killers in the recipe

    Very high sugar (above ~15–20% of flour weight — brioche and panettone rise slowly by design), heavy fats, and large amounts of cinnamon all stretch fermentation to 3–4+ hours, which reads as “not rising” to an impatient baker.

    The fix: Enriched doughs need longer, warmer rises — plan for it. If you’re adapting a recipe, add sweet or fatty ingredients after the first rise where possible.

    Step 7: Decide — rescue or restart?

    If the yeast is dead (Step 1 failed), the dough cannot become risen bread. But don’t bin it:

    • Flatbread and pizza: Roll the unrisen dough thin, top it, and bake hot — dead-yeast dough makes excellent pizza bases and flatbreads.
    • Crackers: Roll very thin, dock with a fork, salt, and bake until crisp.
    • Restart: If the yeast was the only problem and you have fresh yeast, it’s honestly faster to start a new dough than to nurse a compromised one.

    If the yeast is alive and the dough is simply slow (Step 4), patience plus warmth is the entire rescue plan. I’ve had doughs take 4 hours in a cold kitchen and still bake into beautiful loaves — yeast works on its own schedule, not yours.

    Rescue pizza baked on a stone with golden edges
    the same unrisen dough repurposed — rolled thin as a pizza base with toppings, mid-bake

    Frequently asked questions

    How long should bread dough take to rise?
    At 75–80°F (24–27°C): 1–2 hours for the first rise, 30–60 minutes for the shaped proof. Below 70°F (21°C), double that. Fridge-retarded dough takes 8–24 hours. Judge by doubling and the poke test, never the clock.

    Can I bake bread that never rose?
    You can bake it, but it won’t be bread as you imagined — it’ll be dense and heavy. Repurpose it as flatbread, pizza, or crackers (Step 7) instead of baking a disappointing loaf.

    Does salt really kill yeast?
    At bread’s normal 2%, no — it just moderates activity and improves flavor and structure. Direct contact between dry salt and dry yeast, or heavy over-salting, can damage or severely slow yeast. Mixed properly, salt is yeast’s friend, not its enemy.

    How can I tell if my yeast is still good?
    The 10-minute proof test in Step 1: yeast + sugar + warm water = foam. Do this with any yeast you’re unsure about before it goes near your flour. It takes 10 minutes and has saved me from countless failed bakes.

    Can dough rise in the fridge?
    Yes — slowly, over 8–24 hours, and the long cold ferment actually develops deeper, more complex flavor. This is a technique, not a problem. Just make sure the dough shows some activity at room temperature for 30–60 minutes before refrigerating.

    My dough rose the first time but not after shaping — why?
    The shaped proof is shorter and subtler than the first rise — look for about 50% growth, not doubling, and use the poke test. If there’s zero movement after an hour in warmth, the yeast likely exhausted itself in an over-long first rise; next time, shorten the first rise.

    Related troubleshooting: Why Is My Bread Dense? · Why Is My Sourdough Gummy Inside? · Bread Crust Too Hard or Too Soft

  • Why Is My Bread Dense? 9 Causes and How to Fix Each One

    Why Is My Bread Dense? 9 Causes and How to Fix Each One

    Quick diagnosis: 9 out of 10 dense loaves come down to two things: a gluten network that never fully developed, or fermentation that was cut short. If your dough failed the windowpane test and never roughly doubled during its rise, start with causes #1 and #3.

    Bread’s open crumb comes from gas bubbles trapped in a strong gluten network. When the network is weak or the gas never forms, the crumb collapses dense. Work through the nine causes in order — the first match is almost certainly your answer.

    1. The dough was under-kneaded

    The most common cause, full stop. Kneading develops gluten — the elastic protein network that stretches around gas bubbles like tiny balloons. Under-kneaded dough has a weak, ragged network that can’t hold gas, so bubbles escape and the crumb sets dense.

    How to tell: Tear off a golf-ball-sized piece and stretch it gently. If you can stretch it thin enough to see light through it without tearing — the windowpane test — gluten is developed. If it rips immediately, it needs more work.

    The fix: Knead 10–12 minutes by hand (6–8 in a stand mixer on medium-low) until smooth, elastic, and passing the windowpane test. An under-kneaded batch comes out like a brick; the same recipe properly kneaded gives an open crumb.

    Hands stretching dough for the windowpane test
    hands stretching dough for the windowpane test, backlit

    2. Too much flour was added

    Extra flour makes a stiff dough that yeast gas can’t push apart. The usual culprit: scooping flour straight from the bag with a cup. A scooped cup can weigh 150g versus the standard 120g — that’s 25% too much flour without you realizing it.

    How to tell: The dough felt firm and dry rather than soft and slightly tacky, and resisted stretching during shaping.

    The fix: Weigh flour at 120g per cup. Hold back the last ¼ cup during mixing, adding it only if the dough is genuinely sticky once kneading begins — proper dough feels soft and tacky, not stiff.

    3. The rise was cut short

    Yeast needs time to produce the carbon dioxide that leavens bread. Shape and bake before fermentation finishes, and there simply isn’t enough gas in the dough — dense crumb guaranteed.

    How to tell: The poke test. Press a floured finger half an inch into the risen dough. Springs back immediately and fills in? Under-proofed — give it more time. Springs back slowly, leaving a slight indent? Ready to bake.

    The fix: Let the first rise go until roughly doubled — typically 1–2 hours at 75–80°F (24–27°C). Watch the dough, not the clock: in a cold kitchen the same recipe can take nearly twice as long as in warm conditions.

    4. The yeast was weak or dead

    Dead yeast produces no gas; weak yeast produces too little. Yeast dies from heat and slowly loses strength past its expiry — an opened packet in a warm cupboard for months is a prime suspect.

    How to tell: Proof it first. Stir 2¼ teaspoons yeast and 1 teaspoon sugar into ¼ cup warm water (100–110°F / 37–43°C). Foamy and bubbling within 5–10 minutes means alive. Nothing happens? It’s dead — no amount of extra rising time will save that dough.

    The fix: Proof any yeast you’re unsure about. Store opened yeast airtight in the fridge or freezer, and respect expiry dates.

    Foamy proofed yeast beside flat lifeless yeast in glasses
    two glasses side by side — foamy proofed yeast vs flat lifeless yeast

    5. The kitchen was too cold

    Yeast activity roughly doubles with every 15°F (8°C) within its working range. Dough rising at 65°F (18°C) can take twice as long as at 78°F (26°C) — shape on your usual schedule and you’ve baked an under-fermented loaf.

    How to tell: The dough barely moved in the expected time and the room felt cool.

    The fix: Find 75–80°F (24–27°C): inside the oven with just the light on, on top of the fridge, or near a radiator. Above 90°F (32°C) the rise gets too fast and flavor suffers; above 140°F (60°C) yeast dies.

    6. Too much salt, or salt directly on the yeast

    Salt is essential — it tightens gluten and builds flavor — but concentrated salt draws water out of yeast cells and stalls them. Dumping it directly onto undissolved yeast is the worst version.

    How to tell: You salted heavily, or sprinkled it straight onto the yeast.

    The fix: Use about 2% salt by flour weight (10g per 500g flour, roughly 2 teaspoons table salt). Mix it evenly through the flour before the yeast goes in. At the right percentage, salt improves crumb structure.

    7. The dough over-proofed and collapsed

    Over-proofed dough can also bake up dense: the yeast exhausts its food, the gluten overstretches and tears, gas escapes, and the loaf collapses into a dense layer — often with a pale, wrinkled crust.

    How to tell: The poke-test indent doesn’t spring back at all; the dough looks puffy but fragile and smells strongly alcoholic.

    The fix: If caught early, gently reshape and give a short 20–30 minute second proof. If fully collapsed, pan-bake it as a fallback or repurpose for flatbread — and next time, proof by the poke test, not the clock.

    8. The oven wasn’t hot enough, or the loaf was under-baked

    Oven spring — the final burst of rise in the first 10 minutes — needs fierce initial heat. A cool oven means weak spring. And an under-baked loaf never sets its structure; the interior stays heavy.

    How to tell: Pale soft crust, a loaf that feels heavy for its size, and a dull thud (not hollow) when you tap the bottom.

    The fix: Preheat a full 20–30 minutes — most ovens lie about being ready. Bake until a thermometer through the bottom reads 190–210°F (88–99°C) — the most reliable doneness test; crust color alone will fool you.

    Thermometer inserted in the bottom of a loaf on a cooling rack
    thermometer inserted into the bottom of a loaf on a cooling rack

    9. You sliced it too soon

    Fresh from the oven, the crumb is full of steam and the starches haven’t set. Early slicing lets steam escape and the soft interior compresses under the knife — dense, sometimes gummy slices.

    How to tell: Cut within 30 minutes of baking; the crumb looked steamy or compressed.

    The fix: Wait at least 1 hour — 2 for large or sourdough loaves. The bread finishes cooking from residual heat during the rest. Hardest instruction in baking; most impactful.

    The 5-minute pre-bake checklist

    Windowpane passed → flour weighed → yeast proofed or fresh → dough roughly doubled (poke test: slow spring-back) → oven preheated 20–30 min → thermometer ready for 190–210°F → rack cleared for a 1-hour rest. Hit all seven and dense bread becomes very hard to produce.

    Frequently asked questions

    Can I fix dense bread after baking?
    No — the structure is set. But dense bread makes outstanding toast, croutons, breadcrumbs, French toast, and bread pudding, where a tight crumb is an advantage.

    Does bread flour matter versus all-purpose?
    Yes — its 12–14% protein (vs 10–12% in all-purpose) builds a stronger gluten network that holds gas better. Switching flour is one of the highest-impact single changes for chronic density.

    How do I know I’ve kneaded enough?
    The windowpane test in cause #1 — binary and reliable. When in doubt, knead 2–3 minutes more; over-kneading by hand is far rarer than under-kneading.

    Is dense bread safe to eat?
    Yes, if fully baked — verify 190–210°F (88–99°C) internal temp. Dense but raw in the middle is unpleasant, so finish the bake properly.

    Why is my no-knead bread dense?
    No-knead trades kneading for very long fermentation (12–18 hours). Dense results mean the ferment was too short, too cold, or the dough over-floured. Give it the full time at room temp and keep the dough wet and shaggy.

    Related troubleshooting: Why Didn’t My Bread Rise? · Why Is My Sourdough Gummy Inside? · Bread Crust Too Hard or Too Soft