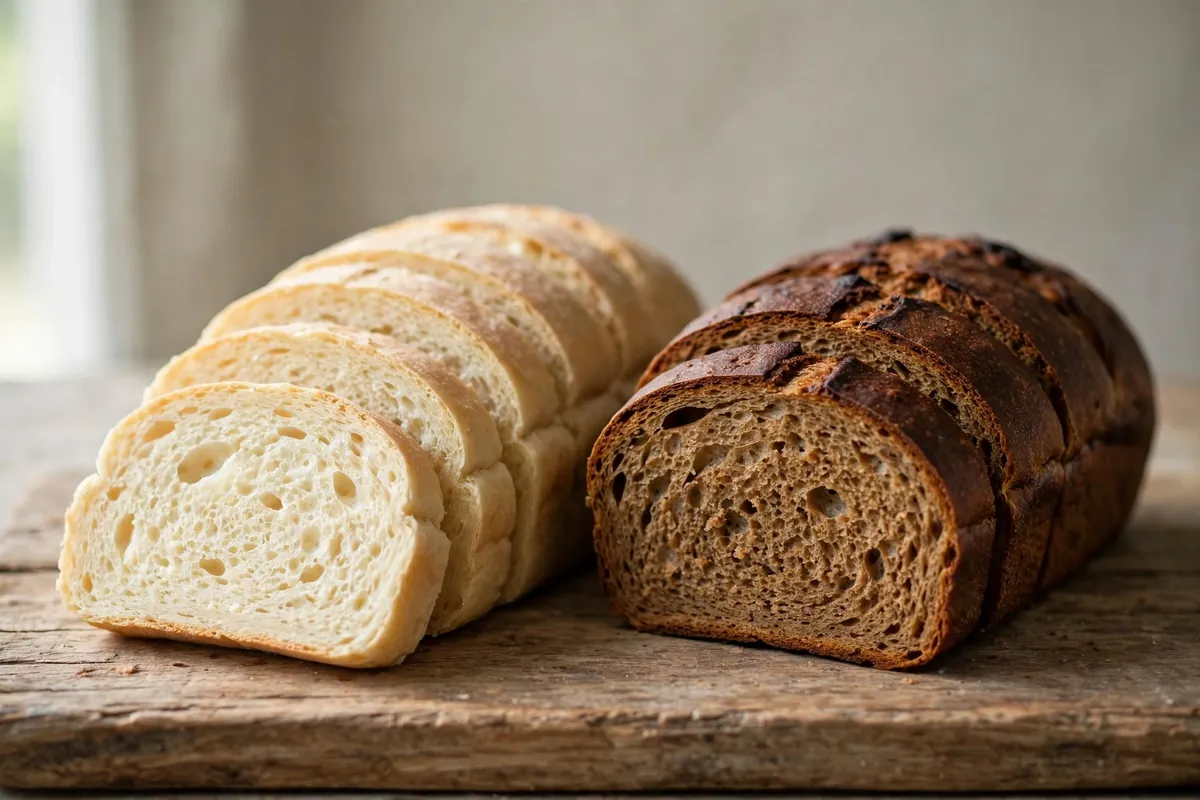
Category: Bread

  • Why Is My Bread Crust Pale? The Browning Science

    Why Is My Bread Crust Pale? The Browning Science

    Your bread tastes fine — good crumb, good rise — but the loaf came out looking anemic: pale, blonde, soft. A pale crust isn’t just cosmetic: browning is flavor. The same reactions that paint the crust golden-brown create hundreds of flavor compounds, so a pale loaf genuinely tastes blander than a well-browned one. The fix is understanding what browning actually needs, because it’s a short list: heat, sugar, protein, and a dry surface.

    Quick diagnosis: Pale crusts come down to oven temperature more than anything. If your oven runs cool — and most do — the crust never gets hot enough for browning reactions to fire. Check cause #1 first. If your oven is accurate but the loaf is a lean dough (flour, water, salt, yeast only), it simply has less browning fuel — see cause #3.

    What browning actually is (the 60-second science)

    Two reactions brown crust. Maillard — amino acids reacting with sugars — starts around 285°F (140°C) at the surface, creating deep brown color and savory flavor. Caramelization — sugars breaking down — needs roughly 330°F (165°C) and up, adding sweetness and dark color. Both need the crust surface genuinely hot and dry. Anything keeping it cool or wet — a cool oven, too much steam, a wet surface — delays browning. That’s the diagnostic framework: find what’s keeping your crust cool, wet, or fuel-starved.

    1. The oven wasn’t hot enough (or wasn’t actually preheated)

    This is the cause behind most pale loaves. Browning needs the crust surface to exceed 285°F (140°C), and that only happens if the oven air is genuinely at the set temperature — with the baking stone or steel fully saturated with heat. An oven that’s “preheated” for 5 minutes after the beep is lying: the air might be near temp, but the walls and stone are still cool, and they suck heat off your loaf in the first critical minutes.

    How to tell: The loaf took longer than the recipe said and the crust is uniformly pale, bottom included — a generally cool bake.

    The fix: Preheat a full 30–45 minutes with your stone or steel inside from the start, and verify with an oven thermometer — most home ovens run 15–25°F cool. Preheat 45 minutes and trust the thermometer instead of the dial — crusts go from blonde to bakery-brown in one bake. Bake lean loaves at a true 450–475°F (230–245°C); sugary enriched doughs do well at 375–400°F (190–200°C).

    2. Too much steam, for too long

    Steam is essential for oven spring — it keeps the crust soft and expandable for the first minutes of the bake. But steam is the enemy of browning: a wet surface can’t exceed 212°F (100°C) until the water evaporates. If your steam source keeps pumping moisture for the whole bake — a covered Dutch oven you never uncover, a pan of water you never remove — the crust stays pale because it never gets hot and dry enough to brown.

    How to tell: Great oven spring but a pale, leathery crust — baked covered the whole time, or the steam pan stayed in.

    The fix: Steam is a first-act tool only: bake covered for the first 20 minutes, then uncover for the rest — the second half is when browning happens. Remove water pans after 15–20 minutes. The loaf should spend at least half its bake in dry heat. (Steam timing is also behind crust texture problems — see Is My Bread Crust Too Hard or Too Soft?.)

    3. Lean doughs have less browning fuel

    A lean dough — flour, water, salt, yeast — has very little sugar and modest protein. There’s simply less raw material for Maillard and caramelization. That’s why a baguette needs a screaming-hot oven to brown at all, while a brioche turns golden at moderate heat: the brioche brings sugar, milk protein, and egg to the browning party.

    How to tell: Your oven is accurate and enriched breads brown fine, but lean loaves (baguette, sourdough, pizza dough) stay pale.

    The fix: Give lean doughs browning help. A teaspoon of sugar or malt powder per 500g flour adds fuel without noticeable sweetness — diastatic malt is the professional’s secret. Longer fermentation helps too: enzymes break starches into sugars over time, so a cold-retarded dough browns better than a rushed same-day one.

    4. You skipped the wash — the easiest color there is

    A wash on the crust surface is the single fastest way to add color, and different washes give different results. This is the fix when everything else is right but you want deeper, richer, shinier color.

    The wash lineup, tested: Whole egg plus a splash of water: deep golden-brown with shine — the all-rounder. Yolk only: the darkest mahogany — my pick for brioche. Milk or cream: soft matte gold for sandwich loaves. Melted butter: gentle browning, soft crust. Sugar-water glaze (1 tablespoon sugar in 2 tablespoons hot water): boosts caramelization on lean doughs.

    How to tell: The loaf is evenly baked and tastes right, but the color is flat and matte — it looks “unfinished.”

    The fix: Brush thinly and evenly just before baking — puddles of egg bake rubbery. For lean artisan loaves, the sugar-water trick or malt in the dough (cause #3) looks more natural.

    5. Underbaked — pulled before the color developed

    Color develops late in the bake. A loaf pulled 10 minutes early can look dramatically paler than its fully-baked twin, because the last stretch of baking is when surface temperature peaks and browning accelerates. If you’re judging doneness by time alone, you’re probably pulling early.

    How to tell: The crust is pale and soft rather than crisp, and the loaf feels light for its size. The bottom doesn’t sound hollow when thumped.

    The fix: Bake to internal temperature, not the clock: 200–210°F (93–99°C) for lean artisan loaves, 190–200°F (88–93°C) for enriched breads. A done loaf is deeply colored, sounds hollow when thumped, and feels firm. When in doubt, give it 5 more minutes — darker is almost always better eating than pale. (Full doneness guide: How to Tell When Bread Is Done.)
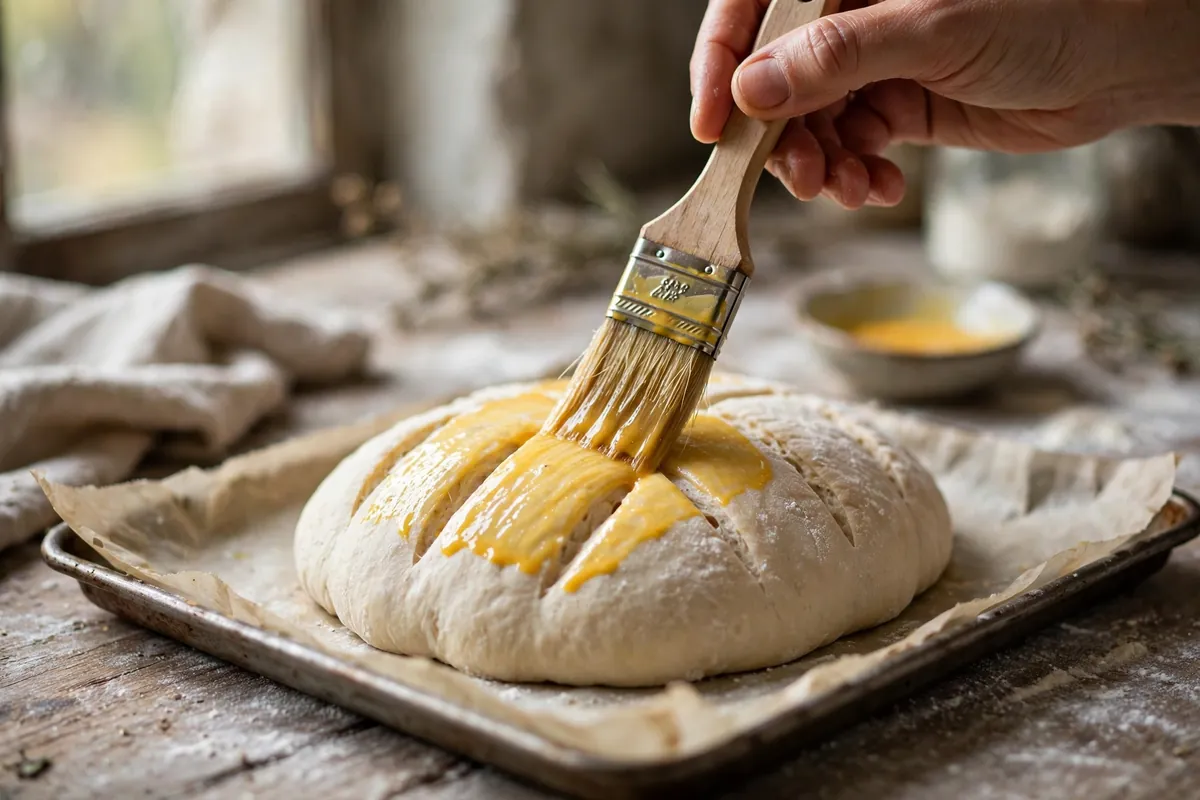
    hand brushing egg wash onto scored bread dough before baking
    hand brushing egg wash onto scored bread dough before baking

    Putting it together: my browning checklist

    Before every bake: oven preheated 45 minutes with the stone in? Thermometer reading true? Steam only for the first 20 minutes? Wash applied (or malt in the dough)? Baking to internal temp, not the timer? When all five check out, pale crusts simply don’t happen. The one I forget most is the preheat — boring, passive, and more important than any wash or sugar trick.

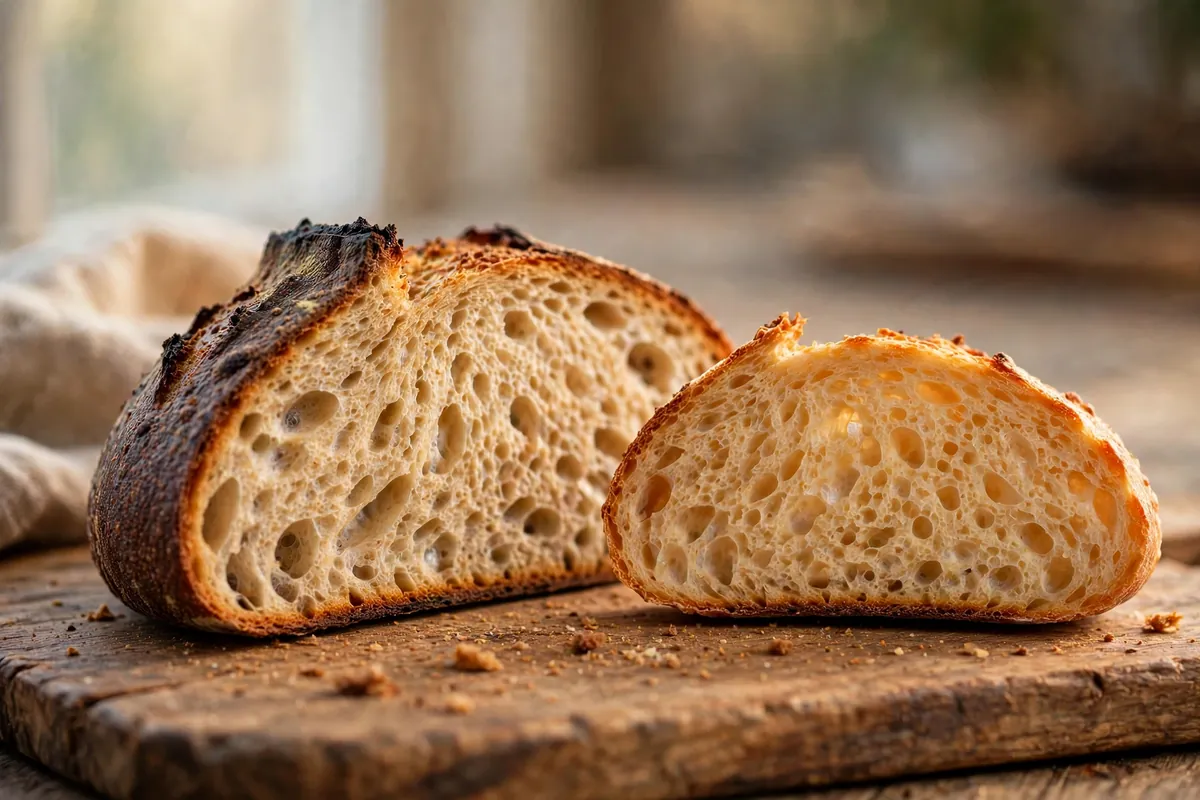
    close-up of a deeply browned crust with visible blistering
    close-up of a deeply browned crust with visible blistering

    Frequently asked questions

    Does a pale crust mean my bread is underbaked?
    Not necessarily — a loaf can be fully baked inside and pale outside. But paleness plus a soft crust and light weight means underbaked: check 200–210°F (93–99°C) internally for lean loaves.

    Egg wash vs. milk wash — which browns better?
    Egg wash, clearly — its protein and fat drive strong Maillard browning plus shine. Milk gives a softer matte gold; yolk-only gives maximum color.

    Can I still eat pale bread?
    Absolutely — safe and fine-tasting, just milder. Toasting slices browns them after the fact.

    Why did only the top stay pale but the bottom browned?
    Weak top element or the loaf sat too low — move to the upper-middle rack. A baking stone shields the bottom while top heat works.

    Will sugar in dough make my bread sweet?
    No — a teaspoon or two per loaf feeds browning and yeast without perceptible sweetness, and diastatic malt adds browning with zero sweetness.

    Does whole wheat bread brown differently?
    Yes — higher protein and minerals make it brown faster and darker. What looks “not done yet” on white bread is often already perfect on whole wheat.

    Related troubleshooting: Is My Bread Crust Too Hard or Too Soft? · How to Tell When Bread Is Done · Why Is My Bread Dense?
  • Why Is My Sourdough Crust Too Thick? (Steam + Bake Fixes)

    Why Is My Sourdough Crust Too Thick? (Steam + Bake Fixes)

    A great sourdough crust shatters; a bad one puts up a fight — thick, leathery, jaw-aching. Thickness isn’t luck: it’s bake time, steam exposure, and heat delivery. All adjustable.

    Quick diagnosis: You baked too long at too low a temperature (most common), kept the steam going too far into the bake, or both. Fix: full preheat, 20 minutes covered at 450°F (232°C), then 20–25 minutes uncovered until the internal temp hits 200–210°F (93–99°C) — and pull the loaf at color, not at the clock.

    My tested baseline: 500g bread flour, 375g water (75% hydration), 100g ripe starter, 10g salt (2%). Baked in a preheated Dutch oven: 20 minutes with the lid on at 450°F (232°C), 20–25 minutes lid off, to an internal temperature of 205°F (96°C). Cooled on a wire rack a full 2 hours before slicing.

    1. You baked too long at too low a temperature — the classic thick-crust recipe

    Crust thickens with oven time: 55 minutes at 425°F (218°C) always builds thicker crust than 40 minutes at 450°F (232°C), because the crust keeps dehydrating layer by layer. Under-heated ovens are the usual culprit — the baker compensates for pale color with extra time, and those 10–15 minutes build crust like tree rings.

    How to tell: The crust is uniformly thick all around, dark but not burnt; the crumb inside is fine; total bake time was 50+ minutes.

    The fix: Preheat a full 45–60 minutes with the Dutch oven inside — a cool start steals your first 10 minutes of spring and adds them to the crust. Bake 20 minutes covered at 450°F (232°C), then 20–25 uncovered, pulling at 200–210°F (93–99°C) internal — not at the timer.

    2. Too much steam, for too long

    Early steam keeps the crust flexible for oven spring. But steam past the first 20 minutes keeps re-wetting the surface, and each wet-dry cycle lays down another hardened layer — thick and leathery instead of thin and glassy. This is the mirror image of the too-hard-or-soft crust problem, where steam timing is also the lever.

    How to tell: The crust is thick but also slightly chewy-leathery rather than crisp; you sprayed water repeatedly or left a steam pan in for the whole bake.

    The fix: Steam belongs to the first 20 minutes only. In a Dutch oven, that’s the lid-on phase — lid off at 20 minutes, no more moisture. On a stone, remove the steam pan at 20 minutes and crack the door 30 seconds to vent humidity. The second half should be dry heat.

    3. The loaf was under-proofed or over-proofed — both bake up thick-crusted

    Under-proofed loaves burst and tear, exposing thick ragged crust at the scores. Over-proofed loaves spread flat — more surface area per volume, more crust per bite — and the outside over-bakes while you wait for color.

    How to tell: Under-proofed: big tearing around the score, dense band under the crust. Over-proofed: the loaf spread sideways, pale and flat, with a thick bottom crust. Check with the poke test and the dense bread and didn’t rise guides.

    The fix: Proof by percentage rise, not clock: shape at 50–75% bulk rise (use an aliquot jar). Poke test: slow spring-back with a slight indent means ready. A tall loaf has less crust per slice.

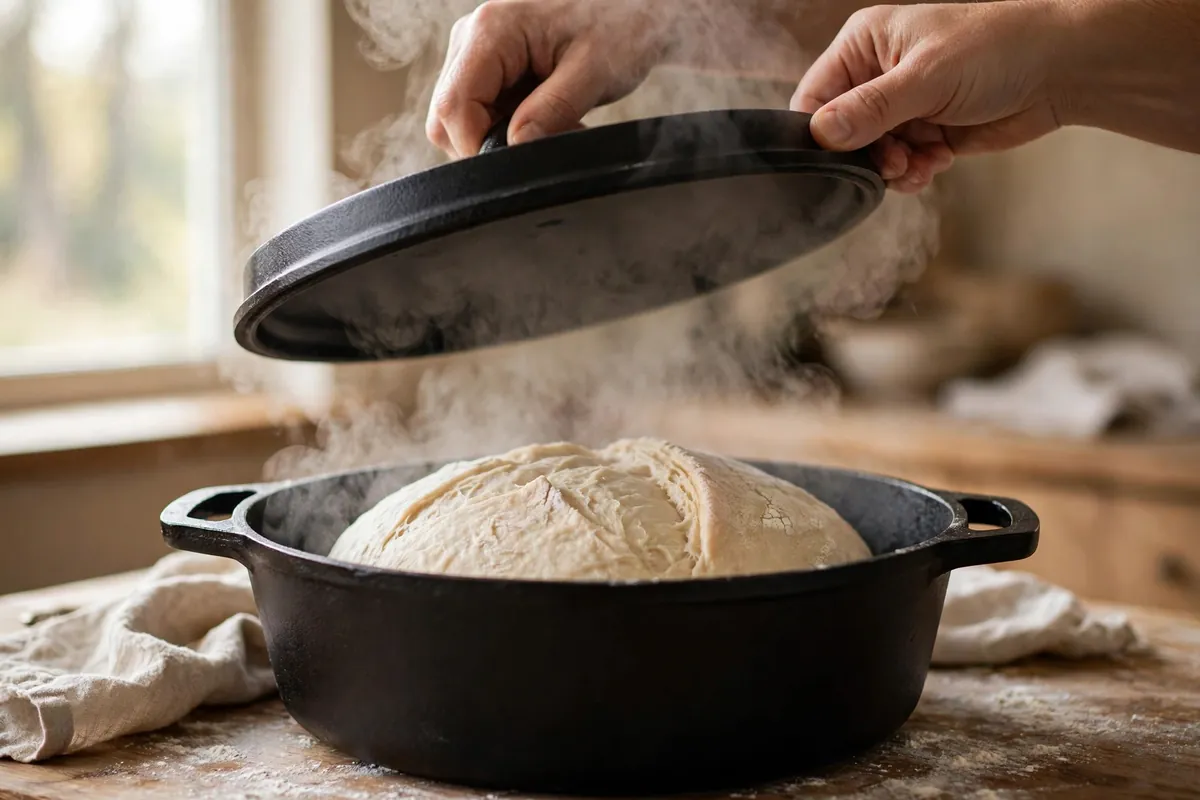
    hands lifting the lid off a Dutch oven at the 20-minute mark, steam escaping, revealing a pale risen sourdough loaf
    hands lifting the lid off a Dutch oven at the 20-minute mark, steam escaping, revealing a pale risen sourdough loaf

    4. You cooled it wrong — trapped steam toughens the crust

    Fresh from the oven the crust is still dehydrating. Cool on a solid surface — or worse, in the turned-off oven with the door closed — and escaping steam condenses back on, re-hardening into a thick shell. I learned this the embarrassing way: a perfect bake “kept warm” in the cooling oven came out like boot leather.

    How to tell: The crust was crisp when it came out but turned thick and leathery within an hour; the bottom of the loaf feels damp.

    The fix: Cool on a wire rack with full air circulation, for at least 2 hours — the crumb is still setting inside (cutting early gives gummy sourdough). Never wrap a warm loaf in plastic or a bag; that steams the crust soft, and it re-hardens thicker than before. Room-temperature air and patience.

    5. The Dutch oven never got hot enough — a pale start means a long finish

    Fifteen minutes of preheat means the covered phase bakes in a 380°F (193°C) vessel, not 450°F (232°C). Spring suffers, you extend the uncovered phase chasing color, and those minutes go straight into crust. The thermometer doesn’t lie even when the dial does.

    How to tell: Your oven runs cool (check with an oven thermometer — most do, by 15–25°F); the loaf looked pale at the 20-minute lid-off mark; you added 10+ minutes “for color.”

    The fix: Preheat the Dutch oven inside the oven for a full 45–60 minutes at 450°F (232°C). Verify with a $10 oven thermometer — if your oven runs 25°F cool, set it to 475°F. A properly preheated vessel gives you full color in the standard 40–45 minute total bake, which is exactly the window for a thin crust.

    6. Low hydration doughs build thicker crusts

    A 65%-hydration dough has less internal steam and sets faster and harder than 75%. If you bake stiff dough because it’s easier to handle, thick crust is partly the price. For shattering-thin, hydration is a lever.

    How to tell: The dough felt firm and easy to shape; the crumb is tight; the crust is thick even when bake time and temperature were correct.

    The fix: Push hydration to 72–75% (360–375g water per 500g flour) and handle the wetter dough with wet hands and confident folds. Higher hydration means more oven spring, a thinner crust, and a more open crumb — the classic artisan trio.

    a baker tapping the bottom of a sourdough loaf with knuckles, listening for the hollow sound, crust golden and thin
    a baker tapping the bottom of a sourdough loaf with knuckles, listening for the hollow sound, crust golden and thin

    FAQ

    Is a thick sourdough crust safe to eat?
    Completely. It’s a texture issue, not a safety one. If it’s too tough to enjoy, slice it thin and toast it — thick crust makes excellent toast — or cut it off and blitz it into breadcrumbs.

    Can I soften a thick crust after baking?
    A kitchen towel for a few hours softens it somewhat, as does storing cut-side down. But that softens, not thins — the real fix is the next bake’s time and temperature.

    Does scoring affect crust thickness?
    Deep, confident scoring (½ inch / 1 cm at a shallow angle) lets the loaf expand fully, which keeps the crust thinner around the expansion. Shallow timid scores restrict spring and the crust sets thick around the tears.

    Why is my sourdough crust thick on the bottom only?
    The bottom sits on the hot Dutch oven floor throughout. Parchment helps; a baking sheet on the rack below deflects direct heat. Also check for over-proofing — a flat loaf over-bakes its base.

    Does cold retard affect crust thickness?
    It helps: cold dough springs more, and long fermentation builds flavor so you can pull at color a few minutes earlier. Bake straight from the fridge.

    What internal temperature should sourdough reach?
    200–210°F (93–99°C). Below 200°F the crumb is gummy — and the crust keeps thickening while the center catches up, the worst of both worlds.

    Related troubleshooting: Bread Crust Too Hard or Too Soft · Why Is My Bread Dense? · Sourdough Gummy Inside
  • Why Is My Focaccia Flat? High-Hydration Dough Fixes

    Why Is My Focaccia Flat? High-Hydration Dough Fixes

    Focaccia should be the most forgiving bread there is: no shaping finesse, no scoring, just dimpled dough in an oiled pan. So when it comes out flat — thin, dense, more cracker than cloud — it feels like a betrayal. Flat focaccia is never bad luck; it’s always one of the failures below.

    Quick diagnosis: Flat focaccia is under-fermentation 8 times out of 10. High-hydration dough looks ready before it is — if you dimpled and baked before the dough was truly puffy and jiggly, that’s your answer. Start with cause #1.

    Focaccia is typically 70–80% hydration — wetter than most bread doughs. That wetness is what makes the open, holey crumb possible, but it also makes the dough harder to read: it spreads, it looks slack, and it lies to you about being ready. Every fix below is about giving that wet dough what it needs to rise tall.

    1. Under-fermented — the dough wasn’t ready when you baked

    The number one cause, by a wide margin. Focaccia needs a full, generous fermentation — the dough should be visibly puffy, full of bubbles, and jiggly like set custard before it goes in the oven. Most flat focaccias were baked an hour too early. High-hydration dough is deceptive: it spreads outward and looks “big” while still being under-aerated inside.

    How to tell: The dough looked spread out but not puffy — no visible bubbles on the surface, no jiggle when you nudged the pan, and it didn’t feel airy when you dimpled it.

    The fix: Ferment longer than you think. At room temperature (70–75°F / 21–24°C), focaccia dough typically needs 2–4 hours of bulk fermentation with a few sets of stretch-and-folds, OR an overnight cold retard in the fridge (12–18 hours) followed by 2–3 hours at room temperature in the pan. The cold retard is the reliable path — time builds both flavor and structure. The dough is ready when it’s doubled, bubbly on top, and jiggles. When in doubt, give it another 45 minutes; over-fermented focaccia is rare, under-fermented is everywhere. (Same reading-the-dough skill as all bread: Why Didn’t My Bread Rise?.)

    2. You degassed it with aggressive dimpling

    Dimpling is signature focaccia — but those fingers can undo hours of fermentation. Stabbing straight down to the pan bottom with stiff fingers squeezes out the gas the yeast spent all day producing. The classic mistake: dimpling a perfectly risen dough like you’re angry at it.

    How to tell: The dough was beautifully puffy before dimpling and visibly deflated after. The baked result has dimple craters but no lift between them.

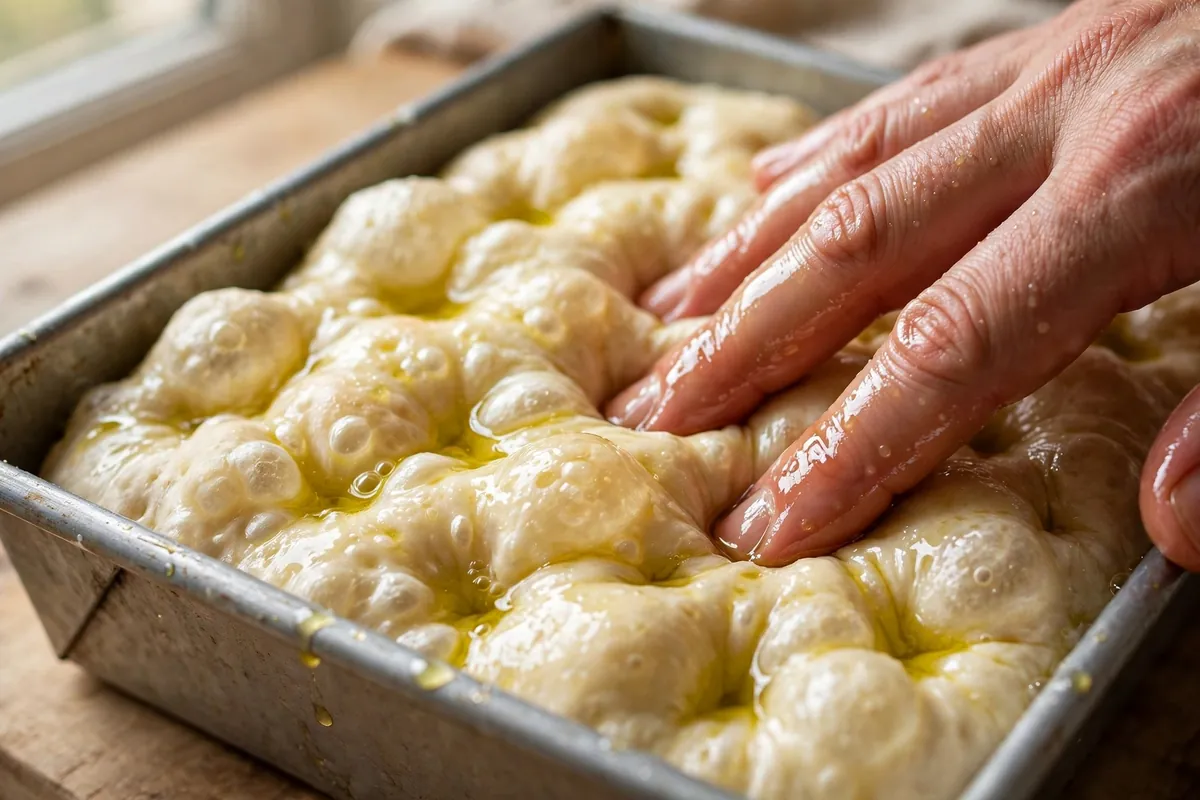
    The fix: Dimple with oiled fingers, firmly but not violently — press about halfway down, not to the pan. And dimple decisively once; don’t go back for a second round of poking. Here’s the key insight most recipes bury: dimple AFTER the pan proof is complete, right before baking, and get it in the oven within minutes. The longer dimpled dough sits, the more it settles. Oil your fingers generously — dry fingers drag and tear the surface, which also degasses.

    oiled fingers dimpling puffy risen focaccia dough in a pan
    oiled fingers dimpling puffy risen focaccia dough in a pan

    3. The pan was too big — the dough spread instead of rising

    Focaccia rises where the pan lets it. In an oversized pan, high-hydration dough spreads outward into a thin sheet — and a thin sheet can’t build height no matter how well fermented it is. Gas escapes sideways instead of pushing up.

    How to tell: The dough covered the pan easily with room to spare, or you scaled a recipe up without scaling the pan. The baked focaccia is uniformly thin edge to edge.

    The fix: Match pan to dough. A standard batch (500g flour) belongs in a 9×13-inch pan — the dough should fill it snugly, about 1–1.5 inches deep before the final proof. If your dough swims in the pan, it’s the wrong pan. The sides of the pan are structural: they force the rise upward. For extra-tall focaccia, some bakers use a slightly smaller pan deliberately.

    4. The oven wasn’t hot enough

    Focaccia needs a hard initial blast: 450°F (230°C), fully preheated. That heat does two jobs — it triggers maximum oven spring in the first 10 minutes, and it sets the structure before the wet dough can spread and settle. A 375°F (190°C) oven gives you a slow, lazy bake: the dough spreads, the gas escapes gradually, and you get flatbread.

    How to tell: The focaccia took longer than the recipe said, browned gently all over instead of puffing dramatically, and never got that crackly, blistered top.

    The fix: True 450°F (230°C) — verify with an oven thermometer, preheat a full 20 minutes past the beep. Bake 20–25 minutes until deeply golden with a crisp, blistered crust. If the top is browning too fast while the center seems underdone, that’s actually a different problem (too much topping weight — see below), not a temperature problem. Don’t lower the heat to compensate.

    5. Too much topping weighed it down

    Focaccia toppings are wonderful until they’re structural sabotage. A heavy layer of wet tomatoes, piles of onions, or rivers of sauce press the dough down exactly when it needs to rise up. Watery toppings also steam the surface, preventing the crust from setting and crisping.

    How to tell: The areas under the toppings are flat and pale while the bare edges rose fine. Or the top stayed soggy.

    The fix: Toppings go on light, and wet toppings go on late or pre-cooked. Halved cherry tomatoes are fine in moderation; a full can of crushed tomatoes is a casserole, not a topping. Pre-cook watery vegetables to drive off moisture first.

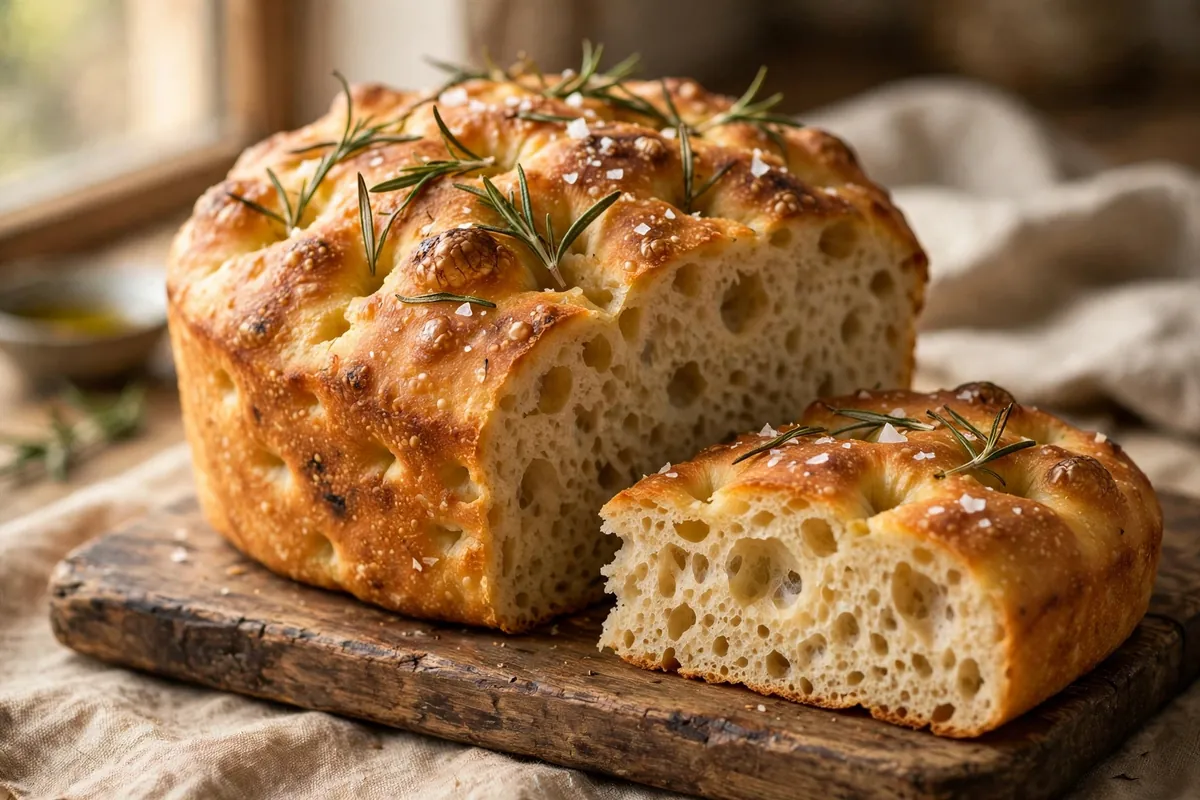
    tall golden focaccia with rosemary and flaky salt, cross-section showing open holes
    tall golden focaccia with rosemary and flaky salt, cross-section showing open holes

    6. Low-protein flour in a high-hydration dough

    At 75–80% hydration, the flour’s protein is doing heavy structural lifting — it’s the net holding all that water and gas. All-purpose flour (10–12% protein) can work, but it’s near its limit; the dough goes slack, tears easily during folds, and can’t support maximum rise. Bread flour (12–14%) gives the gluten network the strength high hydration demands.

    How to tell: The dough felt more like batter than dough — extremely slack, tearing when you tried stretch-and-folds, impossible to handle even with wet hands.

    The fix: Use bread flour for focaccia. The extra protein isn’t about chewiness here — it’s about the dough holding together at high hydration. If all-purpose is all you have, drop the hydration to 65–70% (325–350g water per 500g flour) rather than fighting a slack dough. (Full flour guide: Bread Flour vs All-Purpose: When It Actually Matters.)

    7. Skipped the salt — or added it too late to matter

    This one’s subtle. Salt tightens the gluten network (stronger dough = better gas retention) and obviously seasons. But beyond flavor, unsalted high-hydration dough is noticeably slacker and weaker — some bakers can feel the difference in handling alone.

    How to tell: The dough was unusually slack and the baked focaccia tastes flat in both senses.

    The fix: Salt at 2% of flour weight (10g per 500g flour), mixed in after a 20–30 minute autolyse if you want to be precise — or just mixed in with everything at the start if you don’t. Either beats forgetting it. And don’t forget the flaky salt on top before baking; it’s structural seasoning.

    Frequently asked questions

    Can I fix flat focaccia after baking?
    Not the height — that’s set. But flat focaccia is delicious repurposed: split it for sandwiches, cube it for croutons or panzanella, or top and re-bake it as pizza bianca.

    Why does my focaccia stick to the pan?
    Not enough oil, or the wrong pan. Use 3–4 tablespoons in the pan before the dough goes in, plus a drizzle on top. Dark metal releases better than glass; a parchment sling solves it permanently.

    Is flat focaccia safe to eat?
    Completely. Flat is a texture failure, not a safety issue — if it’s golden and baked through, it’s safe.

    How long should focaccia proof in the pan?
    Until it’s visibly puffy and jiggly — typically 1–2 hours at room temperature after shaping into the oiled pan, longer if the dough came from the fridge. The jiggle test is the truth: nudge the pan and the whole mass should wobble like custard.

    Can I use instant yeast instead of active dry?
    Yes — same quantity, and you can skip the proofing step (mix it straight into the flour). For a 500g-flour batch: 7g (2¼ tsp) instant yeast for a same-day focaccia; drop to 3–4g for an overnight cold retard so it doesn’t over-ferment.

    Why did my focaccia come out greasy?
    Too much oil pooled rather than absorbing — usually from oil added on top of an under-proofed dough that couldn’t absorb it, or simply an excessive hand. 3–4 tablespoons in the pan plus a light drizzle on top is the zone; a quarter cup pooled on top is a different dish.

    Related troubleshooting: Why Didn’t My Bread Rise? · Why Is My Bread Dense? · How to Tell When Bread Is Done

  • Why Is My Gingerbread Tough? (Molasses Dough Fixes)

    Why Is My Gingerbread Tough? (Molasses Dough Fixes)

    Tough gingerbread is the December heartbreak: the kitchen smells incredible, and the cookies could double as roofing tiles. Gingerbread should have texture — a snap for cut-outs, a soft chew for cake-style — but “tough” means the crumb fights back. The causes are almost always in the dough handling, not the recipe.

    Quick diagnosis: You overworked the dough and/or used too much flour (most common pair). Mix just until combined, measure flour by weight (120g per cup — packed cups add 20–30%), rest the dough at least 1 hour (overnight is better), roll to an even ¼ inch, and pull the cookies when the edges are set but centers still look slightly soft — they firm up dramatically as they cool.

    My tested baseline: 340g all-purpose flour, 170g butter at cool room temperature, 150g dark brown sugar, 160ml unsulphured molasses, 1 egg, 1 tsp baking soda, spices (2 tsp ginger, 1½ tsp cinnamon, ¼ tsp cloves), ½ tsp salt. Cream butter and sugar, beat in molasses and egg, fold in dries just until no streaks remain. Chill overnight. Roll ¼ inch thick; bake at 350°F (175°C) for 8–10 minutes.

    1. You overworked the dough — gluten is the enemy of tenderness

    Gingerbread dough is a cookie dough, but it gets kneaded like bread surprisingly often — especially when rolling gets sticky and the baker keeps working flour in. Every minute of handling develops gluten, and gluten in a cookie means tough and bready instead of tender.

    How to tell: The dough felt elastic and springy rather than soft and pliable; it shrank back when you rolled it; the baked cookies are hard all the way through with a bready chew.

    The fix: Mix the dries into the wets just until no flour streaks remain — then stop. When rolling, if the dough resists, let it rest 10 minutes instead of fighting it. Gluten relaxes with rest; it never relaxes with more rolling.

    2. Too much flour — the packed-cup problem

    This is the quietest cause and the most common. A “cup” of flour scooped straight from the bag with the measuring cup can weigh 150–160g; the recipe assumed 120g. That’s up to 30% extra flour — enough to turn any gingerbread recipe tough and dry, because the fat and sugar ratios that guarantee tenderness are suddenly wrong.

    How to tell: The dough was stiff and crumbly rather than soft; you needed extra force to roll it; the cookies taste floury and dry, not rich and molasses-y.

    The fix: Weigh your flour — 120g per cup, every time. If you must use cups, spoon the flour in and level it; never scoop. And when the recipe says “flour your surface,” use a whisper, not a snowstorm. This is the same measurement discipline that fixes Overbaked Cookies more often than any oven adjustment.

    3. You skipped the rest — the dough needed its overnight nap

    An overnight chill (minimum 1–2 hours) hydrates the flour so the crumb bakes tender, relaxes whatever gluten you developed, and deepens the molasses-spice flavor. Unrested dough bakes up tougher and blander in side-by-side comparisons.

    How to tell: The dough was soft and sticky when you rolled it; the spices taste flat; the texture is simultaneously tough and slightly raw in the center.

    The fix: Wrap the dough tightly and refrigerate overnight. If you’re short on time, 2 hours is the honest minimum. The dough will feel firmer and drier when you unwrap it — that’s the flour hydrating, and it’s exactly what you want. Roll it cold; cold dough holds its shape and bakes up with cleaner edges.

    4. You overbaked — gingerbread lies about being done

    This is the trap: gingerbread firms up enormously as it cools. A cookie that feels perfectly soft at 9 minutes will be a brick at room temperature if you gave it 12. The visual cues mislead because molasses dough is already dark — you can’t judge by browning the way you can with sugar cookies.

    How to tell: The cookies felt firm when you pulled them; the bottoms are very dark; they were bendable-tender yesterday and jawbreakers today (they kept “baking” from residual heat and then set hard).

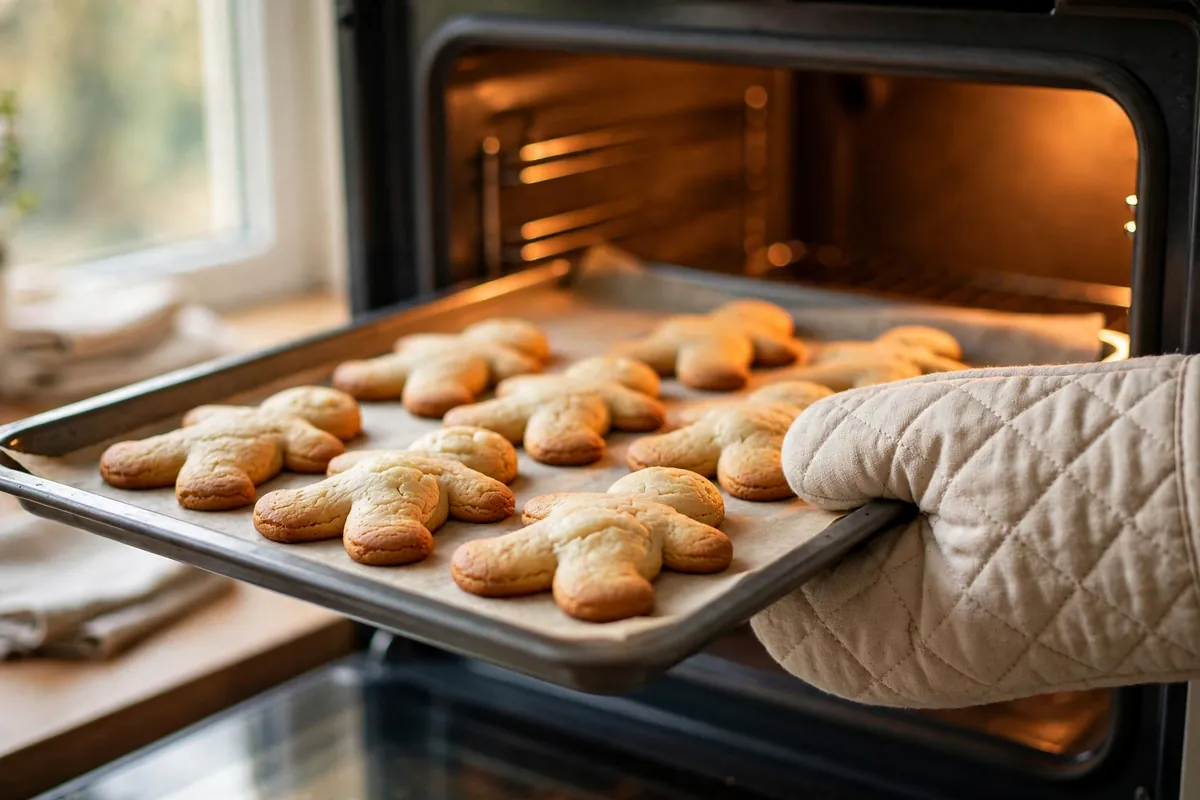
    The fix: Pull cut-outs when the edges are set and the centers still look slightly soft — 8–10 minutes at 350°F (175°C) for ¼-inch cookies. They’ll look underdone; carryover heat finishes them on the tray. When in doubt, underbake by a minute — you can always add time.

    hands lifting a tray of gingerbread cookies from the oven when edges are just set
    hands lifting a tray of gingerbread cookies from the oven when edges are just set

    5. Your fat and sugar were short — tenderness is a ratio

    Tenderness in cookies comes from fat coating flour particles (shortening gluten strands — hence “shortbread”) and sugar tenderizing the crumb. If you cut the butter “to be a bit lighter,” swapped in all white sugar, or used blackstrap molasses (which is bitter and low in sugar compared to unsulphured), you’ve removed the very ingredients that keep gingerbread tender.

    How to tell: The recipe was modified from the original; the cookies taste more bitter than sweet-spicy; the dough felt lean and dry.

    The fix: Don’t reduce the fat, and use dark brown sugar, not white — its molasses content adds moisture and acidity that tenderize. Use regular unsulphured molasses, never blackstrap, for cookies: blackstrap’s bitterness and lower sugar make everything harder and harsher.

    6. You re-rolled the scraps too many times — the second batch is always tougher

    Every re-roll works more flour into the dough and develops more gluten. The first cutting bakes up tender; the gathered scraps, re-rolled twice, bake up like hockey pucks. This is physics, not failure.

    How to tell: The first tray was fine and each subsequent tray got progressively harder; the last cookies are noticeably paler (flour worked in) and tougher.

    The fix: Roll once and cut tightly to minimize scraps. Press scraps gently together (don’t knead), chill 20 minutes before re-rolling. For Christmas Cookies That Stay Fresh, bake the best cuttings for gifting and keep the re-rolls for the family tin.

    hands gently pressing gingerbread scraps together without kneading
    hands gently pressing gingerbread scraps together without kneading

    Frequently asked questions

    Is tough gingerbread safe to eat?
    Yes — toughness is a texture defect, not a safety issue.

    Can I soften gingerbread that’s already baked rock-hard?
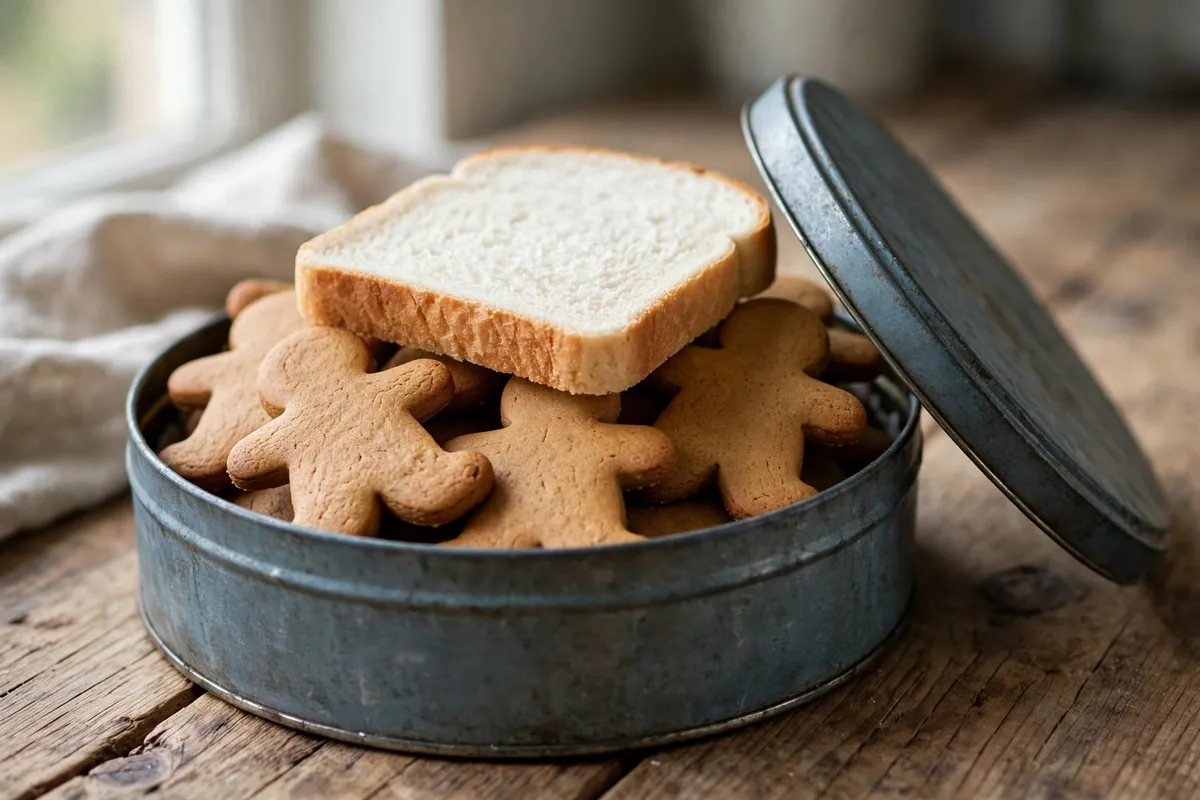
    Partly: seal the cookies in an airtight tin with a slice of fresh bread overnight. They absorb moisture and soften noticeably. It won’t fix true bricks — but for next time, underbake by a minute.

    Why did my gingerbread spread into blobs?
    Opposite problem: butter too warm or too little chilling. Chill cut shapes 15 minutes before baking; keep butter at cool room temperature, not melty. Spreaders are rarely tough — it’s the over-floured, over-worked dough that goes hard.

    Can I make gingerbread dough ahead?
    Yes — one of the best make-ahead doughs. Wrapped tight: 3 days refrigerated, 3 months frozen. Thaw frozen dough overnight in the fridge; rest 10–15 minutes at room temp before rolling so it doesn’t crack.

    What’s the difference between snappy and soft gingerbread?
    Formula: snappy cut-outs use more sugar, less leavening, and bake longer; soft cake-style uses more fat, an egg, and sometimes hot water or coffee. Both should still yield to the bite — “snappy” means crisp, not jawbreaker.

    a tin of gingerbread cookies with a slice of fresh bread tucked in for softening
    a tin of gingerbread cookies with a slice of fresh bread tucked in for softening

    Related troubleshooting: How to Fix Overbaked Cookies · Christmas Cookies That Stay Fresh · Why Are My Cookies Cakey Instead of Chewy?

  • Sticky Buns Troubleshooting: Burnt Sugar, Raw Centers

    Sticky Buns Troubleshooting: Burnt Sugar, Raw Centers

    Sticky buns are a high-wire act: caramelizing sugar on the bottom, enriched dough on top, one oven cooking both at once. Burnt caramel and raw centers are the same problem in two costumes — the outside browning faster than the inside bakes through.

    Quick diagnosis: Burnt bottoms mean your oven runs hot or your pan is too dark — drop to a true 350°F (175°C) and use a light-colored metal pan. Raw centers mean the rolls were overcrowded or underbaked — give them space, bake 25–30 minutes until the centers hit 190°F (88°C), and flip the pan within 5 minutes of baking.

    My baseline. Dough: 500g flour, 7g instant yeast, 60g sugar, 60g soft butter, 1 egg, 240ml warm milk, 8g salt (see Why Didn’t My Bread Rise? if it won’t cooperate). Topping: 115g butter melted with 200g brown sugar and 60ml honey, pinch of salt — stirred just until dissolved and gently bubbling, NOT dark caramel. Pour into a buttered 9×13-inch light metal pan, add pecans, arrange rolls cut-side up with breathing room, proof 30–45 minutes until puffy, bake at 350°F (175°C) for 25–30 minutes.

    1. The sugar burned — your caramel went too far, twice

    Burnt topping has two crime scenes: stovetop and oven. On the stovetop, cooks treat the butter-sugar mix like real caramel and cook it to amber — but it spends 25+ minutes in the oven, so it must go in undercooked. In the oven, dark nonstick or glass pans run hotter on the bottom than light metal, scorching the topping while the rolls still bake.

    How to tell: Bitter or acrid rather than sweet and buttery, dark brown to black in spots, scorched smell when you open the oven.

    The fix: Stovetop: melt butter and sugar just until dissolved and gently bubbling — 2–3 minutes, no darker than light tan. Oven: verify a true 350°F (175°C), use light-colored metal (dark pans burn the topping — see Baking Pan Materials), and tent with foil if the tops brown too fast.

    2. Raw centers — the rolls insulated each other

    Twelve rolls crammed in a 9×13 pan are one giant dough mass; heat travels far to reach the middle. Rolls touching tightly before proofing can’t expand outward — centers stay dense and doughy while tops overbrown.

    How to tell: Middle rolls gummy or tasting of raw flour while outer rolls are done; rolls look squashed and tall — no room to spread.

    The fix: Space rolls 1 inch apart — they’ll touch after proofing, fine. Bake until middle-roll centers hit 190°F (88°C) on an instant-read thermometer; it overrules the clock. Tops done but centers not? Tent with foil and keep baking. Thermometer-checked buns were perfect every time; timer-only were a lottery.

    3. You didn’t flip fast enough — the caramel became cement

    The topping is molten sugar; the moment the pan leaves the oven it starts setting. Wait 15 minutes and it welds the rolls to the pan — you’ll tear the buns freeing them.

    How to tell: Rolls stuck to the pan, topping left behind as a hard sheet, buns torn on serving.

    The fix: Flip within 5 minutes — set a timer. Run a thin knife around the edge, place a platter over the pan, invert in one motion. Scrape any stuck topping over the buns. Wear oven mitts; hot caramel is unforgiving. (Related: Why Did My Cinnamon Rolls Unravel?.)

    4. The proof was wrong — under-proofed buns bake up dense, over-proofed collapse

    After shaping, proof 30–45 minutes in a warm spot until puffy. Under-proofed rolls bake dense — tight crumb reads as doughy even when baked through. Over-proofed rolls collapse into flat, gummy disks.

    How to tell: Under-proofed: small going in, tight bready crumb. Over-proofed: huge and jiggly going in, deflated in the oven, sour yeasty smell.

    The fix: Poke test, not clock: springs back immediately = 15 more minutes; slow partial fill = ready; indent stays and roll looks slack = over-proofed (bake anyway — the caramel forgives). Proof at 75–80°F (24–27°C); cold kitchens double the time.

    5. The filling leaked and burned — too much, too wet, too loose

    Escaped filling lands on the hot topping and scorches — black bitter streaks between buns are leaked filling, not failed caramel. It leaks when the filling is too thick, the roll too loose, or the log unsealed.

    How to tell: Dark burnt streaks between rolls, filling oozing out the sides, rolls partially unwound.

    The fix: Spread filling thin — 2–3 tablespoons soft butter, light even cinnamon sugar, ½-inch border on the far edge. Roll tight, seal the seam with water, slice with floss or a sharp serrated knife, place seam-side down.

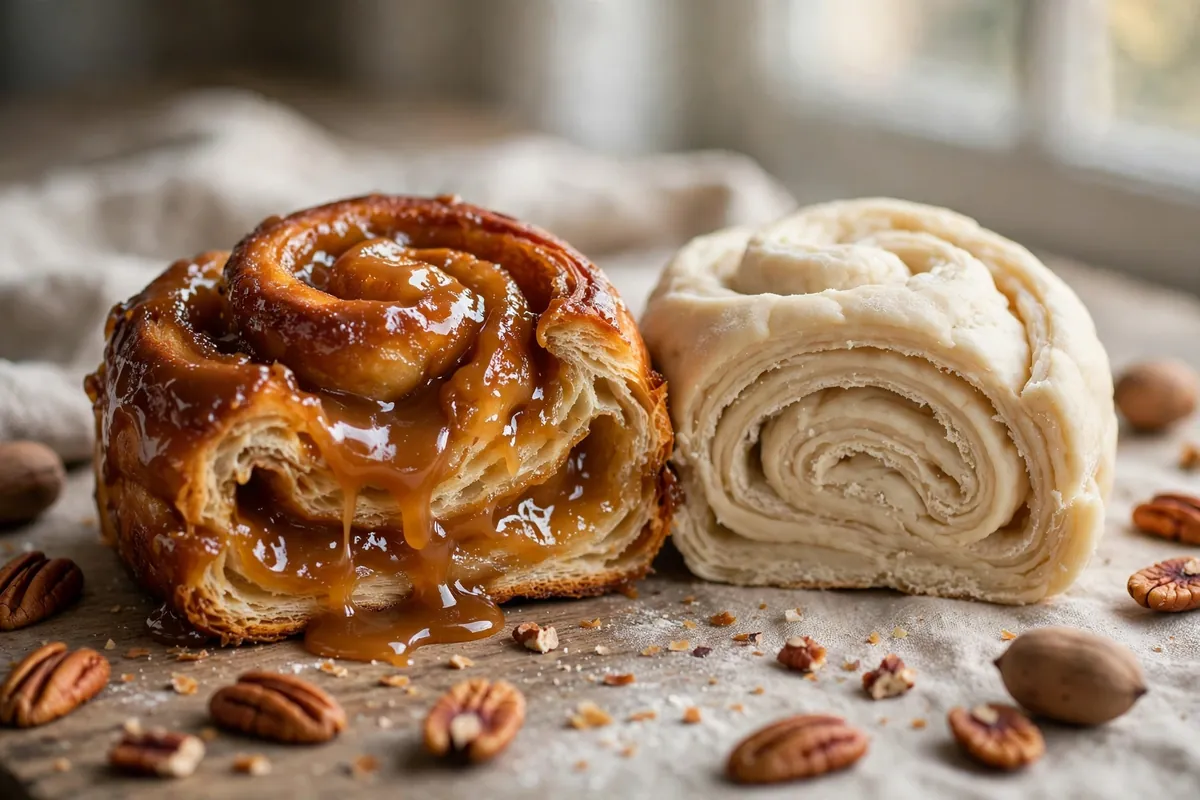
    cross-section of a sticky bun showing the gooey caramel layer versus a raw doughy center comparison
    cross-section of a sticky bun showing the gooey caramel layer versus a raw doughy center comparison
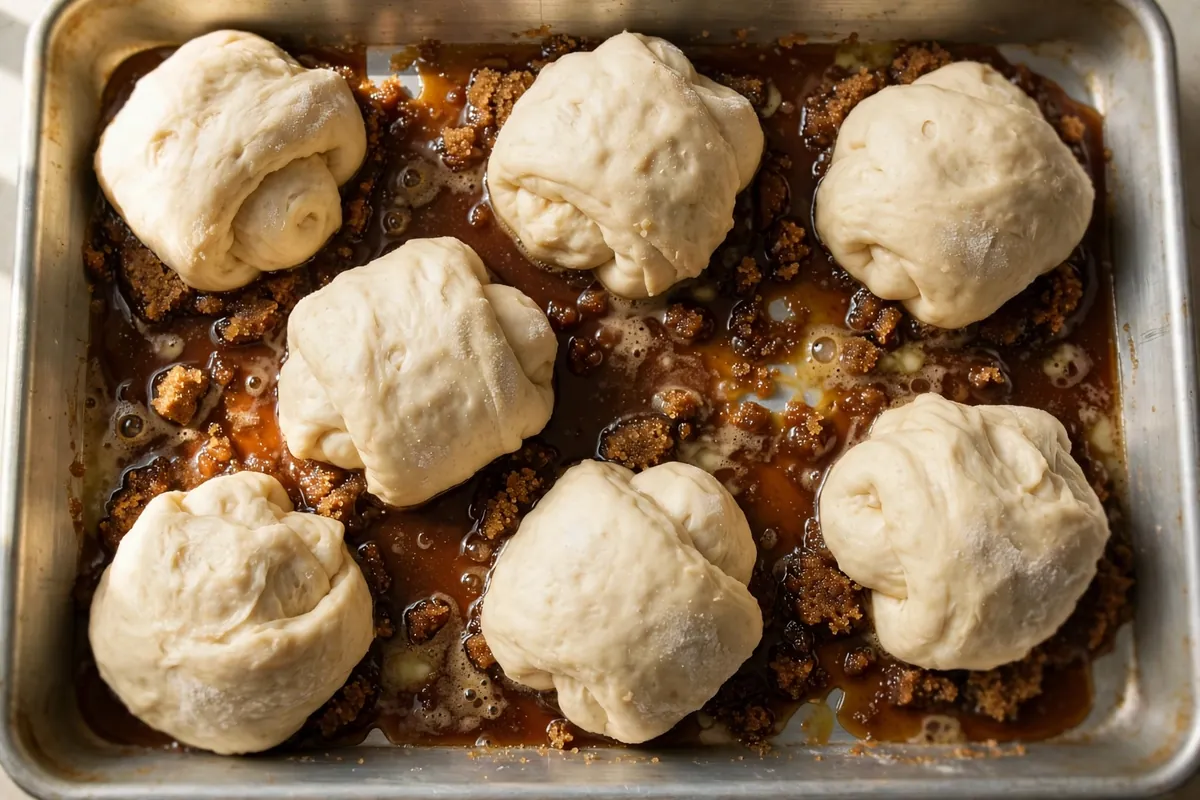
    proofed sticky bun rolls in the pan before baking, spaced with room to expand
    proofed sticky bun rolls in the pan before baking, spaced with room to expand

    Frequently asked questions

    Can I fix burnt sticky buns?
    Partially. Scrape off black, bitter topping — burnt sugar’s acrid flavor can’t be rescued. If just dark, serve as intended; the caramel still shines. Scorched batches become bread pudding: cube, soak in custard, bake.

    What if the caramel hardened in the pan and the buns are stuck?
    Return the pan to a warm 200°F (95°C) oven for 5 minutes to re-melt the sugar, then flip immediately. Never chisel at cold caramel.

    Can I make sticky buns ahead? Overnight?
    Yes. Assemble in the caramel-lined pan, cover, refrigerate overnight (up to 12 hours). In the morning, rest 45–60 minutes at room temperature until puffy, then bake. The cold retard improves flavor. (See Make-Ahead Bread Dough.)

    Why did my sticky buns stick to the pan?
    Three reasons: you didn’t butter the pan before adding the topping, you waited too long to flip, or you used a pan with a damaged nonstick coating. Butter the pan generously, flip within 5 minutes, and the buns release cleanly.

    Is it safe to eat sticky buns with doughy centers?
    Raw flour can carry bacteria — bake until centers reach 190°F (88°C). When in doubt, bake 5 minutes more under foil.

    Can I use a glass pan for sticky buns?
    You can, but drop the oven temperature by 25°F (to 325°F / 165°C) — glass holds heat longer and runs hotter on the bottom, which burns the sugar topping. Light metal is still the best choice.

    Related troubleshooting: Why Did My Cinnamon Rolls Unravel? · Why Didn’t My Bread Rise? · Baking Pan Materials: Which Pan for What

  • Bread Crust Too Hard (or Too Soft)? How to Control It

    Bread Crust Too Hard (or Too Soft)? How to Control It

    Bread Crust Too Hard (or Too Soft)? How to Control It

    Quick diagnosis: Crust texture is controlled by four variables: dough formula (lean vs enriched), steam, oven heat, and cooling. Too hard? You likely baked a lean dough hot with steam and cooled it uncovered — the artisan formula. Too soft? Your dough probably contains fat, sugar, or dairy, or the loaf cooled covered/trapped in steam. Identify which side you’re on below, then adjust the matching variables.

    Blistered artisan bread crust beside smooth soft crust, close-up
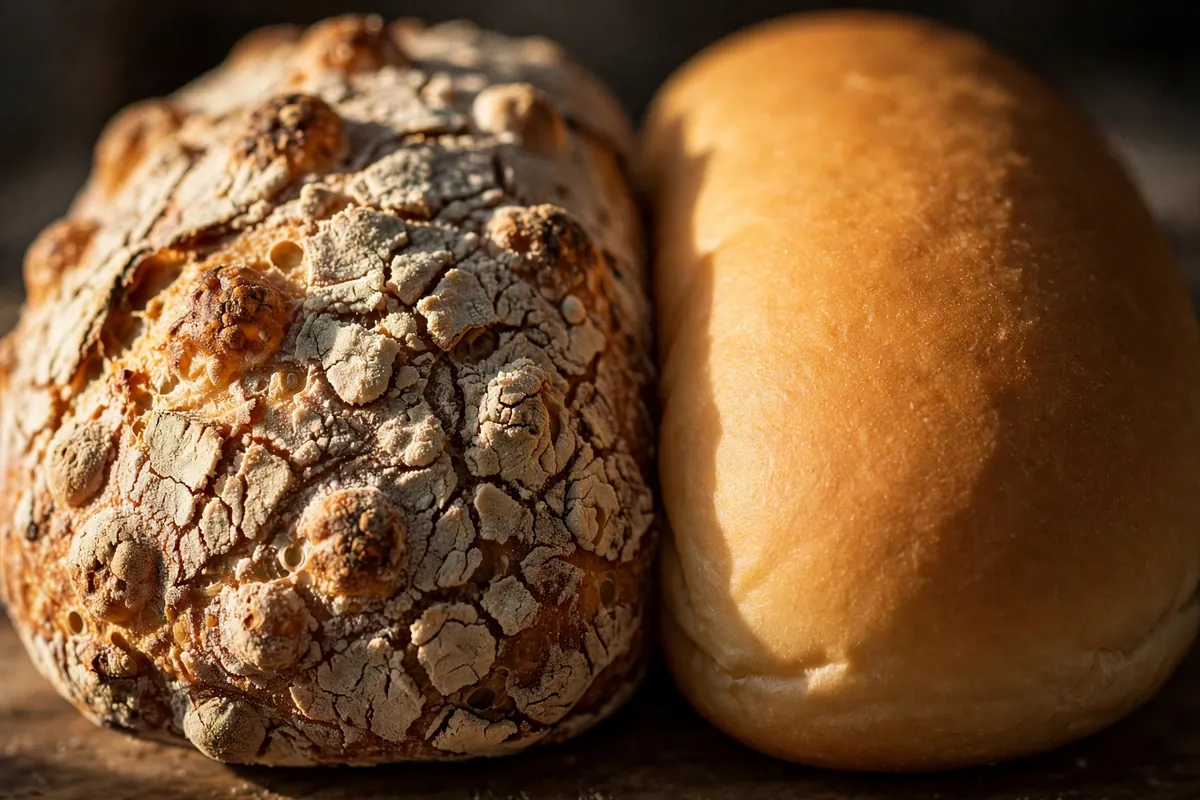
    close-up of a crackled, blistered artisan crust next to a soft, smooth sandwich-loaf crust

    Crust isn’t luck — it’s physics and formula. Once you understand the four levers, you can produce a shattering baguette crust or a pillowy sandwich crust on demand, from the same basic dough with small adjustments. Once these variables are mapped, “crust roulette” ends permanently.

    The four levers of crust texture

    1. Formula: lean vs enriched. Lean doughs (flour, water, salt, yeast — baguettes, sourdough, ciabatta) bake into crisp, crackly crusts. Enriched doughs (with fat, sugar, eggs, or dairy — brioche, sandwich bread, dinner rolls) bake into soft, tender crusts, because fat and sugar interfere with crust formation and keep it pliable.

    2. Steam. Steam in the first 10–15 minutes of baking keeps the crust surface moist and elastic while the loaf expands, then it needs to vent off so the crust can dry and crisp. Steam = thinner, crisper crust. No steam = thicker, chewier, often harder crust.

    3. Oven heat and bake length. Hotter ovens and longer bakes drive more moisture out of the crust — crisper and harder. Cooler, shorter bakes leave more moisture — softer.

    4. Cooling and storage. A loaf cooled uncovered on a rack keeps its crisp crust. A loaf covered while warm, or stored in plastic, traps steam and softens the crust within hours.

    If your crust is too hard

    A crust that’s jaw-breakingly hard (rather than pleasantly crisp) usually means one of these:

    The bake was too hot or too long for the formula. Dark, thick, hard crust on what should be a soft loaf? Drop the temperature 15–25°F and pull the loaf when the internal temp hits 190–200°F (88–93°C) rather than baking by color alone. Enriched loaves are done at lower internal temps than lean ones.

    No enrichment in a soft-crust recipe. If your sandwich bread crust could break teeth, add tenderness: brush the dough with milk before baking, or enrich the formula slightly — even 2–3% butter or oil (by flour weight) noticeably softens crust.

    It cooled uncovered for too long. For soft-crust breads, cover the loaf with a clean kitchen towel as soon as it comes out of the oven. The trapped residual steam softens the crust as it cools — this single step transforms sandwich bread.

    The fix that always works for soft crust: brush the hot loaf with melted butter the moment it leaves the oven, then cover with a towel until cool. Buttery, soft, golden — every time.

    Brushing melted butter over a hot loaf
    brushing melted butter over a hot sandwich loaf, towel ready beside it

    If your crust is too soft (and you wanted crisp)

    A flabby, soft crust on what should be crackly artisan bread means moisture never left the party:

    Not enough initial heat. Crust crispness starts with a fully preheated oven — a full 30–45 minutes for artisan loaves, longer with a baking stone or steel. An under-preheated oven gives a pale, soft, thick crust. Use an oven thermometer; most home ovens run 25–50°F cool.

    No steam. For lean artisan loaves, steam is non-negotiable: bake in a covered Dutch oven for the first 20 minutes, or add a tray of boiling water to the oven floor (and spritz the loaf). Then uncover/vent for the final 15–25 minutes so the crust dries and sets crisp.

    Under-baking. A crust that’s merely golden is often still moisture-laden. Artisan loaves should bake to a deep mahogany — darker than feels safe. That deep color is caramelized, dehydrated crust: the crispness itself. Verify 200–210°F (93–99°C) internal temp so you can bake boldly without fear.

    Cooled or stored wrong. Cool artisan bread uncovered on a wire rack — never wrapped, never in plastic. Store cut-side down on a board or in a paper bag for day one. Plastic bags are crust killers: within hours, migrating moisture turns crackle to chew.

    Steam bursting as a Dutch oven lid is lifted
    steam escaping as a Dutch oven lid is lifted mid-bake

    The cooling rules (memorize these)

    • Want crisp? Rack, uncovered, room air. Slice only after 1–2 hours.
    • Want soft? Towel over the loaf (or butter-brush + towel) until fully cool.
    • Day-two crisp revival: 5–10 minutes in a 350°F (175°C) oven re-crisp any softened artisan loaf. Spritz lightly with water first for extra crackle.
    • Never refrigerate bread (unless it’s a rich dough) — cold accelerates staling and ruins crust texture faster than anything except plastic wrap.

    Frequently asked questions

    Why did my crust go soft overnight?
    Moisture migration. Water moves from the moist crumb into the dry crust until they equalize — physics, not failure. Store artisan loaves cut-side down or in paper (never plastic) and re-crisp in a hot oven before serving.

    How do I get a shiny crust?
    Egg wash (one egg beaten with a tablespoon of water or milk), brushed on before baking, gives a deep glossy brown. For shine without richness, a cornstarch glaze — 1 teaspoon cornstarch boiled in ½ cup water, brushed on hot out of the oven — gives a bakery-window gleam.

    Why is my baguette crust chewy instead of crisp?
    Almost always insufficient steam or heat. Baguettes need a ripping-hot oven (475°F / 245°C), real steam for the first 10 minutes, and a bake dark enough to fully dehydrate the crust. A pale baguette is a chewy baguette.

    Can I soften an already-baked hard crust?
    Somewhat. Wrap the loaf in a barely damp towel for 20–30 minutes, or warm it in a 300°F (150°C) oven wrapped in foil. It won’t become pillowy, but it takes the weapon-edge off. Next time, use the butter-and-towel method from the start.

    Does scoring affect the crust?
    Indirectly, yes. Proper scoring lets the loaf expand fully in the oven’s first minutes, which gives an even, thin crust. An unscored or poorly scored loaf bursts unpredictably, creating thick, hard ridges where it tore. Score ¼-inch deep at a shallow angle just before baking.

    Related troubleshooting: Why Is My Bread Dense? · Why Didn’t My Bread Rise? · Why Is My Sourdough Gummy Inside?
  • Why Is My Cornbread Dry? Fat, Sugar & Bake Time Fixes

    Why Is My Cornbread Dry? Fat, Sugar & Bake Time Fixes

    Dry cornbread is a special kind of disappointment — it looks golden and perfect, then crumbles into sawdust in your mouth. The good news: dryness in cornbread is almost never a mystery. It’s a lean formula, too much oven time, or the wrong pan, and each one has a specific fingerprint you can read in the crumb.

    Quick diagnosis: Dry cornbread is usually overbaked (cause #1) or made with a lean recipe low in fat and sugar (cause #2). Pull it at 18–20 minutes when the center is just set, and make sure your recipe has real fat — butter, oil, or bacon drippings.

    Style note: there are two cornbreads. Southern-style is lean and savory — mostly cornmeal, little or no sugar, baked in a screaming-hot cast iron skillet with bacon fat: crisp crust, coarse crumb. Northern-style is sweeter and cakier, with flour, sugar, and butter. Judge dryness against the right tradition — a crisp-crusted Southern cornbread isn’t “dry,” it’s correct.

    1. You overbaked it — the #1 cause, and it’s minutes, not tens of minutes

    A 9-inch skillet of batter is barely an inch deep, so the window between done and dry is about three minutes. Most recipes say 20–25 minutes at 400–425°F (200–220°C), but that’s written for the slowest oven — many are done at 18.

    How to tell: Dry all the way through with a hard, dark bottom, 22+ minutes in the oven, edges pulled well away from the pan.

    The fix: Start checking at 15 minutes: golden top, center springs back when pressed, toothpick with a few moist crumbs. Pull it then — carryover heat finishes the center. The same batter at 18 vs 24 minutes is the difference between tender and chalky. Verify with an oven thermometer; 25°F hot turns a 20-minute bake into 17.

    2. The recipe is too lean — cornmeal needs fat to stay tender

    Cornmeal has almost no gluten and a coarse, thirsty structure. Without enough fat and moisture, the crumb can’t hold together. A “healthy” cornbread with halved fat and no sugar will always bake dry — you removed the two ingredients doing the moisture work.

    How to tell: Crumbly and coarse even with perfect timing — falls apart when sliced, flat starchy flavor instead of rich.

    The fix: Baseline for a 9-inch skillet: at least 4 tablespoons (60g) fat — butter, oil, or bacon drippings — and 1 to 1¼ cups (240–300ml) liquid, ideally buttermilk. No buttermilk? Add a tablespoon of lemon juice per cup of milk and wait 5 minutes. And don’t fear sugar: 1–2 tablespoons tenderizes without real sweetness — sugar is hygroscopic and holds moisture.

    3. The batter never rested — dry cornmeal stayed dry

    Cornmeal hydrates slowly. Mix and bake immediately and the coarse particles never absorb the liquid — gritty, dry crumb. The fix costs nothing: rest the batter.

    How to tell: Gritty or sandy texture even with the right bake time, uneven crumb — moist pockets next to dry ones.

    The fix: Rest the mixed batter 10–15 minutes — you’ll see it thicken as the cornmeal drinks up the liquid. (Same hydration principle as Why Is My Cake Dry?.) Don’t exceed 20 minutes; the baking powder starts reacting on contact with liquid.

    4. Wrong pan or a cold skillet — the crust never had a chance

    A preheated cast iron skillet flash-sets the bottom crust on contact, sealing in moisture, and its even heat bakes fast — less oven time means less moisture lost. A cold glass or thin metal pan does the opposite: slow warm-up, longer bake, steamed instead of crisped bottom.

    How to tell: Pale, soft bottom with a steamy texture — or a burnt bottom with a gummy middle (thin dark pans transmit heat too aggressively).

    The fix: Heat the skillet in the oven during preheating with a tablespoon of fat in it. When the fat shimmers, pour in the rested batter — it should sizzle on contact — and return immediately to the oven. No cast iron? Use light-colored metal (dark nonstick over-browns — see Baking Pan Materials) and add 2–3 minutes.

    5. You used the wrong grind or stale cornmeal

    Cornmeal goes stale — the germ oils turn rancid and stale meal absorbs liquid poorly, baking up dry and flat no matter what you do. Grind matters too: coarse stone-ground needs more liquid and a longer rest than fine; swapping without adjusting hydration guarantees a mismatch.

    How to tell: Dull, cardboard-like or faintly bitter flavor even with a good recipe, and the bag has been open in the pantry for months.

    The fix: Smell it: fresh is sweet and corny, stale is musty or flat. Buy small bags; store in the freezer. For coarse stone-ground, add 2–3 tablespoons liquid and rest a full 20 minutes.

    Rescue: what to do with the dry batch you already baked

    Don’t throw it out. Warm it and serve with salted butter and honey. Crumble it into chili, cube and toast it into croutons, or pulse into crumbs for cornbread dressing — slightly dry cornbread is actually preferred for dressing because it absorbs stock without turning to mush. Or split, butter, and griddle it crisp — fried cornbread with a runny egg is a legitimate breakfast.

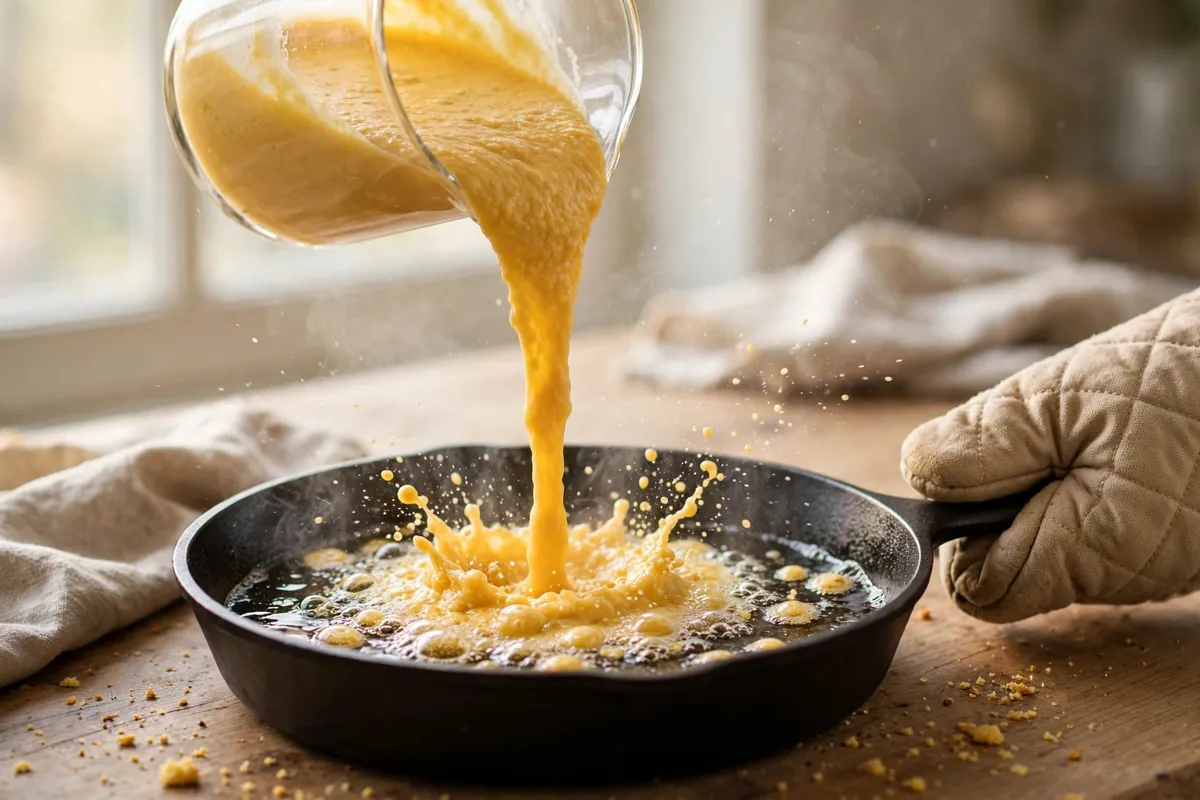
    batter being poured into a smoking-hot cast iron skillet, sizzling on contact
    batter being poured into a smoking-hot cast iron skillet, sizzling on contact
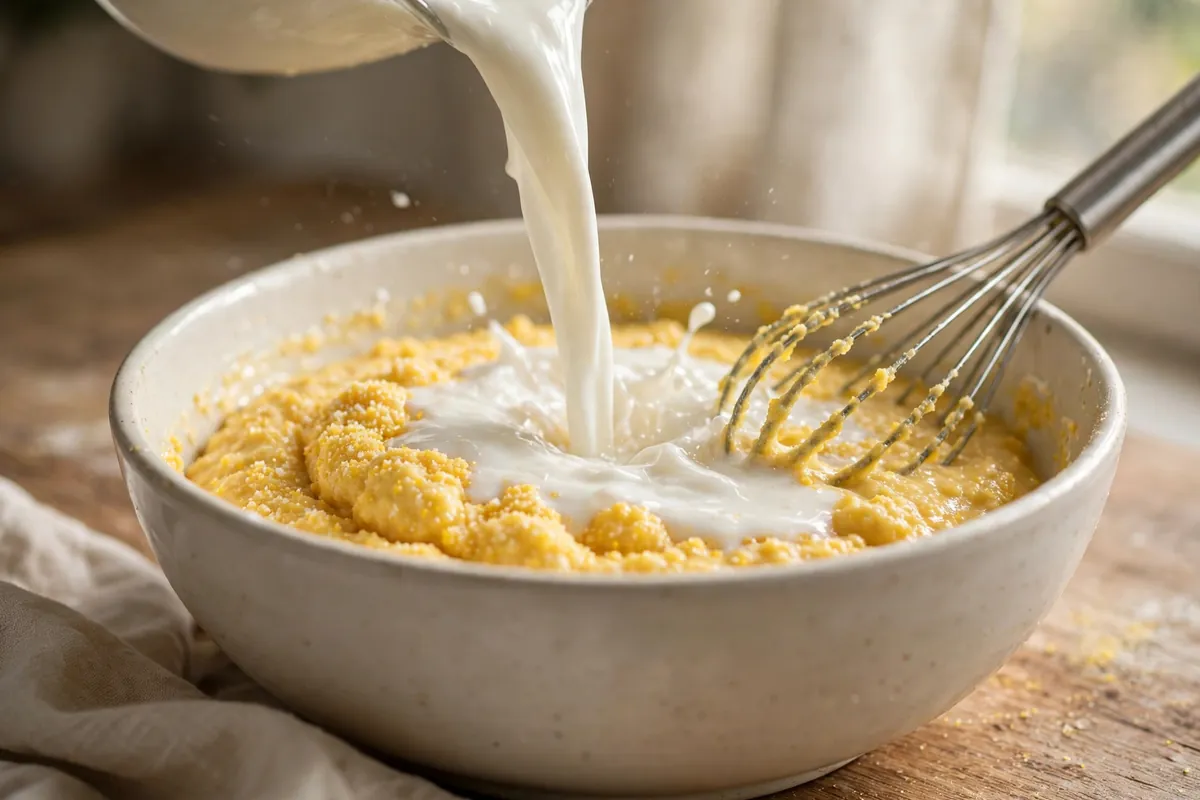
    buttermilk being poured into a mixing bowl of cornmeal batter
    buttermilk being poured into a mixing bowl of cornmeal batter

    Frequently asked questions

    Is dry cornbread safe to eat?
    Yes — dryness is texture, not safety. As long as it baked through (no wet, gummy raw center), dry cornbread is perfectly safe. Warm it, butter it, or repurpose it.

    How do I moisten cornbread after baking?
    Serve warm with butter and honey. For a whole loaf, brush with melted butter, wrap in foil, warm 10 minutes at 300°F (150°C) — trapped steam softens the crumb.

    Should cornbread be sweet or savory?
    Both are authentic — it’s regional. Southern: savory, little sugar, bacon fat, cast iron. Northern: sweeter, cakier, butter. Neither should be dry.

    Can I use regular milk instead of buttermilk?
    Yes, with a fix: add 1 tablespoon of lemon juice or white vinegar per cup of milk and let it stand 5 minutes. The acidity tenderizes the crumb almost as well as real buttermilk. (Dairy swaps are covered broadly in Dairy-Free Frosting for the frosting side of substitutions.)

    Why is my cornbread crumbly and falling apart?
    Not enough binder or fat, or sliced too hot. Rest 10 minutes in the pan before slicing — starches firm as it cools. If it still crumbles, the recipe needs more egg or fat.

    Can I make cornbread ahead?
    Bake it the day before and rewarm wrapped in foil — it actually slices cleaner the next day. For dressing, deliberately bake it 1–2 days ahead and let it go stale; stale cornbread absorbs stock better.

    Related troubleshooting: Why Is My Cake Dry? · Why Did My Muffins Turn Out Tough? · Why Is My Banana Bread Dense?

  • Why Is My Sourdough Gummy Inside? (Under-Fermentation Explained)

    Why Is My Sourdough Gummy Inside? (Under-Fermentation Explained)

    Why Is My Sourdough Gummy Inside? (Under-Fermentation Explained)

    Quick diagnosis: A gummy sourdough interior has three usual causes, in order of likelihood: you cut the loaf too soon (the #1 cause — the crumb is still setting), it was under-fermented (bulk ferment cut short), or it was under-baked (internal temp below 200°F). Check them in that order — most gummy loaves are a cooling problem, not a recipe problem.

    Gummy versus fully set sourdough crumb in raking light
    close-up of a gummy, compressed crumb vs a properly set open crumb

    You’ve done everything right — the starter was lively, the shaping felt good, the crust is gorgeous — and then you slice in and the inside is damp, dense, and gluey. Before you blame your starter or your recipe, know this: the majority of gummy sourdough is caused by what happens after the bake, not during it.

    Cause 1: You cut it too soon (the most common reason)

    This deserves the top spot because it fixes the most loaves with zero recipe changes. When bread comes out of the oven, the interior is still around 200°F+ and full of steam. The starches that form the crumb structure are still gelatinized and soft — they firm up and “set” as the loaf cools, a process that takes a full 1–2 hours for sourdough. Slice at 30 minutes and you interrupt it: steam escapes, the unset crumb compresses under the knife, and every slice tastes gummy.

    The fix: Wait a minimum of 2 hours before slicing sourdough — longer for large loaves. Cool it on a wire rack, never in the pan or on a flat surface (trapped steam = soggy bottom). I know the crackling crust is calling. The wait is the recipe.

    Cause 2: Under-fermentation

    If the crumb is gummy and tight with almost no holes, the bulk ferment was likely cut short. Under-fermented dough hasn’t developed enough gas or acidity; the crumb bakes up dense and damp because there’s insufficient structure for steam to escape through.

    How to tell: The loaf also shows other under-fermentation signs — minimal oven spring, a pale thick crust, large irregular holes surrounded by dense areas (“fool’s crumb”), or a generally tight texture throughout.

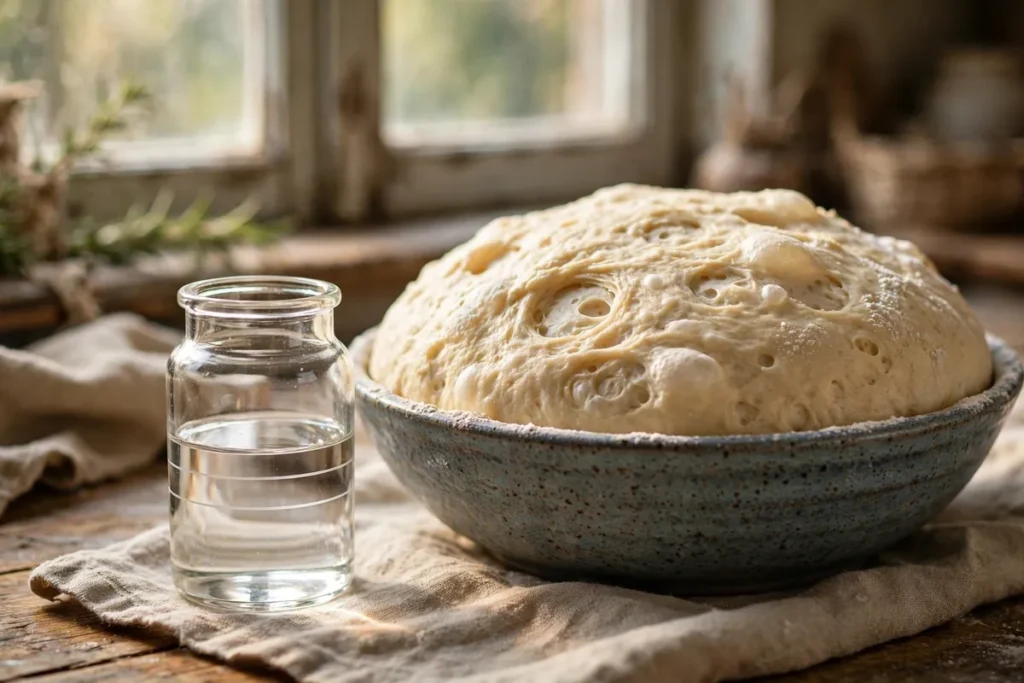
    The fix: Judge bulk fermentation by percentage rise, not the clock. For most sourdough, aim for a 50–75% rise (not a full doubling — sourdough continues fermenting during shaping and the cold retard). The aliquot jar method makes this foolproof: after mixing, pinch off a small piece of dough into a straight-sided jar, mark the level, and watch it hit your target percentage. Warmer dough (78–80°F) ferments in 4–6 hours; cooler dough (70°F) can take 8–12. Same dough, different kitchen, different timeline — the jar doesn’t lie.

    Aliquot jar with marked levels beside bulk fermenting dough
    aliquot jar beside the bulk ferment bowl, marked levels visible

    Cause 3: Under-baking

    A loaf pulled too early never drives enough heat into the center. The exterior looks done — sourdough crusts brown fast — while the interior is still under 200°F and the starches never fully set. The result: a gummy band through the middle, sometimes with a visibly damp line.

    How to tell: The bottom crust is pale and soft rather than deep brown and firm; the loaf feels heavy for its size.

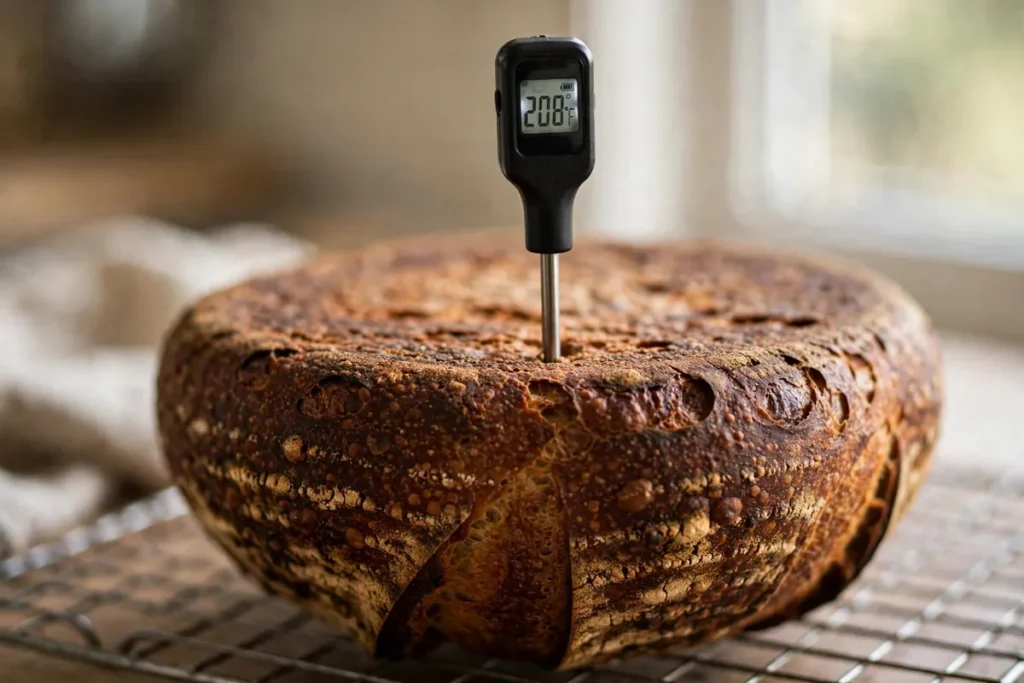
    The fix: Bake to an internal temperature of 200–210°F (93–99°C), measured with an instant-read thermometer pushed through the bottom into the center. For a typical 900g sourdough baked in a Dutch oven: 20 minutes covered at 450°F (230°C), then 20–25 minutes uncovered until deeply browned — and verify with the thermometer, because ovens vary enormously. Temp every loaf and gummy centers stop happening.

    Thermometer pushed through the bottom crust of an upside-down loaf
    thermometer reading the center of a sourdough loaf through the bottom crust

    Cause 4: Hydration too high for your flour

    High-hydration dough (80%+) gives that coveted open crumb — but only if the flour’s protein can handle it. Push a 10.5%-protein all-purpose flour to 82% hydration and the gluten network can’t contain the water; the crumb bakes up wet and gummy no matter how perfect your fermentation is.

    The fix: Match hydration to flour strength. With standard bread flour (12–13% protein), 70–75% hydration is the sweet spot for most home bakers. Master that before pushing higher. If a recipe’s hydration routinely gives you gumminess, drop it 3–5 percentage points and compare — the crumb will tell you the truth.

    Cause 5: Trapped steam and a cold baking vessel

    Two related issues: baking in a Dutch oven that wasn’t fully preheated means the base starts cold and the bottom under-bakes (gummy stripe along the base). And cooling the loaf in the Dutch oven or on a flat counter traps steam underneath, re-wetting the bottom crust and lower crumb.

    The fix: Preheat the Dutch oven a full 30–45 minutes. And always — always — cool on a wire rack with air circulating underneath.

    Frequently asked questions

    How long should I wait before cutting sourdough?
    Minimum 2 hours; 3 is even better for large loaves. The crumb is still cooking from residual heat and the starches are setting. Cutting early is the single most common cause of gumminess, and the easiest to fix.

    Is gummy sourdough safe to eat?
    Yes, as long as it reached a safe internal temperature (200°F+). Gumminess is a texture defect, not a safety issue. If the very center tastes raw and doughy rather than just damp, it was under-baked — toast the slices.

    Can I fix a gummy loaf after baking?
    Partially. You can’t reset the crumb, but slicing and toasting drives off moisture and dramatically improves the eating experience. Gummy sourdough also makes excellent toast, croutons, and panzanella — don’t waste it.

    Why is only the bottom of my loaf gummy?
    Classic under-baked base: the Dutch oven wasn’t fully preheated, or the loaf cooled on a flat surface trapping steam. Preheat 30–45 minutes and cool on a wire rack.

    My crumb has big holes AND gummy dense patches — what happened?
    That’s “fool’s crumb” — the signature of under-fermentation. The big holes are trapped gas from shaping; the dense gummy areas never fermented properly. Extend your bulk ferment and use the aliquot jar method.

    Does over-fermentation cause gumminess too?
    Rarely directly — over-fermented dough more often bakes flat and pale with a sour taste. But a severely over-proofed loaf can collapse into a dense, damp layer at the bottom. If your dough doubled-plus and smells strongly of alcohol, shorten the ferment next time.

    Related troubleshooting: Starter Smells Like Acetone? · Why Is My Bread Dense? · Bread Crust Too Hard or Too Soft
  • How to Fix Over-Salted Dough (Without Starting Over)

    How to Fix Over-Salted Dough (Without Starting Over)

    You were scaling a recipe, the salt slipped, and now you’re staring at a bowl of dough with twice the salt it should have. First, the bad news, stated plainly so we can move past it: you cannot remove salt from dough. No rinsing, no trick, no hack extracts dissolved salt from a mixed dough. But the good news is better than you’d expect: in most cases you don’t need to remove it — you dilute it, and the math is simple. I’ve saved more over-salted batches than I can count, and the rescue below works every time.

    Quick diagnosis: Salt can’t be removed, only diluted. If you added roughly double the salt (say 4% instead of 2%), double the flour, water, and yeast — with NO additional salt — and mix it in: you’re back to 2%. For small overshoots (up to ~2.5–3%), just bake it; the difference is barely noticeable. Only truly extreme salt (5%+) means starting over.

    What too much salt actually does to dough

    Understanding the damage tells you how urgent the fix is. Salt does three things in dough, and excess amplifies all of them:

    It slows the yeast. Salt draws water out of yeast cells by osmosis, dehydrating and stunning them. At the correct 2%, this is desirable — it paces fermentation for better flavor. At 4%+, the yeast barely functions: expect a sluggish, under-risen loaf no matter how long you wait. (This is the same mechanism behind slow rises generally — see Why Didn’t My Bread Rise?.)

    It tightens the gluten. Salt strengthens gluten networks — good in moderation, but excess makes dough stiff, resistant to shaping, and prone to tearing.

    It tastes salty. Obvious, but worth stating: above ~3%, most people can taste it, and above 4% it’s unpleasant in plain bread.

    Step 1: Figure out how bad it is

    Before doing anything, estimate the damage. The target is 2% salt by flour weight — 10g per 500g flour, about 2 teaspoons of fine salt per 4 cups.

    • ~2.5–3% (a heavy hand, a rounded spoon): Bake it. Seriously. At this level the difference is subtle — slightly slower rise, slightly firmer crumb, a touch more flavor. Extend the rise time a little and carry on.
    • ~3–4% (doubled the salt, or used tablespoons instead of teaspoons): Dilute — the rescue below. Fully salvageable.
    • 5%+ (poured freely, or confused salt with something else): Start over. At this level you’d need to triple the batch to dilute it, the yeast is severely compromised, and the result isn’t worth the flour.

    How to estimate: Think back to what you added versus what the recipe called for. If the recipe said 2 teaspoons and you added 2 tablespoons, that’s 3× — roughly 6%, which means starting over. If it said 10g and you added 20g, that’s 4% — dilutable.

    Step 2: The dilution rescue (the actual fix)

    The math is straightforward: salt percentage = salt weight ÷ flour weight. To halve the percentage, double the flour (and everything else except salt).

    Worked example: Your recipe used 500g flour and you accidentally added 20g salt (4%) instead of 10g (2%).

    1. Mix a second batch of the same dough — 500g flour, the recipe’s water, the recipe’s yeast — with zero salt.
    2. Knead the two doughs together thoroughly until completely homogeneous (5–8 minutes). Don’t just stack them; the salt must distribute evenly.
    3. You now have 1000g flour and 20g salt = 2%. Correct.
    4. Proceed with the recipe, allowing a slightly longer rise (the yeast had a head start in the salty half).

    No scale? Work in the recipe’s own units: if the recipe was “4 cups flour, 2 teaspoons salt” and you added 4 teaspoons, make a second identical batch with no salt and combine. The units cancel out as long as both halves match.

    Yeast note: the yeast in the over-salted half is sluggish but alive. The fresh yeast in the new half carries the rise. Combined and given time, the batch ferments fine — just expect it to need a bit longer than usual. Judge by the dough (doubled, poke test), not the clock.

    two doughs being kneaded together — the salted batch and the fresh unsalted batch merging
    two doughs being kneaded together — the salted batch and the fresh unsalted batch merging

    Step 3: Adjust the bake

    A rescued batch needs two small accommodations:

    • Longer fermentation. Give it 25–50% more rise time than the recipe states. The yeast is recovering; don’t rush it.
    • Watch the shaping. The combined dough may be slightly stiffer than usual (salt tightened the first half’s gluten). If it resists shaping, rest it 15 minutes and try again — relaxed gluten stretches willingly.

    What does NOT work (don’t waste your time)

    • Rinsing the dough. Salt is dissolved throughout; surface rinsing removes almost nothing and waterlogs the dough.
    • Adding sugar to “balance” it. Sugar doesn’t cancel salt on the palate the way people hope — you get sweet and salty, and the yeast is still stunned.
    • Adding more yeast alone. Extra yeast in a 4%-salt dough just gives you more stunned yeast. Dilution first, then the yeast already present is plenty.
    • Baking it salty and hoping. Above ~3.5%, hope is not a strategy. Dilute or discard.

    Prevention (so this is the last time)

    • Weigh salt. 10g per 500g flour. A scale eliminates the tablespoon/teaspoon confusion that causes most over-salting.
    • Know your salt. Fine table salt packs denser than kosher — a tablespoon of fine salt can weigh nearly twice a tablespoon of coarse kosher. If a recipe doesn’t specify, assume fine and measure accordingly.
    • Add salt with the flour, not the yeast. Mixing salt through the dry ingredients distributes it evenly and avoids concentrated pockets stunning the yeast on contact.
    • Mise en place. Measure everything before mixing starts. Most salt accidents happen mid-recipe, reaching for the wrong spoon in a hurry.
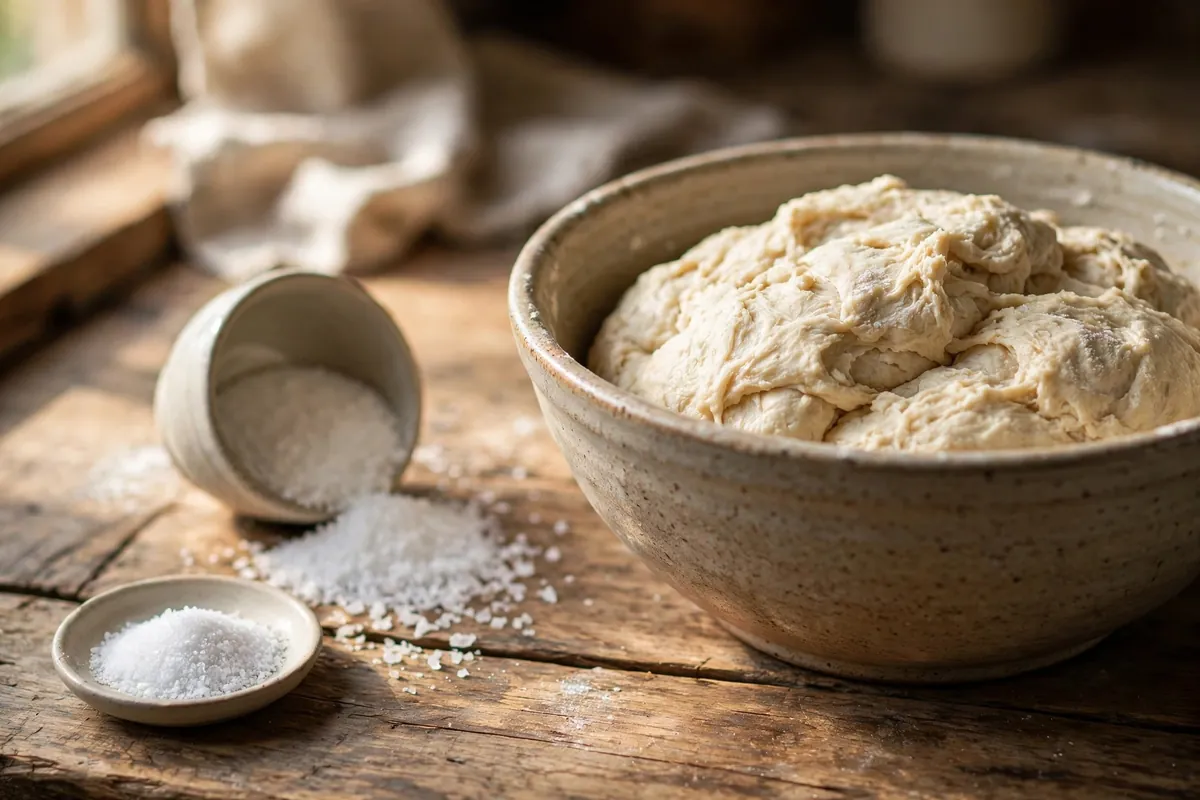
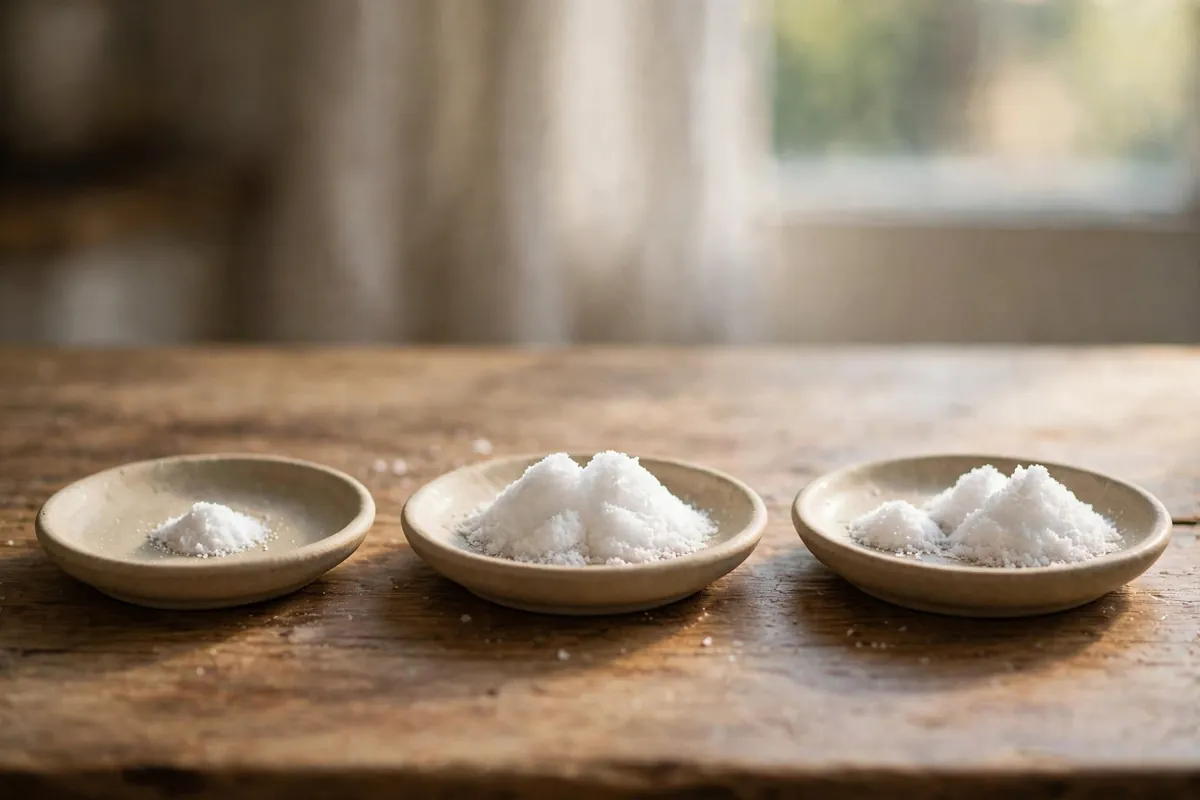
    three small dishes showing correct salt (10g), double salt (20g), and the visual difference
    three small dishes showing correct salt (10g), double salt (20g), and the visual difference

    Frequently asked questions

    Will the rescued dough taste normal?
    Yes — that’s the point of the math. At a true 2% after dilution, the salt level is exactly what the recipe intended. The crumb, crust, and flavor will be indistinguishable from a correct batch, provided you gave it the full rise.

    My dough hasn’t risen at all — is the yeast dead?
    Probably stunned, not dead. Salt at 4% slows yeast dramatically but rarely kills it outright (that takes much higher concentrations or heat). Give it time in a warm spot (75–80°F / 24–27°C) — up to twice the normal rise. If there’s genuinely zero movement after hours, then yes, start fresh; but sluggish is normal here, not fatal.

    Can I just make the recipe salt-free to compensate?
    That’s exactly what the dilution rescue is — a second salt-free batch combined with the first. Don’t try to “average it out” by serving salty bread with bland toppings; fix the dough itself.

    Does this work for pizza dough too?
    Yes — same math, same method. Pizza dough is actually more forgiving because toppings and sauce mask minor salt variations. For a 3% overshoot on pizza dough, many bakers just proceed; the toppings carry it.

    What if I used salted butter instead of unsalted by mistake?
    Different problem, smaller scale: salted butter adds roughly 1–1.5% salt equivalent to the dough — usually within the tolerable range. Proceed, and skip any additional salt the recipe calls for. No rescue needed.

    Is over-salted dough safe to eat?
    The dough itself is safe — salt isn’t a food-safety hazard at these levels. The question is purely palatability and yeast function. (Truly extreme salt — a cup in a single loaf — would be inedible but still not dangerous.)

    Related troubleshooting: Why Didn’t My Bread Rise? · Make-Ahead Bread Dough · No-Yeast Bread

  • Sourdough Starter Smells Like Acetone — What It Means and the Fix

    Sourdough Starter Smells Like Acetone — What It Means and the Fix

    Sourdough Starter Smells Like Acetone — What It Means and the Fix

    Quick diagnosis: That sharp, nail-polish-remover smell is alcohol and acetic acid produced by a hungry starter — it has run out of food and is telling you so. Your starter is not ruined. Stir the dark liquid back in (or pour it off), discard down to a spoonful, and feed it a generous meal. Two to three days of proper feeding and it’ll smell yeasty and sweet again.

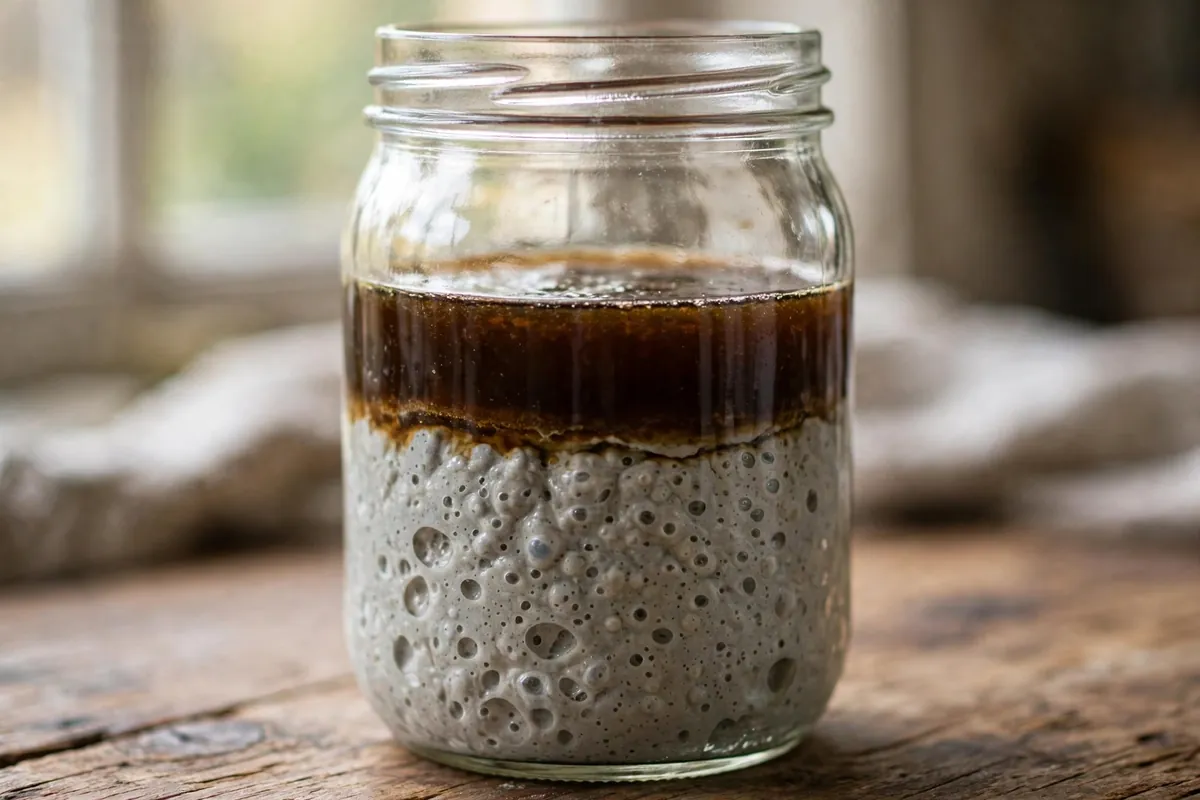
    Sourdough starter jar with dark hooch layer on top
    clear jar of starter with a dark hooch layer sitting on top

    Open your starter jar and get hit with acetone instead of that pleasant yeasty tang, and it’s natural to panic. But this smell is one of the most common and most fixable starter issues there is. Here’s exactly what’s happening and the feeding protocol that fixes it.

    What the acetone smell actually is

    A sourdough starter is a culture of wild yeast and lactic acid bacteria living in flour and water. When they’re well fed, they produce CO₂ (the rise), mild lactic acid (the tang), and pleasant estery aromas. When the food runs out, the yeast switches to survival metabolism and produces ethanol and acetic acid in larger quantities — and acetic acid at concentration smells sharply like acetone or nail polish remover.

    You’ll often see a dark liquid on top too. That’s hooch — mostly alcohol — and it’s part of the same story: hunger, not death. The culture is dormant and stressed, not gone.

    Why it happens

    Three triggers, usually in combination:

    1. Too long between feeds. A room-temperature starter burns through its flour in 8–12 hours. Miss a day or two and it’s starving.
    2. A warm kitchen. Heat accelerates fermentation — at 80°F+ (27°C+) a starter can go from fed to famished in half the usual time. Summer neglect produces acetone smell fast.
    3. Too small a feed. Feeding 1:1:1 (equal parts starter, flour, water by weight) gives a small meal that runs out quickly. In warmth, or after neglect, the culture needs a bigger ratio.

    Is my starter ruined? (Probably not — check this)

    Hooch plus acetone smell = hungry, salvageable. There is exactly one thing that means discard: pink, orange, or red streaks, or any fuzzy mold (white, green, black fuzz). That’s contamination, and no feeding fixes it — throw it out, sterilize the jar, and start fresh. Everything else — dark liquid, sharp smell, grayish color, sluggish rise — is recoverable.

    One more reassurance: the acetone smell itself is not a safety issue. You’re smelling volatile acids and alcohol, the same compounds (at lower levels) that give sourdough its characteristic tang. Once the starter is fed and active again, the smell normalizes.

    The fix: a 3-day revival feeding protocol

    Day 1 — the reset feed. Pour off the hooch or stir it in (pouring off slightly reduces acidity; stirring in keeps hydration stable — either is fine). Discard all but about a tablespoon of starter, then feed it generously: 1 part starter to 3 parts flour to 3 parts water by weight (1:3:3). Use a 50/50 mix of bread flour and whole wheat or rye if you have it — the extra nutrients wake sluggish cultures faster. Mark the level with a rubber band.

    Day 2 — feed at peak, not by the clock. Watch for the starter to rise and just begin to fall (the dome flattens). That’s peak — feed it again 1:3:3 at that moment, even if it’s only been 8 hours. Feeding at peak, called peak-to-peak feeding, rebuilds a vigorous population fastest. A neglected starter usually shows real life by the second peak-to-peak feed.

    Day 3 — confirm the rhythm. By now it should be doubling (or more) predictably within 4–8 hours of feeding at room temperature, smelling yeasty, sweet, and mildly tangy — the acetone edge gone. It’s ready to bake with, or to go back on a maintenance schedule.

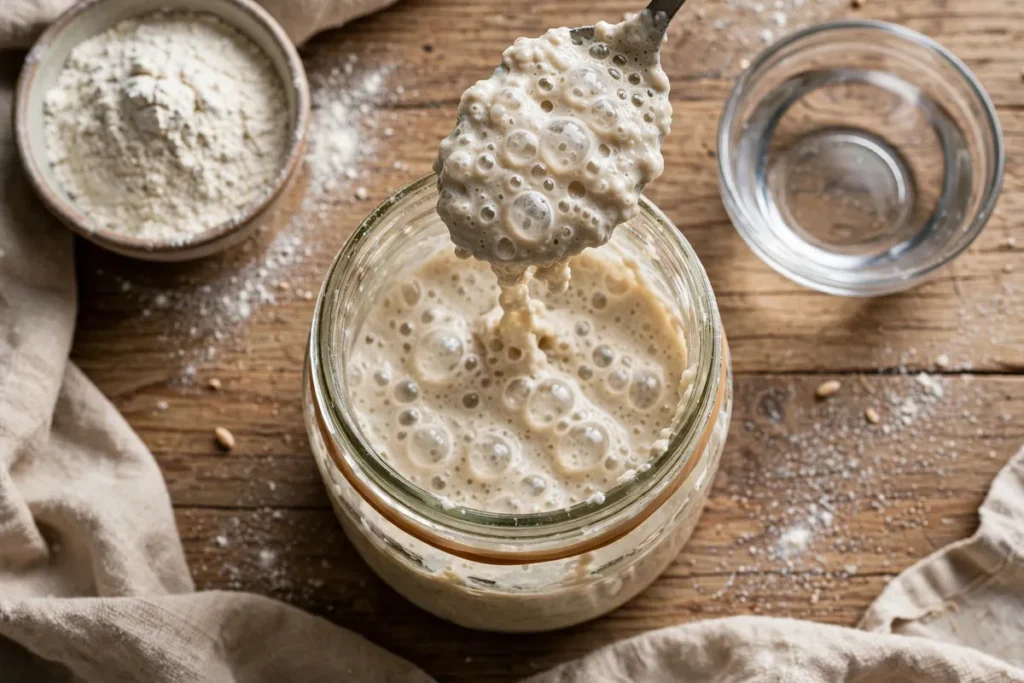
    Discarding and feeding a sourdough starter, overhead view
    feeding the starter — discarding half, flour and water measured beside the jar
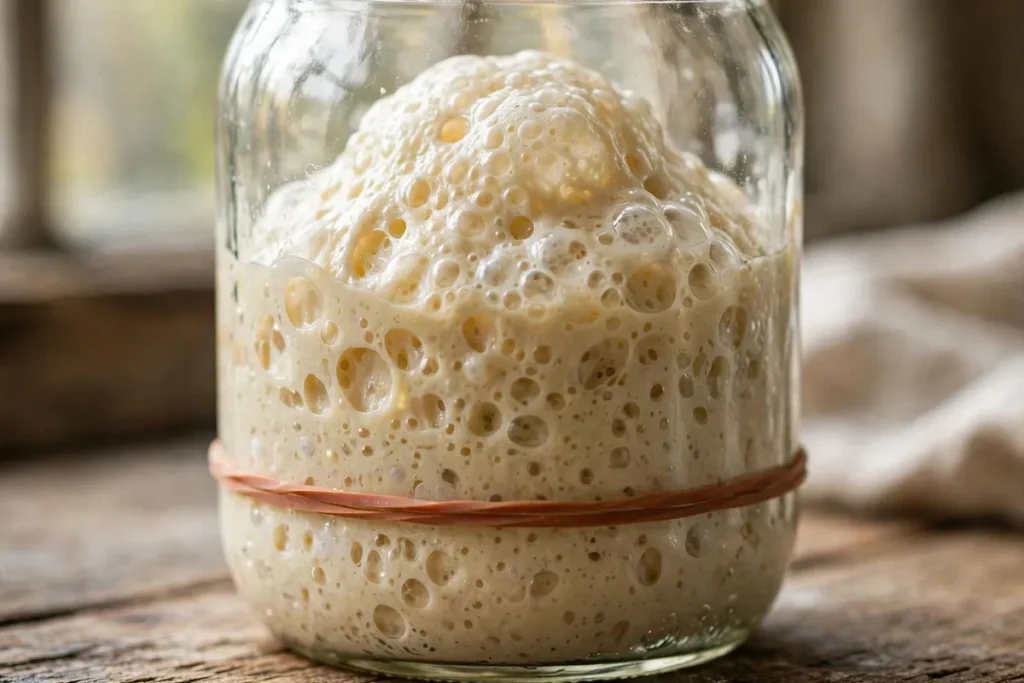
    Sourdough starter risen past the rubber-band line at peak
    starter at peak — domed, bubbly, risen well above the rubber-band marker

    Keeping it from coming back

    • Room temperature: feed every 12 hours (twice daily) with at least 1:2:2. In hot kitchens, go 1:3:3.
    • Fridge storage: feed it, let it start rising (1–2 hours), then refrigerate. Feed once a week — set a reminder. It’ll develop mild hooch between feeds; that’s normal. Just feed before baking, and give it 1–2 room-temperature feeds after long fridge stays to wake it fully.
    • Bigger feeds before neglect: if you know you’ll skip days, feed 1:5:5 before the gap. More food = longer runway.

    Frequently asked questions

    Is a starter that smells like acetone safe to use?
    The smell itself isn’t dangerous — it’s alcohol and acetic acid, normal fermentation byproducts at high concentration. But don’t bake with it in this state: a starving culture won’t leaven properly. Revive it with the 3-day protocol first, then bake once it doubles predictably.

    Should I pour off the hooch or stir it in?
    Either works. Pouring off removes some acidity and alcohol (slightly milder flavor, marginally lower hydration). Stirring in keeps everything consistent. Pour off very dark hooch and stir in light hooch — but honestly, the feeding protocol matters far more than this choice.

    Why does it smell like nail polish remover specifically?
    Acetic acid — the same acid that gives vinegar its bite — at high concentration has a sharp, solvent-like aroma our noses read as acetone or nail polish remover. Starving yeast and bacteria overproduce it. A healthy starter makes small amounts of it too; that’s part of sourdough’s tang.

    How often should I feed my starter?
    At room temperature (70–75°F / 21–24°C): every 12 hours. In the fridge: once a week. After any neglect, do 2–3 peak-to-peak feeds at room temperature before trusting it for bread.

    Can I bake with it right now, acetone smell and all?
    Not yet. A hungry starter has a depleted yeast population and excess acidity — your loaf will rise poorly and taste harshly sour. Wait until it doubles within 4–8 hours of feeding and smells yeasty-sweet. Usually 2–3 days of proper feeding.

    My starter smells like acetone even though I feed daily — why?
    Your feeds are too small for your conditions. Move from 1:1:1 to 1:2:2 or 1:3:3, or feed twice daily. Warm kitchens (above 78°F / 26°C) burn through flour fast — match the meal size to the metabolism.

    Related troubleshooting: Why Is My Sourdough Gummy Inside? · Why Didn’t My Bread Rise? · Why Is My Bread Dense?