Category: Cakes

  • Why Did My Cupcakes Overflow? Batter Fill Levels Explained

    Why Did My Cupcakes Overflow? Batter Fill Levels Explained

    Why Did My Cupcakes Overflow? Batter Fill Levels Explained

    Quick diagnosis: Overflowed cupcakes are almost always overfilled cups — more than two-thirds full gives the batter nowhere to go but over the rim. Fill standard cups two-thirds max (half for flat tops), check your leavening, and keep the oven at a true 350°F (175°C).

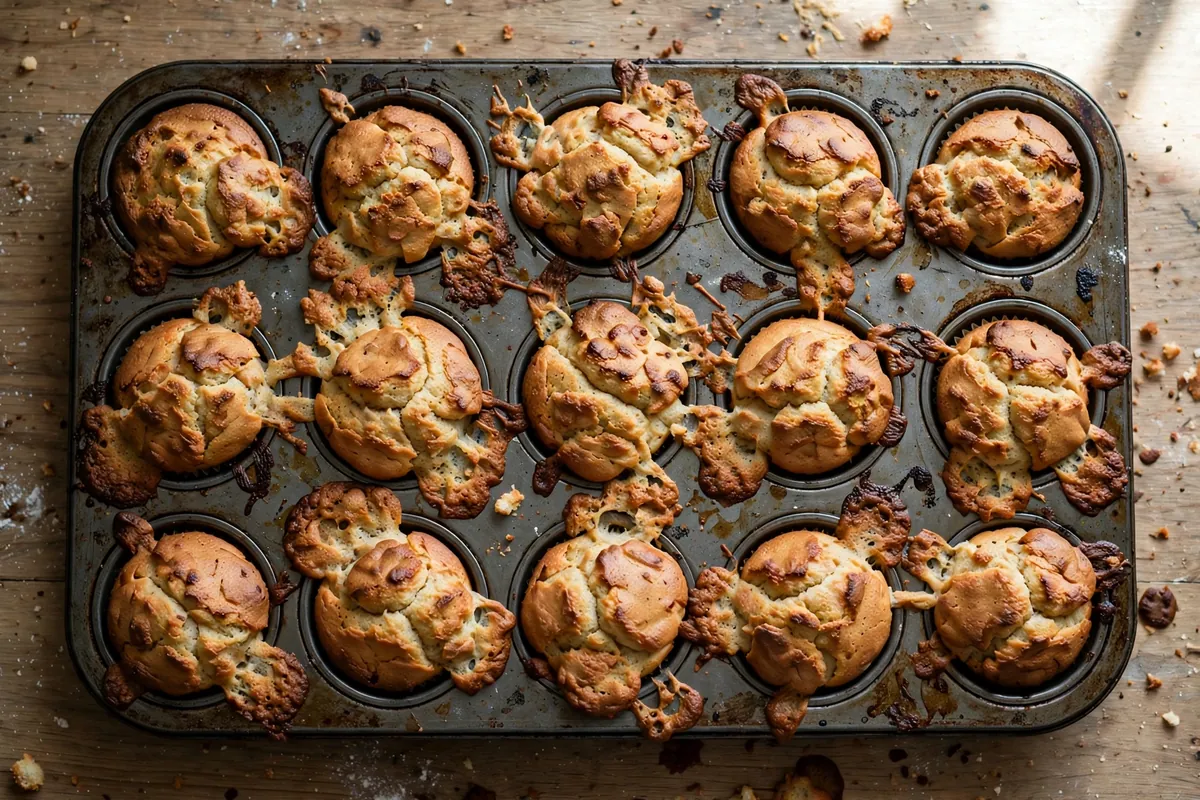
    Overflowed muffin tin with spilled batter and mushroomed tops
    a muffin tin of overflowed cupcakes with batter spilled over rims and fused tops

    A cupcake is a tiny cake in a paper cup — and that paper cup is doing structural work. As batter heats, leavening gases expand it upward; the liner contains the rise and shapes the signature dome. Overfill the cup and the rising batter crests the rim, spills onto the hot tin, and fuses neighboring cupcakes into one inseparable slab. The fixes are all about giving the rise somewhere legal to go.

    1. The cups were overfilled

    The cause in the great majority of cases. Standard guidance exists for a reason: fill cups two-thirds full. That leaves exactly the headroom a properly leavened batter needs to rise into a dome without breaching the rim. Eyeballing “almost full” routinely lands at 85–90% — and 90% full plus oven spring equals overflow, every time.

    How to tell: The batter was near the top of the liners before baking, and the overflow looks like the cupcakes simply outgrew their cups.

    The fix: Two-thirds full for classic domed tops; one-half full for flat tops (better for piping tall frosting swirls). Use a scoop for consistency — a #20 disher holds about 3 tablespoons, the perfect amount for a standard cupcake. No scoop? Fill, then remove a spoonful from each cup. When I switched from eyeballing to a scoop, my batches went from chaotic to uniform overnight.

    2. Too much leavening

    Excess baking powder or soda supercharges the rise. The batter doesn’t just dome — it erupts. This is the same over-leavening behind sunken cake centers (see Why Did My Cake Sink in the Middle?) — in a full-size cake it collapses, in a tiny cup it escapes over the rim first.

    How to tell: The rise was violent — batter fountained rather than domed — and the crumb has a coarse, open texture with a faintly soapy taste.

    The fix: About 1 teaspoon baking powder per cup (120g) of flour, leveled with real measuring spoons. Check the tin’s age — dead leavening tempts over-measuring, and old-plus-extra is the worst combination.

    3. The oven was too hot

    High heat makes leavening react fast and hard before the crumb structure sets — a rapid, uncontrolled rise that breaches the liner before the batter firms up enough to hold its shape. The same hot-oven mechanism that domes and cracks full cakes (see Cake Domed and Cracked on Top) turns cupcakes into volcanoes.

    How to tell: The cupcakes rose dramatically in the first 10 minutes, browned fast on top, and spilled — while the centers may still be soft.

    The fix: A true 350°F (175°C) on the center rack, verified with an oven thermometer. For fan/convection ovens, drop to 325°F (163°C). Cupcakes are small and bake fast — most are done in 18–22 minutes, and a hot oven compresses that window past the point of control.
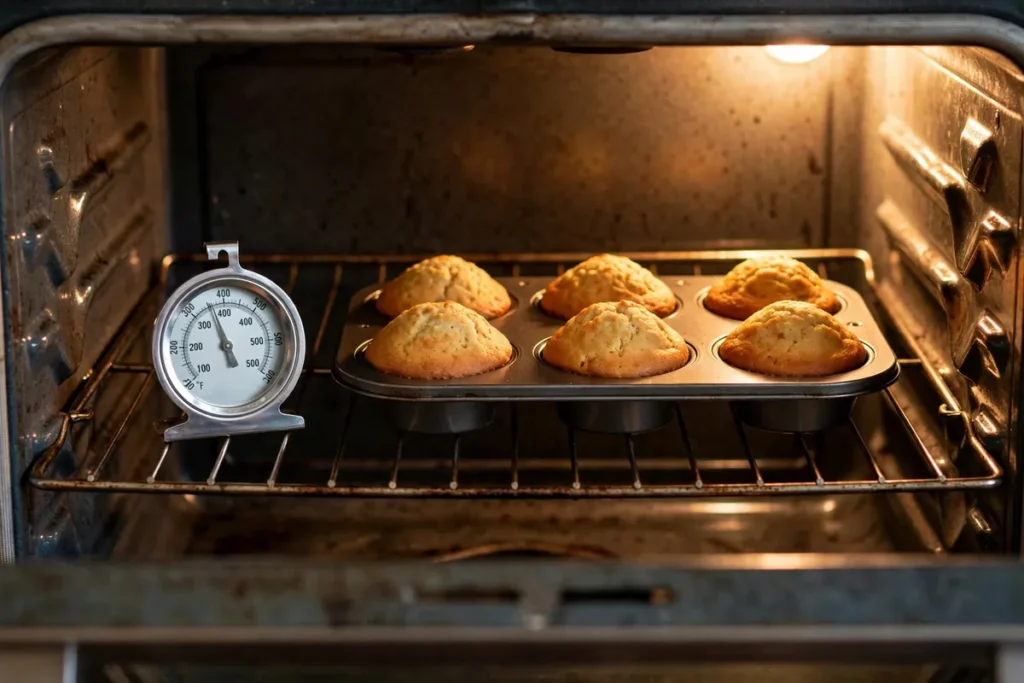
    Oven thermometer on a rack next to a muffin tin
    oven thermometer on the middle rack next to a muffin tin, reading visible

    4. The batter was too thin

    Thin, wet batter has further to rise and less structure to contain it — it behaves more like a liquid boiling over than a dough rising. Over-measured milk, extra eggs, or melted-butter batters thinned beyond the recipe’s intent all push toward overflow.

    How to tell: The batter poured like heavy cream rather than plopping like thick pancake batter, and the baked crumb is dense at the base where overflowed batter pooled.

    The fix: Respect liquid ratios — measure milk and eggs rather than eyeballing. Standard cupcake batter should fall from the spoon in thick ribbons, not run. If you’ve already thinned it, whisk in flour a tablespoon at a time until it ribbons.

    5. Inconsistent scooping

    Twelve cups filled by eye means twelve different fill levels — the fullest three overflow while the emptiest barely dome. Inconsistent batter depth also means inconsistent bake times: the full cups are still raw inside when the shallow ones are done.

    How to tell: Some cupcakes overflowed, some are perfect, some are flat — all from the same tin.

    The fix: The #20 scoop (3 tablespoons) for standard cupcakes; a #40 (about 1½ tablespoons) for minis. For jumbo tins, fill two-thirds by depth and weigh the first cup, then match the rest. Uniformity is free quality.

    6. The tin was jostled or the door slammed

    A sharp jolt mid-bake sloshes semi-set batter over rims that were borderline full. Slamming the oven door sends a pressure wave through the oven — enough to collapse a delicate rise or slosh a full cup over the edge.

    How to tell: The overflow is on one side of the tin, or it happened right after you checked and closed the door hard.

    The fix: Slide the tin in gently, close the door softly, and don’t move it until the three-quarter mark. If you must rotate, do it once, quickly and smoothly.

    Fill-level guide by cupcake size

    Tin size Fill level Approx. batter Bake time at 350°F (175°C)
    Mini ⅔ full ~1½ Tbsp 10–12 min
    Standard ⅔ full (domed) / ½ full (flat) ~3 Tbsp 18–22 min
    Jumbo ⅔ full ~⅓ cup 25–30 min

    Flat tops (half fill) are the decorator’s choice — more room for frosting architecture. Domed tops (two-thirds) are the classic bakery look. Both are correct; over the rim is the only wrong answer.

    Salvaging overflowed cupcakes
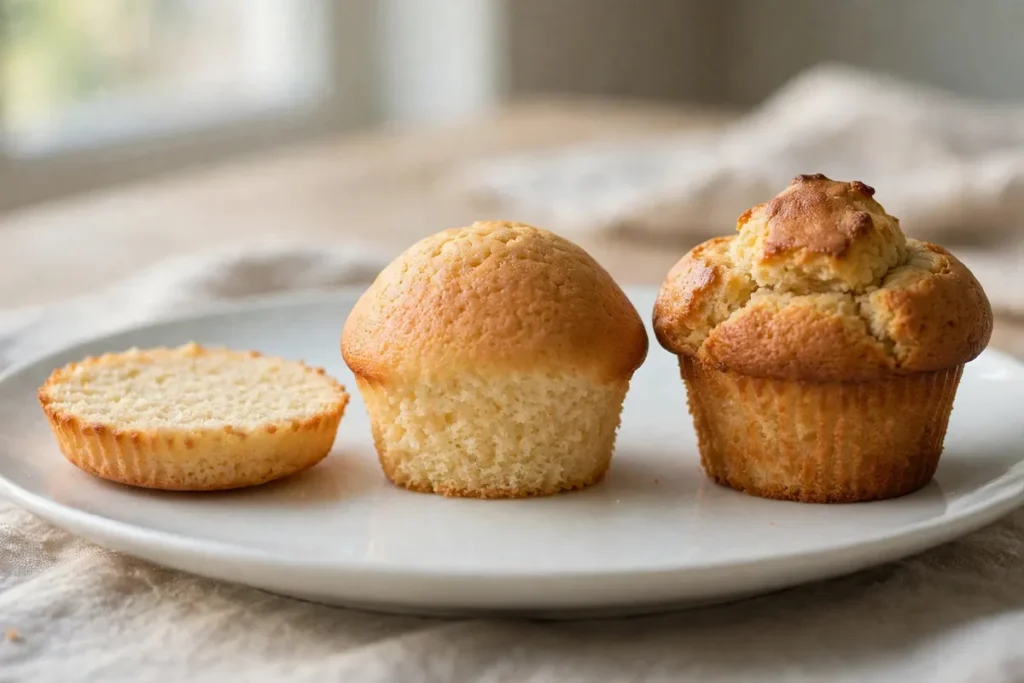
    Three cupcakes sliced open — flat, domed, and mushroomed
    three cupcakes showing half fill (flat), two-thirds fill (domed), and overfilled (mushroomed) side by side

    They’re still perfectly edible — trim the mushroomed tops flat with a serrated knife (the trimmings are cook’s treats), and frost generously. For fused-together neighbors, run a knife between them while warm. Next batch, drop to two-thirds and the problem disappears.

    Frequently asked questions

    Are overflowed cupcakes safe to eat?
    Yes — overflow is cosmetic. The spilled batter baked on the hot tin is fully cooked. Trim, frost, and serve; the flavor is identical to a perfect cupcake.

    Should cupcake liners be filled half or two-thirds?
    Two-thirds for classic domed tops, one-half for flat tops meant for tall frosting. Both work. The only wrong answer is fuller than two-thirds.

    Why do my cupcakes overflow but the recipe says the same fill?
    Ovens and leavening vary — your oven may run hot (fast, violent rise) or your baking powder may be extra fresh and strong. Drop the fill to one-half as a test batch; if those come out perfect, your setup runs hot and half-fill is your standard.

    Can I stop cupcakes from mushrooming?
    The mushroom shape is overflow plus continued rising — the spilled batter sets into a brim. Prevent it with correct fill levels and true 350°F (175°C) heat. Once mushroomed, trim the brim off; it won’t un-mushroom.

    Do silicone cups prevent overflow?
    No — silicone changes release, not rise physics. An overfilled silicone cup overflows exactly like paper. Use the same two-thirds rule regardless of liner material.

    Related troubleshooting: Why Did My Cake Sink in the Middle? · Cake Domed and Cracked on Top · Why Didn’t My Bread Rise?
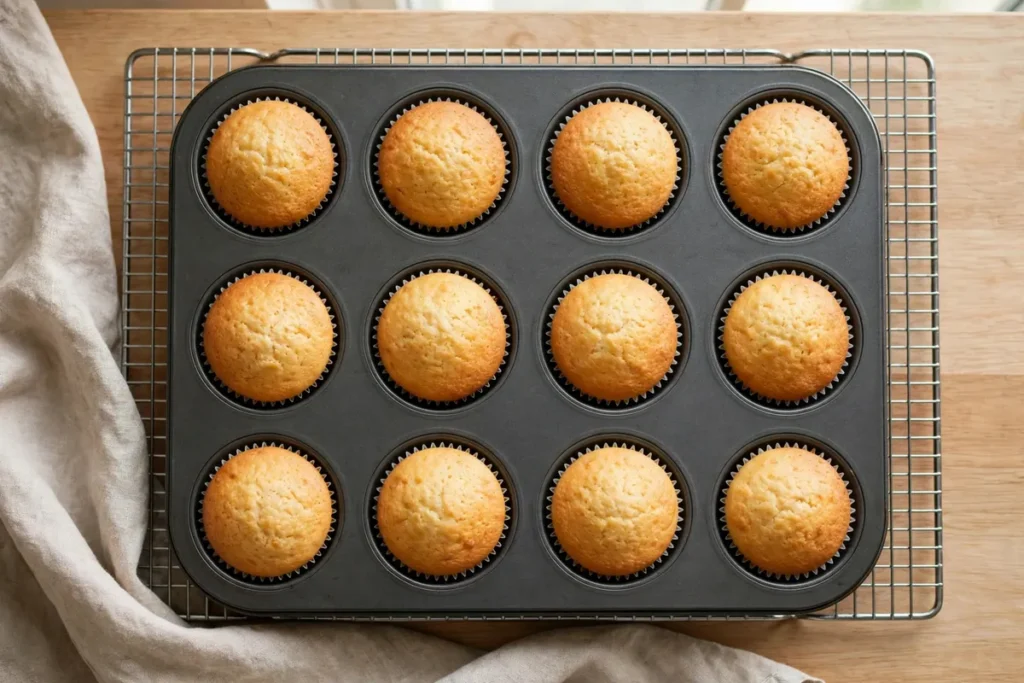
    Perfect uniform batch of cupcakes in a clean tin
    a perfect batch — uniform domed cupcakes with clean liners, no spill on the tin
  • Why Did My Tiramisu Turn Watery? (Mascarpone Fixes)

    Why Did My Tiramisu Turn Watery? (Mascarpone Fixes)

    Watery tiramisu is almost never about the coffee. It’s the mascarpone filling — a delicate emulsion that turns to soup the moment it’s overworked, under-chilled, or layered over drowning-wet ladyfingers. The causes are few, and once you know them, tiramisu becomes one of the most reliable desserts you make.

    Quick diagnosis: You overmixed the mascarpone (most common — it breaks and weeps), soaked the ladyfingers too long, or served it before the filling had time to set. Fix: stir mascarpone gently by hand, dip ladyfingers 1–2 seconds per side, and chill the finished tiramisu a full 8–12 hours before serving.

    My tested baseline: 4 large egg yolks beaten with 100g sugar over a bain-marie to 160°F (71°C) until thick and pale. 500g mascarpone (cold, full-fat), loosened with a spoon — never beaten. 300ml heavy cream whipped to soft peaks. Ladyfingers (savoiardi) dipped 1–2 seconds per side in 250ml strong espresso cooled to room temperature, mixed with 2 tbsp coffee liqueur. Assembled in a 20cm dish, chilled overnight.

    1. You overmixed the mascarpone — it’s broken, not beaten

    This is the number-one cause of watery tiramisu, and it happens in seconds. Mascarpone is roughly 40%+ butterfat with almost no stabilizers. Beat it with an electric mixer — especially once it’s warmed up — and the fat emulsion shears: grainy, then liquid, and no amount of chilling brings it back. Two minutes with a hand mixer once turned 500g of mine from silk to cottage-cheese soup.

    How to tell: The filling looks curdled or grainy before you even assemble; liquid pools around the edges of the bowl; the mascarpone seemed thin the moment you mixed it.

    The fix: Work the mascarpone by hand with a spatula or whisk, gently, just until smooth — 30 seconds, no more. Add it to the cooled yolk base in two additions, folding rather than beating. Cold mascarpone straight from the fridge is actually safer here; it holds its structure longer than room-temperature cheese.

    2. The ladyfingers soaked too long — they became sponges of espresso

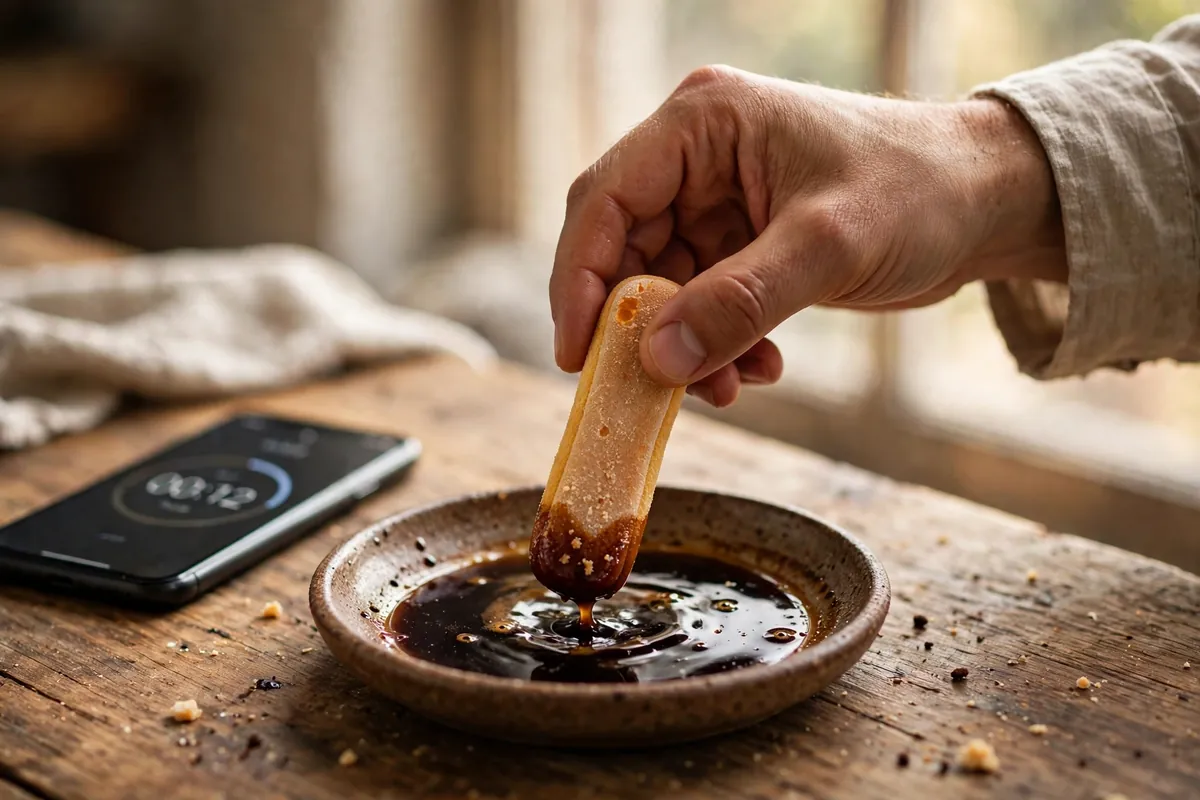
    Savoiardi are designed to absorb liquid fast. A full dunk — even three or four seconds — loads each ladyfinger with far more espresso than the filling can absorb, and that excess coffee migrates out during chilling, pooling at the bottom of the dish. I time my dips now: one second per side, in and out, like developing a photograph.

    How to tell: Liquid at the bottom of the dish is brown (coffee), not white (filling); the ladyfinger layer is mushy and falling apart while the cream layer looks fine.

    The fix: Dip each ladyfinger 1–2 seconds per side in room-temperature espresso — never hot. They should feel firm going into the dish; they finish softening in the fridge. Soft, cake-like savoiardi get a single quick second.

    3. You served it too soon — the filling needs 8–12 hours to set

    Tiramisu straight from assembly is always soft. The filling firms through chilling: the whipped cream, egg yolk foam, and mascarpone need hours at fridge temperature to knit into a sliceable structure. Four hours gives you a spoonable dessert; eight to twelve gives you clean slices.

    How to tell: The tiramisu tastes right but collapses when you try to lift a portion; there’s no graininess, no excess coffee, just softness.

    The fix: Chill a minimum of 8 hours, ideally overnight (10–12 hours). Press plastic wrap onto the surface for the first few hours if your fridge runs humid — condensation dripping onto the top is a sneaky extra water source. Keep it refrigerated until the moment you serve.

    hands quickly dipping a ladyfinger into a shallow dish of espresso, one side only, with a timer visible on a phone nearby
    hands quickly dipping a ladyfinger into a shallow dish of espresso, one side only, with a timer visible on a phone nearby

    4. The cream was overwhipped — stiff peaks weep

    Whipped cream taken past soft peaks starts to separate: the fat clumps into butter granules and the liquid (whey) squeezes out. Folded into mascarpone, those granules read as graininess and the released whey reads as wateriness. This is the same failure mode as overwhipped cream, just hidden inside a dessert.

    How to tell: The filling has tiny buttery lumps; it looked fine at assembly but wept overnight in the fridge.

    The fix: Whip the cream only to soft peaks — the whisk leaves a trail but the peak flops over when you lift it. Stop the mixer early — you can always add five seconds, but you can’t un-whip. Fold into the mascarpone in three additions until just combined, no white streaks.

    5. Your mascarpone was low-fat or warm — both are structural risks

    “Light” mascarpone and mascarpone-style spreads have less fat and more water by design — they simply can’t hold the structure that full-fat mascarpone (40%+ fat) gives. And mascarpone left on the counter for an hour before you start is already halfway to broken; warm fat emulsions shear under the slightest agitation.

    How to tell: The filling was thin from the very first stir, before any cream was added; the cheese container says “light” or lists gums and starches high in the ingredients.

    The fix: Buy full-fat mascarpone and use it cold. Real mascarpone lists cream and citric acid, not a paragraph of stabilizers. With a softer brand, whip the cream to medium peaks and chill a full 12 hours.

    6. The yolk base was undercooked or warm when combined

    The zabaglione-style yolk base does structural work: properly cooked to 160°F (71°C), the yolks thicken into a stable foam that supports the mascarpone. Undercooked yolks stay thin and add free liquid. Worse, a warm yolk base melts the cold mascarpone on contact — the emulsion breaks before assembly even starts.

    How to tell: The yolk-sugar mixture was pourable rather than ribbon-thick; or it felt warm to the touch when you added the mascarpone.

    The fix: Whisk yolks and sugar over simmering water until the mixture reaches 160°F (71°C) and falls from the whisk in thick ribbons — about 5–7 minutes. Cool to room temperature — about 20 minutes, stirring occasionally — before the mascarpone goes near it. It should feel neutral to the touch.

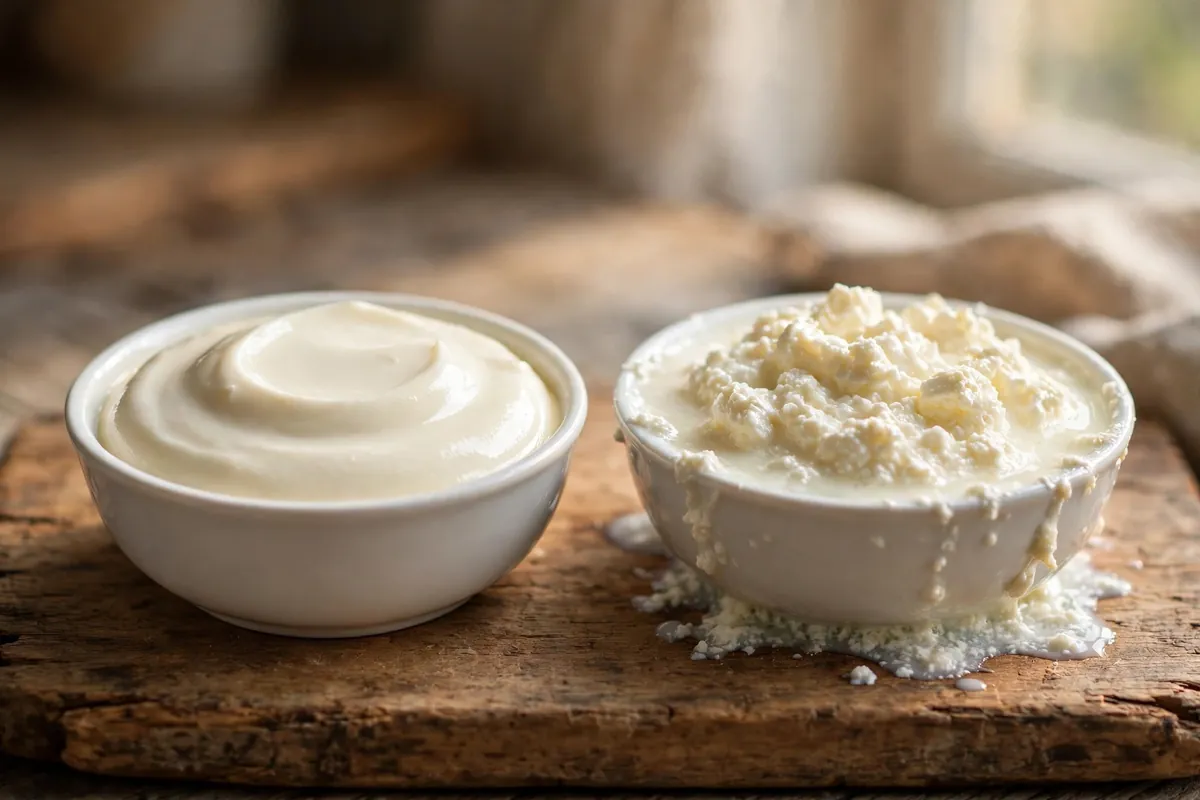
    side-by-side comparison of two small bowls of mascarpone filling, one smooth and glossy, one grainy and weeping liquid
    side-by-side comparison of two small bowls of mascarpone filling, one smooth and glossy, one grainy and weeping liquid

    Can you fix watery tiramisu after it’s assembled?

    Barely. Drain off pooled liquid, chill uncovered for the full 12 hours, and serve in glasses as a trifle-style dessert — it tastes fine even when it won’t slice. The real fix is the next batch: gentle mascarpone, quick dips, overnight chill. Prevention is the entire game here.

    FAQ

    Is watery tiramisu safe to eat?
    Yes, if refrigerated throughout. The liquid is coffee or whey, not spoilage. But it contains eggs and dairy, so never leave it out more than 2 hours and eat within 3 days.

    Can I use gelatin to make tiramisu firmer?
    Yes — 1 teaspoon powdered gelatin bloomed in 2 tablespoons cold water, melted into the warm yolk base, gives insurance-level firmness. Useful for tall molded tiramisu or hot climates.

    Why is my tiramisu grainy?
    The mascarpone broke — overmixed, too warm, or hit with a warm yolk base. Next time stir cold mascarpone by hand for 30 seconds max, with everything else at room temperature or colder.

    Can I make tiramisu without raw eggs?
    Yes — yolks cooked to 160°F (71°C) are food-safe with classic texture. Or skip yolks: mascarpone, whipped cream, and a little sweetened condensed milk, though less rich.

    How long does tiramisu need to chill before serving?
    Minimum 8 hours; 10–12 overnight is ideal for clean slices. Keeps 3 days refrigerated — the flavor deepens on day two.

    Can I freeze tiramisu?
    Yes, up to a month airtight. Thaw overnight in the fridge. Freeze before dusting with cocoa; add it after thawing.

    Related troubleshooting: Why Did My Cheesecake Crack? · Fixing Overwhipped Cream · Why Is My Meringue Weeping?

  • Why Is My Banana Cake Gummy? Mixing and Moisture Fixes

    Why Is My Banana Cake Gummy? Mixing and Moisture Fixes

    Banana cake should be tender, moist, and light enough to layer — the refined cousin of banana bread, not its twin. But it goes gummy with depressing ease: a dense wet streak through the middle, a gluey bottom layer, a crumb that sticks to your teeth. Unlike bread, where density is forgiving, cake is a creamed batter — gumminess means something structural went wrong. It comes down to three things: overmixed batter, too much banana, or an underbaked center.

    Quick diagnosis: Your banana cake is gummy from excess gluten (overmixed after the flour went in), too much banana (bananas are 75% water), or an underbaked center. Mix just until the flour disappears, use no more than 1 to 1½ cups mashed banana for a two-layer cake, and bake to 200–205°F (93–96°C) internal.

    My tested baseline, two 9-inch (23 cm) layers: 340g (2¾ cups) flour, 1½ tsp baking soda, 1 tsp baking powder, 1 tsp salt, 1 tsp cinnamon; 170g (¾ cup) cool-room-temp butter, 300g (1½ cups) granulated + 100g (½ cup) brown sugar; 3 eggs; 240g (1 cup) well-mashed very ripe banana (2–3); 120ml (½ cup) buttermilk; 2 tsp vanilla. Cream butter and sugars 3–4 minutes until pale and fluffy, beat in eggs one at a time, mix in banana, add dries in three additions alternating with buttermilk — start and end with dry, low speed, just until each disappears. Bake at 350°F (175°C) 28–32 minutes.

    1. You overmixed the batter — gluten is the #1 gumminess maker

    In bread you want gluten; in cake, developed gluten kills tenderness. The moment flour meets liquid, gluten forms, and every extra mixer revolution tightens it. Overmixed banana cake doesn’t just toughen — the wet banana amplifies it into that gummy, gluey texture, worst where the batter was worked most.

    How to tell: Dense, slightly elastic crumb rather than crumbly-tender; pale gummy streaks or tunnels; the cake feels wet though a toothpick came out clean.

    The fix: Once flour goes in, mixer on low, stop the instant the last streak vanishes — finish with three or four spatula folds. Sift lumps out before dries meet batter, never beat them out after. (Same gluten discipline as Why Are My Muffins Tough? The Muffin Method Explained.)

    2. You used too much banana — it’s three-quarters water

    This is the trap separating banana cake from banana bread. In bread, an extra banana just adds moisture. In cake — a balanced emulsion — 2 cups of banana where the formula expects 1 adds half a cup of unaccounted water the flour and eggs can’t structure. The excess settles into a gummy bottom layer.

    How to tell: The recipe said “3–4 bananas” without a cup measure (a large banana can be ¾ cup mashed); the batter looked thin before baking; gumminess worst at the bottom.

    The fix: Measure, don’t count: 1 to 1½ cups (240–360g) mashed for a two-layer 9-inch cake. Use heavily speckled to black bananas — sweeter, smoother, incorporating evenly instead of leaving wet pockets.

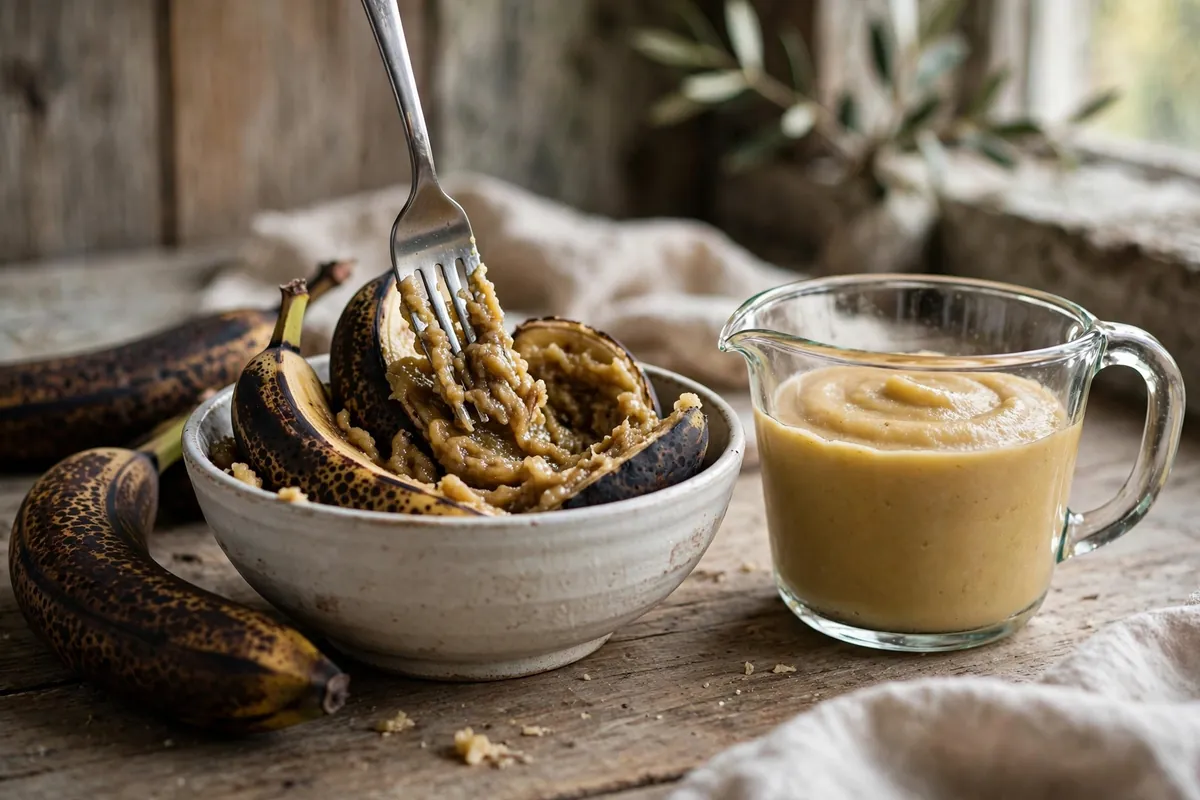
    hands mashing ripe bananas in a bowl next to a measuring cup of mashed banana
    hands mashing ripe bananas in a bowl next to a measuring cup of mashed banana

    3. The center was underbaked — the toothpick lied to you

    Banana batter is wet and heavy, setting from the outside in more slowly than plain cake. The toothpick test is treacherous: clean from the outer two-thirds while the center is a degree from set — and that last degree is the difference between tender and gummy. Underbaked banana cake doesn’t look raw; it just eats wet.

    How to tell: Gumminess concentrated in the center, fading toward the edges; slight sink as it cooled; the center feels cool-damp at room temperature.

    The fix: Bake to temperature, not time: 200–205°F (93–96°C) center. Top springs back when pressed, edges just pulling from the pan. Top browning early? Tent with foil the last 10 minutes. Cool in the pan only 10 minutes — longer and trapped steam sogs the bottom. (Same doneness discipline as Why Did My Cake Sink in the Middle? 7 Causes, Tested Fixes.)

    4. Oil vs. butter isn’t the cause — but it changes the margin of error

    Neither fat causes gumminess, but they forgive different mistakes. Oil coats flour proteins and inhibits gluten — harder to overmix into gumminess. Butter gives better flavor and a finer crumb, but an overmixed butter cake goes gummy faster as the collapsed creamed structure turns dense.

    How to tell: Gummy with oil? The banana quantity or the bake is your problem, not the mixing. Gummy with butter? Check whether you actually creamed a full 3–4 minutes — under-creamed butter never built the aeration that keeps the crumb open.

    The fix: For oil: whisk oil, sugars, eggs, banana, fold in dries gently — simple and forgiving. For butter: cream 3–4 minutes until pale and fluffy, then don’t overmix the flour. I use butter for flavor, oil when baking with kids or in a hurry. (Fat-ratio science: Why Did My Brownies Turn Out Cakey? Fudgy vs Cakey Science.)

    5. The pan was too small or too deep — geometry matters

    Batter for two 9-inch layers, baked in one deep 9×13 or a loaf pan, can’t bake through before the outside over-sets. Exterior looks done, center stays wet — the classic gummy middle, amplified by banana batter’s moisture. Dark pans worsen it by over-browning the outside early.

    How to tell: Edges and top well-browned or dry while the center is gummy; you baked in a different pan than specified.

    The fix: Match pan to recipe. In a 9×13, expect 35–40 minutes; check temperature, not color. In dark or glass pans, drop 25°F (to 325°F / 165°C) so the exterior doesn’t race ahead. (See Glass vs Metal vs Dark Pans: What Changes in Your Bake.)

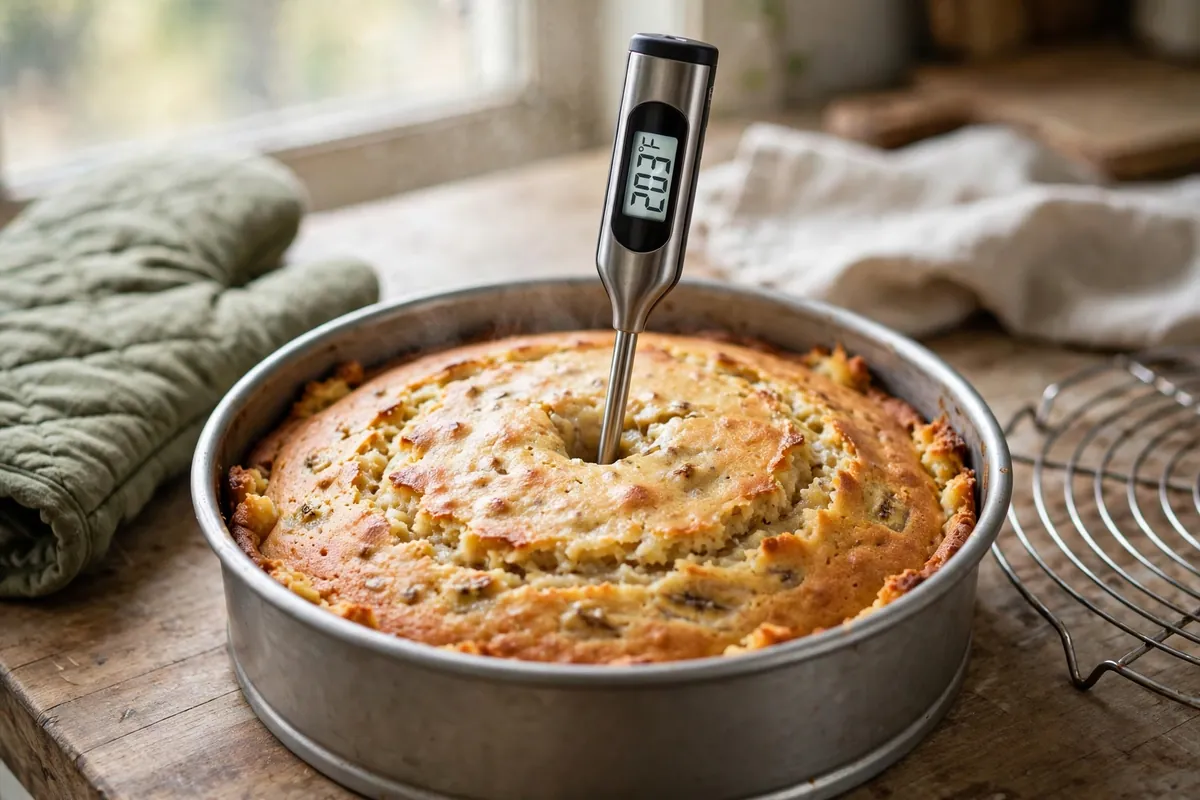
    thermometer probe in the center of a banana cake layer fresh from the oven
    thermometer probe in the center of a banana cake layer fresh from the oven

    Frequently asked questions

    Can I fix a banana cake that’s already gummy?
    Not structurally — but repurpose it: cube, toast at 325°F (165°C) for 15–20 minutes into croutons, and layer into a trifle with whipped cream and caramel. Toasting drives off the excess moisture and the complaint disappears under cream.

    Is gummy banana cake safe to eat?
    Yes, if fully baked — gumminess is texture, not raw batter. If the center tastes of raw flour or egg, it was underbaked; 200°F (93°C) or above on the thermometer means it’s cooked.

    How is banana cake different from banana bread, really?
    Banana bread is a quick bread: muffin method, no creaming, loaf format, density acceptable. Banana cake is a creamed cake: aerated fat and sugar, layered, frosted, expected light and tender. Different recipes sharing a fruit. (Bread version: Why Is My Banana Bread Dense? Quick Bread Fixes.)

    Can I reduce the sugar to fix gumminess?
    Sugar isn’t the cause, and cutting it backfires — sugar tenderizes by interfering with gluten. Under-sugared banana cake is tougher, not less gummy. Fix the mixing, banana quantity, and bake; leave the sugar alone.

    Why does my banana cake have tunnels?
    Tunnels are the signature of overmixing plus too much leavening — the gluten network trapped large gas bubbles that tunneled upward. Same fix as gumminess: gentle mixing, measured leavening, correct banana quantity.

    Should I use baking powder, baking soda, or both?
    Banana batter is acidic, so baking soda is essential — 1 to 1½ teaspoons for a two-layer cake. A little baking powder (about 1 teaspoon) adds insurance lift. Too much of either gives a soapy taste and a fragile crumb that collapses into gumminess.

    Related troubleshooting: Why Is My Banana Bread Dense? Quick Bread Fixes · Why Did My Tres Leches Turn Soggy? Soak Ratios That Work

  • Why Did My Cake Stick to the Pan? Release Methods That Work

    Why Did My Cake Stick to the Pan? Release Methods That Work

    Why Did My Cake Stick to the Pan? Release Methods That Work

    Quick diagnosis: Cake sticks for one of three reasons: the pan wasn’t prepped (no grease/flour or parchment), it was unmolded at the wrong moment (too hot = falls apart, too cool = steams itself stuck), or the pan’s nonstick coating is worn out. Parchment paper rounds eliminate the problem entirely — they’re the single most reliable fix.

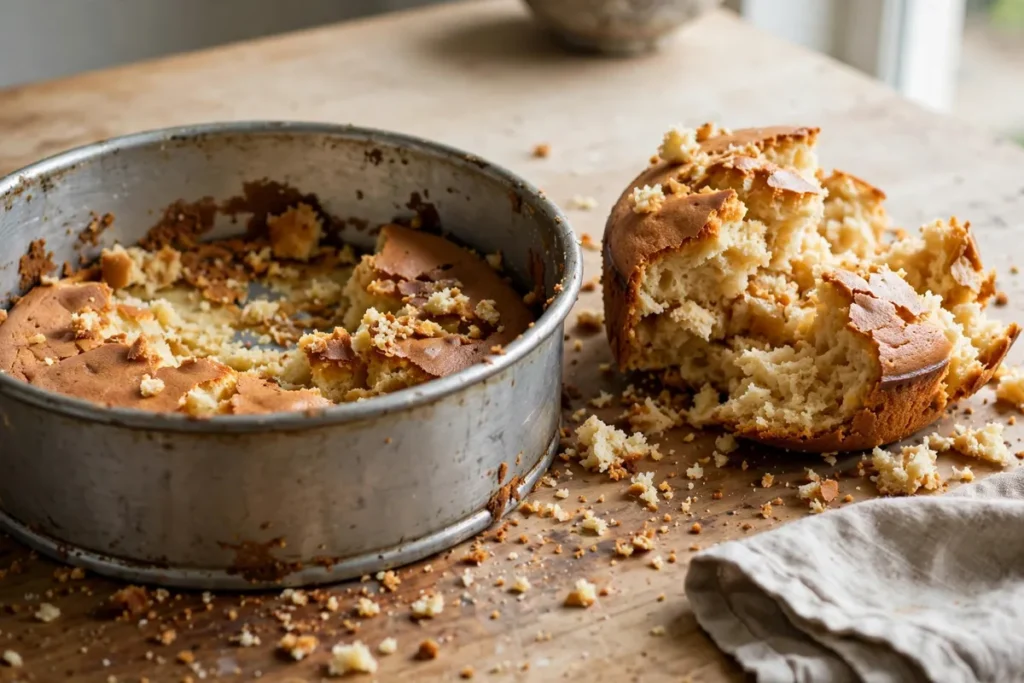
    Torn cake stuck to the pan
    a cake torn apart from sticking, half still in the pan

    A baked cake releases when there’s a barrier between batter and metal. Without one, the cake’s proteins and sugars bond directly to the pan as they set — and sugar, when hot, is essentially glue. Every method below is a version of building that barrier, plus the timing that makes it work.

    1. The pan wasn’t prepped properly

    The classic failure: a quick spritz of oil or nothing at all. A thin oil film isn’t a barrier — it fries into the crumb and bonds. The method that actually works has two layers: fat, then a dry coating.

    How to tell: The cake bonded across the whole bottom and sides, and you greased lightly or not at all.

    The fix: The full prep, every time: coat the pan with softened butter or shortening (get into the corners), then dust with flour and tap out the excess — you want a thin, even film, not clumps. For chocolate cakes, dust with cocoa powder instead of flour so there’s no white residue. This two-layer barrier is what bakeries use, and it has never failed me.

    2. No parchment paper

    Grease-and-flour handles the sides; parchment handles the bottom — the surface with the most contact and the most tearing. A parchment round is cut to fit the pan base exactly, so the cake’s largest surface never touches metal at all.

    How to tell: The sides released fine but the bottom tore off and stayed in the pan.

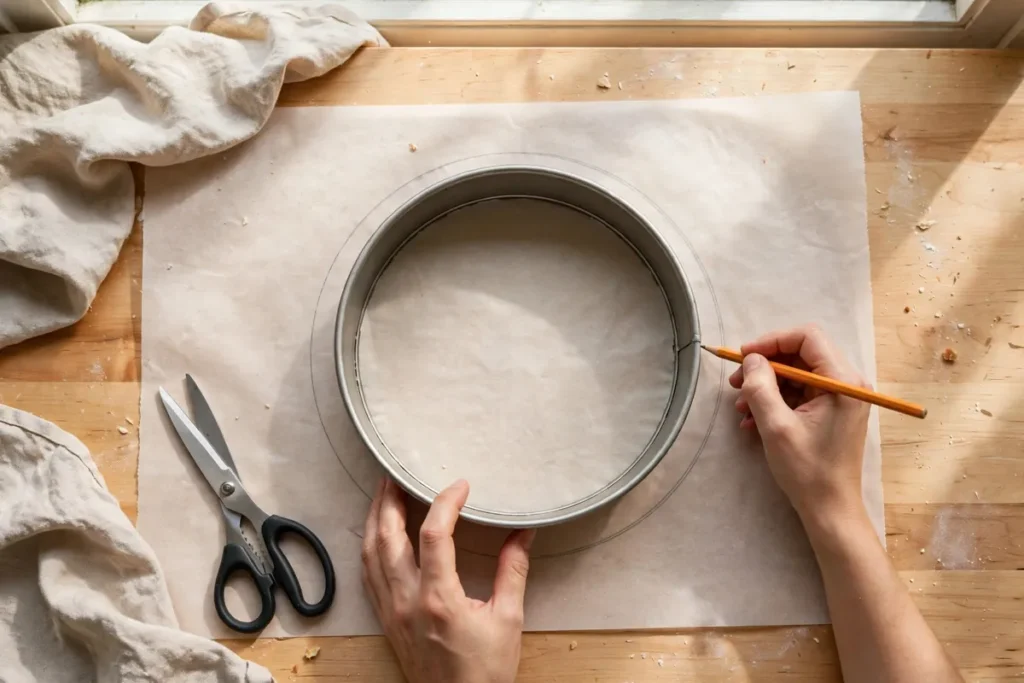
    The fix: Trace the pan on parchment, cut just inside the line, and lay the round in the greased pan (a dab of butter underneath holds it in place). Grease and flour over the parchment too — belt and suspenders. Pre-cut rounds are cheap; keep a stack in every pan size.

    Tracing a cake pan on parchment with a pencil
    tracing a pan on parchment paper with a pencil, scissors beside

    3. It was unmolded too hot — or too cold

    Timing is the second half of release. Invert a cake straight from the oven and the crumb is still fragile steam-held foam — it breaks apart under its own weight. Wait too long and the opposite happens: as the cake cools in the pan, escaping steam condenses between cake and metal, and sugars re-bond to the surface. The window is 10–15 minutes on a wire rack.

    How to tell: It shattered coming out (too hot), or it released from the sides but the bottom vacuum-sealed itself to the pan (too cold — it sat 30+ minutes).

    The fix: Cool in the pan on a rack for 10–15 minutes — no more. Run a thin knife or offset spatula around the edge, place the rack over the pan, and flip confidently in one motion. If it resists, don’t force it: set the pan on a warm damp towel for a minute to loosen, then try again.

    4. The nonstick coating is worn out

    Nonstick isn’t forever. Scratched, overheated, or decade-old coatings lose their release — and the failure is sneaky because the pan looks fine. Metal utensils, abrasive scrubbers, and dishwasher heat all shorten the life. A worn pan sticks worse than bare aluminum because the damaged coating grabs unevenly.

    How to tell: The pan is old, visibly scratched, or food has started sticking in it generally — not just cake.

    The fix: Retire it for baking, or commit to full parchment lining every time (parchment doesn’t care about the coating). When replacing, light-colored aluminum with a parchment round outlasts and outperforms cheap nonstick for cakes.

    5. High-sugar batters need more than grease

    Caramel-like batters — sticky toffee, heavy fruit cakes, anything with melted sugar or honey — laugh at grease-and-flour. Hot sugar bonds to metal at a molecular level; flour just becomes part of the glue.

    How to tell: The recipe is very high in sugar, honey, or syrup, and the stuck layer is glossy and caramelized where it bonded.

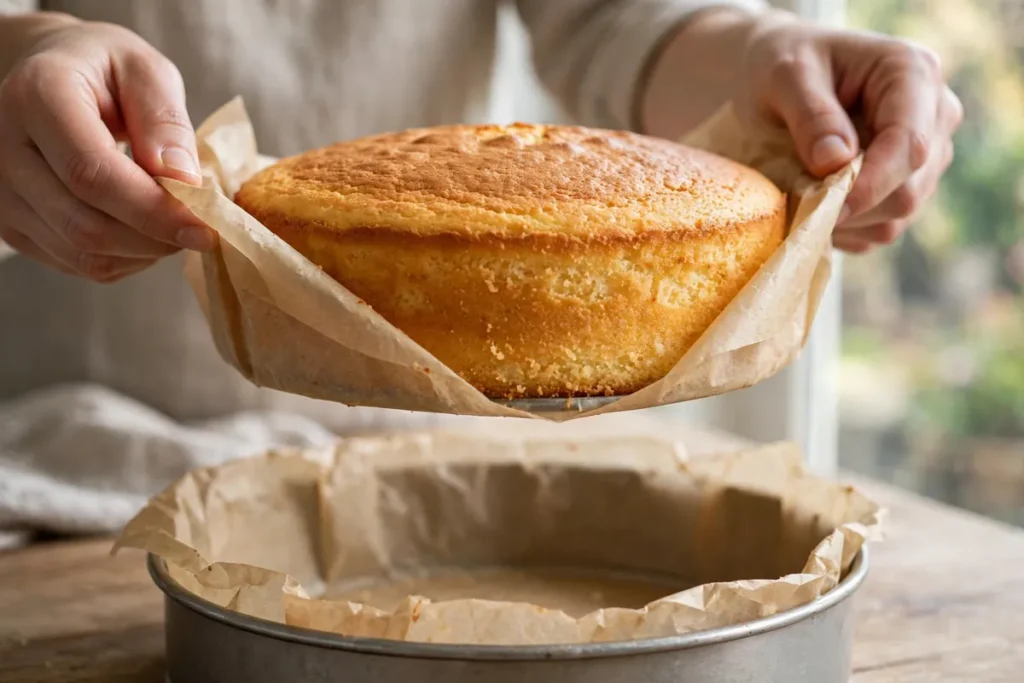
    The fix: Full parchment lining — bottom AND sides (cut a strip for the wall, or use a parchment collar). Grease under and over the parchment. For extreme cases (sticky toffee pudding in particular), this is the only method I trust.

    Cake lifting cleanly from the pan with a parchment sling
    a sticky cake lifting cleanly out of a fully parchment-lined pan

    6. Bundt and shaped pans need crevice-by-crevice prep

    Intricate pans have dozens of tiny ridges where batter locks in mechanically. A spray-and-pray approach misses crevices, and the cake tears at exactly those points.

    How to tell: A Bundt or shaped cake released mostly but tore at the detailed sections.

    The fix: Brush every crevice with melted butter using a pastry brush — don’t spray and hope — then dust thoroughly with flour (or a 50/50 flour-sugar mix, which releases even better on sweet cakes). Tap the pan firmly upside down to remove all excess. Use baking spray WITH flour (not plain oil spray, which polymerizes into a sticky varnish over time). Cool the full 15 minutes before inverting; Bundts are heavy and need the structure.

    Rescue: the cake is stuck right now

    Don’t panic and don’t pry. Run a thin, flexible knife around the entire edge, pressing against the pan. Set the pan on a warm, damp towel for 2–3 minutes — gentle heat softens the sugar bonds. Invert onto the rack and give the pan a firm tap; if it holds, tap the bottom sharply once more. Torn anyway? Frosting is structural spackle: patch tears with a crumb coat, chill 20 minutes, then frost normally. A patched cake under frosting is indistinguishable from a perfect one.

    Offset spatula smoothing frosting over a patched tear
    a torn cake being patched with frosting, the repair invisible after smoothing

    Frequently asked questions

    Can I still use a cake that stuck and tore?
    Yes — this is purely cosmetic. Patch tears with frosting (crumb coat, chill, final coat) and nobody will know. Badly torn layers become trifle, cake pops, or an icebox cake. The flavor is completely unaffected.

    Is butter or baking spray better for greasing pans?
    Baking spray that contains flour is the most foolproof for everyday cakes — one step, even coverage. For shaped pans, brushed melted butter plus flour gets into crevices better. Plain oil spray without flour is the worst option; it can bake into a sticky layer.

    Do I need to grease parchment paper?
    Greasing the pan under the parchment holds it in place; a light grease over the parchment guarantees release. It’s thirty seconds of insurance — I always do both.

    Why did my cake stick even though I greased the pan?
    Usually one of three things: the grease layer was too thin or missed spots, there was no flour/parchment second layer, or the cake cooled too long in the pan and steamed itself stuck. The full method — grease, flour, parchment round, 10–15 minute cool — fails so rarely it’s effectively foolproof.

    Can I fix a stuck cake without tearing it?
    Try the warm damp towel trick: 2–3 minutes of gentle heat under the pan softens sugar bonds. Then the confident single flip. Hesitation and partial lifts cause more tearing than one decisive inversion.

    Related troubleshooting: Why Did My Cake Sink in the Middle? · Cake Domed and Cracked on Top · Why Is My Bread Dense?

  • Why Did My Cheesecake Crack? (And the Water Bath Fix)

    Why Did My Cheesecake Crack? (And the Water Bath Fix)

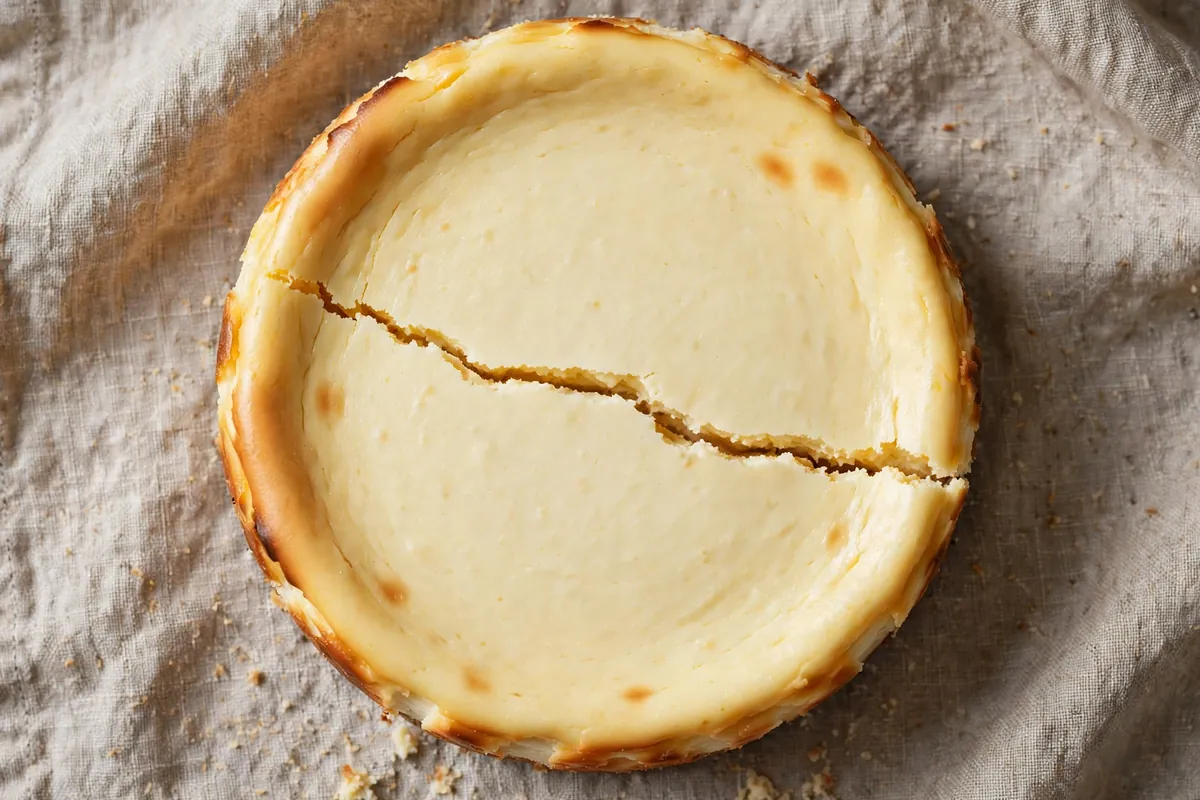
    There’s a special heartbreak reserved for pulling a beautiful cheesecake from the oven, only to watch a crack split across the top as it cools. The good news: cracks are almost always preventable, and even a cracked one is fully salvageable. Here’s the why and the fix.

    Quick diagnosis: Cracked cheesecakes come down to two things in nearly every case: the cheesecake was overbaked, and it cooled too fast. If the center was fully set with no jiggle when you pulled it, and it went straight from oven to counter to fridge, start with causes #1 and #2.

    A crack is a structural failure: the surface set while the interior was still expanding or contracting at a different rate. Cheesecake is a custard, not a cake — it needs gentle heat and gentle cooling. Work through the five causes in order.

    1. It was overbaked

    The number one cause. Cheesecake keeps cooking from residual heat after it leaves the oven — carryover cooking. A cheesecake that’s fully set when you pull it was overbaked ten minutes ago, and overbaked custard contracts as it cools, splitting the surface.

    How to tell: The center didn’t jiggle at all when you gently shook the pan. The top puffed slightly or turned golden-brown. The edges pulled away from the pan sides while still in the oven.

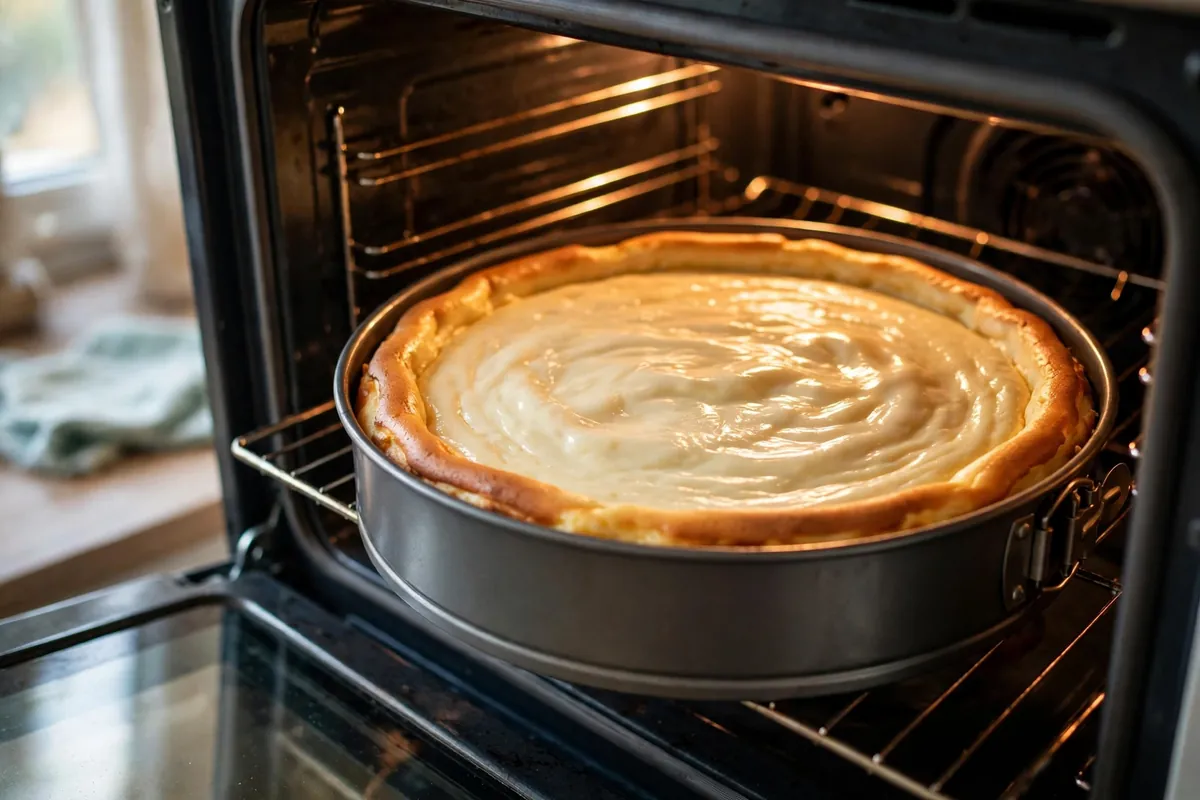
    The fix: Pull the cheesecake when the outer 2–3 inches are set but the center still jiggles like Jell-O — a loose wobble about 2–3 inches across. It looks underdone. It isn’t. Residual heat finishes the job as it cools. If you own an instant-read thermometer, the center should read about 150°F (66°C); carryover takes it the rest of the way. The jiggle test never fails; the thermometer is just confirmation.

    cheesecake in the oven with the center visibly jiggling, oven door open
    cheesecake in the oven with the center visibly jiggling, oven door open

    2. It cooled too fast

    A hot cheesecake moved to a cool counter — or worse, straight into the fridge — experiences thermal shock. The surface contracts rapidly while the center is still hot and expanded. The surface loses, and it loses with a crack.

    How to tell: The crack appeared during cooling, not in the oven. You moved it from oven to counter quickly, or refrigerated it within the hour.

    The fix: Cool in stages. Turn the oven off, crack the door open with a wooden spoon, and leave the cheesecake inside for 1 hour. Then move it to the counter for another hour. Then refrigerate — minimum 4 hours, overnight is better. Slow, boring cooling is the whole secret. Keep it away from drafts and open windows during the counter stage.

    3. The batter was overmixed

    Every minute of beating folds air into the batter. Air expands in the oven heat, puffing the cheesecake up — then collapses as it cools, and the deflating surface cracks. This is the same physics as a fallen soufflé, just slower.

    How to tell: The cheesecake rose noticeably in the oven and then sank. The texture is slightly foamy or mousse-like rather than dense and creamy. You beat the filling on high speed or for a long time.

    The fix: Use room-temperature cream cheese (it blends without aggressive beating — cold cream cheese forces you to overmix). Beat on low speed, only until smooth, scraping the bowl twice. Add eggs last, one at a time, mixing just until each disappears. After pouring, tap the pan firmly on the counter a few times to pop surface air bubbles.

    4. The oven ran too hot

    Most cheesecakes bake at 325°F (163°C). A hot oven sets and browns the edges long before the center catches up — the rigid outer ring then cracks as the still-expanding center pushes against it. Most home ovens run 15–25°F off, usually hot.

    How to tell: The edges browned or puffed while the center was still liquid. Everything you bake seems to finish “early.”

    The fix: Verify with an oven thermometer and bake on the middle rack. If your oven runs hot, 300°F (149°C) with a slightly longer bake is safer than 325°F in a lying oven. This is the same oven-calibration issue behind domed cake tops (see Cake Domed and Cracked on Top).

    5. No water bath

    A water bath (bain-marie) is insulation: the water never exceeds 212°F (100°C), so the cheesecake bakes in gentle, even, humid heat instead of harsh dry oven air. It dramatically reduces cracking — the single highest-leverage technique on this list.

    How to tell: You baked it dry — just the springform on the rack. The top browned, the edges set fast, the texture is slightly drier.

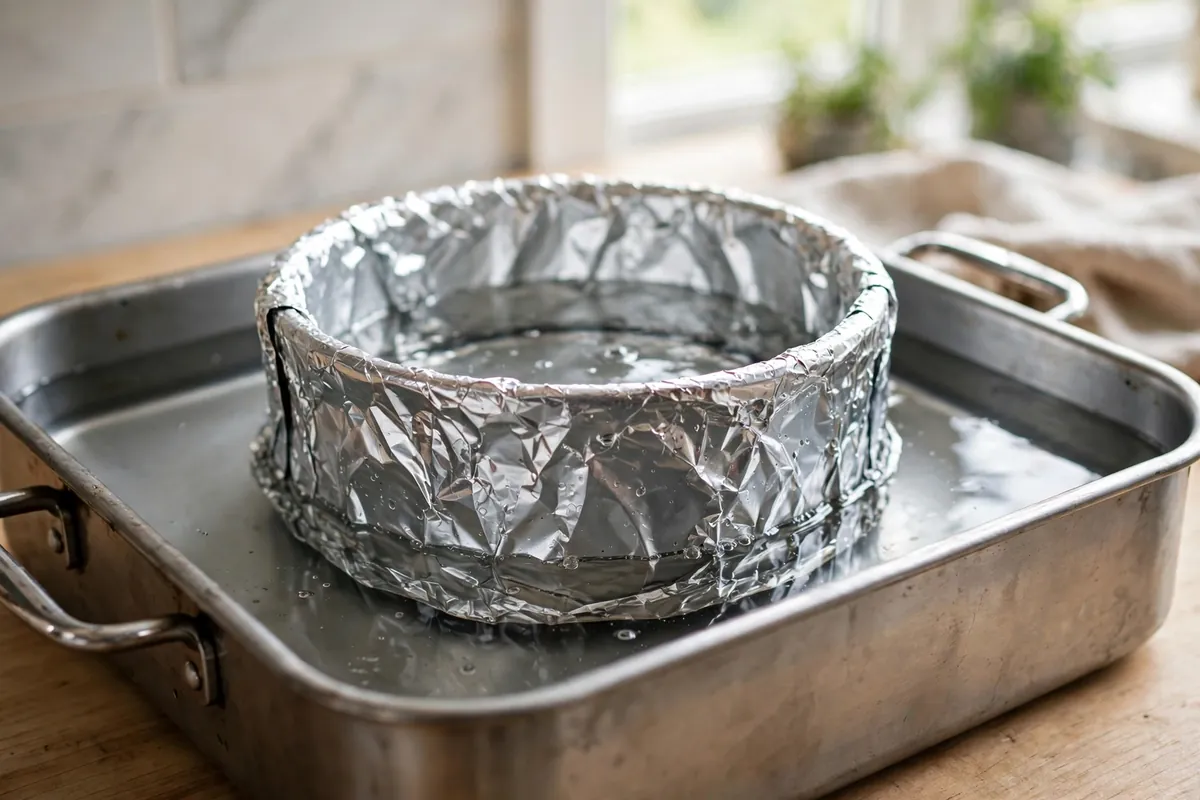
    The fix — the water bath, step by step:
    1. Wrap the outside of your springform pan in 2–3 layers of heavy-duty foil (or a silicone cake-pan wrap). Water must not touch the crust.
    2. Place the wrapped pan in a large roasting pan.
    3. Pour in boiling water until it comes halfway up the sides of the springform.
    4. Bake at 325°F (163°C) until the edges are set and the center jiggles (see cause #1).
    5. Cool in stages per cause #2 — the water bath doesn’t excuse fast cooling.

    No roasting pan? Place a pan of hot water on the rack below the cheesecake. It’s not a true water bath but adds humidity and softens the heat — a meaningful halfway measure.

    springform wrapped in foil sitting in a roasting pan with water halfway up the sides
    springform wrapped in foil sitting in a roasting pan with water halfway up the sides
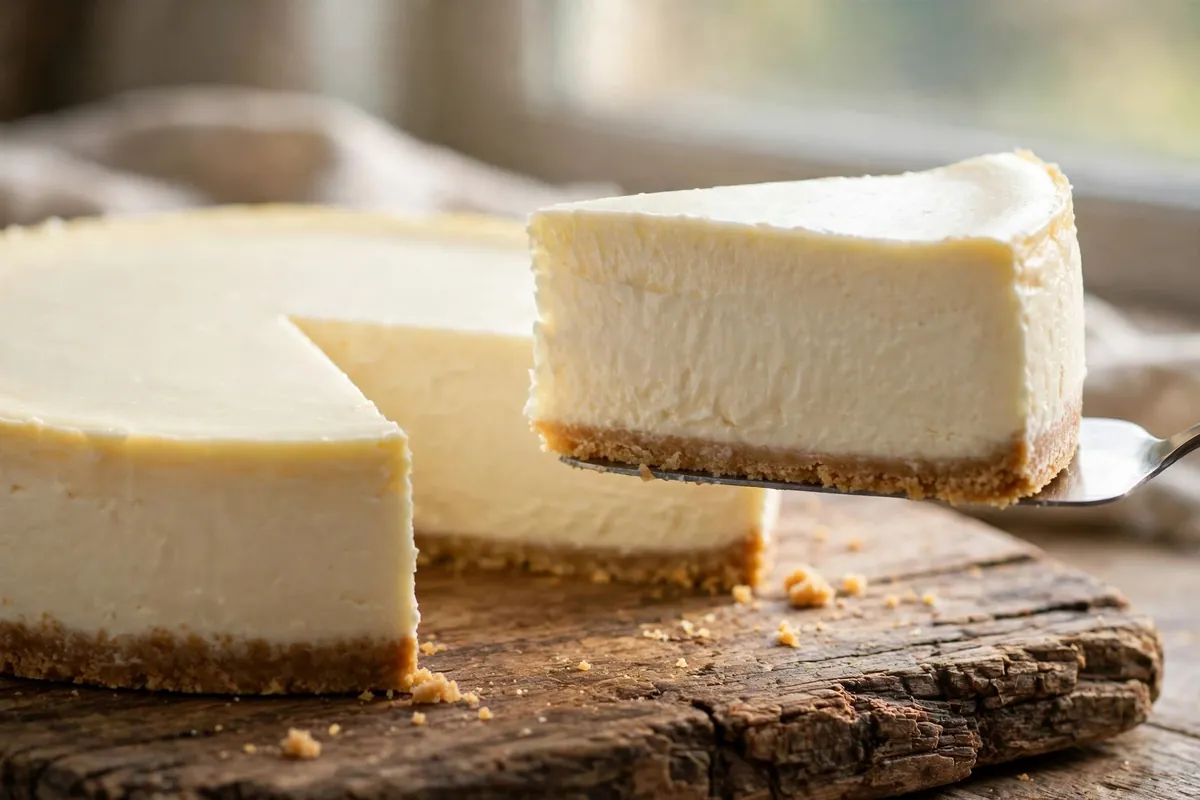
    slicing into a perfectly smooth, crack-free cheesecake showing dense creamy interior
    slicing into a perfectly smooth, crack-free cheesecake showing dense creamy interior

    Can I fix a crack that’s already there?

    Yes — cracks are cosmetic, and the cheesecake underneath is perfectly good. The classic cover: whisk 1 cup sour cream with 2–3 tablespoons sugar and 1 teaspoon vanilla, spread it over the cooled cheesecake, and bake 5 minutes at 450°F (232°C). It sets into a smooth, tangy glaze that hides everything. No sour cream? A fruit compote, chocolate ganache, or a pile of macerated berries does the same job deliciously. Nobody will know.

    Frequently asked questions

    Is a cracked cheesecake safe to eat?
    Completely. A crack is a cosmetic structural issue, not a food-safety one. If it baked through and was refrigerated properly, it eats exactly as good as a flawless one — it just photographs worse.

    Can I put it back in the oven to fix the crack?
    No — reheating won’t fuse a crack closed, and it risks overbaking the whole cheesecake. Cover it instead: the sour-cream glaze above, ganache, or fruit topping. The fix is camouflage, and it’s delicious camouflage.

    Do I really need a water bath?
    It’s the most reliable crack prevention, but not the only path. A low, slow bake at 300°F (149°C) with a pan of hot water on the lower rack, plus staged cooling, gets you most of the way there. If you bake cheesecake more than twice a year, though, learn the water bath — it’s fifteen minutes of setup for insurance.

    Why did my cheesecake crack even with a water bath?
    The water bath controls heat, not time or cooling. The usual culprits: it was still overbaked (no jiggle when pulled), or it cooled too fast afterward. Run through causes #1 and #2 — the bath only does its half of the job.

    Springform pan or regular pan?
    Springform, always — you can’t slice a cheesecake out of a regular pan cleanly. Wrap it well for the water bath, and if your springform leaks, set it inside a slightly larger cake pan before wrapping.

    Related troubleshooting: Why Did My Cake Sink in the Middle? · Make-Ahead Thanksgiving Desserts: A Baker’s Timeline

  • Cake Domed and Cracked on Top — Oven Temp and Pan Fixes

    Cake Domed and Cracked on Top — Oven Temp and Pan Fixes

    Cake Domed and Cracked on Top — Oven Temp and Pan Fixes

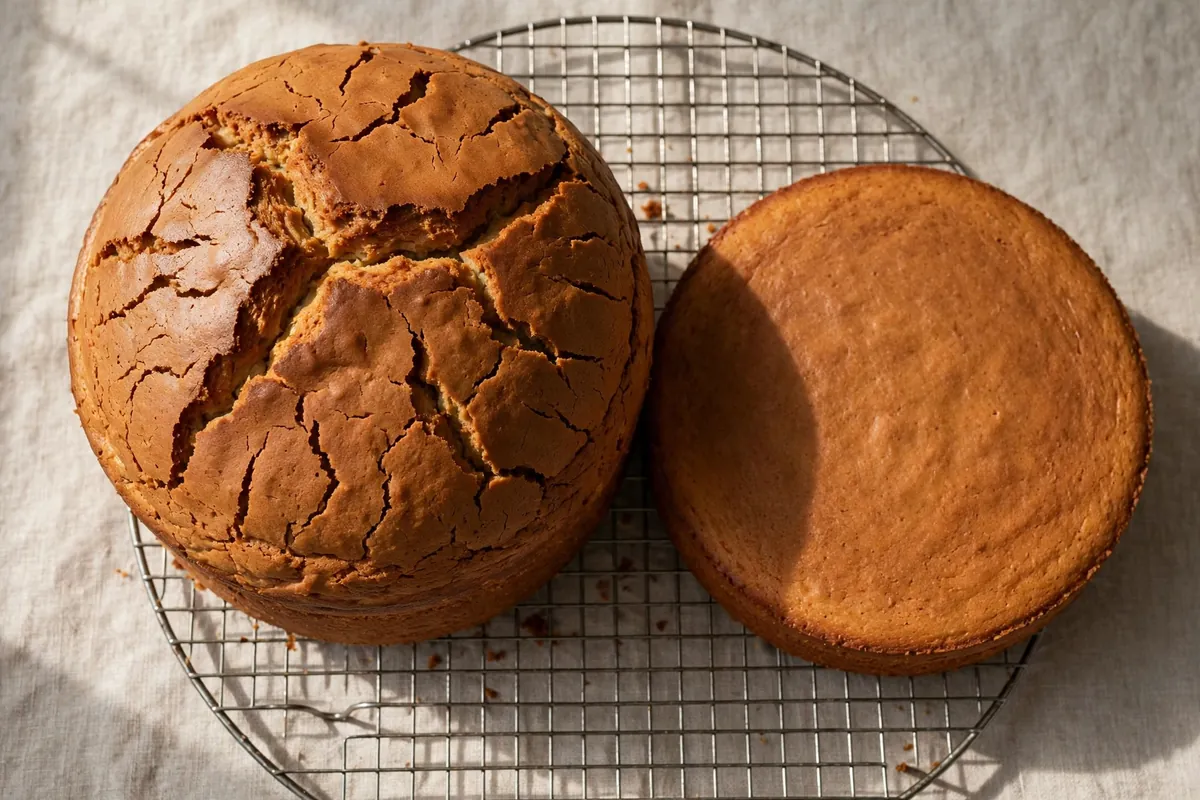
    Quick diagnosis: A dome with a crack means the edges set before the center finished rising — almost always an oven running too hot, the wrong rack position, or no insulation on the pan sides. Drop the temperature 25°F (15°C) and move to the center rack first; that fixes most cases.

    Domed cracked cake beside a flat-topped cake, overhead view
    top-down view of a domed, cracked cake next to a flat-topped cake

    Here’s the mechanism: batter at the edges of the pan heats first and sets into a firm ring. The center stays fluid longer and keeps rising on leavening gases — pushing up through the path of least resistance, which is the still-soft middle. The faster the edges set relative to the center, the bigger the dome; push it far enough and the stretched surface splits. Every fix below slows the edges down or cools the whole bake so the cake rises evenly.

    1. The oven was too hot

    The single biggest cause. At high heat the outer inch of batter sets within minutes while the middle is still raw and expanding. The center has nowhere to go but up, and the already-firm top crust cracks under the pressure. Bake the same vanilla batter at 375°F (190°C) versus 325°F (163°C): the hot bake domes nearly an inch; the cooler bake comes out nearly level.

    How to tell: Big dome, deep crack, dark or thick crust on the sides. The cake may also have a slightly dry edge (see Why Is My Cake Dry?).

    The fix: Verify your actual temperature with an oven thermometer — most home ovens are off by 25°F (15°C). Bake at a true 325–350°F (163–175°C) for most butter cakes, on the center rack. Lower and slower gives the center time to rise with the edges instead of against them.

    2. Wrong rack position

    Heat in a home oven is not even: the top runs hotter (especially with an upper element or in small ovens), the bottom runs hotter near the lower element. A cake on the top rack gets blasted from above — the surface sets early into a crust, then the still-rising middle shoves straight through it.

    How to tell: The top browned fast and formed a firm skin early, while the middle kept visibly rising underneath it.

    The fix: Center rack, always, for cakes — it gives the most even top-to-bottom heat. If your oven has a noticeable hot spot (one side always browns first), rotate the pan once, quickly, at the three-quarter mark.

    3. Dark or nonstick pans

    Dark metal absorbs radiant heat far more aggressively than light aluminum — the edges of the batter can run 25°F (15°C) hotter than the center. Nonstick coatings are usually dark for the same reason. That extra edge heat sets the perimeter fast and the dome follows.

    How to tell: You’re using dark gray/black or nonstick pans, and the sides of your cakes are noticeably darker and thicker-crusted than the tops.

    The fix: Drop the oven temperature by 25°F (15°C) when using dark or nonstick pans, or switch to light-colored aluminum — the professional standard for even baking. Either way works; just don’t bake a dark pan at the recipe’s light-pan temperature.

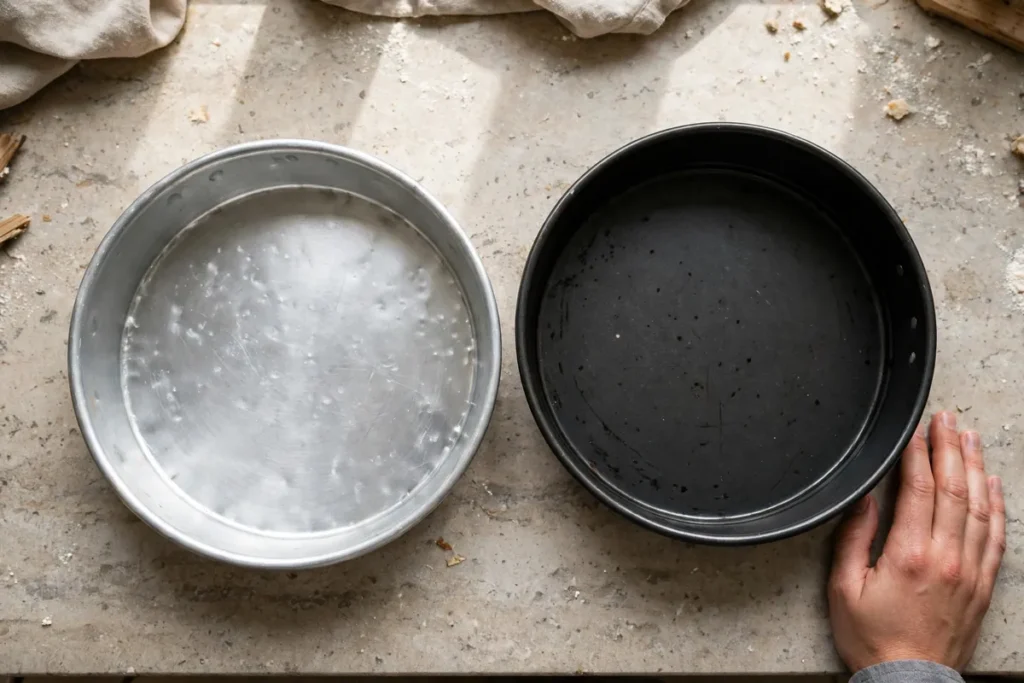
    Light aluminum pan beside a dark nonstick pan
    light aluminum pan vs dark nonstick pan side by side, empty

    4. Too much batter in the pan

    A pan filled to the brim leaves the batter with enormous vertical room to climb. Deep batter also bakes unevenly — the same depth problem that sinks centers (see Why Did My Cake Sink in the Middle?) pushes domes upward instead when the oven is hot.

    How to tell: The batter was near the rim before baking, or the dome rose well above the pan’s edge.

    The fix: Fill pans one-half to two-thirds full. More than that and you’re fighting physics. Split deep batters across two pans for layer cakes — thinner layers bake flatter and more evenly anyway.

    5. Too much leavening

    Excess baking powder or soda generates more gas than the batter structure can gracefully contain. The center, being last to set, takes the full force of that extra lift. This is the same over-leavening that collapses cakes when the structure can’t keep up — here it domes them when the oven is hot enough to set the top mid-rise.

    How to tell: Dramatic rise, coarse open texture near the dome, sometimes a soapy aftertaste.

    The fix: About 1 teaspoon baking powder per cup (120g) of flour, leveled with proper measuring spoons. Replace baking powder older than 6–12 months instead of compensating with extra.

    6. No insulation on the pan sides (baking strips)

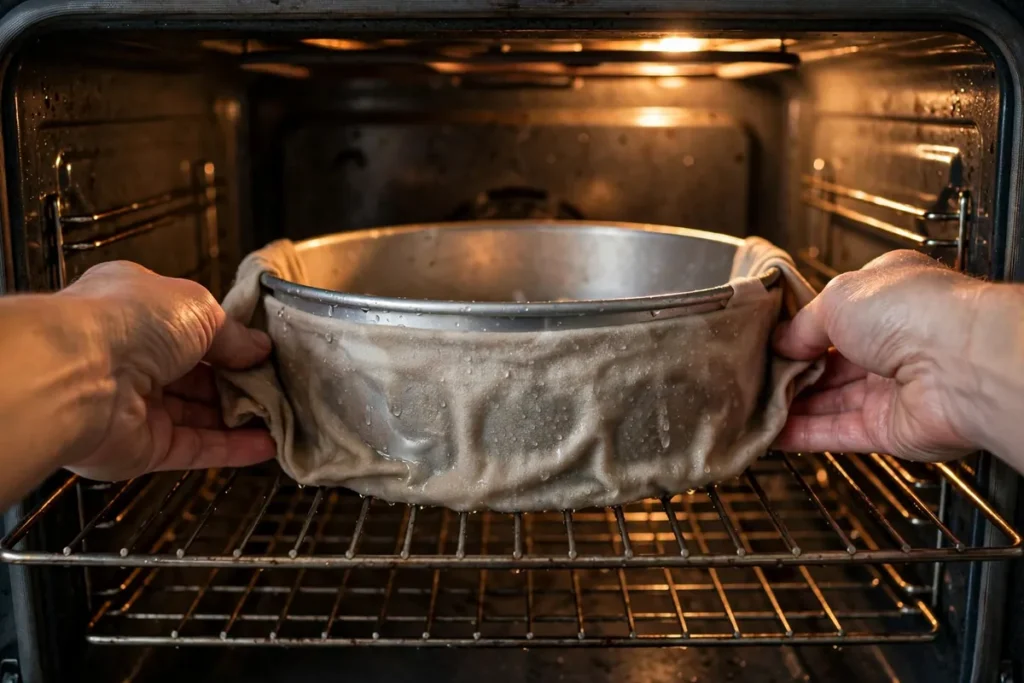
    This is the professional fix most home bakers never hear about. A wet fabric baking strip wrapped around the pan insulates the sides, so the edges heat at nearly the same rate as the center. The whole cake rises as one level sheet instead of edges-first. In side-by-side tests, the stripped pan consistently produces the flatter cake.

    How to tell: You’ve fixed temperature, rack, and pans, and still get a mild dome — or you just want reliably level layers for stacking.

    The fix: Buy reusable baking strips (soak in water, wring lightly, wrap and pin around the pan), or DIY: fold wet paper towels into a strip, wrap in foil, and secure around the pan. They add a few minutes to the bake — start checking at the normal time and expect up to 5 extra.

    Cake pan wrapped in a wet baking strip going into the oven
    pan wrapped in a wet baking strip going into the oven

    What to do with a domed cake right now

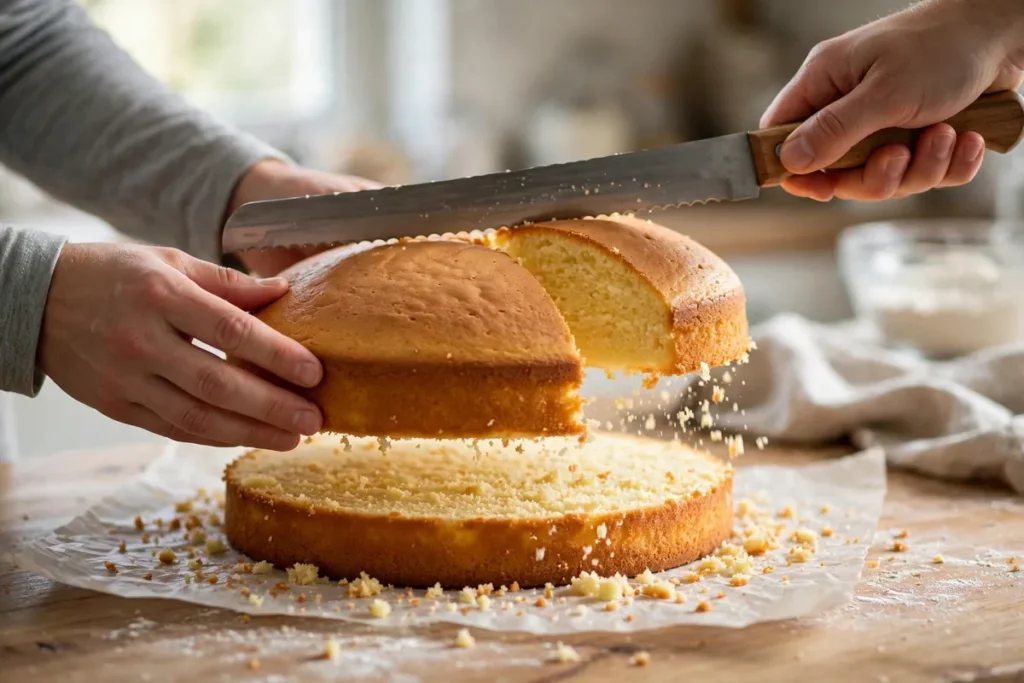
    Level it. A long serrated knife (or a cake leveler) sawn gently across the top takes the dome off in one pass — let the knife do the work, don’t press down. Save the trimmings: domed tops are baker’s snacks, or blitz them into cake crumbs for trifles and cake pops. And here’s the secret professionals won’t admit: nearly every tall layer cake in a bakery started with a dome. Level layers actually stack better than “perfect” ones because the cut surface grips frosting.

    Frequently asked questions

    Is a cracked cake ruined?
    No — it’s a cosmetic issue. The crack is on top, which gets leveled or becomes the bottom layer. Flavor and texture are unaffected. Level it, frost it, and nobody will ever know.

    Why does my cake dome in the middle but the recipe photo is flat?
    Recipe photos are styled — and often leveled before shooting. But the technical answer is even heat: test kitchens use calibrated ovens, light aluminum pans, and correct batter depth. Match those three and your cakes will come out nearly as flat.

    Can I prevent doming without buying baking strips?
    Yes: true 325–350°F (163–175°C) on the center rack, light-colored pans, batter filled two-thirds max. That combination prevents most doming. Strips are the upgrade for reliably dead-flat layers, not a requirement.

    Should I cut the dome off while warm or after cooling?
    After cooling — a warm cake crumbles and tears under the knife. Cool the layer completely (or chill 30 minutes), then level with a long serrated knife using a gentle sawing motion.

    Does a dome mean my cake will taste bad?
    Not at all. Doming is about heat distribution, not flavor. The crumb under a dome is usually perfectly good — sometimes the dome itself is the tastiest part, with its caramelized top.

    Hands leveling a cake layer with a serrated knife
    hands leveling a cooled cake layer with a long serrated knife, crumbs falling

    Related troubleshooting: Why Did My Cake Sink in the Middle? · Why Is My Cake Dry? · Why Is My Bread Dense?

  • Why Is My Cake Dry? Moisture Science for Home Bakers

    Why Is My Cake Dry? Moisture Science for Home Bakers

    Why Is My Cake Dry? Moisture Science for Home Bakers

    Quick diagnosis: Dry cake is almost always overbaked or over-floured. If the edges are dark and the crumb is tough, it baked too long or too hot. If the texture is fine but just parched, check your flour measuring — a scooped cup can pack in 25% too much flour.

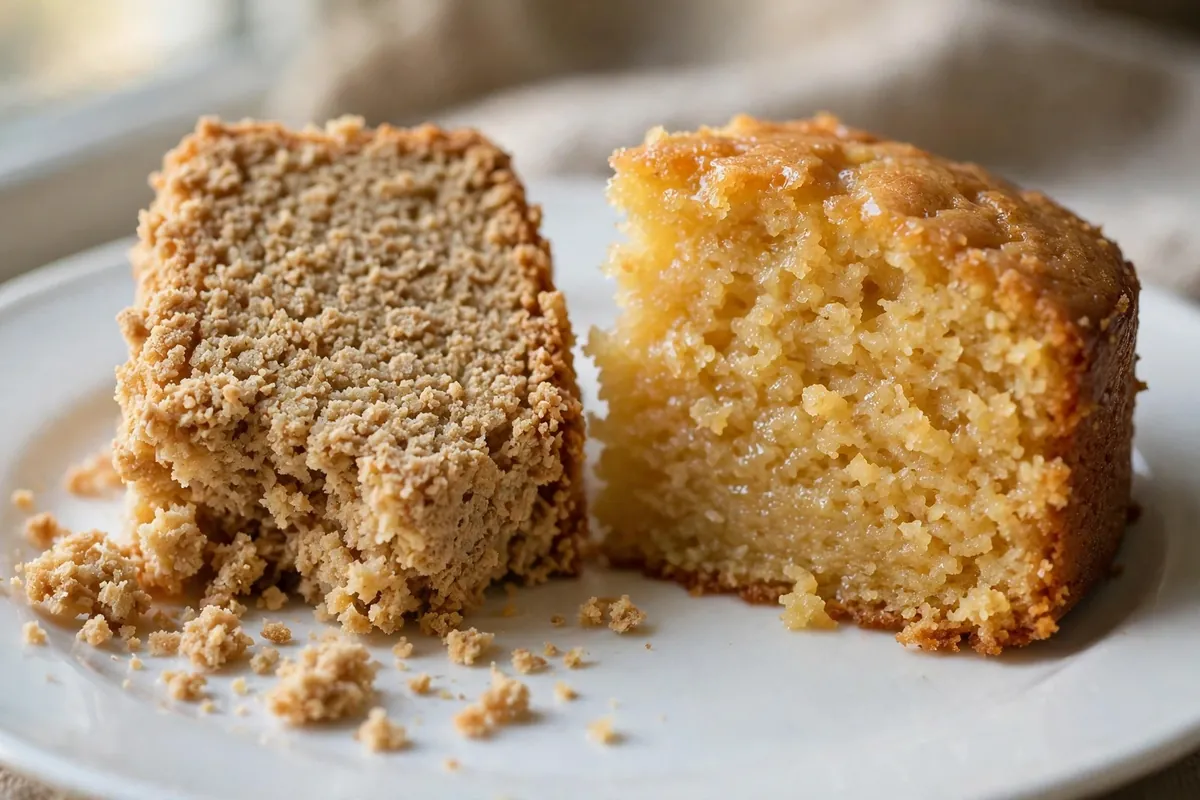
    Dry crumbly cake slice beside a moist tender slice
    close-up of a dry, crumbly cake slice next to a moist, tender slice

    Moisture in cake isn’t just water — it’s a partnership between water, sugar, and fat. Sugar is hygroscopic: it grabs water and holds it in the crumb. Fat coats flour proteins, slowing gluten for a tender texture. Eggs emulsify it all. Shortchange any partner and the cake dries out.

    1. It was overbaked

    The number one cause, by a wide margin. Cake goes from perfectly moist to dry in about five minutes — the line between “moist crumbs on the toothpick” and “bone dry” is razor thin at the end of a bake. Recipes give ranges for a reason; ovens vary.

    How to tell: Dark, firm edges, a dry surface, cottony crumb. The toothpick came out completely clean — which most bakers misread as “done” when it means “done five minutes ago.”

    The fix: Start checking 5–8 minutes before the earliest time in the range. The target is a toothpick with a few moist crumbs clinging — not wet batter, not clean. An instant-read thermometer removes the guesswork: most butter cakes are done at 200–210°F (93–99°C) in the center. And calibrate your oven with a thermometer; a hot oven overbakes everything on schedule (see Cake Domed and Cracked on Top).

    2. Too much flour

    Flour is the usual suspect behind “I followed the recipe exactly.” Scooping the measuring cup straight into the flour bag compacts it — a scooped cup can weigh 150g versus the 120g the recipe assumed. That’s 25% extra flour silently absorbing moisture meant for the crumb. In side-by-side tests, the scooped-flour cake comes out visibly drier and denser.

    How to tell: The batter looked thick and stiff rather than pourable, and the baked crumb is dense as well as dry.

    The fix: Weigh flour — 120g per cup, every time. No scale? Spoon it into the cup and level off; never scoop. This one habit fixes more dry cakes than any recipe change.

    3. Not enough fat or sugar

    Fat and sugar aren’t just flavor — they’re moisture infrastructure. Fat coats flour proteins so less gluten forms (tender crumb) and adds richness that reads as moistness. Sugar holds water in the crumb for days. “Healthier” swaps — cutting the butter, slashing the sugar, replacing oil with applesauce — reliably produce drier cake.

    How to tell: You reduced fat or sugar from the recipe, or used a “light” recipe that was dry from the start.

    The fix: Keep the recipe’s fat and sugar ratios intact. Oil-based cakes stay moist longer than butter cakes (oil is liquid at room temperature; butter firms up) — if moistness is the priority, choose oil-based recipes. Add moisture after baking instead of cutting structure before it: a simple-syrup soak is the professional fix (more below).

    Brushing simple syrup onto a cake layer
    brushing simple syrup onto a cake layer with a pastry brush

    4. The wrong flour

    Protein content decides crumb texture. Cake flour (7–9% protein) gives a fine, tender crumb. All-purpose (10–12%) is the safe middle. Bread flour (12–14%) builds strong gluten — great for chew in bread, terrible in cake: tough, dry-feeling crumb. Using bread flour, or a high-protein all-purpose, dries out the eating experience even at correct moisture.

    How to tell: The crumb is tough and bready rather than tender, especially in a recipe that should be delicate.

    The fix: Use the flour the recipe specifies. If you only have all-purpose and want a more tender crumb, replace 2 tablespoons of flour per cup with cornstarch — a reasonable homemade cake-flour approximation. Never use bread flour for cake.

    5. Over-mixing the batter

    Once flour meets liquid, gluten starts forming. Beat it too long and you build a strong gluten network — the crumb turns tough and elastic, and tough crumb tastes dry even when the moisture content is technically fine. Mouthfeel is half of perceived moistness.

    How to tell: The crumb is rubbery or tunnels run through it, and the cake bounced back aggressively when pressed.

    The fix: Mix on low speed only until the flour disappears, then finish by hand. The creaming stage (butter + sugar) is where vigorous beating belongs — after flour goes in, restraint wins. This is the same principle behind dense bread from over-kneaded dough (see Why Is My Bread Dense?).

    6. The oven was too hot

    High heat drives moisture out of the crumb before the interior finishes baking. The outside over-browns, the inside dries, and you get a cake that’s both dark and parched. Convection/fan ovens run effectively hotter — a fan oven set to 350°F (175°C) behaves like 375°F (190°C) conventional.

    How to tell: Dark crust, dry crumb, and the cake finished well before the recipe’s minimum time.

    The fix: Verify with an oven thermometer and reduce by 25°F (15°C) for fan/convection or dark pans. Bake on the center rack for even heat.

    7. It was stored wrong

    A perfect cake dries out in hours if left uncovered — the crumb’s moisture migrates straight into dry room air. Slicing exposes even more surface. Refrigeration makes it worse: cold accelerates starch retrogradation (staling), so fridge-stored cake tastes dry and stale fast.

    How to tell: The cake was moist on day one and dry by day two, sitting cut-side exposed or uncovered.

    The fix: Wrap layers tightly in plastic while still slightly warm — the trapped steam redistributes into the crumb. Press plastic wrap directly against cut surfaces. Store at room temperature for up to 2 days; freeze (double-wrapped) for longer. Only refrigerate cakes with perishable fillings, and bring slices to room temperature before serving.

    The professional rescue: simple-syrup soak

    If the cake is already baked and dry, don’t despair — bakeries fix this routinely. Simmer equal parts sugar and water (1:1) until the sugar dissolves, cool it, and brush it generously over each layer before frosting. A standard 8-inch layer takes 2–3 tablespoons. The syrup soaks in within minutes and the cake tastes freshly moist. Flavor it if you like: a splash of vanilla, citrus zest, or espresso for chocolate cake. This is the same trick that saves an overbaked sponge every time.

    Syrup-soaked cake cross-section with even moist crumb
    cross-section of a syrup-soaked cake layer showing even moist crumb

    Frequently asked questions

    Can I still eat a dry cake?
    Absolutely — dry is a texture problem, not a safety problem. Serve it with ice cream, custard, or fruit compote, or convert it into a trifle. Nobody complains about dry cake buried under whipped cream.

    Why is my cake dry even though I followed the recipe?
    The most likely culprit is flour measurement — scooped versus weighed flour is the biggest silent variable in home baking. Second is oven temperature: if your oven runs hot, “following the recipe” still overbakes. Fix those two and most mystery dryness disappears.

    Does sour cream or yogurt really make cake moister?
    Yes — they add both moisture and acidity, and acid tenderizes crumb by weakening gluten slightly. Buttermilk, sour cream, or full-fat yogurt in place of some milk is one of the most reliable moistness upgrades. Use full-fat versions; nonfat adds water without the tenderizing fat.

    Can I fix a dry cake after baking?
    Yes — the simple-syrup soak above is the standard professional fix. Brush 2–3 tablespoons of cooled 1:1 syrup onto each layer before frosting. For cupcakes, a light brush on the tops works the same way.

    Why does my cake dry out the next day?
    Moisture migrates from crumb to air, and starch retrogradation (staling) firms the crumb — refrigeration accelerates both. Wrap tightly in plastic while slightly warm, keep cut faces covered, and store at room temperature. Oil-based cakes stale noticeably slower than butter cakes.

    Related troubleshooting: Why Did My Cake Sink in the Middle? · Cake Domed and Cracked on Top · Why Is My Bread Dense?

  • How to Fix Broken Buttercream (Curdled, Soupy, Too Sweet)

    How to Fix Broken Buttercream (Curdled, Soupy, Too Sweet)

    You’re halfway through frosting a cake when the buttercream turns. One minute it’s coming together; the next it’s a curdled, lumpy mess — or a sad soup sliding off the spatula — or so sweet it makes your teeth ache. Before you throw the bowl in the sink: broken buttercream is almost always fixable. I’ve rescued every version of this failure, and the fix depends entirely on which break you’re looking at. Diagnose first, then rescue.

    Quick diagnosis: Curdled and lumpy? The butter was too cold — warm the bowl and keep beating, it almost always comes together. Soupy and slide-y? The butter was too warm or there’s too much liquid — chill 15–20 minutes, then re-whip. Way too sweet? A pinch of salt and a spoonful of cream fix more than you’d think; details below.

    Buttercream is an emulsion: fat, sugar, and a little liquid beaten into a stable foam. Every break is that emulsion failing for a specific reason — temperature, ratio, or technique. Fix the reason and the emulsion reforms. Here’s each failure and its rescue.

    1. Curdled and lumpy — the butter was too cold

    The most common break and the easiest to fix. Cold butter (straight from the fridge, or a cold kitchen) can’t emulsify smoothly — the fat stays in distinct lumps while the sugar and liquid form a separate thin base around them. It looks like cottage cheese and feels like a disaster. It isn’t.

    How to tell: Distinct lumps of butter suspended in a thinner, almost watery base. The butter was cold to the touch when you started, or your kitchen is cool.

    The fix: Warm it gently and keep beating. The single most reliable rescue: warm the outside of the mixing bowl with your hands, a warm towel, or 10-second bursts of a hairdryer on low while the mixer runs on medium. As the butter softens to the right temperature, the lumps melt into the emulsion — you’ll literally watch it come together, usually within 2–3 minutes. Don’t add anything; don’t start over. Just warmth + time. When I first learned this, I stopped throwing away curdled batches entirely — I’ve never had one fail to come back.

    2. Soupy and melting — the butter was too warm

    The mirror image. Butter above about 72°F (22°C) is too soft to hold air — instead of a fluffy emulsion you get sweetened grease that slides off the spatula and won’t hold a swirl. Warm kitchens, butter left out for hours, or liquid added too fast all cause this.

    How to tell: Shiny, loose, almost pourable frosting. It won’t hold peaks or piped shapes; it slumps within seconds. The butter felt soft and greasy before you started.

    The fix: Chill, then re-whip. Refrigerate the whole bowl 15–20 minutes until the edges firm up but the center is still workable — then beat on medium-high for 2–3 minutes. The re-whip rebuilds the air structure now that the fat is firm enough to hold it. If it’s still soft, chill another 10 minutes and repeat. Don’t add more powdered sugar to “thicken” soupy buttercream — you’ll just make sweet soup. Temperature is the problem; temperature is the fix. (For a full guide to heat-stable frosting, see Dairy-Free Frosting That Holds Its Shape — the same principles apply.)

    hands piping a swirl of smooth buttercream onto a cupcake
    hands piping a swirl of smooth buttercream onto a cupcake

    3. Grainy — the sugar never dissolved into the fat

    Grainy buttercream has a sandy mouthfeel: tiny undissolved sugar crystals throughout. This happens when the powdered sugar goes in too fast, the butter wasn’t beaten smooth first, or (common with older powdered sugar) the sugar absorbed moisture and formed micro-clumps.

    How to tell: It looks smooth-ish but feels gritty on the tongue. Rub a dab between your fingers — you’ll feel the grains.

    The fix: Two options. The reliable one: add liquid one teaspoon at a time (cream or milk), beating a full minute after each — the extra moisture dissolves the crystals. Usually 1–2 teaspoons does it. The thorough one: sift your powdered sugar before it goes in. I sift every time now — it takes 60 seconds and prevents the problem entirely. If the graininess came from clumped old sugar, sifting is the only real fix; no amount of beating dissolves actual lumps.

    4. Too sweet — rebalance, don’t dilute

    American buttercream is inherently sweet (it’s mostly powdered sugar by weight), but sometimes it crosses into inedible: teeth-aching, throat-catching sweet. The instinct is to add more butter — resist it. More butter without rebalancing just makes sweet butter.

    How to tell: You taste sugar first, second, and third; no butter flavor, no depth.

    The fix, in order of impact:
    1. Salt — ¼ teaspoon per 3 cups of powdered sugar. Salt doesn’t make frosting salty; it suppresses the flat one-note sweetness and lets the butter and vanilla come forward. This single addition fixes most “too sweet” complaints.
    2. A spoonful of cream or milk (1–2 tablespoons). Liquid dilutes the sugar concentration slightly and improves mouthfeel.
    3. Acid — a teaspoon of lemon juice or a tablespoon of cream cheese. Acidity cuts sweetness perception sharply. Cream cheese especially: it adds tang and body while reducing the sugar ratio.
    4. If it’s truly beyond saving: beat in 4 oz (115g) of softened cream cheese. It transforms the frosting into something closer to cream cheese frosting — tangy, less sweet, still pipeable. Different frosting, saved dessert.

    5. Separated after adding flavoring — liquid went in too fast

    Melted chocolate, fruit purée, coffee, or liqueur added all at once can shock a stable emulsion into separating — the extra liquid overwhelms the fat’s ability to hold it, and you get a weeping, split mess.

    How to tell: The buttercream was smooth, then you added the flavoring and it broke within seconds.

    The fix: Match temperatures and go slow. Flavorings should be at room temperature (melted chocolate cooled to barely warm, ~85°F / 29°C — warm chocolate melts butter on contact). Add in a thin stream with the mixer running, giving each addition 30 seconds to emulsify before the next. If it’s already broken: warm the bowl slightly and beat hard for 2–3 minutes — heat + agitation rebuilds most flavoring breaks. As a last resort, beat in 2–3 tablespoons of additional powdered sugar to give the emulsion more structure to grab onto.

    6. Buttercream “broke” overnight in the fridge — it’s fine

    Not actually a failure, but it panics everyone once. Refrigerated buttercream turns hard, and when you bring it back to room temperature it can look curdled or separated as the fat warms unevenly.

    How to tell: It was perfect yesterday; today it’s firm and looks split around the edges.

    The fix: Let it come fully to room temperature (1–2 hours — don’t microwave it), then beat on medium for 3–4 minutes. It will look worse before it looks better — grainy, then lumpy, then suddenly smooth. This always works. Never frost a cold cake with cold buttercream straight from the fridge; the temperature shock tears the cake surface.

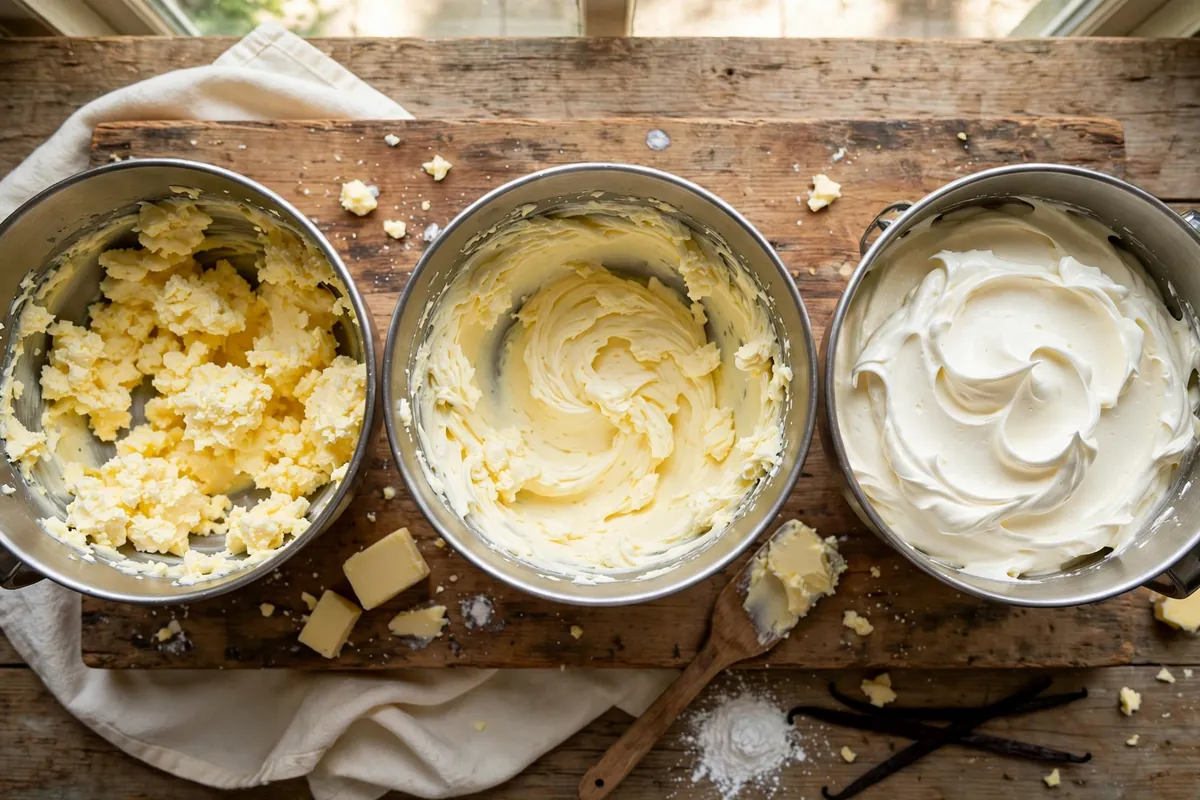
    mixer bowl of buttercream at three stages — curdled, mid-rescue, smooth and fluffy
    mixer bowl of buttercream at three stages — curdled, mid-rescue, smooth and fluffy

    Frequently asked questions

    Can curdled buttercream always be saved?
    Nearly always. Curdling from cold butter is the most rescuable failure in baking — warmth plus continued beating reforms the emulsion in minutes. The only truly dead buttercream is one where the fat has fully melted and separated into grease (from serious overheating), and even that can sometimes be chilled and re-whipped.

    Why does my buttercream taste like butter and nothing else?
    Under-sweetened or under-flavored — the mirror of “too sweet.” Add powdered sugar ¼ cup at a time, plus 1 teaspoon vanilla and ¼ teaspoon salt. (Full flavor-balance guide: Why Does My Frosting Taste Like Butter?.)

    Can I fix buttercream that’s too thin for piping?
    Chill it 15–20 minutes, then re-whip — that’s the fix in most cases. If it still won’t hold a peak, the ratio is off: beat in powdered sugar 2 tablespoons at a time until it firms up. For hot-weather piping, a tablespoon of cornstarch per 3 cups of sugar adds heat stability.

    Is broken buttercream safe to eat?
    Yes — every failure here is textural, not a food-safety issue. Curdled, soupy, grainy, or over-sweet buttercream is all perfectly safe. The only discard signal is off smells or mold from dairy left too long at room temperature (buttercream is fine at cool room temp for 2–3 days; beyond that, refrigerate).

    Can I re-freeze buttercream that I’ve already thawed?
    Yes, once. Freeze in an airtight container up to 3 months; thaw overnight in the fridge, bring to room temp, and re-whip. Each freeze-thaw cycle degrades the texture slightly, so don’t do it twice.

    Why did my chocolate buttercream seize?
    The melted chocolate was too hot when added, or a drop of water got in. Chocolate seizes on contact with water and melts butterfat on contact with heat. Cool melted chocolate to barely-warm (85°F / 29°C) and add it in a stream with the mixer running.

    Related troubleshooting: Why Does My Frosting Taste Like Butter? · Dairy-Free Frosting That Holds Its Shape · Why Did My Cake Sink in the Middle?

  • Why Did My Cake Sink in the Middle? 7 Causes, Tested Fixes

    Why Did My Cake Sink in the Middle? 7 Causes, Tested Fixes

    Why Did My Cake Sink in the Middle? 7 Causes, Tested Fixes

    Quick diagnosis: A sunken center almost always means the structure wasn’t set when the heat came off — underbaked, door opened too early, or too much leavening. Wet or gummy middle? Cause #1. Rose beautifully then fell while cooling? #2 or #3.

    Sunken cake cross-section with collapsed dense center
    cross-section of a sunken cake showing the dense dip in the center

    A cake is a foam: gas bubbles trapped in batter that heat sets into a solid scaffold. While that scaffold is still soft, gravity wins. Every cause below is that same story — the structure wasn’t ready to stand on its own.

    1. It was underbaked

    The most common cause. The edges set first; the center finishes last. Pull it even five minutes early and the middle is still unset foam that collapses as it cools.

    How to tell: The sunken area looks wet, gummy, or dense — almost pudding-like — rather than just flat. A toothpick in the center comes out with wet batter (not moist crumbs).

    The fix: Bake until the center is genuinely done. Ignore the clock as your only guide: start checking 5 minutes before the recipe’s time. A toothpick should come out with a few moist crumbs clinging, never wet batter. Better yet, use an instant-read thermometer — most butter cakes are done at an internal temperature of 200–210°F (93–99°C) in the very center. If the top is browning too fast while the middle lags, tent loosely with foil and keep baking.

    2. The oven door was opened too early

    Opening the door floods the oven with cool air — temperature can drop 25–50°F (15–30°C) in seconds. If the scaffold hasn’t set, that thermal shock deflates it on the spot.

    How to tell: The cake was rising nicely, you peeked, and it fell — either immediately or by the time it cooled.

    The fix: Don’t open the door before the cake is three-quarters done (about 25 minutes into a 35-minute bake). Use the oven light and the glass to check progress. After the structure has set, a quick open-and-close to rotate the pan is harmless.

    Risen cake baking inside a lit oven
    oven door slightly open with a cake visibly risen inside, oven light on

    3. Too much leavening

    Baking powder and baking soda create gas that lifts the batter — but the structure has to keep pace with the lift. Over-leavened batter inflates like a balloon, outruns its scaffold, and collapses. The cruel part: it looks spectacular in the oven right before it falls.

    How to tell: The cake rose dramatically, maybe even domed, then sank in the center as it cooled. The crumb tastes slightly soapy or metallic (excess soda).

    The fix: Measure leavening with proper measuring spoons, leveled off — never a dinner spoon. The standard ratio is about 1 teaspoon of baking powder per 1 cup (120g) of flour, or ¼ teaspoon of baking soda per cup of flour when there’s an acid present (buttermilk, cocoa, brown sugar). Replace baking powder older than 6–12 months instead of adding “a bit extra.”

    4. The batter was over-mixed after the flour went in

    Two problems at once: beating whips in too much air, so the batter starts over-inflated — and overworking develops excess gluten, making the crumb tough and springy. It rises on oven spring, then the tight gluten contracts and drags the center down.

    How to tell: The cake has tunnels or large irregular holes near the top, a rubbery layer, and a sunken middle. The batter looked smooth and elastic rather than just combined.

    The fix: Once flour goes in, mix on low only until the last streak disappears, then stop — finish by hand with a spatula. The vigorous beating belongs in the butter-and-sugar stage, not after the flour.

    5. The oven ran too hot

    A hot oven sets the crust early. That firm shell insulates the middle, so the center stays raw while the outside looks done — you pull it “on time” and the middle collapses. Home ovens routinely run 25°F (15°C) off; dial settings are a suggestion, not a measurement.

    How to tell: Deep golden or dark crust with a raw, sunken center. The recipe’s timing seemed right but the middle never caught up.

    The fix: Put a $10 oven thermometer on the middle rack and trust it over the dial. Bake on the center rack, and if your oven runs hot, drop the set temperature by 25°F (15°C). This is the same thermometer discipline I use for bread — an uncalibrated oven ruins more bakes than any recipe flaw (see Why Didn’t My Bread Rise?).

    6. The wrong pan size

    Batter depth decides whether the center bakes through. Pour an 8-inch recipe into a 6-inch pan and the batter sits deeper — the edges set, the middle stays liquid, and down it goes.

    How to tell: The batter filled the pan more than two-thirds full before baking, or you substituted a smaller/deeper pan than the recipe called for.

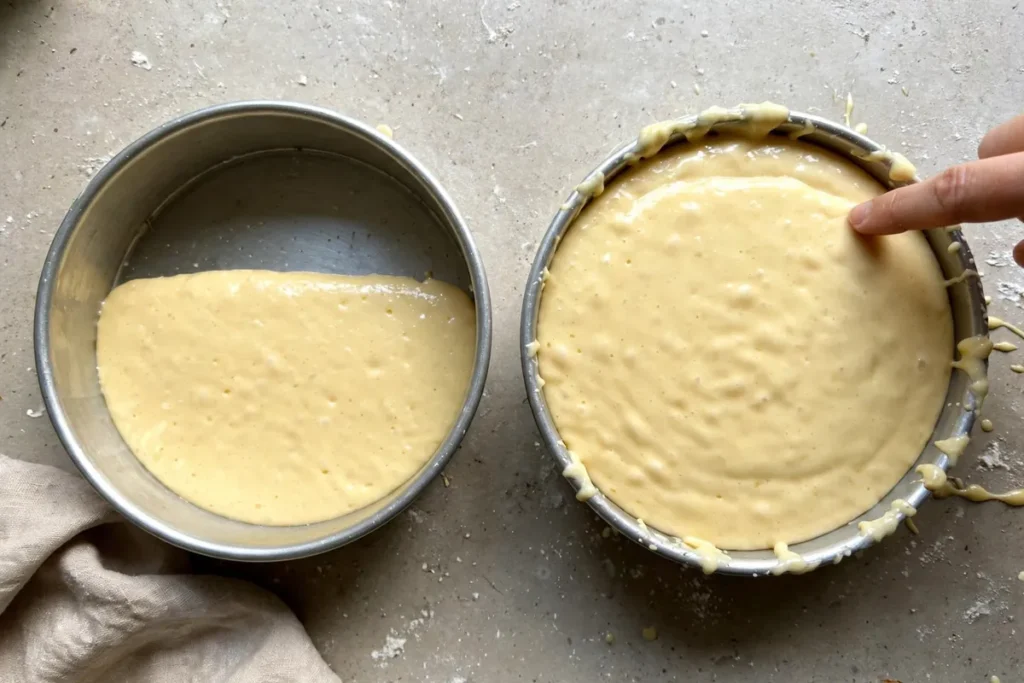
    The fix: Fill pans one-half to two-thirds full, no more. If you only own the wrong size, split the batter between two pans or bake in batches. And measure your pans — “8-inch” pans vary by brand, and a true 8×2-inch pan holds about 6 cups of batter.

    Two cake pans, half-filled versus overfilled, with a finger marking the two-thirds line
    two pans side by side — one filled to half, one overfilled near the rim

    7. Too much sugar or liquid

    Sugar tenderizes crumb by interfering with gluten and egg-protein networks — wonderful in the right amount, structural sabotage in excess. Same with liquid: a batter that’s too wet can’t build a scaffold strong enough to hold its rise. This usually happens when scaling by feel or swapping ingredients (applesauce for oil, extra milk “for moisture”).

    How to tell: You altered the recipe’s ratios, or the batter looked noticeably thinner than usual before baking.

    The fix: Respect the recipe’s ratios, especially when substituting. If you want a moister cake, add moisture after baking — a simple-syrup soak (see Why Is My Cake Dry?) — rather than loading it into the batter.

    Can I fix a sunken cake after the fact?

    Yes — it’s almost always salvageable, because the flavor is usually fine and only the shape suffered. Level the top with a long serrated knife, then flip the cake upside down so the flat bottom becomes the top. Fill the crater with whipped cream, frosting, or fruit. For a bad case, cube it into a trifle — sunken cake makes an outstanding trifle because the dense center soaks up flavor.

    Frequently asked questions

    Is a sunken cake safe to eat?
    Yes, as long as the center is fully baked through. If the middle is wet, raw batter rather than just dense, it was underbaked — the texture will be gummy, though it’s still safe if it reached a safe temperature. When in doubt, the toothpick test decides.

    Can I put a sunken cake back in the oven?
    Only if you catch it immediately and the center is still wet — give it 5–10 more minutes. Once cooled, the structure has set in its collapsed shape and re-baking just dries it out. Salvage it as a trifle instead.

    Why did my cake sink after I took it out, not in the oven?
    Because the collapse happens as steam escapes and the cake cools. An under-set center holds its shape while hot air and steam support it, then gives way on the counter — the classic signature of underbaking or excess leavening.

    Does opening the oven door always sink a cake?
    No — only while the structure is still setting, roughly the first three-quarters of the bake. Once the crumb is set, a quick open to rotate the pan is fine.

    Sunken cake rescued as a layered trifle in a glass bowl
    the same sunken cake rescued as a layered trifle in a glass bowl

    Related troubleshooting: Why Is My Cake Dry? · Cake Domed and Cracked on Top · Why Didn’t My Bread Rise?
  • Why Did My Opera Cake Layers Slide? (Layered Cake Stability)

    Why Did My Opera Cake Layers Slide? (Layered Cake Stability)

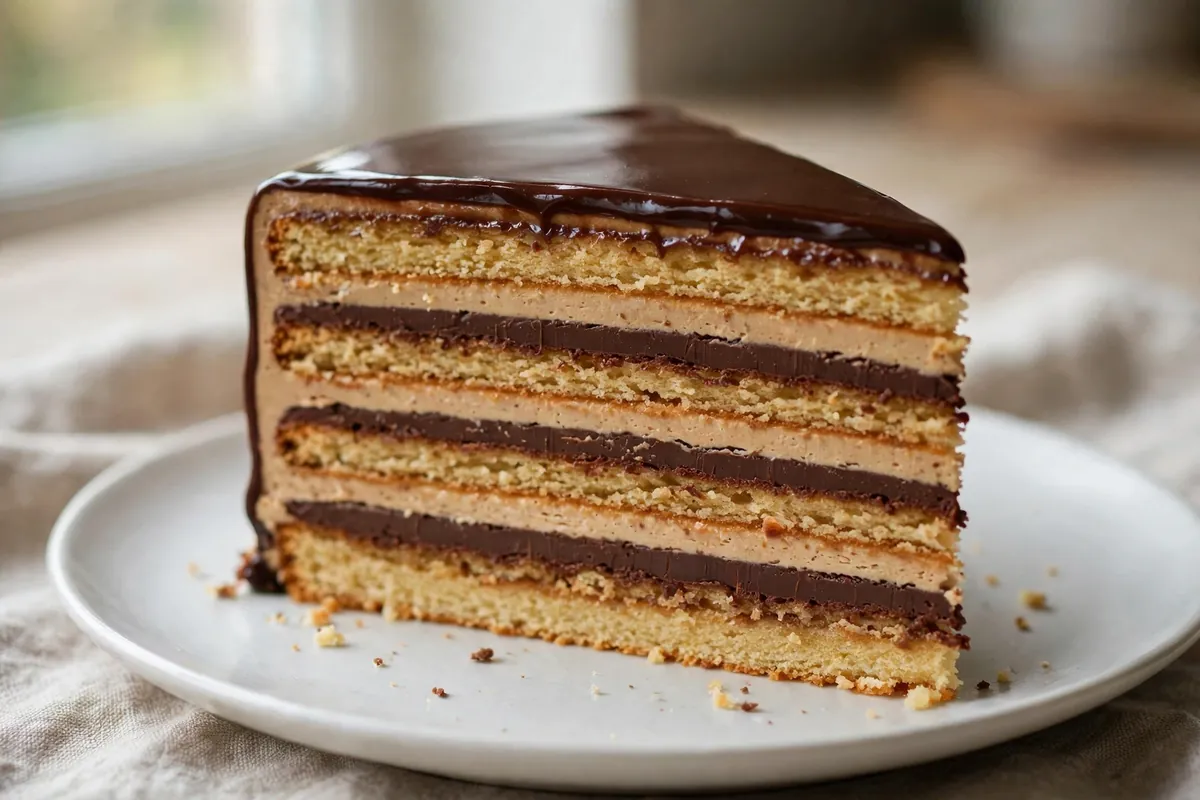
    An opera cake sliding apart is heartbreaking because the hard parts are done: joconde whipped, French buttercream made, ganache poured. Then the stack shifts sideways in the fridge. The cake isn’t wrong — the assembly sequence was.

    Quick diagnosis: You built on soft, warm layers without chilling between them (most common). Chill every layer 20–30 minutes as you build, make the ganache firm enough to spread like peanut butter, don’t drown the sponge in coffee syrup, and freeze the finished cake 3–4 hours before glazing.

    My tested baseline: one half-sheet of almond joconde, cut into three even rectangles. Coffee syrup: 120ml strong espresso + 60g sugar, brushed on — not poured. Coffee French buttercream: 3 yolks beaten with 120g sugar syrup at 240°F (115°C), then 170g soft butter and 2 tbsp espresso. Ganache: 150g dark chocolate + 150g hot cream, cooled thick. Mirror glaze poured at 95–100°F (35–38°C).

    1. You didn’t chill between layers — warm fillings are lubricant, not glue

    This is the cause in nine out of ten sliding opera cakes. Buttercream and ganache only hold a stack when they’re firm. Spread warm ganache over warm buttercream over syrup-soaked sponge and you’ve built a layer cake on a slip-and-slide — the layers will drift within an hour in the fridge.

    How to tell: The layers shifted sideways rather than compressing; the filling squeezed out one side when you added the next layer; the whole cake looks like a leaning tower.

    The fix: Chill 20–30 minutes after every single layer before adding the next. The buttercream should feel firm and dry to a light touch, not tacky.

    2. Your ganache was too loose — it needs to be spreadable, not pourable

    Ganache for an opera layer is not the same ganache you pour over truffles. At a 1:1 ratio (150g chocolate to 150g cream), cooled to room temperature, it should spread like thick peanut butter and hold the spatula’s ridges. If it’s still flowing when you spread it, it will flow sideways under the weight of the next sponge.

    How to tell: The ganache layer in your finished slice is uneven — thick on one side, paper-thin on the other; the top sponge sits crooked.

    The fix: Cool the ganache at room temperature, stirring occasionally, until it spreads like thick peanut butter and holds the spatula’s ridges — usually 1–2 hours. If it holds a soft peak, it’s ready to build with — the same test I use in Fixing Curdled Ganache.

    3. The joconde sheets weren’t flat — a wavy foundation tilts everything

    Joconde baked in a half-sheet pan can dome slightly or bake unevenly at the corners. Stack three wavy sheets and the curves compound: each layer amplifies the last until the top slides off the high side.

    How to tell: The slide always goes the same direction; individual sponge layers are visibly thicker on one side.

    The fix: Level each sheet before stacking — shave any dome with a long serrated knife. Cut the three rectangles with a ruler and a sharp knife; ragged, uneven pieces create pressure points that push layers sideways.

    4. You soaked the sponge too much — syrup is slippery

    Coffee syrup is essential — dry joconde is the opera cake’s other great sin — but there’s a line between moist and waterlogged. A sponge swimming in syrup can’t grip the filling above it; the whole layer hydroplanes.

    How to tell: Syrup pooled on the tray under the cake; the sponge layers feel soggy rather than moist; the bottom of each sponge is darker and wet-looking.

    The fix: Brush, don’t pour. Two light passes with a pastry brush per layer, letting the first soak in before the second. The sponge should glisten, not drip.

    5. You skipped the final freeze — the glaze went on a soft cake

    Even a well-chilled stack is slightly yielding at fridge temperature. Pour warm-ish glaze over it and the layers can shift during unmolding.

    How to tell: The cake looked fine going into the glaze step and shifted during unmolding or glazing; the glaze has a wavy edge where a layer moved underneath it.

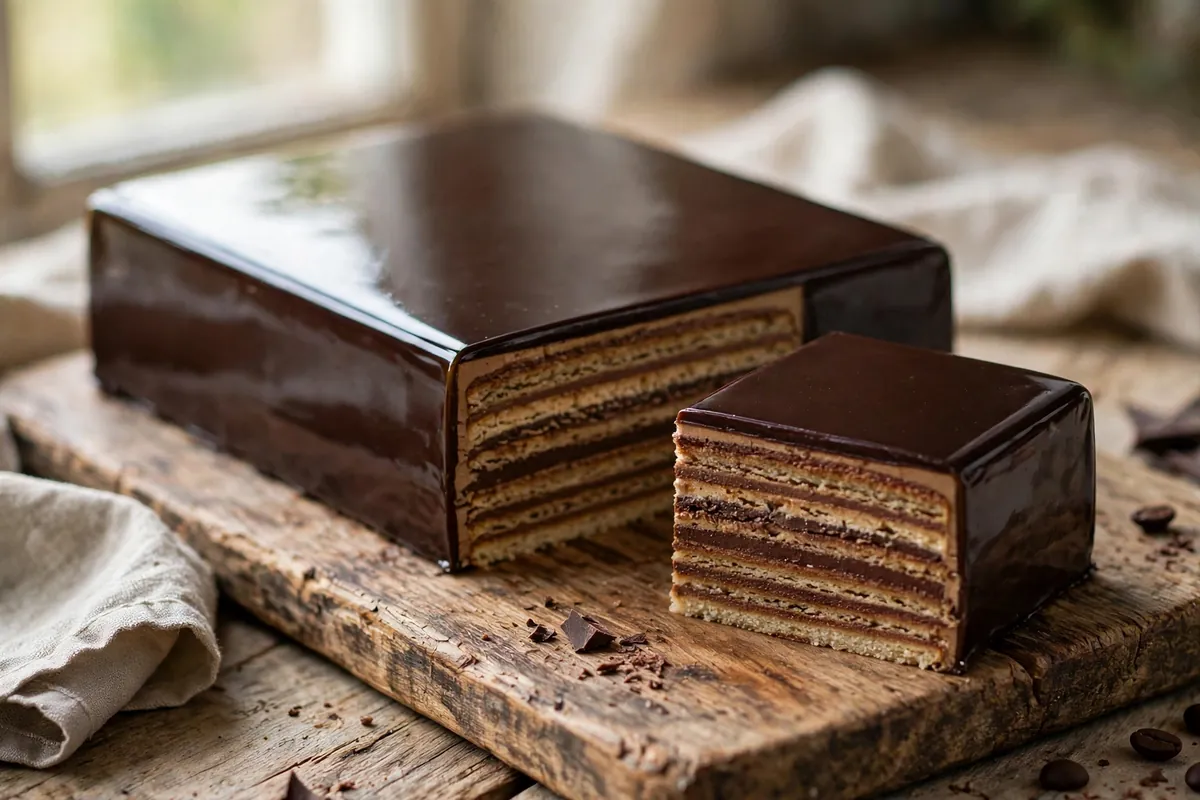
    The fix: After the final layer, wrap the frame and freeze the whole cake 3–4 hours minimum, overnight if you can. Unmold while frozen, trim the edges with a hot dry knife for those razor-sharp sides, and pour the glaze at 95–100°F (35–38°C) over the frozen cake. The glaze sets almost instantly on contact and locks everything in place.

    6. You built freehand — opera cake wants a frame

    Professional pâtissiers build opera inside a metal frame or a lined loaf pan — the frame does structural work, not just shaping.

    How to tell: Layers bulge outward at the sides; the finished cake is wider at the bottom than the top (or vice versa).

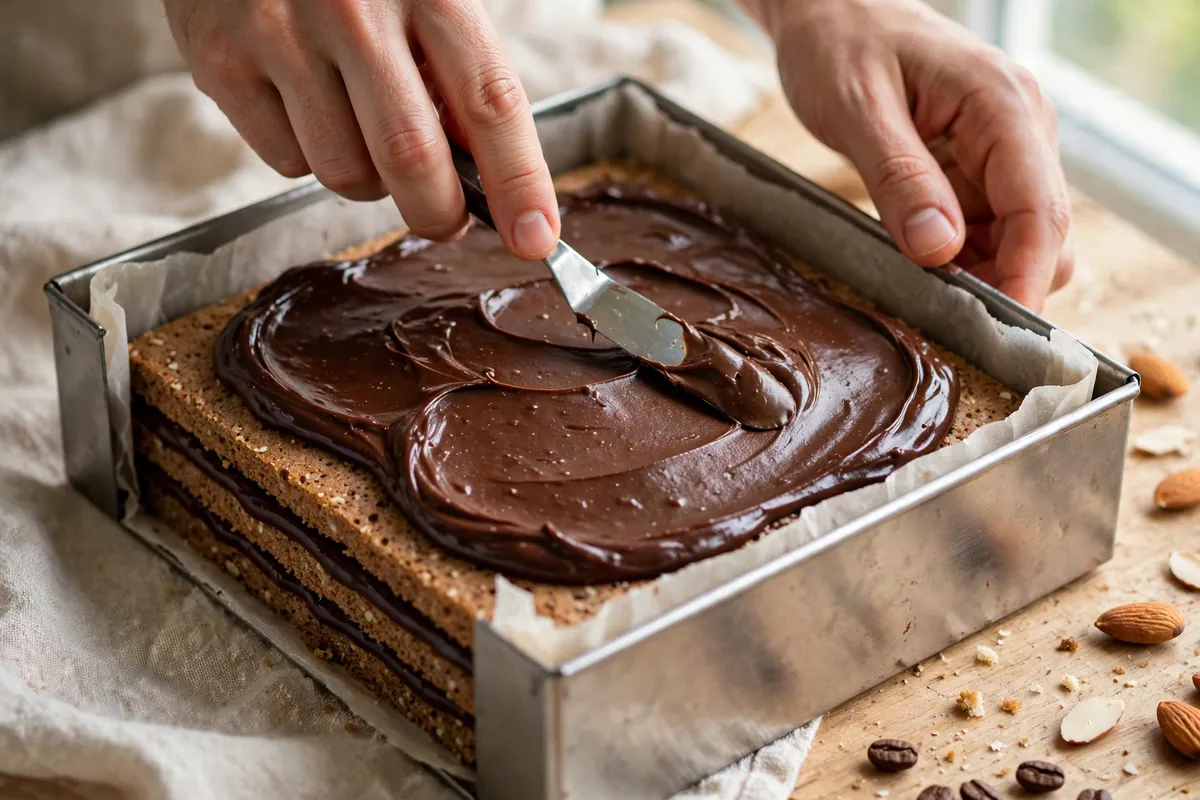
    The fix: Line a loaf pan or square frame with acetate or parchment, build inside it, and keep the frame on through the freeze. Press each layer down gently with an offset spatula to seat it before chilling.

    hands building opera cake layers inside a parchment-lined square frame
    hands building opera cake layers inside a parchment-lined square frame

    7. Your kitchen was too warm — buttercream has a melting point

    French buttercream starts softening around 75°F (24°C) and slumps well before 80°F (27°C). If you’re assembling in a warm kitchen in summer, the buttercream layer is melting as you spread it, and no amount of chilling between layers fully compensates.

    How to tell: The buttercream looked glossy and loose while spreading rather than matte and holding; the cake slid fastest on the counter, not in the fridge.

    The fix: Work in the coolest part of the day and be aggressive with the between-layer chills — 30 minutes, not 20. French buttercream starts softening around 75°F (24°C), so a warm kitchen melts your glue as you spread it.

    opera cake mid-assembly in a freezer, showing firm chilled layers before the next layer goes on
    opera cake mid-assembly in a freezer, showing firm chilled layers before the next layer goes on

    Frequently asked questions

    Is a sliding opera cake safe to eat?
    Completely — a structural failure, not a food safety one. Eat the evidence proudly; it still tastes like opera cake.

    Can I fix an opera cake after the layers have slid?
    Yes, if you catch it before glazing. Freeze the whole thing (frame and all) 2–3 hours until rock solid, then nudge the layers back into alignment with an offset spatula — they’ll move as one rigid block. Trim the edges with a hot knife and glaze. If it’s already glazed, serve it as is.

    Why did my buttercream layer disappear into the sponge?
    You spread buttercream over warm or over-soaked sponge. Always assemble on completely cool sponge, and give the syrup-soaked layer 10 minutes in the fridge before the buttercream goes on.

    Can I make opera cake ahead of time?
    It’s one of the best make-ahead cakes: 4–5 days refrigerated once glazed, or freeze unglazed up to a month, thaw overnight in the fridge, then glaze. The flavors meld and improve after a day.

    Why did my mirror glaze crack on top?
    Temperature shock: glaze poured too hot over a deeply frozen cake. Pour at 95–100°F (35–38°C) — warm to the touch, not hot — and move the glazed cake to the fridge, not the freezer.

    finished opera cake with clean trimmed edges and glossy glaze, one slice pulled forward
    finished opera cake with clean trimmed edges and glossy glaze, one slice pulled forward

    Related troubleshooting: Fixing Curdled Ganache · How to Fix Broken Buttercream · Custard Split? How to Save It