Category: Baking Basics

  • How to Store Homemade Bread So It Stays Fresh for Days

    How to Store Homemade Bread So It Stays Fresh for Days

    How to Store Homemade Bread So It Stays Fresh for Days

    Quick diagnosis: Keep crusty bread cut-side down on a board or in a paper bag at room temperature — 2–3 days. Soft sandwich loaves: airtight bag or bread box, 3–4 days. Never refrigerate bread (the fridge accelerates staling). For anything beyond 3 days, slice and freeze airtight for up to 3 months.

    Homemade bread has no preservatives, no dough conditioners, no calcium propionate — which is exactly why it tastes better, and exactly why it goes stale faster than store-bought. But “faster” doesn’t mean “by tomorrow.” Stored right, a homemade loaf stays genuinely good for days. Stored wrong — and the most common wrong is the refrigerator — it turns to cardboard overnight. Here’s the science and the method.

    Why bread goes stale (it’s not drying out)

    The surprise: staling is mostly not moisture loss. It’s starch retrogradation — the starch molecules in the crumb, gelatinized and soft when fresh from the oven, slowly recrystallize as the bread cools and sits, squeezing water out of their structure and turning firm and crumbly. A stale loaf can contain nearly as much water as a fresh one; the water has just been locked away where your tongue can’t find it.

    This matters because it flips the obvious advice. If staling were drying, you’d wrap bread airtight immediately. But since it’s recrystallization, the strategy is different: slow the recrystallization, which happens fastest at refrigerator temperatures (34–40°F / 1–4°C) — roughly three times faster than at room temperature. The fridge, humanity’s default freshness tool, is bread’s worst enemy.

    The golden rules

    1. Room temperature wins. 68–77°F (20–25°C) is the sweet spot — recrystallization runs slowest here.
    2. Never refrigerate. The single most impactful rule. Fridge-cold bread stales in hours what room-temp bread takes days to do.
    3. Match the wrap to the crust. Crusty bread needs to breathe (paper, linen, cut-side down); soft bread needs sealing (plastic, airtight box). One method does not fit all.
    4. Freeze for the long haul. Beyond 3–4 days, the freezer beats every countertop method. Slice first, wrap airtight, 3 months.

    Crusty bread: sourdough, baguettes, artisan loaves

    A crackling crust is the whole point of these breads — and airtight plastic is its assassin. Sealed plastic traps the moisture migrating out of the crumb, and within hours your shattering crust turns leathery and soft.

    Day 1: Nothing. Leave it cut-side down on a wooden board, uncovered. The crust stays crisp, the cut face seals itself against the board. This is how bakeries display bread all day.

    Days 2–3: Paper bag or a linen bread bag. Both breathe just enough to protect the crust while slowing moisture loss. A bread box works on the same principle — it buffers humidity without sealing it in.

    What NOT to do: plastic wrap, zip bags, the fridge. Each one kills the crust or accelerates staling (or both).
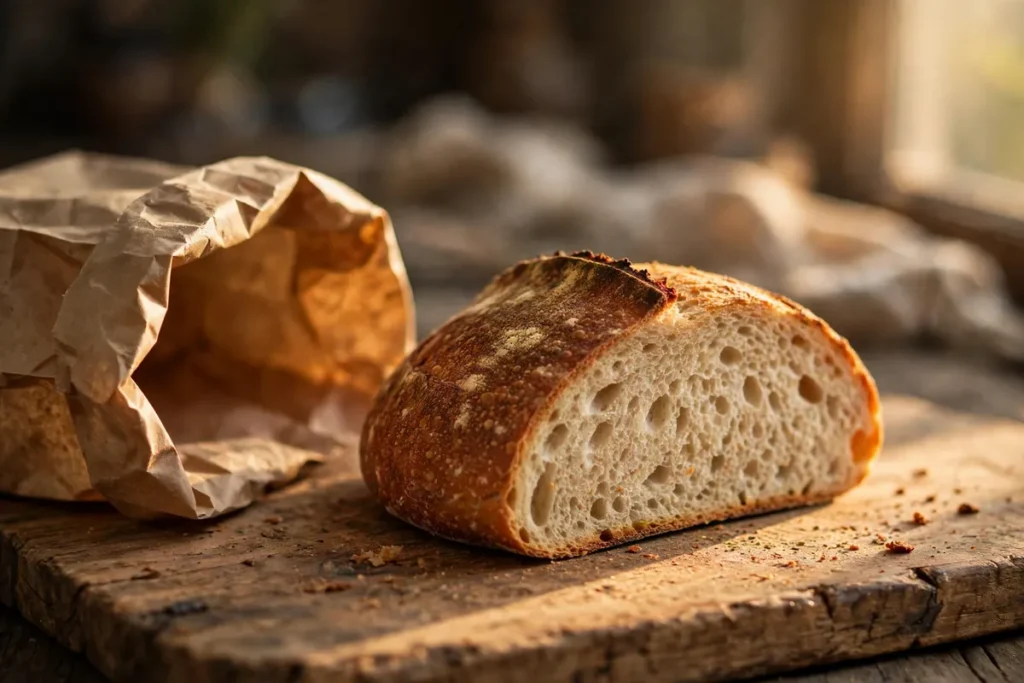
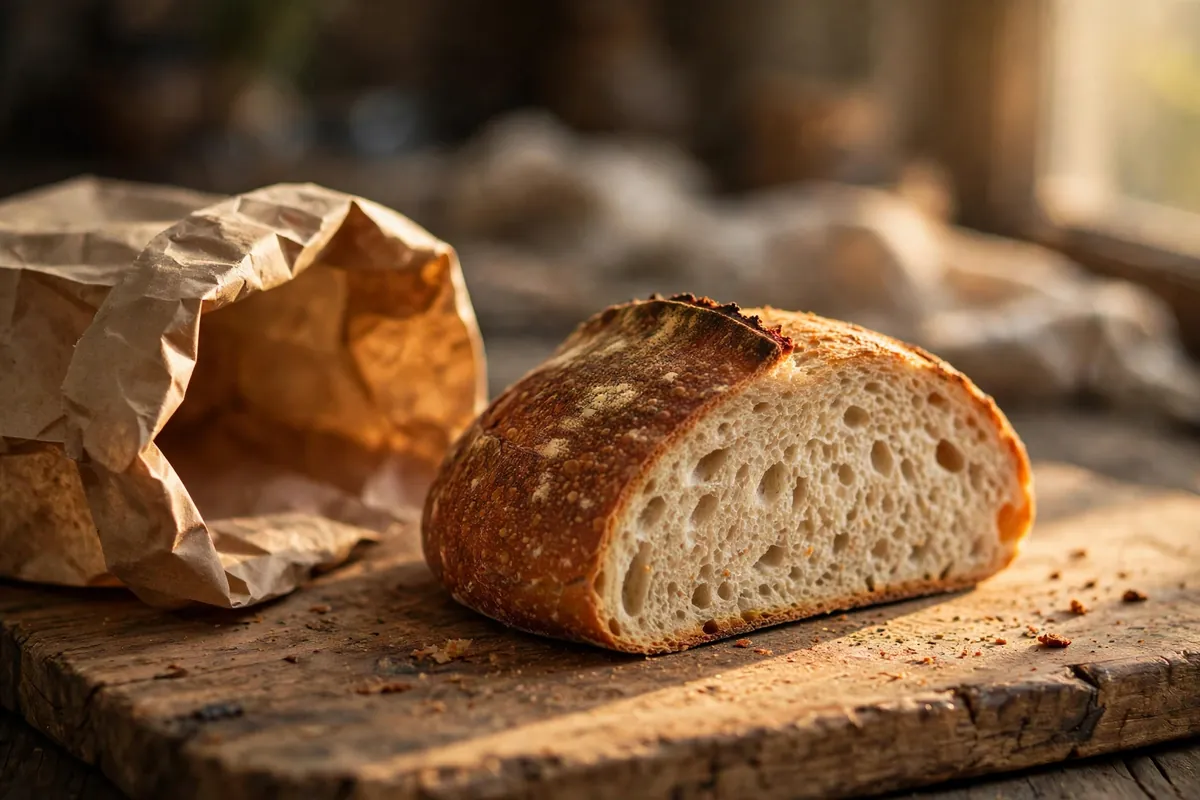
    Artisan loaf cut-side down on a wooden board, paper bag beside it
    artisan loaf cut-side down on a wooden board, paper bag beside it

    Soft bread: sandwich loaves, brioche, rolls

    Soft breads have the opposite need: their tender crust is meant to stay soft, so sealing in moisture is correct here. Cool the loaf completely first (bagging warm bread traps steam and makes the crust gummy), then into a plastic bag or airtight bread box.

    Well-stored soft loaves hold 3–4 days at room temperature. Enriched doughs (brioche, challah, milk bread) keep best of all — the fat and sugar slow retrogradation noticeably, which is why a brioche still eats well on day 4 while a lean baguette is done by day 2.

    Freezing: the 3-month pause button

    For anything you won’t eat in 3–4 days, freezing beats every other method — it halts retrogradation essentially completely.

    1. Slice first. Frozen whole loaves are awkward; frozen slices let you take exactly what you need. (Whole-loaf freezing works too if you’ll eat it all at once — just thaw fully before slicing.)
    2. Wrap airtight — twice. Plastic wrap pressed directly against the bread, then into a freezer bag with the air pressed out. Freezer burn is dehydration plus off-flavors; the double barrier stops both.
    3. Label and date. 3 months at 0°F (-18°C) is the quality window.
    4. Thaw at room temperature, still wrapped — unwrapping early lets condensation form on the surface. Slices go straight into the toaster from frozen.

    The same portion-first logic applies to freezing cookie dough — the freezer rewards people who prep before freezing, not after.
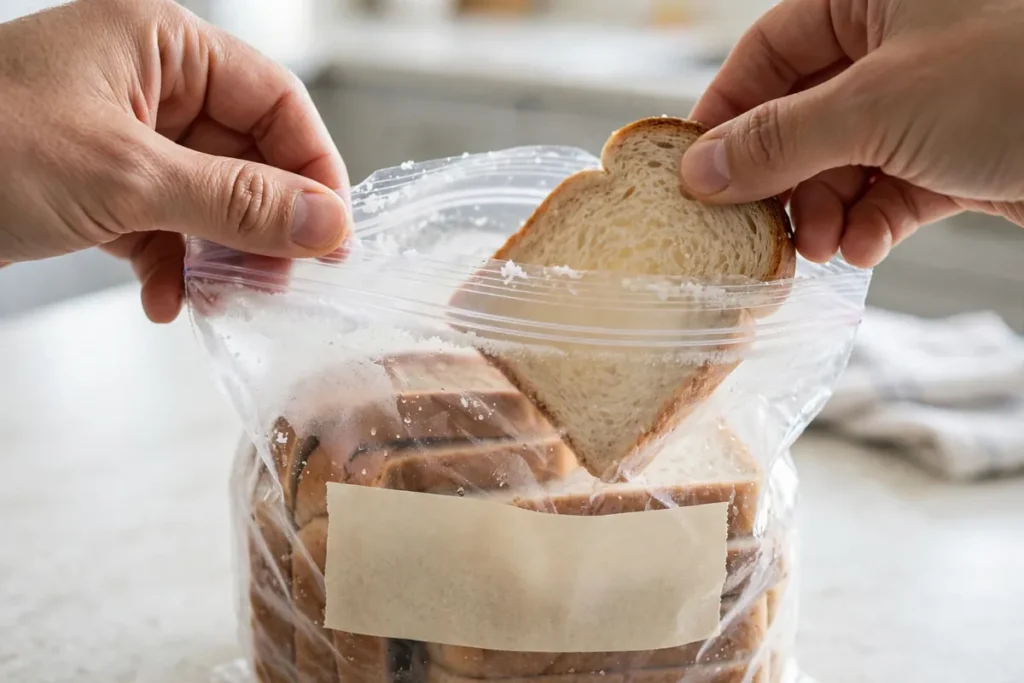
    Freezer bag of bread slices with masking-tape label, one slice being pulled out
    freezer bag of bread slices with masking-tape label, one slice being pulled out

    Reviving day-old (or day-three) bread

    Stale bread isn’t dead bread — retrogradation is partially reversible with heat.

    • The oven refresh: Spritz the loaf lightly with water, then bake at 350°F (175°C) for 5–10 minutes (slices: 3–5 minutes). The heat re-gelatinizes the starches and re-crisps the crust. A day-old baguette comes back remarkably well; a three-day-old one becomes genuinely good again.
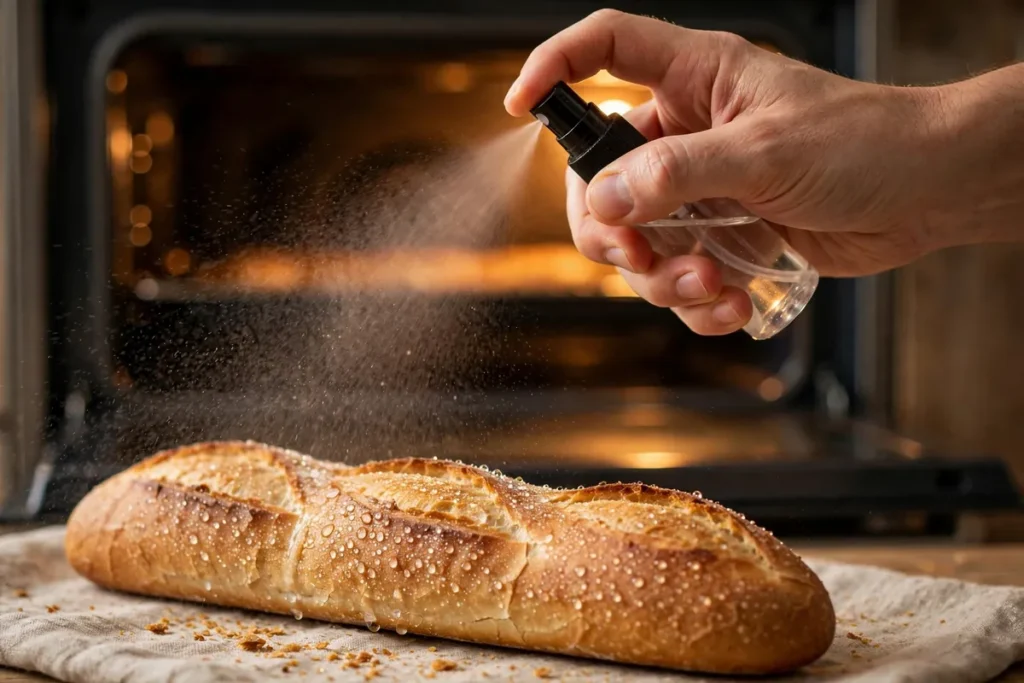
    Hand spritzing water onto a day-old baguette before it goes into the oven
    hand spritzing water onto a day-old baguette before it goes into the oven
    • The toaster rescue: For slices, toasting is the fastest revival — heat plus browning masks a multitude of staling sins.
    • Beyond revival: Truly stale bread has a second career. Cube it for croutons (toss with oil, bake 375°F / 190°C until crisp), blitz into breadcrumbs, or make panzanella, strata, or bread pudding — dishes where stale bread actually outperforms fresh.

    Storage mistakes, ranked by damage

    1. The fridge. Accelerates staling ~3×. The #1 bread-storage sin, and the most common.
    2. Bagging warm bread. Trapped steam = gummy crust and a mold invitation. Cool completely first — at least 1–2 hours on a rack.
    3. Plastic on crusty bread. Leathery crust within hours. Paper or linen for anything with a crackle.
    4. Pre-slicing a whole loaf “for convenience.” Every cut face is a moisture exit. Slice as you eat.
    5. The microwave “refresh.” Ten seconds of softness followed by bread harder than before — microwaves accelerate retrogradation as the bread cools. Use the oven.

    Frequently asked questions

    Should you refrigerate homemade bread?
    No — never. Starch recrystallization (the main mechanism of staling) runs about three times faster at refrigerator temperatures than at room temperature. Room temp in appropriate wrapping keeps bread fresh days longer than the fridge.

    How long does homemade bread last?
    Crusty artisan loaves: 2–3 days at room temperature (paper bag, cut-side down). Soft sandwich loaves: 3–4 days airtight. Enriched breads (brioche, challah) keep longest. Frozen sliced and airtight: 3 months with minimal quality loss.

    Why does my bread go stale so fast?
    Two likely causes: you’re refrigerating it (the #1 accelerator), or you’re comparing it to store-bought bread full of preservatives and conditioners. Homemade bread stales faster by nature — proper room-temp storage and freezing are the honest fixes, not a recipe problem.

    Can you freeze homemade bread?
    Yes — it’s the best long-term method. Slice first, wrap airtight (plastic wrap + freezer bag), freeze up to 3 months at 0°F (-18°C). Thaw wrapped at room temperature, or toast slices straight from frozen.

    How do you refresh stale bread?
    Spritz lightly with water and bake at 350°F (175°C) for 5–10 minutes (3–5 for slices). The heat re-gelatinizes starches and re-crisps crust. For slices, the toaster is fastest. Past revival, repurpose: croutons, breadcrumbs, panzanella, bread pudding.

    Is it safe to eat week-old bread?
    If it shows no mold and was stored properly, yes — staleness is a texture issue, not a safety one. Check carefully for any fuzzy spots (especially in warm, humid kitchens), and when in doubt, throw it out. Mold on soft bread means the whole loaf is compromised, not just the visible spot.

    Related troubleshooting: How to Tell When Bread Is Done · Why Is My Sourdough Gummy Inside? · How to Freeze Cookie Dough · Make-Ahead Bread Dough
  • No-Knead Bread for Beginners: Your First Loaf, Step by Step

    No-Knead Bread for Beginners: Your First Loaf, Step by Step

    No-Knead Bread for Beginners: Your First Loaf, Step by Step

    Quick diagnosis: Mix 500g bread flour, 375g water, 10g salt, and ¼ teaspoon instant yeast. Rest 12–18 hours. Shape, proof 30 minutes, and bake in a preheated Dutch oven at 450°F (230°C) — 30 minutes covered, 15–20 uncovered. That’s the whole recipe. The long rest does the kneading for you.

    If you’ve never baked bread, this is where you start. No-knead bread has the best effort-to-result ratio in all of baking: five minutes of actual work produces a loaf with a crackling crust and open crumb that tastes like it came from an artisan bakery. The method was popularized by Jim Lahey in 2006 and it hasn’t been improved since, because the science is sound — time develops gluten just as surely as kneading does.

    Why no-knead works (so you trust the process)

    Kneading builds gluten through mechanical force. But gluten also develops on its own when flour and water sit together — the proteins hydrate, link up, and organize over hours. A 12–18 hour rest at room temperature does the same structural work as 10 minutes of kneading, while also building deeper flavor through slow fermentation.

    The tiny yeast quantity (¼ teaspoon — not a typo) is deliberate. Less yeast means slower fermentation, which means the dough can rest all night without over-proofing. It also means better flavor: slow fermentation produces the organic acids and complex tastes that make good bread taste like bread instead of like yeast.

    The recipe (baker’s percentages included)

    Ingredient Weight Volume approx. Baker’s %
    Bread flour 500g ~4 cups, spooned 100%
    Water, lukewarm 375g 1⅔ cups 75%
    Fine salt 10g 2 tsp 2%
    Instant yeast 1g ¼ tsp 0.2%

    Use bread flour if you can (12–14% protein gives the chewiest crumb), but all-purpose works — the loaf will be slightly less lofty. Instant yeast and active dry both work at this quantity; if using active dry, dissolve it in the water first.

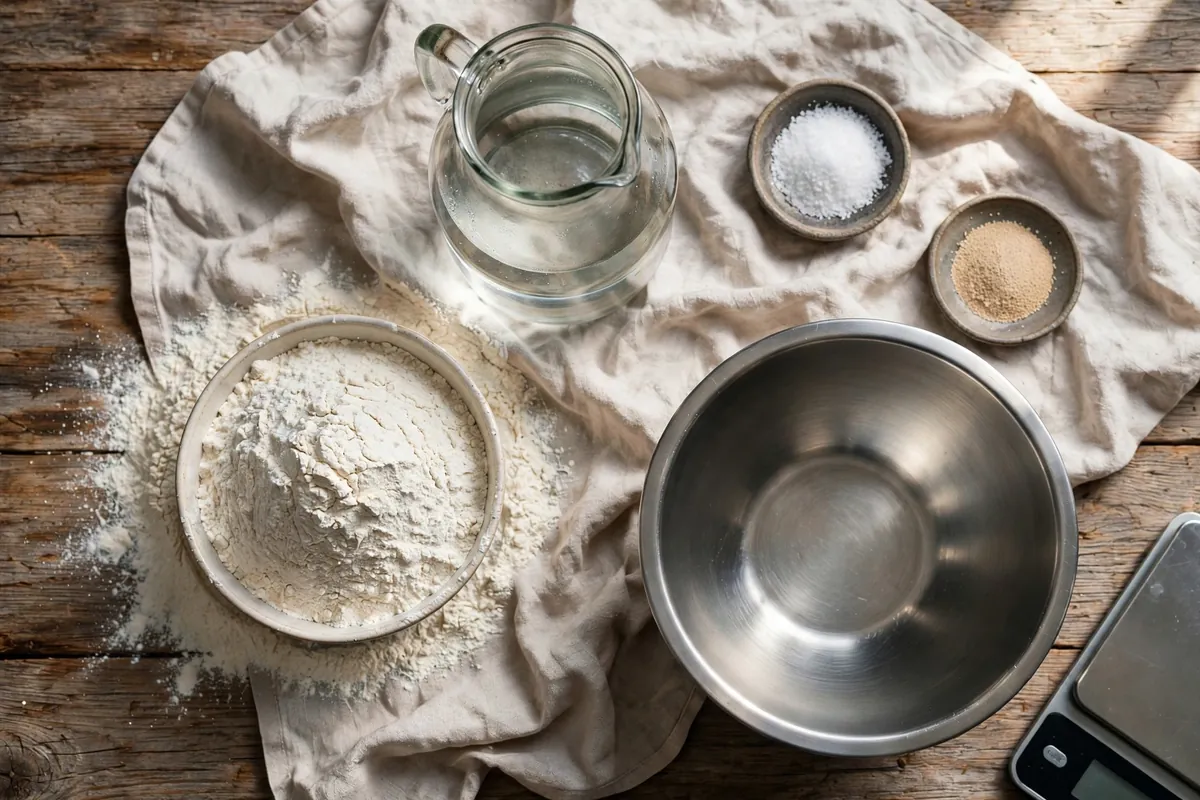
    The four no-knead bread ingredients measured out in bowls beside a mixing bowl
    the four ingredients measured out in bowls beside a large mixing bowl

    Step 1: Mix (5 minutes, evening)

    Combine everything in a large bowl and stir with a wooden spoon or your hand until no dry flour remains. The dough will look shaggy, rough, and frankly wrong — lumpy, sticky, uneven. This is correct. Do not knead it. Do not smooth it. Walk away.

    Cover the bowl with plastic wrap or a damp towel and leave it at room temperature (70–75°F / 21–24°C) for 12–18 hours. Overnight is perfect: mix at 8pm, bake at noon.

    Step 2: The long rest (12–18 hours, overnight)

    During the rest, three things happen without you: gluten develops, the yeast slowly produces gas, and flavor compounds build. You’ll know it’s ready when the dough has roughly doubled, the surface is dotted with bubbles, and it smells pleasantly yeasty and slightly tangy — not sharply sour (that’s over-fermented; see below).

    Timing by kitchen temperature:
    – Warm kitchen (78°F+ / 26°C+): 10–12 hours. Check early — warm dough moves fast.
    – Normal (70–75°F / 21–24°C): 12–18 hours. The sweet spot.
    – Cool (65°F / 18°C): 18–24 hours. Slower, but the flavor is worth it.

    If the dough has more than tripled, smells strongly of alcohol, and collapses when touched, it over-proofed. Don’t bin it — it’ll still bake into decent bread, just flatter. Next time, use a touch less yeast or a shorter rest. (For the full diagnosis, see Why Didn’t My Bread Rise? — over-proofing is the mirror image of under-proofing.)

    Step 3: Shape (10 minutes)

    Flour your work surface generously — this is a wet 75%-hydration dough and it will stick to everything. Scrape the dough out (it’ll be bubbly and alive). With floured hands, fold the edges into the center a few times to form a rough ball, then flip it seam-side down.

    The envelope fold: pull the top edge down to the center, the bottom edge up, then left and right — like folding a letter. Flip seam-down. That’s your shaping. No-knead shaping is intentionally minimal; you’re just creating surface tension, not developing anything new.

    Place the ball seam-down on a floured piece of parchment (the parchment becomes your transfer sling later). Cover with a towel and rest 30 minutes while the oven preheats.

    Hands doing the envelope fold on shaggy dough, floured surface visible
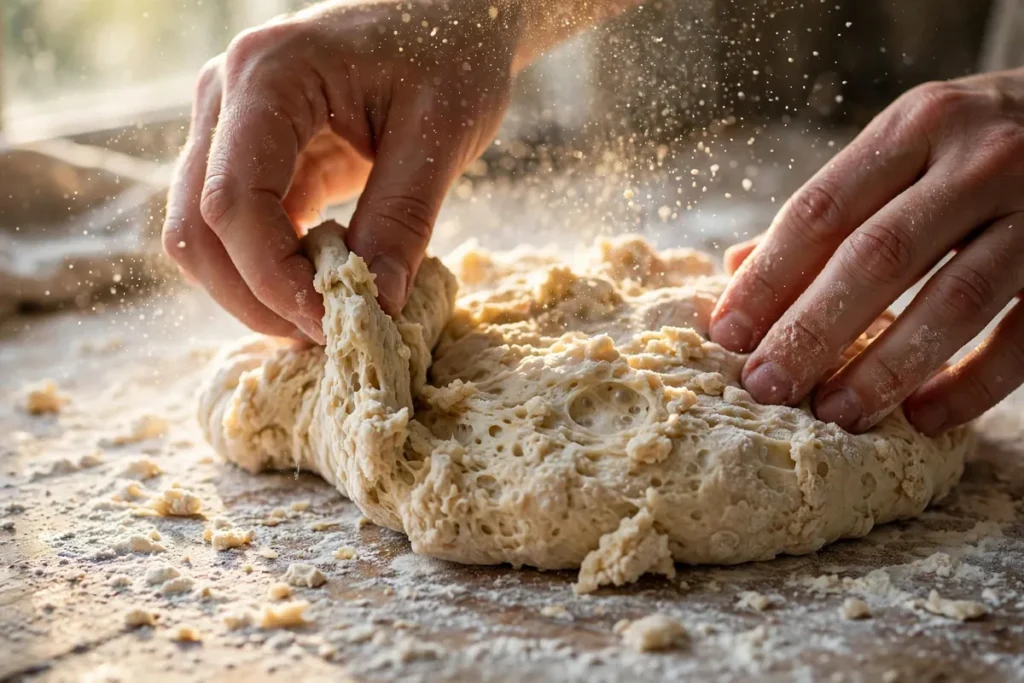
    hands doing the envelope fold on the shaggy dough, floured surface visible

    Step 4: Preheat the Dutch oven (30–45 minutes)

    Put your Dutch oven (with its lid) into the oven and heat to 450°F (230°C). Preheat a full 30–45 minutes — the pot must be screaming hot. This is non-negotiable: the searing heat is what creates oven spring, the burst of expansion in the first minutes of baking.

    No Dutch oven? A heavy oven-safe pot with a tight lid works. In desperation, an inverted deep roasting pan over a baking stone works. But a Dutch oven is the single best bread investment you can make — it traps the dough’s own steam, which keeps the crust soft long enough for maximum spring, then the dry heat crisps it. (More on steam’s role in Bread Crust Too Hard or Too Soft.)

    Step 5: Bake (45–50 minutes)

    1. Score the top — one confident slash with a sharp knife or razor, about ½ inch deep. Cold dough scores best, but room-temp no-knead dough is fine with a decisive cut.
    2. Lower the dough into the hot pot using the parchment sling. This is the only scary moment: the pot is 450°F. Go slow, keep fingers clear.
    3. Lid on, bake 30 minutes. The trapped steam does its work.
    4. Lid off, bake 15–20 minutes more. Now the crust browns and crisps. You’re looking for deep mahogany — darker than you think. Pale no-knead bread is the classic beginner mistake; color equals flavor.
    5. Check doneness: 200–210°F (93–99°C) internal (see How to Tell When Bread Is Done).
    Finished no-knead loaf on a cooling rack — deep mahogany crust, bold score opened into an ear
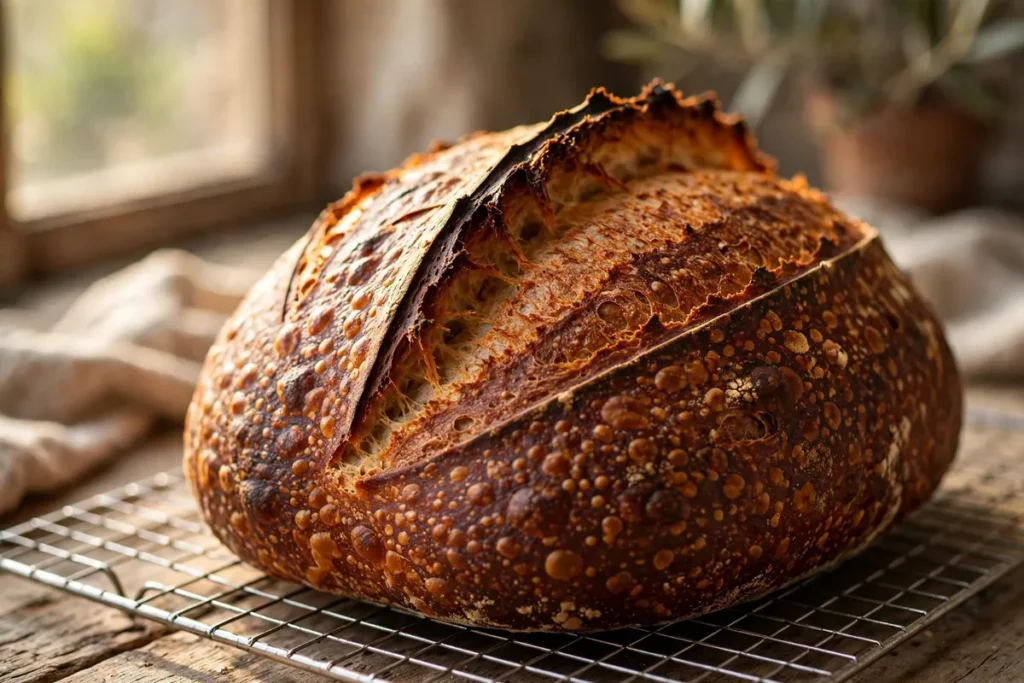
    the finished loaf on a cooling rack — deep mahogany crust, one bold score mark opened into an ear

    Step 6: Cool (the hardest step)

    Cool on a wire rack for at least 2 hours before slicing. I know. The smell is unbearable. But cutting early compresses the still-setting crumb into gumminess — the exact problem in sourdough cut too soon. The bread is still cooking inside during the first hour of cooling. Wait.

    Your first-loaf troubleshooting cheat sheet

    What happened Likely cause Fix next time
    Flat, dense loaf Over-proofed during the long rest Less yeast (⅛ tsp) or shorter rest; cooler spot
    Pale, soft crust Underbaked / lid off too late Full 15–20 min uncovered; aim for mahogany
    Gummy center Sliced too soon Cool 2 full hours on a rack
    Burnt bottom Pot too close to lower element Middle rack; parchment under the loaf helps
    Dough stuck to towel Not enough flour on the cloth Flour the towel heavily, or proof on parchment

    Frequently asked questions

    Can I use all-purpose flour instead of bread flour for no-knead bread?
    Yes. The loaf will be slightly less chewy and a touch less lofty (all-purpose is 10–12% protein vs bread flour’s 12–14%), but the method works identically. Don’t adjust anything else.

    Do I really not need to knead at all?
    Really. Time replaces kneading: over 12–18 hours, gluten proteins hydrate and organize on their own. If the long rest makes you nervous, do 3–4 gentle stretch-and-folds during the first 2 hours — it adds insurance but isn’t required.

    Can I make no-knead bread without a Dutch oven?
    You can, but the crust won’t match. The Dutch oven traps steam; without it, bake on a preheated stone or steel with a pan of boiling water on the rack below for the first 20 minutes, then remove it. Expect a good loaf with a slightly less dramatic crust.

    Why did my no-knead bread come out flat?
    Almost always over-proofing during the long rest — too much yeast, too warm a kitchen, or too long a rest. The dough exhausts its food and the gluten relaxes. Cut yeast to ⅛ teaspoon or shorten the rest, and make sure your kitchen isn’t above 78°F.

    How do I store no-knead bread?
    Room temperature, cut-side down on a board or in a paper bag, 2–3 days. Never the fridge (it accelerates staling). For longer, slice and freeze airtight up to 3 months — full guide in How to Store Homemade Bread.

    Can I add things like olives, cheese, or herbs?
    Yes — fold 100–150g of add-ins during shaping (not during the initial mix, where they can interfere with gluten development). Wet add-ins like olives should be patted dry first. Cheese near the surface will crisp beautifully.

    Related troubleshooting: Why Is My Bread Dense? · How to Tell When Bread Is Done · Make-Ahead Bread Dough: Fridge Timelines

  • How to Fix Seized Chocolate (The Water Rescue That Actually Works)

    How to Fix Seized Chocolate (The Water Rescue That Actually Works)

    Seized chocolate looks like a cruel joke: one minute you have silk, the next you have grainy sludge — all because a single drop of water fell in. It feels like it should be ruined. It isn’t, mostly. And the fix is gloriously counterintuitive: the thing that destroyed your chocolate is more of the same thing, added deliberately.

    Quick diagnosis: A tiny amount of water dissolved the sugar in your chocolate, turning it into sticky syrup that glued the cocoa particles into clumps. Rescue it by stirring in more hot liquid — 1 tablespoon of boiling water or hot cream per 30g (1 oz) of chocolate — until it smooths into a glossy sauce or ganache. It won’t be dippable again, but it’s perfectly usable.

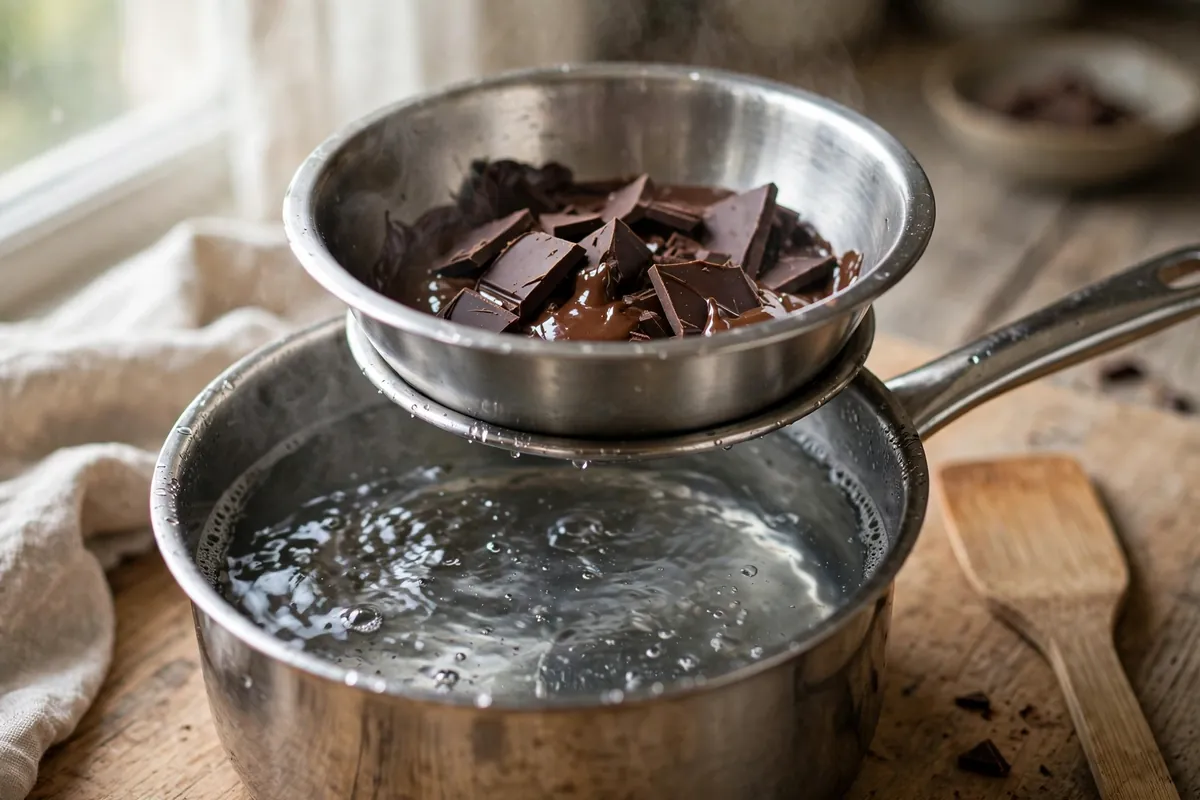
    My tested baseline: 200g dark chocolate (60–70% cacao), chopped fine, melted in a completely dry bowl over barely simmering water — the bowl must not touch the water. Keep dark chocolate below 120°F (49°C); milk and white below 110°F (43°C).

    1. Why one drop of water destroys melted chocolate

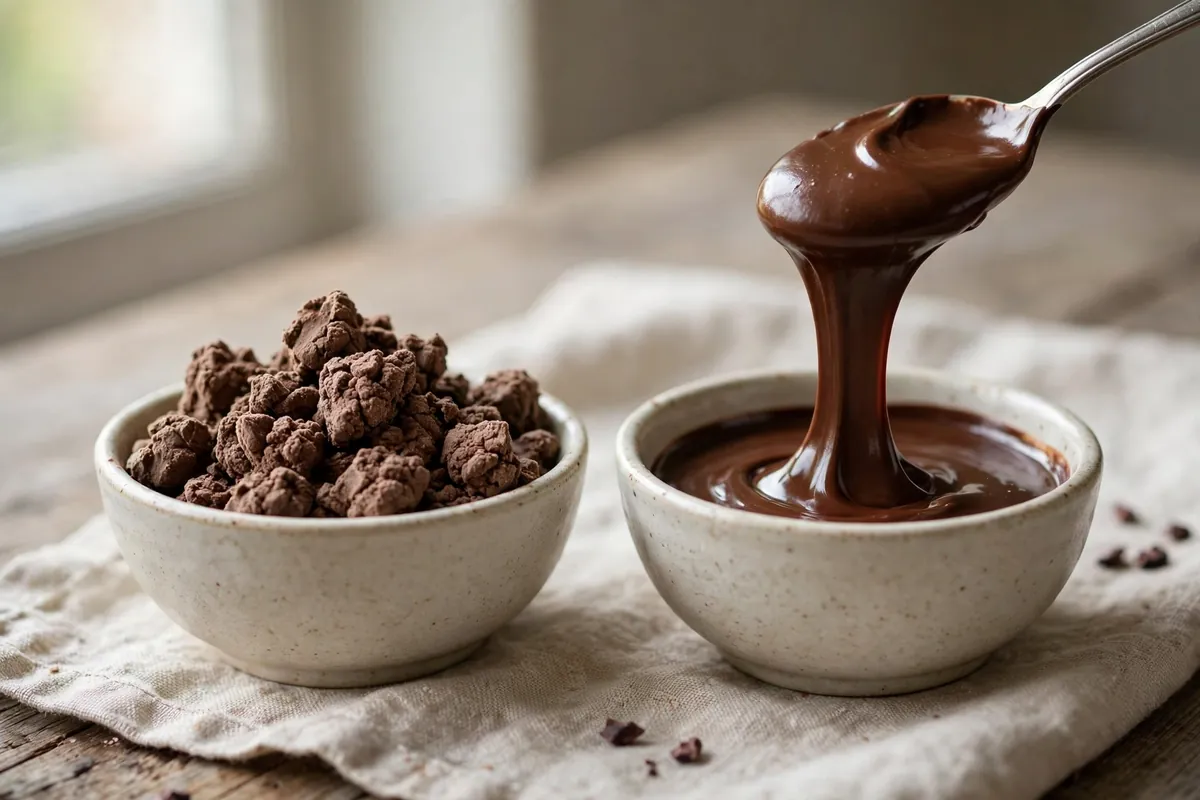
    Chocolate is a suspension of dry particles — sugar, cocoa solids — in cocoa butter, with almost no water in it (well under 1%). Melted, those particles flow freely in the fat. Add a tiny amount of water and the sugar dissolves into it, forming a sticky syrup that coats and glues the cocoa particles together into clumps. The smooth suspension becomes wet sand. That’s seizing: not burning, not curdling — gluing.

    This is why the usual suspects are all moisture, not heat: steam escaping from under a double boiler, a wet spoon, chocolate stored in a humid kitchen, condensation from chocolate that went fridge-to-counter, or — the classic — covering the melting bowl with a lid, which traps steam that drips back in.

    2. The rescue paradox: add more liquid, on purpose

    Here’s the part that feels wrong. A teaspoon of water seized your chocolate, but a tablespoon of boiling water per 30g (1 oz) of chocolate will save it. Once there’s enough liquid, the sugar fully dissolves instead of forming partial sticky syrup, the cocoa particles disperse evenly through the liquid, and the whole mass relaxes into a smooth, glossy sauce.

    How to do it: Bring water or cream to a boil. Add it one tablespoon at a time to the seized chocolate, stirring vigorously and constantly in the center of the bowl. It will look worse for about 30 seconds — thinner, weirder — then suddenly come together into glossy smoothness. For 200g of chocolate, expect to add 6–7 tablespoons.

    What you get: Not your original melted chocolate — you now have a chocolate sauce (water rescue) or thin ganache (cream rescue). Use it over ice cream, as a cake soak, or whisked into frosting. The rescue changes the product; it doesn’t rewind time. The same principle fixes a broken emulsion in Fixing Curdled Ganache.

    3. Rule out the other graininess: burnt chocolate can’t be rescued

    Not all grainy chocolate is seized chocolate. Overheated chocolate — dark pushed past 130°F (54°C), milk or white past 120°F (49°C) — also turns thick and gritty, but the mechanism is different: the cocoa butter separates and the solids scorch. The liquid rescue won’t fix burnt chocolate, and burnt chocolate tastes acrid and bitter underneath the grain.

    How to tell: Seized chocolate happened the instant water touched it and smells like normal chocolate. Burnt chocolate thickened gradually as it got hotter and smells sharp, bitter, almost like burnt coffee.

    The fix for burnt: There isn’t one. If it tastes scorched, it stays scorched. Melt in short microwave bursts at 50% power with stirring between — prevention beats rescue every time.

    hands whisking boiling water into seized chocolate as it turns glossy
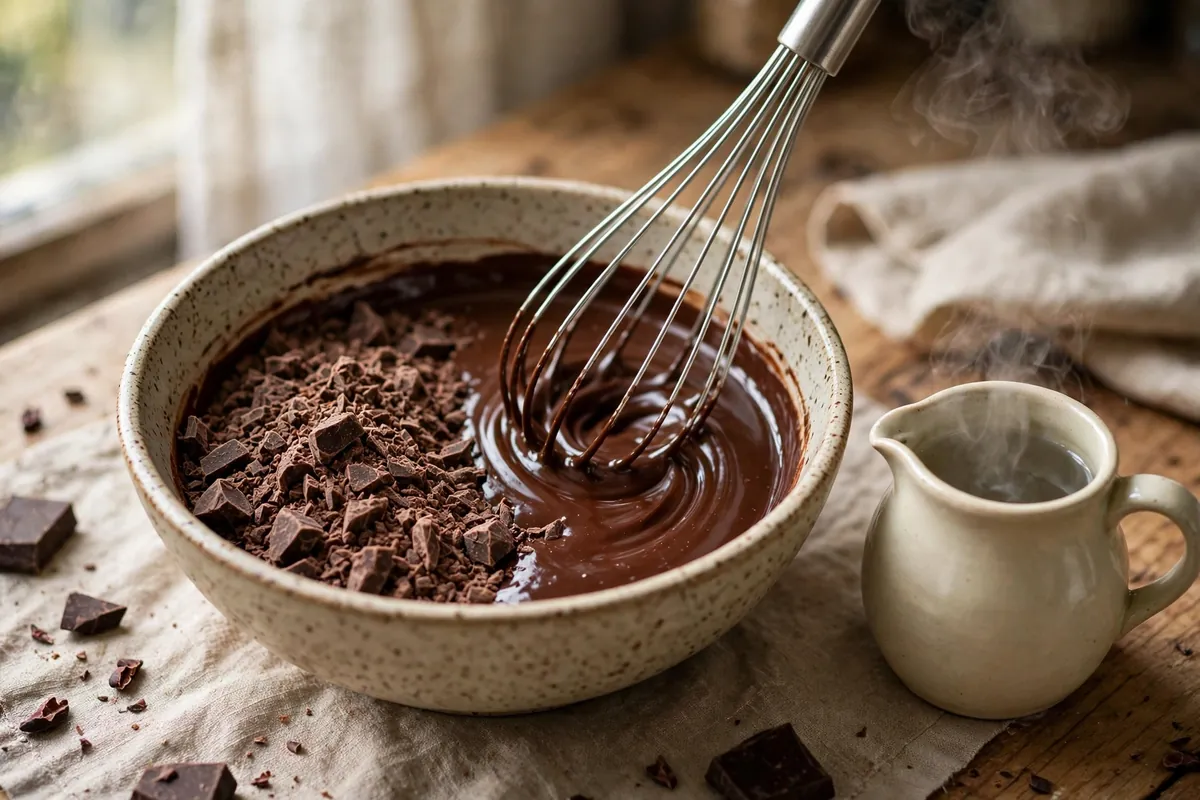
    hands whisking boiling water into seized chocolate as it turns glossy

    4. Prevention: the dry-kitchen protocol

    Every seized-chocolate disaster I’ve caused came from rushing the setup, never from the chocolate itself. The protocol:

    • Everything bone dry. Bowl, spatula, thermometer — dry them even if they look dry. One invisible film of water is enough.
    • Chop fine and even. Big chunks melt unevenly; the small bits overheat while the big ones are still solid, and you stir longer, inviting steam.
    • Barely simmer, never boil. The water under your double boiler should tremble, not bubble. The bowl must not touch the water. No lid — ever.
    • Microwave in bursts. 50% power, 20–30 seconds, stir between every burst. Chocolate holds its shape when melted, so stir to check — it can be fully liquid while looking solid.
    • Temper your additions. If a recipe adds liquid to melted chocolate (like a ganache), the liquid must be hot. Cold cream into warm chocolate seizes it just as surely as a water drop.

    5. White and milk chocolate seize faster — handle them like eggs

    White chocolate has more sugar and milk solids and less cocoa butter structure than dark; milk chocolate sits in between. Both seize on smaller amounts of moisture and scorch at lower temperatures (110°F/43°C is the ceiling). If you’re new to melting chocolate, practice the dry-kitchen protocol on dark first — it’s the most forgiving — before moving to white.

    How to tell it’s starting: The chocolate goes from flowing to suddenly thick and matte at the edges of the bowl. Stop heating immediately. If you catch it at the first thickening and the cause was heat, not water, sometimes just taking it off the heat and stirring in a tablespoon of neutral oil or cocoa butter will bring it back.

    6. What rescued chocolate is good for (and what it isn’t)

    Rescued chocolate will never temper again — no snap and shine for dipped strawberries or molded bonbons. Its honest second lives: chocolate sauce, ice cream topping, mousse base (fold in whipped cream once cool), hot chocolate, or brownie batter — where nobody will ever know. If your brownies run cakey anyway, see Fudgy vs. Cakey Brownies.

    glossy rescued chocolate sauce being poured over vanilla ice cream
    glossy rescued chocolate sauce being poured over vanilla ice cream

    Frequently asked questions

    Is seized chocolate safe to eat?
    Yes. Seizing is a texture event, not spoilage. It tastes like chocolate, just with the mouthfeel of wet sand. Rescue it into sauce and it’s genuinely good.

    Can I still use seized chocolate for dipping or candy molds?
    No — that’s the one thing rescue can’t restore. Dipping needs tempered chocolate with proper cocoa-butter crystals for snap and shine. Use rescued chocolate for anything where it stays soft: sauces, ganaches, frostings, batters.

    Why did my chocolate seize when I added cold cream?
    Cold liquid shocks melted chocolate: the cocoa butter firms around the cold spots and the sugar grabs the cream’s water before it disperses. Ganache cream must be hot — steaming, just off the boil.

    Can seized white chocolate be rescued?
    Yes, with the same boiling-water method — but add the liquid a teaspoon at a time and stir gently, or the milk proteins turn gummy. Use water rather than cream; extra dairy fat can push white chocolate into greasiness.

    My chocolate looks dusty and streaky but melts fine — is that seizing?
    No, that’s fat bloom — cocoa butter surfacing during temperature swings in storage. Cosmetic only; it melts normally. Don’t throw out bloomed chocolate.

    proper double-boiler setup with dry bowl over barely simmering water
    proper double-boiler setup with dry bowl over barely simmering water

    Related troubleshooting: Fixing Curdled Ganache · Grainy Fudge? How to Fix It · Fudgy vs. Cakey Brownies

  • How to Tell When Bread Is Done: Internal Temps and the Thump Test

    How to Tell When Bread Is Done: Internal Temps and the Thump Test

    How to Tell When Bread Is Done: Internal Temps and the Thump Test

    Quick diagnosis: The only sure test is internal temperature — 190–210°F (88–99°C) in the center, measured with an instant-read thermometer. Lean artisan loaves: 200–210°F. Soft sandwich loaves: 190–200°F. No thermometer? Thump the bottom — a deep hollow sound means done; a dull thud means give it more time.

    Every baker has pulled a gorgeous, deeply browned loaf from the oven, sliced it open, and found a gummy, underbaked stripe through the middle. Crust color lies. The outside can look perfect while the inside is still raw — because browning is about surface heat, and doneness is about the center reaching temperature. Here are the tests that don’t lie, in order of reliability.

    1. Internal temperature (the gold standard)

    Nothing beats a thermometer. It’s the one tool that removes all guesswork, and a basic instant-read costs less than two bags of flour.

    The targets:
    – Lean artisan loaves, sourdough, baguettes: 200–210°F (93–99°C)
    – Soft sandwich loaves, brioche, enriched breads: 190–200°F (88–93°C)
    – Rolls and small buns: 190°F (88°C)

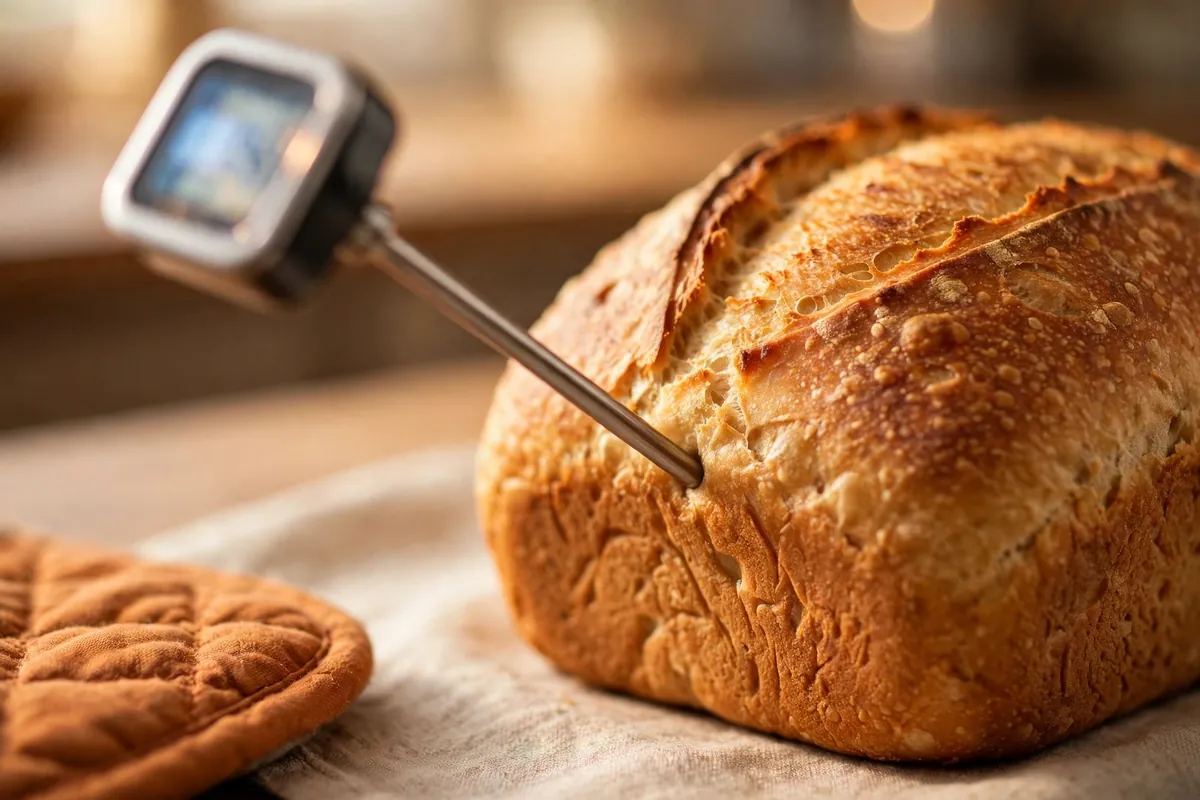
    How to measure: Insert the probe into the center of the loaf through the side or bottom (not the top — the top crust gives a falsely high reading from direct oven heat). Push to the middle of the thickest part. In a pan loaf, go in from the end. Read the number, don’t guess by feel.

    Why the range differs: enriched doughs with eggs, milk, and sugar set at lower temperatures and dry out if pushed to 210°F. Lean doughs need the full 200°F+ for the crumb to set properly — pull a sourdough at 190°F and you’ll find that gummy line.

    Instant-read thermometer inserted into a loaf, display showing about 205°F
    instant-read thermometer inserted into the side of a loaf, display showing ~205°F

    2. The thump test (the classic backup)

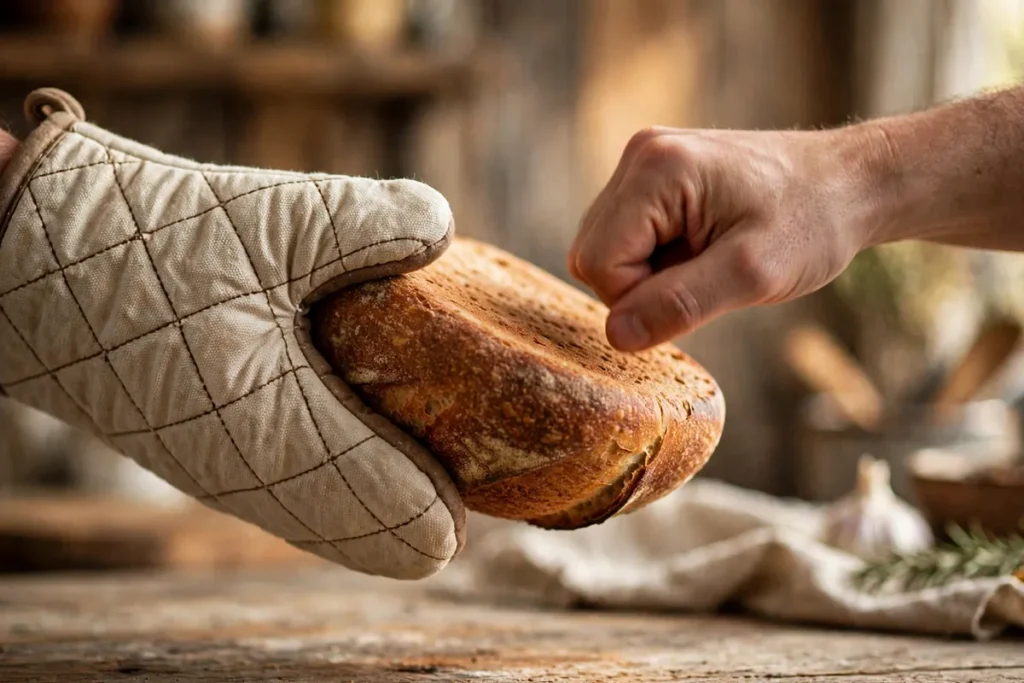
    Flip the loaf out of its pan (use oven mitts — it’s 400°F of bread) and thump the bottom firmly with your thumb or knuckles.

    • Deep, hollow drum sound: done. The interior is set and full of air pockets that resonate.
    • Dull, dense thud: not done. The center is still wet and heavy, absorbing the sound instead of echoing it.

    This test is centuries old because it works — but it takes practice to calibrate your ear. Pair it with the thermometer for your first dozen loaves; after that, you’ll trust the thump. One caveat: it works best on crusty, lean loaves. Soft sandwich bread in a pan gives a less distinct sound, so lean on temperature there.

    Baker's hand thumping the bottom of an inverted loaf, knuckles mid-tap
    baker’s hand thumping the bottom of an inverted loaf, knuckles mid-tap

    3. Color and crust cues (supporting evidence, not proof)

    Crust color tells you about the outside. A deeply browned, firm crust on a lean loaf usually correlates with doneness — but “usually” has burned many bakers, because ovens brown at different rates. Dark pans, hot spots, and high sugar all brown crusts early.

    Use color as a gate, not a verdict: if the crust is still pale, it’s definitely not done. If it’s deeply browned, it might be done — confirm with temperature or thump. For enriched breads, tent with foil if the top is browning faster than the center is baking (a common issue — see Cake Domed and Cracked on Top for the same principle in cakes).

    4. Weight and feel

    A finished loaf feels lighter than you’d expect — a surprising amount of water (often 10–15% of the dough’s weight) bakes off as steam. Pick up the loaf: if it feels unexpectedly light for its size, that’s a good sign. If it feels dense and heavy, the interior is still wet.

    The sides matter too: on a pan loaf, the sides should be firm and pull slightly away from the pan. If the sides look pale and feel soft when you peek, the loaf needs more time regardless of what the top looks like.

    5. The skewer test (for when there’s no thermometer)

    In a pinch, a wooden skewer or thin knife works like a cake tester: push it into the center and pull it out. It should come out clean or with dry crumbs — no wet dough clinging. It’s less precise than a thermometer (a skewer can’t tell 195°F from 205°F), but it catches the obvious underbaked loaf.

    Don’t use the toothpick logic from cakes here — bread is denser, and a few moist crumbs on a bread skewer are fine. You’re checking for wet, gummy residue, not perfect cleanliness.

    What underbaked bread looks like inside

    Know the enemy. Slice into a cooled loaf and look for:

    • The gummy line: a dense, translucent stripe through the center or just under the top crust. This is underbaked crumb — starches that never fully set. It’s the #1 sign of a loaf pulled too early (and it’s closely related to the gumminess in sourdough cut too soon).
    • A wet, shiny interior that looks almost raw. Needs 10–15 more minutes.
    • Collapse after cooling: the loaf looked fine out of the oven but sank as it cooled. The structure wasn’t set — the steam escaped and the crumb couldn’t hold itself up.

    If you catch it within 10 minutes of pulling the loaf, you can often save it: put it back in the oven directly on the rack (out of the pan) for 10–15 minutes. Past that window, the structure has set wrong and re-baking won’t fix it.

    The step everyone skips: cooling

    Bread isn’t done when it leaves the oven. It’s done when it’s cool. The interior continues cooking from residual heat (carryover), and — critically — the starches need time to set. Slice a loaf hot and the crumb compresses into gumminess under the knife; the same loaf sliced after 2 hours has a perfect open crumb.

    The rule: cool lean artisan loaves at least 2 hours on a wire rack before slicing. Sandwich loaves: 1 hour minimum. The rack matters — a loaf cooling on a solid counter traps steam underneath and sogs the bottom crust (the same enemy as soggy-bottom pie).

    Yes, the smell is torture. No, you may not cut it early. (Fine — cut one heel slice. Everyone does.)

    Cross-section of a perfectly baked loaf next to one with a gummy underbaked line
    cross-section of a perfectly baked loaf next to one with a gummy underbaked line, labeled

    Frequently asked questions

    What temperature should bread be when done?
    200–210°F (93–99°C) internal for lean artisan loaves and sourdough; 190–200°F (88–93°C) for soft sandwich loaves and enriched breads. Measure in the center through the side or bottom with an instant-read thermometer.

    How can you tell bread is done without a thermometer?
    Thump the bottom of the loaf — a deep hollow sound means done, a dull thud means it needs more time. Combine with visual cues: deeply browned crust, firm sides pulling from the pan, and a loaf that feels light for its size.

    Can you put underbaked bread back in the oven?
    Yes, if you catch it within about 10 minutes. Return it directly on the oven rack (out of the pan) for 10–15 minutes. Much later than that, the crumb structure has set incorrectly and re-baking won’t fix the gummy texture.

    Why is my bread gummy inside even though the crust is brown?
    The crust browns from surface heat while the center lags behind — especially in hot ovens, dark pans, or high-sugar doughs. The fix is temperature, not color: verify 200–210°F internal for lean loaves, and tent with foil if the crust is racing ahead.

    How long should bread cool before slicing?
    At least 2 hours for lean artisan loaves, 1 hour for sandwich loaves, always on a wire rack. Slicing hot compresses the unset crumb into gumminess. The bread is still cooking from residual heat during the first part of cooling.

    Does bread continue cooking after leaving the oven?
    Yes — carryover cooking continues for 15–30 minutes as internal heat evens out, and starches firm up as the loaf cools to room temperature. This is why a loaf that reads 205°F at pull-out is perfect, not underdone.

    Related troubleshooting: Why Is My Sourdough Gummy Inside? · Bread Crust Too Hard or Too Soft · Why Didn’t My Bread Rise?

  • Glass vs Metal vs Dark Pans: What Changes in Your Bake

    Glass vs Metal vs Dark Pans: What Changes in Your Bake

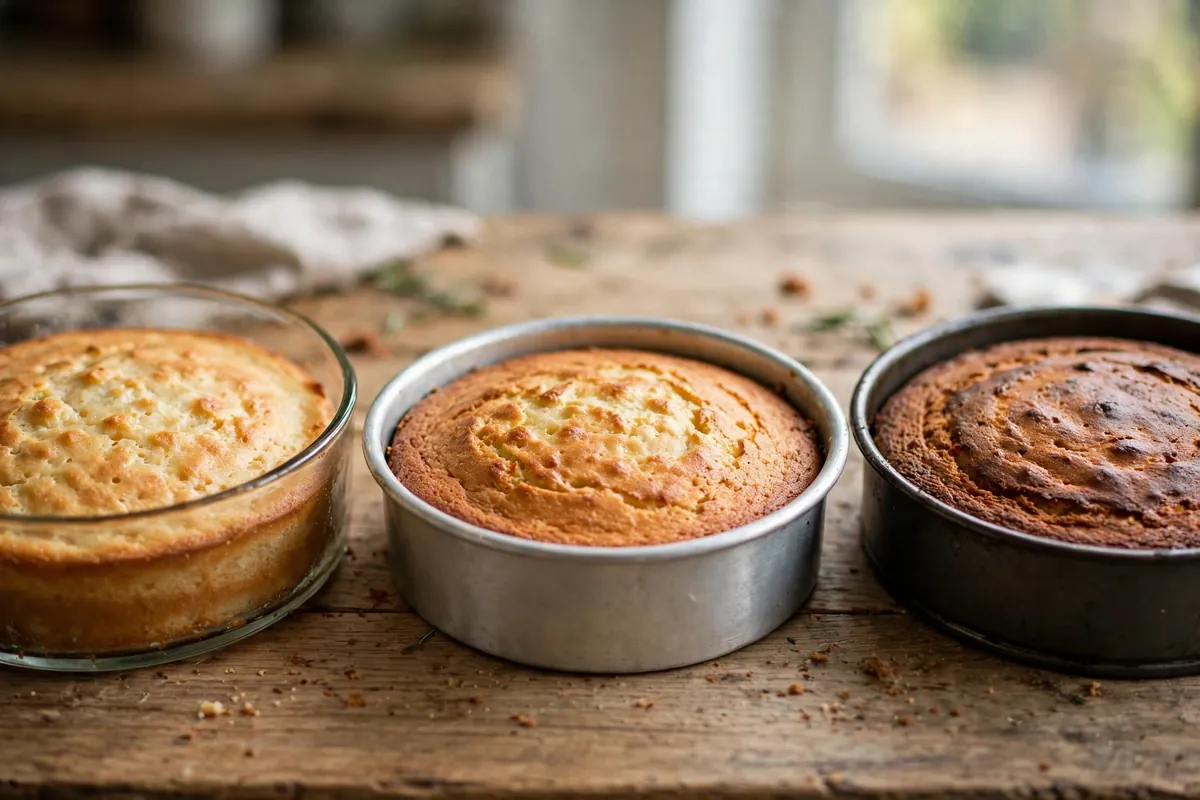
    Your recipe says “bake in a 9×5 loaf pan” — but it doesn’t say glass, light aluminum, or dark nonstick, and that omission matters more than most bakers realize. The same batter in three different pans comes out three different ways: different browning, different rise, sometimes a different bake time entirely. The same recipes baked across all three pan types show consistent, repeatable differences. Here’s what actually changes, and the adjustments that make any pan work.

    Quick diagnosis: Pan color and material change how fast heat reaches your batter. Dark pans absorb more radiant heat — browner, thicker crusts, faster baking: reduce heat 25°F (15°C). Glass is a slow insulator — paler bakes that need more time: same reduction, or add 5–10 minutes. Light aluminum is what nearly every recipe was developed in — when in doubt, that’s the baseline.

    The physics in 60 seconds

    Ovens heat food three ways: conduction (direct contact with the hot pan), convection (hot air circulating), and radiation (infrared energy from the oven walls and elements). Pan material changes the first and third dramatically:

    • Dark surfaces absorb radiant heat; light surfaces reflect it. A dark pan soaks up infrared energy and runs hotter than the oven air around it. A shiny light pan bounces much of it away.
    • Metal conducts heat fast; glass conducts it slowly. Aluminum moves heat into the batter quickly and evenly. Glass is an insulator — it heats slowly, holds heat long, and delivers it gently.

    Every difference below follows from those two facts.

    Light aluminum: the baseline

    This is the pan nearly every recipe was tested in — light-colored, usually aluminum, sometimes aluminized steel. It conducts heat quickly and evenly, browns moderately, and behaves exactly the way the recipe author expected.

    What changes: Nothing. Follow the recipe as written — temperature, time, all of it.

    Best for: Everything, honestly. Cakes, cookies, quick breads, sheet pans. If you’re buying one pan type to cover a whole kitchen, light aluminum is it. Heavy-gauge (thicker) pans resist warping and heat more evenly than thin cheap ones — worth the small premium.

    Watch out for: Thin, flimsy aluminum sheets warp and buckle in a hot oven (that alarming bang mid-bake). It doesn’t ruin anything, but heavy-gauge avoids it.

    Dark metal: the browning accelerator

    Dark nonstick pans, black steel, dark anodized aluminum — these absorb radiant heat aggressively and run significantly hotter than the oven setting. The result: deeper browning, thicker and crisper crusts, and faster baking.

    What changes:
    – Reduce oven temperature by 25°F (15°C). This is the standard, tested adjustment — a 350°F recipe bakes at 325°F in a dark pan.
    – Check 5 minutes early. The faster heat transfer shortens the bake.
    – Expect darker bottoms and edges. Even with the temperature cut, dark pans brown more.

    Best for: Pizza (crisp bottoms), artisan bread bottoms, anything where deep browning is the goal. Roasting pans, too.

    Watch out for: Delicate cakes, sugar cookies, and anything pale — dark pans over-brown them before the center sets. If a dark pan is all you have for a layer cake, the 25°F reduction is non-negotiable, and consider a light-colored cake strip around the outside. (Dark-pan over-browning is a frequent accomplice in dry cake — see Why Is My Cake Dry?.)

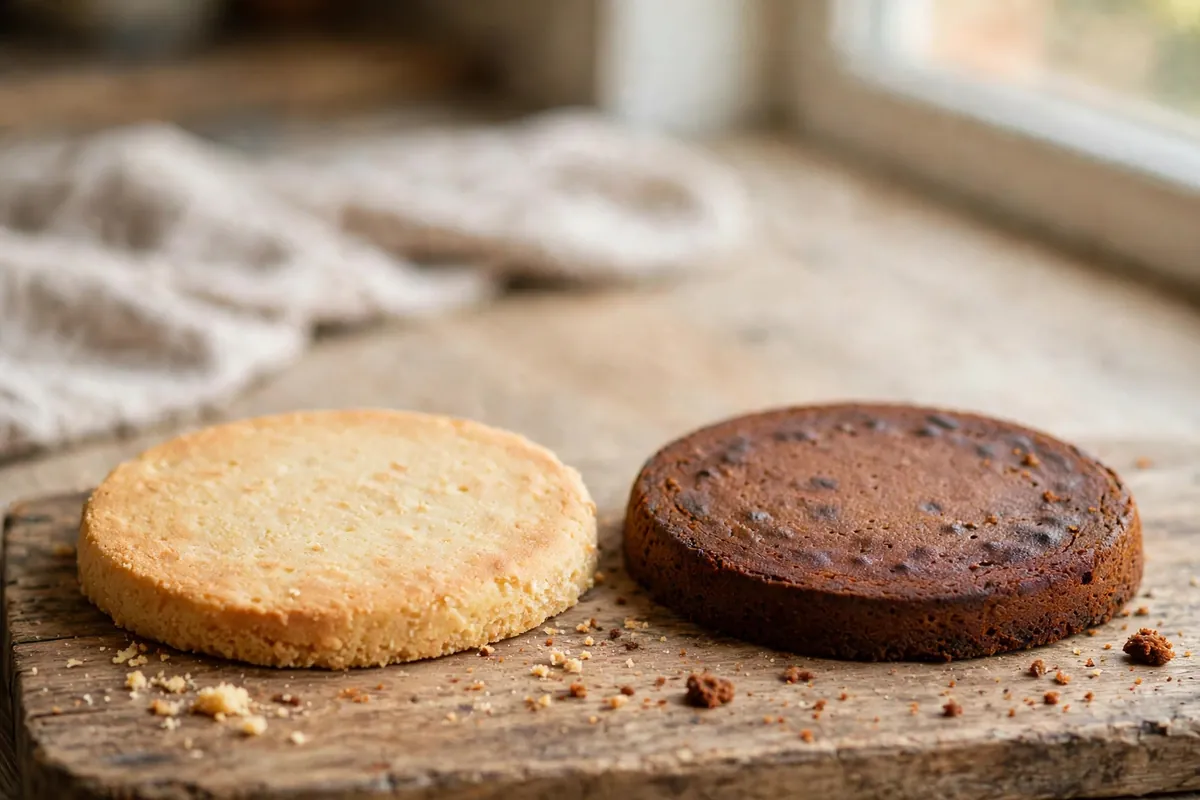
    bottom crusts compared — pale from light aluminum vs deep brown from a dark pan
    bottom crusts compared — pale from light aluminum vs deep brown from a dark pan

    Glass: the slow insulator

    Glass (Pyrex and friends) heats slowly and holds heat long. It doesn’t brown aggressively — glass is transparent to radiant heat rather than absorbing it — but it keeps cooking after you pull it from the oven, thanks to retained heat.

    What changes:
    – Reduce oven temperature by 25°F (15°C) — same rule as dark pans, but for the opposite reason: not because glass runs hot, but because it holds heat and overcooks the carryover.
    – Or keep the temperature and add 5–10 minutes. Glass needs more time to get heat into the batter in the first place.
    – Expect paler crusts. Glass browns less — fine for cobblers and custards, less ideal when you want a deep golden crust.
    – Cool in the pan briefly, then turn out. Food keeps cooking in hot glass; don’t leave it sitting.

    Best for: Pies (you can see the bottom crust browning through the glass — genuinely useful), cobblers, crisps, baked custards, lasagna-style bakes. Transparency is glass’s superpower: visual doneness cues you can’t get from metal.

    Watch out for: Thermal shock — never move glass straight from freezer to hot oven or plunge hot glass into cold water; it can shatter. And never use glass under the broiler.

    Ceramic and stoneware: glass’s cousins

    Ceramic and stoneware behave like glass — slow to heat, long retention, gentle browning. Same 25°F (15°C) reduction; excellent for bread pudding, gratins, and deep-dish pie. Same thermal-shock caution as glass.

    The quick-reference table

    Pan Heat behavior Temp adjustment Time adjustment Browning
    Light aluminum Fast, even (baseline) None — follow recipe None Moderate
    Dark metal / nonstick Absorbs radiant heat, runs hot −25°F (−15°C) Check 5 min early Deep, fast
    Glass Slow insulator, holds heat −25°F (−15°C) +5–10 min (or reduce temp) Pale
    Ceramic / stoneware Like glass −25°F (−15°C) +5–10 min Gentle

    What if the recipe doesn’t specify?

    Assume light aluminum — that’s what the author used. Then apply the table above for whatever you actually own. And when a bake goes wrong in an unfamiliar pan, check the pan before blaming the recipe: a dark pan at full recipe temperature explains a remarkable number of “why did this burn on the bottom” mysteries. (See Cake Domed and Cracked on Top — pan choice is a frequent accomplice there too.)

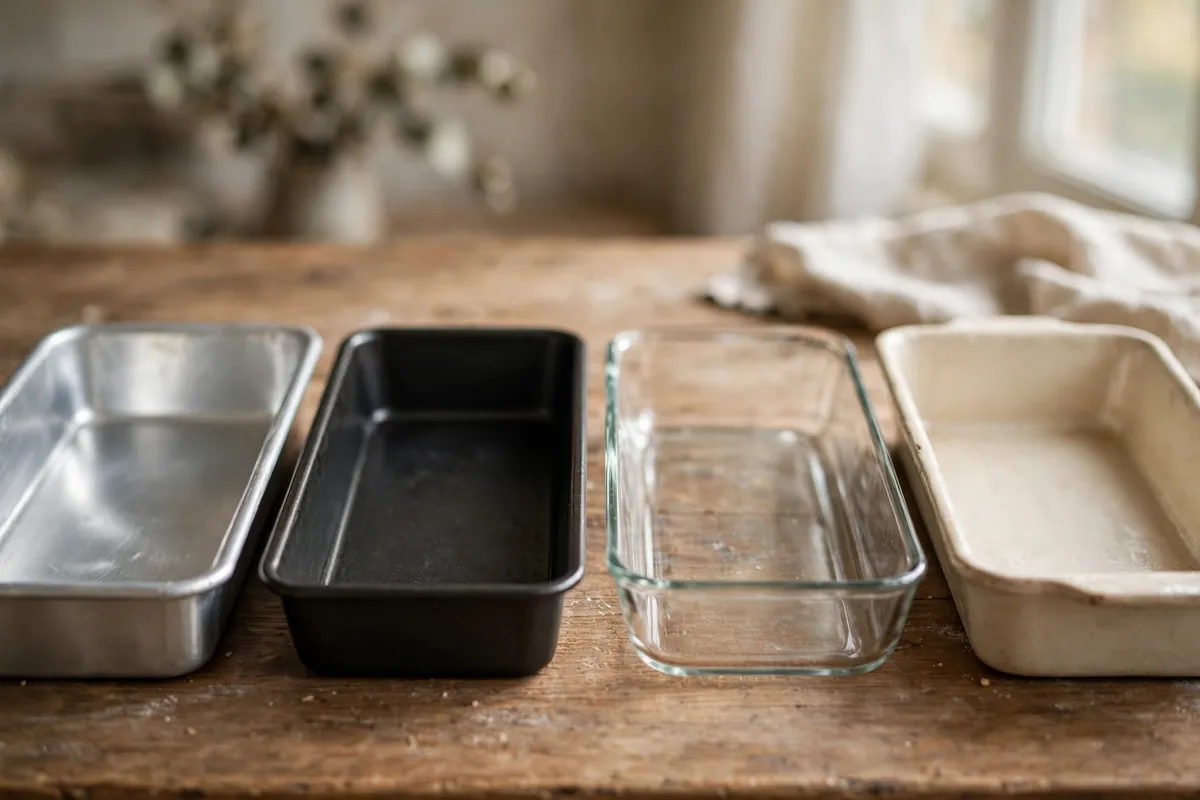
    the four pan types in a row — light aluminum, dark nonstick, glass, ceramic — empty, showing color and material
    the four pan types in a row — light aluminum, dark nonstick, glass, ceramic — empty, showing color and material

    Frequently asked questions

    Can I use a glass pan instead of metal for cake?
    Yes, with the adjustments: reduce heat 25°F (15°C) or add 5–10 minutes, and expect a paler crust. For layer cakes where even browning matters, metal is better — but glass works fine for sheet cakes, snacking cakes, and quick breads.

    Why do my cookies burn on the bottom with my dark cookie sheet?
    The dark surface is superheating the bottoms. Drop 25°F (15°C), and consider lining with parchment (which adds a thin insulating layer) or switching to a light aluminum sheet — the single best upgrade for a cookie baker.

    Is it safe to bake in a dark nonstick pan at high heat?
    Standard nonstick coatings are rated safe to around 450–500°F depending on the manufacturer — check yours. Above that, or with a damaged/scratched coating, switch to uncoated metal or glass. Never preheat an empty nonstick pan.

    Do I need to adjust for a shiny new pan vs an old darkened one?
    Yes, actually — aluminum darkens with age and use, and a well-seasoned darkened sheet behaves more like a dark pan than a light one. If your old sheet suddenly browns faster than it used to, that’s why. The 25°F rule of thumb applies by color, not by what the pan was when new.

    What about silicone pans?
    Silicone is an extreme insulator — even slower than glass — and it doesn’t brown at all. It also flexes, so place it on a rigid sheet pan. Fine for muffins and molded shapes; poor for anything where crust matters. Reduce expectations for browning rather than adjusting temperature much.

    Can the wrong pan ruin an otherwise good recipe?
    “Ruin” is strong, but it can turn a good bake mediocre — burnt bottoms, pale tops, raw centers. When a trusted recipe misbehaves in a new kitchen, check the pan right after oven temperature.

    Related troubleshooting: Cake Domed and Cracked on Top · Why Is My Cake Dry? · Why Did My Cupcakes Overflow?

  • Make-Ahead Bread Dough: Fridge Fermentation Timelines

    Make-Ahead Bread Dough: Fridge Fermentation Timelines

    Make-Ahead Bread Dough: Fridge Fermentation Timelines

    Quick diagnosis: Shape your dough, then refrigerate it — most doughs happily wait 12–48 hours at 38–40°F (3–4°C), and the slow cold ferment actually improves flavor. Bake straight from the fridge (cold dough scores cleaner). Reduce yeast slightly for retards over 24 hours, and never refrigerate dough that’s already fully proofed.

    The best bread trick I know isn’t a recipe — it’s a schedule. Cold fermentation, or “retarding” the dough in the fridge, lets you split bread-making across two days: mix and shape today, bake fresh tomorrow morning. The bonus nobody tells beginners: the bread tastes better. Those long, slow hours in the cold build the complex, slightly tangy flavors that make bakery bread taste like bakery bread.

    Why the fridge works (the 60-second science)

    Yeast is temperature-driven. At room temperature (75–80°F / 24–27°C), it’s racing; at fridge temperature (38–40°F / 3–4°C), it crawls — roughly 10–15 times slower. But the enzymes in the flour keep working steadily in the cold, breaking starches into sugars and developing flavor compounds the whole time. That’s the magic of retarding: fermentation slows to a near-standstill while flavor keeps building.

    This is also why the fridge is forgiving. A dough that would over-proof in 45 minutes on a warm counter can sit safely for a day or more in the cold. Time becomes your ingredient instead of your enemy.

    When to refrigerate: the two windows

    You have two good moments to send dough to the fridge. Pick one — don’t do both, or you’ll over-ferment.

    Window 1 — After bulk fermentation, before shaping (my preference for wet doughs). Let the dough complete its first rise at room temperature, then refrigerate the whole mass 12–24 hours. Shape cold the next day (cold dough is less sticky and easier to handle), then give it a final proof at room temperature before baking.

    Window 2 — After shaping (my preference for most breads). Shape the loaves, place them in their proofing baskets or pans, cover well, and refrigerate 8–48 hours. Bake straight from the fridge — no warm-up needed. This is the simplest path and the one I recommend to beginners: shape today, bake tomorrow.

    Window 2 wins for one reason: cold dough scores beautifully. A lame or sharp knife glides through firm, cold dough and the cuts stay open in the oven, giving you those dramatic ears and blooms. Room-temperature dough drags and seals back up.

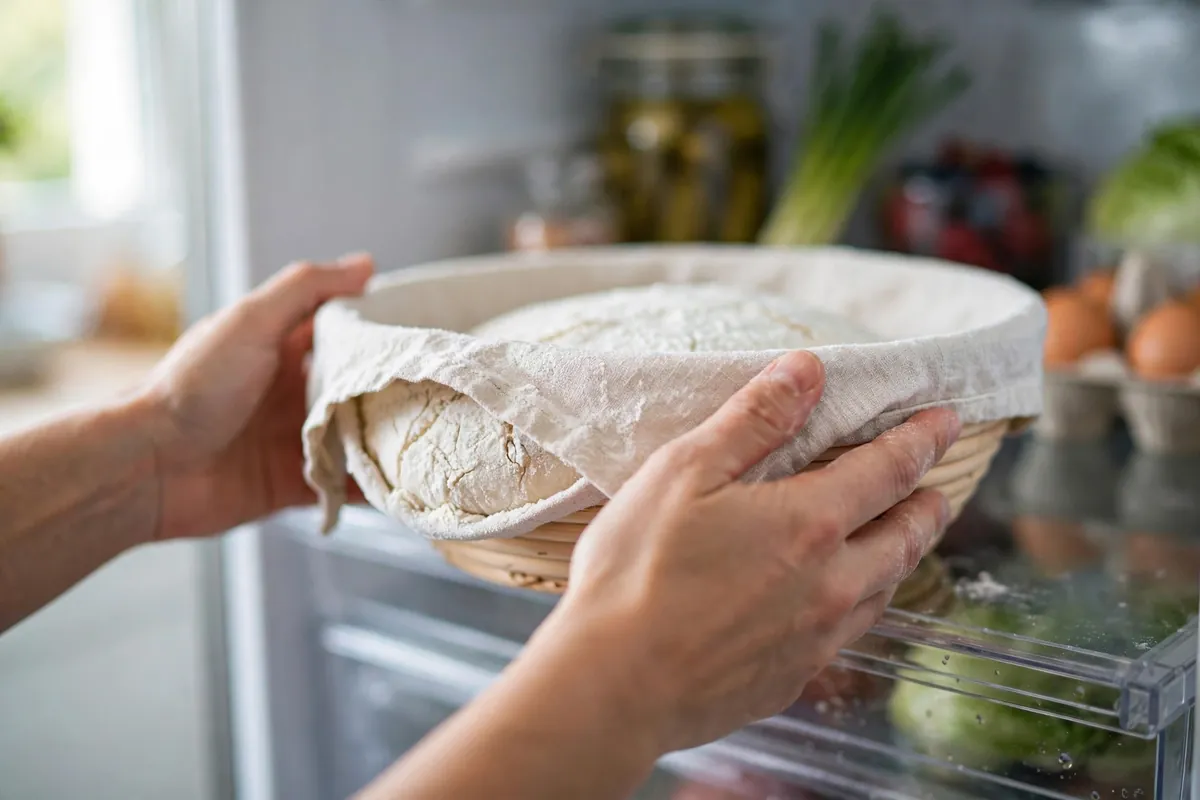
    Shaped loaf in a floured proofing basket, covered, going into the fridge
    shaped loaf in a floured proofing basket, covered, going into the fridge

    The timeline table: how long each dough can wait

    These are safe, tested ranges at 38–40°F (3–4°C). “Peak flavor” is where I’d aim; “maximum” is the edge before quality drops.

    Dough type In the fridge Peak flavor Maximum Notes
    Lean artisan / sourdough 12–36 hrs 18–24 hrs 48 hrs The classic retard candidate; flavor deepens beautifully
    Sandwich / pan loaves 8–24 hrs 12–18 hrs 36 hrs Watch for over-proofing past 24 hrs
    Pizza dough 24–72 hrs 48 hrs 5 days Longer = more complex, leopard-spotted crust
    Brioche / enriched dough 8–24 hrs 12–18 hrs 48 hrs Butter firms up; needs a longer bake from cold
    Cinnamon rolls / sweet dough 8–16 hrs 12 hrs 24 hrs Sugar accelerates things even in the cold
    Focaccia 12–48 hrs 24 hrs 72 hrs Dimple cold, bake cold — works brilliantly

    Past the maximum, two things go wrong: the yeast exhausts its food and the gluten network starts breaking down (protease enzymes don’t sleep), giving you a slack, sticky dough that bakes up flat. If your dough smells strongly of alcohol and collapses when touched, it’s gone too far — bake it anyway as focaccia rather than binning it.

    Adjusting the recipe for a cold retard

    Three small tweaks make retarding foolproof:

    1. Reduce the yeast for long retards. For anything over 24 hours, cut yeast by a third to a half (e.g., from 2% to 1–1.25% of flour weight, or from 2¼ tsp to 1–1½ tsp per 500g flour). Less yeast means a slower, more controlled cold ferment with no risk of exhaustion. Sourdough needs no adjustment — the culture self-regulates.
    2. Use cold water in the mix. If you know the dough is heading for the fridge, mix with cool water (65–70°F / 18–21°C) so it enters the cold already calm rather than racing.
    3. Salt stays at 2%. Don’t reduce salt to “help” the yeast — salt controls fermentation pace and builds flavor. The full 10g per 500g flour stands.
    Side-by-side crumb comparison — room-temp ferment vs 24-hour cold retard
    side-by-side crumb comparison — same recipe, room-temp ferment vs 24-hour cold retard

    Baking straight from the fridge

    This surprises beginners, but yes: no warm-up needed. Cold dough goes directly into the hot oven, and it’s actually advantageous:

    • Score cold. The firm surface takes clean, confident cuts (see Bread Crust Too Hard or Too Soft for scoring’s effect on crust).
    • Better oven spring. The cold exterior sets slightly slower relative to the interior’s expansion — actually, the real mechanism: the dough hits the hot oven while still cool inside, so the yeast gets a final burst of activity before dying, boosting spring.
    • Add 5–10 minutes to the bake time for large loaves, since you’re starting from 40°F instead of 75°F. Trust the thermometer, not the clock: lean loaves are done at 200–210°F (93–99°C) internal.

    The one exception: enriched doughs like brioche bake more evenly with a 20–30 minute counter rest while the oven preheats. The butter needs a head start or the center stays doughy.

    The mistakes that wreck a retard

    1. Refrigerating fully-proofed dough. The fridge slows yeast; it doesn’t stop it. Dough that was ready to bake will over-proof in the cold within hours. Refrigerate at 75–80% of the final proof, not 100%.
    2. Uncovered dough. The fridge is a desert — uncovered dough forms a dry skin that never browns properly and can tear during oven spring. Cover airtight: plastic wrap pressed to the surface, or a damp towel plus a bag.
    3. A warm fridge. Above 42°F (5.5°C), fermentation runs faster than these timelines assume. Keep a fridge thermometer — most home fridges drift warmer than their dials claim.
    4. Retarding twice. Fridge after bulk AND after shaping = over-fermented. Pick one window.
    5. Baking an over-retarded dough as a loaf. If it collapsed and smells boozy, pivot: flatten it into a focaccia, dimple with oiled fingers, and bake hot. You’ll never know it was a rescue.
    Cold dough being scored with a lame, clean ear-forming cut visible
    cold dough being scored with a lame, clean ear-forming cut visible

    Frequently asked questions

    Can I refrigerate bread dough overnight?
    Yes — that’s the ideal use case. Shape your loaves in the evening, refrigerate 8–16 hours, and bake straight from the fridge in the morning. Most doughs are at peak flavor in this window, and cold dough scores more cleanly than room-temperature dough.

    How long can bread dough stay in the fridge?
    12–48 hours for most doughs at 38–40°F (3–4°C); pizza dough up to 5 days. Past that, yeast exhausts its food and enzymes weaken the gluten, producing slack dough that bakes flat. Reduce yeast by a third for retards over 24 hours.

    Should bread dough come to room temperature before baking?
    No — bake it cold. Cold dough scores cleanly, gets good oven spring, and needs only 5–10 extra minutes in the oven. The sole exception is rich brioche-style dough, which benefits from 20–30 minutes on the counter while the oven preheats.

    Can you put dough in the fridge during the first rise?
    You can, but it’s the less predictable window — judging when a cold bulk ferment is “done” is harder than judging a shaped loaf. If you do, give it 12–24 hours, then shape cold and proof at room temperature until ready (use the poke test: slow spring-back with a slight indent means bake).

    Is cold-fermented bread healthier?
    Cold fermentation does break down more starches and can modestly lower the bread’s glycemic impact, but the difference is small and I won’t oversell it. The real, reliable payoff is flavor — deeper, more complex, faintly tangy — and scheduling freedom.

    My retarded dough didn’t rise in the fridge — is it dead?
    Almost certainly not. Proper cold fermentation shows little visible rise — that’s normal and expected. The dough should feel alive and slightly puffy, not doubled. It does its real rising in the oven (oven spring). Only worry if it smells strongly of alcohol and collapses at a touch — that’s over-fermentation, not under.

    Related troubleshooting: Why Didn’t My Bread Rise? · Why Is My Bread Dense? · How to Tell When Bread Is Done

  • How to Freeze Cookie Dough (and Bake It Straight From Frozen)

    How to Freeze Cookie Dough (and Bake It Straight From Frozen)

    How to Freeze Cookie Dough (and Bake It Straight From Frozen)

    Quick diagnosis: Scoop the dough into balls FIRST, freeze them solid on a tray (1–2 hours), then bag them airtight. Bake straight from frozen at the recipe’s temperature, adding 1–3 minutes. Never thaw on the counter first — thawed dough spreads flat. Frozen dough keeps 3 months at peak quality.

    There’s a special kind of magic in pulling warm cookies from the oven on a Tuesday night with zero prep. Freezing cookie dough is how you get there — a stash of portioned dough in the freezer means fresh-baked cookies in under 20 minutes, any day, with no mixing bowls to wash. I’ve kept a running freezer stash for years, and the method below is the one that survives every dough type I throw at it.

    Which cookie doughs freeze best (and which don’t)

    Freeze beautifully: drop-cookie doughs (chocolate chip, oatmeal, peanut butter, double chocolate), slice-and-bake/shortbread logs, snickerdoodles. These are sturdy, high-fat doughs whose structure doesn’t depend on delicate foams.

    Freeze fine with care: sugar-cookie dough for cutouts (freeze as a flattened disc, roll and cut after a 10-minute counter rest), gingerbread, thumbprints (freeze the balls plain; add the jam or Hershey’s kiss after baking — fillings get weepy in the freezer).

    Don’t freeze: meringue-based doughs (they weep and collapse), very delicate lace cookies (Florentines — the caramelized sugar goes sticky), and anything with a fresh-cream filling. These are bake-fresh-only cookies.

    The rule of thumb: if the dough is scoopable or sliceable and leavened with baking soda or powder, it freezes. If its texture depends on whipped egg whites or paper-thin caramel, it doesn’t.

    Step 1: Portion before you freeze

    This is the step people skip, and it’s the whole game. Frozen dough is nearly impossible to portion — you’ll be chiseling at a rock with a knife, which is how countertops get scarred and tempers get lost.

    Scoop the fresh dough into balls exactly as you would for baking (a #20 scoop, about 3 tablespoons, for standard cookies). For slice-and-bake logs, shape the log, wrap it, and freeze the whole log — slice while still frozen, which is actually easier than slicing soft dough.

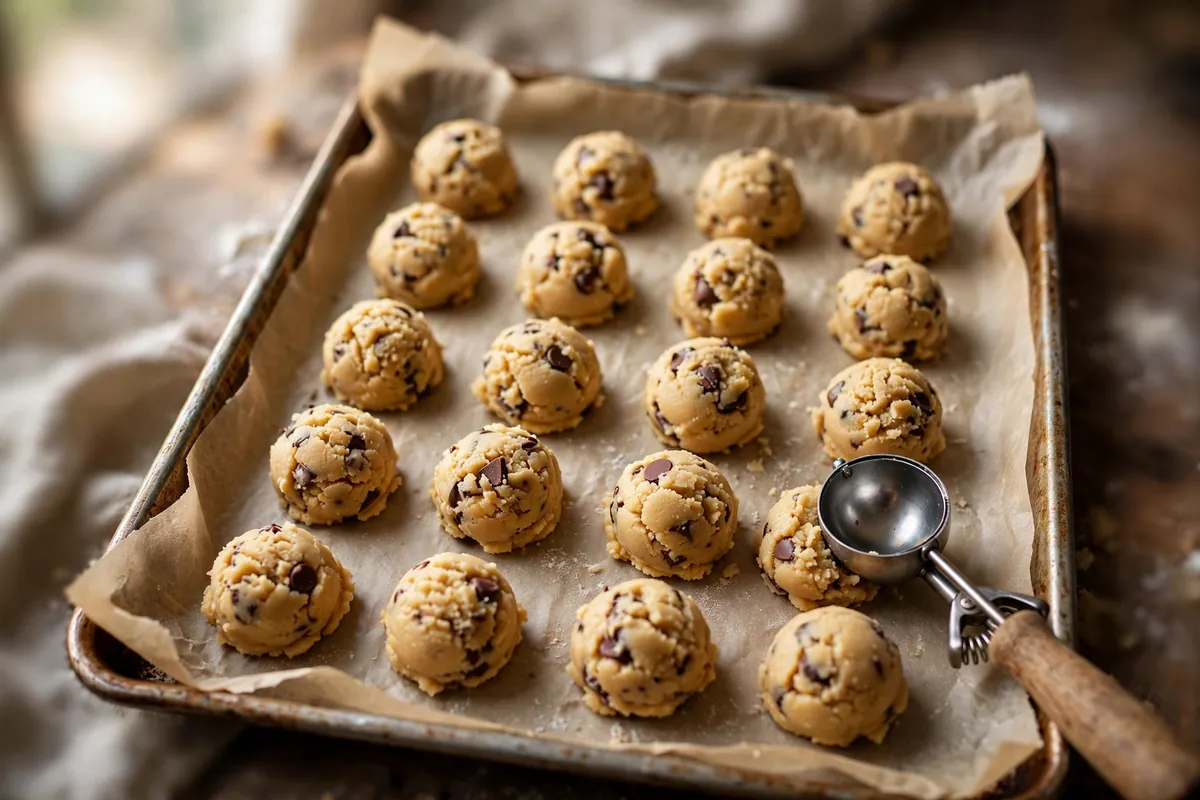
    Tray of scooped raw cookie dough balls on parchment, ready for the freezer
    tray of scooped raw cookie dough balls on parchment, ready for the freezer

    Step 2: Flash-freeze on a tray

    Spread the portioned balls on a parchment-lined sheet pan with space between them and freeze uncovered for 1–2 hours, until rock solid. This is called flash-freezing, and it keeps the balls from fusing into one dough boulder in the bag.

    Skip this step and bag soft dough, and you’ll pull out a single inseparable mass. Flash-freezing means every ball stays individual — grab exactly as many as you want, any time.

    Step 3: Pack it airtight

    Transfer the frozen balls to a heavy-duty freezer bag. Press out as much air as possible before sealing — air is what causes freezer burn, those dry gray patches that taste like the freezer smells. For extra insurance on dough you’ll keep past a month, wrap the bag’s contents in a second bag or a layer of plastic wrap.

    Label everything: dough type, date frozen, bake temp, and bake time. Frozen dough balls all look identical after a month. A strip of masking tape and a marker takes ten seconds and saves you from the mystery-bag gamble. I write it like this: “Choc chip — 1/12 — 350°F — 11–13 min +2 frozen.”

    Labeled freezer bag of frozen cookie dough balls, masking-tape label visible
    labeled freezer bag of frozen dough balls, masking-tape label visible

    How long frozen dough keeps

    At 0°F (-18°C) or below, portioned cookie dough holds peak quality for 3 months. It’s still safe well past that — frozen food doesn’t spoil — but quality slides: fats pick up off-flavors, leaveners lose punch, and the baked texture gets progressively flatter and duller. My rule: if it’s been 4+ months, bake a test batch of two before committing to a full tray.

    Keep the freezer at a steady 0°F. A freezer that’s constantly opened (or a frost-free model cycling through defrost) shortens the window — store dough in the coldest, least-disturbed spot, usually the back.

    Baking straight from frozen: the method

    Here’s the payoff. No thawing, no planning ahead.

    1. Heat the oven fully — a full 15–20 minutes past the preheat beep. Frozen dough hitting a half-hot oven spreads before it sets (the same too-cool-oven problem behind flat cookies).
    2. Place frozen balls on a parchment-lined sheet, spaced as the recipe directs. They go on the tray frozen solid, straight from the bag.
    3. Bake at the recipe’s temperature — don’t raise it. The frozen center needs steady heat, not a blast.
    4. Add 1–3 minutes to the recipe’s bake time. Start checking at the original time; most doughs need just 1–2 extra minutes. The visual cues don’t change: set edges, slightly underdone-looking centers.

    The result is arguably better than fresh dough: baking from frozen gives thicker cookies with chewier centers, because the fat melts slowly while the structure sets — the same principle as chilling dough, taken further. Frozen versus fresh batches side by side: the frozen batch consistently comes out taller.

    Side-by-side comparison — cookies baked from frozen (thick) vs baked fresh (flatter)
    side-by-side comparison — cookies baked from frozen (thick) vs baked fresh (flatter)

    Thaw-first vs. bake-from-frozen

    You’ll see advice to thaw dough in the fridge overnight. Here’s my honest take after testing both: thawing works, but it’s strictly worse. Thawed dough is soft dough — it spreads more, bakes up thinner, and you’ve added 8+ hours of planning for a worse cookie.

    The one exception: slice-and-bake logs and cutout sugar cookies. A log that’s rock solid is hard to slice cleanly — give it 10 minutes on the counter, no more, just until the knife goes through. Cutout dough needs a brief rest to become rollable. Everything scoopable goes in frozen.

    The 5 mistakes that ruin frozen dough

    1. Freezing unportioned dough. The chisel problem. Always portion first.
    2. Skipping the flash-freeze. One fused dough boulder instead of grab-and-go balls.
    3. Thin bags with air inside. Freezer burn in weeks. Press the air out; double-bag for long storage.
    4. No labels. Mystery dough is how good cookies go unbaked. Date, type, temp, time.
    5. Thawing on the counter. Room-temp thaw = soft dough = flat cookies. Bake from frozen or don’t bother.

    Frequently asked questions

    Can you bake cookie dough from frozen without thawing?
    Yes — that’s the best method. Place frozen dough balls directly on a parchment-lined sheet, bake at the recipe’s temperature, and add 1–3 minutes. The cookies come out thicker than from fresh dough because the fat melts slowly while the structure sets.

    How long does cookie dough last in the freezer?
    Peak quality for 3 months at 0°F (-18°C). It’s safe beyond that, but fats absorb off-flavors and leaveners weaken, so texture declines. Bake a 2-cookie test batch before committing a full tray of older dough.

    Should you thaw frozen cookie dough before baking?
    No, for drop cookies — thawing makes the dough soft, which causes spreading. The only doughs that need a brief rest are slice-and-bake logs (10 minutes, for clean slicing) and cutout sugar cookie dough (10 minutes, to become rollable).

    Can you freeze cookie dough with raw eggs in it?
    Yes. The eggs are fully incorporated into the dough and will be baked to a safe internal temperature. Standard food-safety guidance applies: keep the dough frozen solid until baking, and don’t refreeze thawed raw dough.

    Does freezing change how cookies taste?
    Properly packed dough (airtight, 3 months or less) bakes up indistinguishable from fresh — in blind tests, tasters actually preferred the frozen-baked batch for thickness. Poorly packed dough (air exposure, 5+ months) picks up stale, flat flavors. The packing matters more than the freezing.

    Can you refreeze cookie dough?
    Don’t refreeze thawed raw dough — each freeze-thaw cycle degrades texture and raises food-safety questions. But you can absolutely bake thawed dough and then freeze the baked cookies, which keep 2–3 months airtight.

    Related troubleshooting: Why Do My Cookies Spread Flat? · Why Are My Cookies Cakey Instead of Chewy? · How to Store Homemade Bread So It Stays Fresh for Days

  • High-Altitude Baking Adjustments: What Actually Changes

    High-Altitude Baking Adjustments: What Actually Changes

    High-Altitude Baking Adjustments: What Actually Changes

    You moved to Denver, or Santa Fe, or just uphill — and suddenly your reliable cake recipe collapses in the middle, your cookies spread into lace, and your bread over-proofs before you’ve finished the dishes. Nothing is wrong with your technique. The air changed.

    At altitude, air pressure drops. That single fact rewrites three rules of baking: leavening gases expand more and faster, water boils at a lower temperature, and the air is drier. Your sea-level recipe doesn’t know any of this. The same formulas at sea level and at 7,000 feet need different adjustments — organized by what to change, with the altitude bands where each change kicks in.

    Quick diagnosis: Above ~3,500 ft (1,050m): reduce baking powder/soda by ~1/4 per teaspoon, cut sugar by 1–2 tbsp per cup, add 2–4 tbsp liquid per cup, and raise oven temp 15–25°F (10–15°C). Watch batters, not clocks — everything happens faster up high. Start with these four changes; fine-tune from there.

    Why Altitude Breaks Recipes (The 60-Second Physics)

    Three things happen as you climb:

    1. Lower air pressure → gases expand more. The CO2 from your leavening and the steam in the batter meet less resistance, so bubbles grow bigger and faster. The batter rises beautifully — then the overstretched bubble walls can’t hold, and the whole structure collapses. That sunken cake middle? Classic altitude failure (and yes, it looks exactly like the collapse in Why Did My Cake Sink in the Middle? — same symptom, different cause).
    2. Lower boiling point → faster moisture loss. Water boils at 203°F (95°C) at 5,000 ft instead of 212°F (100°C). Moisture escapes the batter sooner and the dry mountain air pulls more out. Result: drier crumb, faster staling.
    3. Drier air → flour is drier. Flour stored at altitude holds less ambient moisture, so it drinks more of the recipe’s liquid.

    Every adjustment below is a direct counter to one of these three effects.

    Know Your Band (Adjustments Scale With Altitude)

    Band Altitude What changes
    Low 3,000–5,000 ft (900–1,500m) Small tweaks: slight leavening/sugar cuts, a little extra liquid
    Medium 5,000–7,000 ft (1,500–2,100m) The full adjustment set below
    High 7,000+ ft (2,100m+) Aggressive cuts + structural help (extra egg, stronger flour)

    Below 3,000 ft, don’t touch anything — normal recipe variation swamps altitude effects. These are starting points: bake, observe, adjust once.

    Adjustment 1: Reduce Leavening (Fights Over-Expansion)

    This is the single most important change. Less air pressure means your normal leavening dose is now an overdose.

    • 3,500–5,000 ft: reduce baking powder or soda by 1/8 teaspoon per teaspoon called for.
    • 5,000–7,000 ft: reduce by 1/4 teaspoon per teaspoon (about 20–25% less).
    • 7,000 ft+: reduce by up to 1/3, and consider switching part of the baking powder to baking soda + acid for a gentler, more controllable rise.

    Why it works: smaller gas production matches the weaker bubble walls. The rise is slightly lower but stable — a cake that stays up beats a tall one that falls.

    Two cupcakes side by side — one collapsed and sunken, one perfectly domed
    two cupcakes side by side — one with a collapsed sunken top, one with a perfect dome, labeled with altitude context

    Adjustment 2: Cut the Sugar (Strengthens Structure)

    Sugar weakens gluten and egg structure — at sea level that’s tenderness; at altitude it’s collapse fuel, because the structure is already under extra stress from over-expansion.

    • 3,500–5,000 ft: reduce sugar by 1 tablespoon per cup.
    • 5,000 ft+: reduce by 2 tablespoons per cup.

    Don’t go further than 2 tbsp per cup — beyond that you change the recipe’s character and moisture balance. (And no, this doesn’t make the cake “healthy” — it’s structural engineering, not nutrition.)

    Adjustment 3: Add Liquid (Fights Dryness)

    The dry air and lower boiling point steal moisture. Compensate directly:

    • 3,500–5,000 ft: add 1–2 tablespoons liquid per cup of flour.
    • 5,000 ft+: add 2–4 tablespoons per cup.

    Use whatever liquid the recipe already contains — don’t introduce new flavors. In chocolate cakes, hot coffee as the added liquid is my favorite: it deepens the chocolate while fixing the moisture.

    Adjustment 4: Raise the Oven Temperature (Sets Structure Faster)

    A hotter oven sets the cake’s structure before the over-eager gases can over-expand it. It’s a race, and heat is your head start.

    • 3,500–5,000 ft: increase by 15°F (10°C).
    • 5,000 ft+: increase by 25°F (15°C).

    Then shorten the bake time slightly and check early — the hotter oven plus faster evaporation narrows the window between done and dry. Toothpick-test at the earliest stated time, every time.

    Adjustment 5: Strengthen the Flour (For High Altitudes)

    At 7,000 ft and above, sometimes the four adjustments aren’t enough — the structure needs reinforcement:

    • Add an extra egg (or one extra white) to cake batters. The protein firms the crumb noticeably.
    • Add 1–2 tablespoons flour per cup for a bit more scaffolding.
    • Use bread flour (12–14% protein) in place of all-purpose for sturdy cakes and quick breads. Don’t do this for tender cakes — it’s a trade of tenderness for height.
    Two slices of the same cake recipe baked at sea level and high altitude
    the same cake recipe baked at sea level and at high altitude side by side, both successful after adjustments

    Yeast Breads at Altitude: Easier Than Cakes

    Good news: yeast doughs are less fussy about altitude than cakes, because you can see and feel what’s happening. Rise times shrink — dough that takes 90 minutes at sea level might take 45 at 6,000 ft. Watch the dough, not the clock.
    – Slightly less yeast helps if you’re consistently over-proofing: cut by about 1/4 teaspoon per loaf.
    – Punch down more aggressively and consider an extra fold — degassing redistributes yeast and evens out the too-fast rise.
    – Increase oven temp 15–25°F like cakes, for better oven spring control.

    If your yeast breads are failing for non-altitude reasons, the diagnostics in Why Didn’t My Bread Rise? still apply — altitude just compresses the timeline.

    Cookies at Altitude: Mostly Fine

    Cookies are the low-drama category. Chill the dough, add 1–2 tablespoons flour per cup if they’re spreading into lace, and pull them a minute early. For the full playbook: Why Do My Cookies Spread Flat?.

    Notebook showing a recipe's original versus altitude-adjusted measurements
    a small whiteboard or notebook showing one recipe’s original vs altitude-adjusted measurements side by side

    Frequently Asked Questions

    My cake collapsed in the middle — is it altitude or something else?
    Could be either — the symptom is identical. Rule of thumb: if the recipe worked at sea level and fails above ~3,500 ft, suspect altitude first and apply the leavening cut. If it fails at any altitude, work through Why Did My Cake Sink in the Middle?.

    Do I need to adjust no-yeast breads like soda bread?
    Yes — chemical leaveners over-expand at altitude just like in cakes. Cut the soda by ~1/4 teaspoon per teaspoon above 5,000 ft and raise the oven temp 25°F. (The method itself is in No-Yeast Bread: How It Works.)

    What about a pressure cooker or Instant Pot at altitude?
    Pressure cooking largely sidesteps the problem — the sealed environment normalizes pressure. It’s one reason pressure-cooker cakes are popular in mountain regions. Just follow the manufacturer’s altitude guidance for timing.

    Can I still eat a collapsed altitude cake?
    Absolutely — it’s a texture issue, not a safety one. Cube it for trifle, where the layers hide every flaw and the custard adds back moisture. Some of my best trifles started as altitude casualties.

    Do canned refrigerated doughs need adjusting?
    They’re formulated with wide tolerances and usually bake fine — maybe 25°F hotter and a minute less. It’s the from-scratch recipes with precise chemistry that need the full treatment.

    I’m at 10,000 ft — is baking even possible?
    Yes, but treat every recipe as a starting hypothesis. Use the aggressive end of every adjustment, add the extra egg, and expect 2–3 test bakes to dial in a finicky cake. Sturdy recipes (pound cake, banana bread) adapt far more easily than foam cakes.

    Related troubleshooting: Why Did My Cake Sink in the Middle? · Why Didn’t My Bread Rise? · Metric to US Cups: Baking Conversion Chart

  • Metric to US Cups: Baking Conversion Chart (With Weight Tables)

    Metric to US Cups: Baking Conversion Chart (With Weight Tables)

    You’re mid-recipe. The blogger wrote “250g flour” and your kitchen has measuring cups. Or the reverse — “2 cups” and all you trust is your scale. Every baker hits this wall, and the stakes are real: in baking, unlike cooking, measurement errors don’t forgive. A cup of flour can weigh anywhere from 120g to 150g depending on how you scoop it — that’s a 25% swing in the most important ingredient in the recipe. (Scooped-packing flour is one of the sneakiest causes of dry cake — see Why Is My Cake Dry?.)

    This is the definitive conversion resource I wish I’d had taped inside my cupboard door. Bookmark it.

    Quick answer: 1 US cup = 236.6ml. For baking, the weights that matter most: 1 cup all-purpose flour = 120g (spooned and leveled), 1 cup granulated sugar = 200g, 1 cup butter = 227g (2 sticks), 1 cup water or milk = 240g. A kitchen scale beats cups every time — but when cups are all you have, the tables below keep you accurate.

    Why Weight Beats Volume (The 30-Second Case for a Scale)

    Flour is compressible. Scoop your cup straight from the bag and you pack in ~150g. Spoon it in lightly and level it off: ~120g. Same cup, 25% more flour — and that extra flour drinks the recipe’s liquid, producing the dense, dry results I diagnose in Why Is My Bread Dense?.

    A basic digital kitchen scale costs less than a bag of good chocolate and eliminates this entire category of failure. Weigh everything 120g-and-up; use spoons only for small quantities (leaveners, salt, spices, extracts). If you’re converting a cups recipe to weights for the first time, the tables below are your Rosetta Stone.

    Volume Equivalents (US Cups, Tablespoons, Milliliters)

    Cups Tbsp Tsp Milliliters
    1 cup 16 tbsp 48 tsp 237ml
    3/4 cup 12 tbsp 36 tsp 177ml
    2/3 cup 10 tbsp + 2 tsp 32 tsp 158ml
    1/2 cup 8 tbsp 24 tsp 118ml
    1/3 cup 5 tbsp + 1 tsp 16 tsp 79ml
    1/4 cup 4 tbsp 12 tsp 59ml
    1/8 cup 2 tbsp 6 tsp 30ml
    1 tbsp — 3 tsp 15ml

    Note: US cup = 236.6ml. Australian tablespoons are 20ml (not 15ml) — if you’re using an Australian recipe, that difference matters in small-batch baking.

    Weight Tables: Cups to Grams

    These use the spooned-and-leveled standard — spoon flour into the cup, level with a knife. This matches how most professional recipe developers measure.

    Flours

    1 cup Grams Ounces
    All-purpose flour 120g 4.25 oz
    Bread flour 127g 4.5 oz
    Cake flour 114g 4 oz
    Whole wheat flour 113g 4 oz
    Rye flour 102g 3.6 oz
    Almond flour 96g 3.4 oz
    Cornstarch 128g 4.5 oz

    Sugars

    1 cup Grams Ounces
    Granulated sugar 200g 7.1 oz
    Brown sugar, packed 220g 7.8 oz
    Powdered/confectioners’ sugar 120g 4.25 oz
    Cocoa powder (Dutch) 100g 3.5 oz

    Fats and dairy

    Measure Grams
    1 cup butter 227g (2 sticks / 16 tbsp)
    1 tbsp butter 14g
    1 cup oil 224g
    1 cup milk/buttermilk 240g
    1 cup heavy cream 238g
    1 cup sour cream/yogurt 245g

    Sweeteners and misc.

    1 cup Grams
    Honey / golden syrup 340g
    Maple syrup 315g
    Molasses 328g
    Water 236g
    Rolled oats 90g
    Chocolate chips 170g
    Chopped nuts 120g
    Raisins 145g
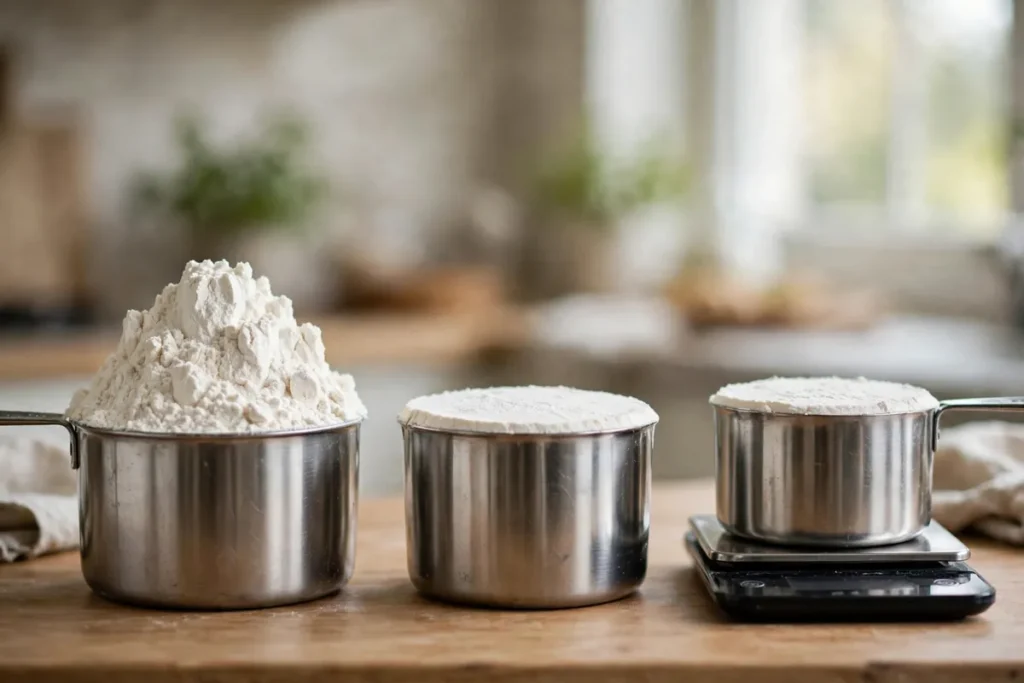
    Three cups of flour — scooped and heaped, spooned and leveled, weighed at 120g
    three cups of flour side by side — one scooped and heaped, one spooned and leveled, one weighed at 120g on a scale

    Temperature Conversions

    °F °C Gas Mark What it’s for
    325°F 165°C 3 Slow bakes, cheesecakes, meringues
    350°F 175°C 4 The standard — most cakes, cookies, quick breads
    375°F 190°C 5 Biscuits, scones, golden crusts
    400°F 200°C 6 Puff pastry, artisan breads
    425°F 220°C 7 Pizza, soda bread, high-heat roasts
    450°F 230°C 8 Pizza steel, flatbreads

    Quick formula: °C = (°F − 32) × 5/9. For oven settings, round to the nearest 5°C — ovens aren’t more precise than that anyway.

    Pan Size Conversions

    Pan size changes batter depth, which changes bake time. Going from an 8-inch round to a 9-inch round increases area ~25% — the layer bakes thinner and faster.

    Original Substitute Adjustment
    8″ round 9″ round Reduce time ~5 min, same temp
    9″ round 8″ round Increase time ~5–8 min, check center
    9×13″ sheet Two 8″ rounds Similar depth; watch edges
    Loaf pan 9×5″ 8″ square Slightly thicker; add 5 min
    Muffin tin (12) 8″ square pan Same batter; add 10–15 min

    Rule of thumb: keep the batter depth similar and adjust time, not temperature. A toothpick test overrules every chart.

    How to Convert a Recipe: A Worked Example

    Recipe says: 2 cups flour, 1 cup sugar, 1/2 cup butter, 350°F.

    1. Flour: 2 × 120g = 240g
    2. Sugar: 1 × 200g = 200g
    3. Butter: 0.5 × 227g = 114g (1 stick + 1 tbsp, or just weigh it)
    4. Temperature: 175°C / Gas 4

    Write the weights on the recipe the first time. Next time, you skip the cups entirely.

    Handwritten recipe card with gram weights written beside cup measures
    a handwritten recipe card with gram weights written in beside the original cup measures

    Frequently Asked Questions

    Why does my cup of flour weigh differently every time?
    Because flour compresses. Scooping packs it down; humidity changes its density. The fix isn’t a better cup — it’s a scale. Until then, always spoon flour into the cup and level it off; never scoop from the bag.

    Can I convert baking powder and baking soda by volume?
    Yes — and you should. Small quantities (under ~20g) are more accurate by spoon than by scale, since most kitchen scales round to whole grams. Level your measuring spoons with a straight edge.

    My recipe is in Australian cups — does it matter?
    An Australian cup is 250ml vs the US 236.6ml — about 6% more. For most home baking it won’t ruin anything, but in precise recipes (macarons, sponge cakes), use the weight tables above instead of converting cup-for-cup.

    How do I convert eggs to weight?
    One large egg ≈ 50g total (about 30g white + 20g yolk). Medium ≈ 44g, extra-large ≈ 56g. When a recipe’s success hinges on egg quantity — custards, sponges — weigh them.

    Does altitude change these conversions?
    No — grams are grams everywhere. But altitude changes how the recipe behaves (faster rise, more moisture loss). For that, see High-Altitude Baking Adjustments.

    Cups or grams for sourdough?
    Grams, always. Sourdough runs on baker’s percentages — every ingredient expressed as a percentage of flour weight. Cups can’t do that math reliably. (New to the terms? Why Didn’t My Bread Rise? covers the fundamentals.)

    Related troubleshooting: Why Is My Cake Dry? · Why Is My Bread Dense? · High-Altitude Baking Adjustments