Author: Ali Ramzan

  • Why Did My Opera Cake Layers Slide? (Layered Cake Stability)

    Why Did My Opera Cake Layers Slide? (Layered Cake Stability)

    An opera cake sliding apart is heartbreaking because the hard parts are done: joconde whipped, French buttercream made, ganache poured. Then the stack shifts sideways in the fridge. The cake isn’t wrong — the assembly sequence was.

    Quick diagnosis: You built on soft, warm layers without chilling between them (most common). Chill every layer 20–30 minutes as you build, make the ganache firm enough to spread like peanut butter, don’t drown the sponge in coffee syrup, and freeze the finished cake 3–4 hours before glazing.

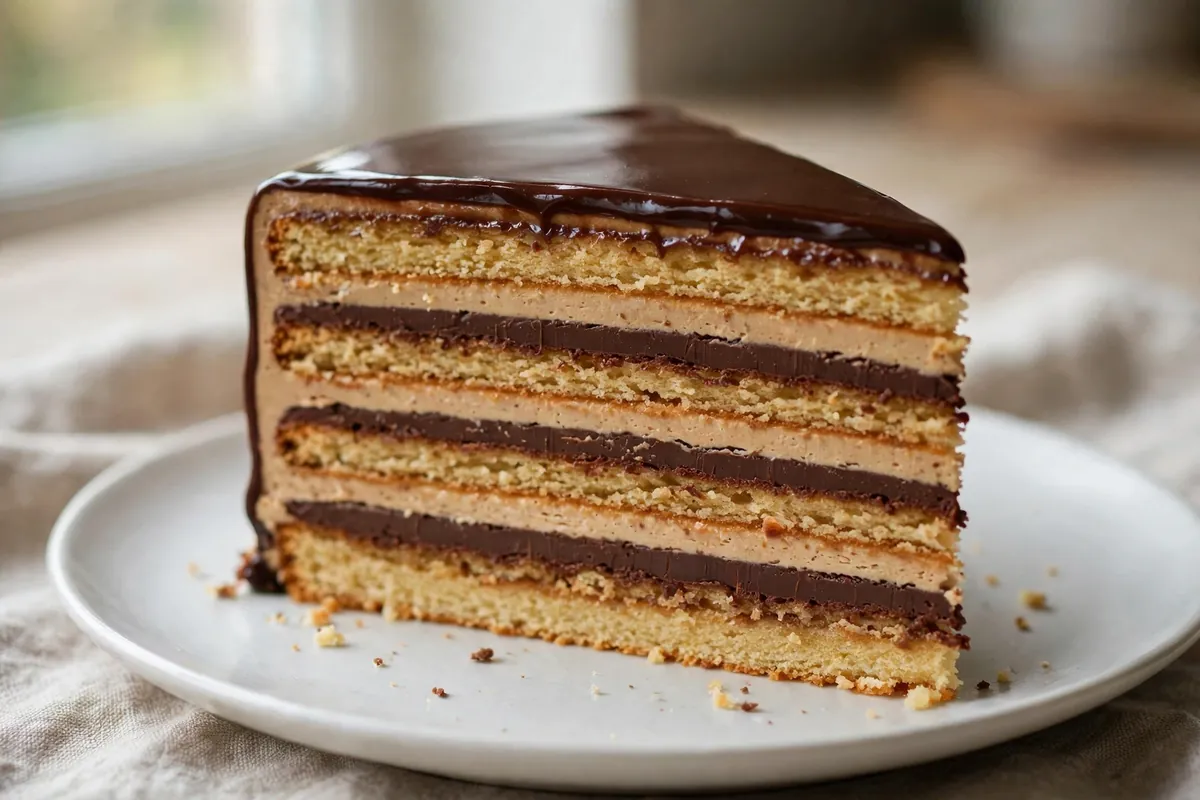
    My tested baseline: one half-sheet of almond joconde, cut into three even rectangles. Coffee syrup: 120ml strong espresso + 60g sugar, brushed on — not poured. Coffee French buttercream: 3 yolks beaten with 120g sugar syrup at 240°F (115°C), then 170g soft butter and 2 tbsp espresso. Ganache: 150g dark chocolate + 150g hot cream, cooled thick. Mirror glaze poured at 95–100°F (35–38°C).

    1. You didn’t chill between layers — warm fillings are lubricant, not glue

    This is the cause in nine out of ten sliding opera cakes. Buttercream and ganache only hold a stack when they’re firm. Spread warm ganache over warm buttercream over syrup-soaked sponge and you’ve built a layer cake on a slip-and-slide — the layers will drift within an hour in the fridge.

    How to tell: The layers shifted sideways rather than compressing; the filling squeezed out one side when you added the next layer; the whole cake looks like a leaning tower.

    The fix: Chill 20–30 minutes after every single layer before adding the next. The buttercream should feel firm and dry to a light touch, not tacky.

    2. Your ganache was too loose — it needs to be spreadable, not pourable

    Ganache for an opera layer is not the same ganache you pour over truffles. At a 1:1 ratio (150g chocolate to 150g cream), cooled to room temperature, it should spread like thick peanut butter and hold the spatula’s ridges. If it’s still flowing when you spread it, it will flow sideways under the weight of the next sponge.

    How to tell: The ganache layer in your finished slice is uneven — thick on one side, paper-thin on the other; the top sponge sits crooked.

    The fix: Cool the ganache at room temperature, stirring occasionally, until it spreads like thick peanut butter and holds the spatula’s ridges — usually 1–2 hours. If it holds a soft peak, it’s ready to build with — the same test I use in Fixing Curdled Ganache.

    3. The joconde sheets weren’t flat — a wavy foundation tilts everything

    Joconde baked in a half-sheet pan can dome slightly or bake unevenly at the corners. Stack three wavy sheets and the curves compound: each layer amplifies the last until the top slides off the high side.

    How to tell: The slide always goes the same direction; individual sponge layers are visibly thicker on one side.

    The fix: Level each sheet before stacking — shave any dome with a long serrated knife. Cut the three rectangles with a ruler and a sharp knife; ragged, uneven pieces create pressure points that push layers sideways.

    4. You soaked the sponge too much — syrup is slippery

    Coffee syrup is essential — dry joconde is the opera cake’s other great sin — but there’s a line between moist and waterlogged. A sponge swimming in syrup can’t grip the filling above it; the whole layer hydroplanes.

    How to tell: Syrup pooled on the tray under the cake; the sponge layers feel soggy rather than moist; the bottom of each sponge is darker and wet-looking.

    The fix: Brush, don’t pour. Two light passes with a pastry brush per layer, letting the first soak in before the second. The sponge should glisten, not drip.

    5. You skipped the final freeze — the glaze went on a soft cake

    Even a well-chilled stack is slightly yielding at fridge temperature. Pour warm-ish glaze over it and the layers can shift during unmolding.

    How to tell: The cake looked fine going into the glaze step and shifted during unmolding or glazing; the glaze has a wavy edge where a layer moved underneath it.

    The fix: After the final layer, wrap the frame and freeze the whole cake 3–4 hours minimum, overnight if you can. Unmold while frozen, trim the edges with a hot dry knife for those razor-sharp sides, and pour the glaze at 95–100°F (35–38°C) over the frozen cake. The glaze sets almost instantly on contact and locks everything in place.

    6. You built freehand — opera cake wants a frame

    Professional pâtissiers build opera inside a metal frame or a lined loaf pan — the frame does structural work, not just shaping.

    How to tell: Layers bulge outward at the sides; the finished cake is wider at the bottom than the top (or vice versa).

    The fix: Line a loaf pan or square frame with acetate or parchment, build inside it, and keep the frame on through the freeze. Press each layer down gently with an offset spatula to seat it before chilling.
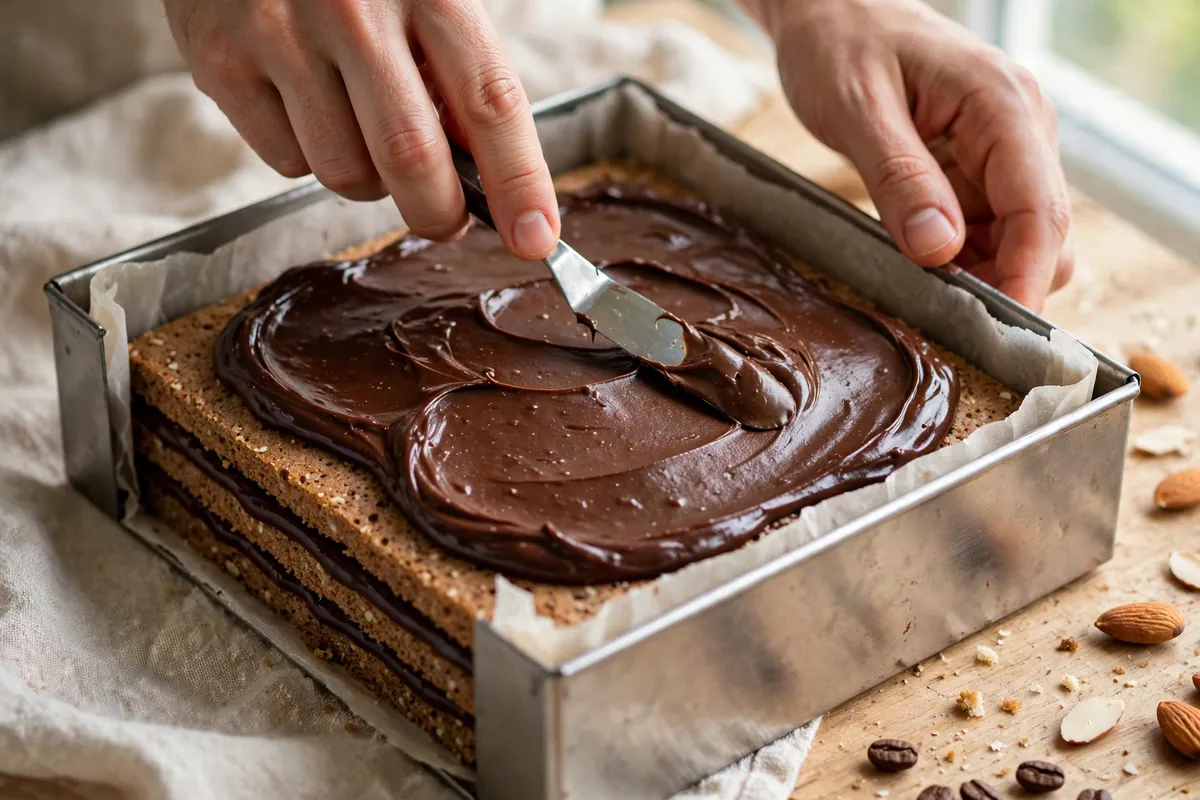
    hands building opera cake layers inside a parchment-lined square frame
    hands building opera cake layers inside a parchment-lined square frame

    7. Your kitchen was too warm — buttercream has a melting point

    French buttercream starts softening around 75°F (24°C) and slumps well before 80°F (27°C). If you’re assembling in a warm kitchen in summer, the buttercream layer is melting as you spread it, and no amount of chilling between layers fully compensates.

    How to tell: The buttercream looked glossy and loose while spreading rather than matte and holding; the cake slid fastest on the counter, not in the fridge.

    The fix: Work in the coolest part of the day and be aggressive with the between-layer chills — 30 minutes, not 20. French buttercream starts softening around 75°F (24°C), so a warm kitchen melts your glue as you spread it.

    opera cake mid-assembly in a freezer, showing firm chilled layers before the next layer goes on
    opera cake mid-assembly in a freezer, showing firm chilled layers before the next layer goes on

    Frequently asked questions

    Is a sliding opera cake safe to eat?
    Completely — a structural failure, not a food safety one. Eat the evidence proudly; it still tastes like opera cake.

    Can I fix an opera cake after the layers have slid?
    Yes, if you catch it before glazing. Freeze the whole thing (frame and all) 2–3 hours until rock solid, then nudge the layers back into alignment with an offset spatula — they’ll move as one rigid block. Trim the edges with a hot knife and glaze. If it’s already glazed, serve it as is.

    Why did my buttercream layer disappear into the sponge?
    You spread buttercream over warm or over-soaked sponge. Always assemble on completely cool sponge, and give the syrup-soaked layer 10 minutes in the fridge before the buttercream goes on.

    Can I make opera cake ahead of time?
    It’s one of the best make-ahead cakes: 4–5 days refrigerated once glazed, or freeze unglazed up to a month, thaw overnight in the fridge, then glaze. The flavors meld and improve after a day.

    Why did my mirror glaze crack on top?
    Temperature shock: glaze poured too hot over a deeply frozen cake. Pour at 95–100°F (35–38°C) — warm to the touch, not hot — and move the glazed cake to the fridge, not the freezer.
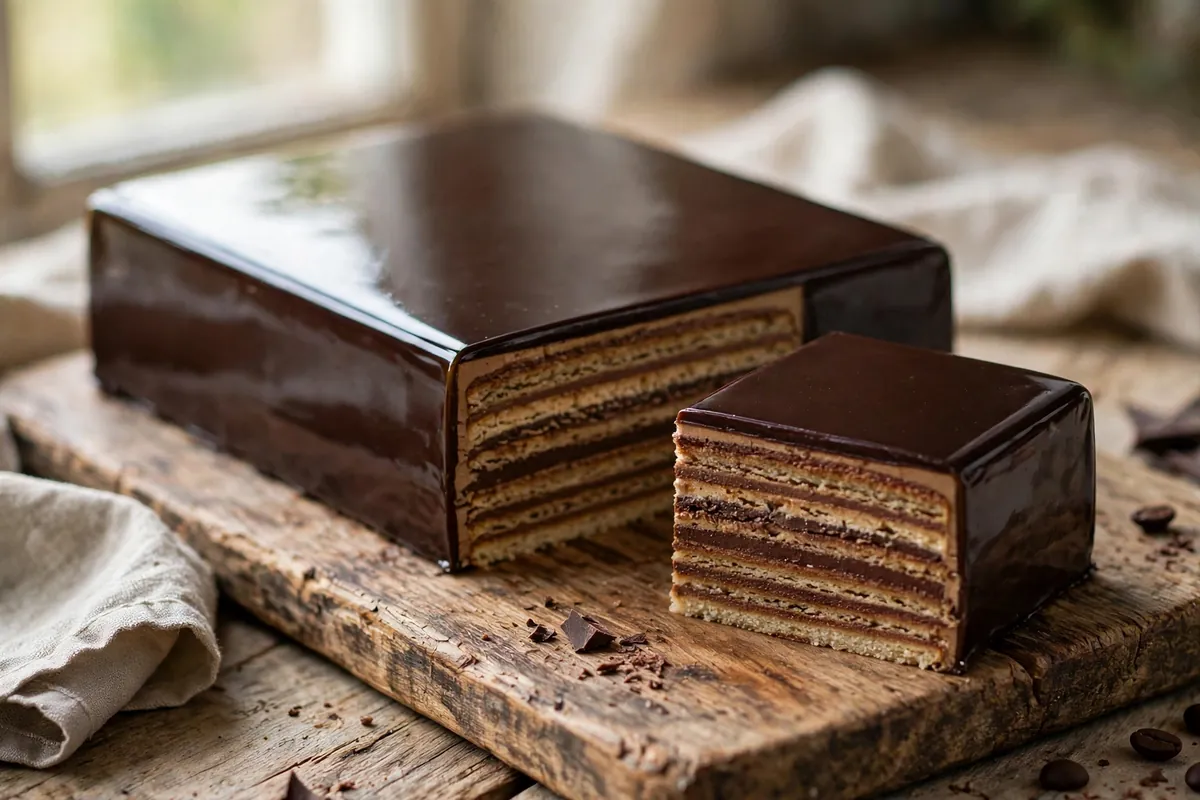
    finished opera cake with clean trimmed edges and glossy glaze, one slice pulled forward
    finished opera cake with clean trimmed edges and glossy glaze, one slice pulled forward

    Related troubleshooting: Fixing Curdled Ganache · How to Fix Broken Buttercream · Custard Split? How to Save It
  • Why Is My Cornbread Dry? Fat, Sugar & Bake Time Fixes

    Why Is My Cornbread Dry? Fat, Sugar & Bake Time Fixes

    Dry cornbread is a special kind of disappointment — it looks golden and perfect, then crumbles into sawdust in your mouth. The good news: dryness in cornbread is almost never a mystery. It’s a lean formula, too much oven time, or the wrong pan, and each one has a specific fingerprint you can read in the crumb.

    Quick diagnosis: Dry cornbread is usually overbaked (cause #1) or made with a lean recipe low in fat and sugar (cause #2). Pull it at 18–20 minutes when the center is just set, and make sure your recipe has real fat — butter, oil, or bacon drippings.

    Style note: there are two cornbreads. Southern-style is lean and savory — mostly cornmeal, little or no sugar, baked in a screaming-hot cast iron skillet with bacon fat: crisp crust, coarse crumb. Northern-style is sweeter and cakier, with flour, sugar, and butter. Judge dryness against the right tradition — a crisp-crusted Southern cornbread isn’t “dry,” it’s correct.

    1. You overbaked it — the #1 cause, and it’s minutes, not tens of minutes

    A 9-inch skillet of batter is barely an inch deep, so the window between done and dry is about three minutes. Most recipes say 20–25 minutes at 400–425°F (200–220°C), but that’s written for the slowest oven — many are done at 18.

    How to tell: Dry all the way through with a hard, dark bottom, 22+ minutes in the oven, edges pulled well away from the pan.

    The fix: Start checking at 15 minutes: golden top, center springs back when pressed, toothpick with a few moist crumbs. Pull it then — carryover heat finishes the center. The same batter at 18 vs 24 minutes is the difference between tender and chalky. Verify with an oven thermometer; 25°F hot turns a 20-minute bake into 17.

    2. The recipe is too lean — cornmeal needs fat to stay tender

    Cornmeal has almost no gluten and a coarse, thirsty structure. Without enough fat and moisture, the crumb can’t hold together. A “healthy” cornbread with halved fat and no sugar will always bake dry — you removed the two ingredients doing the moisture work.

    How to tell: Crumbly and coarse even with perfect timing — falls apart when sliced, flat starchy flavor instead of rich.

    The fix: Baseline for a 9-inch skillet: at least 4 tablespoons (60g) fat — butter, oil, or bacon drippings — and 1 to 1¼ cups (240–300ml) liquid, ideally buttermilk. No buttermilk? Add a tablespoon of lemon juice per cup of milk and wait 5 minutes. And don’t fear sugar: 1–2 tablespoons tenderizes without real sweetness — sugar is hygroscopic and holds moisture.

    3. The batter never rested — dry cornmeal stayed dry

    Cornmeal hydrates slowly. Mix and bake immediately and the coarse particles never absorb the liquid — gritty, dry crumb. The fix costs nothing: rest the batter.

    How to tell: Gritty or sandy texture even with the right bake time, uneven crumb — moist pockets next to dry ones.

    The fix: Rest the mixed batter 10–15 minutes — you’ll see it thicken as the cornmeal drinks up the liquid. (Same hydration principle as Why Is My Cake Dry?.) Don’t exceed 20 minutes; the baking powder starts reacting on contact with liquid.

    4. Wrong pan or a cold skillet — the crust never had a chance

    A preheated cast iron skillet flash-sets the bottom crust on contact, sealing in moisture, and its even heat bakes fast — less oven time means less moisture lost. A cold glass or thin metal pan does the opposite: slow warm-up, longer bake, steamed instead of crisped bottom.

    How to tell: Pale, soft bottom with a steamy texture — or a burnt bottom with a gummy middle (thin dark pans transmit heat too aggressively).

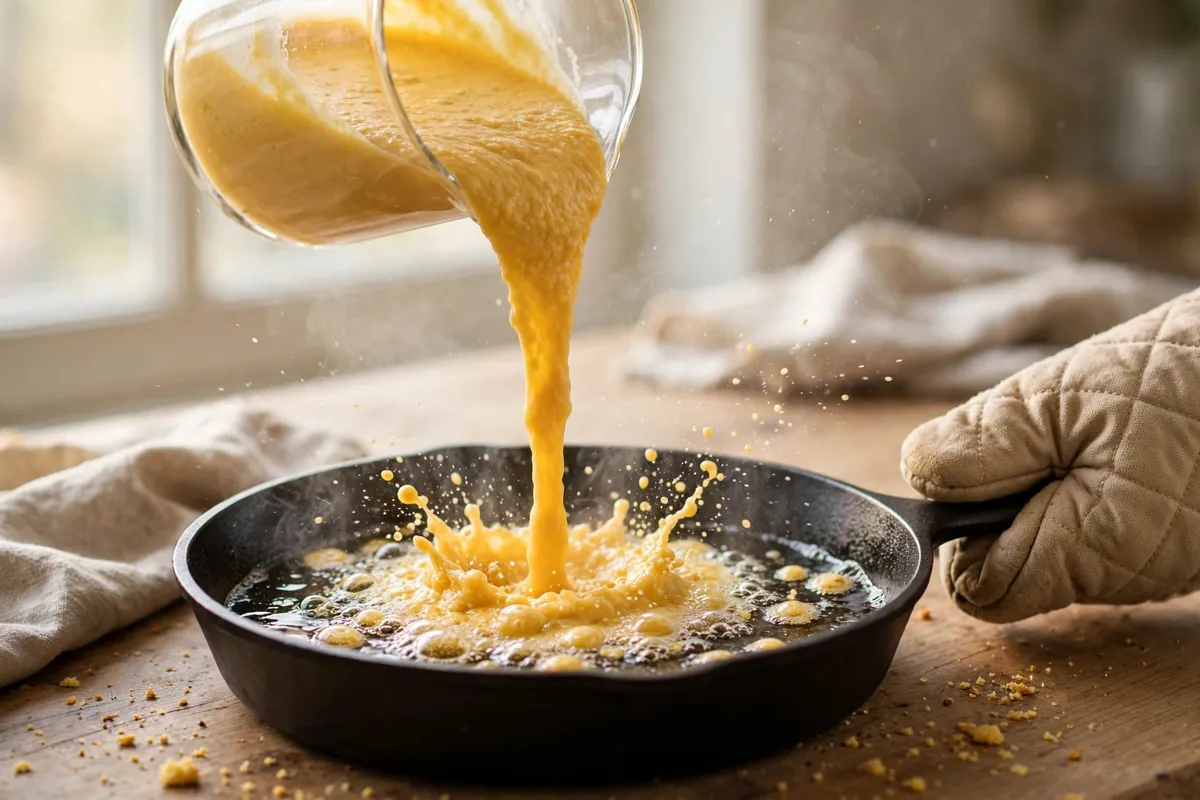
    The fix: Heat the skillet in the oven during preheating with a tablespoon of fat in it. When the fat shimmers, pour in the rested batter — it should sizzle on contact — and return immediately to the oven. No cast iron? Use light-colored metal (dark nonstick over-browns — see Baking Pan Materials) and add 2–3 minutes.

    5. You used the wrong grind or stale cornmeal

    Cornmeal goes stale — the germ oils turn rancid and stale meal absorbs liquid poorly, baking up dry and flat no matter what you do. Grind matters too: coarse stone-ground needs more liquid and a longer rest than fine; swapping without adjusting hydration guarantees a mismatch.

    How to tell: Dull, cardboard-like or faintly bitter flavor even with a good recipe, and the bag has been open in the pantry for months.

    The fix: Smell it: fresh is sweet and corny, stale is musty or flat. Buy small bags; store in the freezer. For coarse stone-ground, add 2–3 tablespoons liquid and rest a full 20 minutes.

    Rescue: what to do with the dry batch you already baked

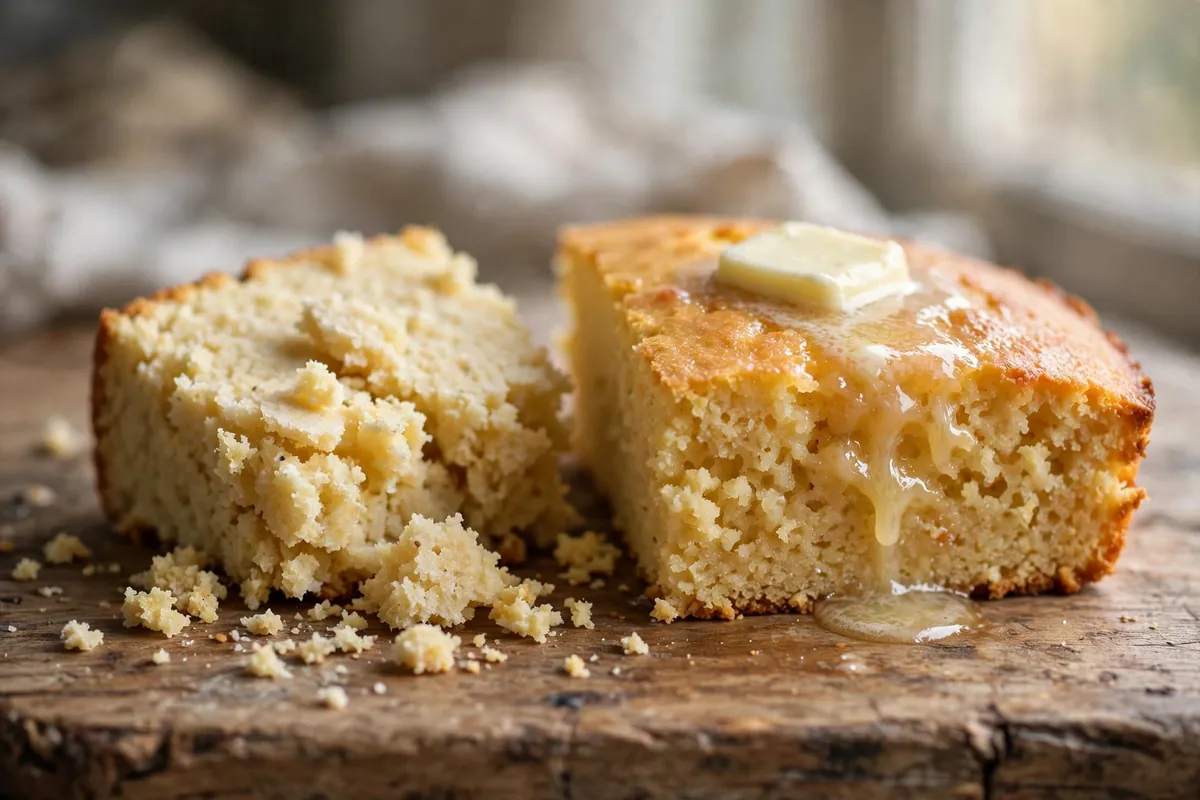
    Don’t throw it out. Warm it and serve with salted butter and honey. Crumble it into chili, cube and toast it into croutons, or pulse into crumbs for cornbread dressing — slightly dry cornbread is actually preferred for dressing because it absorbs stock without turning to mush. Or split, butter, and griddle it crisp — fried cornbread with a runny egg is a legitimate breakfast.

    batter being poured into a smoking-hot cast iron skillet, sizzling on contact
    batter being poured into a smoking-hot cast iron skillet, sizzling on contact
    buttermilk being poured into a mixing bowl of cornmeal batter
    buttermilk being poured into a mixing bowl of cornmeal batter

    Frequently asked questions

    Is dry cornbread safe to eat?
    Yes — dryness is texture, not safety. As long as it baked through (no wet, gummy raw center), dry cornbread is perfectly safe. Warm it, butter it, or repurpose it.

    How do I moisten cornbread after baking?
    Serve warm with butter and honey. For a whole loaf, brush with melted butter, wrap in foil, warm 10 minutes at 300°F (150°C) — trapped steam softens the crumb.

    Should cornbread be sweet or savory?
    Both are authentic — it’s regional. Southern: savory, little sugar, bacon fat, cast iron. Northern: sweeter, cakier, butter. Neither should be dry.

    Can I use regular milk instead of buttermilk?
    Yes, with a fix: add 1 tablespoon of lemon juice or white vinegar per cup of milk and let it stand 5 minutes. The acidity tenderizes the crumb almost as well as real buttermilk. (Dairy swaps are covered broadly in Dairy-Free Frosting for the frosting side of substitutions.)

    Why is my cornbread crumbly and falling apart?
    Not enough binder or fat, or sliced too hot. Rest 10 minutes in the pan before slicing — starches firm as it cools. If it still crumbles, the recipe needs more egg or fat.

    Can I make cornbread ahead?
    Bake it the day before and rewarm wrapped in foil — it actually slices cleaner the next day. For dressing, deliberately bake it 1–2 days ahead and let it go stale; stale cornbread absorbs stock better.

    Related troubleshooting: Why Is My Cake Dry? · Why Did My Muffins Turn Out Tough? · Why Is My Banana Bread Dense?

  • Glass vs Metal vs Dark Pans: What Changes in Your Bake

    Glass vs Metal vs Dark Pans: What Changes in Your Bake

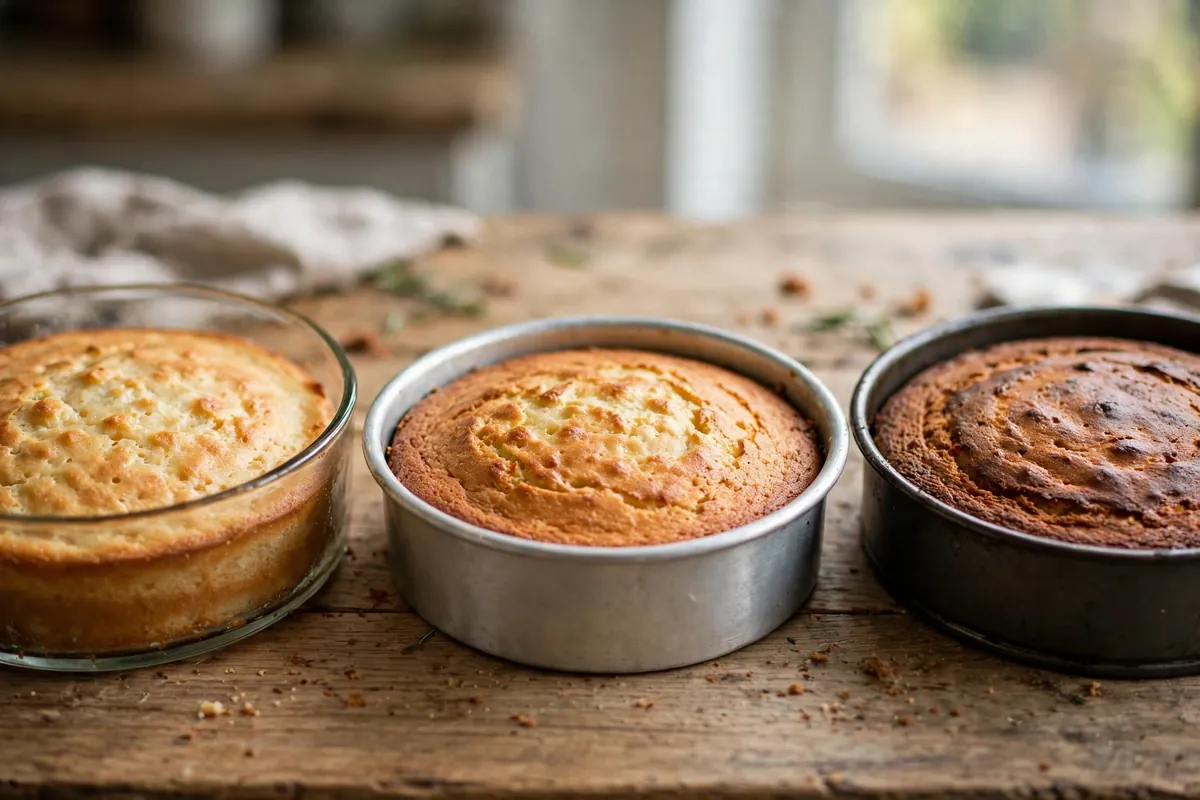
    Your recipe says “bake in a 9×5 loaf pan” — but it doesn’t say glass, light aluminum, or dark nonstick, and that omission matters more than most bakers realize. The same batter in three different pans comes out three different ways: different browning, different rise, sometimes a different bake time entirely. The same recipes baked across all three pan types show consistent, repeatable differences. Here’s what actually changes, and the adjustments that make any pan work.

    Quick diagnosis: Pan color and material change how fast heat reaches your batter. Dark pans absorb more radiant heat — browner, thicker crusts, faster baking: reduce heat 25°F (15°C). Glass is a slow insulator — paler bakes that need more time: same reduction, or add 5–10 minutes. Light aluminum is what nearly every recipe was developed in — when in doubt, that’s the baseline.

    The physics in 60 seconds

    Ovens heat food three ways: conduction (direct contact with the hot pan), convection (hot air circulating), and radiation (infrared energy from the oven walls and elements). Pan material changes the first and third dramatically:

    • Dark surfaces absorb radiant heat; light surfaces reflect it. A dark pan soaks up infrared energy and runs hotter than the oven air around it. A shiny light pan bounces much of it away.
    • Metal conducts heat fast; glass conducts it slowly. Aluminum moves heat into the batter quickly and evenly. Glass is an insulator — it heats slowly, holds heat long, and delivers it gently.

    Every difference below follows from those two facts.

    Light aluminum: the baseline

    This is the pan nearly every recipe was tested in — light-colored, usually aluminum, sometimes aluminized steel. It conducts heat quickly and evenly, browns moderately, and behaves exactly the way the recipe author expected.

    What changes: Nothing. Follow the recipe as written — temperature, time, all of it.

    Best for: Everything, honestly. Cakes, cookies, quick breads, sheet pans. If you’re buying one pan type to cover a whole kitchen, light aluminum is it. Heavy-gauge (thicker) pans resist warping and heat more evenly than thin cheap ones — worth the small premium.

    Watch out for: Thin, flimsy aluminum sheets warp and buckle in a hot oven (that alarming bang mid-bake). It doesn’t ruin anything, but heavy-gauge avoids it.

    Dark metal: the browning accelerator

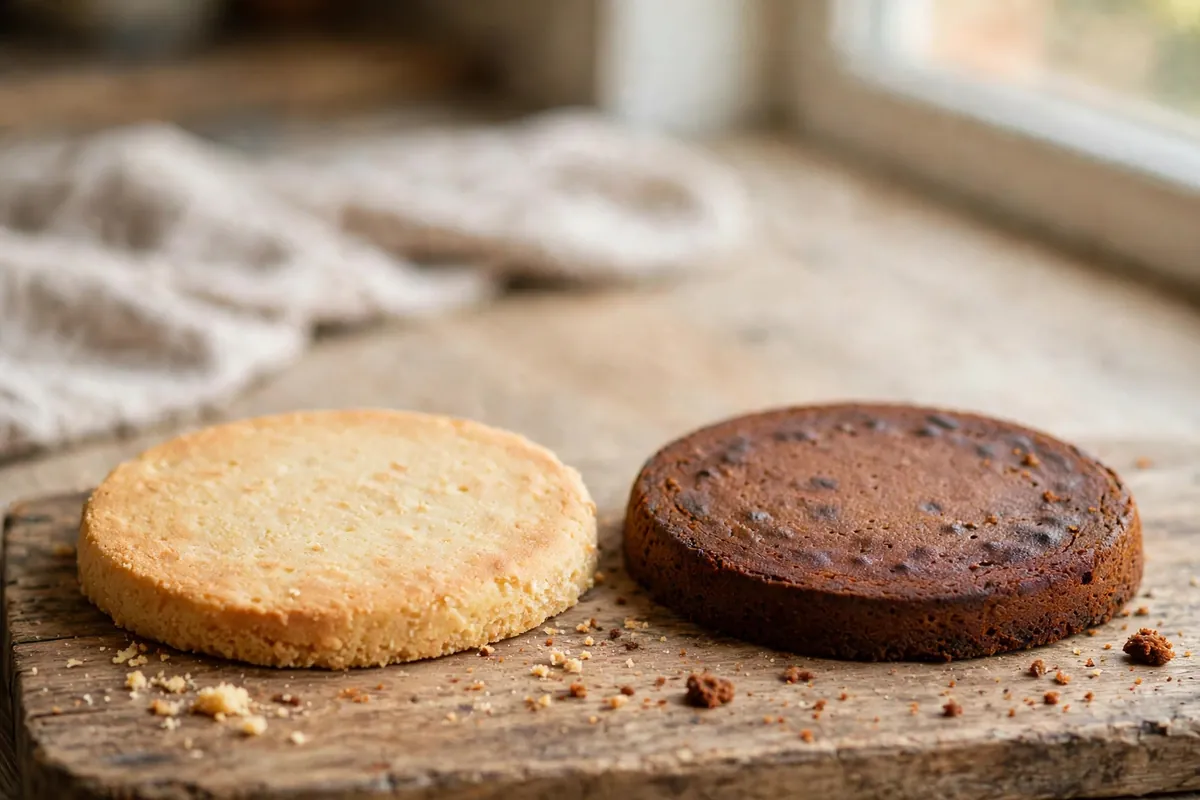
    Dark nonstick pans, black steel, dark anodized aluminum — these absorb radiant heat aggressively and run significantly hotter than the oven setting. The result: deeper browning, thicker and crisper crusts, and faster baking.

    What changes:
    – Reduce oven temperature by 25°F (15°C). This is the standard, tested adjustment — a 350°F recipe bakes at 325°F in a dark pan.
    – Check 5 minutes early. The faster heat transfer shortens the bake.
    – Expect darker bottoms and edges. Even with the temperature cut, dark pans brown more.

    Best for: Pizza (crisp bottoms), artisan bread bottoms, anything where deep browning is the goal. Roasting pans, too.

    Watch out for: Delicate cakes, sugar cookies, and anything pale — dark pans over-brown them before the center sets. If a dark pan is all you have for a layer cake, the 25°F reduction is non-negotiable, and consider a light-colored cake strip around the outside. (Dark-pan over-browning is a frequent accomplice in dry cake — see Why Is My Cake Dry?.)

    bottom crusts compared — pale from light aluminum vs deep brown from a dark pan
    bottom crusts compared — pale from light aluminum vs deep brown from a dark pan

    Glass: the slow insulator

    Glass (Pyrex and friends) heats slowly and holds heat long. It doesn’t brown aggressively — glass is transparent to radiant heat rather than absorbing it — but it keeps cooking after you pull it from the oven, thanks to retained heat.

    What changes:
    – Reduce oven temperature by 25°F (15°C) — same rule as dark pans, but for the opposite reason: not because glass runs hot, but because it holds heat and overcooks the carryover.
    – Or keep the temperature and add 5–10 minutes. Glass needs more time to get heat into the batter in the first place.
    – Expect paler crusts. Glass browns less — fine for cobblers and custards, less ideal when you want a deep golden crust.
    – Cool in the pan briefly, then turn out. Food keeps cooking in hot glass; don’t leave it sitting.

    Best for: Pies (you can see the bottom crust browning through the glass — genuinely useful), cobblers, crisps, baked custards, lasagna-style bakes. Transparency is glass’s superpower: visual doneness cues you can’t get from metal.

    Watch out for: Thermal shock — never move glass straight from freezer to hot oven or plunge hot glass into cold water; it can shatter. And never use glass under the broiler.

    Ceramic and stoneware: glass’s cousins

    Ceramic and stoneware behave like glass — slow to heat, long retention, gentle browning. Same 25°F (15°C) reduction; excellent for bread pudding, gratins, and deep-dish pie. Same thermal-shock caution as glass.

    The quick-reference table

    Pan Heat behavior Temp adjustment Time adjustment Browning
    Light aluminum Fast, even (baseline) None — follow recipe None Moderate
    Dark metal / nonstick Absorbs radiant heat, runs hot −25°F (−15°C) Check 5 min early Deep, fast
    Glass Slow insulator, holds heat −25°F (−15°C) +5–10 min (or reduce temp) Pale
    Ceramic / stoneware Like glass −25°F (−15°C) +5–10 min Gentle

    What if the recipe doesn’t specify?

    Assume light aluminum — that’s what the author used. Then apply the table above for whatever you actually own. And when a bake goes wrong in an unfamiliar pan, check the pan before blaming the recipe: a dark pan at full recipe temperature explains a remarkable number of “why did this burn on the bottom” mysteries. (See Cake Domed and Cracked on Top — pan choice is a frequent accomplice there too.)

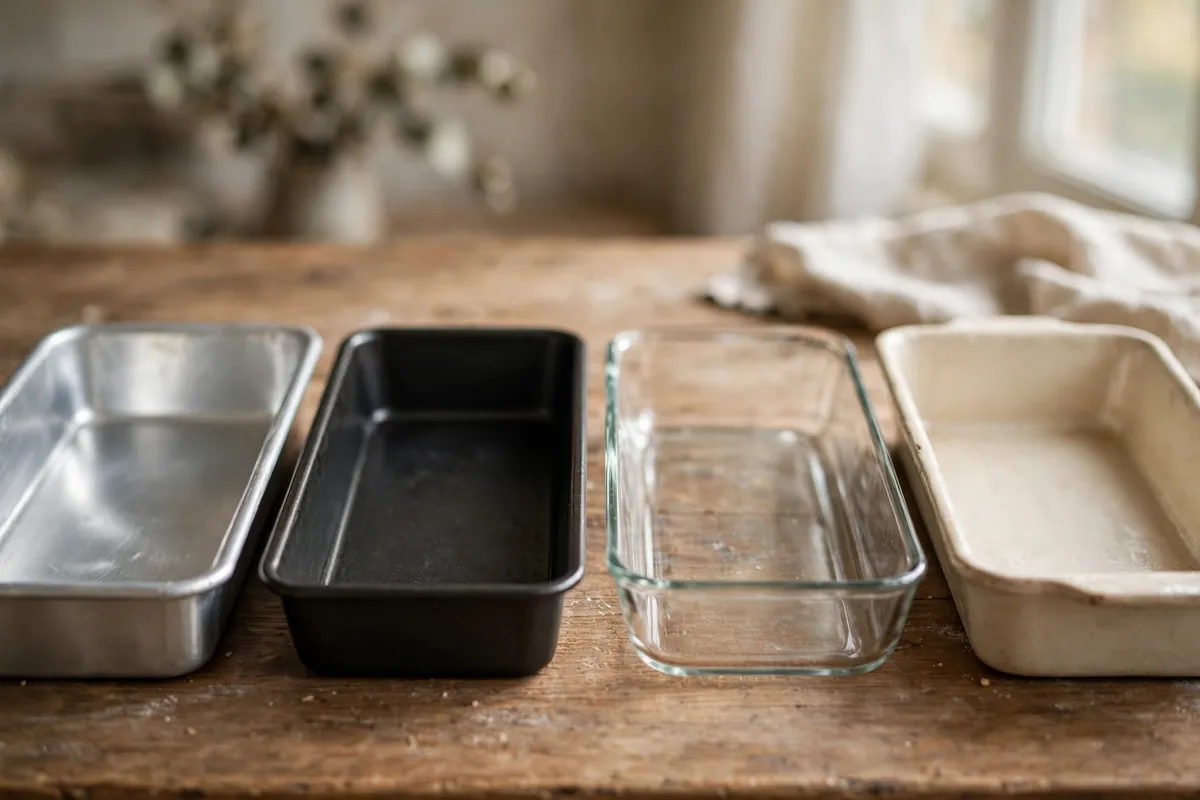
    the four pan types in a row — light aluminum, dark nonstick, glass, ceramic — empty, showing color and material
    the four pan types in a row — light aluminum, dark nonstick, glass, ceramic — empty, showing color and material

    Frequently asked questions

    Can I use a glass pan instead of metal for cake?
    Yes, with the adjustments: reduce heat 25°F (15°C) or add 5–10 minutes, and expect a paler crust. For layer cakes where even browning matters, metal is better — but glass works fine for sheet cakes, snacking cakes, and quick breads.

    Why do my cookies burn on the bottom with my dark cookie sheet?
    The dark surface is superheating the bottoms. Drop 25°F (15°C), and consider lining with parchment (which adds a thin insulating layer) or switching to a light aluminum sheet — the single best upgrade for a cookie baker.

    Is it safe to bake in a dark nonstick pan at high heat?
    Standard nonstick coatings are rated safe to around 450–500°F depending on the manufacturer — check yours. Above that, or with a damaged/scratched coating, switch to uncoated metal or glass. Never preheat an empty nonstick pan.

    Do I need to adjust for a shiny new pan vs an old darkened one?
    Yes, actually — aluminum darkens with age and use, and a well-seasoned darkened sheet behaves more like a dark pan than a light one. If your old sheet suddenly browns faster than it used to, that’s why. The 25°F rule of thumb applies by color, not by what the pan was when new.

    What about silicone pans?
    Silicone is an extreme insulator — even slower than glass — and it doesn’t brown at all. It also flexes, so place it on a rigid sheet pan. Fine for muffins and molded shapes; poor for anything where crust matters. Reduce expectations for browning rather than adjusting temperature much.

    Can the wrong pan ruin an otherwise good recipe?
    “Ruin” is strong, but it can turn a good bake mediocre — burnt bottoms, pale tops, raw centers. When a trusted recipe misbehaves in a new kitchen, check the pan right after oven temperature.

    Related troubleshooting: Cake Domed and Cracked on Top · Why Is My Cake Dry? · Why Did My Cupcakes Overflow?

  • Make-Ahead Bread Dough: Fridge Fermentation Timelines

    Make-Ahead Bread Dough: Fridge Fermentation Timelines

    Make-Ahead Bread Dough: Fridge Fermentation Timelines

    Quick diagnosis: Shape your dough, then refrigerate it — most doughs happily wait 12–48 hours at 38–40°F (3–4°C), and the slow cold ferment actually improves flavor. Bake straight from the fridge (cold dough scores cleaner). Reduce yeast slightly for retards over 24 hours, and never refrigerate dough that’s already fully proofed.

    The best bread trick I know isn’t a recipe — it’s a schedule. Cold fermentation, or “retarding” the dough in the fridge, lets you split bread-making across two days: mix and shape today, bake fresh tomorrow morning. The bonus nobody tells beginners: the bread tastes better. Those long, slow hours in the cold build the complex, slightly tangy flavors that make bakery bread taste like bakery bread.

    Why the fridge works (the 60-second science)

    Yeast is temperature-driven. At room temperature (75–80°F / 24–27°C), it’s racing; at fridge temperature (38–40°F / 3–4°C), it crawls — roughly 10–15 times slower. But the enzymes in the flour keep working steadily in the cold, breaking starches into sugars and developing flavor compounds the whole time. That’s the magic of retarding: fermentation slows to a near-standstill while flavor keeps building.

    This is also why the fridge is forgiving. A dough that would over-proof in 45 minutes on a warm counter can sit safely for a day or more in the cold. Time becomes your ingredient instead of your enemy.

    When to refrigerate: the two windows

    You have two good moments to send dough to the fridge. Pick one — don’t do both, or you’ll over-ferment.

    Window 1 — After bulk fermentation, before shaping (my preference for wet doughs). Let the dough complete its first rise at room temperature, then refrigerate the whole mass 12–24 hours. Shape cold the next day (cold dough is less sticky and easier to handle), then give it a final proof at room temperature before baking.

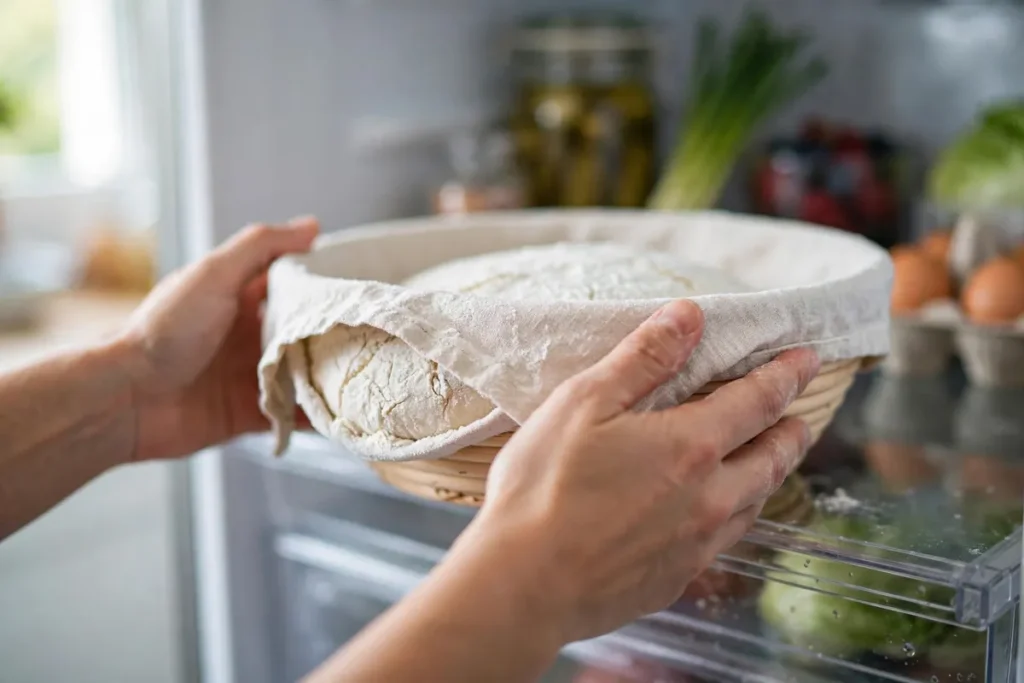
    Window 2 — After shaping (my preference for most breads). Shape the loaves, place them in their proofing baskets or pans, cover well, and refrigerate 8–48 hours. Bake straight from the fridge — no warm-up needed. This is the simplest path and the one I recommend to beginners: shape today, bake tomorrow.

    Window 2 wins for one reason: cold dough scores beautifully. A lame or sharp knife glides through firm, cold dough and the cuts stay open in the oven, giving you those dramatic ears and blooms. Room-temperature dough drags and seals back up.

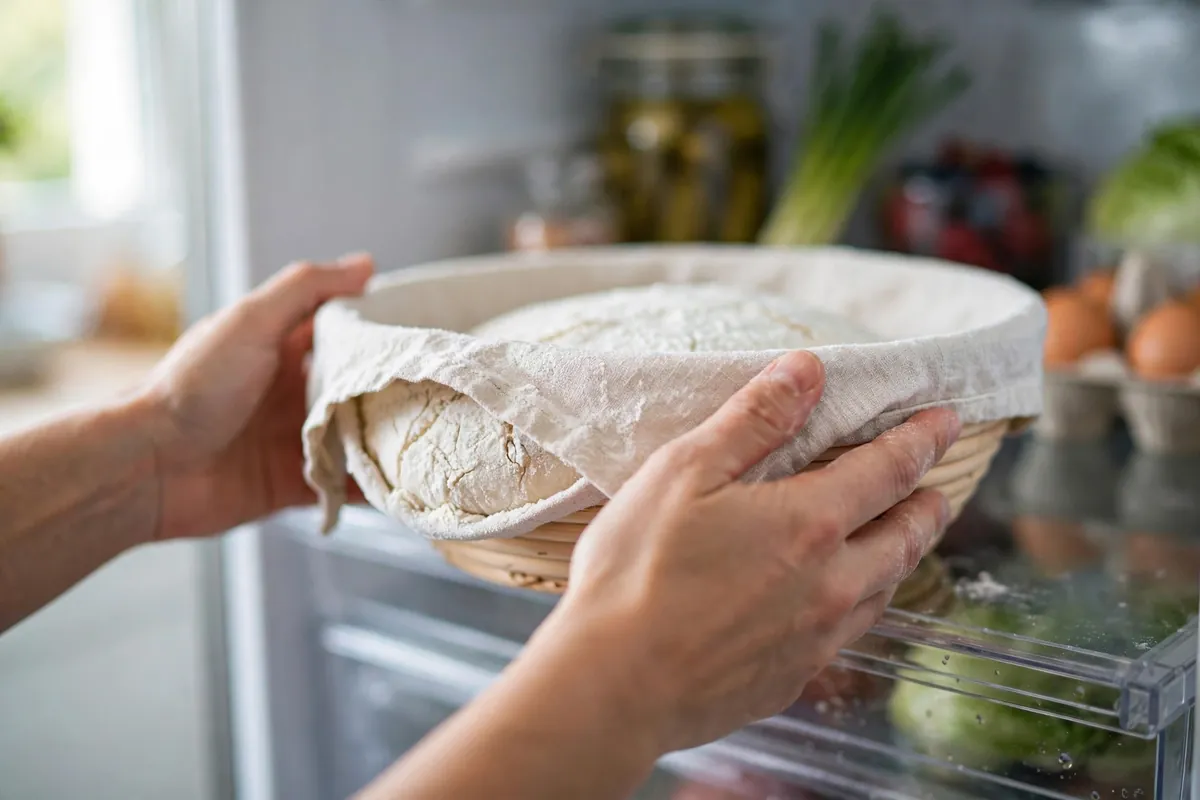
    Shaped loaf in a floured proofing basket, covered, going into the fridge
    shaped loaf in a floured proofing basket, covered, going into the fridge

    The timeline table: how long each dough can wait

    These are safe, tested ranges at 38–40°F (3–4°C). “Peak flavor” is where I’d aim; “maximum” is the edge before quality drops.

    Dough type In the fridge Peak flavor Maximum Notes
    Lean artisan / sourdough 12–36 hrs 18–24 hrs 48 hrs The classic retard candidate; flavor deepens beautifully
    Sandwich / pan loaves 8–24 hrs 12–18 hrs 36 hrs Watch for over-proofing past 24 hrs
    Pizza dough 24–72 hrs 48 hrs 5 days Longer = more complex, leopard-spotted crust
    Brioche / enriched dough 8–24 hrs 12–18 hrs 48 hrs Butter firms up; needs a longer bake from cold
    Cinnamon rolls / sweet dough 8–16 hrs 12 hrs 24 hrs Sugar accelerates things even in the cold
    Focaccia 12–48 hrs 24 hrs 72 hrs Dimple cold, bake cold — works brilliantly

    Past the maximum, two things go wrong: the yeast exhausts its food and the gluten network starts breaking down (protease enzymes don’t sleep), giving you a slack, sticky dough that bakes up flat. If your dough smells strongly of alcohol and collapses when touched, it’s gone too far — bake it anyway as focaccia rather than binning it.

    Adjusting the recipe for a cold retard

    Three small tweaks make retarding foolproof:

    1. Reduce the yeast for long retards. For anything over 24 hours, cut yeast by a third to a half (e.g., from 2% to 1–1.25% of flour weight, or from 2¼ tsp to 1–1½ tsp per 500g flour). Less yeast means a slower, more controlled cold ferment with no risk of exhaustion. Sourdough needs no adjustment — the culture self-regulates.
    2. Use cold water in the mix. If you know the dough is heading for the fridge, mix with cool water (65–70°F / 18–21°C) so it enters the cold already calm rather than racing.
    3. Salt stays at 2%. Don’t reduce salt to “help” the yeast — salt controls fermentation pace and builds flavor. The full 10g per 500g flour stands.
    Side-by-side crumb comparison — room-temp ferment vs 24-hour cold retard
    side-by-side crumb comparison — same recipe, room-temp ferment vs 24-hour cold retard

    Baking straight from the fridge

    This surprises beginners, but yes: no warm-up needed. Cold dough goes directly into the hot oven, and it’s actually advantageous:

    • Score cold. The firm surface takes clean, confident cuts (see Bread Crust Too Hard or Too Soft for scoring’s effect on crust).
    • Better oven spring. The cold exterior sets slightly slower relative to the interior’s expansion — actually, the real mechanism: the dough hits the hot oven while still cool inside, so the yeast gets a final burst of activity before dying, boosting spring.
    • Add 5–10 minutes to the bake time for large loaves, since you’re starting from 40°F instead of 75°F. Trust the thermometer, not the clock: lean loaves are done at 200–210°F (93–99°C) internal.

    The one exception: enriched doughs like brioche bake more evenly with a 20–30 minute counter rest while the oven preheats. The butter needs a head start or the center stays doughy.

    The mistakes that wreck a retard

    1. Refrigerating fully-proofed dough. The fridge slows yeast; it doesn’t stop it. Dough that was ready to bake will over-proof in the cold within hours. Refrigerate at 75–80% of the final proof, not 100%.
    2. Uncovered dough. The fridge is a desert — uncovered dough forms a dry skin that never browns properly and can tear during oven spring. Cover airtight: plastic wrap pressed to the surface, or a damp towel plus a bag.
    3. A warm fridge. Above 42°F (5.5°C), fermentation runs faster than these timelines assume. Keep a fridge thermometer — most home fridges drift warmer than their dials claim.
    4. Retarding twice. Fridge after bulk AND after shaping = over-fermented. Pick one window.
    5. Baking an over-retarded dough as a loaf. If it collapsed and smells boozy, pivot: flatten it into a focaccia, dimple with oiled fingers, and bake hot. You’ll never know it was a rescue.
    Cold dough being scored with a lame, clean ear-forming cut visible
    cold dough being scored with a lame, clean ear-forming cut visible

    Frequently asked questions

    Can I refrigerate bread dough overnight?
    Yes — that’s the ideal use case. Shape your loaves in the evening, refrigerate 8–16 hours, and bake straight from the fridge in the morning. Most doughs are at peak flavor in this window, and cold dough scores more cleanly than room-temperature dough.

    How long can bread dough stay in the fridge?
    12–48 hours for most doughs at 38–40°F (3–4°C); pizza dough up to 5 days. Past that, yeast exhausts its food and enzymes weaken the gluten, producing slack dough that bakes flat. Reduce yeast by a third for retards over 24 hours.

    Should bread dough come to room temperature before baking?
    No — bake it cold. Cold dough scores cleanly, gets good oven spring, and needs only 5–10 extra minutes in the oven. The sole exception is rich brioche-style dough, which benefits from 20–30 minutes on the counter while the oven preheats.

    Can you put dough in the fridge during the first rise?
    You can, but it’s the less predictable window — judging when a cold bulk ferment is “done” is harder than judging a shaped loaf. If you do, give it 12–24 hours, then shape cold and proof at room temperature until ready (use the poke test: slow spring-back with a slight indent means bake).

    Is cold-fermented bread healthier?
    Cold fermentation does break down more starches and can modestly lower the bread’s glycemic impact, but the difference is small and I won’t oversell it. The real, reliable payoff is flavor — deeper, more complex, faintly tangy — and scheduling freedom.

    My retarded dough didn’t rise in the fridge — is it dead?
    Almost certainly not. Proper cold fermentation shows little visible rise — that’s normal and expected. The dough should feel alive and slightly puffy, not doubled. It does its real rising in the oven (oven spring). Only worry if it smells strongly of alcohol and collapses at a touch — that’s over-fermentation, not under.

    Related troubleshooting: Why Didn’t My Bread Rise? · Why Is My Bread Dense? · How to Tell When Bread Is Done

  • Why Is My Sourdough Gummy Inside? (Under-Fermentation Explained)

    Why Is My Sourdough Gummy Inside? (Under-Fermentation Explained)

    Why Is My Sourdough Gummy Inside? (Under-Fermentation Explained)

    Quick diagnosis: A gummy sourdough interior has three usual causes, in order of likelihood: you cut the loaf too soon (the #1 cause — the crumb is still setting), it was under-fermented (bulk ferment cut short), or it was under-baked (internal temp below 200°F). Check them in that order — most gummy loaves are a cooling problem, not a recipe problem.

    Gummy versus fully set sourdough crumb in raking light
    close-up of a gummy, compressed crumb vs a properly set open crumb

    You’ve done everything right — the starter was lively, the shaping felt good, the crust is gorgeous — and then you slice in and the inside is damp, dense, and gluey. Before you blame your starter or your recipe, know this: the majority of gummy sourdough is caused by what happens after the bake, not during it.

    Cause 1: You cut it too soon (the most common reason)

    This deserves the top spot because it fixes the most loaves with zero recipe changes. When bread comes out of the oven, the interior is still around 200°F+ and full of steam. The starches that form the crumb structure are still gelatinized and soft — they firm up and “set” as the loaf cools, a process that takes a full 1–2 hours for sourdough. Slice at 30 minutes and you interrupt it: steam escapes, the unset crumb compresses under the knife, and every slice tastes gummy.

    The fix: Wait a minimum of 2 hours before slicing sourdough — longer for large loaves. Cool it on a wire rack, never in the pan or on a flat surface (trapped steam = soggy bottom). I know the crackling crust is calling. The wait is the recipe.

    Cause 2: Under-fermentation

    If the crumb is gummy and tight with almost no holes, the bulk ferment was likely cut short. Under-fermented dough hasn’t developed enough gas or acidity; the crumb bakes up dense and damp because there’s insufficient structure for steam to escape through.

    How to tell: The loaf also shows other under-fermentation signs — minimal oven spring, a pale thick crust, large irregular holes surrounded by dense areas (“fool’s crumb”), or a generally tight texture throughout.

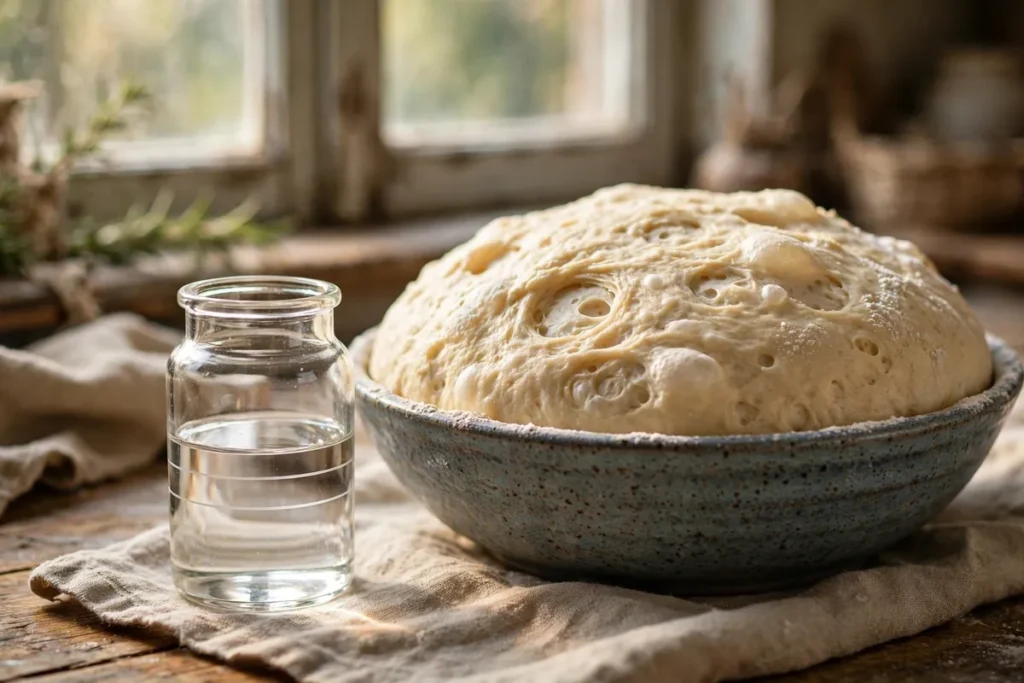
    The fix: Judge bulk fermentation by percentage rise, not the clock. For most sourdough, aim for a 50–75% rise (not a full doubling — sourdough continues fermenting during shaping and the cold retard). The aliquot jar method makes this foolproof: after mixing, pinch off a small piece of dough into a straight-sided jar, mark the level, and watch it hit your target percentage. Warmer dough (78–80°F) ferments in 4–6 hours; cooler dough (70°F) can take 8–12. Same dough, different kitchen, different timeline — the jar doesn’t lie.

    Aliquot jar with marked levels beside bulk fermenting dough
    aliquot jar beside the bulk ferment bowl, marked levels visible

    Cause 3: Under-baking

    A loaf pulled too early never drives enough heat into the center. The exterior looks done — sourdough crusts brown fast — while the interior is still under 200°F and the starches never fully set. The result: a gummy band through the middle, sometimes with a visibly damp line.

    How to tell: The bottom crust is pale and soft rather than deep brown and firm; the loaf feels heavy for its size.

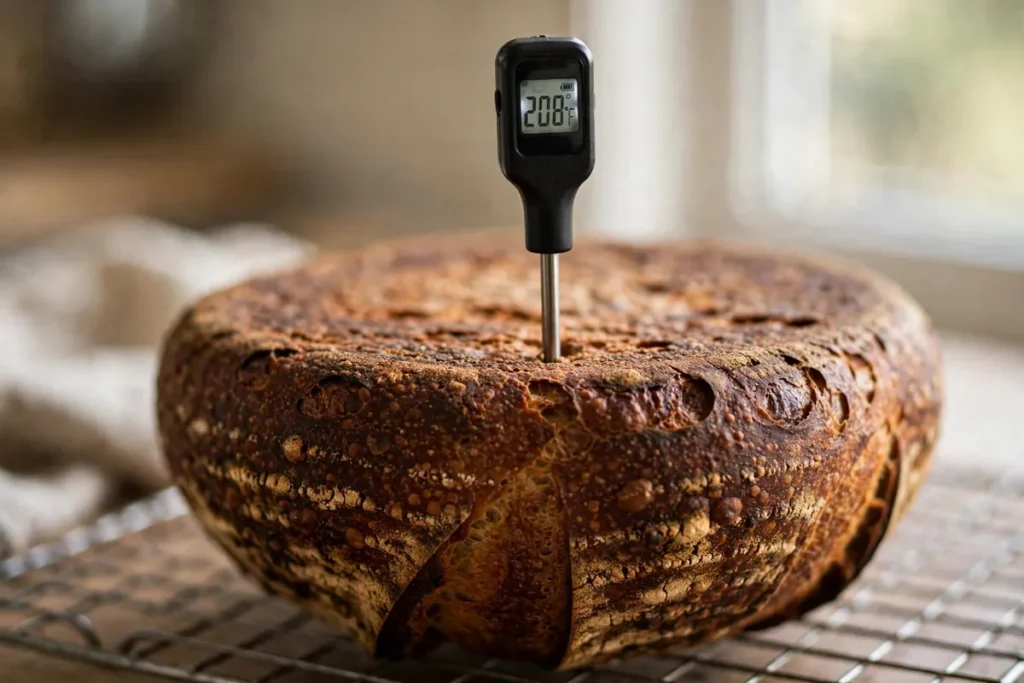
    The fix: Bake to an internal temperature of 200–210°F (93–99°C), measured with an instant-read thermometer pushed through the bottom into the center. For a typical 900g sourdough baked in a Dutch oven: 20 minutes covered at 450°F (230°C), then 20–25 minutes uncovered until deeply browned — and verify with the thermometer, because ovens vary enormously. Temp every loaf and gummy centers stop happening.

    Thermometer pushed through the bottom crust of an upside-down loaf
    thermometer reading the center of a sourdough loaf through the bottom crust

    Cause 4: Hydration too high for your flour

    High-hydration dough (80%+) gives that coveted open crumb — but only if the flour’s protein can handle it. Push a 10.5%-protein all-purpose flour to 82% hydration and the gluten network can’t contain the water; the crumb bakes up wet and gummy no matter how perfect your fermentation is.

    The fix: Match hydration to flour strength. With standard bread flour (12–13% protein), 70–75% hydration is the sweet spot for most home bakers. Master that before pushing higher. If a recipe’s hydration routinely gives you gumminess, drop it 3–5 percentage points and compare — the crumb will tell you the truth.

    Cause 5: Trapped steam and a cold baking vessel

    Two related issues: baking in a Dutch oven that wasn’t fully preheated means the base starts cold and the bottom under-bakes (gummy stripe along the base). And cooling the loaf in the Dutch oven or on a flat counter traps steam underneath, re-wetting the bottom crust and lower crumb.

    The fix: Preheat the Dutch oven a full 30–45 minutes. And always — always — cool on a wire rack with air circulating underneath.

    Frequently asked questions

    How long should I wait before cutting sourdough?
    Minimum 2 hours; 3 is even better for large loaves. The crumb is still cooking from residual heat and the starches are setting. Cutting early is the single most common cause of gumminess, and the easiest to fix.

    Is gummy sourdough safe to eat?
    Yes, as long as it reached a safe internal temperature (200°F+). Gumminess is a texture defect, not a safety issue. If the very center tastes raw and doughy rather than just damp, it was under-baked — toast the slices.

    Can I fix a gummy loaf after baking?
    Partially. You can’t reset the crumb, but slicing and toasting drives off moisture and dramatically improves the eating experience. Gummy sourdough also makes excellent toast, croutons, and panzanella — don’t waste it.

    Why is only the bottom of my loaf gummy?
    Classic under-baked base: the Dutch oven wasn’t fully preheated, or the loaf cooled on a flat surface trapping steam. Preheat 30–45 minutes and cool on a wire rack.

    My crumb has big holes AND gummy dense patches — what happened?
    That’s “fool’s crumb” — the signature of under-fermentation. The big holes are trapped gas from shaping; the dense gummy areas never fermented properly. Extend your bulk ferment and use the aliquot jar method.

    Does over-fermentation cause gumminess too?
    Rarely directly — over-fermented dough more often bakes flat and pale with a sour taste. But a severely over-proofed loaf can collapse into a dense, damp layer at the bottom. If your dough doubled-plus and smells strongly of alcohol, shorten the ferment next time.

    Related troubleshooting: Starter Smells Like Acetone? · Why Is My Bread Dense? · Bread Crust Too Hard or Too Soft

  • Why Did My Macarons Hollow? Feet, Hollows, and the Fixes

    Why Did My Macarons Hollow? Feet, Hollows, and the Fixes

    Hollow macarons are the cruelest macaron failure because everything else can look right: smooth tops, pretty feet, lovely colors — and then you bite in and there’s an air pocket where chewy shell should be. The causes live in three places: how you mixed, how you rested, and how you baked.

    Quick diagnosis: You under-mixed the batter (most common) — thick batter traps big air pockets that bake into hollows. Macaronage until the batter flows like lava and a ribbon dissolves in 10 seconds, bang the tray hard to release air, rest until the shells are dry to the touch, and bake at a true 300–315°F (150–160°C) until fully set.

    My tested baseline: 100g aged egg whites (about 3 large), 125g fine almond flour, 200g powdered sugar, 25g granulated sugar, pinch of salt. Sift almond flour + powdered sugar twice. Whip whites to firm glossy peaks with the granulated sugar. Pipe 1½-inch rounds, bang the tray firmly 3–4 times, pop surface bubbles with a toothpick, rest 30–60 minutes until matte and dry to the touch. Bake at 310°F (155°C) for 14–16 minutes, until shells lift cleanly off the parchment. Cool fully before filling.

    1. You under-mixed — thick batter traps the air that becomes hollows

    The number one cause, and the hardest to judge. Under-macaronaged batter is thick, holds stiff peaks of its own, and is full of trapped air from the meringue that never got folded out. In the oven, those air pockets expand, the top sets around them, and you’re left with shells that are all dome and no interior.

    How to tell: Batter was thick and held its shape instead of flowing; piped rounds kept tall peaks (“kisses” that never settled); shells came out lumpy, tall, and hollow; feet were minimal or absent.

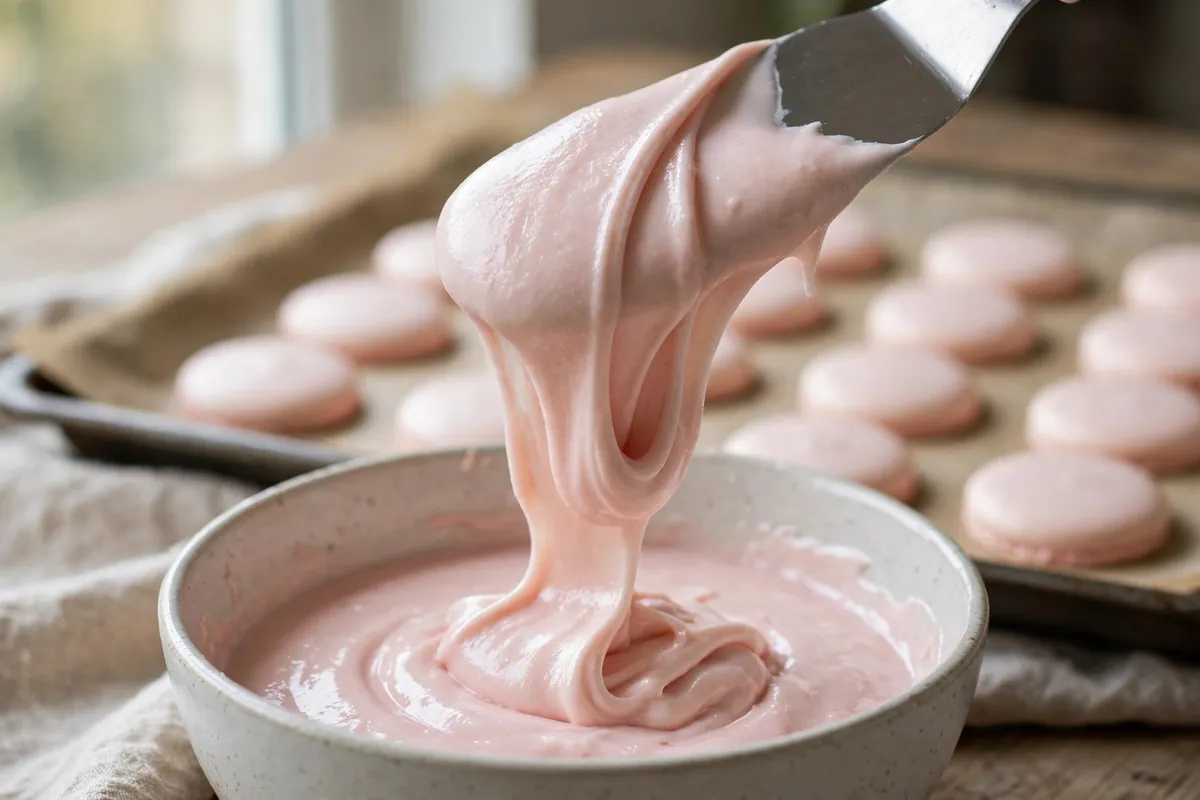
    The fix: Learn the ribbon test and trust it over counting folds. Lift the spatula: the batter should fall in a thick ribbon that melts back into the surface within about 10 seconds. (Macaronage is the same deflation judgment as Meringue Weeping: Why Your Peaks Leak — know your foam’s limits.)

    2. You didn’t bang out the air — the pockets stayed in

    Even perfectly macaronaged batter holds air bubbles from piping. Left in the shell, they expand into hollows in the oven’s heat.

    How to tell: Hollows concentrated near the top of the shell; visible bubbles on the surface before baking; shells with a rough or pockmarked top after baking.

    The fix: Bang the tray flat on the counter 3–4 times, hard — from 3–4 inches up, not a gentle tap. Then go over the surface with a toothpick or scribe and pop every remaining visible bubble, smoothing the surface. This also settles the batter into even rounds and helps feet form uniformly.

    3. You skipped or rushed the rest — no skin, no structure

    Resting forms the dry skin that does two jobs: it lets the shell rise upward into feet instead of spreading outward, and it gives the top structural integrity so it doesn’t dome up over expanding interior air.

    How to tell: Shells spread wider than piped, tops cracked, feet spread outward instead of rising, hollow gap directly under the top shell.

    The fix: Rest piped shells until they’re matte and completely dry to a light fingertip touch — 30–60 minutes at normal humidity, longer on humid days (up to 2 hours; a fan helps). They should look dull, not shiny, and your finger should come away clean. In very dry climates 20–30 minutes can be enough — judge by touch, not the clock.

    4. Your oven ran too hot — the top set before the inside finished

    An oven running at 340°F when it claims 315°F will set the shell’s exterior in minutes while the interior is still expanding batter. The rigid top can’t settle back down as the interior finishes, so a gap opens and stays.

    How to tell: Shells browned, tops domed high, feet looked good but the interior gaped; one side of the tray hollowed while the other didn’t.

    The fix: An oven thermometer is non-negotiable for macarons — most home ovens run 15–25°F off. Target a true 300–315°F (150–160°C). If your oven has hot spots, rotate the tray once at the halfway mark.

    hands performing the ribbon test, batter falling in a thick lava-like ribbon from a spatula
    hands performing the ribbon test, batter falling in a thick lava-like ribbon from a spatula

    5. You underbaked them — the interior never set

    Hollows also come from pulling shells too early. An underbaked shell’s interior is still soft batter when it leaves the oven; as it cools, the unset center contracts and pulls away from the top, opening a gap. The shell looks done — feet, color, smooth top — but the structure inside never finished.

    How to tell: Shells stuck slightly to the parchment, bottoms looked wet or shiny, shells felt fragile and cracked when lifted, hollows appeared as they cooled rather than in the oven.

    The fix: Bake until the shells lift cleanly off the parchment with no sticking — that’s the doneness test that overrules the clock. If the first test shell sticks, give the tray 2 more minutes. A fully baked macaron shell is sturdy; if yours feel delicate, they needed more time.

    6. Your meringue and dry ingredients weren’t right — the foundation

    Hollows start before macaronage if the components are off.

    How to tell: Batter never looked smooth no matter how much you folded; shells were speckled with dark almond bits; meringue looked soft or weepy before you even started folding.

    The fix: Age egg whites 24–48 hours in the fridge (covered), then bring to room temperature before whipping — aged whites whip to a stabler, more elastic meringue. Sift the almond flour and powdered sugar together twice. Whip to firm, glossy peaks — not dry and clumpy (over-whipped meringue folds out unevenly and leaves pockets).

    perfect macaron shells on a tray showing even ruffled feet, one shell lifted to show the bottom
    perfect macaron shells on a tray showing even ruffled feet, one shell lifted to show the bottom

    Frequently asked questions

    Are hollow macarons safe to eat?
    Yes — hollows are a texture defect, not a safety issue, as long as the shells are fully baked. Fill them generously; a good ganache or buttercream filling hides a multitude of hollows and the sandwich still tastes like a macaron.

    Can I fix hollow macarons after baking?
    Not the shells themselves — the structure is set. But the classic fix is the “maturing” step: fill them and refrigerate 24 hours. The filling’s moisture migrates into the shells, softening them slightly and making small hollows far less noticeable. Matured macarons taste better anyway.

    Why do my macarons have no feet AND are hollow?
    Under-mixed batter plus no rest — the double fault. The thick batter couldn’t rise properly (no feet) and trapped air became hollows. Fix the macaronage first (ribbon test), then the rest (dry to touch), and both problems usually resolve together.

    Can humidity cause hollow macarons?
    Indirectly, yes. High humidity extends the resting time needed to form a skin — shells that feel dry in 30 minutes on a dry day can take 2 hours when it’s humid. If you bake on skinless shells in humid weather, you get spreading, cracking, and hollows. Run a fan and be patient.

    Related troubleshooting: Meringue Weeping: Why Your Peaks Leak · Why Did My Pavlovas Crack? · Choux Pastry Collapse: Why Your Éclairs Fell

  • How to Fix Curdled Ganache: Emulsion Rescue

    How to Fix Curdled Ganache: Emulsion Rescue

    One minute your ganache is glossy chocolate silk; the next it’s a grainy, oily mess with pools of fat floating on top. Your ganache hasn’t died — the emulsion simply broke. Chocolate ganache is a suspension of cocoa butter and milk fat in water (from the cream), and like every emulsion, it can be rebuilt. Most split ganache is rescued in under five minutes with nothing but warm cream and a whisk.

    Quick diagnosis: Ganache splits when the emulsion breaks — usually from overheating the chocolate or adding cream at the wrong temperature. Rescue it by whisking in 1 tablespoon of warm cream at a time, or blitz it with an immersion blender. Both rebuild the emulsion in minutes.

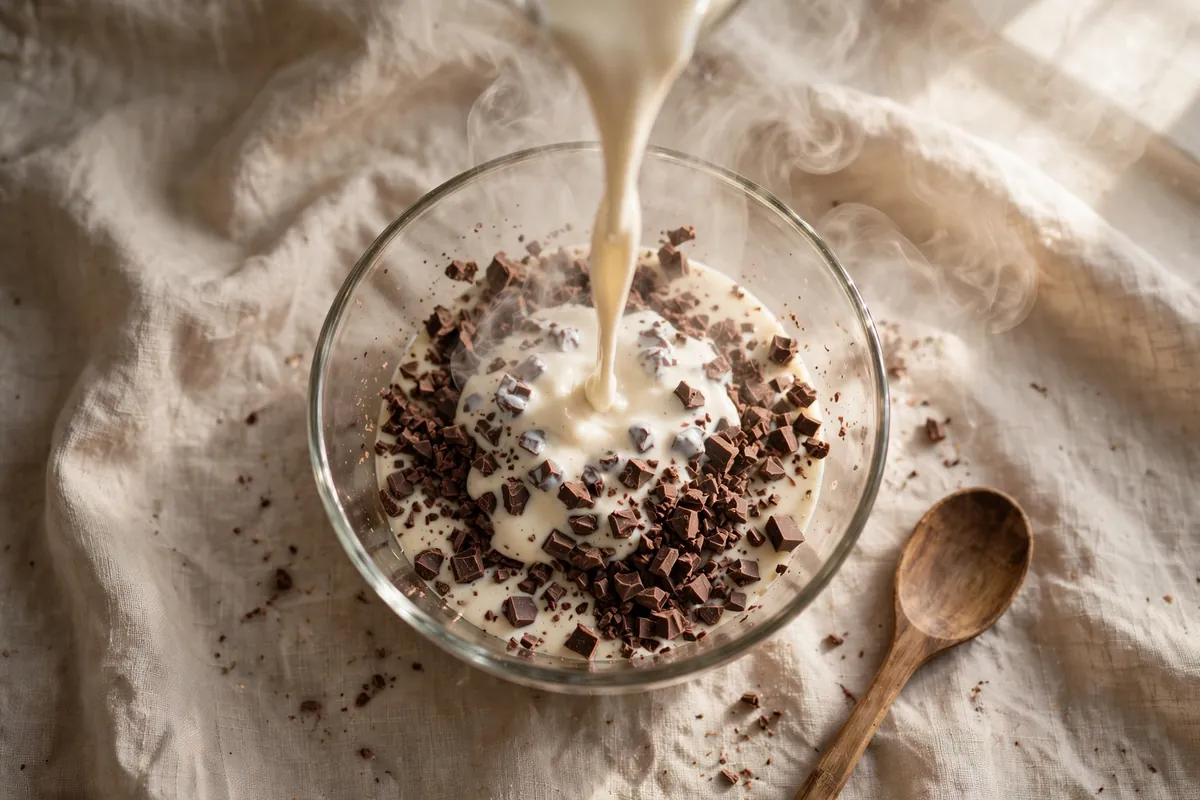
    The baseline: ratios by weight — 1:1 chocolate to cream for a pourable glaze, 2:1 for firm truffles. Chop chocolate to pea-sized pieces, heat the cream to just simmering, about 180°F (82°C) — bubbles at the edges, never boiling. Pour over, wait 2 full minutes untouched, then stir slowly from the center outward. The center melts first and the emulsion spreads; stirring the whole bowl at once breaks it.

    Why did my ganache split? The three culprits

    Overheated chocolate. Cocoa butter separates from cocoa solids when overheated. Boiling cream poured over chocolate can scorch the mixture before the emulsion forms — the fat renders out and floats. This usually happens when someone boils the cream hard “to be sure it’s hot enough.”

    Cream added at the wrong temperature or too fast. Cooled cream makes chocolate seize into lumps; cold cream hitting warm chocolate shocks the forming emulsion. The two components must meet at compatible temperatures — warm cream, room-temperature chopped chocolate, combined gently.

    Water contamination — the seizing trap. A few drops of water seize melting chocolate into a stiff, grainy paste — a different failure from splitting, though the rescue is the same. Prevention: keep every utensil bone dry.

    How to tell which one you have: Greasy oil pools over grainy chocolate = broken emulsion. Stiff, matte paste that seized on contact = water contamination. Both fix the same way.

    Rescue method 1: Warm cream, one tablespoon at a time

    This is the classic fix and it works on most broken ganaches. Warm 2–3 tablespoons of cream (or whole milk) to about 110°F (43°C) — warm to the touch, not hot. Add one tablespoon to the split ganache and whisk firmly in small circles from the center. You’ll see the mixture start to come together and gloss up. Add the next tablespoon only after the first is fully incorporated. Usually 2–3 tablespoons is enough for a batch made with 8 oz (225g) of chocolate.

    The broken emulsion is missing its water phase — the fat has nothing to suspend in. Warm cream reintroduces water and milk proteins at a temperature that coaxes the fat back into suspension. Add gradually: a flood of cream overwhelms the mixture.

    Rescue method 2: The immersion blender

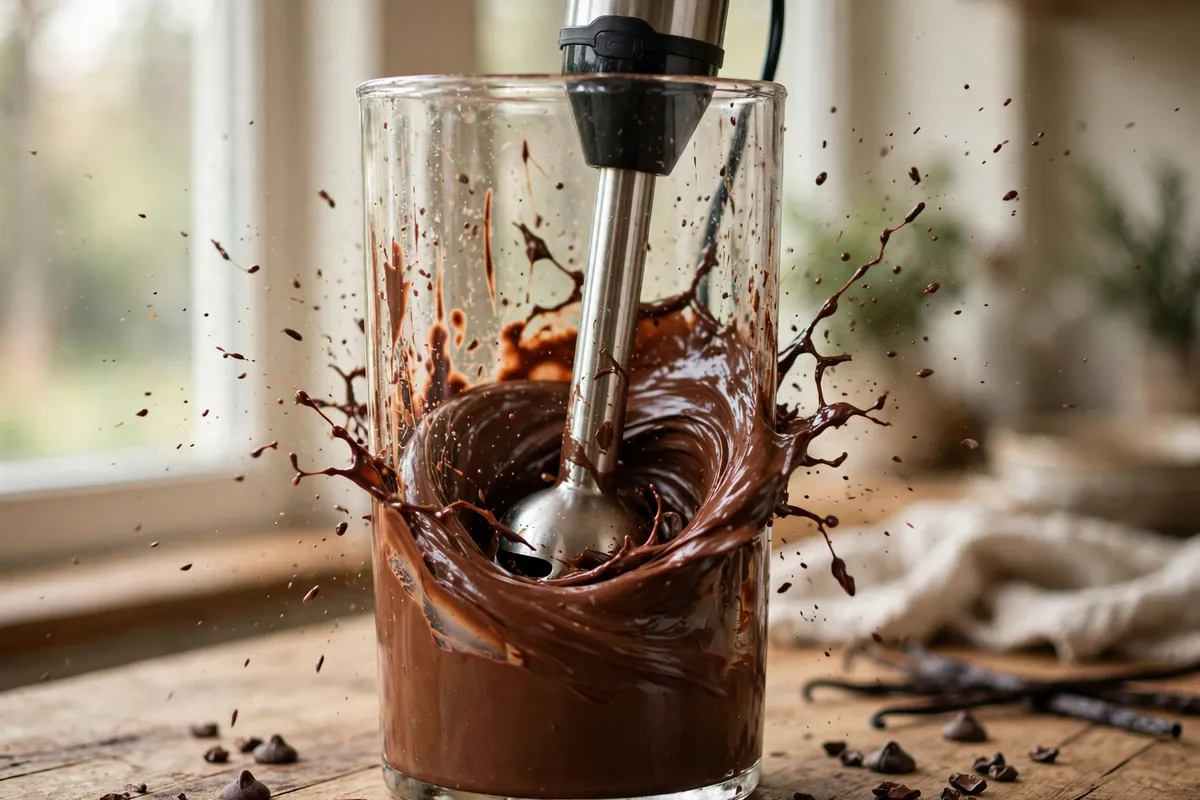
    When whisking isn’t enough — the ganache is badly separated with real oil slicks — bring out the immersion blender. Add a tablespoon of warm cream, then blitz the ganache in short 5-second bursts, keeping the blender head fully submerged to avoid whipping in air. The high shear forces physically smash the fat droplets small enough to re-suspend.

    Three 5-second bursts with a tablespoon of warm milk bring a visibly split batch back to full gloss. It’s just physics — an emulsion is a mechanical state, and shear force rebuilds it.

    Caution: Don’t over-blend: more than 15–20 seconds total whips in air and turns glaze into mousse. Short bursts, check between each one.

    Rescue method 3: The butter knob (for stubborn cases)

    If cream and blending haven’t fully fixed it, whisk in a small knob of soft room-temperature butter — about 1 tablespoon per 8 oz (225g) of chocolate. Butter is itself an emulsion (butterfat suspended with water and milk solids), so it donates ready-made emulsifiers to the mixture. Whisk vigorously until glossy. This slightly softens the set of the ganache, so it’s best for glazes and fillings rather than truffles that need to hold a firm shape.

    an immersion blender re-emulsifying split ganache in a tall container, the mixture turning glossy
    an immersion blender re-emulsifying split ganache in a tall container, the mixture turning glossy
    hot cream being poured over finely chopped chocolate in a glass bowl
    hot cream being poured over finely chopped chocolate in a glass bowl

    When ganache is beyond saving

    Honesty matters here: not every broken ganache comes back. If the chocolate scorched — it smells burnt, tastes bitter and acrid, or has dark brown-black flecks — no amount of whisking fixes burnt. Sugar burns, cocoa solids burn, and burnt is a flavor, not a texture. Throw it out and start over; the chocolate is cheap compared to the dessert it’s supposed to cover.

    Also beyond saving: a wildly off ratio (equal volumes instead of weights means far too much cream — always weigh). A soupy ganache isn’t broken, it’s just wrong; whisk in more melted chocolate until the ratio is right.

    How to prevent split ganache next time

    Five rules, in order of importance:

    1. Weigh, don’t volume-measure. Chocolate and cream have different densities. 1:1 by weight is the only ratio that means anything.
    2. Chop fine. Pea-sized pieces melt evenly; big chunks force you to overheat the already-melted portion waiting for the centers to catch up.
    3. Cream to 180°F (82°C), no hotter. Small bubbles at the edges. Boiling cream is the #1 cause of split ganache in home kitchens.
    4. Rest 2 minutes, stir from the center. The pause lets residual heat do the melting; center-outward stirring builds the emulsion instead of breaking it.
    5. Keep water away. Dry bowls, dry spatulas, dry hands. A few drops cause seizing.

    Cold-kitchen habit: below about 65°F (18°C), warm the bowl with hot water and dry it first — cold bowls steal heat and the chocolate sets before the emulsion forms.

    Frequently asked questions

    Is split ganache safe to eat?
    Yes. A broken emulsion is a texture failure, not a safety issue — every ingredient is still cooked and fine. Taste it: if it tastes like chocolate (not burnt), it’s safe to rescue and serve.

    Can I use water instead of cream to fix ganache?
    A tablespoon of warm water works — the emulsion needs a water phase. But cream works better because milk proteins act as emulsifiers. Never use cold water.

    Why did my ganache get thick and grainy the moment I added liquid?
    That’s seizing — a few drops of water hit the chocolate. Ironically, the fix is more liquid: add warm cream a tablespoon at a time while whisking until it relaxes back.

    Can I reheat ganache that already split?
    Yes — set the bowl over barely simmering water (not touching), stir until fluid, then apply the warm-cream rescue. Never microwave on high; hot spots scorch chocolate.

    My rescued ganache looks fine but won’t set firm. What happened?
    Too much rescue liquid — each tablespoon softens the set. For truffles, whisk in extra melted chocolate to compensate.

    Can I fix ganache that split in the fridge overnight?
    Yes — warm gently over a water bath until fluid, then whisk in warm cream. Cold ganache often just looks separated from crystallized cocoa butter; rewarming alone usually fixes it.

    Related troubleshooting: How to Fix Broken Buttercream · How to Fix Grainy Fudge · Why Does My Frosting Taste Like Butter?

  • How to Fix Over-Salted Dough (Without Starting Over)

    How to Fix Over-Salted Dough (Without Starting Over)

    You were scaling a recipe, the salt slipped, and now you’re staring at a bowl of dough with twice the salt it should have. First, the bad news, stated plainly so we can move past it: you cannot remove salt from dough. No rinsing, no trick, no hack extracts dissolved salt from a mixed dough. But the good news is better than you’d expect: in most cases you don’t need to remove it — you dilute it, and the math is simple. I’ve saved more over-salted batches than I can count, and the rescue below works every time.

    Quick diagnosis: Salt can’t be removed, only diluted. If you added roughly double the salt (say 4% instead of 2%), double the flour, water, and yeast — with NO additional salt — and mix it in: you’re back to 2%. For small overshoots (up to ~2.5–3%), just bake it; the difference is barely noticeable. Only truly extreme salt (5%+) means starting over.

    What too much salt actually does to dough

    Understanding the damage tells you how urgent the fix is. Salt does three things in dough, and excess amplifies all of them:

    It slows the yeast. Salt draws water out of yeast cells by osmosis, dehydrating and stunning them. At the correct 2%, this is desirable — it paces fermentation for better flavor. At 4%+, the yeast barely functions: expect a sluggish, under-risen loaf no matter how long you wait. (This is the same mechanism behind slow rises generally — see Why Didn’t My Bread Rise?.)

    It tightens the gluten. Salt strengthens gluten networks — good in moderation, but excess makes dough stiff, resistant to shaping, and prone to tearing.

    It tastes salty. Obvious, but worth stating: above ~3%, most people can taste it, and above 4% it’s unpleasant in plain bread.

    Step 1: Figure out how bad it is

    Before doing anything, estimate the damage. The target is 2% salt by flour weight — 10g per 500g flour, about 2 teaspoons of fine salt per 4 cups.

    • ~2.5–3% (a heavy hand, a rounded spoon): Bake it. Seriously. At this level the difference is subtle — slightly slower rise, slightly firmer crumb, a touch more flavor. Extend the rise time a little and carry on.
    • ~3–4% (doubled the salt, or used tablespoons instead of teaspoons): Dilute — the rescue below. Fully salvageable.
    • 5%+ (poured freely, or confused salt with something else): Start over. At this level you’d need to triple the batch to dilute it, the yeast is severely compromised, and the result isn’t worth the flour.

    How to estimate: Think back to what you added versus what the recipe called for. If the recipe said 2 teaspoons and you added 2 tablespoons, that’s 3× — roughly 6%, which means starting over. If it said 10g and you added 20g, that’s 4% — dilutable.

    Step 2: The dilution rescue (the actual fix)

    The math is straightforward: salt percentage = salt weight ÷ flour weight. To halve the percentage, double the flour (and everything else except salt).

    Worked example: Your recipe used 500g flour and you accidentally added 20g salt (4%) instead of 10g (2%).

    1. Mix a second batch of the same dough — 500g flour, the recipe’s water, the recipe’s yeast — with zero salt.
    2. Knead the two doughs together thoroughly until completely homogeneous (5–8 minutes). Don’t just stack them; the salt must distribute evenly.
    3. You now have 1000g flour and 20g salt = 2%. Correct.
    4. Proceed with the recipe, allowing a slightly longer rise (the yeast had a head start in the salty half).

    No scale? Work in the recipe’s own units: if the recipe was “4 cups flour, 2 teaspoons salt” and you added 4 teaspoons, make a second identical batch with no salt and combine. The units cancel out as long as both halves match.

    Yeast note: the yeast in the over-salted half is sluggish but alive. The fresh yeast in the new half carries the rise. Combined and given time, the batch ferments fine — just expect it to need a bit longer than usual. Judge by the dough (doubled, poke test), not the clock.

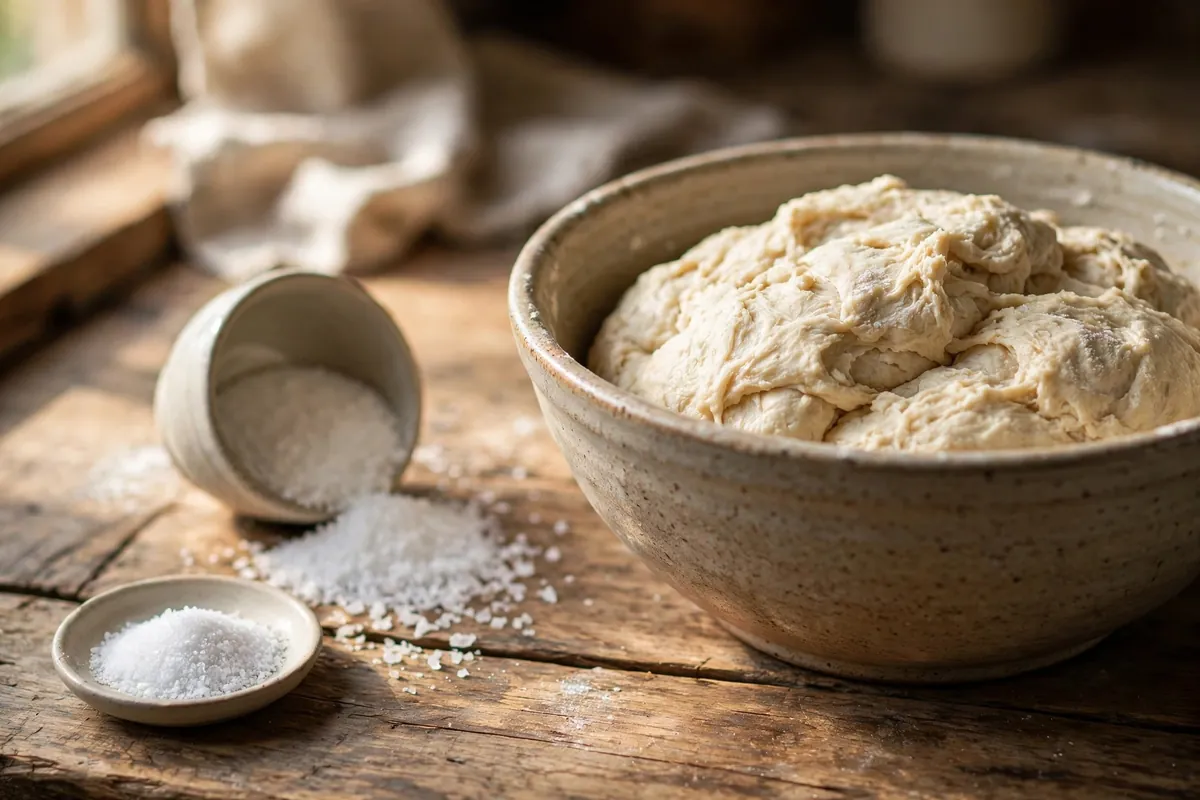
    two doughs being kneaded together — the salted batch and the fresh unsalted batch merging
    two doughs being kneaded together — the salted batch and the fresh unsalted batch merging

    Step 3: Adjust the bake

    A rescued batch needs two small accommodations:

    • Longer fermentation. Give it 25–50% more rise time than the recipe states. The yeast is recovering; don’t rush it.
    • Watch the shaping. The combined dough may be slightly stiffer than usual (salt tightened the first half’s gluten). If it resists shaping, rest it 15 minutes and try again — relaxed gluten stretches willingly.

    What does NOT work (don’t waste your time)

    • Rinsing the dough. Salt is dissolved throughout; surface rinsing removes almost nothing and waterlogs the dough.
    • Adding sugar to “balance” it. Sugar doesn’t cancel salt on the palate the way people hope — you get sweet and salty, and the yeast is still stunned.
    • Adding more yeast alone. Extra yeast in a 4%-salt dough just gives you more stunned yeast. Dilution first, then the yeast already present is plenty.
    • Baking it salty and hoping. Above ~3.5%, hope is not a strategy. Dilute or discard.

    Prevention (so this is the last time)

    • Weigh salt. 10g per 500g flour. A scale eliminates the tablespoon/teaspoon confusion that causes most over-salting.
    • Know your salt. Fine table salt packs denser than kosher — a tablespoon of fine salt can weigh nearly twice a tablespoon of coarse kosher. If a recipe doesn’t specify, assume fine and measure accordingly.
    • Add salt with the flour, not the yeast. Mixing salt through the dry ingredients distributes it evenly and avoids concentrated pockets stunning the yeast on contact.
    • Mise en place. Measure everything before mixing starts. Most salt accidents happen mid-recipe, reaching for the wrong spoon in a hurry.
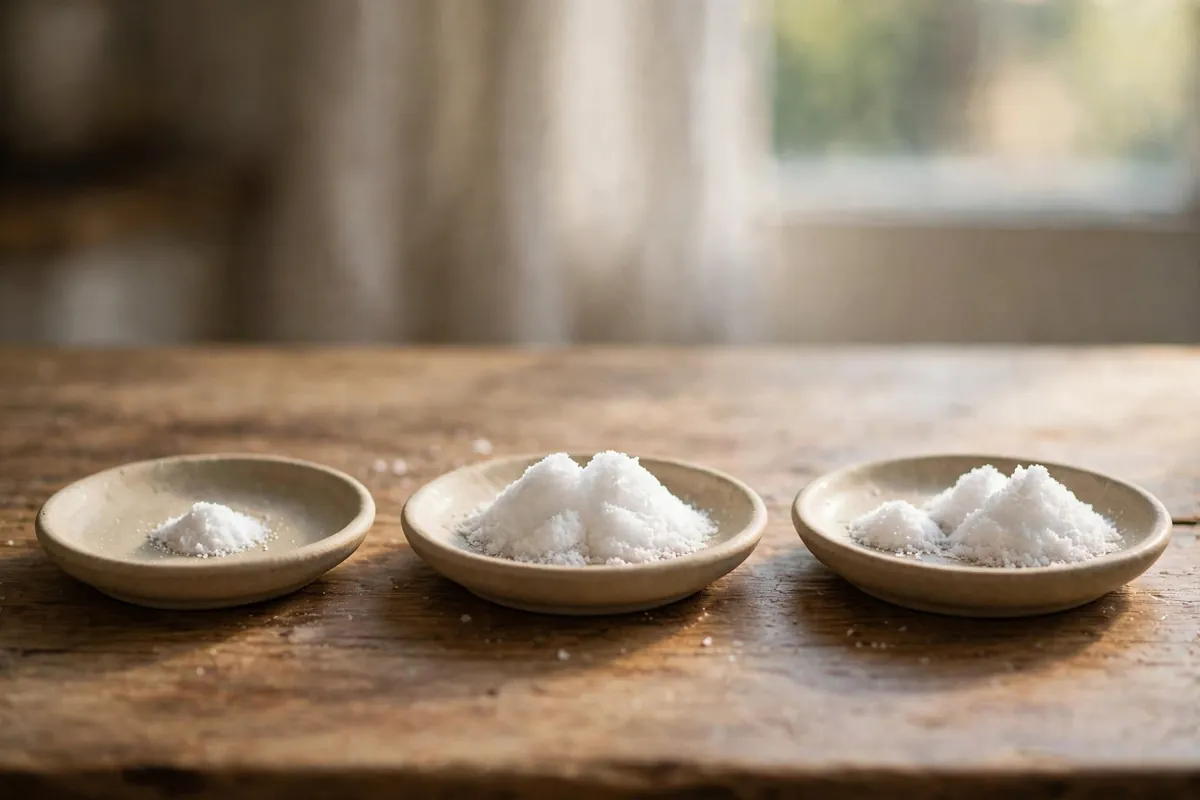
    three small dishes showing correct salt (10g), double salt (20g), and the visual difference
    three small dishes showing correct salt (10g), double salt (20g), and the visual difference

    Frequently asked questions

    Will the rescued dough taste normal?
    Yes — that’s the point of the math. At a true 2% after dilution, the salt level is exactly what the recipe intended. The crumb, crust, and flavor will be indistinguishable from a correct batch, provided you gave it the full rise.

    My dough hasn’t risen at all — is the yeast dead?
    Probably stunned, not dead. Salt at 4% slows yeast dramatically but rarely kills it outright (that takes much higher concentrations or heat). Give it time in a warm spot (75–80°F / 24–27°C) — up to twice the normal rise. If there’s genuinely zero movement after hours, then yes, start fresh; but sluggish is normal here, not fatal.

    Can I just make the recipe salt-free to compensate?
    That’s exactly what the dilution rescue is — a second salt-free batch combined with the first. Don’t try to “average it out” by serving salty bread with bland toppings; fix the dough itself.

    Does this work for pizza dough too?
    Yes — same math, same method. Pizza dough is actually more forgiving because toppings and sauce mask minor salt variations. For a 3% overshoot on pizza dough, many bakers just proceed; the toppings carry it.

    What if I used salted butter instead of unsalted by mistake?
    Different problem, smaller scale: salted butter adds roughly 1–1.5% salt equivalent to the dough — usually within the tolerable range. Proceed, and skip any additional salt the recipe calls for. No rescue needed.

    Is over-salted dough safe to eat?
    The dough itself is safe — salt isn’t a food-safety hazard at these levels. The question is purely palatability and yeast function. (Truly extreme salt — a cup in a single loaf — would be inedible but still not dangerous.)

    Related troubleshooting: Why Didn’t My Bread Rise? · Make-Ahead Bread Dough · No-Yeast Bread

  • How to Freeze Cookie Dough (and Bake It Straight From Frozen)

    How to Freeze Cookie Dough (and Bake It Straight From Frozen)

    How to Freeze Cookie Dough (and Bake It Straight From Frozen)

    Quick diagnosis: Scoop the dough into balls FIRST, freeze them solid on a tray (1–2 hours), then bag them airtight. Bake straight from frozen at the recipe’s temperature, adding 1–3 minutes. Never thaw on the counter first — thawed dough spreads flat. Frozen dough keeps 3 months at peak quality.

    There’s a special kind of magic in pulling warm cookies from the oven on a Tuesday night with zero prep. Freezing cookie dough is how you get there — a stash of portioned dough in the freezer means fresh-baked cookies in under 20 minutes, any day, with no mixing bowls to wash. I’ve kept a running freezer stash for years, and the method below is the one that survives every dough type I throw at it.

    Which cookie doughs freeze best (and which don’t)

    Freeze beautifully: drop-cookie doughs (chocolate chip, oatmeal, peanut butter, double chocolate), slice-and-bake/shortbread logs, snickerdoodles. These are sturdy, high-fat doughs whose structure doesn’t depend on delicate foams.

    Freeze fine with care: sugar-cookie dough for cutouts (freeze as a flattened disc, roll and cut after a 10-minute counter rest), gingerbread, thumbprints (freeze the balls plain; add the jam or Hershey’s kiss after baking — fillings get weepy in the freezer).

    Don’t freeze: meringue-based doughs (they weep and collapse), very delicate lace cookies (Florentines — the caramelized sugar goes sticky), and anything with a fresh-cream filling. These are bake-fresh-only cookies.

    The rule of thumb: if the dough is scoopable or sliceable and leavened with baking soda or powder, it freezes. If its texture depends on whipped egg whites or paper-thin caramel, it doesn’t.

    Step 1: Portion before you freeze

    This is the step people skip, and it’s the whole game. Frozen dough is nearly impossible to portion — you’ll be chiseling at a rock with a knife, which is how countertops get scarred and tempers get lost.

    Scoop the fresh dough into balls exactly as you would for baking (a #20 scoop, about 3 tablespoons, for standard cookies). For slice-and-bake logs, shape the log, wrap it, and freeze the whole log — slice while still frozen, which is actually easier than slicing soft dough.

    Tray of scooped raw cookie dough balls on parchment, ready for the freezer
    tray of scooped raw cookie dough balls on parchment, ready for the freezer

    Step 2: Flash-freeze on a tray

    Spread the portioned balls on a parchment-lined sheet pan with space between them and freeze uncovered for 1–2 hours, until rock solid. This is called flash-freezing, and it keeps the balls from fusing into one dough boulder in the bag.

    Skip this step and bag soft dough, and you’ll pull out a single inseparable mass. Flash-freezing means every ball stays individual — grab exactly as many as you want, any time.

    Step 3: Pack it airtight

    Transfer the frozen balls to a heavy-duty freezer bag. Press out as much air as possible before sealing — air is what causes freezer burn, those dry gray patches that taste like the freezer smells. For extra insurance on dough you’ll keep past a month, wrap the bag’s contents in a second bag or a layer of plastic wrap.

    Label everything: dough type, date frozen, bake temp, and bake time. Frozen dough balls all look identical after a month. A strip of masking tape and a marker takes ten seconds and saves you from the mystery-bag gamble. I write it like this: “Choc chip — 1/12 — 350°F — 11–13 min +2 frozen.”

    Labeled freezer bag of frozen cookie dough balls, masking-tape label visible
    labeled freezer bag of frozen dough balls, masking-tape label visible

    How long frozen dough keeps

    At 0°F (-18°C) or below, portioned cookie dough holds peak quality for 3 months. It’s still safe well past that — frozen food doesn’t spoil — but quality slides: fats pick up off-flavors, leaveners lose punch, and the baked texture gets progressively flatter and duller. My rule: if it’s been 4+ months, bake a test batch of two before committing to a full tray.

    Keep the freezer at a steady 0°F. A freezer that’s constantly opened (or a frost-free model cycling through defrost) shortens the window — store dough in the coldest, least-disturbed spot, usually the back.

    Baking straight from frozen: the method

    Here’s the payoff. No thawing, no planning ahead.

    1. Heat the oven fully — a full 15–20 minutes past the preheat beep. Frozen dough hitting a half-hot oven spreads before it sets (the same too-cool-oven problem behind flat cookies).
    2. Place frozen balls on a parchment-lined sheet, spaced as the recipe directs. They go on the tray frozen solid, straight from the bag.
    3. Bake at the recipe’s temperature — don’t raise it. The frozen center needs steady heat, not a blast.
    4. Add 1–3 minutes to the recipe’s bake time. Start checking at the original time; most doughs need just 1–2 extra minutes. The visual cues don’t change: set edges, slightly underdone-looking centers.

    The result is arguably better than fresh dough: baking from frozen gives thicker cookies with chewier centers, because the fat melts slowly while the structure sets — the same principle as chilling dough, taken further. Frozen versus fresh batches side by side: the frozen batch consistently comes out taller.

    Side-by-side comparison — cookies baked from frozen (thick) vs baked fresh (flatter)
    side-by-side comparison — cookies baked from frozen (thick) vs baked fresh (flatter)

    Thaw-first vs. bake-from-frozen

    You’ll see advice to thaw dough in the fridge overnight. Here’s my honest take after testing both: thawing works, but it’s strictly worse. Thawed dough is soft dough — it spreads more, bakes up thinner, and you’ve added 8+ hours of planning for a worse cookie.

    The one exception: slice-and-bake logs and cutout sugar cookies. A log that’s rock solid is hard to slice cleanly — give it 10 minutes on the counter, no more, just until the knife goes through. Cutout dough needs a brief rest to become rollable. Everything scoopable goes in frozen.

    The 5 mistakes that ruin frozen dough

    1. Freezing unportioned dough. The chisel problem. Always portion first.
    2. Skipping the flash-freeze. One fused dough boulder instead of grab-and-go balls.
    3. Thin bags with air inside. Freezer burn in weeks. Press the air out; double-bag for long storage.
    4. No labels. Mystery dough is how good cookies go unbaked. Date, type, temp, time.
    5. Thawing on the counter. Room-temp thaw = soft dough = flat cookies. Bake from frozen or don’t bother.

    Frequently asked questions

    Can you bake cookie dough from frozen without thawing?
    Yes — that’s the best method. Place frozen dough balls directly on a parchment-lined sheet, bake at the recipe’s temperature, and add 1–3 minutes. The cookies come out thicker than from fresh dough because the fat melts slowly while the structure sets.

    How long does cookie dough last in the freezer?
    Peak quality for 3 months at 0°F (-18°C). It’s safe beyond that, but fats absorb off-flavors and leaveners weaken, so texture declines. Bake a 2-cookie test batch before committing a full tray of older dough.

    Should you thaw frozen cookie dough before baking?
    No, for drop cookies — thawing makes the dough soft, which causes spreading. The only doughs that need a brief rest are slice-and-bake logs (10 minutes, for clean slicing) and cutout sugar cookie dough (10 minutes, to become rollable).

    Can you freeze cookie dough with raw eggs in it?
    Yes. The eggs are fully incorporated into the dough and will be baked to a safe internal temperature. Standard food-safety guidance applies: keep the dough frozen solid until baking, and don’t refreeze thawed raw dough.

    Does freezing change how cookies taste?
    Properly packed dough (airtight, 3 months or less) bakes up indistinguishable from fresh — in blind tests, tasters actually preferred the frozen-baked batch for thickness. Poorly packed dough (air exposure, 5+ months) picks up stale, flat flavors. The packing matters more than the freezing.

    Can you refreeze cookie dough?
    Don’t refreeze thawed raw dough — each freeze-thaw cycle degrades texture and raises food-safety questions. But you can absolutely bake thawed dough and then freeze the baked cookies, which keep 2–3 months airtight.

    Related troubleshooting: Why Do My Cookies Spread Flat? · Why Are My Cookies Cakey Instead of Chewy? · How to Store Homemade Bread So It Stays Fresh for Days

  • Sourdough Starter Smells Like Acetone — What It Means and the Fix

    Sourdough Starter Smells Like Acetone — What It Means and the Fix

    Sourdough Starter Smells Like Acetone — What It Means and the Fix

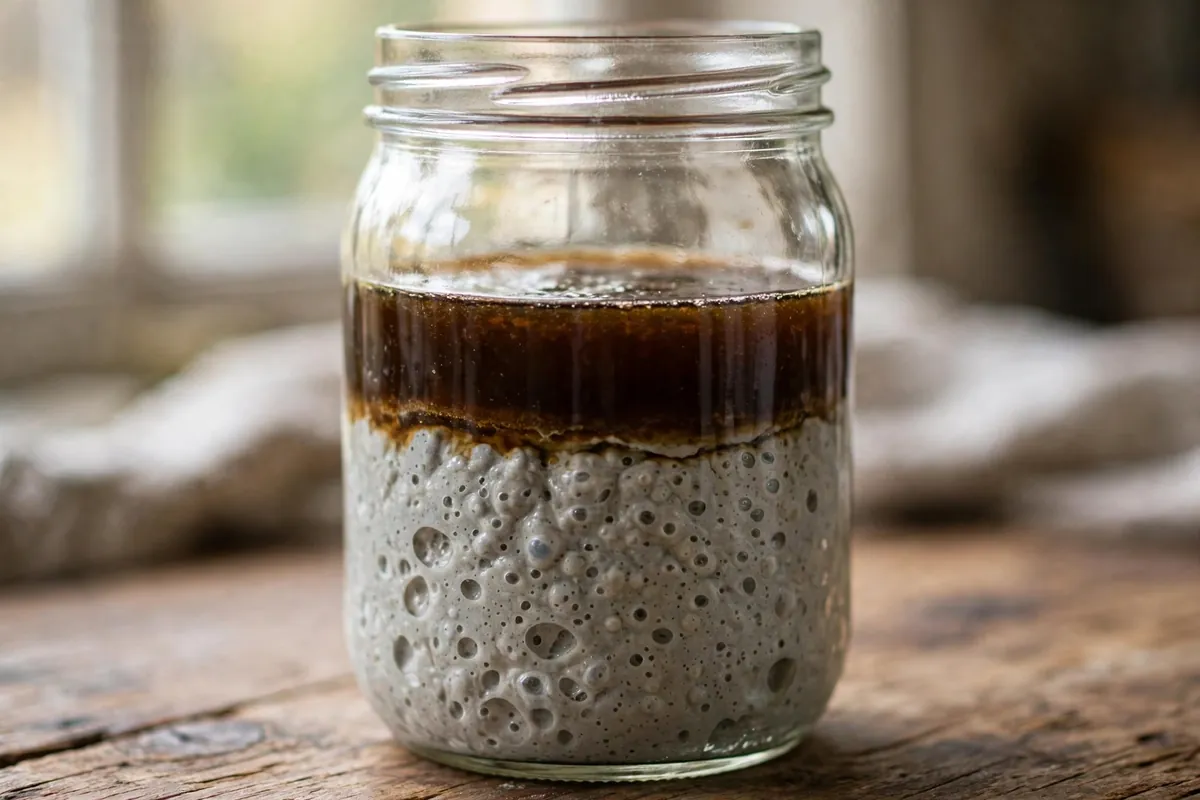
    Quick diagnosis: That sharp, nail-polish-remover smell is alcohol and acetic acid produced by a hungry starter — it has run out of food and is telling you so. Your starter is not ruined. Stir the dark liquid back in (or pour it off), discard down to a spoonful, and feed it a generous meal. Two to three days of proper feeding and it’ll smell yeasty and sweet again.

    Sourdough starter jar with dark hooch layer on top
    clear jar of starter with a dark hooch layer sitting on top

    Open your starter jar and get hit with acetone instead of that pleasant yeasty tang, and it’s natural to panic. But this smell is one of the most common and most fixable starter issues there is. Here’s exactly what’s happening and the feeding protocol that fixes it.

    What the acetone smell actually is

    A sourdough starter is a culture of wild yeast and lactic acid bacteria living in flour and water. When they’re well fed, they produce CO₂ (the rise), mild lactic acid (the tang), and pleasant estery aromas. When the food runs out, the yeast switches to survival metabolism and produces ethanol and acetic acid in larger quantities — and acetic acid at concentration smells sharply like acetone or nail polish remover.

    You’ll often see a dark liquid on top too. That’s hooch — mostly alcohol — and it’s part of the same story: hunger, not death. The culture is dormant and stressed, not gone.

    Why it happens

    Three triggers, usually in combination:

    1. Too long between feeds. A room-temperature starter burns through its flour in 8–12 hours. Miss a day or two and it’s starving.
    2. A warm kitchen. Heat accelerates fermentation — at 80°F+ (27°C+) a starter can go from fed to famished in half the usual time. Summer neglect produces acetone smell fast.
    3. Too small a feed. Feeding 1:1:1 (equal parts starter, flour, water by weight) gives a small meal that runs out quickly. In warmth, or after neglect, the culture needs a bigger ratio.

    Is my starter ruined? (Probably not — check this)

    Hooch plus acetone smell = hungry, salvageable. There is exactly one thing that means discard: pink, orange, or red streaks, or any fuzzy mold (white, green, black fuzz). That’s contamination, and no feeding fixes it — throw it out, sterilize the jar, and start fresh. Everything else — dark liquid, sharp smell, grayish color, sluggish rise — is recoverable.

    One more reassurance: the acetone smell itself is not a safety issue. You’re smelling volatile acids and alcohol, the same compounds (at lower levels) that give sourdough its characteristic tang. Once the starter is fed and active again, the smell normalizes.

    The fix: a 3-day revival feeding protocol

    Day 1 — the reset feed. Pour off the hooch or stir it in (pouring off slightly reduces acidity; stirring in keeps hydration stable — either is fine). Discard all but about a tablespoon of starter, then feed it generously: 1 part starter to 3 parts flour to 3 parts water by weight (1:3:3). Use a 50/50 mix of bread flour and whole wheat or rye if you have it — the extra nutrients wake sluggish cultures faster. Mark the level with a rubber band.

    Day 2 — feed at peak, not by the clock. Watch for the starter to rise and just begin to fall (the dome flattens). That’s peak — feed it again 1:3:3 at that moment, even if it’s only been 8 hours. Feeding at peak, called peak-to-peak feeding, rebuilds a vigorous population fastest. A neglected starter usually shows real life by the second peak-to-peak feed.

    Day 3 — confirm the rhythm. By now it should be doubling (or more) predictably within 4–8 hours of feeding at room temperature, smelling yeasty, sweet, and mildly tangy — the acetone edge gone. It’s ready to bake with, or to go back on a maintenance schedule.

    Discarding and feeding a sourdough starter, overhead view
    feeding the starter — discarding half, flour and water measured beside the jar
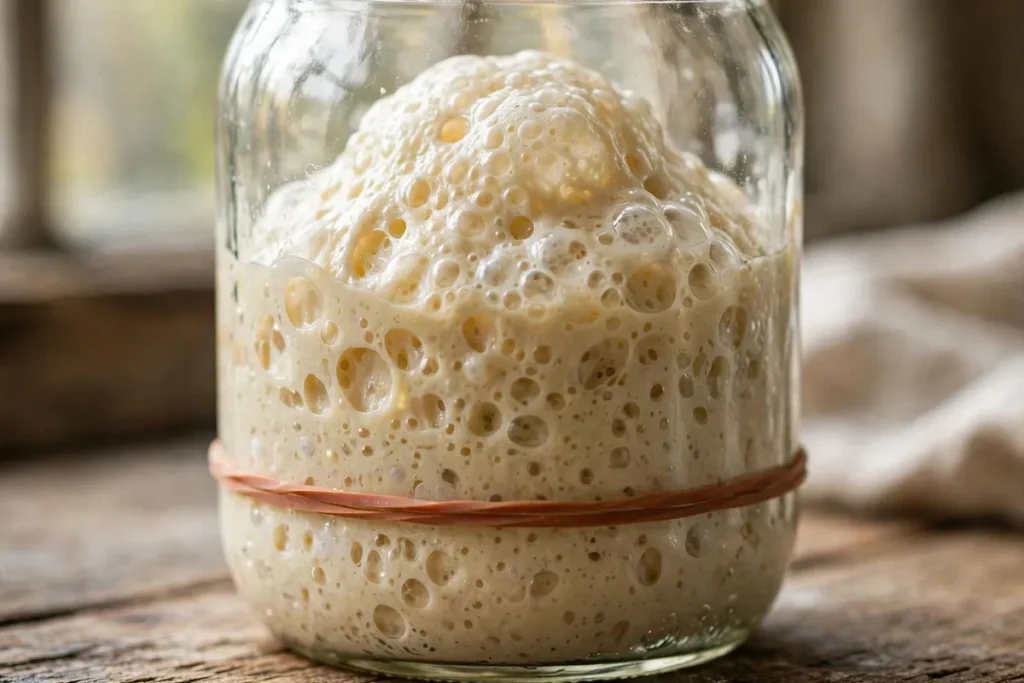
    Sourdough starter risen past the rubber-band line at peak
    starter at peak — domed, bubbly, risen well above the rubber-band marker

    Keeping it from coming back

    • Room temperature: feed every 12 hours (twice daily) with at least 1:2:2. In hot kitchens, go 1:3:3.
    • Fridge storage: feed it, let it start rising (1–2 hours), then refrigerate. Feed once a week — set a reminder. It’ll develop mild hooch between feeds; that’s normal. Just feed before baking, and give it 1–2 room-temperature feeds after long fridge stays to wake it fully.
    • Bigger feeds before neglect: if you know you’ll skip days, feed 1:5:5 before the gap. More food = longer runway.

    Frequently asked questions

    Is a starter that smells like acetone safe to use?
    The smell itself isn’t dangerous — it’s alcohol and acetic acid, normal fermentation byproducts at high concentration. But don’t bake with it in this state: a starving culture won’t leaven properly. Revive it with the 3-day protocol first, then bake once it doubles predictably.

    Should I pour off the hooch or stir it in?
    Either works. Pouring off removes some acidity and alcohol (slightly milder flavor, marginally lower hydration). Stirring in keeps everything consistent. Pour off very dark hooch and stir in light hooch — but honestly, the feeding protocol matters far more than this choice.

    Why does it smell like nail polish remover specifically?
    Acetic acid — the same acid that gives vinegar its bite — at high concentration has a sharp, solvent-like aroma our noses read as acetone or nail polish remover. Starving yeast and bacteria overproduce it. A healthy starter makes small amounts of it too; that’s part of sourdough’s tang.

    How often should I feed my starter?
    At room temperature (70–75°F / 21–24°C): every 12 hours. In the fridge: once a week. After any neglect, do 2–3 peak-to-peak feeds at room temperature before trusting it for bread.

    Can I bake with it right now, acetone smell and all?
    Not yet. A hungry starter has a depleted yeast population and excess acidity — your loaf will rise poorly and taste harshly sour. Wait until it doubles within 4–8 hours of feeding and smells yeasty-sweet. Usually 2–3 days of proper feeding.

    My starter smells like acetone even though I feed daily — why?
    Your feeds are too small for your conditions. Move from 1:1:1 to 1:2:2 or 1:3:3, or feed twice daily. Warm kitchens (above 78°F / 26°C) burn through flour fast — match the meal size to the metabolism.

    Related troubleshooting: Why Is My Sourdough Gummy Inside? · Why Didn’t My Bread Rise? · Why Is My Bread Dense?