Author: Ali Ramzan

  • Churros Troubleshooting: Raw Inside, Greasy Outside

    Churros Troubleshooting: Raw Inside, Greasy Outside

    Churros are fried choux pastry — the same dough as éclairs — and frying is less forgiving than baking. In hot oil, the outside goes from pale to burnt in about ninety seconds while the inside needs every one of those seconds. Raw-inside-greasy-outside is the signature of that race being lost, and it’s almost always the oil temperature.

    Quick diagnosis: Your oil was too cool — below 350°F (175°C), the dough soaks up oil before the crust sets, so it’s greasy outside and raw inside. Hold 350–375°F (175–190°C) with a thermometer, fry 3–4 at a time so the temperature doesn’t crash, and pipe no thicker than ½-inch with a star tip.

    My tested baseline: 1 cup (240ml) water, 100g butter, 1 tbsp sugar, ½ tsp salt — boiled together. Off heat, stir in 1 cup (125g) flour all at once and cook 2–3 minutes, stirring, until a film forms on the pan. Cool 5 minutes, beat in 3 eggs one at a time until the dough is smooth, glossy, and holds a V-shape off the spoon. Pipe 4-inch lengths through a ½-inch open star tip into 350–375°F (175–190°C) oil, 2–3 minutes per side. Drain on a wire rack, toss in cinnamon sugar while hot.

    1. The oil was too cool — the master cause of both symptoms

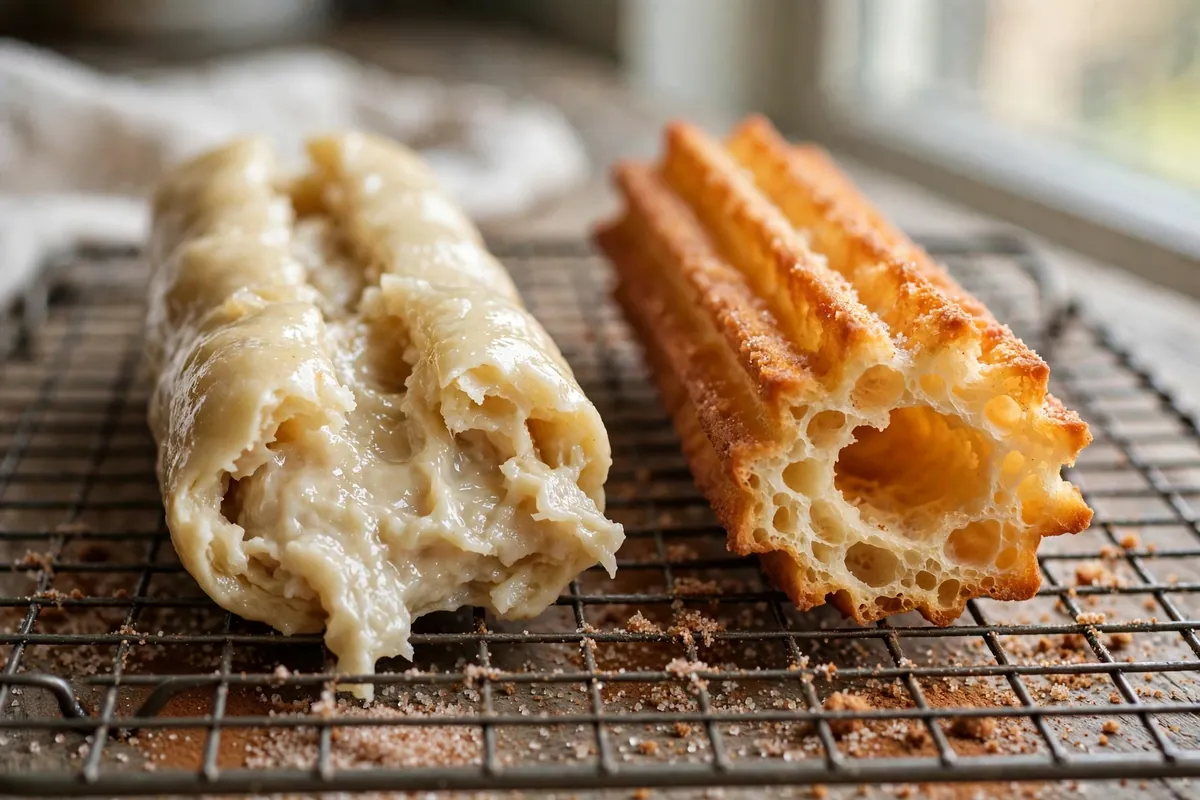
    This one mistake produces both halves of your problem simultaneously. Below about 350°F (175°C), the dough’s surface doesn’t set fast enough to seal, so oil seeps in (greasy outside) while gentle heat fails to drive through to the center before the outside is done (raw inside). It always comes from frying without a thermometer.

    How to tell: Churros took forever to brown, came out pale and heavy, left an oil slick on the plate, and the centers were doughy. The oil barely bubbled around the dough.

    The fix: Use a deep-fry thermometer clipped to the pot. Heat to 365°F (185°C) before the first batch; the cold dough drops it into the 350–375°F (175–190°C) working zone. Fry only 3–4 churros at a time; crowding crashes the temperature. (Temperature discipline is the whole game in fried pastry, same as Choux Pastry Collapse: Why Your Éclairs Fell.)

    2. The oil was too hot — burnt outside, raw inside

    The mirror image. Above 375°F (190°C), the exterior browns in under a minute — gorgeous, tempting, done-looking — while the center is still wet choux paste.

    How to tell: Deep brown or spotty-dark crusts in under 2 minutes total frying, with raw doughy centers; the oil smoked or the churros darkened almost immediately.

    The fix: Between batches, the oil reheats fast with no dough in it; always check the thermometer before the next drop, not after.

    3. You piped them too thick — the center can’t catch up

    Heat penetrates from the outside in, and doubling a churro’s thickness more than doubles the time the center needs. A ¾-inch churro in correct-temperature oil will still be raw inside when the outside is perfectly golden — the geometry defeats the temperature.

    How to tell: The crust color was perfect and the oil temperature verified, but centers were still doughy; churros looked fat and round rather than ridged.

    The fix: A ½-inch (1.3cm) open star tip — Ateco 847 or 827 are the standards.

    4. The dough was wrong — panade or egg errors

    Churro dough must be a proper choux: the flour cooked in the butter-water (the panade) until it forms a film on the pan, then enough egg to make it pipeable but firm. Too much egg makes a slack dough that spreads and fries up greasy; too little makes a stiff dough that cracks and stays dense inside.

    How to tell: Dough tasted floury or the centers were gummy even at correct oil temp and thickness (undercooked panade). Dough oozed flat off the tip instead of holding ridges (too much egg); dough cracked and wouldn’t pipe smoothly (too little egg).

    The fix: Cook the panade a full 2–3 minutes over medium heat, stirring constantly, until a thin film coats the pan bottom — that’s the visual cue the flour is cooked. Cool 5 minutes (hot panade scrambles the eggs), then beat eggs in one at a time, fully incorporating each. The finished dough should be smooth and glossy, fall from the spoon in a thick V that holds its shape, and pipe clean ridges that stand up.
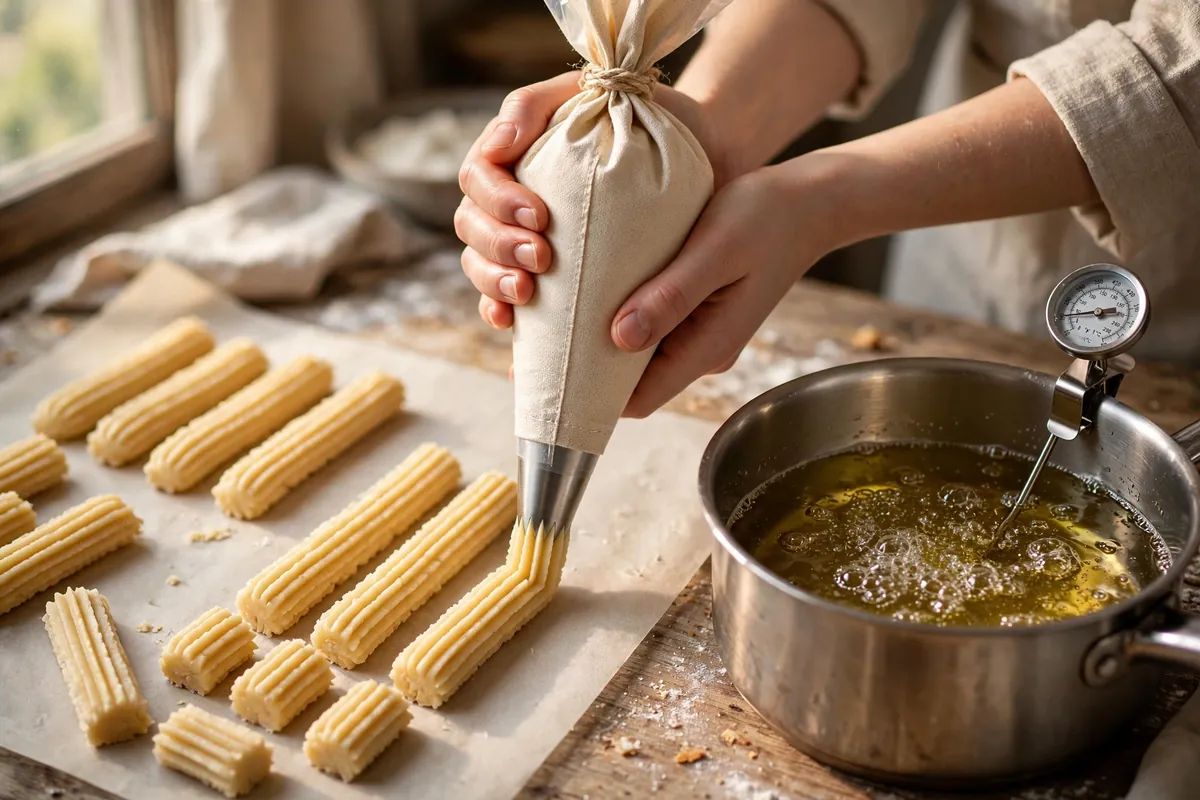
    hands piping ridged churro dough from a pastry bag with a star tip over a pot of oil
    hands piping ridged churro dough from a pastry bag with a star tip over a pot of oil

    5. You drained them wrong — the soggy finish

    Churros emerge from oil carrying surface oil and internal steam. Laid on paper towels, they sit in both: the towel traps steam underneath, and the surface oil has nowhere to go. Thirty seconds on paper is the difference between shattering crisp and disappointingly soft.

    How to tell: Churros were crisp coming out of the oil but softened within minutes; bottoms were oily; paper towels were saturated.

    The fix: Drain on a wire rack over a sheet pan so steam escapes and oil drips away. Toss in cinnamon sugar within a minute of draining, while the surface is still tacky — that’s what makes the sugar stick.

    6. You stored them — churros are a fresh-or-nothing pastry

    Churros stale faster than almost anything I make. Ambient humidity softens the crisp shell within an hour; never refrigerate them.

    How to tell: Leftover churros were chewy and soft the next day; reheating in the microwave made them rubbery.

    The fix: Fry only what you’ll eat within the hour. If you must hold them, keep fried churros uncovered at room temperature up to 2 hours — covering traps steam. Better plan: pipe the raw dough onto a parchment-lined tray, freeze the shapes solid, and fry from frozen (add 1–2 minutes) — frozen piped churros fry up nearly as well as fresh, and the dough holds a week in the freezer. The dough itself can be made a day ahead and refrigerated in the piping bag.
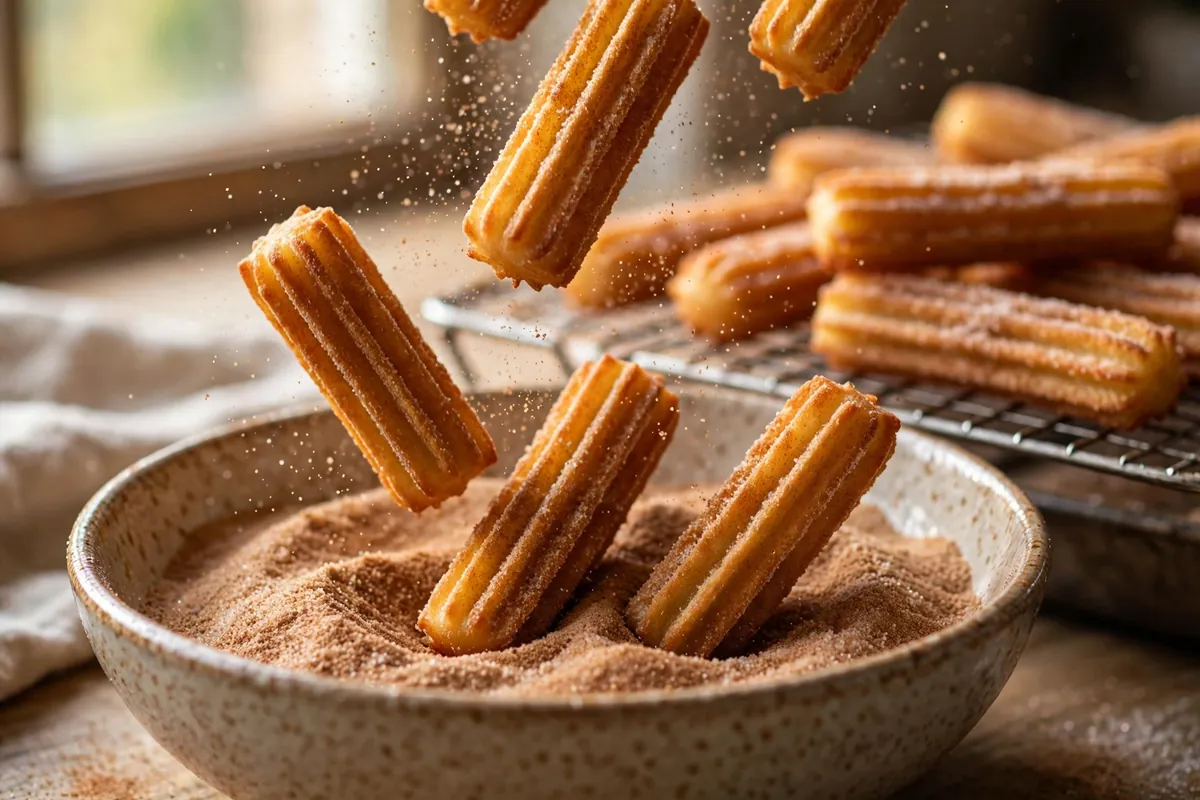
    freshly fried churros being tossed in cinnamon sugar in a shallow bowl, steam rising
    freshly fried churros being tossed in cinnamon sugar in a shallow bowl, steam rising

    Frequently asked questions

    Are raw-inside churros safe to eat?
    Mostly yes — the dough is just flour, butter, egg, and water, and the outside reached full frying temperature. But a truly raw, wet center is unpleasant and undercooked egg is best avoided. When in doubt, the fix is easy: split them and finish in a 375°F (190°C) oven for 5–8 minutes.

    Can I fix greasy churros after frying?
    Partially. A hot oven (400°F/200°C, 5 minutes on a rack) drives off surface oil and re-crisps them. It won’t fix a raw center, but it rescues the grease. Next batch, check the oil temperature — that’s the real fix.

    Can I bake churros instead of frying?
    You can, but they’re a different pastry — baked choux, closer to an éclair stick. Pipe onto parchment, bake at 400°F (200°C) for 20–25 minutes until deeply golden, brush with melted butter, and toss in cinnamon sugar. Good, but not churros.

    What oil is best for frying churros?
    A neutral oil with a high smoke point: vegetable, canola, or peanut. You’ll need enough for 2–3 inches of depth.

    Can I make the dough ahead?
    Yes — the choux dough keeps 24 hours refrigerated in a sealed piping bag, or pipe shapes and freeze up to a week. Fry from frozen, adding 1–2 minutes to the time. Don’t hold fried churros; fry to order.

    Related troubleshooting: Choux Pastry Collapse: Why Your Éclairs Fell · Puff Pastry Not Puffing: Lamination Mistakes · High-Altitude Baking Adjustments

  • Why Did My Pavlovas Crack? Meringue Shell Science

    Why Did My Pavlovas Crack? Meringue Shell Science

    You pulled a gorgeous meringue shell from the oven, walked away for ten minutes, and came back to the Grand Canyon. Cracks are almost never random — a pavlova shell is a dried egg-white foam, and every crack traces back to one of five failures: thermal shock, excess heat, undissolved sugar, humidity, or an unstable foam.

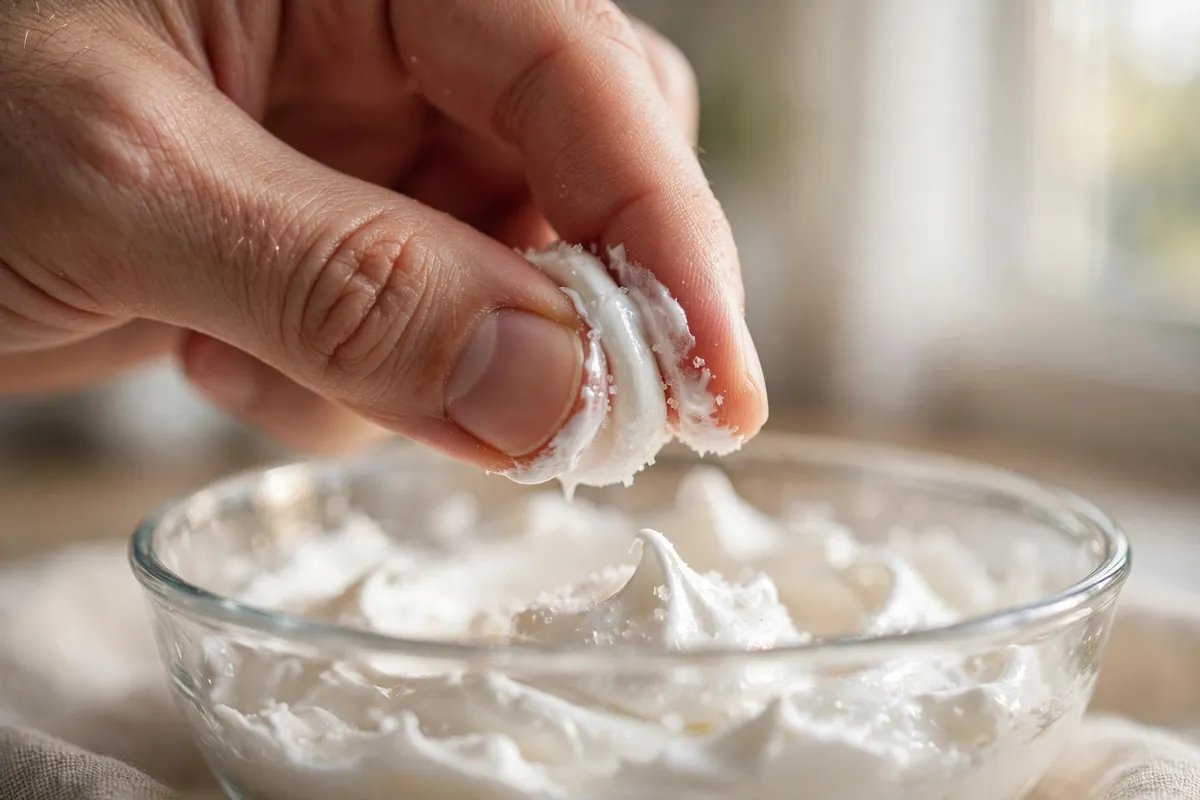
    Quick diagnosis: Pavlovas crack because they cooled too fast (thermal shock is cause #1), the oven ran too hot, or the sugar never fully dissolved. Cool the shell in the turned-off oven, bake at a true 225°F (110°C), and rub the meringue between your fingers — if it’s gritty, keep beating.

    My tested baseline: 6 large room-temperature egg whites (about 180g), 300g (1½ cups) superfine sugar, 1 tablespoon cornstarch, 1 teaspoon white vinegar, pinch of salt. Beat whites to soft peaks, add the sugar a tablespoon at a time, beat to glossy stiff peaks, fold in the cornstarch and vinegar. Bake at 225°F (110°C) for 90–120 minutes until dry and lifting cleanly off the parchment, then cool completely in the turned-off oven — 2 hours minimum, overnight is best.

    1. You cooled it too fast — thermal shock is the #1 cracker

    The shell bakes into a rigid, dry foam. Pull it into a cool kitchen and the outer crust contracts fast while the interior is still expanded — the structure can’t flex, so it splits. Oven-cooled shells come out pristine; rack-cooled ones crack within twenty minutes, every time.

    How to tell: Cracks appeared 10–30 minutes after removing the shell — often one long fissure across the top — though it looked perfect coming out of the oven.

    The fix: Turn the oven off and leave the pavlova inside until completely cool — at least 2 hours, overnight if you can. Never move a hot shell to a cold countertop. (Same slow-cool principle as Why Did My Cheesecake Crack?.)

    2. Your oven was too hot — even 25°F matters

    Pavlova is dried, not baked. Above about 250°F (120°C), the outside sets while the inside is still expanding — a rigid crust over an expanding interior cracks. Many home ovens run 15–25°F hotter than the dial says, so 225°F on the dial can mean 250°F inside.

    How to tell: Deep golden or tan color instead of pale ivory, wide dramatic cracks, possibly a hollow interior and toffee flavor from browning sugar.

    The fix: Verify a true 225°F (110°C) with an oven thermometer; if your oven runs hot, set 200°F (95°C) and add 15–20 minutes. Doneness test: pale cream, dry to the touch, lifting cleanly off the parchment, hollow knock when tapped. (Same heat damage as Why Did My Cake Dome and Crack on Top?.)

    3. The sugar never fully dissolved — grit is a fault line

    Undissolved sugar crystals are weak points in the foam wall; during baking they melt and release moisture, creating pockets that expand into cracks. This is why recipes insist on superfine sugar — regular granulated often never dissolves completely.

    How to tell: Rub meringue between thumb and forefinger before piping — any grit means undissolved sugar. These cracks are usually small spiderwebs rather than one big fissure.

    The fix: Add the sugar very gradually — one tablespoon at a time — to already-foamy whites, and keep beating 1–2 minutes after the last addition. Do the finger-rub test before you stop the mixer. If it’s gritty, beat another minute and test again. Room-temperature whites (about 70°F / 21°C) dissolve sugar faster than cold ones straight from the fridge.

    4. Humidity got into the shell — meringue’s oldest enemy

    Sugar is hygroscopic. On a humid day (above ~60% relative humidity), the shell absorbs water as it cools, softening the crust and creating stress that shows up as cracks — plus weeping, those amber syrup beads, which is the same moisture problem in a different costume.

    How to tell: Shell feels tacky instead of crisp, cracks appeared hours after cooling, or syrup beads weep on the surface — and you baked on a rainy day.

    The fix: Avoid baking pavlova on humid days. If you must, extend the bake 15–20 minutes at the same low temperature, cool with the oven door fully closed, and store airtight at room temperature — never the fridge, which softens the shell within hours. (Full diagnosis: Why Is My Meringue Weeping?.)

    5. The foam itself was unstable — over-beaten whites or a drafty oven

    Beat whites past stiff peaks into the dry, clumpy stage and the protein network breaks down — the foam looks dull and bakes into a fragile shell that cracks under its own contraction. Opening the oven door mid-bake does the same damage from the other direction: cool air collapses the expanding foam unevenly.

    How to tell: Meringue looked dry and lumpy before piping (over-beaten), or cracks radiate from one spot on an uneven shell (door opened mid-bake).

    The fix: Stop at glossy, firm stiff peaks — sharp peaks that don’t flop, still smooth and shiny, not dry. Once it’s in the oven, don’t open the door for any reason; every opening is a cold draft hitting a fragile foam. Use the oven light.

    The cracks-happen-anyway rescue

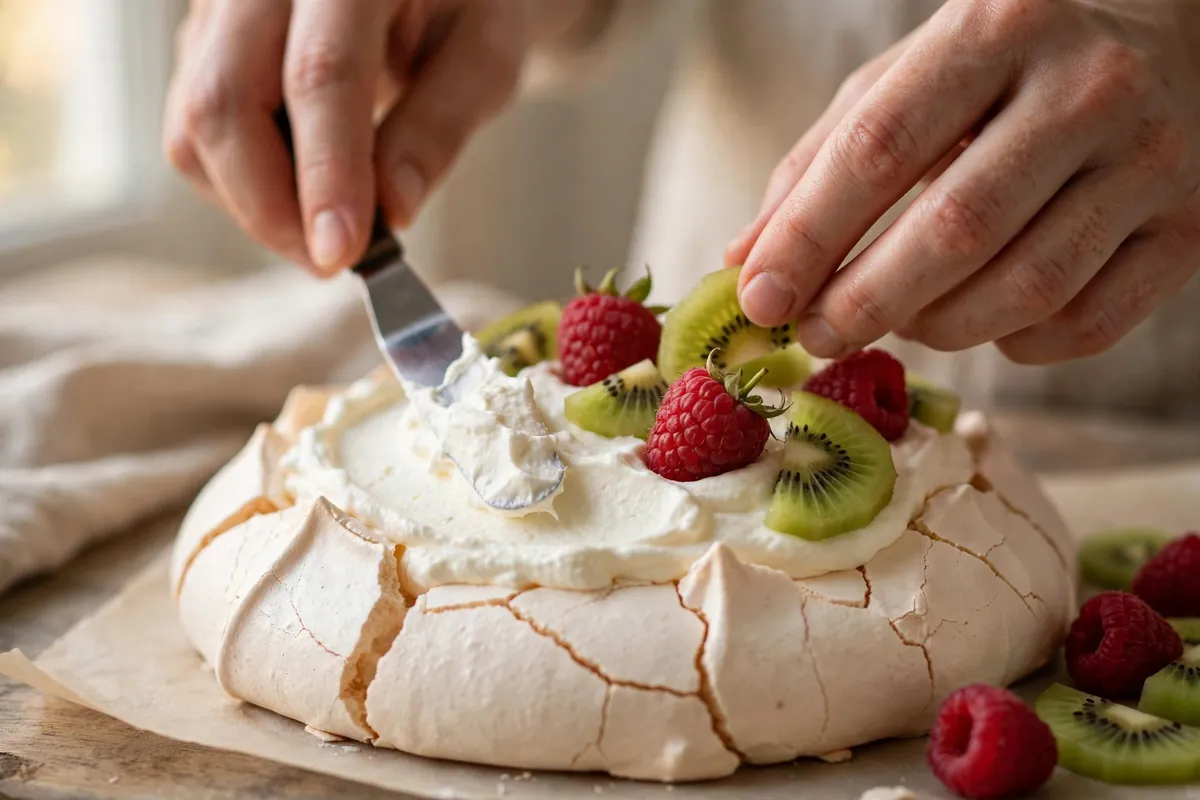
    Even with perfect technique, the occasional shell fissures — and it doesn’t matter, because pavlova is always served buried under whipped cream and fruit. Fill the cracks with extra cream, pile on the berries, and serve it proudly.

    hands spreading whipped cream over a cracked pavlova shell, berries being arranged on top
    hands spreading whipped cream over a cracked pavlova shell, berries being arranged on top
    the finger-rub test — a dab of meringue between thumb and forefinger
    the finger-rub test — a dab of meringue between thumb and forefinger

    Frequently asked questions

    Is it safe to eat a cracked pavlova?
    Yes, completely. Cracks are a structural and cosmetic issue, not a food-safety one. As long as the shell baked through — dry, crisp, lifting off the parchment — a cracked pavlova is just as safe and delicious as a perfect one.

    Can I fix a cracked pavlova after baking?
    You can’t un-crack it, but you don’t need to. Fill the cracks with whipped cream before adding fruit — cream is the standard pavlova camouflage and it’s how pavlovas are served everywhere. Nobody will ever know.

    Why is my pavlova chewy instead of crisp?
    Underbaking or humidity. The shell needs a full 90–120 minutes at 225°F (110°C) until it’s dry all the way through, and it must cool in the oven. A chewy center is actually traditional in Australian-style pavlova — crisp shell, marshmallowy middle — but a chewy exterior means moisture got in.

    Why did my pavlova collapse or go flat?
    Under-beaten whites, fat contamination (even a trace of yolk or grease on the bowl prevents proper whipping), or opening the oven door. Make sure your bowl and beaters are scrupulously clean — wipe with vinegar first — and separate eggs carefully.

    Can I make pavlova ahead of time?
    Yes — the shell actually benefits from it. Bake the shell a day ahead, cool completely in the oven, and store airtight at room temperature. Fill with cream and fruit no more than 2–4 hours before serving, because the moisture from the toppings softens the crisp shell.

    Why did my pavlova weep sticky beads?
    That’s undissolved sugar syrup being squeezed out — usually undissolved sugar plus humidity. Beat longer (the finger-rub test), bake on a dry day, and don’t refrigerate the finished shell. Full diagnosis: Why Is My Meringue Weeping?.

    Related troubleshooting: Why Is My Meringue Weeping? · Why Did My Cheesecake Crack? · How to Keep Christmas Cookies Fresh

  • Why Do My Bagels Deflate? Shaping and Boiling Fixes

    Why Do My Bagels Deflate? Shaping and Boiling Fixes

    You shaped beautiful rings and pulled flat discs from the oven — bagels in outline only, with none of the tall, chewy bite that defines them. Deflation is the classic home-bagel failure, and it comes down to structure: the dough couldn’t hold its shape through boiling and baking. Here’s the full diagnosis.

    Quick diagnosis: Bagels deflate from weak structure: over-proofed dough (the #1 cause — do the float test), under-kneaded dough or weak flour, or a bad boil. Fix the proof first; it’s the culprit in most flat batches.

    Why bagels deflate (the mechanism)

    A bagel must survive a boiling-water bath then bake at high heat while holding a ring shape — that takes a strong gluten network and correct fermentation. Weak gluten (under-kneaded, low-protein flour) or over-fermentation means the network can’t support the dough through the boil: it slumps, spreads, and sets flat.

    1. The bagels were over-proofed

    The single most common cause. An over-proofed bagel has a gluten network that’s already stretched to its limit and yeast that’s exhausted its food. It looks puffy and promising on the counter — then hits the boiling water and collapses, because there’s no strength left to hold the shape through the shock.

    How to tell: The shaped bagels looked very puffy, maybe doubled, before boiling. They may have felt fragile or airy when you lifted them. In the water they flattened within seconds.

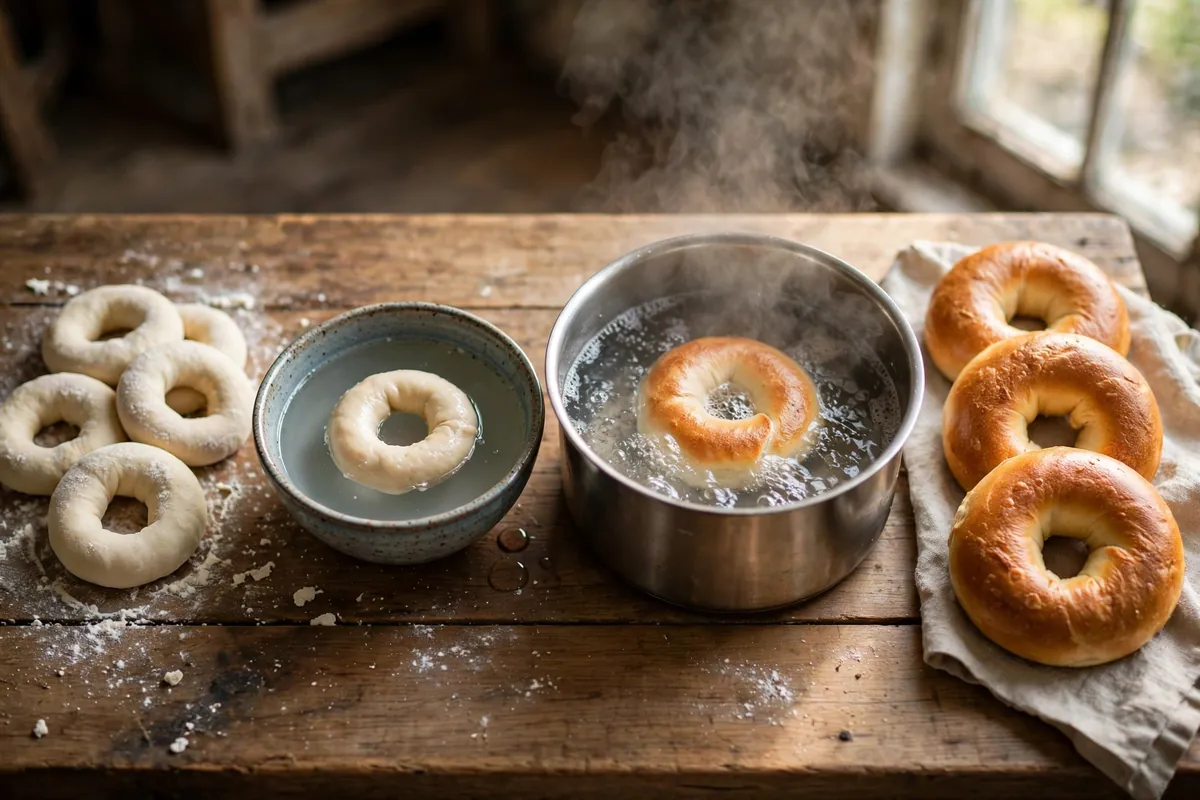
    The fix: Use the float test — it’s the bagel proofing standard for a reason. Drop one shaped bagel into a bowl of cool water: if it floats within 10 seconds, it’s ready to boil. If it sinks like a stone, it needs more time. If it floats high and looks bloated, it’s over-proofed — and unfortunately, there’s no rescue; reshape and re-proof won’t restore the spent structure. Proof at cool room temperature and check early: shaped bagels typically need 20–40 minutes, not hours. (Over-proofing ruins all bread the same way — see Why Didn’t My Bread Rise? for the mirror image.)

    the float test — a bagel floating in a bowl of water beside a sunken one
    the float test — a bagel floating in a bowl of water beside a sunken one

    2. The dough was under-kneaded

    Bagel dough is stiff and low-hydration (typically 50–57%), and it needs full gluten development to hold its shape. Under-kneaded dough has a ragged, weak network — fine for a soft dinner roll, fatal for a boiled bagel. The rings look okay shaped, then relax and spread in the water.

    How to tell: The dough tore when pulled, never passed the windowpane test, or felt rough after kneading.

    The fix: Knead 10–12 minutes by hand (8–10 in a mixer with a dough hook) until smooth, firm, and elastic — it should pass a rough windowpane test. High-protein flour helps enormously (see cause #3).

    3. The flour was too weak

    All-purpose flour (10–12% protein) makes a tender bagel — tender being the problem. Bagels need chew, and chew needs protein: bread flour at 12.7% or higher is the minimum, and high-gluten flour at 14% is the professional standard. Weak flour means weak gluten means flat bagels, no matter how well you knead.

    How to tell: You used all-purpose, the dough felt soft and extensible rather than firm and springy, and the baked bagels are bready-soft instead of chewy.

    The fix: Switch to bread flour or high-gluten flour. If all-purpose is all you have, you can still make bagels — knead thoroughly and handle gently — but expect a softer, less chewy result. This is one of the few cases where flour choice alone decides the outcome.

    4. The boil was wrong

    The boil does two jobs: it sets the crust (gelatinizing the starches on the surface, which is what gives bagels their shine and chew) and it finishes the rise with a final burst of oven spring. Get it wrong and the structure fails at the worst moment.

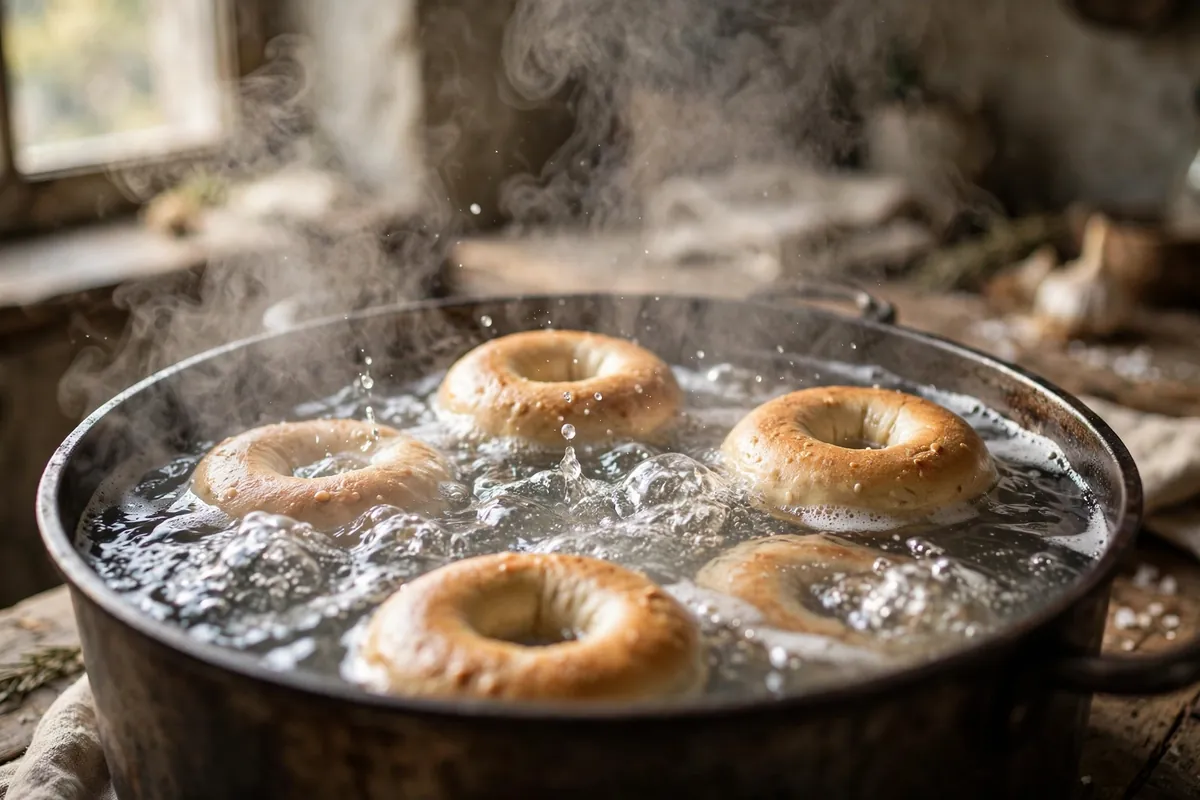
    Too timid: a bare simmer doesn’t set the crust fast enough — the bagel softens and spreads. Too long: past a minute per side, the crust over-gelatinizes into a thick, tough skin.

    How to tell: Spreading in the water means too timid; thick, wrinkled skins mean too long.

    The fix: A full rolling boil, 30–60 seconds per side. Add malt syrup or honey (a tablespoon per quart) for crust color and flavor. Use a wide pot so the boil recovers quickly, don’t crowd, flip once, and get them into the hot oven promptly.

    bagels boiling — some floating high and holding shape, water at a rolling boil
    bagels boiling — some floating high and holding shape, water at a rolling boil

    5. The shaping lacked surface tension

    A bagel holds its shape because the dough skin is pulled tight around it — surface tension. A loosely shaped ring with a slack skin relaxes the moment it hits hot water, spreading outward instead of holding tall.

    How to tell: The rings looked a bit lumpy or uneven before proofing, the holes closed up or went ragged, and the bagels spread rather than rising.

    The fix: Shape with tension. The poke method: roll each portion into a smooth ball first (tucking edges underneath to build a tight skin), then poke a floured finger through the center and stretch the hole to about 2 inches — it shrinks back as it proofs. Or the rope method: roll into a 9-inch rope, overlap the ends, and roll the seam to seal. Either way, the surface should look smooth and taut, not slack. Rest the shaped rings 5 minutes before the final stretch so the gluten relaxes just enough to hold the shape.

    The bagel structure checklist

    1. High-protein flour: bread flour (12.7%+) or high-gluten (14%).
    2. Knead to smooth and elastic — rough windowpane.
    3. Shape with a tight skin; 2-inch holes.
    4. Proof to the float test — 10 seconds, not bloated.
    5. Rolling boil, malted water, 30–60 seconds per side.
    6. Into a 425°F (220°C) oven immediately; bake 20–25 minutes until deep golden.
    the full sequence — shaped rings, float test, boiling, baked bagels — as a four-frame progression
    the full sequence — shaped rings, float test, boiling, baked bagels — as a four-frame progression

    Frequently asked questions

    Can I rescue bagels that already deflated in the boil?
    Not really — once the structure collapses in the water, baking sets the flat shape permanently. But don’t throw them out: flat bagels still taste like bagels. Slice and toast them, and they’re excellent. Next batch, watch the proof with the float test.

    Why do my bagels look fine before boiling but flat after?
    That’s the signature of over-proofing or a weak boil. The shaped rings look promising because the gas is still in them; the boiling water is a stress test, and weak structure fails it. Float-test every batch and keep the boil rolling.

    Should bagel dough be sticky?
    No — proper bagel dough is stiff and firm, noticeably drier than bread dough (50–57% hydration). If your dough is soft and tacky, the flour absorbed less water than expected or the formula is off. A stiff dough is a feature: it’s what builds chew.

    Can I make bagels without malt syrup?
    Yes — honey, brown sugar, or plain water all work for the boil. Malt gives the most authentic flavor and deepest color, but the boil’s structural job (setting the crust) happens regardless of what’s dissolved in it.

    Why did the holes close up?
    Under-stretched holes plus over-proofing. Stretch to a full 2 inches — they shrink dramatically — and don’t let the proof run long. A closed hole is cosmetic; the bagel still eats fine.

    Is it safe to eat a dense, flat bagel?
    Completely — flat is a texture failure, not a safety issue, as long as it baked through (deep golden crust, hollow-ish sound when tapped). Dense bagels toast beautifully.

    Related troubleshooting: Why Didn’t My Bread Rise? · Why Is My Bread Dense? · No-Knead Bread for Beginners

  • High-Altitude Baking Adjustments: What Actually Changes

    High-Altitude Baking Adjustments: What Actually Changes

    High-Altitude Baking Adjustments: What Actually Changes

    You moved to Denver, or Santa Fe, or just uphill — and suddenly your reliable cake recipe collapses in the middle, your cookies spread into lace, and your bread over-proofs before you’ve finished the dishes. Nothing is wrong with your technique. The air changed.

    At altitude, air pressure drops. That single fact rewrites three rules of baking: leavening gases expand more and faster, water boils at a lower temperature, and the air is drier. Your sea-level recipe doesn’t know any of this. The same formulas at sea level and at 7,000 feet need different adjustments — organized by what to change, with the altitude bands where each change kicks in.

    Quick diagnosis: Above ~3,500 ft (1,050m): reduce baking powder/soda by ~1/4 per teaspoon, cut sugar by 1–2 tbsp per cup, add 2–4 tbsp liquid per cup, and raise oven temp 15–25°F (10–15°C). Watch batters, not clocks — everything happens faster up high. Start with these four changes; fine-tune from there.

    Why Altitude Breaks Recipes (The 60-Second Physics)

    Three things happen as you climb:

    1. Lower air pressure → gases expand more. The CO2 from your leavening and the steam in the batter meet less resistance, so bubbles grow bigger and faster. The batter rises beautifully — then the overstretched bubble walls can’t hold, and the whole structure collapses. That sunken cake middle? Classic altitude failure (and yes, it looks exactly like the collapse in Why Did My Cake Sink in the Middle? — same symptom, different cause).
    2. Lower boiling point → faster moisture loss. Water boils at 203°F (95°C) at 5,000 ft instead of 212°F (100°C). Moisture escapes the batter sooner and the dry mountain air pulls more out. Result: drier crumb, faster staling.
    3. Drier air → flour is drier. Flour stored at altitude holds less ambient moisture, so it drinks more of the recipe’s liquid.

    Every adjustment below is a direct counter to one of these three effects.

    Know Your Band (Adjustments Scale With Altitude)

    Band Altitude What changes
    Low 3,000–5,000 ft (900–1,500m) Small tweaks: slight leavening/sugar cuts, a little extra liquid
    Medium 5,000–7,000 ft (1,500–2,100m) The full adjustment set below
    High 7,000+ ft (2,100m+) Aggressive cuts + structural help (extra egg, stronger flour)

    Below 3,000 ft, don’t touch anything — normal recipe variation swamps altitude effects. These are starting points: bake, observe, adjust once.

    Adjustment 1: Reduce Leavening (Fights Over-Expansion)

    This is the single most important change. Less air pressure means your normal leavening dose is now an overdose.

    • 3,500–5,000 ft: reduce baking powder or soda by 1/8 teaspoon per teaspoon called for.
    • 5,000–7,000 ft: reduce by 1/4 teaspoon per teaspoon (about 20–25% less).
    • 7,000 ft+: reduce by up to 1/3, and consider switching part of the baking powder to baking soda + acid for a gentler, more controllable rise.

    Why it works: smaller gas production matches the weaker bubble walls. The rise is slightly lower but stable — a cake that stays up beats a tall one that falls.

    Two cupcakes side by side — one collapsed and sunken, one perfectly domed
    two cupcakes side by side — one with a collapsed sunken top, one with a perfect dome, labeled with altitude context

    Adjustment 2: Cut the Sugar (Strengthens Structure)

    Sugar weakens gluten and egg structure — at sea level that’s tenderness; at altitude it’s collapse fuel, because the structure is already under extra stress from over-expansion.

    • 3,500–5,000 ft: reduce sugar by 1 tablespoon per cup.
    • 5,000 ft+: reduce by 2 tablespoons per cup.

    Don’t go further than 2 tbsp per cup — beyond that you change the recipe’s character and moisture balance. (And no, this doesn’t make the cake “healthy” — it’s structural engineering, not nutrition.)

    Adjustment 3: Add Liquid (Fights Dryness)

    The dry air and lower boiling point steal moisture. Compensate directly:

    • 3,500–5,000 ft: add 1–2 tablespoons liquid per cup of flour.
    • 5,000 ft+: add 2–4 tablespoons per cup.

    Use whatever liquid the recipe already contains — don’t introduce new flavors. In chocolate cakes, hot coffee as the added liquid is my favorite: it deepens the chocolate while fixing the moisture.

    Adjustment 4: Raise the Oven Temperature (Sets Structure Faster)

    A hotter oven sets the cake’s structure before the over-eager gases can over-expand it. It’s a race, and heat is your head start.

    • 3,500–5,000 ft: increase by 15°F (10°C).
    • 5,000 ft+: increase by 25°F (15°C).

    Then shorten the bake time slightly and check early — the hotter oven plus faster evaporation narrows the window between done and dry. Toothpick-test at the earliest stated time, every time.

    Adjustment 5: Strengthen the Flour (For High Altitudes)

    At 7,000 ft and above, sometimes the four adjustments aren’t enough — the structure needs reinforcement:

    • Add an extra egg (or one extra white) to cake batters. The protein firms the crumb noticeably.
    • Add 1–2 tablespoons flour per cup for a bit more scaffolding.
    • Use bread flour (12–14% protein) in place of all-purpose for sturdy cakes and quick breads. Don’t do this for tender cakes — it’s a trade of tenderness for height.
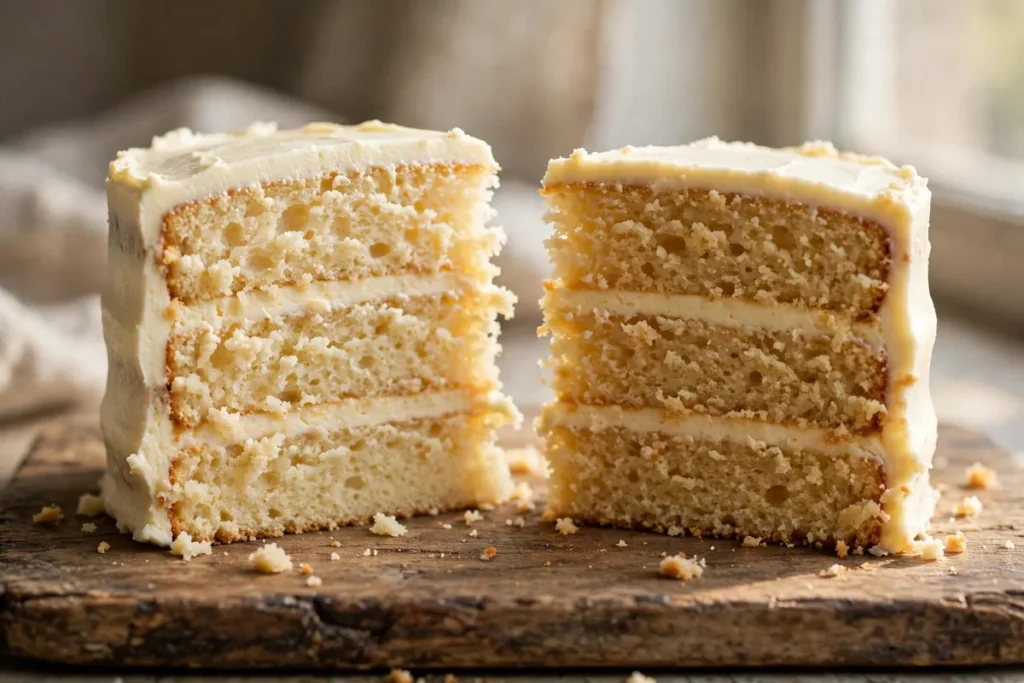
    Two slices of the same cake recipe baked at sea level and high altitude
    the same cake recipe baked at sea level and at high altitude side by side, both successful after adjustments

    Yeast Breads at Altitude: Easier Than Cakes

    Good news: yeast doughs are less fussy about altitude than cakes, because you can see and feel what’s happening. Rise times shrink — dough that takes 90 minutes at sea level might take 45 at 6,000 ft. Watch the dough, not the clock.
    – Slightly less yeast helps if you’re consistently over-proofing: cut by about 1/4 teaspoon per loaf.
    – Punch down more aggressively and consider an extra fold — degassing redistributes yeast and evens out the too-fast rise.
    – Increase oven temp 15–25°F like cakes, for better oven spring control.

    If your yeast breads are failing for non-altitude reasons, the diagnostics in Why Didn’t My Bread Rise? still apply — altitude just compresses the timeline.

    Cookies at Altitude: Mostly Fine

    Cookies are the low-drama category. Chill the dough, add 1–2 tablespoons flour per cup if they’re spreading into lace, and pull them a minute early. For the full playbook: Why Do My Cookies Spread Flat?.

    Notebook showing a recipe's original versus altitude-adjusted measurements
    a small whiteboard or notebook showing one recipe’s original vs altitude-adjusted measurements side by side

    Frequently Asked Questions

    My cake collapsed in the middle — is it altitude or something else?
    Could be either — the symptom is identical. Rule of thumb: if the recipe worked at sea level and fails above ~3,500 ft, suspect altitude first and apply the leavening cut. If it fails at any altitude, work through Why Did My Cake Sink in the Middle?.

    Do I need to adjust no-yeast breads like soda bread?
    Yes — chemical leaveners over-expand at altitude just like in cakes. Cut the soda by ~1/4 teaspoon per teaspoon above 5,000 ft and raise the oven temp 25°F. (The method itself is in No-Yeast Bread: How It Works.)

    What about a pressure cooker or Instant Pot at altitude?
    Pressure cooking largely sidesteps the problem — the sealed environment normalizes pressure. It’s one reason pressure-cooker cakes are popular in mountain regions. Just follow the manufacturer’s altitude guidance for timing.

    Can I still eat a collapsed altitude cake?
    Absolutely — it’s a texture issue, not a safety one. Cube it for trifle, where the layers hide every flaw and the custard adds back moisture. Some of my best trifles started as altitude casualties.

    Do canned refrigerated doughs need adjusting?
    They’re formulated with wide tolerances and usually bake fine — maybe 25°F hotter and a minute less. It’s the from-scratch recipes with precise chemistry that need the full treatment.

    I’m at 10,000 ft — is baking even possible?
    Yes, but treat every recipe as a starting hypothesis. Use the aggressive end of every adjustment, add the extra egg, and expect 2–3 test bakes to dial in a finicky cake. Sturdy recipes (pound cake, banana bread) adapt far more easily than foam cakes.

    Related troubleshooting: Why Did My Cake Sink in the Middle? · Why Didn’t My Bread Rise? · Metric to US Cups: Baking Conversion Chart

  • Why Didn’t My Bread Rise? A Step-by-Step Diagnosis

    Why Didn’t My Bread Rise? A Step-by-Step Diagnosis

    Why Didn’t My Bread Rise? A Step-by-Step Diagnosis

    Quick diagnosis: A dough that won’t rise is almost always a yeast problem or a temperature problem. Start here: proof your yeast (2¼ tsp yeast + 1 tsp sugar + ¼ cup water at 100–110°F — foamy in 10 minutes means alive). If the yeast is alive, your kitchen is probably too cold or you haven’t waited long enough. Walk the steps below in order.

    Doubled risen dough beside flat unrisen dough in bowls
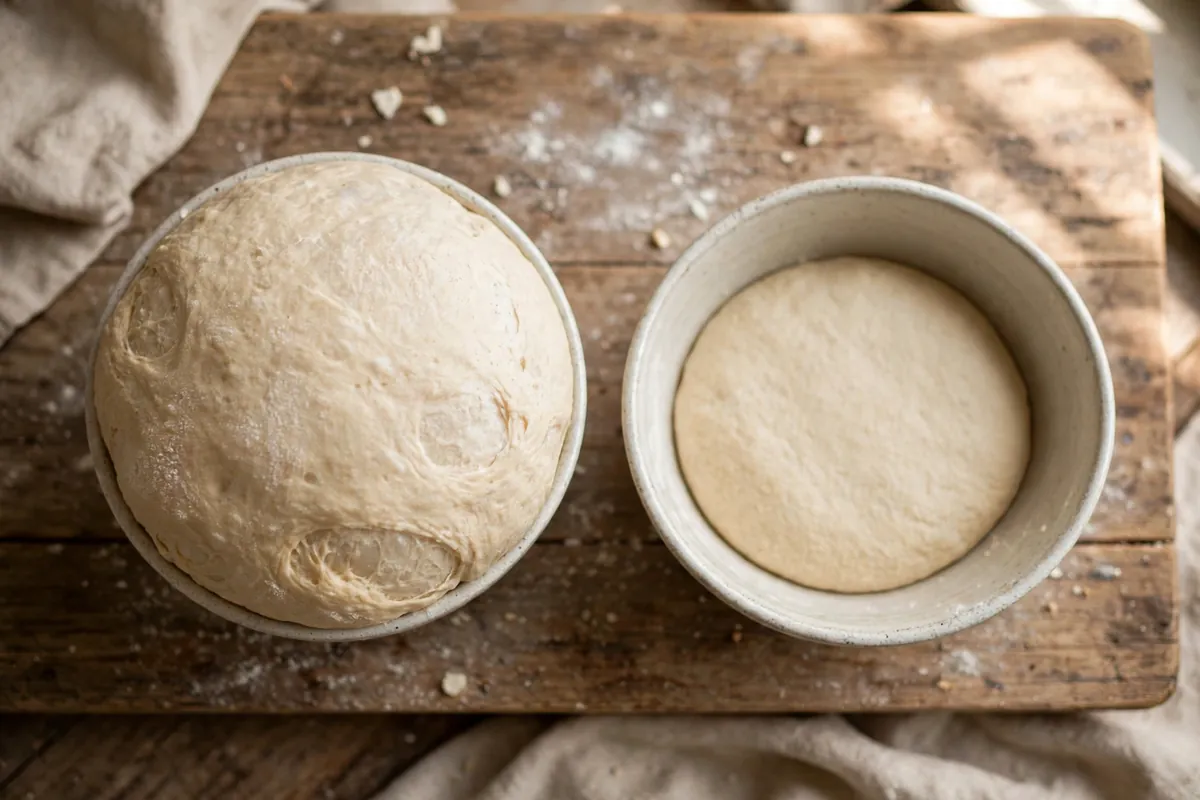
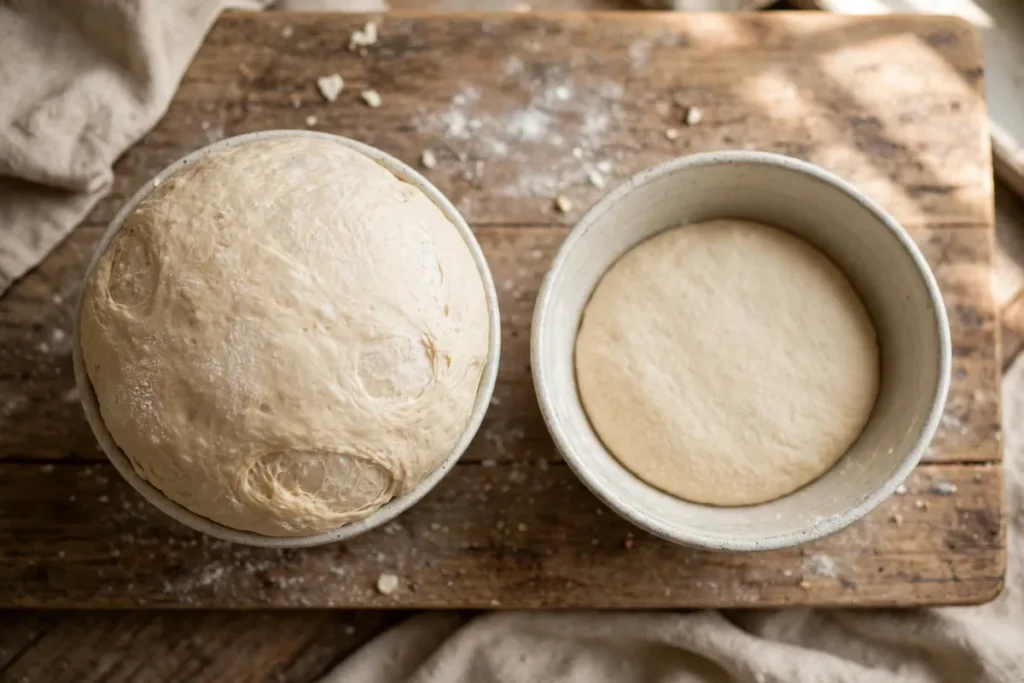
    a bowl of dough that has clearly doubled next to a bowl of flat, unrisen dough

    A dough that hasn’t moved after two hours is disheartening — but a failed rise is one of baking’s most diagnosable problems, because only a handful of variables control fermentation. Work through these seven steps in order; they build on each other.

    Step 1: Check whether your yeast is alive

    Everything else is irrelevant if the yeast is dead. Yeast is a living organism; it dies from heat, old age, and poor storage. An opened packet that’s been sitting in a warm cupboard for six months is the most common culprit I see.

    The test: Dissolve 2¼ teaspoons of yeast and 1 teaspoon of sugar in ¼ cup (60ml) of warm water at 100–110°F (37–43°C). Wait 10 minutes. Vigorous foam and a yeasty, beery smell means it’s alive and ready. Flat water with a few sad granules at the bottom means it’s dead — discard it and start over with fresh yeast. No rescue exists for dead yeast; the dough can’t be saved as bread.

    Prevention: Store opened yeast airtight in the fridge (3–4 months) or freezer (6+ months). Check expiry dates — unopened packets last about a year past packaging in cool storage, far less in warmth.

    Step 2: Check your water temperature

    Water above 140°F (60°C) kills yeast on contact; 120–130°F badly stresses it. Below 70°F (21°C) won’t kill yeast, but fermentation will crawl.

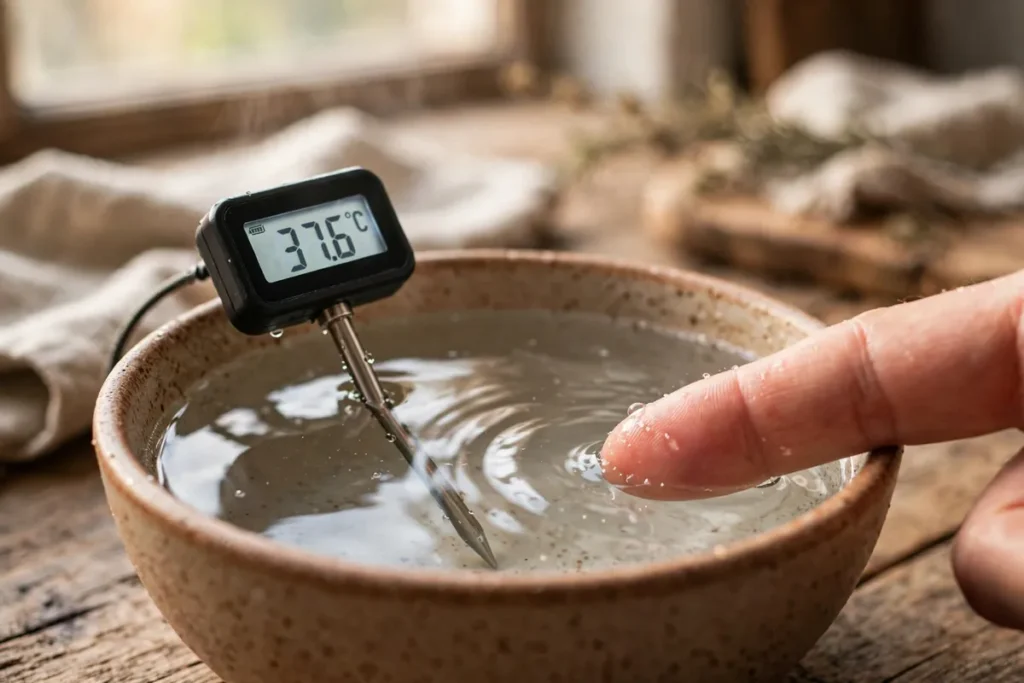
    The test: You should be able to hold your finger in the water comfortably — it should feel like warm bath water, not hot. If you don’t own a thermometer, err on the cooler side: 100–110°F (37–43°C) is the sweet spot for active dry yeast. Instant yeast is more temperature-tolerant and can be mixed directly into dry ingredients, which removes this variable entirely.

    If you suspect you killed it: There’s no revival. But before you throw the dough out, give it the full proof test from Step 1 using yeast from the same batch — if that yeast is dead too, the diagnosis is confirmed.

    Thermometer in warm water for the yeast temperature test
    hand testing water temperature in a bowl, thermometer showing ~105°F

    Step 3: Check the salt

    Salt in normal bread quantities (about 2% of flour weight — 10g per 500g flour) slows yeast slightly but won’t stop a rise. Problems start when salt is heavily over-measured or dumped directly onto undissolved yeast, where the concentrated salt draws water out of the yeast cells and damages them before mixing even begins.

    The test: Did you measure the salt, or shake it in freely? Did it go directly onto the yeast?

    The fix: Always mix salt evenly through the flour first, then add yeast — or add salt after the initial mix comes together. At 2%, salt actually strengthens the gluten network and improves the final crumb.

    Step 4: Check the room temperature and the clock

    This is the step most people skip, and it’s the answer more often than anyone expects. Yeast activity is intensely temperature-dependent: at 65°F (18°C), a rise can take twice as long as at 78°F (26°C). If your recipe says “rise 1 hour” and your kitchen is cool, your dough may simply need 2–3 hours.

    The test: Is the dough showing any signs of life — slight puffiness, a few bubbles when you peek underneath, a yeasty smell? Any activity at all means the yeast is working and you just need patience and warmth.

    The fix: Move the dough to 75–80°F (24–27°C) — oven with just the light on, top of the fridge, or microwave beside a mug of boiled water (door closed). Judge by the dough, not the clock: roughly doubled, and the poke test shows a slow spring-back leaving a slight indent.

    Step 5: Check the flour quantity

    Too much flour makes a stiff dough that expanding gas can’t push apart — the yeast may be working fine, but the dough is too heavy to show it. This is the classic result of scooping flour with a measuring cup instead of weighing it.

    The test: Is the dough firm, dry, and resistant when you poke it, rather than soft and pillowy?

    The fix for next time: Weigh flour at 120g per cup. For the current dough, you can try working in a tablespoon or two of warm water and giving it more time in warmth — it sometimes recovers, though the crumb won’t be perfect. For details on flour’s role in texture, see Why Is My Bread Dense?.

    Step 6: Check for rise-killers in the recipe

    Very high sugar (above ~15–20% of flour weight — brioche and panettone rise slowly by design), heavy fats, and large amounts of cinnamon all stretch fermentation to 3–4+ hours, which reads as “not rising” to an impatient baker.

    The fix: Enriched doughs need longer, warmer rises — plan for it. If you’re adapting a recipe, add sweet or fatty ingredients after the first rise where possible.

    Step 7: Decide — rescue or restart?

    If the yeast is dead (Step 1 failed), the dough cannot become risen bread. But don’t bin it:

    • Flatbread and pizza: Roll the unrisen dough thin, top it, and bake hot — dead-yeast dough makes excellent pizza bases and flatbreads.
    • Crackers: Roll very thin, dock with a fork, salt, and bake until crisp.
    • Restart: If the yeast was the only problem and you have fresh yeast, it’s honestly faster to start a new dough than to nurse a compromised one.

    If the yeast is alive and the dough is simply slow (Step 4), patience plus warmth is the entire rescue plan. I’ve had doughs take 4 hours in a cold kitchen and still bake into beautiful loaves — yeast works on its own schedule, not yours.

    Rescue pizza baked on a stone with golden edges
    the same unrisen dough repurposed — rolled thin as a pizza base with toppings, mid-bake

    Frequently asked questions

    How long should bread dough take to rise?
    At 75–80°F (24–27°C): 1–2 hours for the first rise, 30–60 minutes for the shaped proof. Below 70°F (21°C), double that. Fridge-retarded dough takes 8–24 hours. Judge by doubling and the poke test, never the clock.

    Can I bake bread that never rose?
    You can bake it, but it won’t be bread as you imagined — it’ll be dense and heavy. Repurpose it as flatbread, pizza, or crackers (Step 7) instead of baking a disappointing loaf.

    Does salt really kill yeast?
    At bread’s normal 2%, no — it just moderates activity and improves flavor and structure. Direct contact between dry salt and dry yeast, or heavy over-salting, can damage or severely slow yeast. Mixed properly, salt is yeast’s friend, not its enemy.

    How can I tell if my yeast is still good?
    The 10-minute proof test in Step 1: yeast + sugar + warm water = foam. Do this with any yeast you’re unsure about before it goes near your flour. It takes 10 minutes and has saved me from countless failed bakes.

    Can dough rise in the fridge?
    Yes — slowly, over 8–24 hours, and the long cold ferment actually develops deeper, more complex flavor. This is a technique, not a problem. Just make sure the dough shows some activity at room temperature for 30–60 minutes before refrigerating.

    My dough rose the first time but not after shaping — why?
    The shaped proof is shorter and subtler than the first rise — look for about 50% growth, not doubling, and use the poke test. If there’s zero movement after an hour in warmth, the yeast likely exhausted itself in an over-long first rise; next time, shorten the first rise.

    Related troubleshooting: Why Is My Bread Dense? · Why Is My Sourdough Gummy Inside? · Bread Crust Too Hard or Too Soft

  • Why Is My Carrot Cake Dense? Oil Cake Science

    Why Is My Carrot Cake Dense? Oil Cake Science

    Carrot cake should be the most forgiving cake in the book — oil-based, no creaming, stir-together simple. The reason is structural: this is a heavy batter carrying up to three cups of wet grated carrots plus nuts and raisins, asking a modest amount of leavening to lift all of it. When anything in that equation slips — too much add-in weight, tired leavening, overmixed batter — the cake can’t climb, and you get the brick.

    Quick diagnosis: You overloaded it — too many carrots, nuts, and raisins for the batter to lift. Cap total add-ins at about 3 cups, grate carrots fine (never food-processor mush), check your baking soda is fresh and correctly balanced with the batter’s acidity, and mix just until combined.

    My tested baseline: 2 cups (250g) all-purpose flour, 2 tsp baking soda, 1 tsp baking powder, 1½ tsp cinnamon, 1 cup (200g) granulated + 1 cup (220g) brown sugar, 1¼ cups (295ml) neutral oil, 4 eggs, 3 cups finely grated carrots (about 340g), 1 cup chopped walnuts. Two 9-inch rounds, 350°F (175°C), 30–35 minutes, until a toothpick comes out with moist crumbs. Moist, tender, and sliceable — never heavy.

    1. The add-ins outweighed the batter — the classic cause

    This is the number one reason, and it’s always too much love: an extra cup of carrots “for moisture,” a heavy hand with the walnuts, a full cup of raisins. Every add-in is dead weight the leavening must lift. Carrots are the worst offender because they’re wet — they don’t just weigh the batter down, they add water that extends the bake and compacts the structure.

    How to tell: The cake is heaviest at the bottom, sometimes with a visible gummy layer; the batter looked more like carrot salad than cake batter.

    The fix: Cap total add-ins around 3 cups — that’s the ceiling, not the floor. Grate carrots on the fine holes of a box grater: fine shreds distribute evenly and release moisture gradually. Never use a food processor — it makes pulp that floods the batter all at once. (Add-in weight sinks everything: Why Did My Banana Bread Turn Out Dense? is the same physics with a different fruit.)

    2. Your leavening was wrong — too little, too old, or unbalanced

    Carrot cake leans hard on baking soda, and soda only works in the presence of acid. Brown sugar, and buttermilk or yogurt if your recipe uses them, supply that acid. Too little (or dead) soda gives no lift; too much gives a fast rise that collapses, plus a soapy taste.

    How to tell: Flat, heavy cake with no soapy taste = under-leavened or dead soda. Good rise that fell, with a chemical aftertaste = too much soda. Test old soda: drop ½ tsp in hot vinegar — vigorous fizz means alive, weak fizz means replace.

    The fix: My ratio per 2 cups flour: 2 tsp soda + 1 tsp double-acting baking powder.

    3. You overmixed — oil cakes punish extra strokes

    Without a creaming step, bakers stir “until it looks right” — usually 30 strokes past right. The crumb goes from tender to bready to gummy, and the cake eats dense even when the leavening did its job.

    How to tell: The crumb is tough and elastic rather than tender; it bounced back when pressed; the texture reads more like bread than cake.

    The fix: Combine wet and dry with a spatula in 15–20 strokes, stopping the moment the last flour streak disappears. If you’re using a mixer, use the lowest speed and stop early; a spatula is honestly the better tool here.

    4. The pan was wrong — deep batter can’t bake through

    Carrot cake batter in a too-small or too-deep pan is a density trap. The edges set while the center stays raw, and by the time the center tests done the outside is overbaked.

    How to tell: The center stayed wet long after the edges browned; the finished cake has a dense ring around a gummier middle; the top domed then sank.

    The fix: Two 9-inch rounds (or one 9×13) for a standard batch — batter depth around 1½ inches. Grease and line with parchment. Bake at a true 350°F (175°C) — an oven running at 325°F stretches the bake and lets the heavy batter settle before it sets. (Pan geometry ruins more cakes than recipes do: Why Did My Cake Sink in the Middle?.)

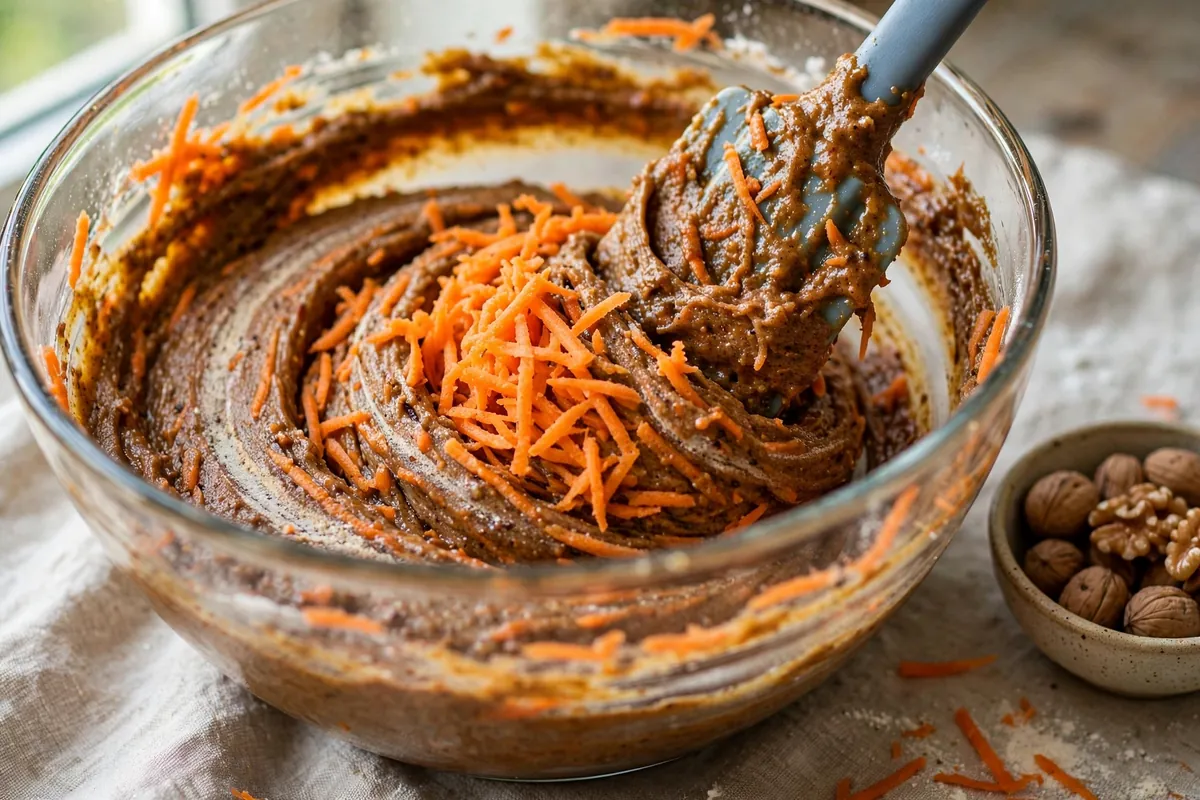
    hands folding finely grated carrots into cake batter with a spatula, just-combined texture
    hands folding finely grated carrots into cake batter with a spatula, just-combined texture

    5. Too much sugar weighed it down — sweetness has mass

    Carrot cake recipes are notoriously sweet — some call for 2½ cups of sugar to 2 cups of flour. It also over-browns the crust early, tempting you to pull the cake before the center sets.

    How to tell: The crust browned fast and dark while the center lagged; the cake tastes cloying; the crumb is moist but compact, almost fudgy in a bad way.

    The fix: My ceiling is 2 cups total sugar to 2 cups flour, split between granulated and brown. If the top browns before the center is done, tent loosely with foil for the last 10–15 minutes rather than pulling early — a pale top on a fully baked cake beats a gorgeous top on a raw middle.

    6. You underbaked it — the toothpick lied

    Dense carrot cake is often just unfinished carrot cake — the heavy batter needs its full time. A toothpick that comes out with wet batter means keep going; moist crumbs clinging to it means done.

    How to tell: The center dipped as it cooled; the bottom layer looked wet and translucent when sliced; the cake tasted eggy or pasty in the middle.

    The fix: Look for moist crumbs, not wet batter, and a center that springs back when lightly pressed. Cool in the pan 10–15 minutes, then turn out to cool fully before frosting. (Underbaking masquerades as a dozen other problems: How to Rescue an Overbaked Cake covers the thermometer habits that prevent both extremes.)

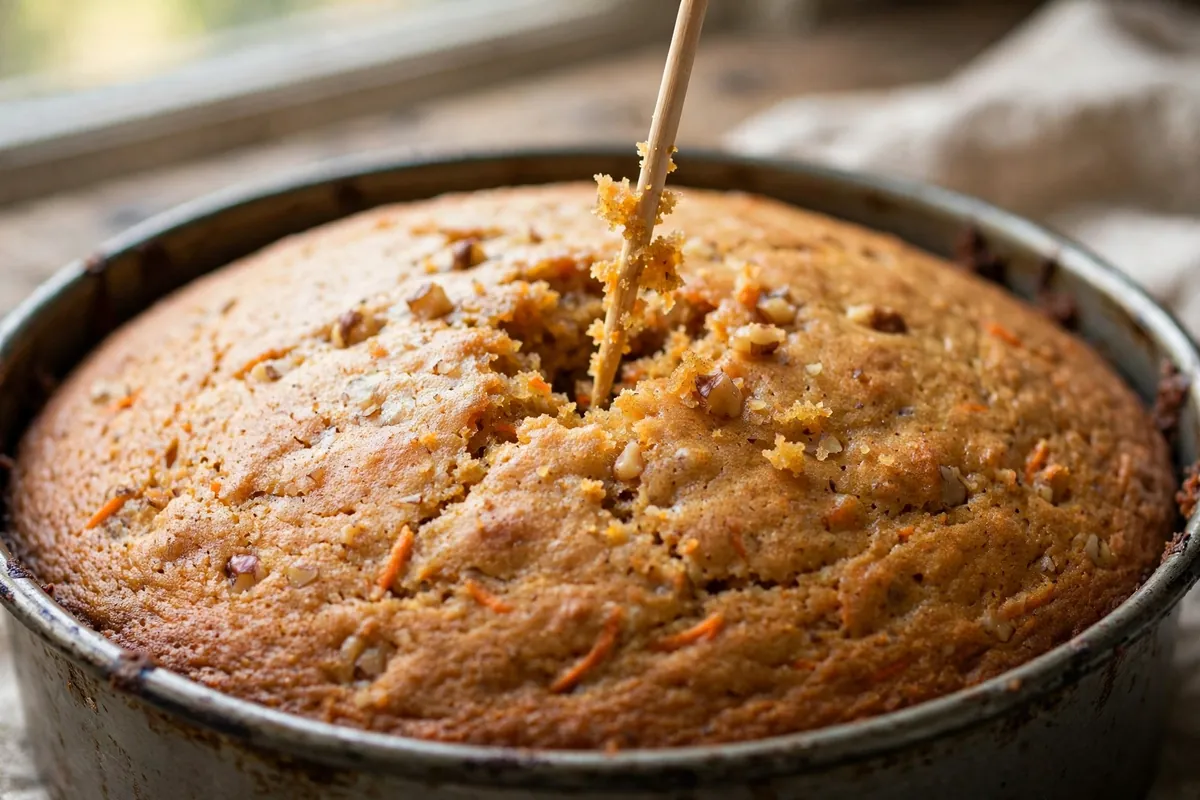
    a toothpick test in the center of a baked carrot cake layer, showing moist crumbs
    a toothpick test in the center of a baked carrot cake layer, showing moist crumbs

    Frequently asked questions

    Is dense carrot cake safe to eat?
    Yes — density is a texture issue, not a safety one. The one exception: if the center is genuinely raw and wet (not just dense), give it more oven time. Fully baked but heavy cake is perfectly fine to serve.

    Can I fix a carrot cake that’s already baked dense?
    You can’t lighten the crumb after baking, but you can redeem the cake: warm slices and serve with ice cream, cube it for a trifle with whipped cream and fruit, or make cake pops. Dense cake is actually ideal for trifles — it holds its shape.

    Why does my carrot cake taste soapy?
    Too much baking soda. Cut it back and make sure there’s enough acid (brown sugar, buttermilk) to neutralize it. Soapy taste plus a fallen center is the textbook signature of excess soda.

    Does it matter if I use oil vs melted butter?
    Yes, and it’s why carrot cake is oil-based: oil coats flour proteins and limits gluten, giving a moister, more tender crumb that stays soft refrigerated (important under cream cheese frosting). Melted butter firms up when cold and gives a denser, richer crumb. For carrot cake, oil wins.

    Related troubleshooting: Why Did My Cake Sink in the Middle? · Why Did My Banana Bread Turn Out Dense? · Why Is My Cake Dry?

  • Why Did My Madeleines Lose Their Hump? (Batter Rest, Cold Pan, Hot Oven)

    Why Did My Madeleines Lose Their Hump? (Batter Rest, Cold Pan, Hot Oven)

    The hump is the whole point of a madeleine — that proud dome on the back separating a madeleine from a vaguely shell-shaped sponge. Flat madeleines taste fine but look wrong, and every baker knows it. The encouraging part: the hump isn’t luck. It’s thermal-shock physics, and once you understand the mechanism it becomes repeatable.

    Quick diagnosis: No hump means no thermal shock — batter not cold enough, oven not hot enough, or both. Rest the batter at least 2 hours (overnight is better), chill the filled pan, bake at a true 425°F (220°C). Those three together produce the hump nearly every time.

    The hump science, in plain terms

    The hump is a race between the batter’s center rising and its edges setting. Cold batter hits a very hot oven: baking powder reacts violently and steam erupts — but the edges, touching hot metal, set almost immediately and lock. The center, insulated by surrounding batter, stays fluid longer and keeps rising with nowhere to go but up. Set edges plus still-rising center equals hump.

    Everything below widens that differential. Cold batter slows the center’s setting. A hot oven accelerates the edge’s setting. A cold pan adds a head start. Remove any one and the race evens out — flat madeleine.

    1. The batter wasn’t rested — the #1 hump killer

    Madeleine batter must rest refrigerated a minimum of 1–2 hours; overnight is genuinely better. The rest chills the batter thoroughly (thermal shock needs cold batter — 38°F/3°C, straight from the fridge, not “sat on the counter while the oven preheated”), hydrates the flour for a tender crumb, and thickens the batter so it holds shape in the shells.

    How to tell: You mixed and baked within the hour, or rested at room temperature. The batter was pourable-thin rather than thick and spoonable.

    The fix: Make the batter the night before and refrigerate covered. Portion it thick, cold, and scoopable. This single change produces more humps than every other fix combined, because most bakers underestimate how cold “cold batter” must be.

    2. The oven wasn’t hot enough

    Madeleines need an opening blast of 425°F (220°C) — that’s what sets the shell edges fast while the center climbs. At 350°F (175°C), a normal cake temperature, everything heats gently and evenly, the edges never get their head start, and no hump forms. Lukewarm ovens make flat madeleines, full stop.

    How to tell: You baked at 350–375°F, they took 12–15 minutes, and browned evenly all over rather than deeply on the ridged shell side.

    The fix: Preheat to a verified 425°F (220°C) — check with an oven thermometer, since most home ovens run cool and a “425°F” that’s really 400°F costs you the hump. Bake 8–10 minutes until edges are deep golden and humps set. Some bakers drop to 375°F (190°C) after 4 minutes to finish gently; either way, the opening blast must be genuinely hot. Don’t open the door early — the temperature drop collapses the race.

    3. The pan wasn’t cold (or wasn’t prepped right)

    The pan is the third leg of the tripod. A room-temperature pan starts warming the batter edges before the oven gets involved, narrowing the differential. The classic French technique freezes the buttered, floured pan while the oven preheats.

    How to tell: You buttered the pan at room temperature and filled immediately, or madeleines stuck and tore.

    The fix: Butter every shell with soft butter — a pastry brush reaches the ridges — dust with flour, tap out excess, freeze 15–20 minutes. Pipe the cold batter into the cold shells (fill ¾ full, never to the brim — overfilled shells spill over and the hump has no room) and get the pan into the hot oven immediately. Cold batter, cold pan, hot oven: the trinity. Traditional tinned steel transfers heat faster than nonstick and gives a slightly better hump.

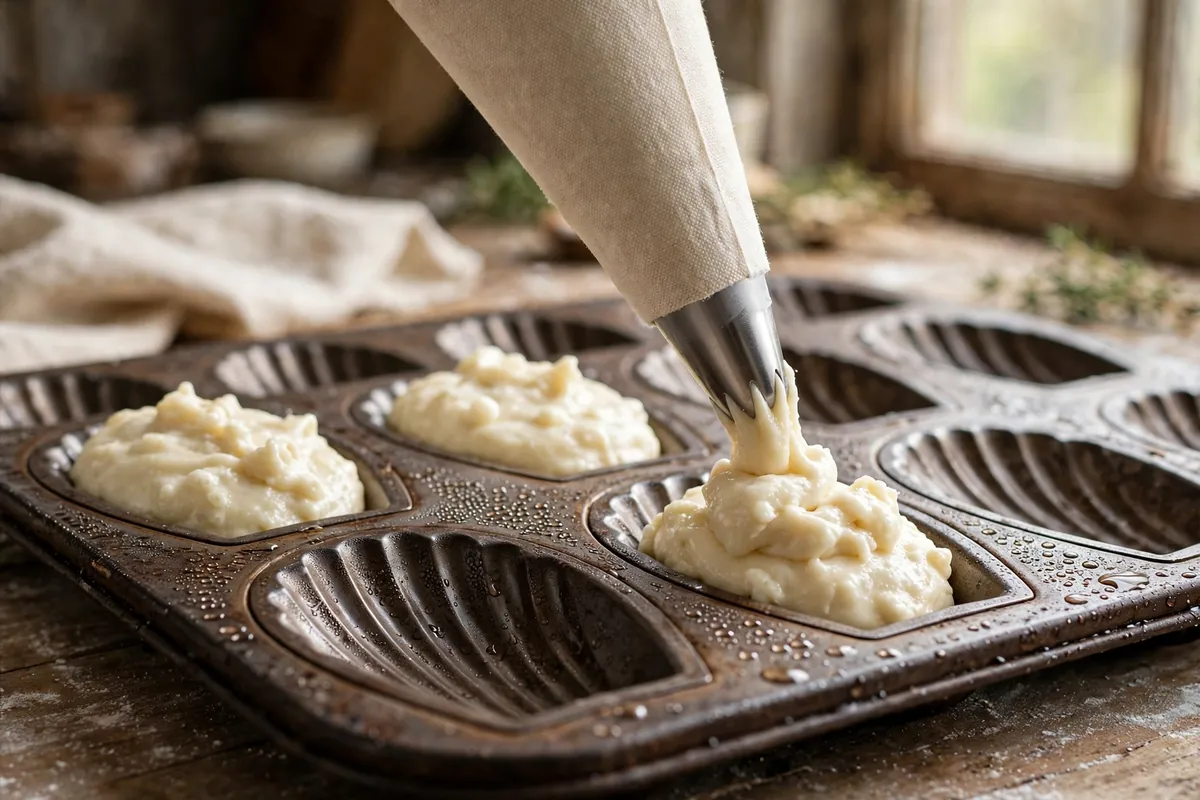
    cold madeleine batter being piped into a chilled shell pan
    cold madeleine batter being piped into a chilled shell pan

    4. The baking powder was dead

    The hump is a leavening event, and leavening needs live leavener. Baking powder loses potency within 6–12 months of opening, faster in humid kitchens. Weak powder means weak oven spring, and weak oven spring means no hump regardless of temperature.

    How to tell: The powder is of unknown age, the madeleines are dense as well as flat, and other bakes have been flat lately too.

    The fix: Test it — a teaspoon in hot water should fizz vigorously; a lazy fizzle means replace. Write the opening date on the tin. Madeleines use about 1 teaspoon per 100g flour; don’t increase it to compensate for dead powder (metallic taste) — replace the powder instead.

    5. You overmixed — or added the butter too hot

    Overmixing develops gluten, and gluten is elastic: it resists the upward push forming the hump and toughens the famously tender crumb. Mix only until the flour disappears. Related: the classic beurre noisette (brown butter) must cool to lukewarm before folding in — hot butter deflates the whipped eggs and partially cooks the flour, both flattening the rise.

    How to tell: The batter was smooth and stretchy rather than thick and soft, or you poured in sizzling butter and watched the batter deflate.

    The fix: Fold with a spatula, minimal strokes, stop when no dry flour remains. Brown the butter for its signature nutty depth, then cool 10 minutes before folding in. Whip eggs and sugar to ribbon stage — thick, pale, falling in ribbons — since that trapped air is half the hump’s lift.

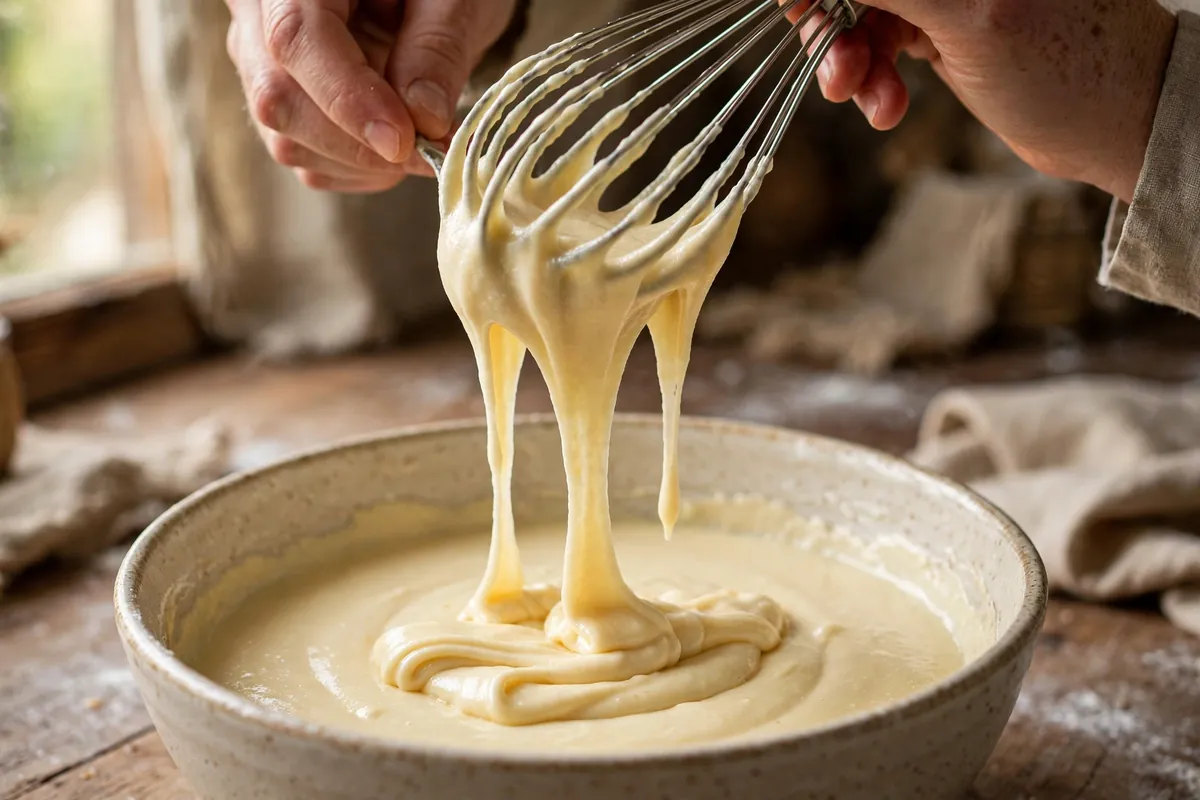
    madeleine batter at ribbon stage falling from a whisk
    madeleine batter at ribbon stage falling from a whisk

    The hump checklist

    Night before: mix batter, refrigerate overnight. Bake day: butter and flour the pan, freeze 15 minutes. Oven to verified 425°F (220°C). Fill cold shells ¾ full with cold batter, bake immediately, 8–10 minutes, no peeking. The hump was never luck — just temperature differential, and now you control all three sides of it.

    FAQ

    Can I still eat flat madeleines?
    Absolutely — same delicious buttery cake, minus the dome. Dip in chocolate, sandwich with jam or lemon curd, or serve with berries and cream. The hump is presentation and tradition, not flavor or safety.

    Do I really need to rest madeleine batter overnight?
    Overnight is ideal; 2 hours minimum refrigerated works. The rest must be cold — room-temperature resting hydrates flour but doesn’t chill the batter, and without cold batter there’s no thermal shock, no hump. Never skip the chill.

    What temperature do I bake madeleines at?
    425°F (220°C), verified with an oven thermometer — the opening blast sets edges fast while the center rises. Bake 8–10 minutes until deep golden. At 350°F the edges never get their head start and the hump won’t form.

    Why do recipes call for brown butter in madeleines?
    Flavor — browned milk solids give the signature nutty, caramel depth. It doesn’t directly affect the hump, but the butter must cool to lukewarm before folding in; hot butter deflates whipped eggs and flattens the rise.

    Can I fix madeleines that already baked flat?
    No — the hump forms in the oven’s first minutes from thermal shock and can’t be retrofitted. Repurpose them: chocolate-dipped, sandwiched with curd, or as a trifle base. Put the fix into the next batch’s rest, pan chill, and oven temp.

    Why are my madeleines dense as well as flat?
    Dense plus flat points to dead baking powder or deflated eggs. Test the powder in hot water (should fizz vigorously), whip eggs and sugar to full ribbon stage, and fold flour gently — overmixing builds gluten that resists the rise.

    Related troubleshooting: Why Did My Cupcakes Overflow? Batter Fill Levels Explained · Why Is My Cake Dry? Moisture Science for Home Bakers · Why Did My Cinnamon Rolls Unravel? Shaping and Proofing Fixes

  • Why Did My Pound Cake Crack on Top? Rich Batter Fixes

    Why Did My Pound Cake Crack on Top? Rich Batter Fixes

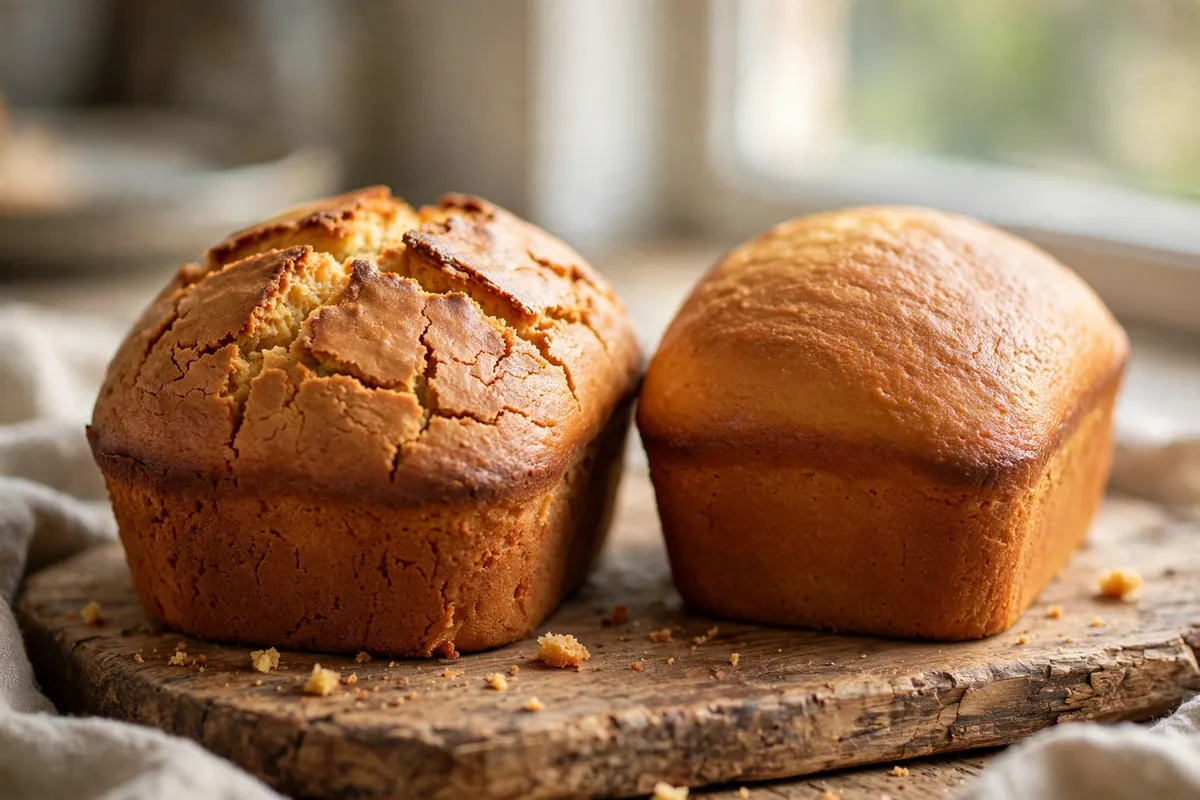
    Your pound cake came out with a proud crack down the middle of the dome. First thing to know: in many traditions that crack isn’t a flaw — it’s the signature. Classic pound cakes are supposed to split. But if yours is a canyon, or you’d simply prefer a smooth top, the causes are well understood and fixable.

    Quick diagnosis: A cracked pound cake top almost always means the oven was too hot — the crust set before the center finished rising, so the rising batter split the crust open. Too much leavening and an overfilled pan are the runners-up. A thin, even crack is normal and fine; a deep jagged split means adjusting heat, leavening, or pan size.

    Why pound cakes crack (the mechanism)

    Pound cake batter is heavy — a pound each of butter, sugar, eggs, and flour, traditionally. In the oven, the batter rises from the center outward while the top surface begins to set into a crust. If the crust sets before the center finishes expanding, the still-rising middle has nowhere to go but through the crust: crack. Everything below is a lever on that timing — slow the crust-setting, calm the rise, and the top stays smooth.

    1. The oven was too hot

    The most common cause. At too high a heat, the outer batter — including the top surface — sets into a firm crust in the first 15 minutes while the insulated center is still cool and rising. The center keeps expanding for another 30 minutes against a crust that can’t stretch: it splits.

    How to tell: The crack is deep and wide, the crust dark and thick. Everything you bake seems to brown fast.

    The fix: Pound cake wants 325°F (163°C), not 350°F — verify with a thermometer, since most ovens run hot and “a little hot” is enough with rich batter. Full preheat, center rack, and keep the door shut for the first 30 minutes.

    2. Too much leavening

    Extra baking powder means extra lift, and extra lift means more pressure against the crust. Many modern pound cake recipes add leavening the traditional formula never had — and then add a little more “to be safe.” That safety margin is your crack.

    How to tell: The recipe called for more than about ½ teaspoon baking powder per 2 cups of flour, or you added “a bit extra” for insurance.

    The fix: Keep leavening modest — the eggs do most of the lifting already. If the recipe is otherwise reliable, cut the baking powder by a quarter and compare. (For the leavening science in detail, see Why Did My Cake Sink in the Middle? — same forces, opposite outcome.)

    cross-section of pound cake showing even rise vs an over-leavened cake with a cracked, peaked top
    cross-section of pound cake showing even rise vs an over-leavened cake with a cracked, peaked top

    3. The batter was overbeaten after the flour went in

    Creaming butter and sugar vigorously is correct — that’s where pound cake gets its fine texture. But once flour enters the bowl, the rules change: beating develops gluten and whips in air, both of which add lift the crust then has to contain. An over-aerated batter rises aggressively and splits.

    How to tell: You beat the finished batter until it was fluffy and voluminous rather than just combined, or the crumb has tunnels.

    The fix: Cream butter and sugar 3–4 minutes until light — that’s the aeration stage, and it belongs before the flour. After flour goes in, mix on low just until it disappears, then finish by hand. Two different stages, two different intensities.

    4. The pan was too small or overfilled

    Batter needs headroom. Fill a loaf pan more than about two-thirds full and the batter has to rise up rather than out — a tall, fast rise against a setting crust, which is exactly the crack recipe. A pan that’s too small also insulates the center, stretching the timing gap between crust and middle.

    How to tell: The batter came close to the rim, the loaf domed dramatically above the pan, and the crack runs the full length.

    The fix: Fill pans no more than two-thirds full; if there’s extra batter, make a few cupcakes on the side. Use the pan size the recipe specifies — a 9×5 loaf pan is standard for most pound cake recipes, and “close enough” pans change the geometry more than you’d think.

    5. Cold ingredients, hot oven (thermal shock)

    Butter straight from the fridge and eggs straight from the carton make a batter that goes into the oven cold and uneven. The outside heats and sets fast while the cold center lags — widening the crust-vs-center timing gap that causes the split.

    How to tell: You creamed cold butter (it never got truly fluffy) or added fridge-cold eggs that curdled the batter.

    The fix: Room-temperature everything: butter at 65–68°F (18–20°C) — cool to the touch, holding its shape, giving slightly when pressed. Eggs on the counter 30 minutes before baking. The batter should be smooth and emulsified going into the pan, not curdled or lumpy.

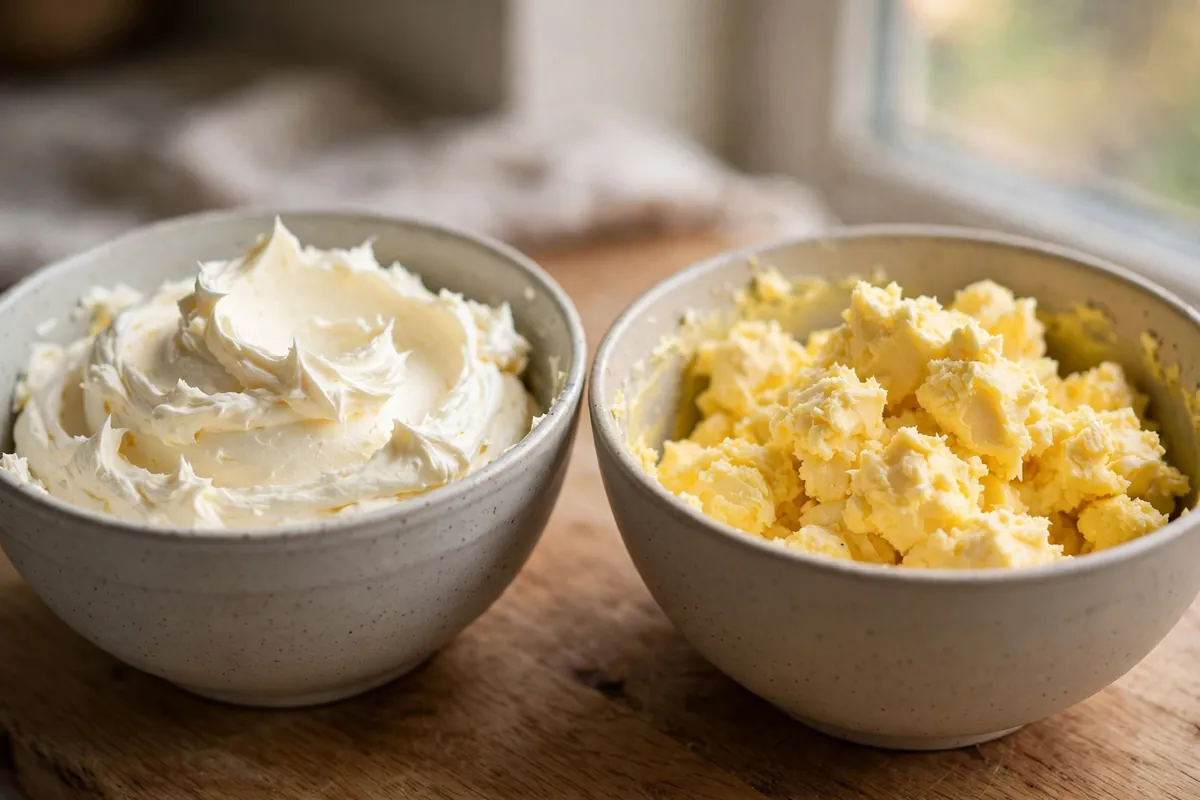
    properly creamed butter and sugar — pale and fluffy — beside under-creamed cold butter mixture
    properly creamed butter and sugar — pale and fluffy — beside under-creamed cold butter mixture

    When the crack is fine (embrace it)

    A thin, even crack down the center is traditional — many bakeries consider it the mark of a real pound cake, proof of a proper rise and the dense, rich crumb the style promises. If flavor and texture are right, the crack is character, not failure. Dust with powdered sugar and serve it proudly.

    The smooth-top checklist

    1. True 325°F (163°C) — verify with a thermometer.
    2. Modest leavening — eggs do the heavy lifting.
    3. Cream hard before flour; barely mix after.
    4. Fill the pan two-thirds max; right pan size.
    5. Room-temperature butter (65–68°F / 18–20°C) and eggs.

    Frequently asked questions

    Is a cracked pound cake ruined?
    No — not even close. A crack is cosmetic. If the crumb is moist and the flavor is right, slice it and serve it; nobody at the table will care, and many will consider it authentic. Only a crack accompanied by a raw, sunken center is a real problem (that’s underbaking, not cracking).

    Can I fix a crack after baking?
    You can hide it, which is usually enough: dust generously with powdered sugar, glaze it, or frost it. A simple lemon glaze poured over the warm cake settles into the crack and turns it into a feature. You can’t un-crack it, but you can absolutely make it beautiful.

    Why does my pound cake crack every single time?
    A systematic crack points to a systematic cause — and the most likely one is an oven running hot. Verify with a thermometer before changing anything else. If the oven is true and it still cracks, cut the leavening by a quarter next bake.

    Should I use a tube pan instead of a loaf pan?
    A tube or Bundt pan actually reduces cracking: the center tube conducts heat into the middle of the batter, so crust and center set more evenly. If you love pound cake but hate the crack, a tube pan is the structural fix. Just grease and flour every crevice.

    Does altitude make pound cakes crack more?
    Yes — at altitude, lower air pressure means faster rising and drier air means faster crust-setting: both sides of the crack equation get worse. See High-Altitude Baking Adjustments for the full correction (less leavening, slightly higher temp, more liquid).

    My crack has raw batter in it — what happened?
    That’s not just cracking; the center didn’t finish baking. The crust set and split while the middle was still liquid — usually a too-hot oven plus underbaking. Next time, lower the heat to a true 325°F (163°C) and give it the full time; a skewer should come out with moist crumbs, not wet batter.

    Related troubleshooting: Cake Domed and Cracked on Top · Why Did My Cake Sink in the Middle? · Why Is My Cake Dry?

  • Metric to US Cups: Baking Conversion Chart (With Weight Tables)

    Metric to US Cups: Baking Conversion Chart (With Weight Tables)

    You’re mid-recipe. The blogger wrote “250g flour” and your kitchen has measuring cups. Or the reverse — “2 cups” and all you trust is your scale. Every baker hits this wall, and the stakes are real: in baking, unlike cooking, measurement errors don’t forgive. A cup of flour can weigh anywhere from 120g to 150g depending on how you scoop it — that’s a 25% swing in the most important ingredient in the recipe. (Scooped-packing flour is one of the sneakiest causes of dry cake — see Why Is My Cake Dry?.)

    This is the definitive conversion resource I wish I’d had taped inside my cupboard door. Bookmark it.

    Quick answer: 1 US cup = 236.6ml. For baking, the weights that matter most: 1 cup all-purpose flour = 120g (spooned and leveled), 1 cup granulated sugar = 200g, 1 cup butter = 227g (2 sticks), 1 cup water or milk = 240g. A kitchen scale beats cups every time — but when cups are all you have, the tables below keep you accurate.

    Why Weight Beats Volume (The 30-Second Case for a Scale)

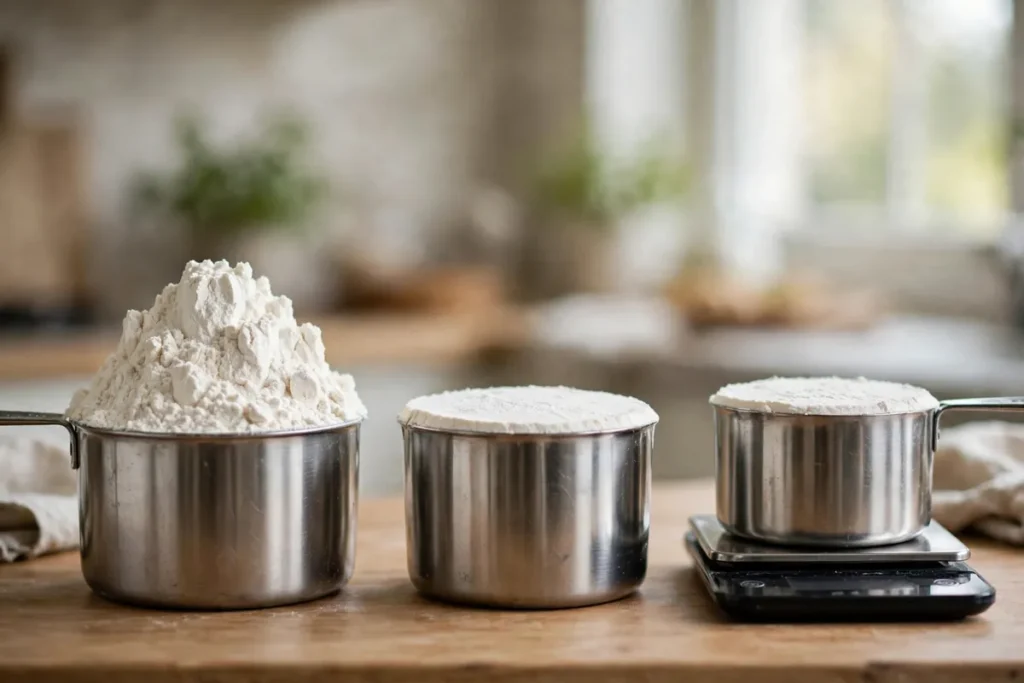
    Flour is compressible. Scoop your cup straight from the bag and you pack in ~150g. Spoon it in lightly and level it off: ~120g. Same cup, 25% more flour — and that extra flour drinks the recipe’s liquid, producing the dense, dry results I diagnose in Why Is My Bread Dense?.

    A basic digital kitchen scale costs less than a bag of good chocolate and eliminates this entire category of failure. Weigh everything 120g-and-up; use spoons only for small quantities (leaveners, salt, spices, extracts). If you’re converting a cups recipe to weights for the first time, the tables below are your Rosetta Stone.

    Volume Equivalents (US Cups, Tablespoons, Milliliters)

    Cups Tbsp Tsp Milliliters
    1 cup 16 tbsp 48 tsp 237ml
    3/4 cup 12 tbsp 36 tsp 177ml
    2/3 cup 10 tbsp + 2 tsp 32 tsp 158ml
    1/2 cup 8 tbsp 24 tsp 118ml
    1/3 cup 5 tbsp + 1 tsp 16 tsp 79ml
    1/4 cup 4 tbsp 12 tsp 59ml
    1/8 cup 2 tbsp 6 tsp 30ml
    1 tbsp — 3 tsp 15ml

    Note: US cup = 236.6ml. Australian tablespoons are 20ml (not 15ml) — if you’re using an Australian recipe, that difference matters in small-batch baking.

    Weight Tables: Cups to Grams

    These use the spooned-and-leveled standard — spoon flour into the cup, level with a knife. This matches how most professional recipe developers measure.

    Flours

    1 cup Grams Ounces
    All-purpose flour 120g 4.25 oz
    Bread flour 127g 4.5 oz
    Cake flour 114g 4 oz
    Whole wheat flour 113g 4 oz
    Rye flour 102g 3.6 oz
    Almond flour 96g 3.4 oz
    Cornstarch 128g 4.5 oz

    Sugars

    1 cup Grams Ounces
    Granulated sugar 200g 7.1 oz
    Brown sugar, packed 220g 7.8 oz
    Powdered/confectioners’ sugar 120g 4.25 oz
    Cocoa powder (Dutch) 100g 3.5 oz

    Fats and dairy

    Measure Grams
    1 cup butter 227g (2 sticks / 16 tbsp)
    1 tbsp butter 14g
    1 cup oil 224g
    1 cup milk/buttermilk 240g
    1 cup heavy cream 238g
    1 cup sour cream/yogurt 245g

    Sweeteners and misc.

    1 cup Grams
    Honey / golden syrup 340g
    Maple syrup 315g
    Molasses 328g
    Water 236g
    Rolled oats 90g
    Chocolate chips 170g
    Chopped nuts 120g
    Raisins 145g
    Three cups of flour — scooped and heaped, spooned and leveled, weighed at 120g
    three cups of flour side by side — one scooped and heaped, one spooned and leveled, one weighed at 120g on a scale

    Temperature Conversions

    °F °C Gas Mark What it’s for
    325°F 165°C 3 Slow bakes, cheesecakes, meringues
    350°F 175°C 4 The standard — most cakes, cookies, quick breads
    375°F 190°C 5 Biscuits, scones, golden crusts
    400°F 200°C 6 Puff pastry, artisan breads
    425°F 220°C 7 Pizza, soda bread, high-heat roasts
    450°F 230°C 8 Pizza steel, flatbreads

    Quick formula: °C = (°F − 32) × 5/9. For oven settings, round to the nearest 5°C — ovens aren’t more precise than that anyway.

    Pan Size Conversions

    Pan size changes batter depth, which changes bake time. Going from an 8-inch round to a 9-inch round increases area ~25% — the layer bakes thinner and faster.

    Original Substitute Adjustment
    8″ round 9″ round Reduce time ~5 min, same temp
    9″ round 8″ round Increase time ~5–8 min, check center
    9×13″ sheet Two 8″ rounds Similar depth; watch edges
    Loaf pan 9×5″ 8″ square Slightly thicker; add 5 min
    Muffin tin (12) 8″ square pan Same batter; add 10–15 min

    Rule of thumb: keep the batter depth similar and adjust time, not temperature. A toothpick test overrules every chart.

    How to Convert a Recipe: A Worked Example

    Recipe says: 2 cups flour, 1 cup sugar, 1/2 cup butter, 350°F.

    1. Flour: 2 × 120g = 240g
    2. Sugar: 1 × 200g = 200g
    3. Butter: 0.5 × 227g = 114g (1 stick + 1 tbsp, or just weigh it)
    4. Temperature: 175°C / Gas 4

    Write the weights on the recipe the first time. Next time, you skip the cups entirely.

    Handwritten recipe card with gram weights written beside cup measures
    a handwritten recipe card with gram weights written in beside the original cup measures

    Frequently Asked Questions

    Why does my cup of flour weigh differently every time?
    Because flour compresses. Scooping packs it down; humidity changes its density. The fix isn’t a better cup — it’s a scale. Until then, always spoon flour into the cup and level it off; never scoop from the bag.

    Can I convert baking powder and baking soda by volume?
    Yes — and you should. Small quantities (under ~20g) are more accurate by spoon than by scale, since most kitchen scales round to whole grams. Level your measuring spoons with a straight edge.

    My recipe is in Australian cups — does it matter?
    An Australian cup is 250ml vs the US 236.6ml — about 6% more. For most home baking it won’t ruin anything, but in precise recipes (macarons, sponge cakes), use the weight tables above instead of converting cup-for-cup.

    How do I convert eggs to weight?
    One large egg ≈ 50g total (about 30g white + 20g yolk). Medium ≈ 44g, extra-large ≈ 56g. When a recipe’s success hinges on egg quantity — custards, sponges — weigh them.

    Does altitude change these conversions?
    No — grams are grams everywhere. But altitude changes how the recipe behaves (faster rise, more moisture loss). For that, see High-Altitude Baking Adjustments.

    Cups or grams for sourdough?
    Grams, always. Sourdough runs on baker’s percentages — every ingredient expressed as a percentage of flour weight. Cups can’t do that math reliably. (New to the terms? Why Didn’t My Bread Rise? covers the fundamentals.)

    Related troubleshooting: Why Is My Cake Dry? · Why Is My Bread Dense? · High-Altitude Baking Adjustments

  • Why Is My Bread Dense? 9 Causes and How to Fix Each One

    Why Is My Bread Dense? 9 Causes and How to Fix Each One

    Quick diagnosis: 9 out of 10 dense loaves come down to two things: a gluten network that never fully developed, or fermentation that was cut short. If your dough failed the windowpane test and never roughly doubled during its rise, start with causes #1 and #3.

    Bread’s open crumb comes from gas bubbles trapped in a strong gluten network. When the network is weak or the gas never forms, the crumb collapses dense. Work through the nine causes in order — the first match is almost certainly your answer.

    1. The dough was under-kneaded

    The most common cause, full stop. Kneading develops gluten — the elastic protein network that stretches around gas bubbles like tiny balloons. Under-kneaded dough has a weak, ragged network that can’t hold gas, so bubbles escape and the crumb sets dense.

    How to tell: Tear off a golf-ball-sized piece and stretch it gently. If you can stretch it thin enough to see light through it without tearing — the windowpane test — gluten is developed. If it rips immediately, it needs more work.

    The fix: Knead 10–12 minutes by hand (6–8 in a stand mixer on medium-low) until smooth, elastic, and passing the windowpane test. An under-kneaded batch comes out like a brick; the same recipe properly kneaded gives an open crumb.

    Hands stretching dough for the windowpane test
    hands stretching dough for the windowpane test, backlit

    2. Too much flour was added

    Extra flour makes a stiff dough that yeast gas can’t push apart. The usual culprit: scooping flour straight from the bag with a cup. A scooped cup can weigh 150g versus the standard 120g — that’s 25% too much flour without you realizing it.

    How to tell: The dough felt firm and dry rather than soft and slightly tacky, and resisted stretching during shaping.

    The fix: Weigh flour at 120g per cup. Hold back the last ¼ cup during mixing, adding it only if the dough is genuinely sticky once kneading begins — proper dough feels soft and tacky, not stiff.

    3. The rise was cut short

    Yeast needs time to produce the carbon dioxide that leavens bread. Shape and bake before fermentation finishes, and there simply isn’t enough gas in the dough — dense crumb guaranteed.

    How to tell: The poke test. Press a floured finger half an inch into the risen dough. Springs back immediately and fills in? Under-proofed — give it more time. Springs back slowly, leaving a slight indent? Ready to bake.

    The fix: Let the first rise go until roughly doubled — typically 1–2 hours at 75–80°F (24–27°C). Watch the dough, not the clock: in a cold kitchen the same recipe can take nearly twice as long as in warm conditions.

    4. The yeast was weak or dead

    Dead yeast produces no gas; weak yeast produces too little. Yeast dies from heat and slowly loses strength past its expiry — an opened packet in a warm cupboard for months is a prime suspect.

    How to tell: Proof it first. Stir 2¼ teaspoons yeast and 1 teaspoon sugar into ¼ cup warm water (100–110°F / 37–43°C). Foamy and bubbling within 5–10 minutes means alive. Nothing happens? It’s dead — no amount of extra rising time will save that dough.

    The fix: Proof any yeast you’re unsure about. Store opened yeast airtight in the fridge or freezer, and respect expiry dates.

    Foamy proofed yeast beside flat lifeless yeast in glasses
    two glasses side by side — foamy proofed yeast vs flat lifeless yeast

    5. The kitchen was too cold

    Yeast activity roughly doubles with every 15°F (8°C) within its working range. Dough rising at 65°F (18°C) can take twice as long as at 78°F (26°C) — shape on your usual schedule and you’ve baked an under-fermented loaf.

    How to tell: The dough barely moved in the expected time and the room felt cool.

    The fix: Find 75–80°F (24–27°C): inside the oven with just the light on, on top of the fridge, or near a radiator. Above 90°F (32°C) the rise gets too fast and flavor suffers; above 140°F (60°C) yeast dies.

    6. Too much salt, or salt directly on the yeast

    Salt is essential — it tightens gluten and builds flavor — but concentrated salt draws water out of yeast cells and stalls them. Dumping it directly onto undissolved yeast is the worst version.

    How to tell: You salted heavily, or sprinkled it straight onto the yeast.

    The fix: Use about 2% salt by flour weight (10g per 500g flour, roughly 2 teaspoons table salt). Mix it evenly through the flour before the yeast goes in. At the right percentage, salt improves crumb structure.

    7. The dough over-proofed and collapsed

    Over-proofed dough can also bake up dense: the yeast exhausts its food, the gluten overstretches and tears, gas escapes, and the loaf collapses into a dense layer — often with a pale, wrinkled crust.

    How to tell: The poke-test indent doesn’t spring back at all; the dough looks puffy but fragile and smells strongly alcoholic.

    The fix: If caught early, gently reshape and give a short 20–30 minute second proof. If fully collapsed, pan-bake it as a fallback or repurpose for flatbread — and next time, proof by the poke test, not the clock.

    8. The oven wasn’t hot enough, or the loaf was under-baked

    Oven spring — the final burst of rise in the first 10 minutes — needs fierce initial heat. A cool oven means weak spring. And an under-baked loaf never sets its structure; the interior stays heavy.

    How to tell: Pale soft crust, a loaf that feels heavy for its size, and a dull thud (not hollow) when you tap the bottom.

    The fix: Preheat a full 20–30 minutes — most ovens lie about being ready. Bake until a thermometer through the bottom reads 190–210°F (88–99°C) — the most reliable doneness test; crust color alone will fool you.

    Thermometer inserted in the bottom of a loaf on a cooling rack
    thermometer inserted into the bottom of a loaf on a cooling rack

    9. You sliced it too soon

    Fresh from the oven, the crumb is full of steam and the starches haven’t set. Early slicing lets steam escape and the soft interior compresses under the knife — dense, sometimes gummy slices.

    How to tell: Cut within 30 minutes of baking; the crumb looked steamy or compressed.

    The fix: Wait at least 1 hour — 2 for large or sourdough loaves. The bread finishes cooking from residual heat during the rest. Hardest instruction in baking; most impactful.

    The 5-minute pre-bake checklist

    Windowpane passed → flour weighed → yeast proofed or fresh → dough roughly doubled (poke test: slow spring-back) → oven preheated 20–30 min → thermometer ready for 190–210°F → rack cleared for a 1-hour rest. Hit all seven and dense bread becomes very hard to produce.

    Frequently asked questions

    Can I fix dense bread after baking?
    No — the structure is set. But dense bread makes outstanding toast, croutons, breadcrumbs, French toast, and bread pudding, where a tight crumb is an advantage.

    Does bread flour matter versus all-purpose?
    Yes — its 12–14% protein (vs 10–12% in all-purpose) builds a stronger gluten network that holds gas better. Switching flour is one of the highest-impact single changes for chronic density.

    How do I know I’ve kneaded enough?
    The windowpane test in cause #1 — binary and reliable. When in doubt, knead 2–3 minutes more; over-kneading by hand is far rarer than under-kneading.

    Is dense bread safe to eat?
    Yes, if fully baked — verify 190–210°F (88–99°C) internal temp. Dense but raw in the middle is unpleasant, so finish the bake properly.

    Why is my no-knead bread dense?
    No-knead trades kneading for very long fermentation (12–18 hours). Dense results mean the ferment was too short, too cold, or the dough over-floured. Give it the full time at room temp and keep the dough wet and shaggy.

    Related troubleshooting: Why Didn’t My Bread Rise? · Why Is My Sourdough Gummy Inside? · Bread Crust Too Hard or Too Soft