Author: Ali Ramzan

  • Why Is My Gingerbread Tough? (Molasses Dough Fixes)

    Why Is My Gingerbread Tough? (Molasses Dough Fixes)

    Tough gingerbread is the December heartbreak: the kitchen smells incredible, and the cookies could double as roofing tiles. Gingerbread should have texture — a snap for cut-outs, a soft chew for cake-style — but “tough” means the crumb fights back. The causes are almost always in the dough handling, not the recipe.

    Quick diagnosis: You overworked the dough and/or used too much flour (most common pair). Mix just until combined, measure flour by weight (120g per cup — packed cups add 20–30%), rest the dough at least 1 hour (overnight is better), roll to an even ¼ inch, and pull the cookies when the edges are set but centers still look slightly soft — they firm up dramatically as they cool.

    My tested baseline: 340g all-purpose flour, 170g butter at cool room temperature, 150g dark brown sugar, 160ml unsulphured molasses, 1 egg, 1 tsp baking soda, spices (2 tsp ginger, 1½ tsp cinnamon, ¼ tsp cloves), ½ tsp salt. Cream butter and sugar, beat in molasses and egg, fold in dries just until no streaks remain. Chill overnight. Roll ¼ inch thick; bake at 350°F (175°C) for 8–10 minutes.

    1. You overworked the dough — gluten is the enemy of tenderness

    Gingerbread dough is a cookie dough, but it gets kneaded like bread surprisingly often — especially when rolling gets sticky and the baker keeps working flour in. Every minute of handling develops gluten, and gluten in a cookie means tough and bready instead of tender.

    How to tell: The dough felt elastic and springy rather than soft and pliable; it shrank back when you rolled it; the baked cookies are hard all the way through with a bready chew.

    The fix: Mix the dries into the wets just until no flour streaks remain — then stop. When rolling, if the dough resists, let it rest 10 minutes instead of fighting it. Gluten relaxes with rest; it never relaxes with more rolling.

    2. Too much flour — the packed-cup problem

    This is the quietest cause and the most common. A “cup” of flour scooped straight from the bag with the measuring cup can weigh 150–160g; the recipe assumed 120g. That’s up to 30% extra flour — enough to turn any gingerbread recipe tough and dry, because the fat and sugar ratios that guarantee tenderness are suddenly wrong.

    How to tell: The dough was stiff and crumbly rather than soft; you needed extra force to roll it; the cookies taste floury and dry, not rich and molasses-y.

    The fix: Weigh your flour — 120g per cup, every time. If you must use cups, spoon the flour in and level it; never scoop. And when the recipe says “flour your surface,” use a whisper, not a snowstorm. This is the same measurement discipline that fixes Overbaked Cookies more often than any oven adjustment.

    3. You skipped the rest — the dough needed its overnight nap

    An overnight chill (minimum 1–2 hours) hydrates the flour so the crumb bakes tender, relaxes whatever gluten you developed, and deepens the molasses-spice flavor. Unrested dough bakes up tougher and blander in side-by-side comparisons.

    How to tell: The dough was soft and sticky when you rolled it; the spices taste flat; the texture is simultaneously tough and slightly raw in the center.

    The fix: Wrap the dough tightly and refrigerate overnight. If you’re short on time, 2 hours is the honest minimum. The dough will feel firmer and drier when you unwrap it — that’s the flour hydrating, and it’s exactly what you want. Roll it cold; cold dough holds its shape and bakes up with cleaner edges.

    4. You overbaked — gingerbread lies about being done

    This is the trap: gingerbread firms up enormously as it cools. A cookie that feels perfectly soft at 9 minutes will be a brick at room temperature if you gave it 12. The visual cues mislead because molasses dough is already dark — you can’t judge by browning the way you can with sugar cookies.

    How to tell: The cookies felt firm when you pulled them; the bottoms are very dark; they were bendable-tender yesterday and jawbreakers today (they kept “baking” from residual heat and then set hard).

    The fix: Pull cut-outs when the edges are set and the centers still look slightly soft — 8–10 minutes at 350°F (175°C) for ¼-inch cookies. They’ll look underdone; carryover heat finishes them on the tray. When in doubt, underbake by a minute — you can always add time.
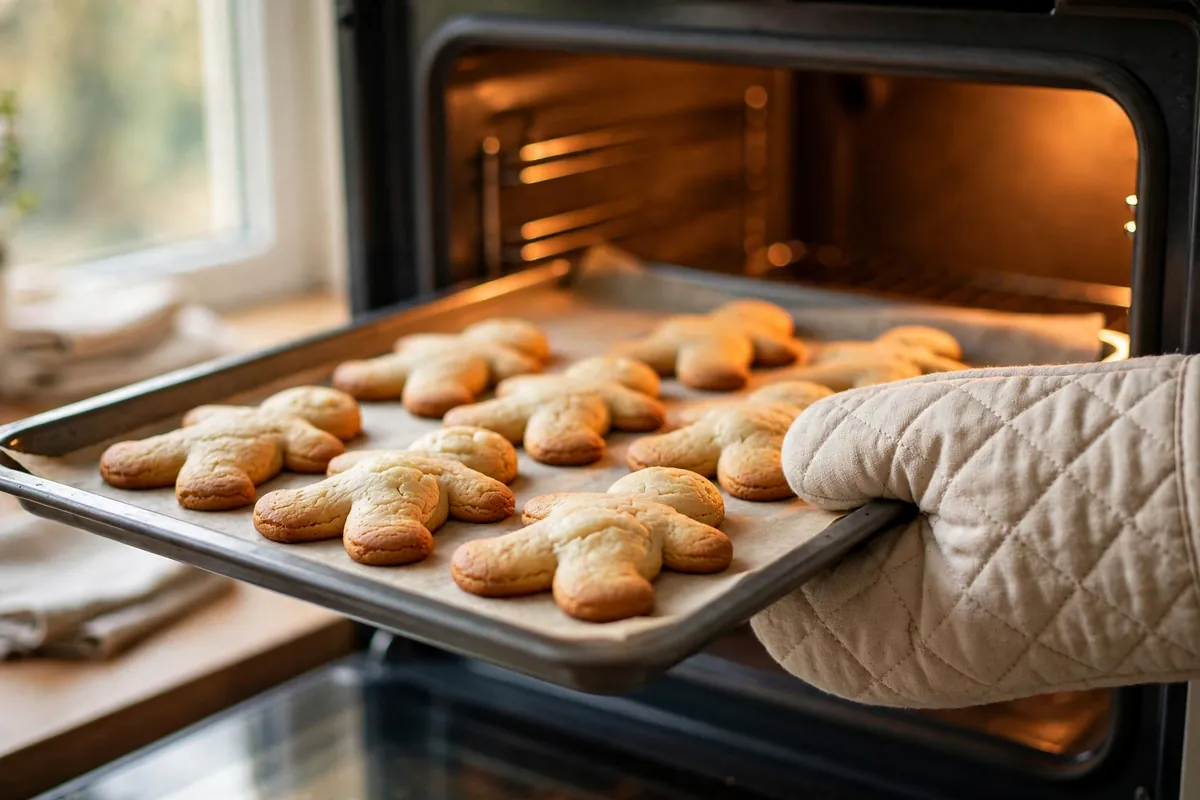
    hands lifting a tray of gingerbread cookies from the oven when edges are just set
    hands lifting a tray of gingerbread cookies from the oven when edges are just set

    5. Your fat and sugar were short — tenderness is a ratio

    Tenderness in cookies comes from fat coating flour particles (shortening gluten strands — hence “shortbread”) and sugar tenderizing the crumb. If you cut the butter “to be a bit lighter,” swapped in all white sugar, or used blackstrap molasses (which is bitter and low in sugar compared to unsulphured), you’ve removed the very ingredients that keep gingerbread tender.

    How to tell: The recipe was modified from the original; the cookies taste more bitter than sweet-spicy; the dough felt lean and dry.

    The fix: Don’t reduce the fat, and use dark brown sugar, not white — its molasses content adds moisture and acidity that tenderize. Use regular unsulphured molasses, never blackstrap, for cookies: blackstrap’s bitterness and lower sugar make everything harder and harsher.

    6. You re-rolled the scraps too many times — the second batch is always tougher

    Every re-roll works more flour into the dough and develops more gluten. The first cutting bakes up tender; the gathered scraps, re-rolled twice, bake up like hockey pucks. This is physics, not failure.

    How to tell: The first tray was fine and each subsequent tray got progressively harder; the last cookies are noticeably paler (flour worked in) and tougher.

    The fix: Roll once and cut tightly to minimize scraps. Press scraps gently together (don’t knead), chill 20 minutes before re-rolling. For Christmas Cookies That Stay Fresh, bake the best cuttings for gifting and keep the re-rolls for the family tin.
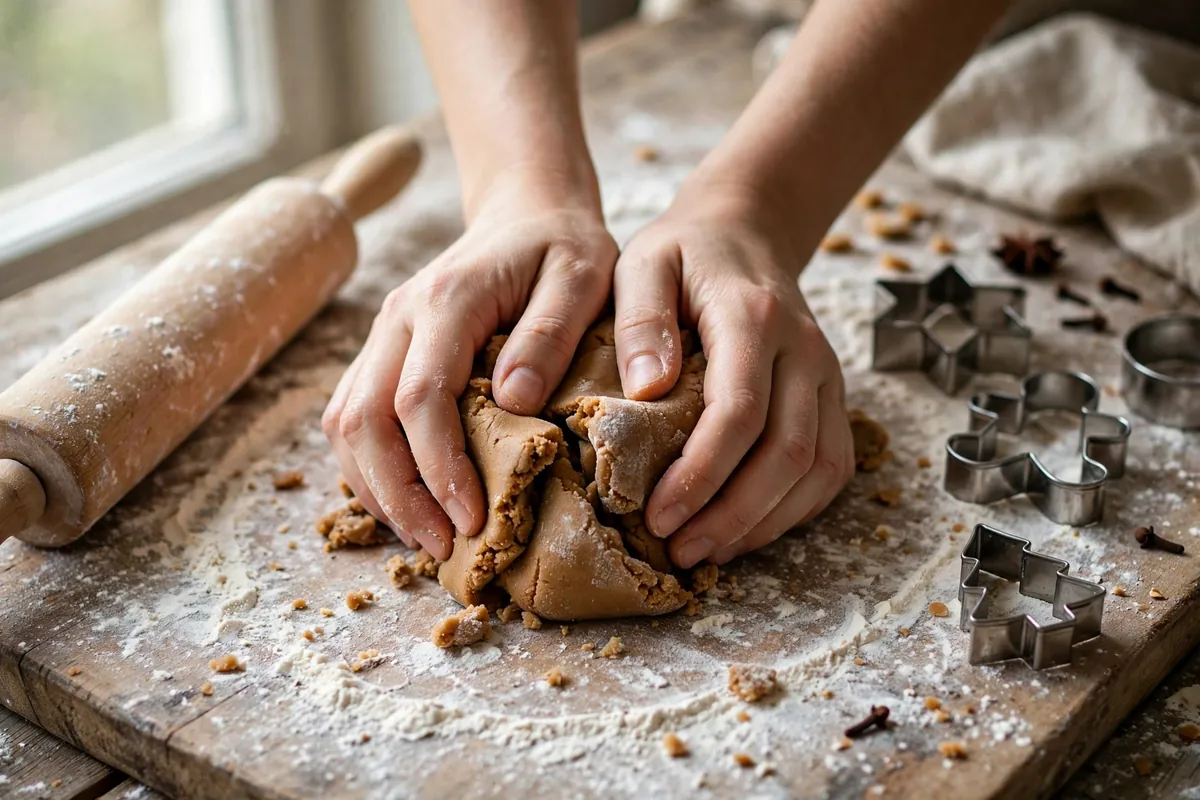
    hands gently pressing gingerbread scraps together without kneading
    hands gently pressing gingerbread scraps together without kneading

    Frequently asked questions

    Is tough gingerbread safe to eat?
    Yes — toughness is a texture defect, not a safety issue.

    Can I soften gingerbread that’s already baked rock-hard?
    Partly: seal the cookies in an airtight tin with a slice of fresh bread overnight. They absorb moisture and soften noticeably. It won’t fix true bricks — but for next time, underbake by a minute.

    Why did my gingerbread spread into blobs?
    Opposite problem: butter too warm or too little chilling. Chill cut shapes 15 minutes before baking; keep butter at cool room temperature, not melty. Spreaders are rarely tough — it’s the over-floured, over-worked dough that goes hard.

    Can I make gingerbread dough ahead?
    Yes — one of the best make-ahead doughs. Wrapped tight: 3 days refrigerated, 3 months frozen. Thaw frozen dough overnight in the fridge; rest 10–15 minutes at room temp before rolling so it doesn’t crack.

    What’s the difference between snappy and soft gingerbread?
    Formula: snappy cut-outs use more sugar, less leavening, and bake longer; soft cake-style uses more fat, an egg, and sometimes hot water or coffee. Both should still yield to the bite — “snappy” means crisp, not jawbreaker.
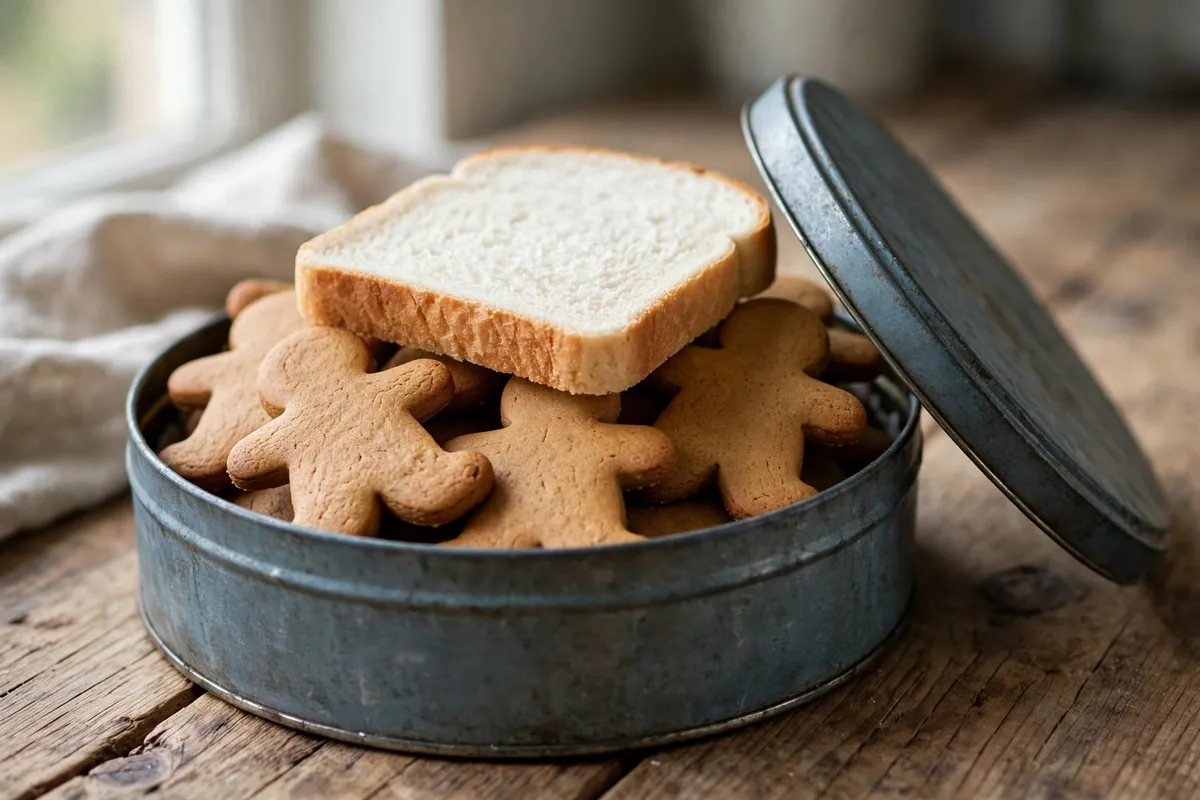
    a tin of gingerbread cookies with a slice of fresh bread tucked in for softening
    a tin of gingerbread cookies with a slice of fresh bread tucked in for softening

    Related troubleshooting: How to Fix Overbaked Cookies · Christmas Cookies That Stay Fresh · Why Are My Cookies Cakey Instead of Chewy?
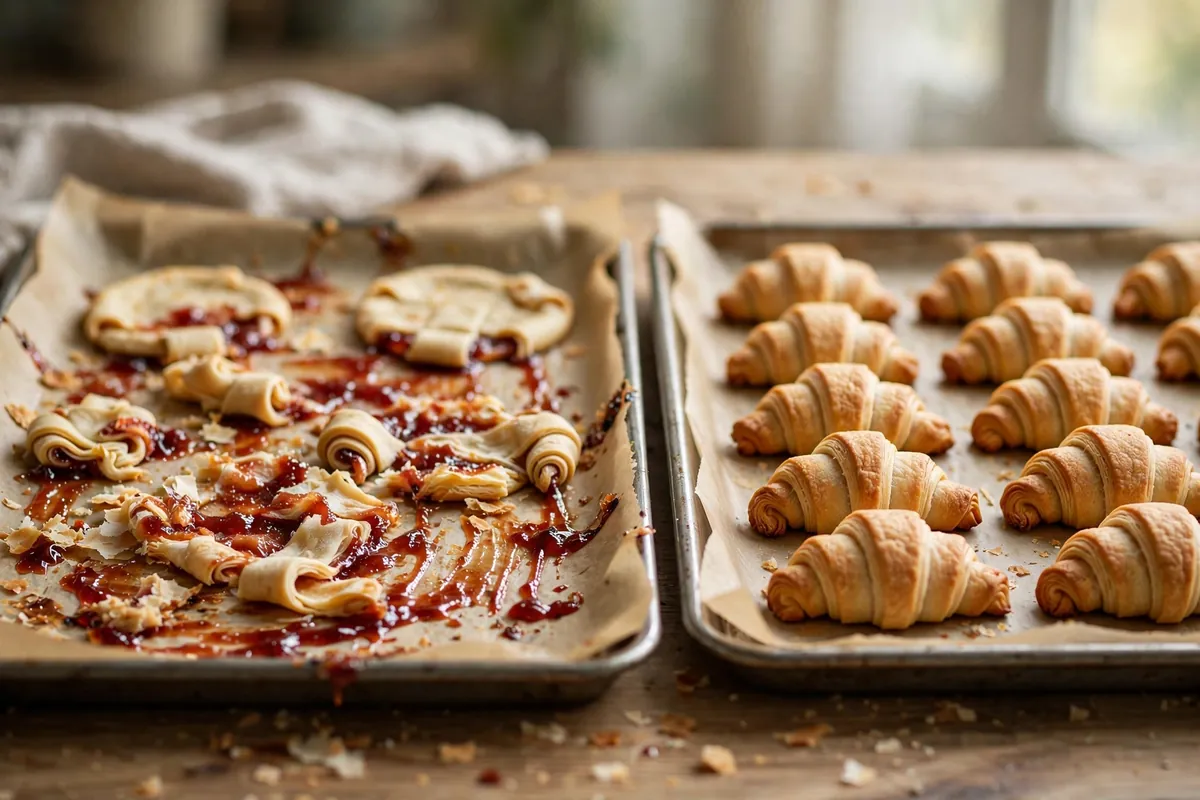
  • Why Did My Rugelach Unravel? Cream Cheese Dough Fixes

    Why Did My Rugelach Unravel? Cream Cheese Dough Fixes

    Neat crescents went in; flat open spirals with oozing filling came out. Unravelling is temperature and tension: dough too warm, filling too wet, or roll too loose. All three are fixable, and the fixes stack.

    Quick diagnosis: Rugelach unravels because the dough got too warm (chill discipline is everything), the filling was too wet, or the crescents were rolled too loosely. Chill the dough 2+ hours, chill shaped rugelach 15–20 minutes before baking, roll tight, and bake seam-side down.

    My baseline: 225g unsalted butter and 225g full-fat cream cheese (both cool room temp), 250g flour, ¼ teaspoon salt, tablespoon of sugar optional. Mix just until combined — overmixing develops gluten that fights your rolling. Divide into 3–4 disks, wrap, chill at least 2 hours or overnight. That chill is the cookie’s structural foundation.

    1. The dough was too warm — chill discipline is everything

    Cream cheese dough is roughly half butter and cream cheese — both soften fast at room temperature. Warm dough is slack: it stretches instead of rolling, won’t hold a spiral, and the fat melts in the oven before the flour sets — the crescent relaxes and lies flat.

    How to tell: Dough felt soft and floppy while rolling, stuck to the counter; baked cookies spread flat, spiral opened like a party blower.

    The fix: Chill disks 2 hours minimum; overnight is better. Work one disk at a time. Above 75°F (24°C), chill the filled log 15 minutes before slicing — and chill the shaped crescents on the tray 15–20 minutes before baking. Cold fat hitting hot heat sets the structure before it melts. (Same principle as Why Did My Scones Come Out Hard?.)

    2. The filling was too wet — steam is a crowbar

    Wet filling turns to steam, and steam pressure pushes the spiral open from inside. Thick jam is the classic offender — mostly water and sugar, it liquefies at baking temperature and floods the layers apart. Chocolate spread does the same.

    How to tell: Filling leaked in sticky puddles, cookies taste fine but look exploded, layers separated with gaps.

    The fix: Thin filling is the golden rule. Jam: a translucent layer, 2–3mm max, thick jam not runny preserve. Cinnamon-sugar: 1–2 teaspoons melted butter per disk, light sprinkle. Chocolate: chopped chocolate or mini chips, not spread — they melt in place. Always leave a ½-inch clean border; that bare strip seals the roll.

    3. The roll was too loose — tension is structure

    Loose rolling leaves air gaps between layers — that’s where unravelling starts. Heat expands the trapped air, soft fat lubricates, the spiral unwinds. Tight rolling eliminates gaps so layers bake into each other.

    How to tell: Baked cookies show separated layers with visible space between them, like a loosely wound cinnamon roll.

    The fix: Roll wide-end to point with gentle constant tension — like a yoga mat. Dab the point with water or beaten egg, tuck it under, place seam-side down. Slice with a sharp knife or floss; a dull blade loosens the roll.

    4. The oven was too cool — the fat melted before the structure set

    Rugelach needs 350°F (175°C), verified. In a cool oven, butter and cream cheese melt while the flour is still soft — the crescent slumps before the starches set. The quiet cause that gets blamed on rolling.

    How to tell: Cookies spread wide and flat, pale bottoms, full 25 minutes without real color.

    The fix: Verify 350°F (175°C) — many ovens run 15–25°F cool, exactly the margin that ruins rugelach. Bake middle rack 20–25 minutes until deeply golden; pale means underbaked and unset. Don’t open the door for the first 15 minutes.

    5. The dough was overworked — gluten springs back

    Mixing past “just combined” develops gluten — and gluten is elastic. It resists rolling, springs back during shaping, and unwinds itself in the oven. Overworked dough feels bouncy, not pliable.

    How to tell: Dough kept shrinking back as you rolled, felt elastic; baked cookies tough as well as unravelled.

    The fix: Mix only until no dry flour remains. If the dough fights rolling, chill 20 minutes — cold relaxes gluten. Re-roll scraps once. If it’s springing back, it needs rest, not force. (See Why Did My Pie Crust Shrink?.)

    hands tightly rolling a rugelach wedge from the wide end toward the point, filling visible
    hands tightly rolling a rugelach wedge from the wide end toward the point, filling visible
    shaped rugelach crescents chilling on a parchment-lined tray, about to go into the oven
    shaped rugelach crescents chilling on a parchment-lined tray, about to go into the oven

    The shape-and-bake sequence that doesn’t unravel

    The full sequence: cold dough, thin filling, tight roll, point tucked under, seam-side down, chill shaped tray 15–20 minutes, bake at verified 350°F (175°C) 20–25 minutes until deeply golden. Egg wash and coarse sugar optional. Miss one step and you might survive; miss two and the oven tells on you.

    Frequently asked questions

    Can I fix rugelach that already unravelled?
    Not after baking — but serve them anyway; it’s purely cosmetic. Call them “rustic.” Next batch: the chill-and-tight-roll sequence above.

    Can I freeze rugelach?
    Yes, at two stages. Freeze the dough disks up to a month (thaw overnight in the fridge). Or freeze the shaped, unbaked crescents on a tray, then bag them — bake from frozen at 350°F (175°C), adding 3–5 minutes. The frozen state actually helps them hold their shape. (Same freeze-first advantage as Can I Freeze Cookie Dough?.)

    Why is my rugelach dough so sticky?
    Warm kitchen, over-softened butter/cream cheese, or too little flour. Chill 30 minutes, dust lightly when rolling. Work in a tablespoon of flour max if still sticky.

    Can I use low-fat cream cheese?
    Don’t. Low-fat cream cheese has more water and stabilizers, which makes the dough sticky, wet, and prone to spreading — exactly the unravelling you’re trying to fix. Full-fat block cream cheese only, never the tubbed spreadable kind.

    Why did all the filling leak out?
    Too much or too wet filling, no sealed border. Thin layer, thick jam, ½-inch border, tight roll, seam down. Trick: stir a teaspoon of cornstarch into ¼ cup jam and warm until thickened.

    How do I get the classic crescent shape?
    Cut each dough disk into 12 wedges like a pizza. Place a small mound of filling (not a spread layer) near the wide end of each wedge, roll toward the point, then curve the ends slightly inward as you set it seam-side down. Chilling before baking locks the curve.

    Related troubleshooting: Why Did My Cinnamon Rolls Unravel? · Why Is My Puff Pastry Not Puffing? · Why Did My Pie Crust Shrink in the Oven?

  • How to Fix Broken Buttercream (Curdled, Soupy, Too Sweet)

    How to Fix Broken Buttercream (Curdled, Soupy, Too Sweet)

    You’re halfway through frosting a cake when the buttercream turns. One minute it’s coming together; the next it’s a curdled, lumpy mess — or a sad soup sliding off the spatula — or so sweet it makes your teeth ache. Before you throw the bowl in the sink: broken buttercream is almost always fixable. I’ve rescued every version of this failure, and the fix depends entirely on which break you’re looking at. Diagnose first, then rescue.

    Quick diagnosis: Curdled and lumpy? The butter was too cold — warm the bowl and keep beating, it almost always comes together. Soupy and slide-y? The butter was too warm or there’s too much liquid — chill 15–20 minutes, then re-whip. Way too sweet? A pinch of salt and a spoonful of cream fix more than you’d think; details below.

    Buttercream is an emulsion: fat, sugar, and a little liquid beaten into a stable foam. Every break is that emulsion failing for a specific reason — temperature, ratio, or technique. Fix the reason and the emulsion reforms. Here’s each failure and its rescue.

    1. Curdled and lumpy — the butter was too cold

    The most common break and the easiest to fix. Cold butter (straight from the fridge, or a cold kitchen) can’t emulsify smoothly — the fat stays in distinct lumps while the sugar and liquid form a separate thin base around them. It looks like cottage cheese and feels like a disaster. It isn’t.

    How to tell: Distinct lumps of butter suspended in a thinner, almost watery base. The butter was cold to the touch when you started, or your kitchen is cool.

    The fix: Warm it gently and keep beating. The single most reliable rescue: warm the outside of the mixing bowl with your hands, a warm towel, or 10-second bursts of a hairdryer on low while the mixer runs on medium. As the butter softens to the right temperature, the lumps melt into the emulsion — you’ll literally watch it come together, usually within 2–3 minutes. Don’t add anything; don’t start over. Just warmth + time. When I first learned this, I stopped throwing away curdled batches entirely — I’ve never had one fail to come back.

    2. Soupy and melting — the butter was too warm

    The mirror image. Butter above about 72°F (22°C) is too soft to hold air — instead of a fluffy emulsion you get sweetened grease that slides off the spatula and won’t hold a swirl. Warm kitchens, butter left out for hours, or liquid added too fast all cause this.

    How to tell: Shiny, loose, almost pourable frosting. It won’t hold peaks or piped shapes; it slumps within seconds. The butter felt soft and greasy before you started.

    The fix: Chill, then re-whip. Refrigerate the whole bowl 15–20 minutes until the edges firm up but the center is still workable — then beat on medium-high for 2–3 minutes. The re-whip rebuilds the air structure now that the fat is firm enough to hold it. If it’s still soft, chill another 10 minutes and repeat. Don’t add more powdered sugar to “thicken” soupy buttercream — you’ll just make sweet soup. Temperature is the problem; temperature is the fix. (For a full guide to heat-stable frosting, see Dairy-Free Frosting That Holds Its Shape — the same principles apply.)

    hands piping a swirl of smooth buttercream onto a cupcake
    hands piping a swirl of smooth buttercream onto a cupcake

    3. Grainy — the sugar never dissolved into the fat

    Grainy buttercream has a sandy mouthfeel: tiny undissolved sugar crystals throughout. This happens when the powdered sugar goes in too fast, the butter wasn’t beaten smooth first, or (common with older powdered sugar) the sugar absorbed moisture and formed micro-clumps.

    How to tell: It looks smooth-ish but feels gritty on the tongue. Rub a dab between your fingers — you’ll feel the grains.

    The fix: Two options. The reliable one: add liquid one teaspoon at a time (cream or milk), beating a full minute after each — the extra moisture dissolves the crystals. Usually 1–2 teaspoons does it. The thorough one: sift your powdered sugar before it goes in. I sift every time now — it takes 60 seconds and prevents the problem entirely. If the graininess came from clumped old sugar, sifting is the only real fix; no amount of beating dissolves actual lumps.

    4. Too sweet — rebalance, don’t dilute

    American buttercream is inherently sweet (it’s mostly powdered sugar by weight), but sometimes it crosses into inedible: teeth-aching, throat-catching sweet. The instinct is to add more butter — resist it. More butter without rebalancing just makes sweet butter.

    How to tell: You taste sugar first, second, and third; no butter flavor, no depth.

    The fix, in order of impact:
    1. Salt — ¼ teaspoon per 3 cups of powdered sugar. Salt doesn’t make frosting salty; it suppresses the flat one-note sweetness and lets the butter and vanilla come forward. This single addition fixes most “too sweet” complaints.
    2. A spoonful of cream or milk (1–2 tablespoons). Liquid dilutes the sugar concentration slightly and improves mouthfeel.
    3. Acid — a teaspoon of lemon juice or a tablespoon of cream cheese. Acidity cuts sweetness perception sharply. Cream cheese especially: it adds tang and body while reducing the sugar ratio.
    4. If it’s truly beyond saving: beat in 4 oz (115g) of softened cream cheese. It transforms the frosting into something closer to cream cheese frosting — tangy, less sweet, still pipeable. Different frosting, saved dessert.

    5. Separated after adding flavoring — liquid went in too fast

    Melted chocolate, fruit purée, coffee, or liqueur added all at once can shock a stable emulsion into separating — the extra liquid overwhelms the fat’s ability to hold it, and you get a weeping, split mess.

    How to tell: The buttercream was smooth, then you added the flavoring and it broke within seconds.

    The fix: Match temperatures and go slow. Flavorings should be at room temperature (melted chocolate cooled to barely warm, ~85°F / 29°C — warm chocolate melts butter on contact). Add in a thin stream with the mixer running, giving each addition 30 seconds to emulsify before the next. If it’s already broken: warm the bowl slightly and beat hard for 2–3 minutes — heat + agitation rebuilds most flavoring breaks. As a last resort, beat in 2–3 tablespoons of additional powdered sugar to give the emulsion more structure to grab onto.

    6. Buttercream “broke” overnight in the fridge — it’s fine

    Not actually a failure, but it panics everyone once. Refrigerated buttercream turns hard, and when you bring it back to room temperature it can look curdled or separated as the fat warms unevenly.

    How to tell: It was perfect yesterday; today it’s firm and looks split around the edges.

    The fix: Let it come fully to room temperature (1–2 hours — don’t microwave it), then beat on medium for 3–4 minutes. It will look worse before it looks better — grainy, then lumpy, then suddenly smooth. This always works. Never frost a cold cake with cold buttercream straight from the fridge; the temperature shock tears the cake surface.

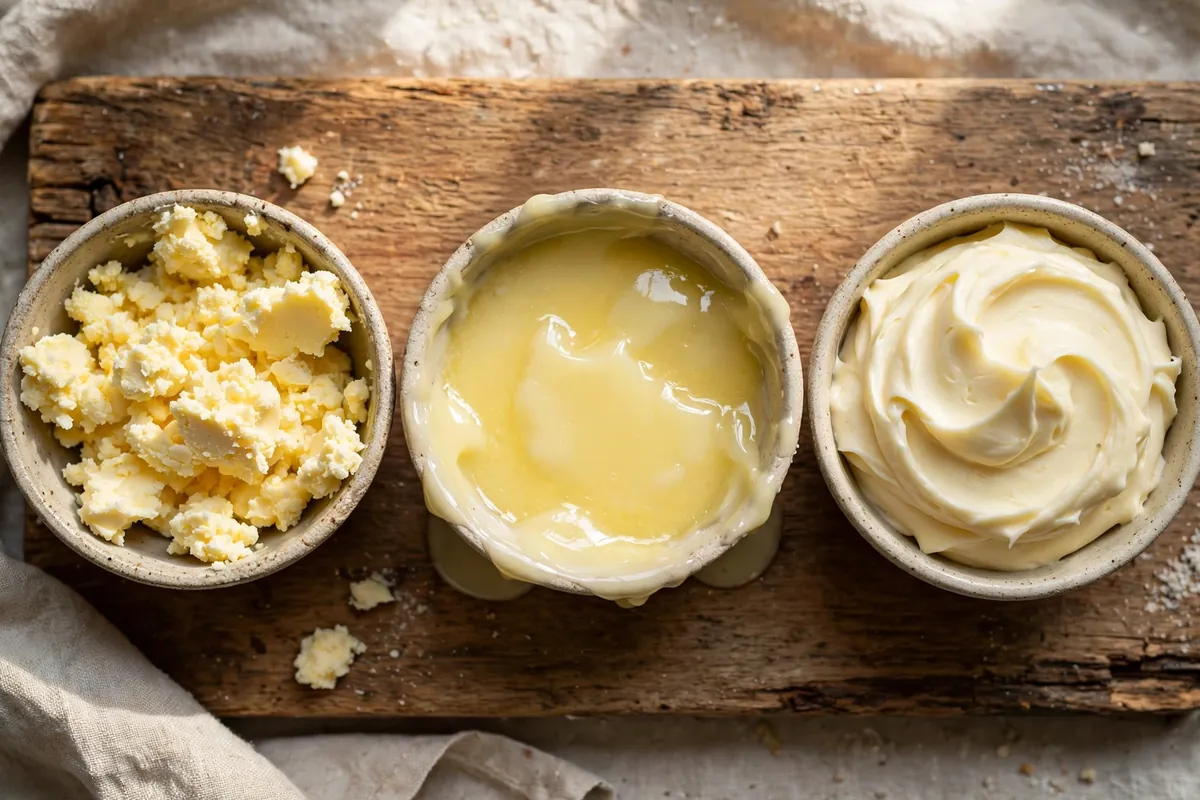
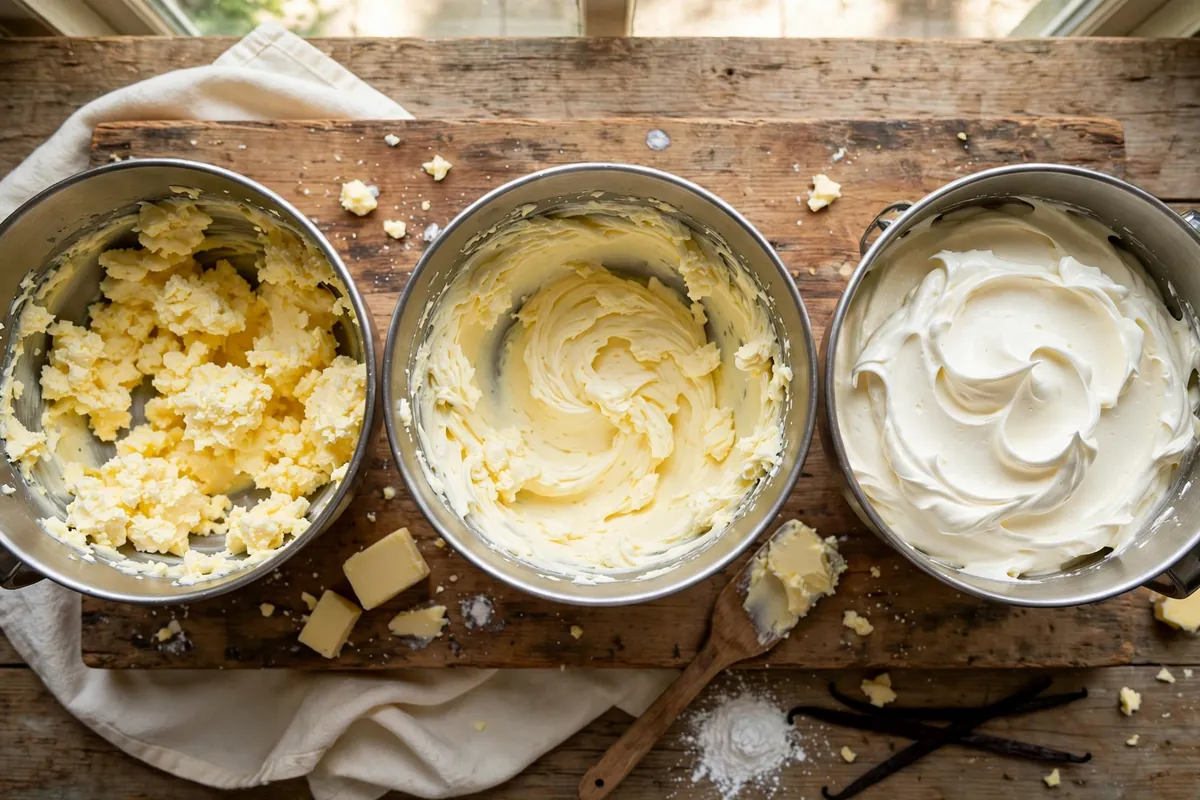
    mixer bowl of buttercream at three stages — curdled, mid-rescue, smooth and fluffy
    mixer bowl of buttercream at three stages — curdled, mid-rescue, smooth and fluffy

    Frequently asked questions

    Can curdled buttercream always be saved?
    Nearly always. Curdling from cold butter is the most rescuable failure in baking — warmth plus continued beating reforms the emulsion in minutes. The only truly dead buttercream is one where the fat has fully melted and separated into grease (from serious overheating), and even that can sometimes be chilled and re-whipped.

    Why does my buttercream taste like butter and nothing else?
    Under-sweetened or under-flavored — the mirror of “too sweet.” Add powdered sugar ¼ cup at a time, plus 1 teaspoon vanilla and ¼ teaspoon salt. (Full flavor-balance guide: Why Does My Frosting Taste Like Butter?.)

    Can I fix buttercream that’s too thin for piping?
    Chill it 15–20 minutes, then re-whip — that’s the fix in most cases. If it still won’t hold a peak, the ratio is off: beat in powdered sugar 2 tablespoons at a time until it firms up. For hot-weather piping, a tablespoon of cornstarch per 3 cups of sugar adds heat stability.

    Is broken buttercream safe to eat?
    Yes — every failure here is textural, not a food-safety issue. Curdled, soupy, grainy, or over-sweet buttercream is all perfectly safe. The only discard signal is off smells or mold from dairy left too long at room temperature (buttercream is fine at cool room temp for 2–3 days; beyond that, refrigerate).

    Can I re-freeze buttercream that I’ve already thawed?
    Yes, once. Freeze in an airtight container up to 3 months; thaw overnight in the fridge, bring to room temp, and re-whip. Each freeze-thaw cycle degrades the texture slightly, so don’t do it twice.

    Why did my chocolate buttercream seize?
    The melted chocolate was too hot when added, or a drop of water got in. Chocolate seizes on contact with water and melts butterfat on contact with heat. Cool melted chocolate to barely-warm (85°F / 29°C) and add it in a stream with the mixer running.

    Related troubleshooting: Why Does My Frosting Taste Like Butter? · Dairy-Free Frosting That Holds Its Shape · Why Did My Cake Sink in the Middle?

  • No-Knead Bread for Beginners: Your First Loaf, Step by Step

    No-Knead Bread for Beginners: Your First Loaf, Step by Step

    No-Knead Bread for Beginners: Your First Loaf, Step by Step

    Quick diagnosis: Mix 500g bread flour, 375g water, 10g salt, and ¼ teaspoon instant yeast. Rest 12–18 hours. Shape, proof 30 minutes, and bake in a preheated Dutch oven at 450°F (230°C) — 30 minutes covered, 15–20 uncovered. That’s the whole recipe. The long rest does the kneading for you.

    If you’ve never baked bread, this is where you start. No-knead bread has the best effort-to-result ratio in all of baking: five minutes of actual work produces a loaf with a crackling crust and open crumb that tastes like it came from an artisan bakery. The method was popularized by Jim Lahey in 2006 and it hasn’t been improved since, because the science is sound — time develops gluten just as surely as kneading does.

    Why no-knead works (so you trust the process)

    Kneading builds gluten through mechanical force. But gluten also develops on its own when flour and water sit together — the proteins hydrate, link up, and organize over hours. A 12–18 hour rest at room temperature does the same structural work as 10 minutes of kneading, while also building deeper flavor through slow fermentation.

    The tiny yeast quantity (¼ teaspoon — not a typo) is deliberate. Less yeast means slower fermentation, which means the dough can rest all night without over-proofing. It also means better flavor: slow fermentation produces the organic acids and complex tastes that make good bread taste like bread instead of like yeast.

    The recipe (baker’s percentages included)

    Ingredient Weight Volume approx. Baker’s %
    Bread flour 500g ~4 cups, spooned 100%
    Water, lukewarm 375g 1⅔ cups 75%
    Fine salt 10g 2 tsp 2%
    Instant yeast 1g ¼ tsp 0.2%

    Use bread flour if you can (12–14% protein gives the chewiest crumb), but all-purpose works — the loaf will be slightly less lofty. Instant yeast and active dry both work at this quantity; if using active dry, dissolve it in the water first.

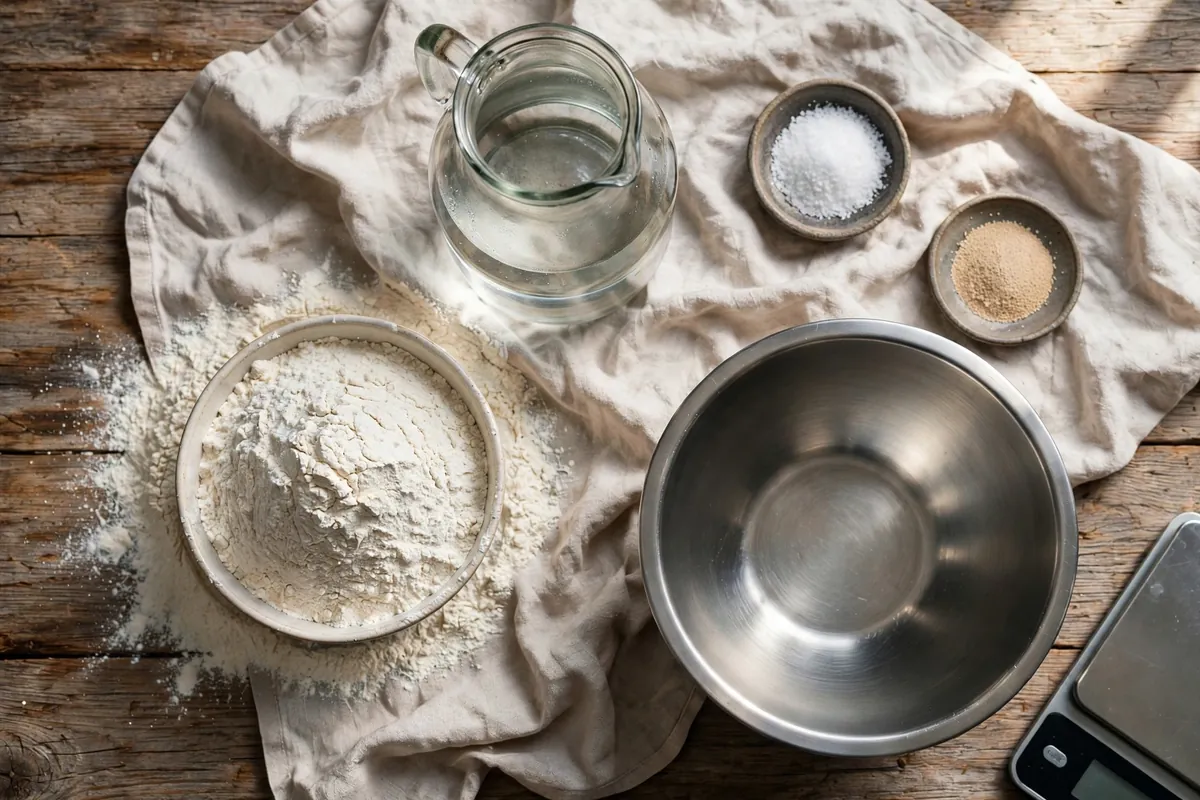
    The four no-knead bread ingredients measured out in bowls beside a mixing bowl
    the four ingredients measured out in bowls beside a large mixing bowl

    Step 1: Mix (5 minutes, evening)

    Combine everything in a large bowl and stir with a wooden spoon or your hand until no dry flour remains. The dough will look shaggy, rough, and frankly wrong — lumpy, sticky, uneven. This is correct. Do not knead it. Do not smooth it. Walk away.

    Cover the bowl with plastic wrap or a damp towel and leave it at room temperature (70–75°F / 21–24°C) for 12–18 hours. Overnight is perfect: mix at 8pm, bake at noon.

    Step 2: The long rest (12–18 hours, overnight)

    During the rest, three things happen without you: gluten develops, the yeast slowly produces gas, and flavor compounds build. You’ll know it’s ready when the dough has roughly doubled, the surface is dotted with bubbles, and it smells pleasantly yeasty and slightly tangy — not sharply sour (that’s over-fermented; see below).

    Timing by kitchen temperature:
    – Warm kitchen (78°F+ / 26°C+): 10–12 hours. Check early — warm dough moves fast.
    – Normal (70–75°F / 21–24°C): 12–18 hours. The sweet spot.
    – Cool (65°F / 18°C): 18–24 hours. Slower, but the flavor is worth it.

    If the dough has more than tripled, smells strongly of alcohol, and collapses when touched, it over-proofed. Don’t bin it — it’ll still bake into decent bread, just flatter. Next time, use a touch less yeast or a shorter rest. (For the full diagnosis, see Why Didn’t My Bread Rise? — over-proofing is the mirror image of under-proofing.)

    Step 3: Shape (10 minutes)

    Flour your work surface generously — this is a wet 75%-hydration dough and it will stick to everything. Scrape the dough out (it’ll be bubbly and alive). With floured hands, fold the edges into the center a few times to form a rough ball, then flip it seam-side down.

    The envelope fold: pull the top edge down to the center, the bottom edge up, then left and right — like folding a letter. Flip seam-down. That’s your shaping. No-knead shaping is intentionally minimal; you’re just creating surface tension, not developing anything new.

    Place the ball seam-down on a floured piece of parchment (the parchment becomes your transfer sling later). Cover with a towel and rest 30 minutes while the oven preheats.

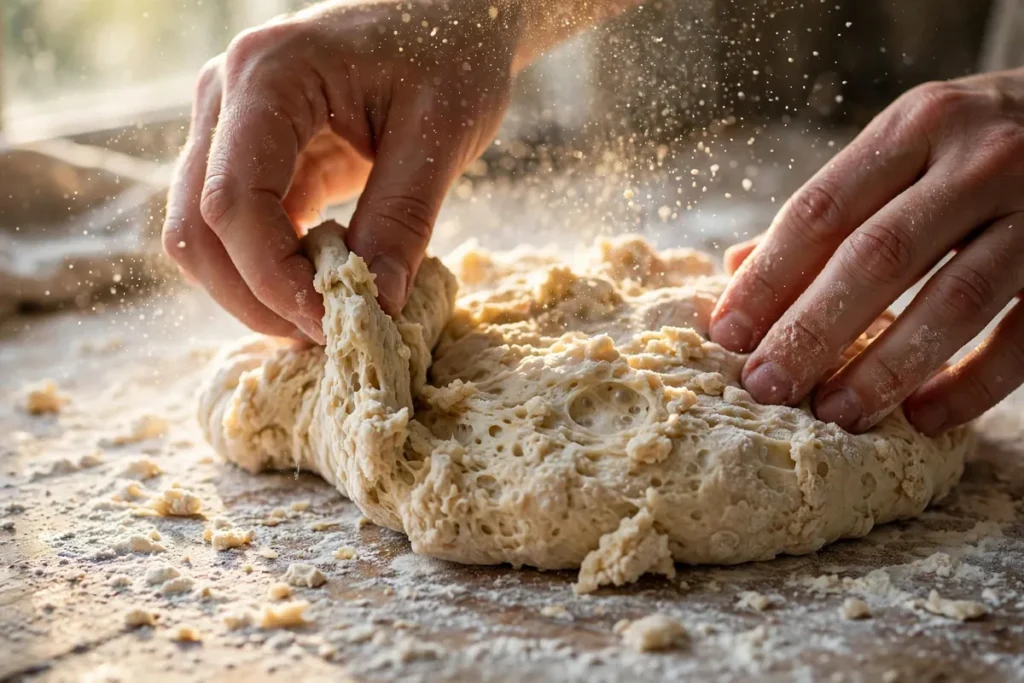
    Hands doing the envelope fold on shaggy dough, floured surface visible
    hands doing the envelope fold on the shaggy dough, floured surface visible

    Step 4: Preheat the Dutch oven (30–45 minutes)

    Put your Dutch oven (with its lid) into the oven and heat to 450°F (230°C). Preheat a full 30–45 minutes — the pot must be screaming hot. This is non-negotiable: the searing heat is what creates oven spring, the burst of expansion in the first minutes of baking.

    No Dutch oven? A heavy oven-safe pot with a tight lid works. In desperation, an inverted deep roasting pan over a baking stone works. But a Dutch oven is the single best bread investment you can make — it traps the dough’s own steam, which keeps the crust soft long enough for maximum spring, then the dry heat crisps it. (More on steam’s role in Bread Crust Too Hard or Too Soft.)

    Step 5: Bake (45–50 minutes)

    1. Score the top — one confident slash with a sharp knife or razor, about ½ inch deep. Cold dough scores best, but room-temp no-knead dough is fine with a decisive cut.
    2. Lower the dough into the hot pot using the parchment sling. This is the only scary moment: the pot is 450°F. Go slow, keep fingers clear.
    3. Lid on, bake 30 minutes. The trapped steam does its work.
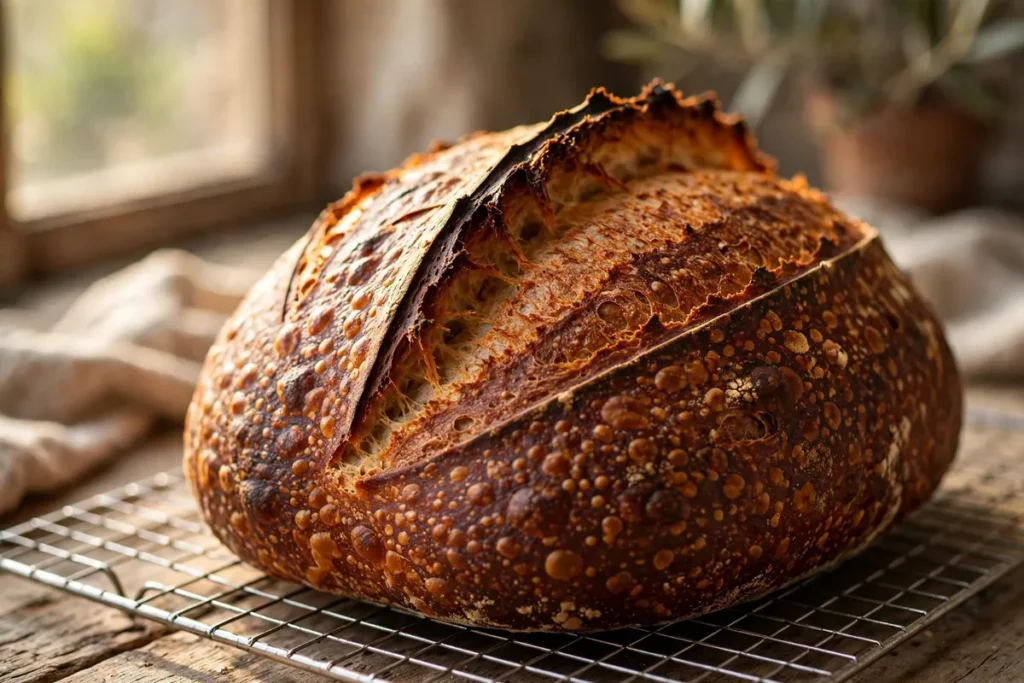
    4. Lid off, bake 15–20 minutes more. Now the crust browns and crisps. You’re looking for deep mahogany — darker than you think. Pale no-knead bread is the classic beginner mistake; color equals flavor.
    5. Check doneness: 200–210°F (93–99°C) internal (see How to Tell When Bread Is Done).
    Finished no-knead loaf on a cooling rack — deep mahogany crust, bold score opened into an ear
    the finished loaf on a cooling rack — deep mahogany crust, one bold score mark opened into an ear

    Step 6: Cool (the hardest step)

    Cool on a wire rack for at least 2 hours before slicing. I know. The smell is unbearable. But cutting early compresses the still-setting crumb into gumminess — the exact problem in sourdough cut too soon. The bread is still cooking inside during the first hour of cooling. Wait.

    Your first-loaf troubleshooting cheat sheet

    What happened Likely cause Fix next time
    Flat, dense loaf Over-proofed during the long rest Less yeast (⅛ tsp) or shorter rest; cooler spot
    Pale, soft crust Underbaked / lid off too late Full 15–20 min uncovered; aim for mahogany
    Gummy center Sliced too soon Cool 2 full hours on a rack
    Burnt bottom Pot too close to lower element Middle rack; parchment under the loaf helps
    Dough stuck to towel Not enough flour on the cloth Flour the towel heavily, or proof on parchment

    Frequently asked questions

    Can I use all-purpose flour instead of bread flour for no-knead bread?
    Yes. The loaf will be slightly less chewy and a touch less lofty (all-purpose is 10–12% protein vs bread flour’s 12–14%), but the method works identically. Don’t adjust anything else.

    Do I really not need to knead at all?
    Really. Time replaces kneading: over 12–18 hours, gluten proteins hydrate and organize on their own. If the long rest makes you nervous, do 3–4 gentle stretch-and-folds during the first 2 hours — it adds insurance but isn’t required.

    Can I make no-knead bread without a Dutch oven?
    You can, but the crust won’t match. The Dutch oven traps steam; without it, bake on a preheated stone or steel with a pan of boiling water on the rack below for the first 20 minutes, then remove it. Expect a good loaf with a slightly less dramatic crust.

    Why did my no-knead bread come out flat?
    Almost always over-proofing during the long rest — too much yeast, too warm a kitchen, or too long a rest. The dough exhausts its food and the gluten relaxes. Cut yeast to ⅛ teaspoon or shorten the rest, and make sure your kitchen isn’t above 78°F.

    How do I store no-knead bread?
    Room temperature, cut-side down on a board or in a paper bag, 2–3 days. Never the fridge (it accelerates staling). For longer, slice and freeze airtight up to 3 months — full guide in How to Store Homemade Bread.

    Can I add things like olives, cheese, or herbs?
    Yes — fold 100–150g of add-ins during shaping (not during the initial mix, where they can interfere with gluten development). Wet add-ins like olives should be patted dry first. Cheese near the surface will crisp beautifully.

    Related troubleshooting: Why Is My Bread Dense? · How to Tell When Bread Is Done · Make-Ahead Bread Dough: Fridge Timelines

  • Why Did My Cake Sink in the Middle? 7 Causes, Tested Fixes

    Why Did My Cake Sink in the Middle? 7 Causes, Tested Fixes

    Why Did My Cake Sink in the Middle? 7 Causes, Tested Fixes

    Quick diagnosis: A sunken center almost always means the structure wasn’t set when the heat came off — underbaked, door opened too early, or too much leavening. Wet or gummy middle? Cause #1. Rose beautifully then fell while cooling? #2 or #3.

    Sunken cake cross-section with collapsed dense center
    cross-section of a sunken cake showing the dense dip in the center

    A cake is a foam: gas bubbles trapped in batter that heat sets into a solid scaffold. While that scaffold is still soft, gravity wins. Every cause below is that same story — the structure wasn’t ready to stand on its own.

    1. It was underbaked

    The most common cause. The edges set first; the center finishes last. Pull it even five minutes early and the middle is still unset foam that collapses as it cools.

    How to tell: The sunken area looks wet, gummy, or dense — almost pudding-like — rather than just flat. A toothpick in the center comes out with wet batter (not moist crumbs).

    The fix: Bake until the center is genuinely done. Ignore the clock as your only guide: start checking 5 minutes before the recipe’s time. A toothpick should come out with a few moist crumbs clinging, never wet batter. Better yet, use an instant-read thermometer — most butter cakes are done at an internal temperature of 200–210°F (93–99°C) in the very center. If the top is browning too fast while the middle lags, tent loosely with foil and keep baking.

    2. The oven door was opened too early

    Opening the door floods the oven with cool air — temperature can drop 25–50°F (15–30°C) in seconds. If the scaffold hasn’t set, that thermal shock deflates it on the spot.

    How to tell: The cake was rising nicely, you peeked, and it fell — either immediately or by the time it cooled.

    The fix: Don’t open the door before the cake is three-quarters done (about 25 minutes into a 35-minute bake). Use the oven light and the glass to check progress. After the structure has set, a quick open-and-close to rotate the pan is harmless.

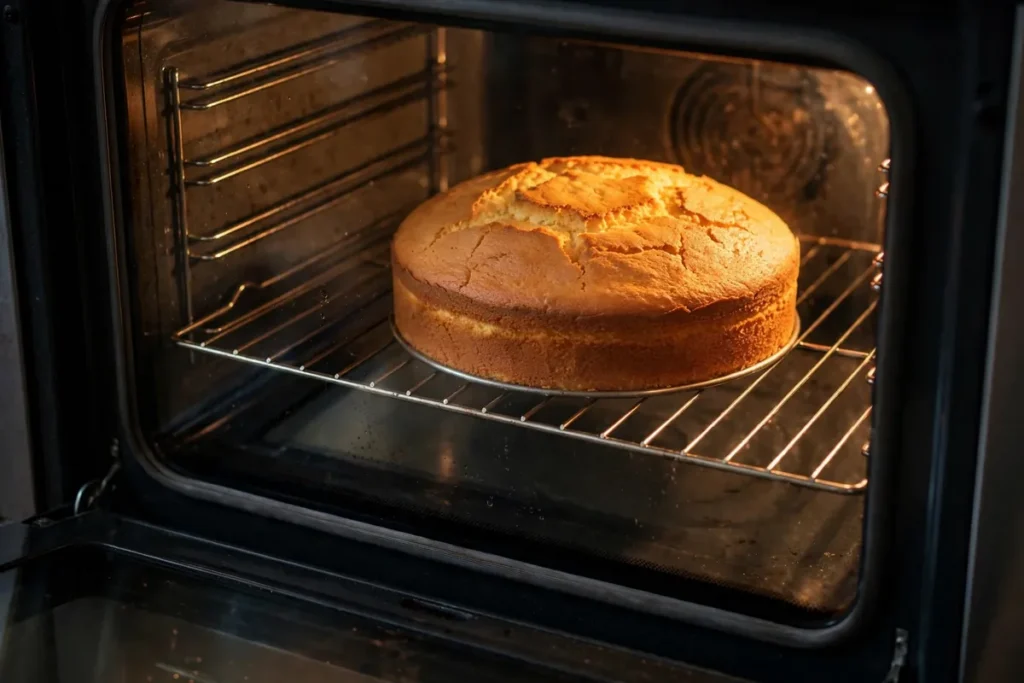
    Risen cake baking inside a lit oven
    oven door slightly open with a cake visibly risen inside, oven light on

    3. Too much leavening

    Baking powder and baking soda create gas that lifts the batter — but the structure has to keep pace with the lift. Over-leavened batter inflates like a balloon, outruns its scaffold, and collapses. The cruel part: it looks spectacular in the oven right before it falls.

    How to tell: The cake rose dramatically, maybe even domed, then sank in the center as it cooled. The crumb tastes slightly soapy or metallic (excess soda).

    The fix: Measure leavening with proper measuring spoons, leveled off — never a dinner spoon. The standard ratio is about 1 teaspoon of baking powder per 1 cup (120g) of flour, or ¼ teaspoon of baking soda per cup of flour when there’s an acid present (buttermilk, cocoa, brown sugar). Replace baking powder older than 6–12 months instead of adding “a bit extra.”

    4. The batter was over-mixed after the flour went in

    Two problems at once: beating whips in too much air, so the batter starts over-inflated — and overworking develops excess gluten, making the crumb tough and springy. It rises on oven spring, then the tight gluten contracts and drags the center down.

    How to tell: The cake has tunnels or large irregular holes near the top, a rubbery layer, and a sunken middle. The batter looked smooth and elastic rather than just combined.

    The fix: Once flour goes in, mix on low only until the last streak disappears, then stop — finish by hand with a spatula. The vigorous beating belongs in the butter-and-sugar stage, not after the flour.

    5. The oven ran too hot

    A hot oven sets the crust early. That firm shell insulates the middle, so the center stays raw while the outside looks done — you pull it “on time” and the middle collapses. Home ovens routinely run 25°F (15°C) off; dial settings are a suggestion, not a measurement.

    How to tell: Deep golden or dark crust with a raw, sunken center. The recipe’s timing seemed right but the middle never caught up.

    The fix: Put a $10 oven thermometer on the middle rack and trust it over the dial. Bake on the center rack, and if your oven runs hot, drop the set temperature by 25°F (15°C). This is the same thermometer discipline I use for bread — an uncalibrated oven ruins more bakes than any recipe flaw (see Why Didn’t My Bread Rise?).

    6. The wrong pan size

    Batter depth decides whether the center bakes through. Pour an 8-inch recipe into a 6-inch pan and the batter sits deeper — the edges set, the middle stays liquid, and down it goes.

    How to tell: The batter filled the pan more than two-thirds full before baking, or you substituted a smaller/deeper pan than the recipe called for.

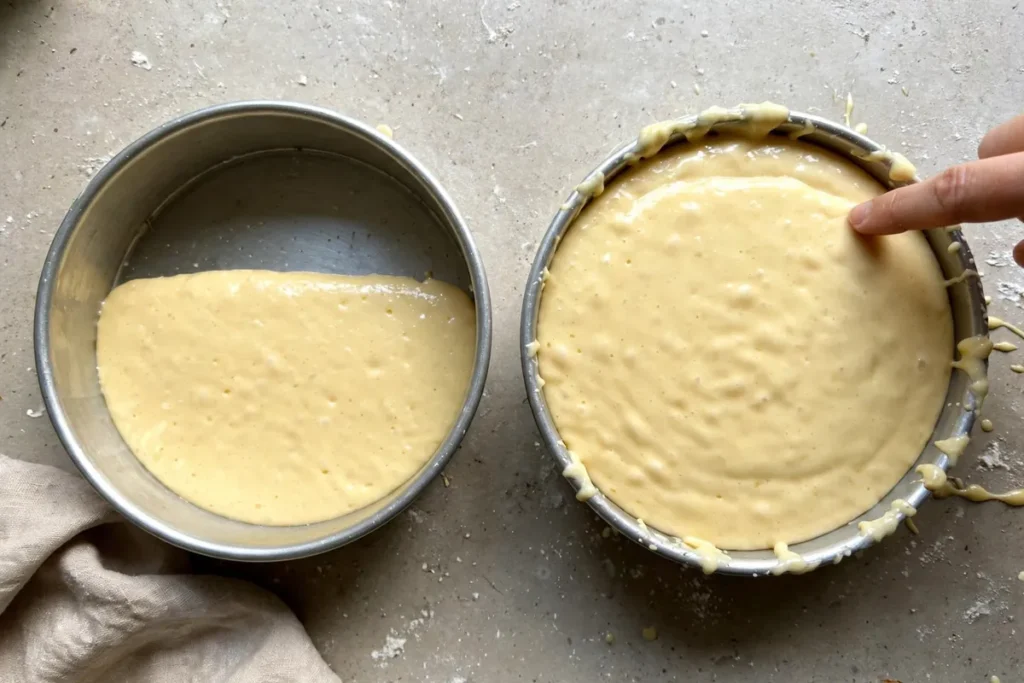
    The fix: Fill pans one-half to two-thirds full, no more. If you only own the wrong size, split the batter between two pans or bake in batches. And measure your pans — “8-inch” pans vary by brand, and a true 8×2-inch pan holds about 6 cups of batter.

    Two cake pans, half-filled versus overfilled, with a finger marking the two-thirds line
    two pans side by side — one filled to half, one overfilled near the rim

    7. Too much sugar or liquid

    Sugar tenderizes crumb by interfering with gluten and egg-protein networks — wonderful in the right amount, structural sabotage in excess. Same with liquid: a batter that’s too wet can’t build a scaffold strong enough to hold its rise. This usually happens when scaling by feel or swapping ingredients (applesauce for oil, extra milk “for moisture”).

    How to tell: You altered the recipe’s ratios, or the batter looked noticeably thinner than usual before baking.

    The fix: Respect the recipe’s ratios, especially when substituting. If you want a moister cake, add moisture after baking — a simple-syrup soak (see Why Is My Cake Dry?) — rather than loading it into the batter.

    Can I fix a sunken cake after the fact?

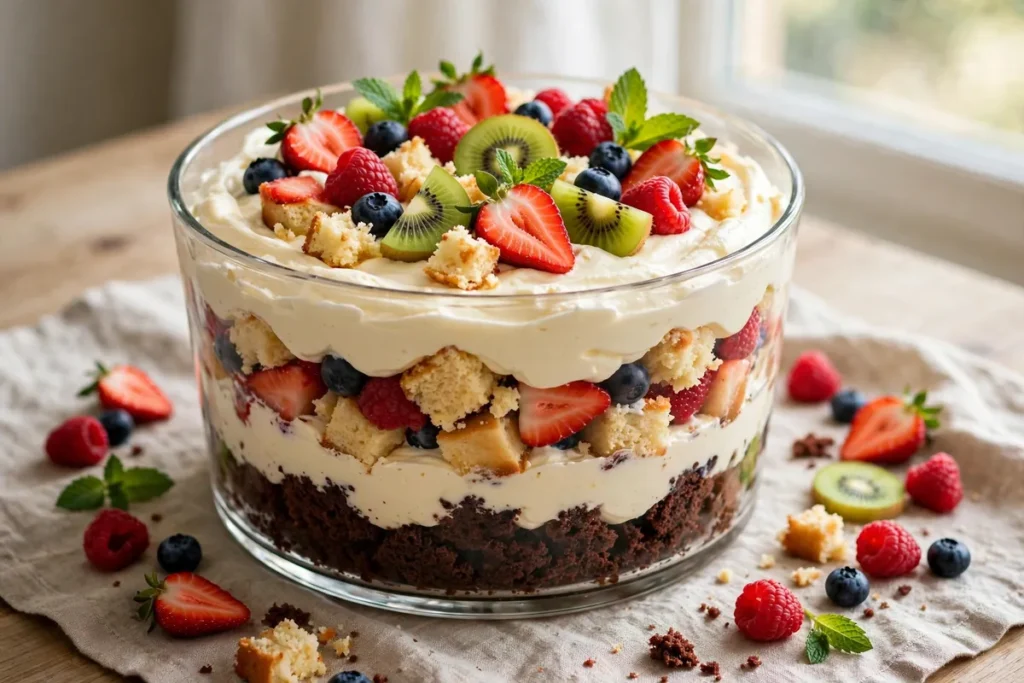
    Yes — it’s almost always salvageable, because the flavor is usually fine and only the shape suffered. Level the top with a long serrated knife, then flip the cake upside down so the flat bottom becomes the top. Fill the crater with whipped cream, frosting, or fruit. For a bad case, cube it into a trifle — sunken cake makes an outstanding trifle because the dense center soaks up flavor.

    Frequently asked questions

    Is a sunken cake safe to eat?
    Yes, as long as the center is fully baked through. If the middle is wet, raw batter rather than just dense, it was underbaked — the texture will be gummy, though it’s still safe if it reached a safe temperature. When in doubt, the toothpick test decides.

    Can I put a sunken cake back in the oven?
    Only if you catch it immediately and the center is still wet — give it 5–10 more minutes. Once cooled, the structure has set in its collapsed shape and re-baking just dries it out. Salvage it as a trifle instead.

    Why did my cake sink after I took it out, not in the oven?
    Because the collapse happens as steam escapes and the cake cools. An under-set center holds its shape while hot air and steam support it, then gives way on the counter — the classic signature of underbaking or excess leavening.

    Does opening the oven door always sink a cake?
    No — only while the structure is still setting, roughly the first three-quarters of the bake. Once the crumb is set, a quick open to rotate the pan is fine.

    Sunken cake rescued as a layered trifle in a glass bowl
    the same sunken cake rescued as a layered trifle in a glass bowl

    Related troubleshooting: Why Is My Cake Dry? · Cake Domed and Cracked on Top · Why Didn’t My Bread Rise?

  • How to Fix Seized Chocolate (The Water Rescue That Actually Works)

    How to Fix Seized Chocolate (The Water Rescue That Actually Works)

    Seized chocolate looks like a cruel joke: one minute you have silk, the next you have grainy sludge — all because a single drop of water fell in. It feels like it should be ruined. It isn’t, mostly. And the fix is gloriously counterintuitive: the thing that destroyed your chocolate is more of the same thing, added deliberately.

    Quick diagnosis: A tiny amount of water dissolved the sugar in your chocolate, turning it into sticky syrup that glued the cocoa particles into clumps. Rescue it by stirring in more hot liquid — 1 tablespoon of boiling water or hot cream per 30g (1 oz) of chocolate — until it smooths into a glossy sauce or ganache. It won’t be dippable again, but it’s perfectly usable.

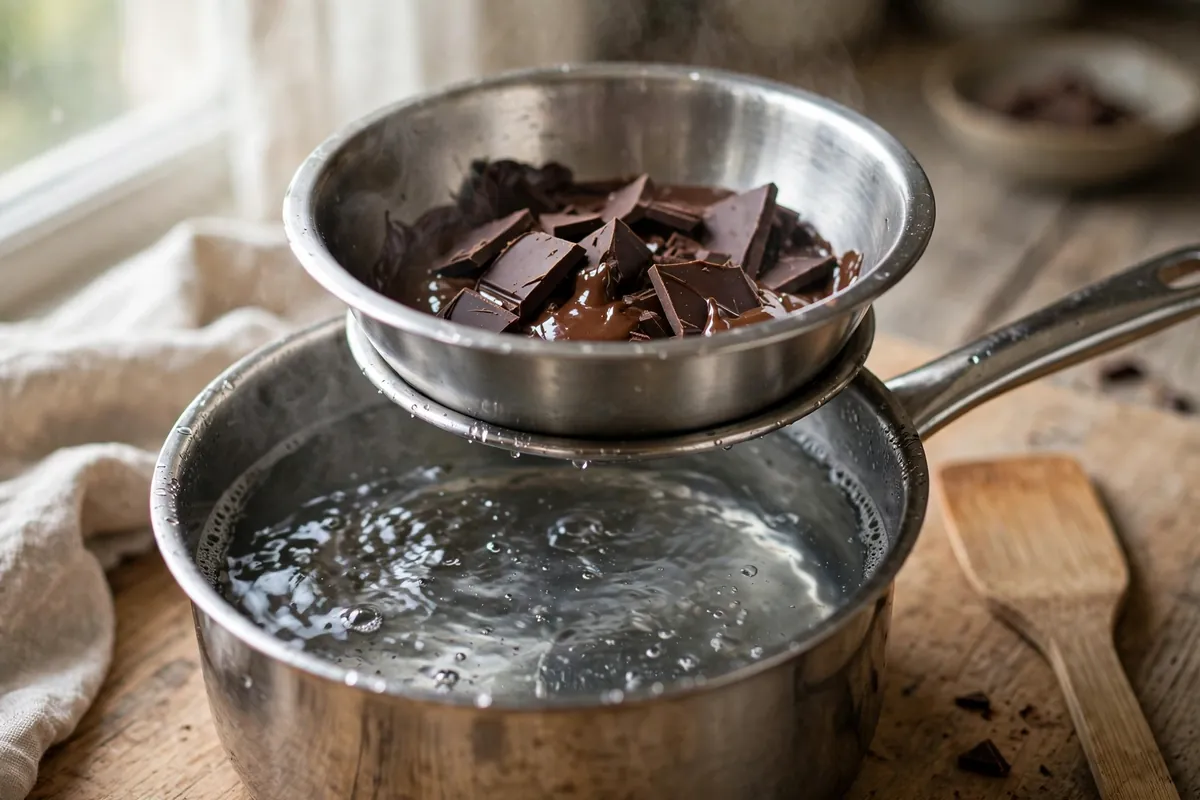
    My tested baseline: 200g dark chocolate (60–70% cacao), chopped fine, melted in a completely dry bowl over barely simmering water — the bowl must not touch the water. Keep dark chocolate below 120°F (49°C); milk and white below 110°F (43°C).

    1. Why one drop of water destroys melted chocolate

    Chocolate is a suspension of dry particles — sugar, cocoa solids — in cocoa butter, with almost no water in it (well under 1%). Melted, those particles flow freely in the fat. Add a tiny amount of water and the sugar dissolves into it, forming a sticky syrup that coats and glues the cocoa particles together into clumps. The smooth suspension becomes wet sand. That’s seizing: not burning, not curdling — gluing.

    This is why the usual suspects are all moisture, not heat: steam escaping from under a double boiler, a wet spoon, chocolate stored in a humid kitchen, condensation from chocolate that went fridge-to-counter, or — the classic — covering the melting bowl with a lid, which traps steam that drips back in.

    2. The rescue paradox: add more liquid, on purpose

    Here’s the part that feels wrong. A teaspoon of water seized your chocolate, but a tablespoon of boiling water per 30g (1 oz) of chocolate will save it. Once there’s enough liquid, the sugar fully dissolves instead of forming partial sticky syrup, the cocoa particles disperse evenly through the liquid, and the whole mass relaxes into a smooth, glossy sauce.

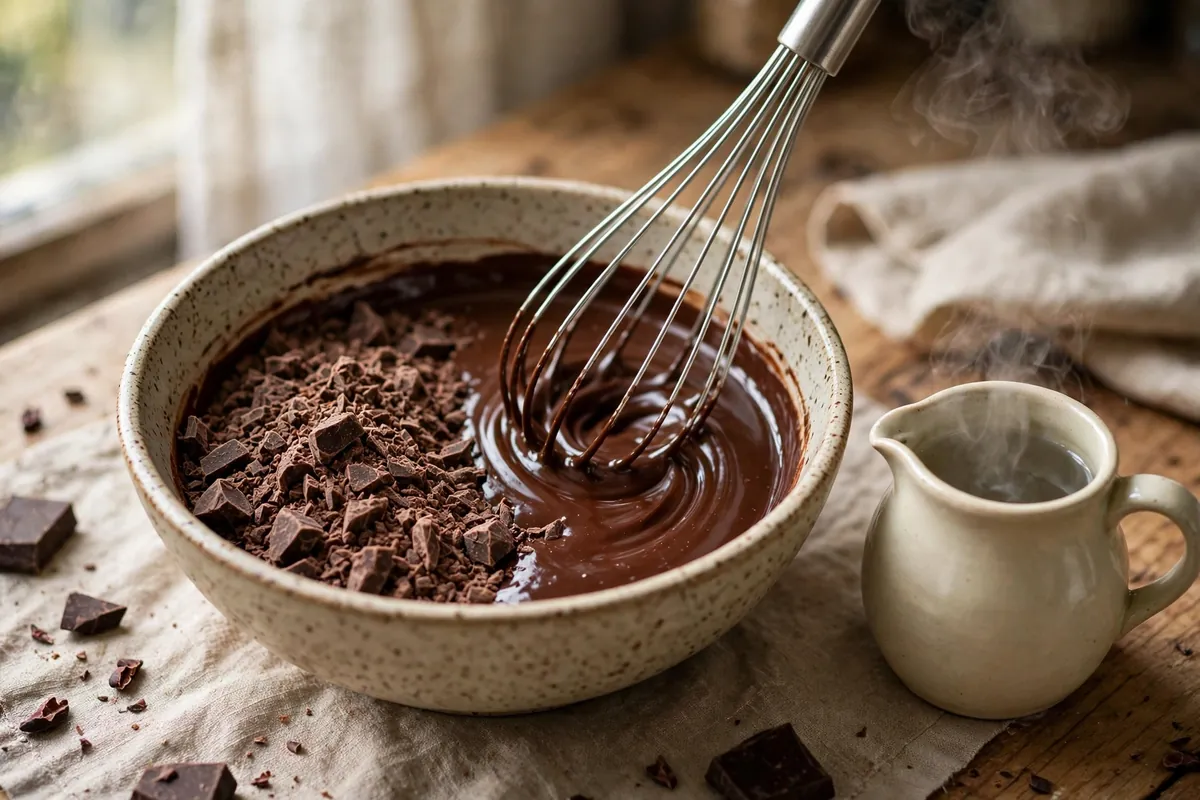
    How to do it: Bring water or cream to a boil. Add it one tablespoon at a time to the seized chocolate, stirring vigorously and constantly in the center of the bowl. It will look worse for about 30 seconds — thinner, weirder — then suddenly come together into glossy smoothness. For 200g of chocolate, expect to add 6–7 tablespoons.

    What you get: Not your original melted chocolate — you now have a chocolate sauce (water rescue) or thin ganache (cream rescue). Use it over ice cream, as a cake soak, or whisked into frosting. The rescue changes the product; it doesn’t rewind time. The same principle fixes a broken emulsion in Fixing Curdled Ganache.

    3. Rule out the other graininess: burnt chocolate can’t be rescued

    Not all grainy chocolate is seized chocolate. Overheated chocolate — dark pushed past 130°F (54°C), milk or white past 120°F (49°C) — also turns thick and gritty, but the mechanism is different: the cocoa butter separates and the solids scorch. The liquid rescue won’t fix burnt chocolate, and burnt chocolate tastes acrid and bitter underneath the grain.

    How to tell: Seized chocolate happened the instant water touched it and smells like normal chocolate. Burnt chocolate thickened gradually as it got hotter and smells sharp, bitter, almost like burnt coffee.

    The fix for burnt: There isn’t one. If it tastes scorched, it stays scorched. Melt in short microwave bursts at 50% power with stirring between — prevention beats rescue every time.

    hands whisking boiling water into seized chocolate as it turns glossy
    hands whisking boiling water into seized chocolate as it turns glossy

    4. Prevention: the dry-kitchen protocol

    Every seized-chocolate disaster I’ve caused came from rushing the setup, never from the chocolate itself. The protocol:

    • Everything bone dry. Bowl, spatula, thermometer — dry them even if they look dry. One invisible film of water is enough.
    • Chop fine and even. Big chunks melt unevenly; the small bits overheat while the big ones are still solid, and you stir longer, inviting steam.
    • Barely simmer, never boil. The water under your double boiler should tremble, not bubble. The bowl must not touch the water. No lid — ever.
    • Microwave in bursts. 50% power, 20–30 seconds, stir between every burst. Chocolate holds its shape when melted, so stir to check — it can be fully liquid while looking solid.
    • Temper your additions. If a recipe adds liquid to melted chocolate (like a ganache), the liquid must be hot. Cold cream into warm chocolate seizes it just as surely as a water drop.

    5. White and milk chocolate seize faster — handle them like eggs

    White chocolate has more sugar and milk solids and less cocoa butter structure than dark; milk chocolate sits in between. Both seize on smaller amounts of moisture and scorch at lower temperatures (110°F/43°C is the ceiling). If you’re new to melting chocolate, practice the dry-kitchen protocol on dark first — it’s the most forgiving — before moving to white.

    How to tell it’s starting: The chocolate goes from flowing to suddenly thick and matte at the edges of the bowl. Stop heating immediately. If you catch it at the first thickening and the cause was heat, not water, sometimes just taking it off the heat and stirring in a tablespoon of neutral oil or cocoa butter will bring it back.

    6. What rescued chocolate is good for (and what it isn’t)

    Rescued chocolate will never temper again — no snap and shine for dipped strawberries or molded bonbons. Its honest second lives: chocolate sauce, ice cream topping, mousse base (fold in whipped cream once cool), hot chocolate, or brownie batter — where nobody will ever know. If your brownies run cakey anyway, see Fudgy vs. Cakey Brownies.

    glossy rescued chocolate sauce being poured over vanilla ice cream
    glossy rescued chocolate sauce being poured over vanilla ice cream

    Frequently asked questions

    Is seized chocolate safe to eat?
    Yes. Seizing is a texture event, not spoilage. It tastes like chocolate, just with the mouthfeel of wet sand. Rescue it into sauce and it’s genuinely good.

    Can I still use seized chocolate for dipping or candy molds?
    No — that’s the one thing rescue can’t restore. Dipping needs tempered chocolate with proper cocoa-butter crystals for snap and shine. Use rescued chocolate for anything where it stays soft: sauces, ganaches, frostings, batters.

    Why did my chocolate seize when I added cold cream?
    Cold liquid shocks melted chocolate: the cocoa butter firms around the cold spots and the sugar grabs the cream’s water before it disperses. Ganache cream must be hot — steaming, just off the boil.

    Can seized white chocolate be rescued?
    Yes, with the same boiling-water method — but add the liquid a teaspoon at a time and stir gently, or the milk proteins turn gummy. Use water rather than cream; extra dairy fat can push white chocolate into greasiness.

    My chocolate looks dusty and streaky but melts fine — is that seizing?
    No, that’s fat bloom — cocoa butter surfacing during temperature swings in storage. Cosmetic only; it melts normally. Don’t throw out bloomed chocolate.

    proper double-boiler setup with dry bowl over barely simmering water
    proper double-boiler setup with dry bowl over barely simmering water

    Related troubleshooting: Fixing Curdled Ganache · Grainy Fudge? How to Fix It · Fudgy vs. Cakey Brownies

  • Sticky Buns Troubleshooting: Burnt Sugar, Raw Centers

    Sticky Buns Troubleshooting: Burnt Sugar, Raw Centers

    Sticky buns are a high-wire act: caramelizing sugar on the bottom, enriched dough on top, one oven cooking both at once. Burnt caramel and raw centers are the same problem in two costumes — the outside browning faster than the inside bakes through.

    Quick diagnosis: Burnt bottoms mean your oven runs hot or your pan is too dark — drop to a true 350°F (175°C) and use a light-colored metal pan. Raw centers mean the rolls were overcrowded or underbaked — give them space, bake 25–30 minutes until the centers hit 190°F (88°C), and flip the pan within 5 minutes of baking.

    My baseline. Dough: 500g flour, 7g instant yeast, 60g sugar, 60g soft butter, 1 egg, 240ml warm milk, 8g salt (see Why Didn’t My Bread Rise? if it won’t cooperate). Topping: 115g butter melted with 200g brown sugar and 60ml honey, pinch of salt — stirred just until dissolved and gently bubbling, NOT dark caramel. Pour into a buttered 9×13-inch light metal pan, add pecans, arrange rolls cut-side up with breathing room, proof 30–45 minutes until puffy, bake at 350°F (175°C) for 25–30 minutes.

    1. The sugar burned — your caramel went too far, twice

    Burnt topping has two crime scenes: stovetop and oven. On the stovetop, cooks treat the butter-sugar mix like real caramel and cook it to amber — but it spends 25+ minutes in the oven, so it must go in undercooked. In the oven, dark nonstick or glass pans run hotter on the bottom than light metal, scorching the topping while the rolls still bake.

    How to tell: Bitter or acrid rather than sweet and buttery, dark brown to black in spots, scorched smell when you open the oven.

    The fix: Stovetop: melt butter and sugar just until dissolved and gently bubbling — 2–3 minutes, no darker than light tan. Oven: verify a true 350°F (175°C), use light-colored metal (dark pans burn the topping — see Baking Pan Materials), and tent with foil if the tops brown too fast.

    2. Raw centers — the rolls insulated each other

    Twelve rolls crammed in a 9×13 pan are one giant dough mass; heat travels far to reach the middle. Rolls touching tightly before proofing can’t expand outward — centers stay dense and doughy while tops overbrown.

    How to tell: Middle rolls gummy or tasting of raw flour while outer rolls are done; rolls look squashed and tall — no room to spread.

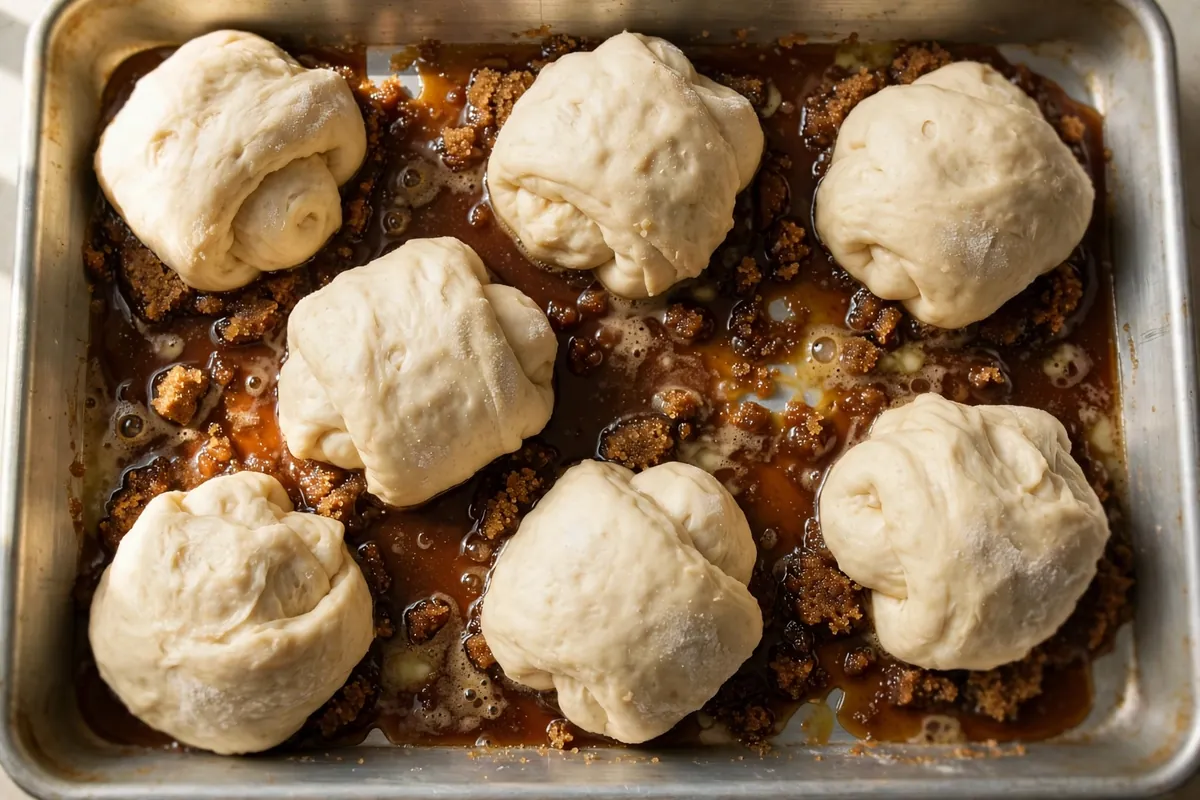
    The fix: Space rolls 1 inch apart — they’ll touch after proofing, fine. Bake until middle-roll centers hit 190°F (88°C) on an instant-read thermometer; it overrules the clock. Tops done but centers not? Tent with foil and keep baking. Thermometer-checked buns were perfect every time; timer-only were a lottery.

    3. You didn’t flip fast enough — the caramel became cement

    The topping is molten sugar; the moment the pan leaves the oven it starts setting. Wait 15 minutes and it welds the rolls to the pan — you’ll tear the buns freeing them.

    How to tell: Rolls stuck to the pan, topping left behind as a hard sheet, buns torn on serving.

    The fix: Flip within 5 minutes — set a timer. Run a thin knife around the edge, place a platter over the pan, invert in one motion. Scrape any stuck topping over the buns. Wear oven mitts; hot caramel is unforgiving. (Related: Why Did My Cinnamon Rolls Unravel?.)

    4. The proof was wrong — under-proofed buns bake up dense, over-proofed collapse

    After shaping, proof 30–45 minutes in a warm spot until puffy. Under-proofed rolls bake dense — tight crumb reads as doughy even when baked through. Over-proofed rolls collapse into flat, gummy disks.

    How to tell: Under-proofed: small going in, tight bready crumb. Over-proofed: huge and jiggly going in, deflated in the oven, sour yeasty smell.

    The fix: Poke test, not clock: springs back immediately = 15 more minutes; slow partial fill = ready; indent stays and roll looks slack = over-proofed (bake anyway — the caramel forgives). Proof at 75–80°F (24–27°C); cold kitchens double the time.

    5. The filling leaked and burned — too much, too wet, too loose

    Escaped filling lands on the hot topping and scorches — black bitter streaks between buns are leaked filling, not failed caramel. It leaks when the filling is too thick, the roll too loose, or the log unsealed.

    How to tell: Dark burnt streaks between rolls, filling oozing out the sides, rolls partially unwound.

    The fix: Spread filling thin — 2–3 tablespoons soft butter, light even cinnamon sugar, ½-inch border on the far edge. Roll tight, seal the seam with water, slice with floss or a sharp serrated knife, place seam-side down.

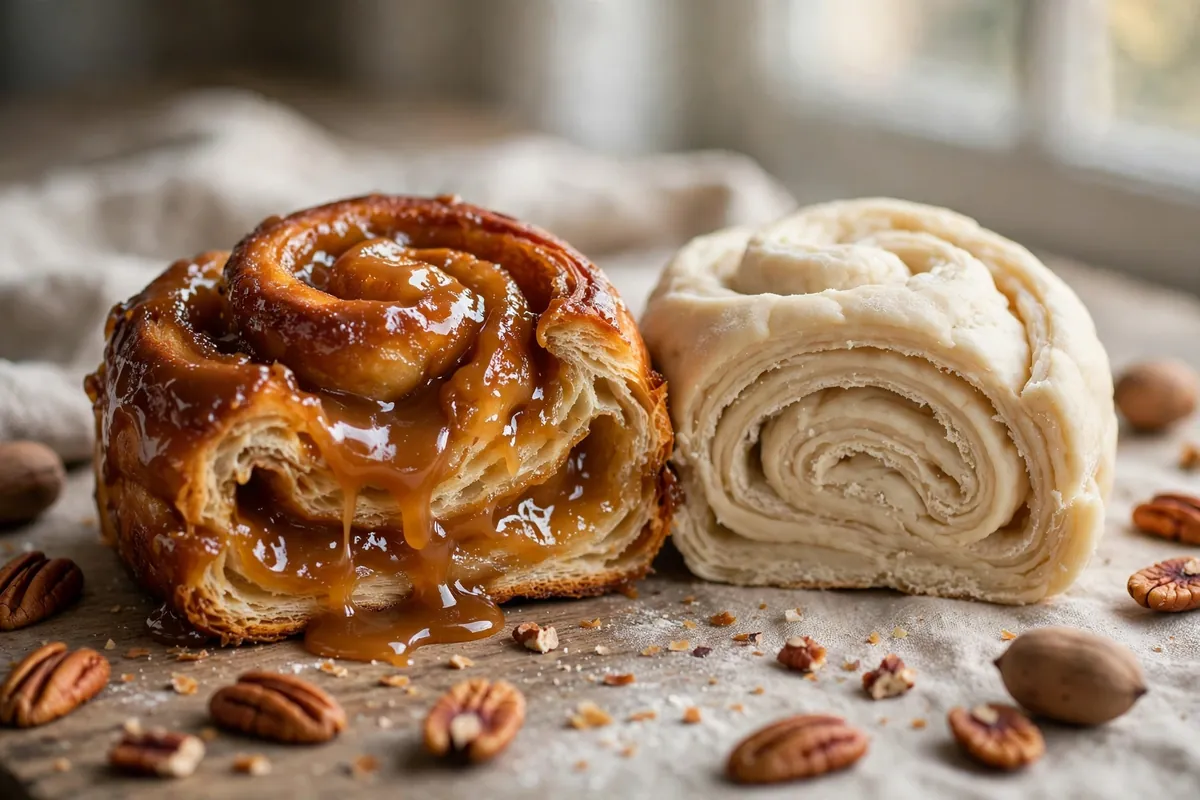
    cross-section of a sticky bun showing the gooey caramel layer versus a raw doughy center comparison
    cross-section of a sticky bun showing the gooey caramel layer versus a raw doughy center comparison
    proofed sticky bun rolls in the pan before baking, spaced with room to expand
    proofed sticky bun rolls in the pan before baking, spaced with room to expand

    Frequently asked questions

    Can I fix burnt sticky buns?
    Partially. Scrape off black, bitter topping — burnt sugar’s acrid flavor can’t be rescued. If just dark, serve as intended; the caramel still shines. Scorched batches become bread pudding: cube, soak in custard, bake.

    What if the caramel hardened in the pan and the buns are stuck?
    Return the pan to a warm 200°F (95°C) oven for 5 minutes to re-melt the sugar, then flip immediately. Never chisel at cold caramel.

    Can I make sticky buns ahead? Overnight?
    Yes. Assemble in the caramel-lined pan, cover, refrigerate overnight (up to 12 hours). In the morning, rest 45–60 minutes at room temperature until puffy, then bake. The cold retard improves flavor. (See Make-Ahead Bread Dough.)

    Why did my sticky buns stick to the pan?
    Three reasons: you didn’t butter the pan before adding the topping, you waited too long to flip, or you used a pan with a damaged nonstick coating. Butter the pan generously, flip within 5 minutes, and the buns release cleanly.

    Is it safe to eat sticky buns with doughy centers?
    Raw flour can carry bacteria — bake until centers reach 190°F (88°C). When in doubt, bake 5 minutes more under foil.

    Can I use a glass pan for sticky buns?
    You can, but drop the oven temperature by 25°F (to 325°F / 165°C) — glass holds heat longer and runs hotter on the bottom, which burns the sugar topping. Light metal is still the best choice.

    Related troubleshooting: Why Did My Cinnamon Rolls Unravel? · Why Didn’t My Bread Rise? · Baking Pan Materials: Which Pan for What

  • Why Did My Croissants Come Out Dense? Lamination Fixes

    Why Did My Croissants Come Out Dense? Lamination Fixes

    You did the folds. You waited through the rests. You shaped those crescents with real hope — and out of the oven came something closer to a dinner roll than a croissant. Dense, bready, no shattering layers, no honeycomb inside. The fix is almost always in the lamination: croissants are an engineering project, and dense crumb means the butter layers stopped being layers somewhere along the way.

    Quick diagnosis: Dense croissants come down to butter temperature more than anything else. Butter that was too cold shattered into shards instead of sheeting into layers; butter that was too warm melted straight into the dough. If your butter cracked and broke during roll-out, start with cause #1. If the dough felt greasy and soft, start with cause #2.

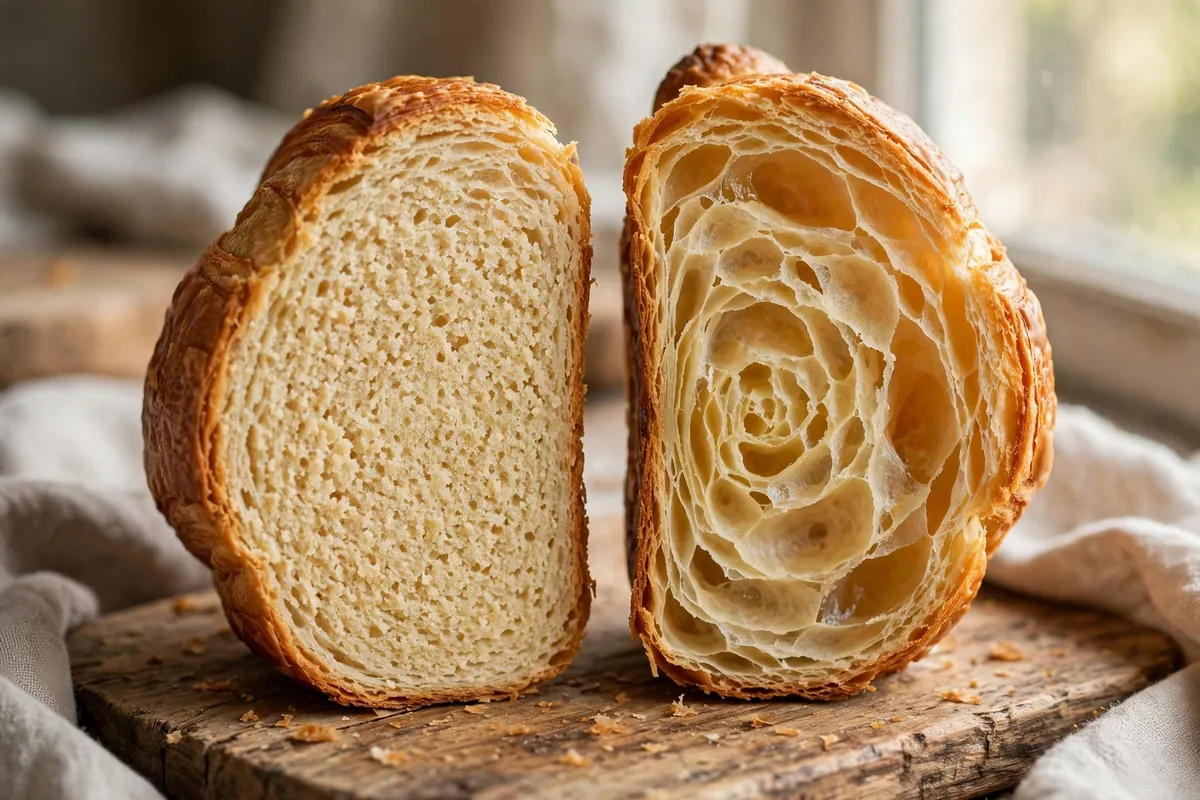
    A croissant is 27 (or more) alternating sheets of dough and butter. In a hot oven, water in the butter flashes to steam and each butter layer pries the dough sheets apart — that’s the flake. Density means those layers merged into one mass before the steam ever got its chance.

    1. The butter was too cold — it shattered instead of sheeting

    This is the number one killer, and it’s counterintuitive: you’d think cold butter is safe butter. But lamination needs the butter to roll out with the dough as one pliable sheet. Butter straight from the fridge (around 38°F / 3°C) is brittle — under the rolling pin it cracks into shards and chunks instead of spreading into a continuous layer. Those shards poke through the dough, the layers never form properly, and you get bready density.

    How to tell: During the lock-in or the folds, you heard cracking, and you could see or feel hard lumps of butter through the dough. The dough surface looked lumpy rather than smooth.

    The fix: Condition the butter block first. Take cold butter, place it between parchment, and beat it with a rolling pin until it’s pliable — it should bend without snapping, around 60°F (16°C), cool to the touch but flexible like modeling clay. It must match the dough’s consistency: if the dough is soft and the butter is a brick (or vice versa), they won’t roll together. Temper the butter block properly and the layer count visibly improves on the very next batch.

    2. The butter melted into the dough — too warm at some stage

    The mirror image. If the butter gets too warm at any point — during a fold, during shaping, during proofing — it melts and absorbs into the dough. Once butterfat soaks into the flour, there are no layers left to separate; you’ve made enriched bread dough, and enriched bread dough bakes up dense. This is the greasy-dough failure.

    How to tell: The dough felt soft, slack, and greasy rather than firm and cool. Butter may have visibly oozed during rolling or proofing. The baked croissants taste rich but have no flake.

    The fix: Keep everything cool between active steps. Rest the dough 30–60 minutes in the fridge between each turn — not the freezer (which sets the outside while the center stays warm), the fridge. If your kitchen is above 75°F (24°C), work in shorter bursts and chill more often. And proof at 75–80°F (24–27°C) max: warmer proofing melts the butter before the oven ever sees it. A proofing box or an oven with just the light on is ideal; a hot summer kitchen is croissant enemy number one.

    3. You skipped (or shortened) the rests — the gluten fought back

    Each fold stretches the gluten network. Roll again immediately and the gluten is still tense — it springs back, resists, and tears instead of extending smoothly. Torn dough means torn layers, and torn layers mean the butter squeezes out through the rips instead of staying in its sheet.

    How to tell: The dough kept shrinking back as you rolled, fought you at every pass, or tore visibly. You may have rolled harder to compensate, which only made it worse.

    The fix: Respect the rests: 30 minutes minimum in the fridge between turns, 60 is better. Three single (letter) folds is the standard home formula — that gives 27 layers, plenty. If the dough resists at any point, stop, wrap, chill 20 minutes, and come back. Patience here is structural, not optional. (The same gluten-tension principle ruins pie crusts — see Pie Crust Shrinking in the Oven.)

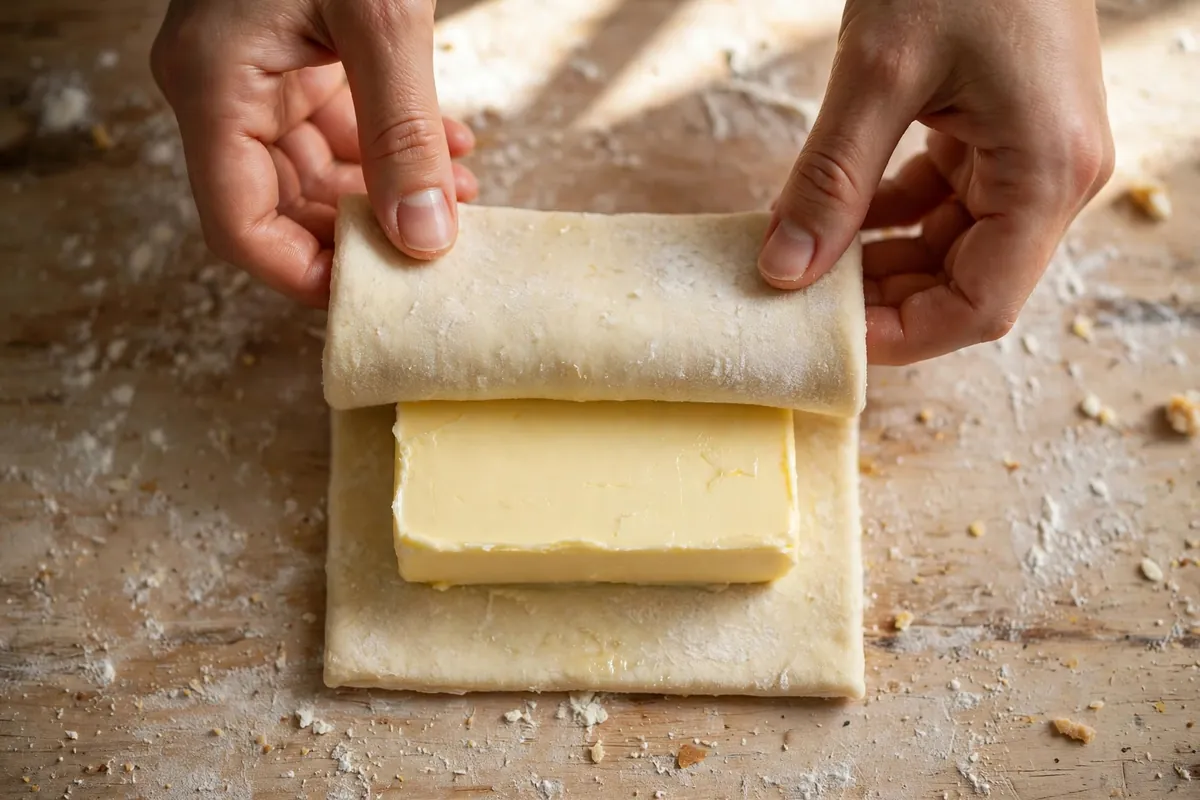
    hands folding dough in a letter fold over a visible butter layer
    hands folding dough in a letter fold over a visible butter layer

    4. Under-proofed — the oven spring never happened

    Croissants need a full final proof: 2–3 hours at 75–80°F (24–27°C), until the layers are visibly separated, the croissant jiggles like jelly when you nudge the tray, and the dough feels airy, not firm. Bake too early and the yeast hasn’t produced enough gas — the crumb sets dense before it ever opens up.

    How to tell: The shaped croissants looked basically the same size going into the oven as when you shaped them. Properly proofed croissants are nearly doubled and the layer lines are visibly puffy and separated.

    The fix: Proof by look and feel, not the clock. The jiggle test is the truth: nudge the baking sheet and the croissant should wobble like set custard. In a cool kitchen this can take 3+ hours — that’s normal. Don’t rush it with extra heat (see cause #2: warm proofing melts butter). If you’re unsure whether they’re ready, give them another 30 minutes; slightly over-proofed beats under-proofed for croissants.

    5. The oven wasn’t hot enough

    Lamination needs a blast of heat: 400–425°F (200–220°C) for the first 10–15 minutes. That initial shock does two things — it sets the outside structure fast, and it flash-converts the butter’s water to steam before the butterfat can melt out. A cool oven gives you slow melt instead of explosive steam: the butter oozes, the layers fuse, density results.

    How to tell: The croissants took longer than expected, browned slowly and evenly rather than puffing dramatically in the first minutes, and butter pooled on the tray.

    The fix: Preheat fully — a full 20 minutes past the beep — and verify with an oven thermometer. Most home ovens run 15–25°F cool. Bake at a true 400°F (200°C) minimum; start at 425°F (220°C) for 10 minutes, then drop to 375°F (190°C) to finish without over-browning. And never open the door in the first 15 minutes: the steam burst is doing the structural work.

    6. Dull cuts sealed the layers shut

    This one hides in plain sight. Croissant triangles must be cut with a sharp blade or pizza wheel. A dull knife drags and compresses the dough’s cut edges, pinching the 27 layers together along the sides. Sealed edges can’t separate — the interior steams, but the sides stay fused, and the crumb reads dense.

    How to tell: The cut edges looked smeared or compressed rather than showing clean alternating stripes of dough and butter.

    The fix: Sharpen up. A pizza wheel is ideal — one firm rolling cut, no sawing. You should see distinct stripes on every cut face.

    7. Too much dusting flour worked into the dough

    A little flour on the bench is necessary; a blizzard of it becomes part of the dough. Every fold picks up the bench flour, and by the third turn you’ve added measurably more flour — drier dough, tougher gluten, tighter crumb. It also dulls flavor.

    How to tell: You floured heavily at every turn and the dough felt progressively drier and stiffer.

    The fix: Flour the bench, not the dough — a whisper, brushed off before each fold. Use a pastry brush to sweep excess off the dough surface. If the dough is sticking, it’s usually too warm (back to cause #2), not under-floured.

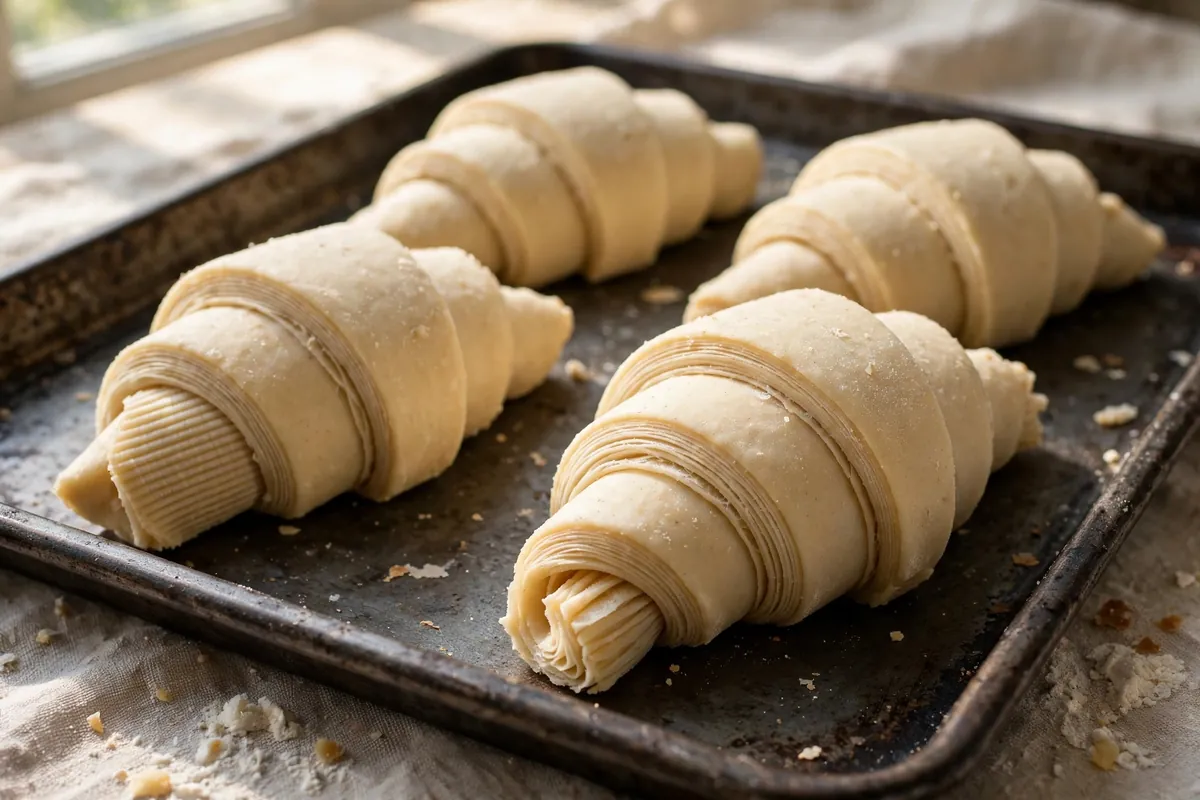
    unbaked croissant triangles on a tray showing visible layer stripes on the cut edges
    unbaked croissant triangles on a tray showing visible layer stripes on the cut edges

    Frequently asked questions

    Can I fix dense croissants after baking?
    Not really — density is structural, set during the bake. But they aren’t wasted: split and toast them, or turn them into bread pudding. Custard soaks into dense crumb beautifully.

    Why is there no honeycomb inside, just solid crumb?
    The layers merged before steaming — butter too warm at some stage (cause #2) or too few distinct layers from shattering (cause #1). No steam separation, no honeycomb.

    Can I use all-purpose flour instead of bread flour for croissants?
    Yes, with a trade-off. Bread flour (12–14% protein) holds layers well; all-purpose (10–12%) gives a more tender, delicate croissant. Either works — don’t use cake flour.

    Is it safe to eat under-proofed croissants?
    Yes — fully baked means fully safe. Under-proofed just means dense.

    How do I know the butter is the right temperature?
    The bend test: it should flex without cracking and feel cool but not hard — about 60°F (16°C). Press a finger in: it should give like firm clay, not shatter like cold butter or smear like soft butter.

    Can I freeze croissants and bake later?
    Yes — freeze after shaping, before proofing. Thaw overnight in the fridge, then proof at room temperature (it’ll take longer, 3–4 hours). Some bakeries do their entire production this way.

    Related troubleshooting: Puff Pastry Not Puffing · Why Is My Bread Dense? · Why Didn’t My Bread Rise?

  • How to Tell When Bread Is Done: Internal Temps and the Thump Test

    How to Tell When Bread Is Done: Internal Temps and the Thump Test

    How to Tell When Bread Is Done: Internal Temps and the Thump Test

    Quick diagnosis: The only sure test is internal temperature — 190–210°F (88–99°C) in the center, measured with an instant-read thermometer. Lean artisan loaves: 200–210°F. Soft sandwich loaves: 190–200°F. No thermometer? Thump the bottom — a deep hollow sound means done; a dull thud means give it more time.

    Every baker has pulled a gorgeous, deeply browned loaf from the oven, sliced it open, and found a gummy, underbaked stripe through the middle. Crust color lies. The outside can look perfect while the inside is still raw — because browning is about surface heat, and doneness is about the center reaching temperature. Here are the tests that don’t lie, in order of reliability.

    1. Internal temperature (the gold standard)

    Nothing beats a thermometer. It’s the one tool that removes all guesswork, and a basic instant-read costs less than two bags of flour.

    The targets:
    – Lean artisan loaves, sourdough, baguettes: 200–210°F (93–99°C)
    – Soft sandwich loaves, brioche, enriched breads: 190–200°F (88–93°C)
    – Rolls and small buns: 190°F (88°C)

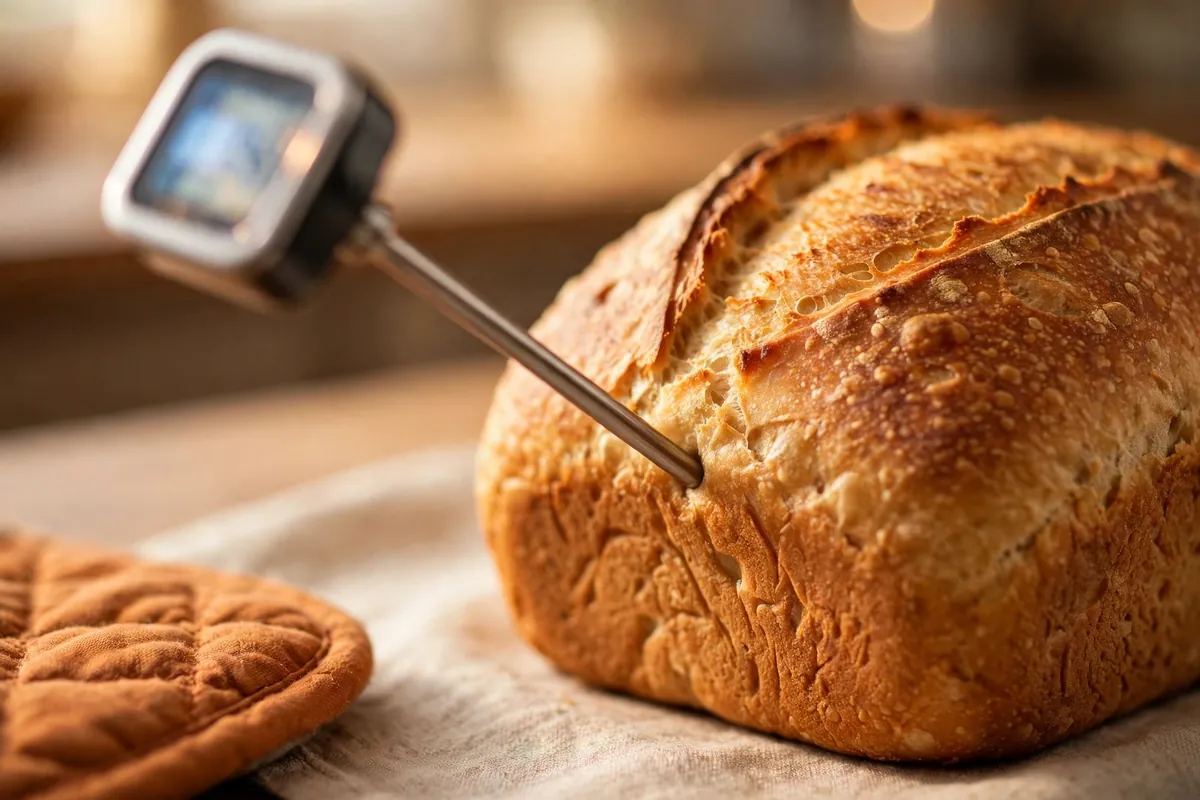
    How to measure: Insert the probe into the center of the loaf through the side or bottom (not the top — the top crust gives a falsely high reading from direct oven heat). Push to the middle of the thickest part. In a pan loaf, go in from the end. Read the number, don’t guess by feel.

    Why the range differs: enriched doughs with eggs, milk, and sugar set at lower temperatures and dry out if pushed to 210°F. Lean doughs need the full 200°F+ for the crumb to set properly — pull a sourdough at 190°F and you’ll find that gummy line.

    Instant-read thermometer inserted into a loaf, display showing about 205°F
    instant-read thermometer inserted into the side of a loaf, display showing ~205°F

    2. The thump test (the classic backup)

    Flip the loaf out of its pan (use oven mitts — it’s 400°F of bread) and thump the bottom firmly with your thumb or knuckles.

    • Deep, hollow drum sound: done. The interior is set and full of air pockets that resonate.
    • Dull, dense thud: not done. The center is still wet and heavy, absorbing the sound instead of echoing it.

    This test is centuries old because it works — but it takes practice to calibrate your ear. Pair it with the thermometer for your first dozen loaves; after that, you’ll trust the thump. One caveat: it works best on crusty, lean loaves. Soft sandwich bread in a pan gives a less distinct sound, so lean on temperature there.

    Baker's hand thumping the bottom of an inverted loaf, knuckles mid-tap
    baker’s hand thumping the bottom of an inverted loaf, knuckles mid-tap

    3. Color and crust cues (supporting evidence, not proof)

    Crust color tells you about the outside. A deeply browned, firm crust on a lean loaf usually correlates with doneness — but “usually” has burned many bakers, because ovens brown at different rates. Dark pans, hot spots, and high sugar all brown crusts early.

    Use color as a gate, not a verdict: if the crust is still pale, it’s definitely not done. If it’s deeply browned, it might be done — confirm with temperature or thump. For enriched breads, tent with foil if the top is browning faster than the center is baking (a common issue — see Cake Domed and Cracked on Top for the same principle in cakes).

    4. Weight and feel

    A finished loaf feels lighter than you’d expect — a surprising amount of water (often 10–15% of the dough’s weight) bakes off as steam. Pick up the loaf: if it feels unexpectedly light for its size, that’s a good sign. If it feels dense and heavy, the interior is still wet.

    The sides matter too: on a pan loaf, the sides should be firm and pull slightly away from the pan. If the sides look pale and feel soft when you peek, the loaf needs more time regardless of what the top looks like.

    5. The skewer test (for when there’s no thermometer)

    In a pinch, a wooden skewer or thin knife works like a cake tester: push it into the center and pull it out. It should come out clean or with dry crumbs — no wet dough clinging. It’s less precise than a thermometer (a skewer can’t tell 195°F from 205°F), but it catches the obvious underbaked loaf.

    Don’t use the toothpick logic from cakes here — bread is denser, and a few moist crumbs on a bread skewer are fine. You’re checking for wet, gummy residue, not perfect cleanliness.

    What underbaked bread looks like inside

    Know the enemy. Slice into a cooled loaf and look for:

    • The gummy line: a dense, translucent stripe through the center or just under the top crust. This is underbaked crumb — starches that never fully set. It’s the #1 sign of a loaf pulled too early (and it’s closely related to the gumminess in sourdough cut too soon).
    • A wet, shiny interior that looks almost raw. Needs 10–15 more minutes.
    • Collapse after cooling: the loaf looked fine out of the oven but sank as it cooled. The structure wasn’t set — the steam escaped and the crumb couldn’t hold itself up.

    If you catch it within 10 minutes of pulling the loaf, you can often save it: put it back in the oven directly on the rack (out of the pan) for 10–15 minutes. Past that window, the structure has set wrong and re-baking won’t fix it.

    The step everyone skips: cooling

    Bread isn’t done when it leaves the oven. It’s done when it’s cool. The interior continues cooking from residual heat (carryover), and — critically — the starches need time to set. Slice a loaf hot and the crumb compresses into gumminess under the knife; the same loaf sliced after 2 hours has a perfect open crumb.

    The rule: cool lean artisan loaves at least 2 hours on a wire rack before slicing. Sandwich loaves: 1 hour minimum. The rack matters — a loaf cooling on a solid counter traps steam underneath and sogs the bottom crust (the same enemy as soggy-bottom pie).

    Yes, the smell is torture. No, you may not cut it early. (Fine — cut one heel slice. Everyone does.)

    Cross-section of a perfectly baked loaf next to one with a gummy underbaked line
    cross-section of a perfectly baked loaf next to one with a gummy underbaked line, labeled

    Frequently asked questions

    What temperature should bread be when done?
    200–210°F (93–99°C) internal for lean artisan loaves and sourdough; 190–200°F (88–93°C) for soft sandwich loaves and enriched breads. Measure in the center through the side or bottom with an instant-read thermometer.

    How can you tell bread is done without a thermometer?
    Thump the bottom of the loaf — a deep hollow sound means done, a dull thud means it needs more time. Combine with visual cues: deeply browned crust, firm sides pulling from the pan, and a loaf that feels light for its size.

    Can you put underbaked bread back in the oven?
    Yes, if you catch it within about 10 minutes. Return it directly on the oven rack (out of the pan) for 10–15 minutes. Much later than that, the crumb structure has set incorrectly and re-baking won’t fix the gummy texture.

    Why is my bread gummy inside even though the crust is brown?
    The crust browns from surface heat while the center lags behind — especially in hot ovens, dark pans, or high-sugar doughs. The fix is temperature, not color: verify 200–210°F internal for lean loaves, and tent with foil if the crust is racing ahead.

    How long should bread cool before slicing?
    At least 2 hours for lean artisan loaves, 1 hour for sandwich loaves, always on a wire rack. Slicing hot compresses the unset crumb into gumminess. The bread is still cooking from residual heat during the first part of cooling.

    Does bread continue cooking after leaving the oven?
    Yes — carryover cooking continues for 15–30 minutes as internal heat evens out, and starches firm up as the loaf cools to room temperature. This is why a loaf that reads 205°F at pull-out is perfect, not underdone.

    Related troubleshooting: Why Is My Sourdough Gummy Inside? · Bread Crust Too Hard or Too Soft · Why Didn’t My Bread Rise?

  • Bread Crust Too Hard (or Too Soft)? How to Control It

    Bread Crust Too Hard (or Too Soft)? How to Control It

    Bread Crust Too Hard (or Too Soft)? How to Control It

    Quick diagnosis: Crust texture is controlled by four variables: dough formula (lean vs enriched), steam, oven heat, and cooling. Too hard? You likely baked a lean dough hot with steam and cooled it uncovered — the artisan formula. Too soft? Your dough probably contains fat, sugar, or dairy, or the loaf cooled covered/trapped in steam. Identify which side you’re on below, then adjust the matching variables.

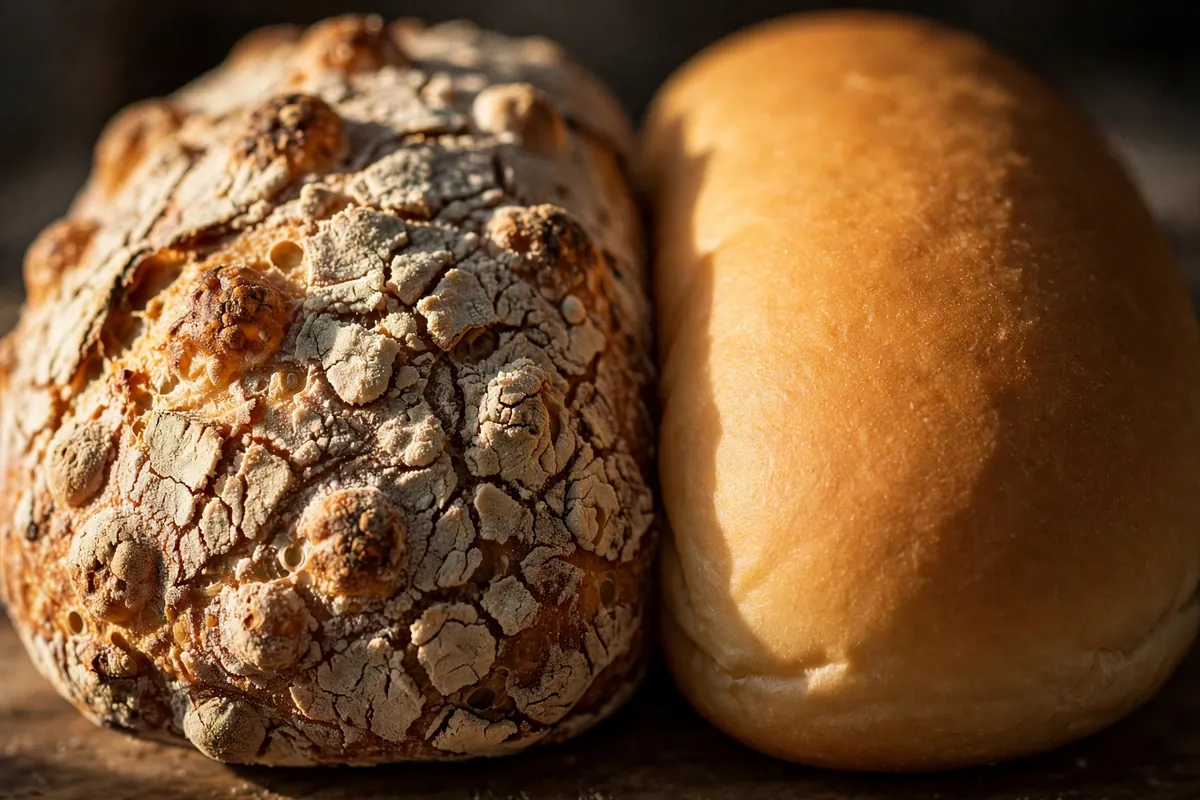
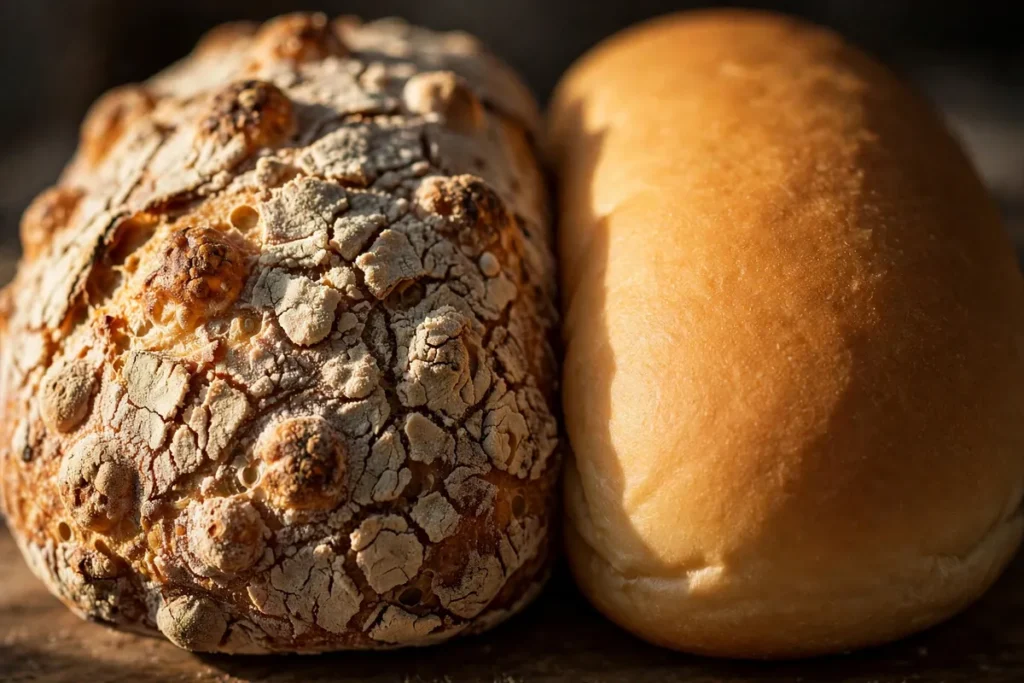
    Blistered artisan bread crust beside smooth soft crust, close-up
    close-up of a crackled, blistered artisan crust next to a soft, smooth sandwich-loaf crust

    Crust isn’t luck — it’s physics and formula. Once you understand the four levers, you can produce a shattering baguette crust or a pillowy sandwich crust on demand, from the same basic dough with small adjustments. Once these variables are mapped, “crust roulette” ends permanently.

    The four levers of crust texture

    1. Formula: lean vs enriched. Lean doughs (flour, water, salt, yeast — baguettes, sourdough, ciabatta) bake into crisp, crackly crusts. Enriched doughs (with fat, sugar, eggs, or dairy — brioche, sandwich bread, dinner rolls) bake into soft, tender crusts, because fat and sugar interfere with crust formation and keep it pliable.

    2. Steam. Steam in the first 10–15 minutes of baking keeps the crust surface moist and elastic while the loaf expands, then it needs to vent off so the crust can dry and crisp. Steam = thinner, crisper crust. No steam = thicker, chewier, often harder crust.

    3. Oven heat and bake length. Hotter ovens and longer bakes drive more moisture out of the crust — crisper and harder. Cooler, shorter bakes leave more moisture — softer.

    4. Cooling and storage. A loaf cooled uncovered on a rack keeps its crisp crust. A loaf covered while warm, or stored in plastic, traps steam and softens the crust within hours.

    If your crust is too hard

    A crust that’s jaw-breakingly hard (rather than pleasantly crisp) usually means one of these:

    The bake was too hot or too long for the formula. Dark, thick, hard crust on what should be a soft loaf? Drop the temperature 15–25°F and pull the loaf when the internal temp hits 190–200°F (88–93°C) rather than baking by color alone. Enriched loaves are done at lower internal temps than lean ones.

    No enrichment in a soft-crust recipe. If your sandwich bread crust could break teeth, add tenderness: brush the dough with milk before baking, or enrich the formula slightly — even 2–3% butter or oil (by flour weight) noticeably softens crust.

    It cooled uncovered for too long. For soft-crust breads, cover the loaf with a clean kitchen towel as soon as it comes out of the oven. The trapped residual steam softens the crust as it cools — this single step transforms sandwich bread.

    The fix that always works for soft crust: brush the hot loaf with melted butter the moment it leaves the oven, then cover with a towel until cool. Buttery, soft, golden — every time.

    Brushing melted butter over a hot loaf
    brushing melted butter over a hot sandwich loaf, towel ready beside it

    If your crust is too soft (and you wanted crisp)

    A flabby, soft crust on what should be crackly artisan bread means moisture never left the party:

    Not enough initial heat. Crust crispness starts with a fully preheated oven — a full 30–45 minutes for artisan loaves, longer with a baking stone or steel. An under-preheated oven gives a pale, soft, thick crust. Use an oven thermometer; most home ovens run 25–50°F cool.

    No steam. For lean artisan loaves, steam is non-negotiable: bake in a covered Dutch oven for the first 20 minutes, or add a tray of boiling water to the oven floor (and spritz the loaf). Then uncover/vent for the final 15–25 minutes so the crust dries and sets crisp.

    Under-baking. A crust that’s merely golden is often still moisture-laden. Artisan loaves should bake to a deep mahogany — darker than feels safe. That deep color is caramelized, dehydrated crust: the crispness itself. Verify 200–210°F (93–99°C) internal temp so you can bake boldly without fear.

    Cooled or stored wrong. Cool artisan bread uncovered on a wire rack — never wrapped, never in plastic. Store cut-side down on a board or in a paper bag for day one. Plastic bags are crust killers: within hours, migrating moisture turns crackle to chew.

    Steam bursting as a Dutch oven lid is lifted
    steam escaping as a Dutch oven lid is lifted mid-bake

    The cooling rules (memorize these)

    • Want crisp? Rack, uncovered, room air. Slice only after 1–2 hours.
    • Want soft? Towel over the loaf (or butter-brush + towel) until fully cool.
    • Day-two crisp revival: 5–10 minutes in a 350°F (175°C) oven re-crisp any softened artisan loaf. Spritz lightly with water first for extra crackle.
    • Never refrigerate bread (unless it’s a rich dough) — cold accelerates staling and ruins crust texture faster than anything except plastic wrap.

    Frequently asked questions

    Why did my crust go soft overnight?
    Moisture migration. Water moves from the moist crumb into the dry crust until they equalize — physics, not failure. Store artisan loaves cut-side down or in paper (never plastic) and re-crisp in a hot oven before serving.

    How do I get a shiny crust?
    Egg wash (one egg beaten with a tablespoon of water or milk), brushed on before baking, gives a deep glossy brown. For shine without richness, a cornstarch glaze — 1 teaspoon cornstarch boiled in ½ cup water, brushed on hot out of the oven — gives a bakery-window gleam.

    Why is my baguette crust chewy instead of crisp?
    Almost always insufficient steam or heat. Baguettes need a ripping-hot oven (475°F / 245°C), real steam for the first 10 minutes, and a bake dark enough to fully dehydrate the crust. A pale baguette is a chewy baguette.

    Can I soften an already-baked hard crust?
    Somewhat. Wrap the loaf in a barely damp towel for 20–30 minutes, or warm it in a 300°F (150°C) oven wrapped in foil. It won’t become pillowy, but it takes the weapon-edge off. Next time, use the butter-and-towel method from the start.

    Does scoring affect the crust?
    Indirectly, yes. Proper scoring lets the loaf expand fully in the oven’s first minutes, which gives an even, thin crust. An unscored or poorly scored loaf bursts unpredictably, creating thick, hard ridges where it tore. Score ¼-inch deep at a shallow angle just before baking.

    Related troubleshooting: Why Is My Bread Dense? · Why Didn’t My Bread Rise? · Why Is My Sourdough Gummy Inside?