Author: Ali Ramzan

  • Why Is My Stollen Dry? (Moist Fruit Bread Fixes)

    Why Is My Stollen Dry? (Moist Fruit Bread Fixes)

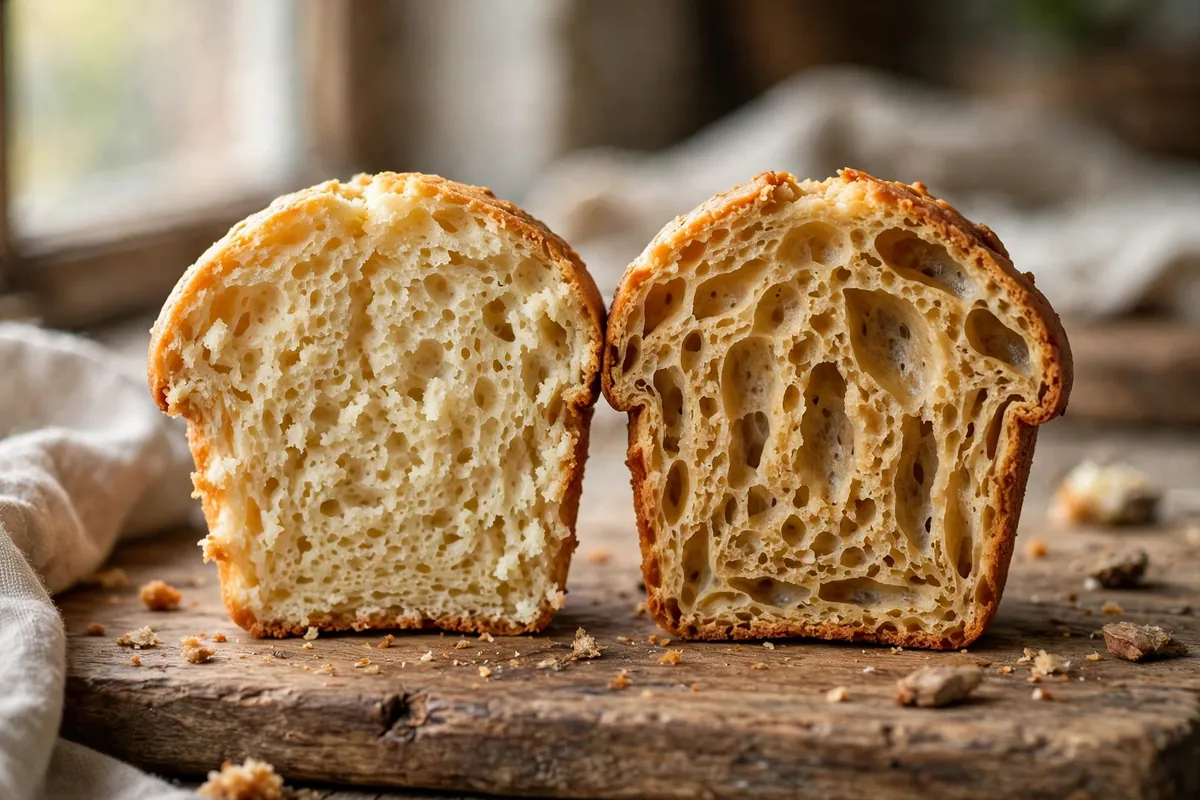
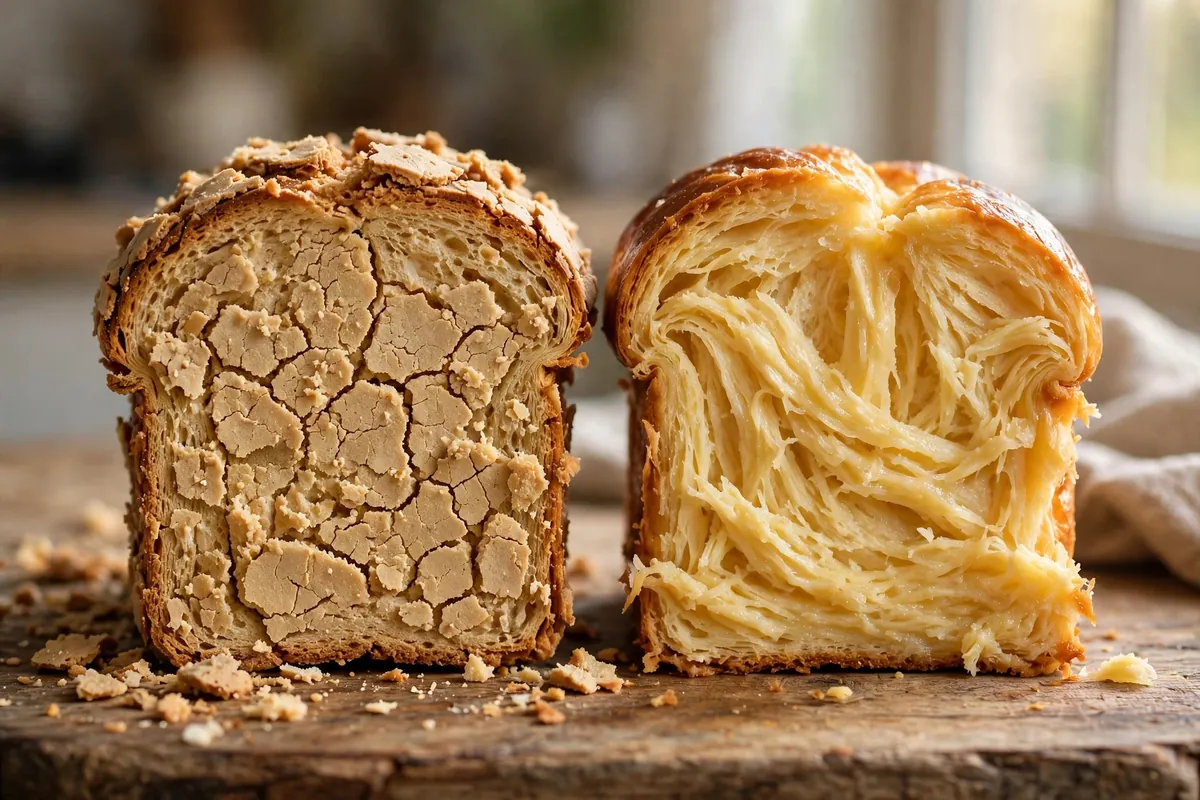
    Dry stollen is almost always a moisture-theft problem, not a recipe problem. Unsoaked dried fruit pulls water out of the crumb as it bakes, overbaking drives off what little moisture an enriched dough holds, and skipping the traditional butter-and-sugar seal lets the loaf stale in days instead of improving over weeks. Get those three right and stollen practically takes care of itself.

    Quick diagnosis: Your dried fruit wasn’t soaked (it stole moisture from the crumb — most common), you overbaked it, or you skipped the melted-butter brush and tight wrapping that keeps stollen moist for weeks. Fix next time: soak fruit 12–24 hours, bake to 190°F (88°C) internal, brush with butter and wrap airtight while warm.

    My tested baseline: 500g bread flour, 75g sugar, 2¼ tsp instant yeast, 1 tsp salt, 200g soft butter, 2 eggs, 150ml warm milk; 300g mixed dried fruit soaked overnight in 100ml dark rum; 200g marzipan log in the center. Baked at 350°F (175°C) for 55 minutes to 190°F (88°C) internal, brushed with 60g melted butter, rolled in sugar, wrapped in plastic then foil, aged 10 days.

    1. The fruit wasn’t soaked — it drank your crumb’s moisture

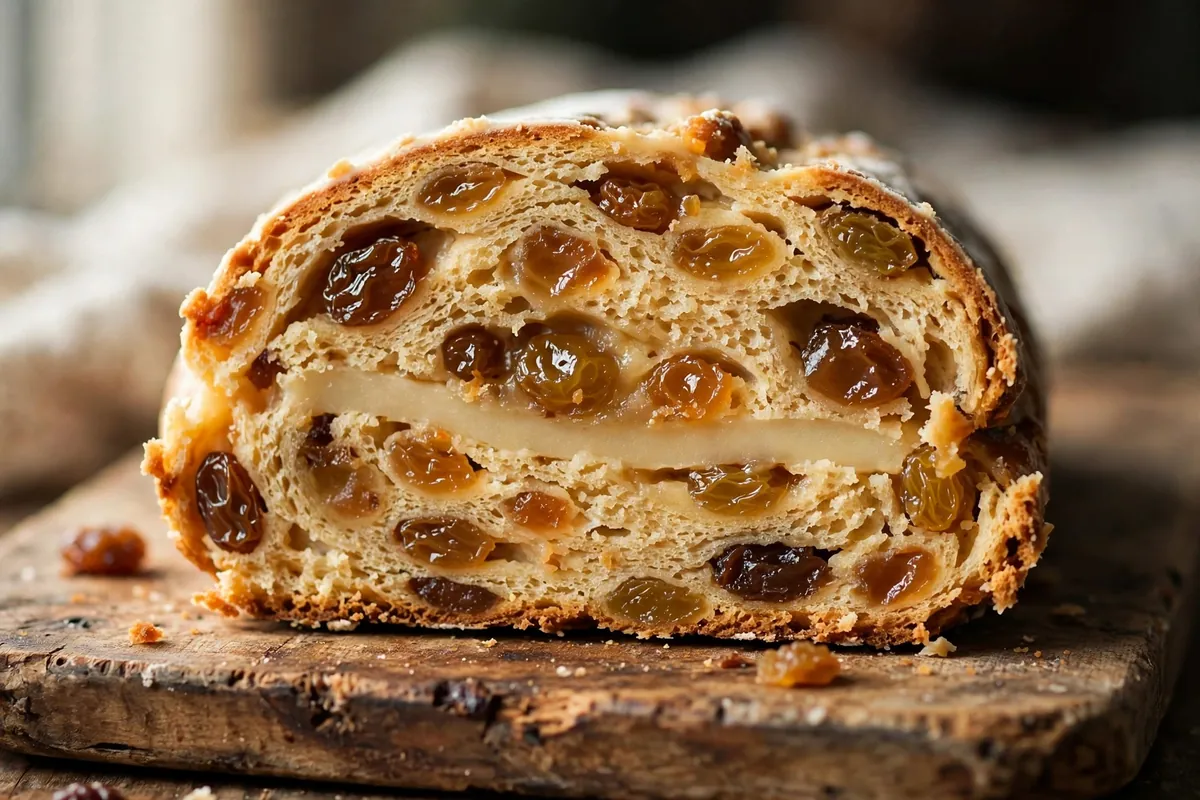
    This is the number-one cause of dry stollen. Dried fruit is hygroscopic: unsoaked raisins spend the entire bake pulling water out of the surrounding crumb. You end up with plump fruit embedded in dry bread — exactly backwards.

    How to tell: The fruit looks plump and glossy but the crumb around it is dry and crumbly; you added the fruit straight from the bag.

    The fix: Soak the fruit 12–24 hours in rum, brandy, or orange juice. Drain well and toss in a spoonful of flour before folding in so pieces don’t sink. Properly soaked fruit gives moisture back to the crumb instead of stealing it.

    2. You overbaked it — enriched doughs dry out fast past 190°F

    Stollen is a dense, heavy loaf, and dense loaves lie: the outside looks done long before the center finishes, so bakers leave it in “to be safe” — and overshoot. Past 190°F (88°C) internal, the crumb tightens and squeezes out moisture with every extra degree.

    How to tell: The crust is thick and deeply browned; the crumb is dry all the way through; the thermometer read over 195°F (91°C), or you baked purely by time.

    The fix: Bake at 350°F (175°C), checking from 45 minutes. Pull at 190°F (88°C) internal, thermometer in the center avoiding the marzipan. Tent with foil after 30 minutes if the top colors fast. Trust the thermometer over the clock — same rule as telling when bread is done.

    3. You skipped the butter seal — stollen’s moisture lock

    The melted-butter brush and sugar coating aren’t decoration — they’re engineering. Brushing the hot loaf with 50–60g of melted butter and rolling it in sugar creates a fat-and-sugar barrier that locks moisture in during the aging weeks. Skip it and the loaf stales in days.

    How to tell: The surface is dry and matte rather than buttery; delicious on day one, stale by day three.

    The fix: While the loaf is still warm, brush generously with the full 50–60g of melted butter, then roll thickly in granulated sugar (plus powdered sugar once cool). Non-negotiable for stollen that keeps.
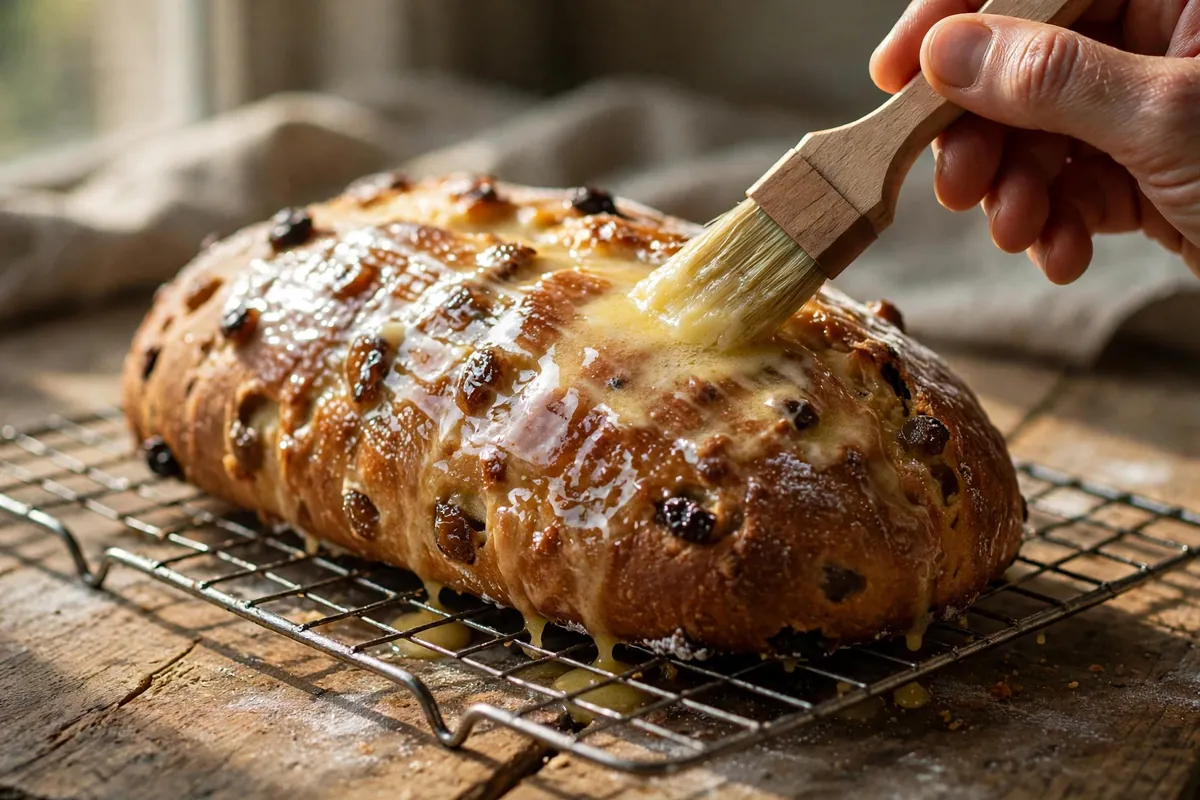
    hands brushing a warm stollen loaf generously with melted butter before sugaring
    hands brushing a warm stollen loaf generously with melted butter before sugaring

    4. It wasn’t wrapped tightly — air is stollen’s enemy

    Stollen is designed to age: wrapped airtight, moisture redistributes, flavors meld, and texture improves over 1–3 weeks. Loosely covered, it just stales.

    How to tell: It dried from the outside in; cut surfaces went leathery; it was stored in a bread bag or loosely in foil.

    The fix: Once fully cool, wrap in two tight layers of plastic wrap pressed against the surface, then foil. Store at cool room temperature — never the fridge, which accelerates staling. Slice only what you’ll eat and rewrap immediately. See How to Store Homemade Bread So It Stays Fresh for Days for the general principles.

    5. The dough was under-enriched — stollen needs its butter

    Enrichment is moisture insurance: fat coats flour proteins, shortens gluten strands, and keeps the crumb tender for weeks. A stollen with too little butter has no such insurance and dries out regardless of technique.

    How to tell: The crumb is bready and lean rather than rich and tender; the recipe used well under the classic 180–200g butter per 500g flour.

    The fix: Don’t skimp on the butter. Use bread flour for structure (the long aging needs it) and knead well — a developed dough holds the heavy fruit load without tearing. Same enriched-dough logic as brioche that stays moist.

    6. The marzipan dried out — seal it inside

    The marzipan log is a moisture reservoir in the loaf’s center — but exposed at the ends, or dry and cracked going in, it contributes nothing and can wick moisture out.

    How to tell: Marzipan visible at the cut ends looks dry or cracked; the center around it is the driest part.

    The fix: Knead the marzipan until pliable, roll a smooth log slightly shorter than the dough, and seal the dough completely around it — pinch the ends shut. Old, stiff marzipan? Knead in a few drops of almond extract or rum first.

    Can you fix dry stollen after the fact?

    Partially. Warm the slices — 10 seconds in the microwave or a quick toast — and serve with good butter; heat plus fat masks most dryness. For a whole dry loaf, brush cut surfaces with warm rum syrup, rewrap tightly, and rest overnight. The real rescue is strategic: slice it, toast it, and make French toast or bread pudding — added custard solves dryness completely, and stollen makes an extraordinary base for both.
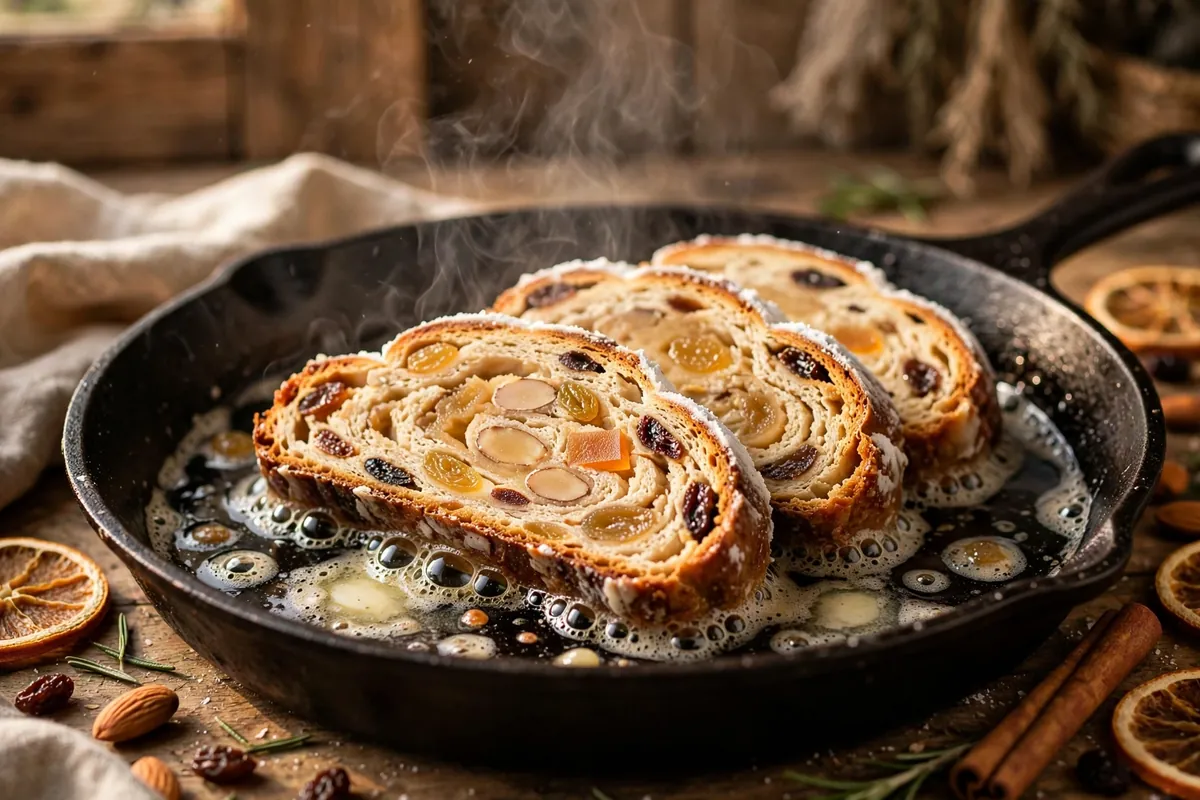
    thick slices of stollen toasting in a pan with melting butter, edges turning golden
    thick slices of stollen toasting in a pan with melting butter, edges turning golden

    FAQ

    Is dry stollen safe to eat?
    Yes — dryness is a texture issue, not a safety one. If it was stored reasonably and shows no mold, it’s fine — and excellent toasted or repurposed into bread pudding.

    How long does stollen last?
    Butter-sealed and tightly wrapped: 3–4 weeks at cool room temperature, improving over the first two. Once sliced, rewrap and eat within a week.

    Should stollen be refrigerated?
    No. Refrigeration speeds up starch retrogradation — bread stales faster in the fridge than at room temperature. Cool room temp, airtight wrapping, done.

    Can I make stollen ahead for Christmas?
    That’s the traditional way — bake 2–3 weeks ahead and let it age wrapped. The flavor deepens and the crumb evens out. Just don’t slice in early “to check.”

    Why did my stollen crack on top?
    The dough rose faster than the heavy, fruit-laden structure could stretch, or the oven was too hot initially. Slash the top before baking to give it a controlled place to expand.

    Can I freeze stollen?
    Yes — plastic plus foil, up to 3 months. Thaw wrapped at room temperature overnight. Do the butter-and-sugar coating before freezing; refresh with powdered sugar after thawing.

    Related troubleshooting: Why Did My Brioche Come Out Dry? Enriched Dough Fixes · Hot Cross Buns Troubleshooting: Dense, Pale, Vanishing Crosses · How to Store Homemade Bread So It Stays Fresh for Days
  • Why Did My Palmiers Unfurl? Puff Pastry Shaping Fixes

    Why Did My Palmiers Unfurl? Puff Pastry Shaping Fixes

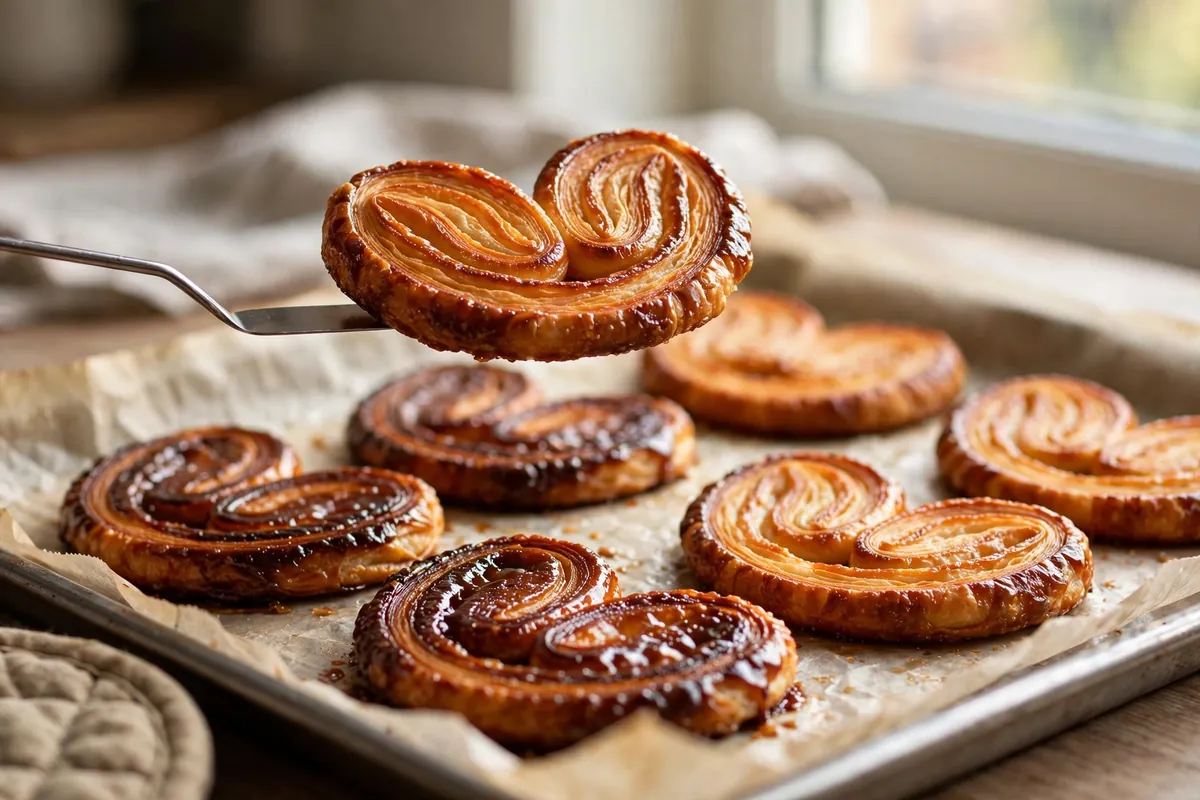
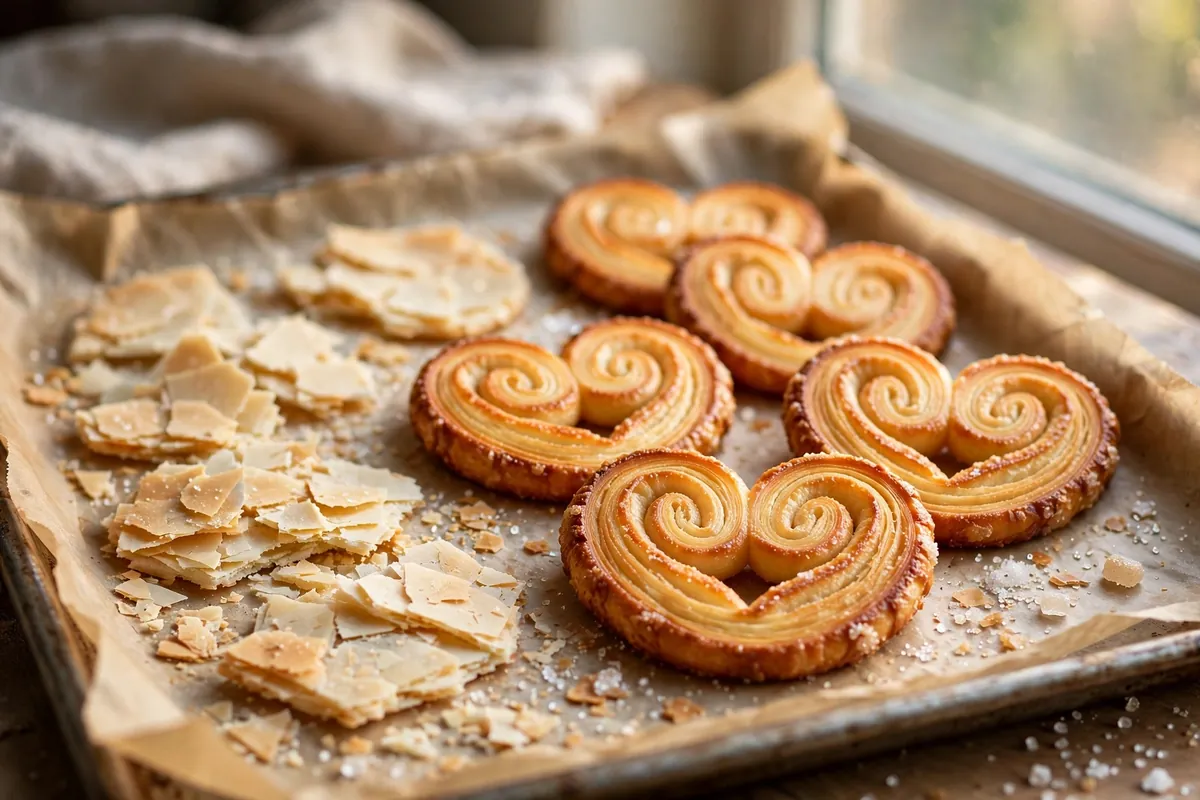
    Palmiers look like the simplest pastry on earth — puff pastry, sugar, a double roll, a slice — and they punish casual shaping like nothing else in the pastry case. When the scrolls open in the oven, you get flat sugary shards instead of crisp caramelized hearts. Unfurling always comes down to the same physics: the butter melted before the steam could set the shape. Every fix below is about winning that race.

    Quick diagnosis: They went into the oven too warm — soft butter melts and releases the folds before steam puffs them into shape. Chill the shaped log 30 minutes (or sliced palmiers 20 minutes), roll both sides tightly to the center, press the seam, and bake hot at 400–425°F (200–220°C).

    My tested baseline: 1 sheet all-butter puff pastry (about 250g), thawed just until pliable but still cold. 100g granulated sugar on the work surface and over the pastry. Fold each long edge to the center, then fold the folded edges together like closing a book — the classic double scroll. Wrap and chill 30 minutes, slice ½-inch thick, press cut faces in sugar, bake at 400°F (200°C) for 12–15 minutes, flipping halfway.

    1. You skipped the chill — warm butter melts before steam sets the shape

    The master cause. Palmiers only survive if the butter layers are cold and firm hitting the oven: cold butter + hot oven = violent steam that puffs the layers rigid in seconds. Warm butter simply melts, the layers slide apart, and the scroll relaxes open before anything sets. Room-temperature shaping in a warm kitchen is enough to cause it.

    How to tell: Palmiers spread wide and flat within minutes; butter pooled on the tray; no puffing, just melting.

    The fix: Chill twice. After rolling, wrap the log tightly and refrigerate 30 minutes until firm. After slicing, chill the cut palmiers on the tray another 15–20 minutes (or freeze 10). They should go in cold to the touch. In a warm kitchen, work fast and return the log to the fridge between steps. (Same temperature race as Puff Pastry Not Puffing: Lamination Mistakes to Avoid.)

    2. Your folds were loose — a slack scroll has nothing to hold

    Palmiers need tension: each side rolls to the center and the two rolls press against each other, and that compression holds the shape while the butter is soft. Loosely rolled palmiers have no internal pressure — the moment the butter softens, the scroll springs open like a released coil.

    How to tell: The log felt soft and springy, not firm and compact; cross-sections show gaps between layers; slices looked like loose spirals, not tight scrolls.

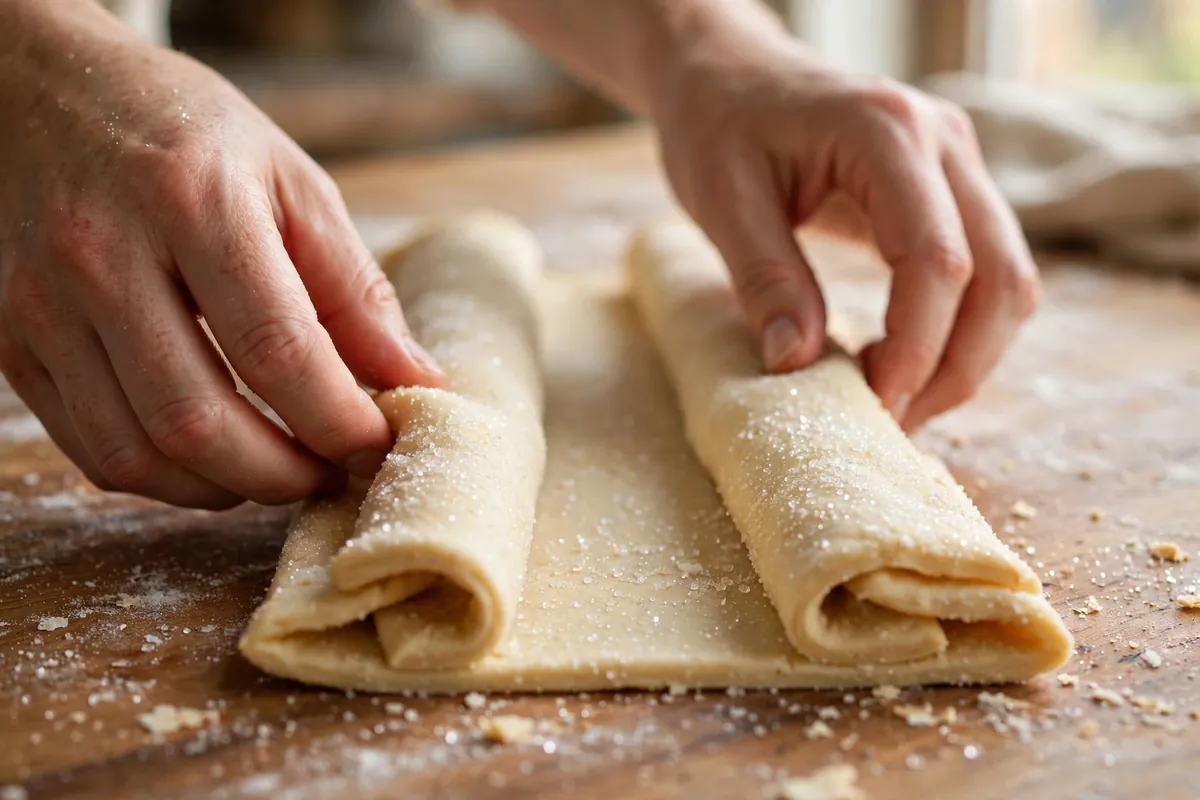
    The fix: Roll firmly, pressing down slightly, and pack each side hard against the center — the two rolls should touch with no gap. After the final book-fold, press the log flat with your palms and roll once with the pin to seal. Slice with a sharp knife in one decisive cut; sawing drags the layers apart. Tight in, tight out.

    3. The sugar had nothing to grip — wrong sugar, or none pressed in

    Sugar is flavor and glue. Pressed into the dough, granulated crystals anchor the outer layers and caramelize into a crisp shell that locks the shape. Coarse or pearl sugar rolls off instead of embedding, and a bare surface gives the outer layer nothing to hold as it bakes.

    How to tell: Sugar scattered loose on the tray rather than fused to the pastry; pale soft exteriors instead of crisp caramelized ones.

    The fix: Plain granulated sugar — the right crystal size to embed. Scatter generously on the work surface before rolling, and press each cut face firmly into a plate of sugar before traying. That sugared face caramelizes first, like edible scaffolding. (Sugar’s structural role in laminated pastry: Kouign-Amann Troubleshooting: Leaked Butter and Burnt Sugar, Fixed.)

    hands rolling both sides of a sugar-covered puff pastry rectangle tightly toward the center
    hands rolling both sides of a sugar-covered puff pastry rectangle tightly toward the center

    4. The oven wasn’t hot enough — slow heat melts, fast heat sets

    Puff pastry needs a blast: at 400–425°F (200–220°C), water in the dough and butter flashes to steam instantly, puffing layers rigid before the butter fully melts. At 350°F (175°C), the butter melts first, layers never separate, and scrolls relax into greasy puddles. An underheated oven is the quiet accomplice to every other mistake.

    How to tell: Palmiers spread and stayed flat with no layering; pale after the full bake time; greasy rather than crisp.

    The fix: Verify a true 400°F (200°C) — 425°F (220°C) if your oven runs cool. Preheat fully, at least 15 minutes past the “ready” beep. Middle rack, light-colored tray; dark trays over-brown sugared bottoms before tops crisp. Don’t open the door for the first 8 minutes — the initial steam blast does the structural work.

    5. You sliced them wrong — thickness controls the outcome

    Too thin (¼ inch): not enough structure, they over-brown and shatter. Too thick (¾ inch+): the center stays raw while sugar burns, the uncooked middle can’t support the shape, and the palmier slumps open cooling. Half an inch is the sweet spot for a reason.

    How to tell: Thin slices burned at the edges while flat; thick slices with doughy pale centers that collapsed after baking.

    The fix: Chill the log firm, then slice exactly ½-inch thick — mark the log lightly first if your eye isn’t calibrated. Even slices bake evenly, and even baking keeps every palmier holding the same shape. Ragged, uneven slices reliably predict a mixed batch: some perfect, some flat.

    6. You didn’t flip them — one-sided caramelization unbalances the bake

    Palmiers bake in a pool of caramelizing sugar; the bottom browns far faster than the top. Without a flip, the bottom over-caramelizes and can stick while the top stays pale and soft — a lopsided palmier that flexes and opens as it cools.

    How to tell: Deep brown, almost bitter bottoms with pale soft tops; palmiers stuck to the tray.

    The fix: At the halfway mark (6–7 minutes), flip each with a thin spatula. The second side caramelizes in the remaining time for the signature even amber crunch on both faces. Work quickly and close the door — you’re borrowing heat, not donating it. Parchment under everything; caramelized sugar welds to bare metal.

    a spatula flipping caramelized palmiers halfway through baking, both sides golden
    a spatula flipping caramelized palmiers halfway through baking, both sides golden

    Frequently asked questions

    Are unfurled palmiers safe to eat?
    Yes — they’re just flat. The flavor is identical: buttery, caramelized, crisp. Serve the shards as-is; nobody will know they were supposed to be hearts unless you tell them.

    Can I fix palmiers that already unfurled?
    Not the shape — once baked, the structure is set. But the shards are excellent crushed over ice cream, folded into whipped cream, or layered into a trifle. Waste nothing.

    Can I use store-bought puff pastry?
    Yes — most palmiers are made with it. All-butter pastry gives the best flavor and most reliable puff; oil-based pastry melts faster and unfurls more easily, so chill it extra well. Keep it cold until you unroll it.

    Why are my palmiers burnt on the bottom?
    Sugar + direct heat + dark tray. Light-colored sheet, always parchment, flip halfway. If your oven runs hot underneath, use the upper-middle rack. Pale gold is the target, not dark brown — burnt sugar tastes bitter.

    Can I freeze shaped palmiers?
    Yes — freeze sliced and sugared on a tray, then bag. Bake from frozen at 400°F (200°C), adding 2–3 minutes. They hold shape beautifully from frozen, going in at maximum cold.

    Related troubleshooting: Puff Pastry Not Puffing: Lamination Mistakes to Avoid · Why Did My Rugelach Unravel? Cream Cheese Dough Fixes · Kouign-Amann Troubleshooting: Leaked Butter and Burnt Sugar, Fixed

  • How to Fix Grainy Fudge (Sugar Crystallization Science)

    How to Fix Grainy Fudge (Sugar Crystallization Science)

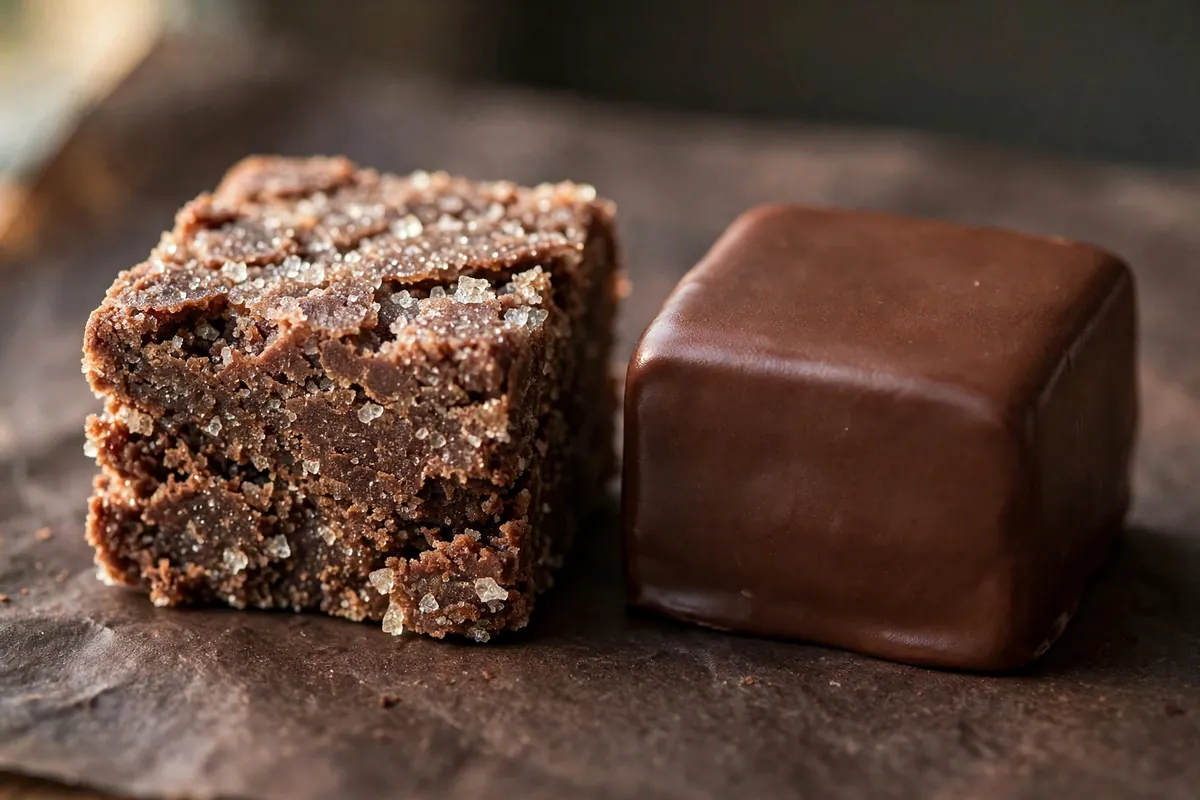
    Grainy fudge is one of the most fixable failures in candy making — and one of the most misunderstood. That sandy texture isn’t bad chocolate or a bad recipe. It’s sugar chemistry: your sucrose formed crystals too large, and large crystals feel gritty while tiny ones feel smooth. The entire game of fudge is controlling when and how big those crystals grow.

    Quick diagnosis: Grainy fudge is a crystallization-timing problem: you almost certainly stirred the syrup while it cooled (cause #1) or cooked it to the wrong temperature (cause #2). The good news: grainy fudge can be fully rescued by reheating and redoing it correctly.

    The 30-second science

    Fudge is a supersaturated sugar solution — more sugar dissolved than the water can comfortably hold at room temperature. As it cools, the sugar wants to crystallize. Your job is to force millions of microscopic crystals (smooth) instead of a few large ones (grainy). Two levers control this: temperature (sets the sugar-to-water ratio) and agitation timing (decides when crystallization starts).

    1. You stirred it while it cooled — the classic mistake

    Cause #1 by a wide margin. Once fudge syrup comes off the heat, it must cool completely undisturbed — no stirring, no scraping the pan, no jiggling the thermometer — down to about 110°F (43°C). Stirring hot supersaturated syrup seeds crystallization early, and early crystals grow large in the warm, mobile syrup. One impatient stir at 180°F can grain the whole batch.

    How to tell: You stirred, scraped, or “checked” the fudge during cooling, or started beating while it was still warm to the touch.

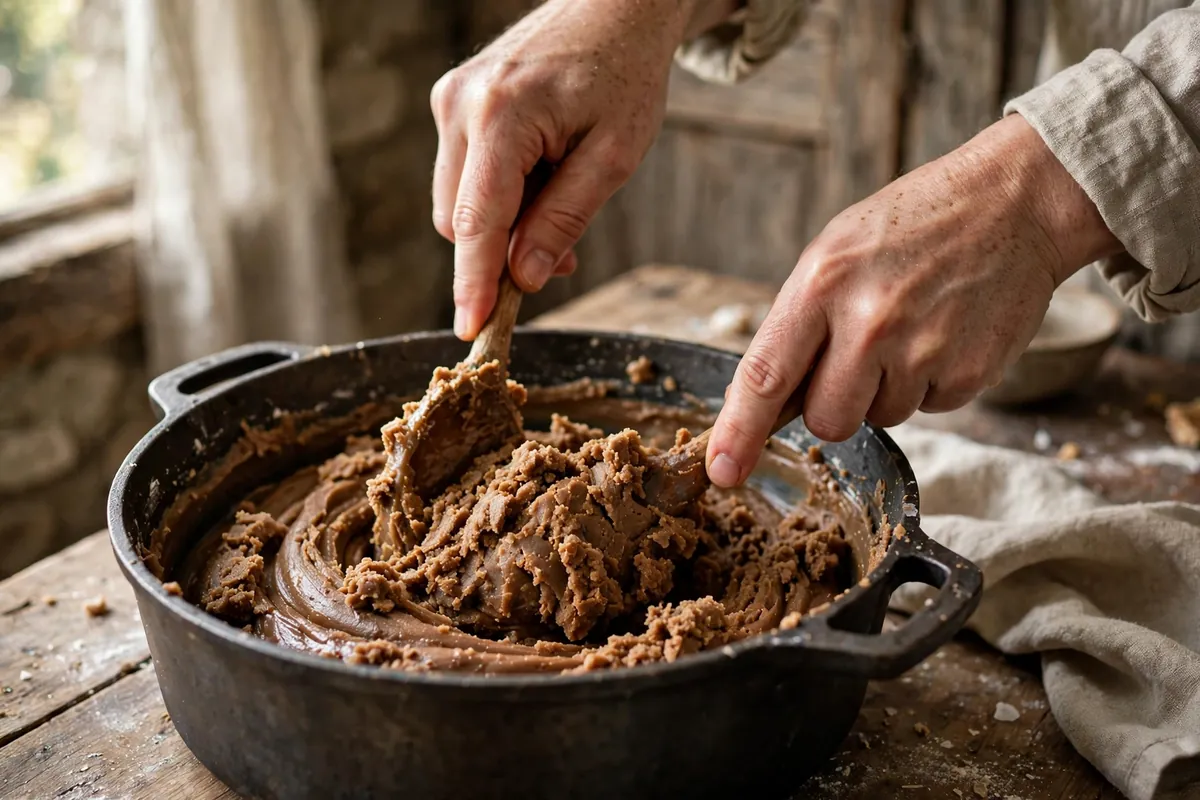
    The fix: After the syrup hits temperature, leave the pan undisturbed until it reads 110°F (43°C) — lukewarm, about 45–60 minutes. Then beat vigorously until it thickens and loses its gloss. Beating at the right moment shatters forming crystals into tiny ones. The rule is absolute: hot syrup, hands off; cool syrup, beat hard. When I stopped “helping” my fudge during cooling, the grain stopped.

    2. You cooked it to the wrong temperature

    Fudge must reach soft-ball stage: 234–238°F (112–114°C). Undercook it and too much water remains — it won’t set. Overcook it past ~240°F and too much water boils off — the sugar concentration is so high that crystals form aggressively, turning the fudge dry, crumbly, and grainy. A few degrees matter enormously.

    How to tell: Undercooked fudge is soft and won’t hold shape; overcooked is hard and dry as well as grainy. No thermometer at all? This is very likely your cause.

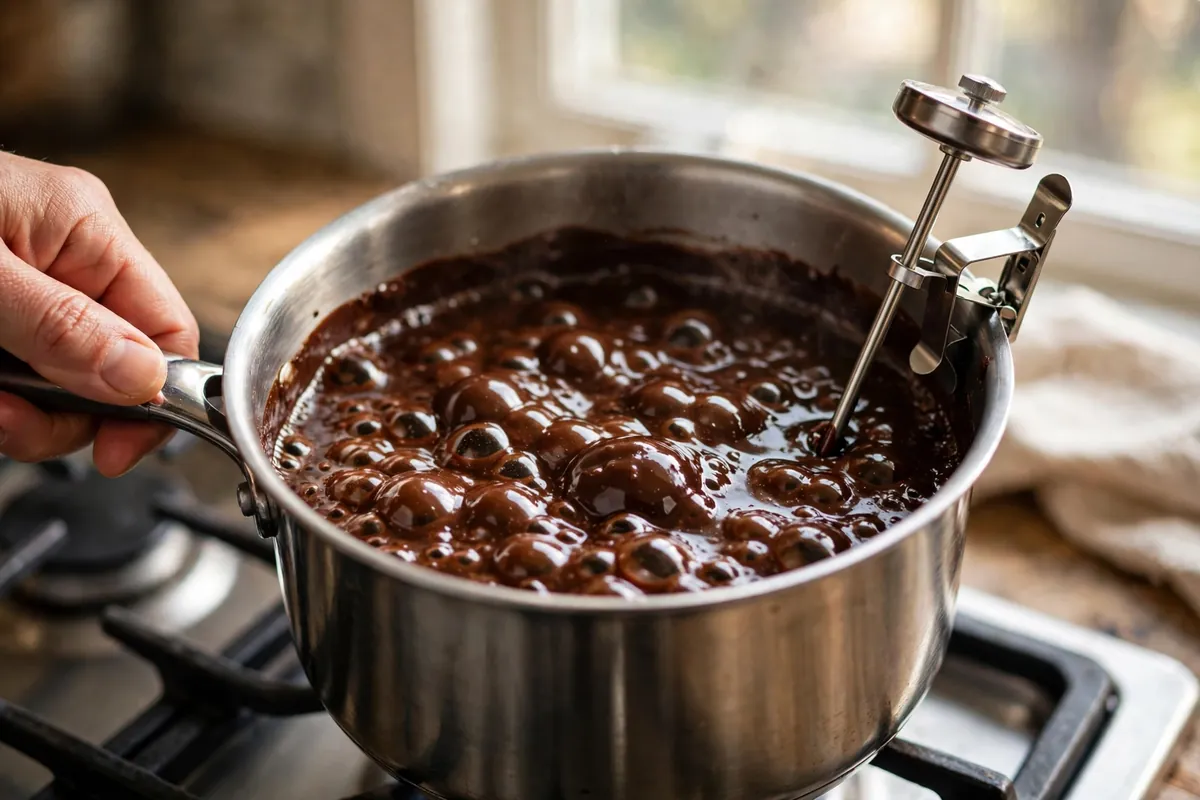
    The fix: Use a calibrated candy thermometer — test in boiling water first (should read 212°F/100°C at sea level; adjust targets by the difference). Clip it so the bulb sits in the syrup, not touching the pan bottom. Pull at 236°F (113°C), the middle of the range. Learn the cold-water backup: a spoonful dropped in ice water should form a soft ball that flattens in your fingers.

    candy thermometer clipped to a saucepan of bubbling fudge syrup
    candy thermometer clipped to a saucepan of bubbling fudge syrup

    3. No interfering agent — nothing stopping big crystals

    Good recipes include an “interfering agent” — 1–2 tablespoons corn syrup or ¼ teaspoon cream of tartar per batch. These molecules physically block sucrose crystals from growing large. Skip them and you’re relying purely on technique, which works but leaves zero margin for error.

    How to tell: Your recipe had no corn syrup, cream of tartar, or glucose, and the fudge grained despite decent temperature and stirring discipline.

    The fix: Add 2 tablespoons light corn syrup per batch with the sugar and liquid — too little to taste, enough to insure against large crystals. Butter dotted on top during cooling (not stirred in) helps too: its milk proteins and fat interfere with crystal growth.

    4. Sugar crystals from the pan sides seeded the batch

    Undissolved crystals clinging to the pan walls are seeds — each can trigger a cascade of large crystals through the batch. Scraping the sides down into the syrup planted them yourself.

    How to tell: You saw crusty sugar on the pan walls, or scraped the sides while bringing the syrup up to temperature.

    The fix: Stir only until the sugar fully dissolves — then stop stirring for the rest of the boil. Wash the sides with a wet pastry brush, or put the lid on for 2 minutes once it boils: trapped steam washes the walls clean by itself. Hands off from then until it hits temperature.

    5. Humidity or a lying thermometer

    On humid days the syrup absorbs airborne moisture, effectively undercooking itself — and an uncalibrated thermometer can be off 5°F, the entire difference between silky and sandy. If it failed on a rainy day despite good technique, or your thermometer never met boiling water, make fudge on dry days, calibrate every thermometer, and trust the cold-water test over a suspect reading.

    Yes, you can rescue grainy fudge

    Chop it up, return it to the pan with 2–3 tablespoons of milk or cream per pound, and melt gently over low heat until completely smooth. Then treat it as a fresh batch: back to 234–238°F (112–114°C) without stirring once boiling, cool undisturbed to 110°F (43°C), beat until it loses its gloss. The second attempt almost always comes out smooth — I’ve rescued every grainy batch I’ve made this way.

    hands beating cooled fudge in a pan as it loses its gloss
    hands beating cooled fudge in a pan as it loses its gloss

    The smooth-fudge checklist

    Dissolve sugar fully. Wash down sides. Boil undisturbed to 236°F (113°C). Cool untouched to 110°F (43°C). Beat until the gloss disappears; pour immediately. Add corn syrup for insurance, calibrate your thermometer, pick a dry day. Nail the cooling-then-beating sequence and the rest is detail — that single discipline separates silky from sandy.

    saucepan with lid on, steam washing down the pan sides
    saucepan with lid on, steam washing down the pan sides

    FAQ

    Is grainy fudge safe to eat?
    Completely — graininess is oversized sugar crystals, a texture defect, not spoilage. It tastes the same, just sandy. And it’s fully fixable: reheat with a little milk and redo the process correctly.

    Can I fix fudge that’s already grainy?
    Yes. Chop it, melt gently with 2–3 tablespoons milk or cream per pound, bring back to 234–238°F (112–114°C), cool undisturbed to 110°F (43°C), then beat until it loses its gloss. Rescued batches routinely come out smoother than most first attempts.

    Why can’t I stir fudge while it cools?
    Cooling syrup is supersaturated — holding more dissolved sugar than it stably can. Agitation seeds crystallization while it’s still hot, and hot crystals grow large, which reads as grainy. Waiting until 110°F (43°C) then beating forces millions of tiny crystals instead — tiny feels smooth.

    What temperature is soft-ball stage?
    234–238°F (112–114°C). Below it, fudge won’t set; above it, it turns dry and crumbly. Aim for 236°F (113°C) with a calibrated thermometer, and confirm with the cold-water test: a spoonful in ice water should form a soft ball that flattens in your fingers.

    Can I make smooth fudge without corn syrup?
    Yes, but you lose your safety net. Corn syrup (or ¼ teaspoon cream of tartar) blocks large crystal formation. Without it, temperature and no-stir discipline must be perfect. If fudge keeps graining, 2 tablespoons of corn syrup per batch is the easiest fix.

    Why is my fudge soft AND grainy?
    Undercooking plus early crystallization: the syrup never reached soft-ball (too much water, won’t set) and got agitated warm (large crystals). Reheat to the full 236°F (113°C) and cool undisturbed this time.

    Related troubleshooting: How to Fix Broken Buttercream (Curdled, Soupy, Too Sweet) · Why Is My Cake Dry? Moisture Science for Home Bakers

  • Why Are My Muffins Tough? The Muffin Method Explained

    Why Are My Muffins Tough? The Muffin Method Explained

    Tough muffins are the quietest baking failure — no dramatic collapse, no visible flaw, just a muffin that chews like bread dough and sits heavy. I’ve pulled batches from the oven that looked perfect and ate like rubber. The cause is almost always the same, and it’s the single most misunderstood technique in home baking: how you mix the batter. Master the muffin method once and tough muffins leave your kitchen permanently.

    Quick diagnosis: Tough muffins come down to one thing in nearly every case: the batter was overmixed. If you stirred until smooth, beat out every lump, or used an electric mixer on the batter, start with cause #1 — it’s the answer 9 times out of 10.

    1. You overmixed the batter

    This is the cause, full stop, for the overwhelming majority of tough muffins. The moment liquid meets flour, gluten starts forming. Every additional stir develops it further. Stir a muffin batter until smooth and you’ve built a bread-dough gluten network in a batter that was supposed to stay tender — the result is chewiness, tunnels (long air channels where gas forced through the elastic network), and sometimes peaked, ugly tops.

    How to tell: Cut one open. Tunnels — elongated holes running through the crumb — are the fingerprint of overmixing. The texture is chewy or rubbery rather than soft, and the tops may have peaked into odd points instead of doming smoothly.

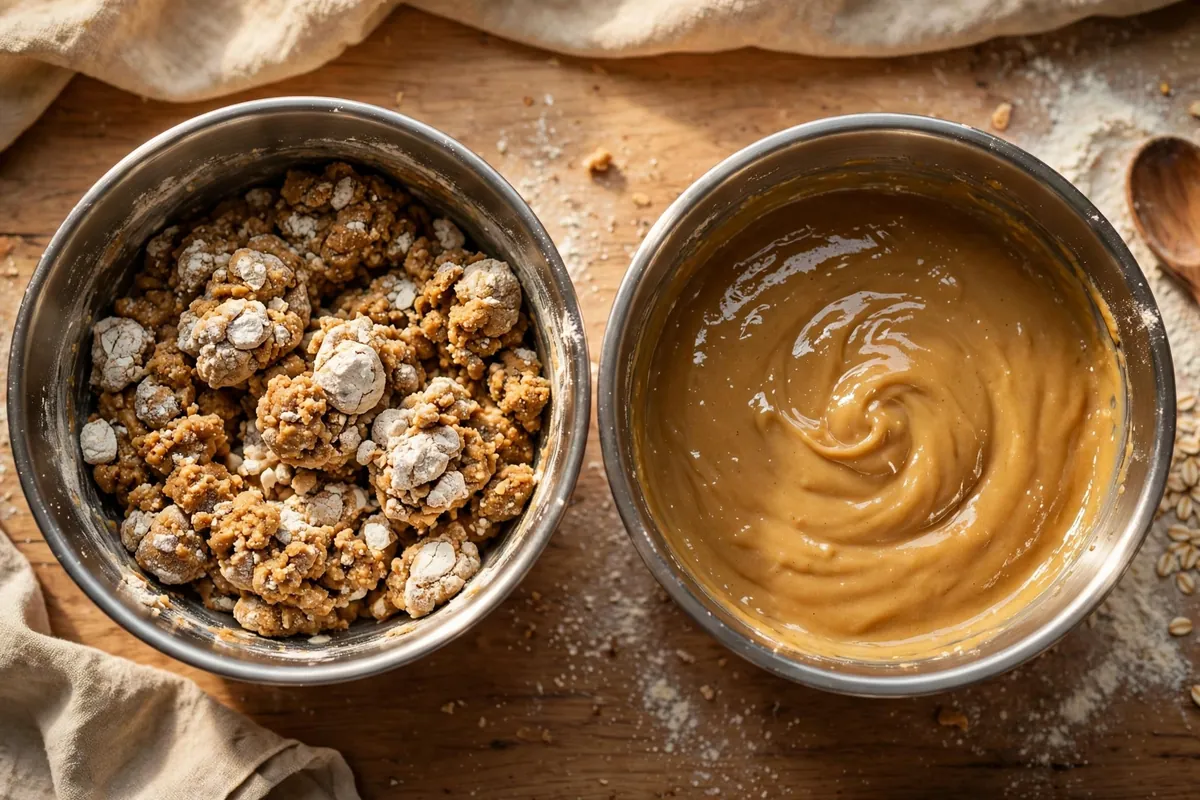
    The fix: Learn the mantra: lumps are fine. The muffin method is: whisk dry ingredients in one bowl, whisk wet in another, pour wet into dry, and stir with a spatula just until the flour disappears — 10 to 12 strokes, no more. The batter should look lumpy and rough. It will feel wrong. It is right. Those lumps hydrate in the oven’s heat and vanish, leaving tender crumb. Never use an electric mixer on muffin batter after the flour goes in — a mixer overdevelops gluten in seconds.

    2. You didn’t actually use the muffin method

    Many recipes say “mix” without explaining the order of operations, and the order matters enormously. The muffin method exists for a reason: combining wet and dry separately, then uniting them with minimal stirring, limits the time flour and liquid spend being agitated together. Dumping everything in one bowl and stirring until combined maximizes it.

    How to tell: You mixed all ingredients in a single bowl, or added flour to already-beaten wet ingredients and kept beating.

    The fix: Two bowls, always. Bowl one: flour, sugar, leavening, salt, spices — whisked. Bowl two: eggs, milk, oil or melted butter, vanilla — whisked. Pour bowl two into bowl one, 10–12 strokes, done. If the recipe includes mix-ins (berries, chocolate chips, nuts), toss them in the dry bowl first — the flour coating keeps them suspended instead of sinking — and count their addition in your stroke budget.

    3. The wrong fat (or the wrong handling of it)

    Fat’s job in muffins is tenderness: it coats flour proteins and physically blocks gluten formation. Oil does this best — it’s liquid at room temperature and coats evenly. Melted butter works nearly as well. But creamed solid butter (the cake method) is wrong for muffins: creaming develops structure and traps air for a fine, firm crumb — the opposite of muffin tenderness.

    How to tell: You creamed butter and sugar together before adding the rest, or used the cake-mixing method out of habit.

    The fix: Use oil or melted (not creamed) butter, whisked into the wet bowl. If flavor matters more than maximum tenderness — it often does — melted butter is the sweet spot: nearly the tenderness of oil with real butter flavor. Never cream solid butter for muffins.

    two batters side by side — one lumpy and rough (correct), one smooth and overmixed
    two batters side by side — one lumpy and rough (correct), one smooth and overmixed

    4. Too much flour (the measuring problem again)

    The flour-scooping problem strikes muffins exactly as it strikes cake and bread: a scooped cup can weigh 150g against the standard 120g, adding 25% more flour — and therefore 25% more gluten potential — without you knowing. In muffins, where tenderness is the entire goal, that hidden extra flour is devastating.

    How to tell: The batter was thick and stiff rather than pourable, and the baked muffins are dense as well as tough.

    The fix: Weigh flour at 120g per cup, or spoon-and-level. This one habit, repeated across every post on this site, fixes more baking failures than any other single change.

    5. Overbaked (even slightly)

    Muffins are small and lean — they go from perfect to dry in about three minutes, and dry reads as tough. A muffin baked to a clean toothpick is overbaked; the carryover heat finishes the job after you pull them.

    How to tell: The edges are dark, the tops are firm and dry rather than springy, and the toothpick came out completely clean.

    The fix: Start checking 3–4 minutes before the recipe’s earliest time. Pull when a toothpick shows a few moist crumbs. Most standard muffins bake at 375–400°F (190–200°C) for 18–22 minutes — but verify with your oven, and cool in the pan only 5 minutes before moving to a rack (the pan’s residual heat keeps baking them).

    6. The batter sat too long — or not at all (the nuance)

    Here’s the subtle one. A brief rest — 20 to 30 minutes after mixing — actually helps: flour hydrates fully, and hydrated flour bakes into a more tender, even crumb. But an hour-plus rest at room temperature lets the chemical leaveners (baking powder especially) spend their first reaction, so the muffins rise less and bake denser — which reads as tough.

    How to tell: You mixed the batter well ahead and baked later, or you always rest and your muffins are consistently a bit dense.

    The fix: If you rest, keep it to 20–30 minutes, and use double-acting baking powder (its second reaction happens in the oven’s heat, so a short rest costs you nothing). For the most reliable results, mix and bake promptly.

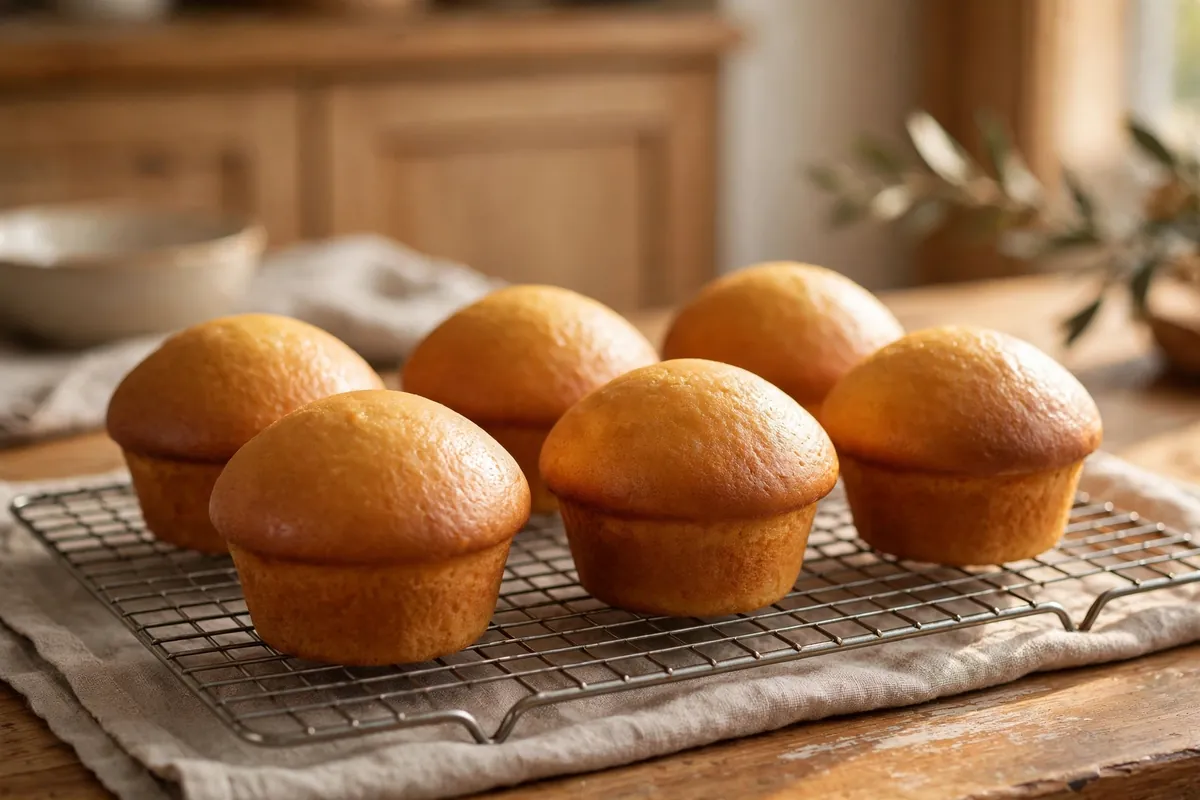
    a tray of perfectly domed muffins cooling on a wire rack, tops golden
    a tray of perfectly domed muffins cooling on a wire rack, tops golden

    Frequently Asked Questions

    What is the muffin method in baking?
    Whisk dry ingredients in one bowl and wet ingredients in another, pour wet into dry, and stir just until combined — 10 to 12 strokes, lumps remaining. Minimal stirring limits gluten development, which is what keeps muffins tender instead of tough.

    Why do my muffins have tunnels inside?
    Tunnels are the classic sign of overmixing. Excess stirring builds an elastic gluten network; expanding gases then force channels through it instead of distributing evenly. Stir less — lumpy batter is correct batter.

    Are dense muffins safe to eat?
    Completely — toughness is a texture issue, not a safety one. (Though if they’re truly inedible, cube them for bread pudding — the rescue logic is identical.)

    Should muffin batter be lumpy or smooth?
    Lumpy, always. Smooth muffin batter is overmixed batter. Ten to twelve strokes with a spatula, flour just disappeared, visible lumps — that’s the target. They bake out.

    Can I use an electric mixer for muffins?
    Only for the wet ingredients, before flour is added. Once flour meets liquid, switch to a spatula and hand-stir. A mixer develops gluten far too efficiently for muffin batter.

    Why are my muffins dry as well as tough?
    Overbaking compounds overmixing — dry and tough usually means both. Fix the mixing first (lumps!), then pull 3–4 minutes earlier with a moist-crumb toothpick test. Either fix alone improves things; both together transform them.

    Related troubleshooting: Why Is My Cake Dry? · Why Is My Bread Dense? · Why Do My Cookies Spread Flat?

  • Eggless Cake That Actually Works: Tested Replacements

    Eggless Cake That Actually Works: Tested Replacements

    Eggless Cake That Actually Works: Tested Replacements

    You’re halfway through a cake recipe and the egg carton is empty. Or eggs are off the menu — an allergy, a vegan household, a dietary choice. Either way, you need a cake that rises, sets, and tastes like cake, not a sweet brick.

    The encouraging part: some beloved chocolate cakes never contained an egg. But the wrong substitute in the wrong cake gives gummy centers and flat tops. Every common replacement behaves differently in real batters — here’s what works.

    Quick diagnosis: Replace each egg with 60g (1/4 cup) plain yogurt + 1/4 tsp extra baking soda (best all-rounder), 60g (1/4 cup) unsweetened applesauce (moist, mild), or 3 tbsp aquafaba, whipped (lightest texture, best for sponge cakes). Don’t replace more than 2–3 eggs — beyond that, bake a recipe designed eggless from the start.

    What Eggs Actually Do in a Cake (Read This Before Substituting)

    You can’t pick the right replacement until you know which job the egg was doing. In cake batter, eggs do four things:

    1. Structure. Egg proteins coagulate in the heat and set the crumb — they’re part of the scaffolding that keeps the cake from collapsing after the leavening gases escape.
    2. Leavening. Beaten eggs trap air; the egg’s moisture converts to steam in the oven. In foam cakes (sponge, chiffon), this is the primary lift.
    3. Moisture and tenderness. The yolk’s fat shortens gluten strands, and lecithin in the yolk emulsifies fat and liquid into a smooth, even batter.
    4. Flavor and color. Richness and that golden crumb.

    No single substitute does all four jobs. So match the substitute to the job your cake needs most: a dense chocolate cake mostly needs moisture and binding (easy); a tall vanilla sponge mostly needs structure and lift (harder).

    The 7 Replacements I Trust (Each Tested in Real Batters)

    1. Plain yogurt — the best all-rounder

    Ratio: 60g (1/4 cup) plain whole-milk yogurt per egg. Add 1/4 tsp extra baking soda if the recipe doesn’t already call for it.

    Why it works: Protein for structure, fat for tenderness, acidity that supercharges baking soda. In side-by-side tests, yogurt vanilla cakes were nearly indistinguishable from the egg version.

    Best for: Vanilla, yellow, and chocolate layer cakes.

    Watch out: Plain only — thin Greek yogurt with a tablespoon of milk. Skip if the eater is dairy-free too.

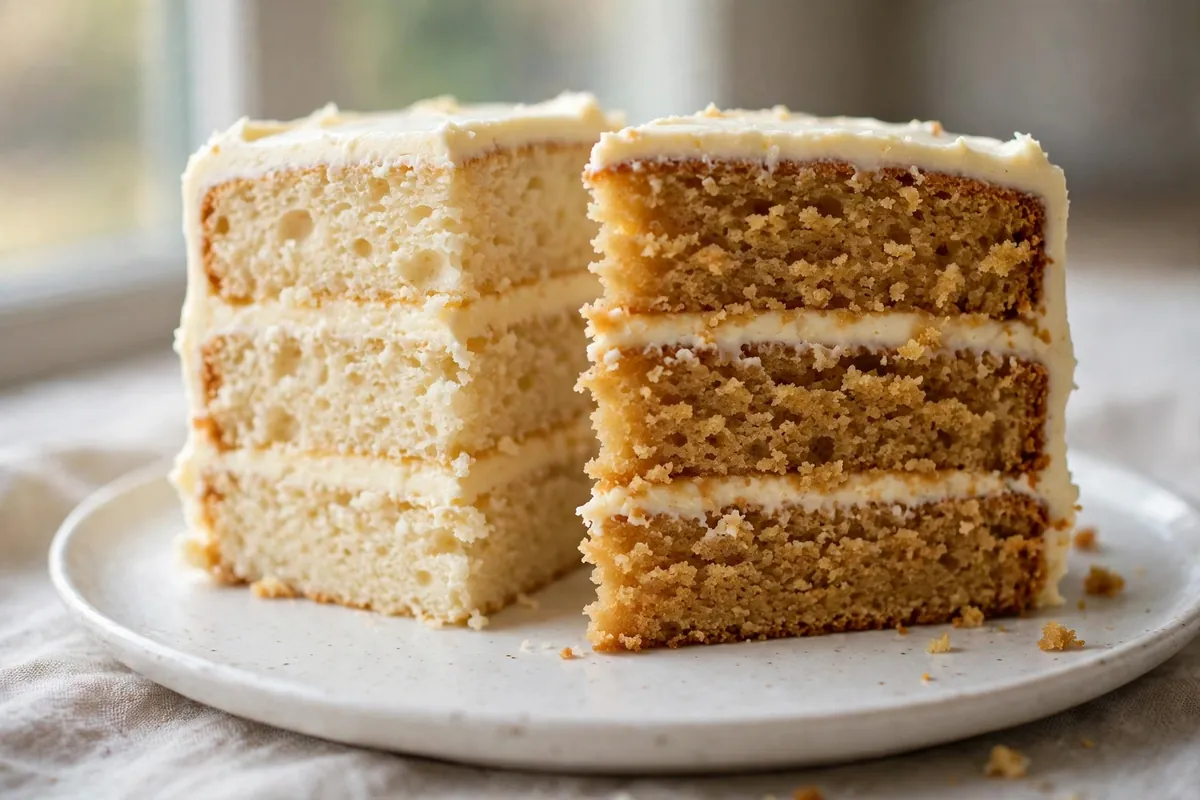
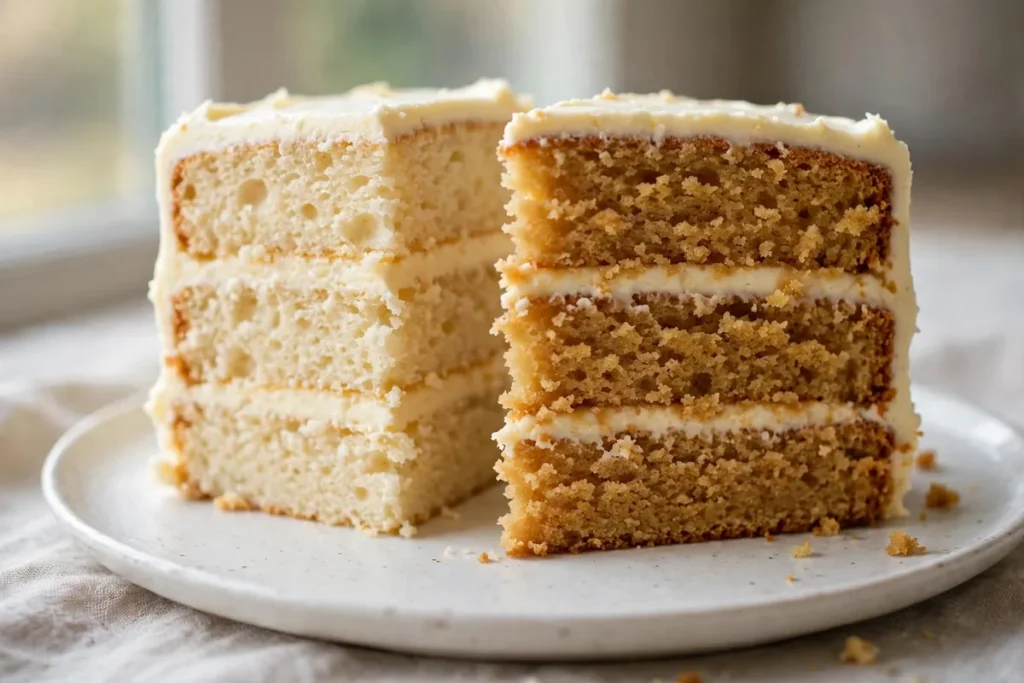
    Two slices of vanilla cake side by side — one made with egg, one with yogurt replacement
    two slices of vanilla cake side by side, one made with egg and one with yogurt replacement

    2. Unsweetened applesauce — the moisture play

    Ratio: 60g (1/4 cup) unsweetened applesauce per egg.

    Why it works: Moisture and gentle binding from fruit pectin. No lift — but in cakes with solid leavening already, it keeps the crumb tender for days. My applesauce spice cakes stay fresher longer than the egg versions.

    Best for: Spice cakes, carrot cake, chocolate cake, muffins — anything dense and moist where fruit flavor fits.

    Watch out: It adds sweetness — cut sugar 1–2 tablespoons per egg if using sweetened. Don’t use it in delicate white cakes; the flavor shows.

    3. Mashed banana — the dense-cake specialist

    Ratio: 60g (1/4 cup) well-mashed ripe banana (about half a banana) per egg.

    Why it works: Starches and sugars bind, moisture keeps things tender. Banana bread exists for a reason — this is that principle applied to cake.

    Best for: Banana cake, chocolate cake, dense snacking cakes.

    Watch out: The flavor is not subtle — never in vanilla or lemon cake. It also densifies the crumb: the opposite of a sponge’s needs.

    4. Aquafaba — the light-texture secret

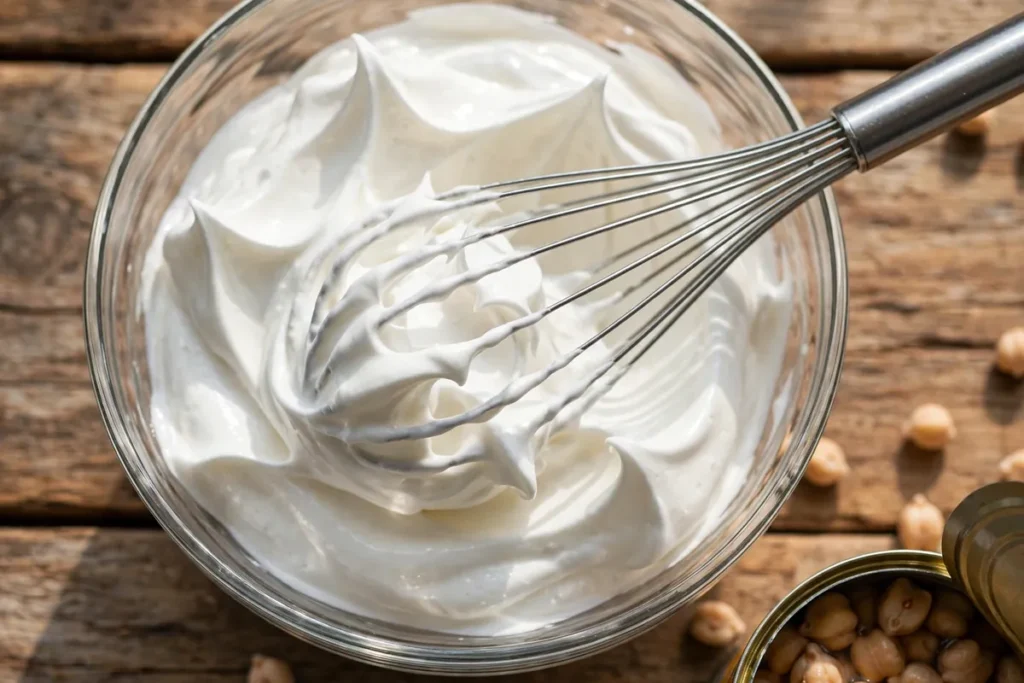
    Ratio: 3 tablespoons aquafaba (the liquid from a can of chickpeas) per whole egg; 2 tablespoons per egg white. Whip to soft peaks for maximum lift.

    Why it works: Chickpea proteins whip into a foam remarkably like egg whites. Folded into chiffon batter, my aquafaba cake rose within half an inch of the egg version. Nothing else here can do that.

    Best for: Sponge, chiffon, angel-food-style cakes, meringue toppings — anywhere the egg’s foaming mattered most.

    Watch out: It must be whipped; unwhipped it’s just bean water. Use unsalted liquid — the smell bakes off completely.

    Aquafaba whipped to soft peaks in a glass bowl beside an open chickpea can
    aquafaba whipped to soft peaks in a glass bowl next to the open chickpea can

    5. Baking soda + vinegar — the leavening booster

    Ratio: 1 teaspoon baking soda + 1 tablespoon white vinegar per egg (in addition to the recipe’s existing leavening).

    Why it works: It replaces the egg’s lift, not its structure or moisture — a burst of CO2 as the batter hits the oven. Best used alongside another replacer (applesauce for moisture + soda/vinegar for lift).

    Best for: Pairing with options 1–3 in cakes that need extra rise.

    Watch out: Work fast — the reaction starts on contact, so get the pan in the oven within minutes. A tablespoon of vinegar per egg is the ceiling; more leaves a tang.

    6. Ground flaxseed — the binder

    Ratio: 1 tablespoon ground flaxseed + 3 tablespoons water per egg. Stir and rest 5 minutes until gel-like (“flax egg”).

    Why it works: Soluble fiber forms a gel that binds like egg protein — the most reliable pure binder here.

    Best for: Brownies, dense chocolate cakes, hearty muffins.

    Watch out: Dark specks, faint nutty flavor, almost no leavening — pair with the soda/vinegar booster when height matters. Grind fresh; whole seeds do nothing.

    7. Buttermilk — the tender-crumb classic

    Ratio: 60ml (1/4 cup) buttermilk per egg. Reduce another liquid in the recipe by the same amount.

    Why it works: Acidity tenderizes gluten and activates baking soda — the backbone of Southern layer cakes for a century, with an exceptionally fine, soft crumb.

    Best for: Layer cakes, sheet cakes, coffee cakes.

    Watch out: None on hand? 60ml milk + 1 teaspoon lemon juice, rested 5 minutes — nearly as good.

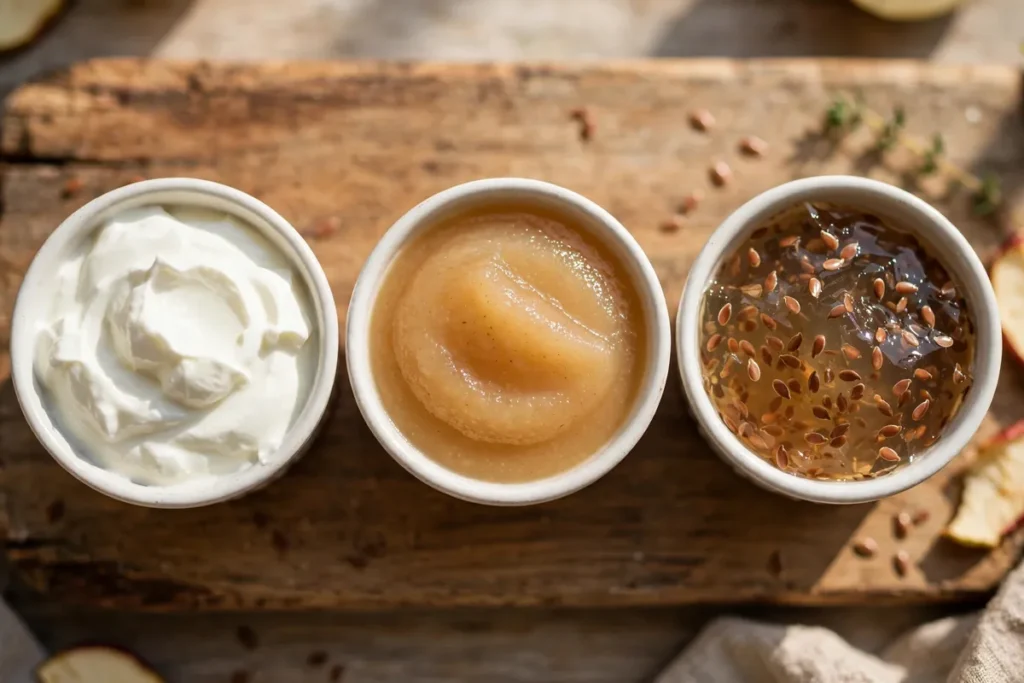
    Three ramekins with yogurt, applesauce, and flax egg substitutes side by side
    three small ramekins showing yogurt, applesauce, and flax egg side by side with labels

    Which Replacement for Which Cake

    Cake type Best picks Avoid
    Chocolate layer cake Yogurt, buttermilk, applesauce Banana (unless you want the flavor)
    Vanilla/yellow cake Yogurt, aquafaba (whipped) Banana, flax (specks show)
    Carrot/spice cake Applesauce, banana Aquafaba (unnecessary)
    Light sponge/chiffon Aquafaba (whipped) Banana, flax, applesauce (too heavy)
    Brownies/blondies Flax egg, banana Aquafaba (too airy for fudgy)
    Muffins/quick breads Applesauce, yogurt, banana — (all work)

    The Rule of Three: When to Stop Substituting

    Here’s the honest limit: don’t replace more than 2–3 eggs in a single recipe. Each substitution is an approximation, and the errors compound. One or two eggs? Any option above gets you 90%+ of the way there. Five eggs in a rich pound cake or tall chiffon — that cake is built on eggs, and no combination of substitutes rebuilds the architecture. Past three eggs, bake a recipe engineered eggless from the start.

    Frequently Asked Questions

    Can I just leave the egg out without replacing it?
    For a single egg in a sturdy recipe, sometimes — add 2–3 tablespoons of extra milk or water. But the cake will be denser and more crumbly. A proper substitute always beats omission.

    Is eggless cake safe for someone with an egg allergy?
    Yes, if every ingredient is egg-free — check baking powder, frosting, and mix-ins, and guard against cross-contamination for severe allergies. These substitutes contain no egg protein.

    Which egg replacer is best for vegan cake?
    Aquafaba for light cakes, flax or applesauce for dense ones — plus dairy-free fat and milk. For the frosting, see Dairy-Free Frosting That Holds Its Shape.

    Can I use store-bought egg replacer powder?
    Yes — follow the package ratio (usually 1 tablespoon powder + 2–3 tablespoons water per egg). Best in cookies, muffins, and brownies; for cakes I still prefer yogurt or aquafaba.

    Will eggless cake taste different?
    Banana and flax add noticeable flavor; the rest are essentially neutral. In blind tastings, nobody identified the yogurt and applesauce cakes as eggless.

    Related troubleshooting: Dairy-Free Frosting That Holds Its Shape · Why Did My Cake Sink in the Middle? · Why Is My Cake Dry?

  • How to Fix Lumpy Batter (Mixing Science That Actually Works)

    How to Fix Lumpy Batter (Mixing Science That Actually Works)

    Lumps in batter are tiny flour time-capsules: dry pockets sealed inside a shell of hydrated flour. They form when liquid hits flour too fast, and the fix depends on what you’re making — pancake and muffin lumps are harmless and should be left alone, while cake batter lumps need smoothing out. Knowing which is which saves you from the real enemy: overmixing.

    Quick diagnosis: Lumps form when liquid is added to flour too quickly. For pancakes and muffins, leave small lumps alone — overmixing makes them tough. For cake batter, smooth them by pressing lumps against the bowl with a whisk, straining through a sieve, or resting the batter 10 minutes so lumps hydrate on their own.

    My tested baseline: a standard vanilla cake batter — 250g flour whisked with 200g sugar, 2 tsp baking powder, ½ tsp salt; 115g melted butter, 2 eggs, 240ml milk at room temperature. Dry ingredients whisked together first, then wet added in three additions, mixed just until smooth — about 45 seconds of whisking total after the last addition.

    1. You added the liquid all at once — the number-one cause

    Flour hydrates from the outside in. Dump all the milk in at once and each flour particle’s surface instantly turns to sticky paste, sealing a core of dry flour inside. Those sealed pockets are your lumps, and once formed, they’re stubborn — stirring just pushes them around.

    How to tell: The lumps appeared the moment liquid hit flour; they’re dry and powdery inside when you break one open; the batter went from floury to lumpy in seconds.

    The fix: Add liquid in three to four additions, whisking each until mostly absorbed before adding the next. Better yet, make a well in the center of the dry ingredients and pour the first addition of liquid into it, gradually pulling flour in from the edges — the classic technique exists precisely to prevent lumps.

    2. You didn’t sift or whisk the dry ingredients first

    Flour compacts in the bag, and baking powder and salt distribute unevenly. Un-sifted flour goes into the bowl in clumps that are already half-formed lumps, and pockets of baking powder create uneven rise later.

    How to tell: Lumps were visible in the dry mixture before any liquid was added; the flour had visible compacted chunks when you measured it.

    The fix: Whisk the dry ingredients together in the bowl for 20–30 seconds before adding anything wet — this aerates the flour and distributes leaveners evenly. A fine-mesh sieve is even better for cocoa powder, which lumps worse than flour. This single step prevents most lumps before they start.

    3. Rest the batter — lumps hydrate themselves in 10 minutes

    This is the lowest-effort fix and it works beautifully for pancakes, waffles, and muffins: walk away. Given 5–10 minutes, liquid migrates into the dry cores and most small lumps dissolve on their own, no extra mixing required. I rest every pancake batter I make — the texture improves and the lumps vanish.

    How to tell: The lumps are small (pea-sized or less); the batter is for pancakes, waffles, or muffins rather than a fine-crumbed cake.

    The fix: Cover the bowl and rest 10 minutes, then give one gentle stir. For pancakes this is the entire solution. Don’t use this as an excuse to overmix afterward — the resting did the work, so stir minimally. This pairs with the core rule of tough muffins: small lumps are fine, overmixing is not.

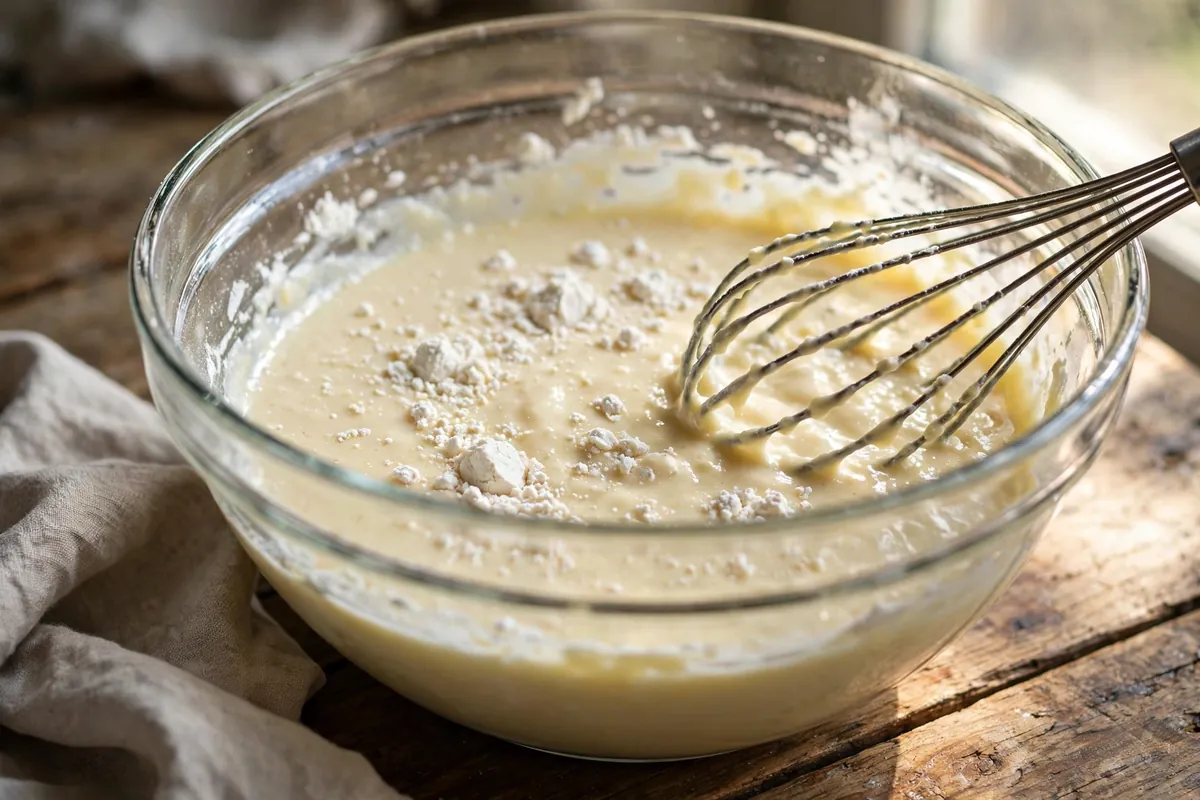
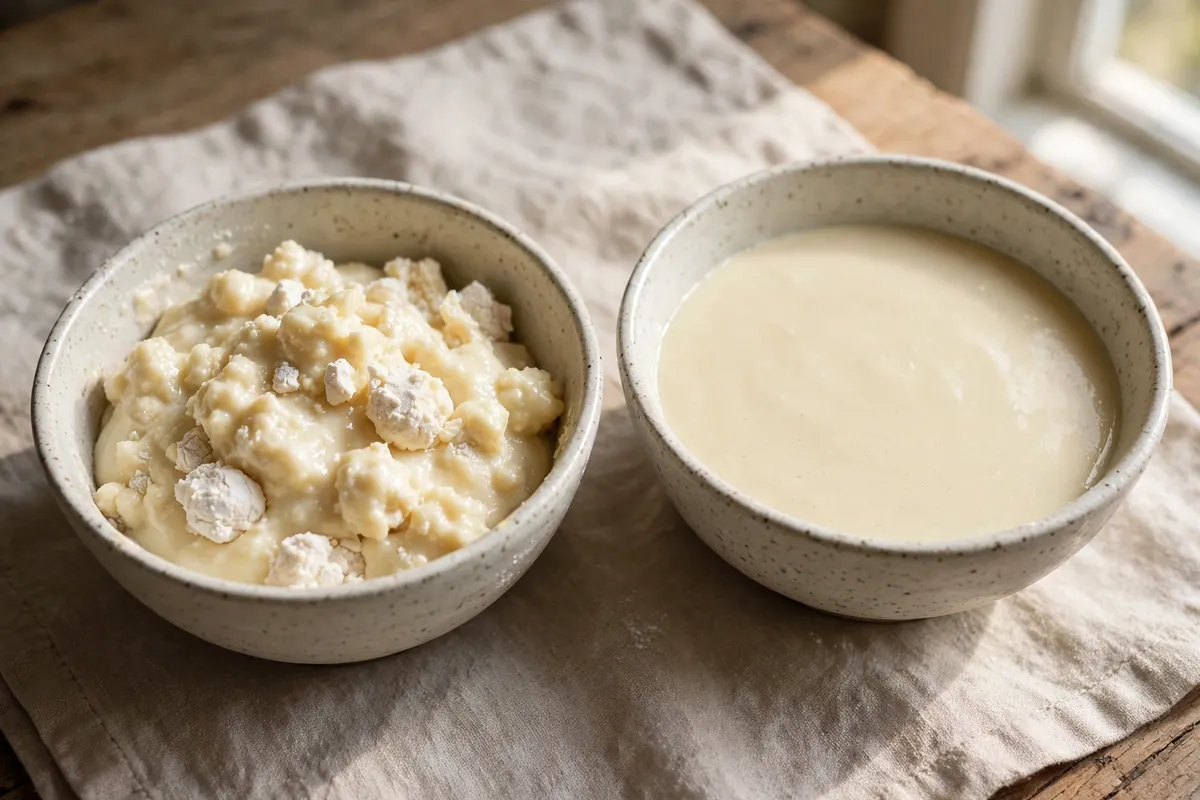
    two small bowls of pancake batter side by side, one freshly mixed with lumps, one rested and smooth
    two small bowls of pancake batter side by side, one freshly mixed with lumps, one rested and smooth

    4. Press lumps out against the bowl — the whisk technique

    For cake batter, where you do want smoothness, the technique matters more than force. Switch to a whisk (not a spoon), tilt the bowl, and press the lumps against the side of the bowl with the wires, crushing them outward. This breaks lumps mechanically without the prolonged beating that develops gluten.

    How to tell: The batter is for cake or cupcakes where a fine, even crumb matters; lumps survived the initial mixing.

    The fix: Whisk in a figure-eight motion, deliberately dragging the whisk against the bowl’s side to crush lumps. Work quickly — 30–45 seconds after the last liquid addition is enough. Stop the moment the batter looks smooth; every extra minute of beating tightens the crumb, which is exactly how cakes end up sinking or tough (see Why Did My Cake Sink in the Middle?).

    5. Strain it — the guaranteed rescue for badly lumpy batter

    When lumps are large, numerous, or the batter is for something unforgiving like crêpes or a smooth layer cake, don’t fight them: pour the batter through a fine-mesh sieve into a clean bowl, pressing the lumps through with a spatula. What comes out is perfectly smooth, every time.

    How to tell: Lumps are large (chickpea-sized or bigger); there are too many to crush individually; the batter is thin enough to pour (works for crêpe, pancake, and most cake batters).

    The fix: Set a fine-mesh sieve over a bowl, pour the batter through, and push remaining lumps through with a rubber spatula or the back of a ladle. Discard any truly dry bits that won’t pass. This adds two minutes and rescues any batter — I do it automatically for crêpes, where even one lump ruins the thin spread.

    Can you fix lumpy batter after it’s already in the pan?

    No — once it’s baking, the lumps are locked in. Small ones in pancakes and muffins will hydrate in the heat and be undetectable; large dry lumps in cake will bake into unpleasant floury pockets. If you catch it before the oven, strain or rest the batter. If it’s already baked, chalk it up to experience: tiny lumps in rustic bakes are invisible in the eating, and the lesson (add liquid gradually) applies to every batter you’ll ever make.

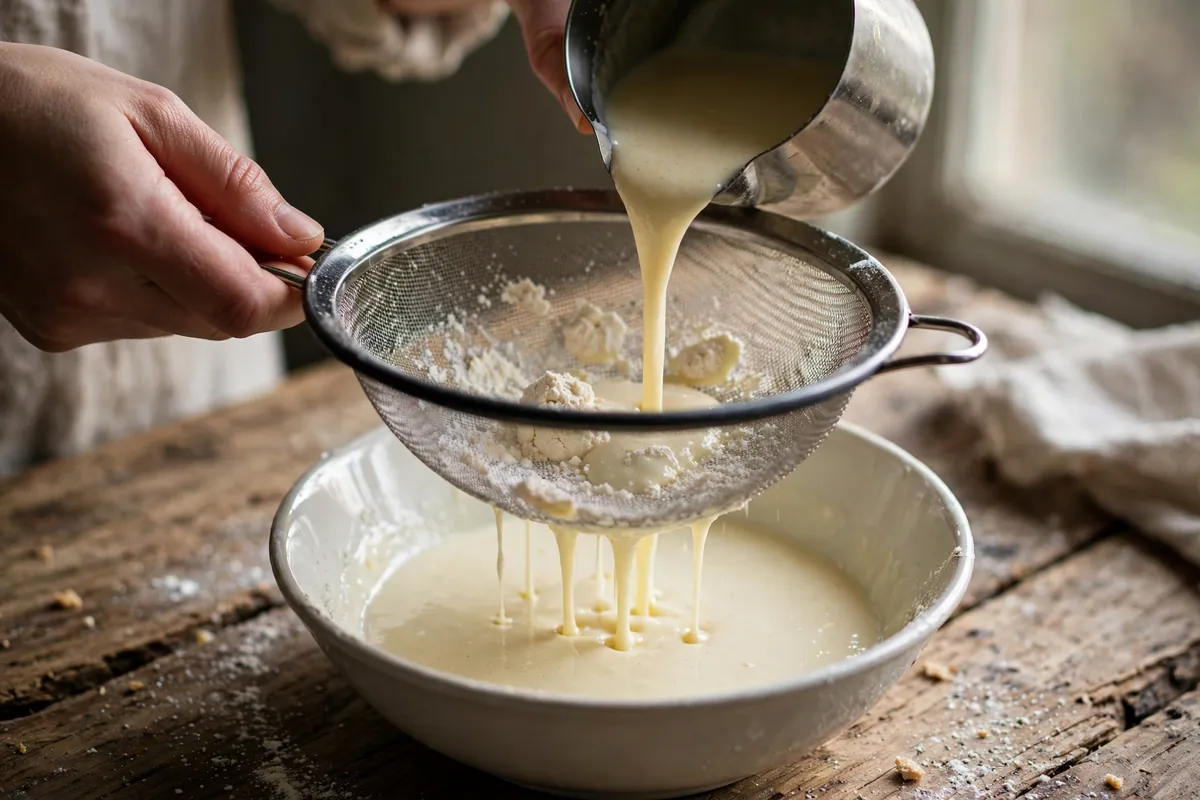
    batter being poured through a fine-mesh sieve into a clean bowl, lumps caught in the mesh
    batter being poured through a fine-mesh sieve into a clean bowl, lumps caught in the mesh

    FAQ

    Is it safe to eat lumpy batter?
    Yes — lumps are just unhydrated flour, completely safe. The only downside is texture: dry, floury pockets in the finished bake. Small lumps in pancakes are undetectable once cooked.

    Should pancake batter be lumpy or smooth?
    Slightly lumpy is correct. The golden rule of pancakes: mix until just combined, with small lumps remaining. Smoothing them out requires overmixing, which develops gluten and makes pancakes rubbery instead of tender.

    Why is my cake batter lumpy but my pancake batter isn’t?
    Cake batters have more flour relative to liquid and often include softened butter that must emulsify — more opportunities for lumps. Pancake batter is thinner and more forgiving. The gradual-liquid technique matters most for thick cake batters.

    Can I use a blender to fix lumpy batter?
    For pancakes, waffles, and crêpes — yes, a few pulses work. For cake or muffin batter — no. A blender develops gluten aggressively and will give you a tough, dense crumb. Strain or whisk those instead.

    Does sifting flour really prevent lumps?
    Whisking dry ingredients together prevents most lumps; true sifting matters most for cocoa powder and powdered sugar, which clump far worse than flour. For plain flour, 30 seconds with a whisk in the bowl is enough.

    Why do my lumps come back after I smooth the batter?
    They don’t reform — what you’re seeing is probably small butter pieces (if using the reverse-creaming method) or air bubbles, both harmless. True flour lumps, once hydrated or strained out, stay gone.

    Related troubleshooting: Why Are My Muffins Tough? The Muffin Method Explained · Why Did My Cake Sink in the Middle? 7 Causes, Tested Fixes · How to Fix Overwhipped Cream (Before It Becomes Butter)

  • Hot Cross Buns Troubleshooting: Dense, Pale, Vanishing Crosses

    Hot Cross Buns Troubleshooting: Dense, Pale, Vanishing Crosses

    Hot cross buns fail in threes: dense as hockey pucks, pale as dinner rolls, the signature cross melted into a ghost of itself. Each fault has its own cause, but they share a root — enriched, spiced dough is slower and fussier than plain bread dough, and it punishes every shortcut. Once you understand what the enrichment is doing, all three faults fix themselves.

    Quick diagnosis: Dense buns mean under-proofed enriched dough — it rises slower than lean dough, so give it time and a warm spot, and judge by the poke test, not the clock. Pale tops mean missing or thin egg wash. Vanishing crosses mean your flour paste was too thin — toothpaste-thick, piped after the egg wash. Bake at 375–400°F (190–200°C).

    My tested baseline: 500g bread flour, 7g instant yeast, 60g sugar, 10g salt, 2 tsp cinnamon, ½ tsp allspice, ¼ tsp nutmeg, 1 egg plus 200ml warm milk, 60g soft butter, 150g raisins soaked 20 minutes and patted dry. Divide into 12 buns (~85g each), proof until puffy and touching, egg-wash twice, pipe crosses, bake at 375°F (190°C) for 18–22 minutes. Glaze: 3 tbsp apricot jam warmed with 1 tbsp water, brushed on hot.

    1. Dense buns — you under-proofed enriched dough

    Fat, sugar, and eggs all slow yeast down — the price of a tender crumb. Enriched dough can take twice as long to rise as lean dough, and bakers on plain-bread timing shape and bake far too early. An under-proofed bun has no air network to expand; it bakes into a dense lump no matter how hot the oven is.

    How to tell: Tight, even crumb with no airiness; buns barely grew in the oven; dough felt firm when shaped rather than puffy.

    The fix: Proof somewhere warm — 75–80°F (24–27°C), like the oven with the light on. Shaped buns should look visibly puffy, nearly doubled and touching, before baking; in a cool kitchen that’s 60–90 minutes, not 30. Poke test: a gentle press should spring back slowly, leaving a slight indent. Fast spring-back means wait. Too much kneading flour also compacts the crumb — the dough should be soft and slightly tacky. (Proofing fundamentals: Why Didn’t My Bread Rise? A Step-by-Step Diagnosis.)

    2. Pale tops — the egg wash was missing, thin, or single-coated

    Burnished mahogany tops come from egg wash, full stop. Without it, the same bake gives a matte, anemic crust — and the flour-paste cross has nothing to contrast against. A thin or single coat gives patchy color; milk-only washes barely brown.

    How to tell: Uniformly pale, dull tops after a full bake; crosses invisible for lack of contrast; crust soft and floury, not glossy.

    The fix: Beat 1 whole egg with 1 tablespoon of milk and brush on gently — then a second coat right before baking. Two thin coats beat one thick one (thick pools and streaks). The milk thins the egg so it spreads evenly. For extra shine, brush hot buns with warmed apricot jam the moment they leave the oven. And bake at a true 375°F (190°C) — too cool an oven never browns enriched dough, however good the wash.

    3. The crosses vanished — your flour paste was too thin

    The traditional cross is flour-and-water paste piped on before baking. Mixed too wet, it spreads and melts into the crust in the oven’s heat — by serving time there’s a pale smear where the cross should be. The most common hot cross bun complaint I hear, and a two-minute fix.

    How to tell: Faint blurry lines or nothing at all; paste spread wider than piped; crosses look “absorbed.”

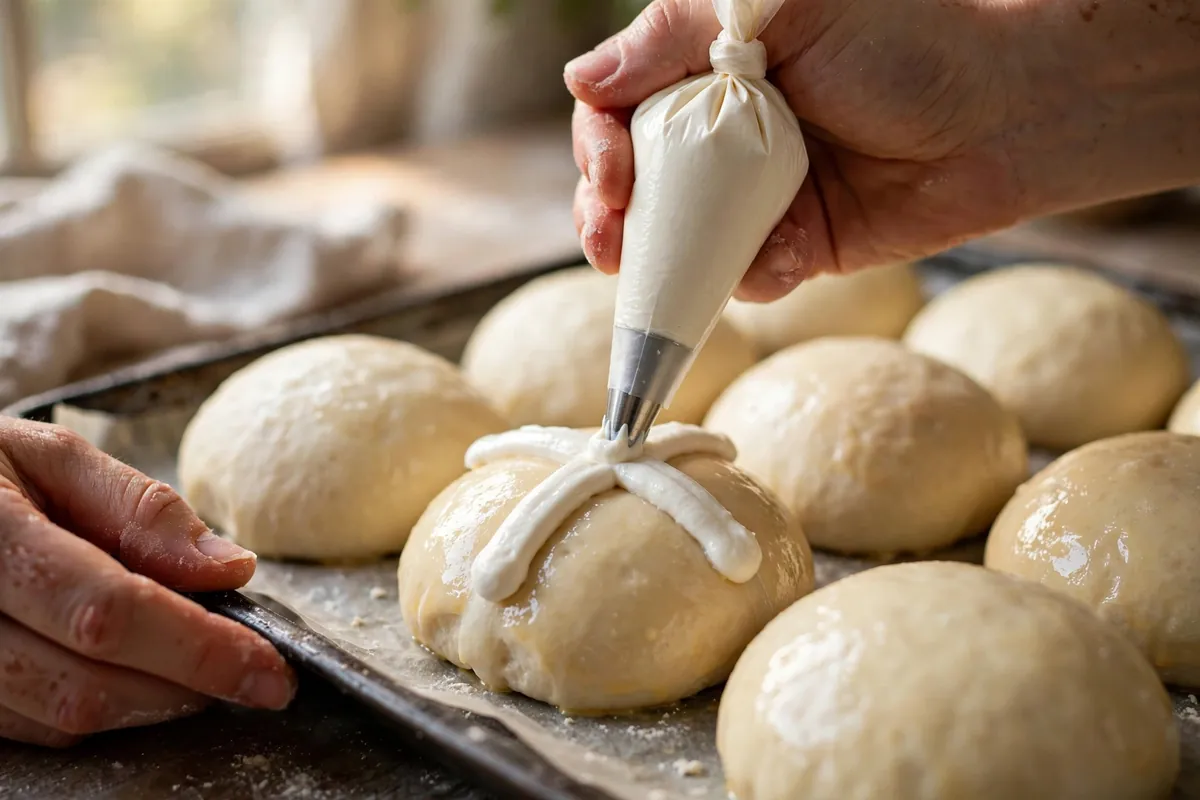
    The fix: Mix 60g flour with just enough water — about 4 tablespoons — for a toothpaste-thick paste that holds its shape on a spoon. Pipe through a small bag in confident lines, after the egg wash (the wash helps it grip), keeping lines thin — they spread slightly in the heat. Shortcut: skip the baked cross and pipe icing crosses onto cooled buns. Not traditional, but it never vanishes.

    hands piping thick flour-paste crosses onto egg-washed buns, the paste holding sharp lines
    hands piping thick flour-paste crosses onto egg-washed buns, the paste holding sharp lines

    4. Burnt bottoms, raw middles — wrong rack, hot oven

    Spiced, sugared dough browns fast, and surface fruit chars faster. Buns baked too low or in a hot-running oven get scorched bases with doughy centers — sugar caramelizes aggressively on the hot pan while the middle lags.

    How to tell: Near-black bottoms with pale sides; doughy centers; raisins on top turned bitter and hard.

    The fix: Middle rack, always. Verify a true 375°F (190°C) — many home ovens run 25°F hot, the difference between golden and scorched here. Line the pan with parchment; it insulates the bottoms just enough. Tops browning before centers finish? Tent loosely with foil for the last 5 minutes. Tuck surface raisins slightly into the dough when shaping so fewer sit exposed.

    5. Dry fruit and harsh spice — hydrate the fruit, measure the spice

    Two flavor faults that read as dryness. Unsoaked raisins pull moisture from surrounding dough as they bake, leaving dry pockets and turning themselves into hard, bitter pellets. And unmeasured spice — a heavy hand with cloves or allspice — gives a harsh, medicinal edge.

    How to tell: Hard, dark raisins; a dry halo of crumb around each piece; spice that’s sharp rather than warm.

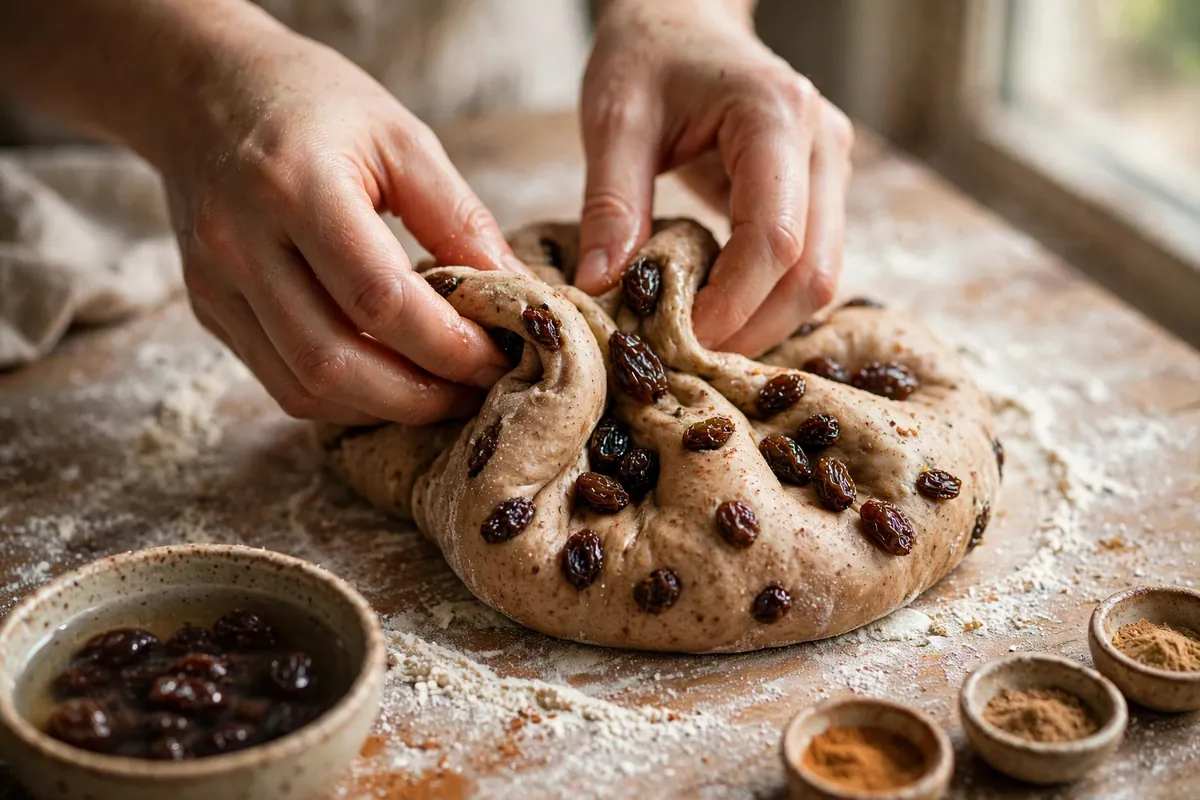
    The fix: Soak 150g raisins in warm water (or orange juice) 20 minutes, pat dry, then knead in — they’ll stay plump and jammy. Measure: per 500g flour, 2 tsp cinnamon, ½ tsp allspice, ¼ tsp nutmeg — warm and present, never harsh. Add fruit late in kneading so it doesn’t tear the gluten network; a torn network can’t hold gas, which circles back to density.

    plump soaked raisins being folded into spiced bun dough, with a small bowl of measured spices beside
    plump soaked raisins being folded into spiced bun dough, with a small bowl of measured spices beside

    Frequently asked questions

    Can I still eat dense hot cross buns?
    Yes — dense buns are safe, just heavy. Split and toast them; the toaster does what the oven didn’t. Slathered with butter while hot, an under-proofed bun is still a good bun.

    Can I pipe the crosses on after baking instead?
    Absolutely. Icing crosses — powdered sugar with a little milk — piped onto fully cooled buns are the modern shortcut and look sharp every time. Purists use flour paste, but nobody at the table will object.

    Can I make hot cross bun dough the night before?
    Yes, and it’s better for it. Refrigerate after kneading (8–12 hours); shape cold the next morning — cold dough portions easier — then give the buns their full warm proof. The slow ferment deepens flavor noticeably.

    Why did my raisins burn on top?
    Exposed fruit chars. Tuck raisins just under the dough surface when shaping, and soak them first — hydrated fruit scorches far slower. A few darkened ones are traditional; black and bitter means fully exposed.

    Can I freeze hot cross buns?
    Yes — freeze baked and cooled up to 2 months in a zip bag. Refresh from frozen at 325°F (165°C) for 10–12 minutes, or split and toast straight from frozen.

    Related troubleshooting: Why Didn’t My Bread Rise? A Step-by-Step Diagnosis · Why Did My Cinnamon Rolls Unravel? Shaping and Proofing Fixes · Why Did My Brioche Come Out Dry? Enriched Dough Fixes

  • Why Did My Brioche Come Out Dry? Enriched Dough Fixes

    Why Did My Brioche Come Out Dry? Enriched Dough Fixes

    You did the hard part — the long knead, the butter worked in piece by piece, the slow rise. Then the loaf came out dry and cottony, nothing like the buttery, pull-apart brioche you were promised. Dry brioche is frustrating because the ingredient list looks rich — but richness on paper and moisture in the crumb are different things.

    Quick diagnosis: Dry brioche is almost always overbaked (cause #1) — enriched doughs dry out fast past 190°F (88°C) internal — or under-kneaded so the butter leaked out instead of staying emulsified in the crumb (cause #2). Check your thermometer first.

    Brioche is roughly half butter by flour weight, plus eggs and sugar — tender only if the gluten holds the fat and you stop the bake before the moisture escapes.

    1. You overbaked it — the #1 killer of enriched doughs

    A lean artisan loaf is done at 200–210°F (93–99°C) internal. Brioche is done at 190°F (88°C). That ten-degree gap is enormous in an enriched dough: butter and egg proteins tighten and squeeze out moisture fast past their set point. Five extra minutes that would barely register on a baguette turns brioche cottony.

    How to tell: The crust is deeply browned, the crumb is dry all the way through, and you baked by time or color instead of temperature.

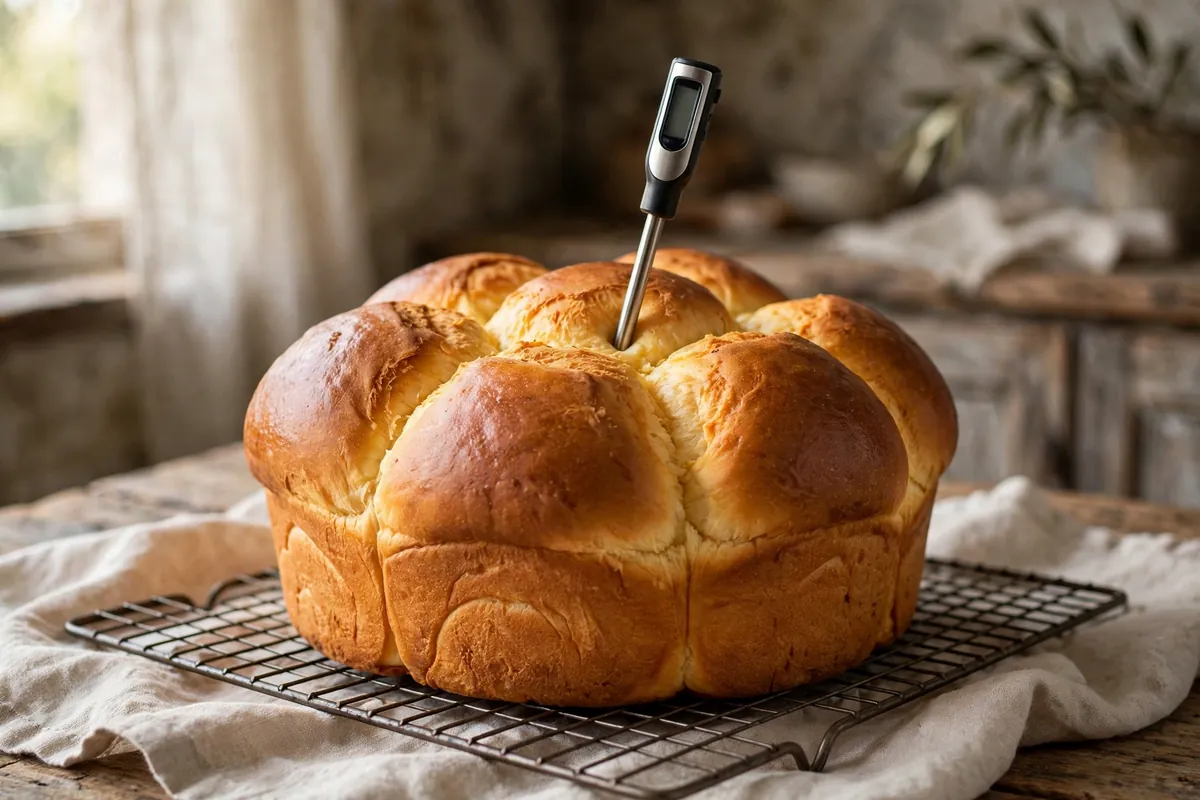
    The fix: Bake at 350–375°F (175–190°C) and start checking early — a loaf-pan brioche is often done at 25–30 minutes. Pull it the moment the center reads 190°F (88°C), tent with foil if the top browns first, and remember carryover adds a few degrees on the counter. Switching from “bake until golden” to “bake until 190°F” fixes more dry brioche than every other change combined. (Same thermometer-first habit works for lean loaves: How to Tell When Bread Is Done.)

    2. The gluten was underdeveloped — so the butter leaked out

    Brioche needs a fully developed gluten network before the butter goes in, and more kneading after. Gluten is the scaffolding that holds fat suspended in the crumb. If it’s weak, butter melts during baking and runs out instead of staying emulsified — dry crumb, sometimes a greasy pan.

    How to tell: Butter visibly leaked into the pan, the crumb is dry but greasy at the bottom, and the dough tore instead of stretching thin when tested.

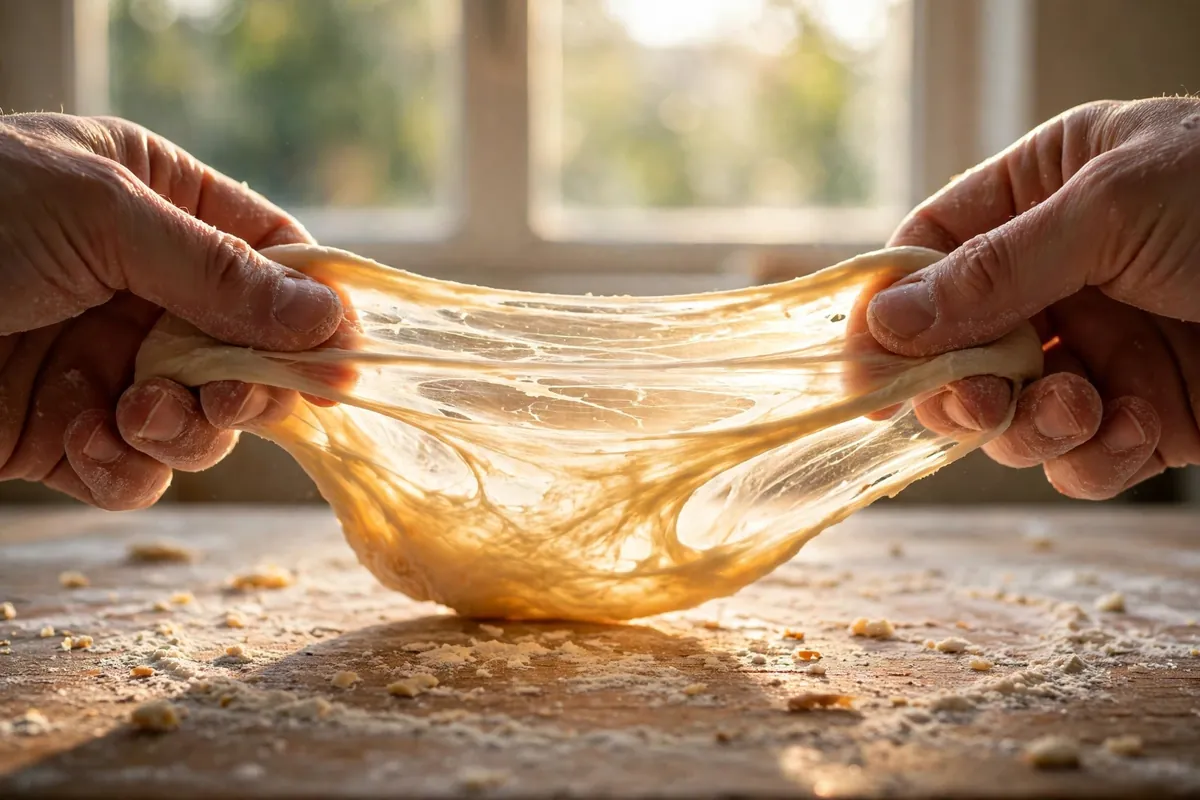
    The fix: Knead the base dough (flour, eggs, sugar, yeast, salt, milk) to a full windowpane first — a translucent membrane that stretches without tearing — then add soft (not melted, not cold) butter a tablespoon at a time. The dough will look broken halfway through; that’s normal. Keep going — 25 to 30 minutes in a stand mixer is typical — until smooth, elastic, and passing the windowpane again. Testing the windowpane twice, before and after the butter, stopped my brioche leaking entirely.

    hands stretching brioche dough into a translucent windowpane
    hands stretching brioche dough into a translucent windowpane

    3. There wasn’t enough fat — the enrichment was too lean

    True brioche runs 50% butter to flour by weight — 250g butter per 500g flour. Many “brioche” recipes cut that to 25–30%, and at that point you’re baking a slightly rich sandwich bread. It will never have shreddable, buttery tenderness no matter how perfect your technique is.

    How to tell: The recipe’s butter was under ~40% of flour weight, the dough was quick and easy to knead, and the crumb is bread-like rather than cake-like.

    The fix: Check the ratio before blaming technique: for 500g flour, use at least 200g butter (40%), ideally 250g (50%). Don’t cut the butter to lighten the recipe — in brioche, the butter is the moisture system. Use real butter, not oil: its milk solids and solid-at-room-temperature structure are part of what makes the crumb tender. (More on when fat and flour choices matter: Bread Flour vs All-Purpose: When It Actually Matters.)

    4. The oven ran too hot — set crust, dry center

    Brioche’s sugar and milk solids brown fast. In an oven running hot — most home ovens are 15–25°F off — the crust sets and darkens before the center finishes, so you either pull a pale-centered loaf or leave it in until the whole thing dries out.

    How to tell: The top browned deeply well before the timer ended and the center is dry even though the loaf looked done early.

    The fix: Verify with an oven thermometer and bake at a true 350°F (175°C). Tent loosely with foil once the top reaches the color you want, usually around the two-thirds mark, and use the lower-third rack so bottom heat drives the center done.

    5. You sliced too soon — or stored it wrong

    Brioche finishes setting as it cools. Slicing warm lets steam escape that would otherwise settle back into the crumb as moisture. And enriched breads stale faster than lean ones uncovered — a brioche left out is noticeably drier by morning.

    How to tell: The loaf seemed fine at first and dried out over hours, or you cut the first slice warm and the crumb felt gummy, then dry.

    The fix: Cool completely — a full 2 hours — before slicing. Store cut-side down on day one, then sealed in a bag or bread box; skip the refrigerator, which accelerates staling. Brioche freezes beautifully up to 3 months: slice first, wrap tight, refresh at 300°F (150°C) for 5 minutes. (Full playbook: How to Store Homemade Bread So It Stays Fresh for Days.)

    The checklist for next time

    50% butter to flour. Full windowpane before and after the butter goes in. True 350°F (175°C) oven. Pull at 190°F (88°C) internal. Cool 2 hours before slicing. And if you want to split the work, a slow fridge ferment improves both flavor and texture — timelines are in Make-Ahead Bread Dough: Fridge Fermentation Timelines.

    instant-read thermometer in the center of a golden brioche loaf
    instant-read thermometer in the center of a golden brioche loaf

    FAQ

    Is dry brioche safe to eat?
    Yes — dryness is a texture defect, not a safety issue. As long as the loaf baked through with no raw center and was stored normally, it’s fine. Repurpose it as French toast, bread pudding, or breadcrumbs, where dryness becomes an advantage.

    Can I fix brioche that’s already baked dry?
    You can’t restore the original tender crumb, but you can make it delicious. Brush slices with warm simple syrup and heat briefly, use thick slices for French toast (dry crumb absorbs custard beautifully), or cube it for bread pudding. Warming slices also perceptibly softens a dry crumb.

    How much butter should brioche actually have?
    At least 40% of flour weight; 50% is the classic benchmark — 250g butter per 500g flour. Below 40% you’re making enriched sandwich bread, and no technique produces true brioche tenderness. The fat is the moisture system — don’t cut it.

    What internal temperature is brioche done at?
    190°F (88°C) — notably lower than lean breads at 200–210°F (93–99°C). Enriched doughs dry out fast past 190°F as egg and butter proteins tighten and expel moisture. Start checking early and tent with foil if the top browns first.

    Why did butter leak out of my brioche while baking?
    Weak gluten. The dough must pass the windowpane test before the butter goes in and after it’s incorporated — about 25–30 minutes of mixer kneading total. Add butter soft, a tablespoon at a time; don’t stop when the dough looks broken midway, since it comes back together.

    Can I use oil instead of butter in brioche?
    You can, but it won’t be brioche in texture — oil gives a soft but slicker, less shreddable crumb. Butter’s milk solids add the signature flavor and help the crumb set tender.

    Related troubleshooting: Why Is My Bread Dense? 9 Causes and How to Fix Each One · How to Tell When Bread Is Done · Make-Ahead Bread Dough: Fridge Fermentation Timelines

  • Overbaked Cake? 5 Rescue Methods That Actually Work

    Overbaked Cake? 5 Rescue Methods That Actually Work

    The toothpick came out clean — five minutes too late. The edges are dark, the crumb is cottony, and the cake you needed for tonight tastes like a sweet sponge. I’ve rescued more overbaked cakes than I care to admit: you can’t un-bake a cake, but you can absolutely make it delicious again. Here are the five rescues that work, in order of effort.

    Quick diagnosis: A dry, overbaked cake needs moisture added back or a complete transformation. For a cake that’s just a little dry, the simple-syrup soak (method #1) fixes it in ten minutes. For a genuinely parched cake, stop trying to serve it as cake — turn it into trifle, cake pops, or bread pudding (methods #3–5) and nobody will ever know.

    Method 1: The simple-syrup soak (10 minutes, best for mildly dry cake)

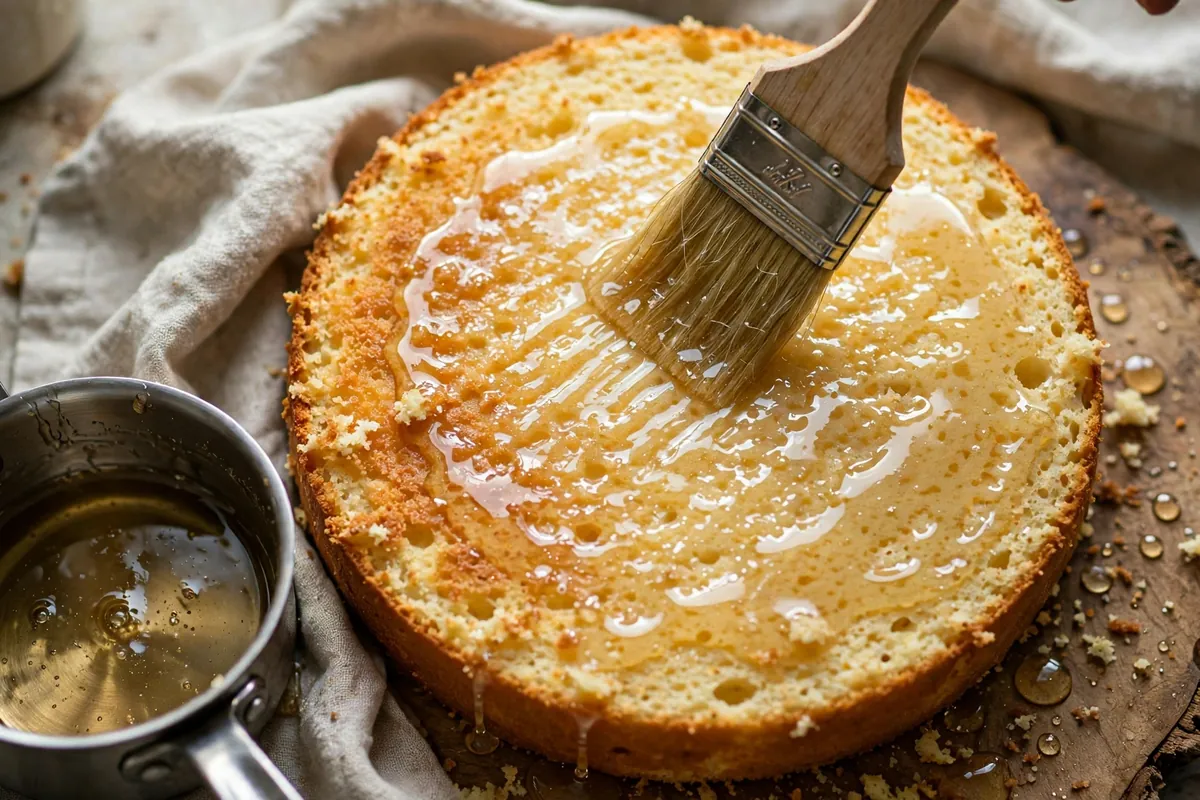
    This is the professional bakery’s everyday fix — most commercial cake layers get syruped as a matter of routine, not emergency. The syrup adds back exactly what overbaking drove out: water and sugar, in the ratio cake crumb absorbs best.

    How: Combine equal parts sugar and water (½ cup each covers two layers). Simmer, stirring, until dissolved, then cool fully — warm syrup melts frosting. Poke the layers all over with a skewer, going halfway through. Brush on 2–3 tablespoons per 8-inch layer, letting it absorb. The crumb should look moist, not soggy.

    Flavor it: Swap the water for brewed coffee (chocolate cake) or orange juice (vanilla cake), or add a teaspoon of vanilla, rum, or almond extract to the cooled syrup. A flavored soak adds a layer the original recipe never had — which is how a rescue becomes an upgrade.

    When it works: Cake that’s dry but structurally sound — intact crumb, no burnt edges. If the edges are actually burnt (bitter, black), trim them off first with a serrated knife; syrup can’t fix carbon.

    Method 2: Frost heavy and seal it in (15 minutes)

    Frosting is a moisture barrier. A dry cake served naked stays dry; the same cake under a generous coat of frosting reads as “sturdy” rather than parched, because every bite includes the frosting’s fat and sugar. This is why bakery sheet cakes — often baked a day ahead — taste fine: they’re sealed.

    How: Level the layers, then apply frosting generously — don’t skimp. A crumb coat first (thin layer, chill 20 minutes), then the full coat. The crumb coat traps loose crumbs and starts sealing moisture immediately. Fill between layers thickly too; the filling is doing rescue work, not just flavor work.

    cross-section of a frosted layer cake showing thick frosting sealing the layers
    cross-section of a frosted layer cake showing thick frosting sealing the layers

    Best for: Layer cakes that are dry but not crumbly — the structure holds, the eating experience needs help. Pair with method #1 (syrup first, then frost) for the full treatment.

    Method 3: Turn it into trifle (20 minutes, the crowd-pleaser)

    This is the rescue with the highest success rate, because trifle doesn’t ask the cake to be good cake — it asks it to be a sponge for custard, fruit, and cream, which is exactly what dry cake does brilliantly. Dry crumb absorbs custard better than moist crumb does. Your failure is now a feature.

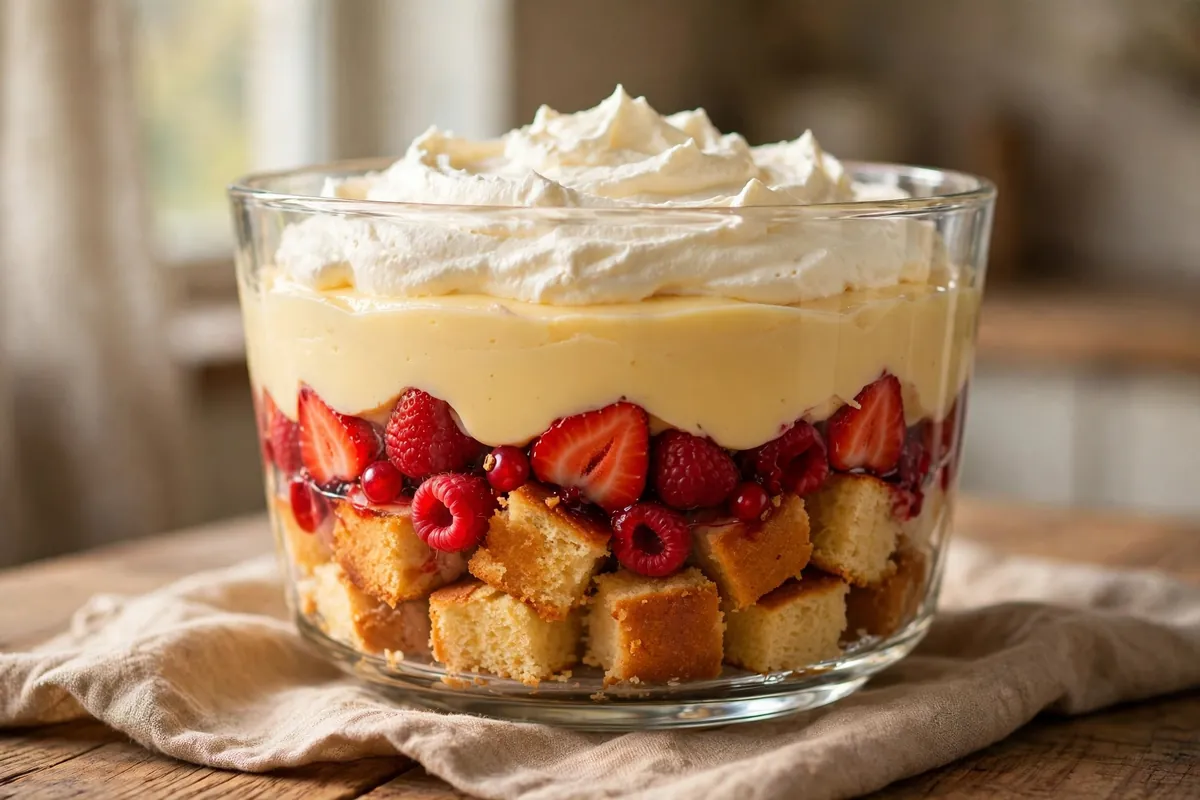
    How: Cube the cake into 1-inch pieces. Layer in a glass bowl: cake cubes, macerated fruit or jam, custard or vanilla pudding, whipped cream. Repeat. Chill at least 2 hours (overnight is better) so the layers meld. The cake cubes drink up the custard and turn meltingly tender.

    Best for: Genuinely parched or crumbly cake, cake with trimmed burnt edges — anything too far gone for the syrup soak. Chocolate cake + raspberries + custard is the classic; vanilla cake + lemon curd + berries is the elegant one.

    a glass trifle bowl showing distinct layers of cake cubes, berries, custard, and cream
    a glass trifle bowl showing distinct layers of cake cubes, berries, custard, and cream

    Method 4: Cake pops and rum balls (30 minutes, the fun one)

    Dry cake is the ideal base for cake pops — the standard recipe literally starts with crumbled cake plus frosting. You’re not hiding the dryness; you’re exploiting it, because dry crumbs absorb the binder perfectly and hold their shape.

    How: Crumble the cake finely. Mix in frosting 1 tablespoon at a time until the mixture holds when squeezed — usually 3–4 tablespoons per 2 cups of crumbs. Roll into 1-inch balls, chill 30 minutes, then dip in melted chocolate. For rum balls: swap the frosting for a splash of dark rum plus a spoonful of jam, roll in cocoa or chopped nuts.

    Best for: Cake that’s too dry or crumbly to slice presentably. Kids’ parties, bake sales, gifts — nobody has ever guessed a cake pop’s origin story.

    Method 5: Bread pudding / tres leches transformation (40 minutes, the total rebuild)

    The nuclear option, and honestly the most delicious one. Bread pudding was invented for stale, dry baked goods — custard soaks in, the oven sets it, and what emerges is a different dessert entirely, one where dryness was a prerequisite.

    How: Cube the cake, place in a buttered baking dish. Whisk together 2 cups milk or half-and-half, 3 eggs, ½ cup sugar, 1 teaspoon vanilla, and a pinch of salt. Pour over the cubes, press to submerge, rest 20 minutes. Bake at 350°F (175°C) for 35–45 minutes until set and golden. For tres leches: skip the eggs, soak in evaporated milk, sweetened condensed milk, and heavy cream, and serve chilled with whipped cream.

    Best for: The worst cases — the cake that’s beyond syrup, beyond frosting. Also the best-tasting rescue on this list; I’ve had guests request “that bread pudding” without knowing it began as a failed layer cake.

    What NOT to do

    • Don’t put it back in the oven. More heat is how you got here. Every rescue on this list adds moisture or transforms the cake — none of them involve rebaking the cake itself.
    • Don’t microwave it. Thirty seconds of microwave makes dry cake briefly soft, then tougher than before as it cools. It’s a party trick, not a fix.
    • Don’t serve it plain and hope. Guests notice. The ten minutes a syrup soak takes is always worth it.

    Frequently Asked Questions

    Can you really fix an overbaked cake?
    You can’t reverse the baking, but you can fix the eating experience completely. A syrup soak restores moisture to mildly dry cake; for badly overbaked cake, trifle, cake pops, or bread pudding transform it into a dessert nobody will recognize as a rescue.

    How do you moisten a dry cake after baking?
    Poke holes with a skewer and brush on simple syrup — equal parts sugar and water, simmered and cooled — 2–3 tablespoons per 8-inch layer. Flavor the syrup with coffee, citrus juice, or extract to match the cake.

    Is it safe to eat overbaked cake?
    Completely — overbaking is a texture problem, not a safety one. The only exception is genuinely burnt (black, bitter) portions; trim those off, as burnt flavors permeate and taste acrid.

    Can I rebake a dry cake with more moisture?
    No — returning a baked cake to the oven only drives out more moisture. All real rescues work by adding moisture (syrup, custard, frosting) or repurposing the crumb, never by reheating the cake itself.

    What’s the best rescue for a dry layer cake needed tonight?
    The syrup soak plus generous frosting — 25 minutes total, and the cake serves as intended. If it’s too far gone, trifle: 20 minutes of assembly, 2 hours chilling, and it’s the best dessert on the table.

    How do I stop overbaking cakes in the first place?
    Start checking 5–8 minutes before the recipe’s earliest time, pull when a toothpick shows moist crumbs (not clean), and verify your oven with a thermometer — most ovens run 15–25°F off. Full prevention guide: Why Is My Cake Dry?

    Related troubleshooting: Why Is My Cake Dry? · Why Did My Cake Sink in the Middle? · Why Is My Pie Filling Runny?

  • Puff Pastry Not Puffing: Lamination Mistakes to Avoid

    Puff Pastry Not Puffing: Lamination Mistakes to Avoid

    Quick diagnosis: Puff pastry rises on steam trapped between butter layers — no distinct layers, no lift. Flat puff comes down to butter at the wrong temperature (melted into the dough, or so cold it shattered), cut edges that got sealed shut, or an oven that wasn’t hot enough to flash water into steam. Check those three first; they account for nearly every failed puff.

    cross-section of properly puffed pastry showing distinct flaky layers vs a flat dense slab

    Puff pastry is architecture: hundreds of alternating layers of dough and butter (a classic six-turn puff has 729 of them). In a hot oven, the water in the butter flashes to steam, and each steam pocket jacks its dough layer upward. The whole structure depends on those layers staying separate until the heat hits. Every mistake below is a way the layers got destroyed, glued, or never formed.

    1. The butter melted into the dough

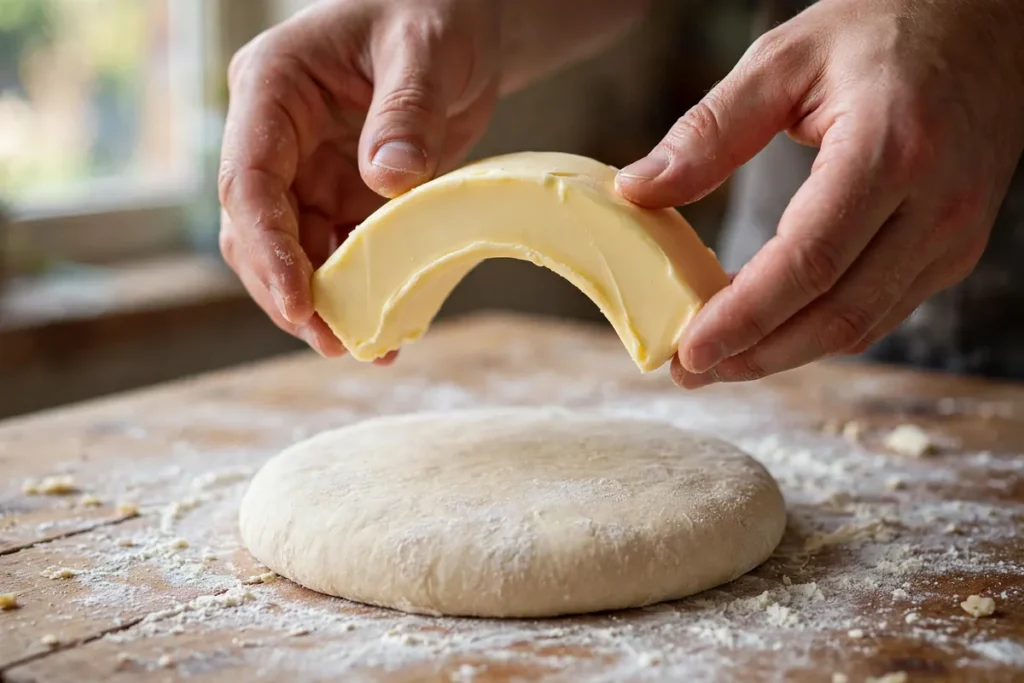
    The cardinal sin of lamination. Butter and dough must stay as separate strata. If the butter gets warm, it absorbs into the surrounding dough — and absorbed butter can’t make steam pockets. You end up with what is essentially a rich shortcrust: tasty, but flat as a board.

    How to tell: The dough felt greasy or soft while rolling, butter visibly smeared instead of staying in a distinct sheet, or you could see buttery patches soaking through the dough surface.

    The fix: Keep everything cool and work in a cool kitchen. The butter block should be pliable but cold — around 60°F (16°C): bendable without cracking, but firm to the touch. If at any point the dough feels soft, greasy, or the butter starts peeking through, stop immediately and refrigerate 30 minutes. There is no penalty for chilling mid-process; there is a total penalty for pushing through warm. Use European-style butter (82%+ fat) if you can — it stays pliable at cooler temperatures than standard butter, giving you a wider working window.

    2. The butter was too cold and shattered

    The mirror image of cause #1, and just as fatal. Butter straight from the fridge is brittle — roll it and it cracks into shards that pierce straight through the dough layers instead of rolling out into a continuous sheet. Shattered butter means broken, discontinuous layers, which means weak, uneven lift.

    How to tell: You heard or felt cracking while rolling the butter block in, or you can see distinct yellow chunks and cracks through the dough rather than smooth marbled layers.

    The fix: Temper the butter block first: pound it with a rolling pin between parchment sheets until it’s the same cool-pliable state as the dough — bendable, not brittle, not soft. The butter and the dough (détrempe) must be the same consistency when they meet; if one is firmer than the other, the firmer one wins and the layers lose. This temperature matching is the single most important skill in lamination, and it applies to pie crust too (see Pie Crust Shrinking in the Oven).

    butter block at correct pliable state — bending slightly without cracking — next to dough of matching firmness

    3. The edges got sealed shut

    Puff rises because steam escapes upward between the layers, pushing them apart. If the cut edges are pressed, pinched, or crimped together, the layers are glued shut at the perimeter — steam can’t lift what it can’t get between. This is why a carelessly cut vol-au-vent rises in the middle and stays welded at the rim.

    How to tell: The center puffed but the edges stayed flat and dense, or the whole piece rose unevenly with one sealed side.

    The fix: Cut with a sharp knife or cutter in one firm downward motion — no sawing, no dragging, which smears the layers together. Never pinch or crimp puff pastry edges the way you would a pie. And keep egg wash off the cut sides: brush only the top surface, because wash running down the edges glues the layers exactly where they need to separate.

    4. Not enough resting between turns

    Each fold (turn) develops gluten and warms the butter. Roll the next turn immediately and you’re working tense, elastic dough with softening butter — the layers smear instead of staying distinct, and the dough fights back, springing out of shape. Resting re-firms the butter and relaxes the gluten.

    How to tell: The dough resisted rolling, shrank back between passes, or felt soft and greasy by the third turn.

    The fix: Rest 30–60 minutes refrigerated between turns, wrapped airtight so the surface doesn’t dry. Mark each turn with a fingertip indent so you don’t lose count. The standard build is six single turns; fewer gives coarse, bready layers, while past seven or eight the layers get so thin they merge back together — more is not better.

    5. The oven wasn’t hot enough

    Steam needs violence. Water flashes to steam explosively only at high heat; in a moderate oven, the butter simply melts and soaks outward before enough steam pressure builds to lift anything. Puff pastry in a 350°F oven is just expensive shortbread.

    How to tell: The pastry looks greasy and flat with butter visibly leaked onto the tray, rather than risen and dry-layered.

    The fix: Bake at 400–425°F (200–220°C), fully preheated — give it 15–20 minutes past the beep. The initial blast is everything: it flash-converts water to steam while the structure is still flexible enough to rise. Don’t open the door for the first 15 minutes; the temperature drop collapses partially-lifted layers. This is the same hot-start principle that sets pie crusts and cookie edges (see Why Do My Cookies Spread Flat?).

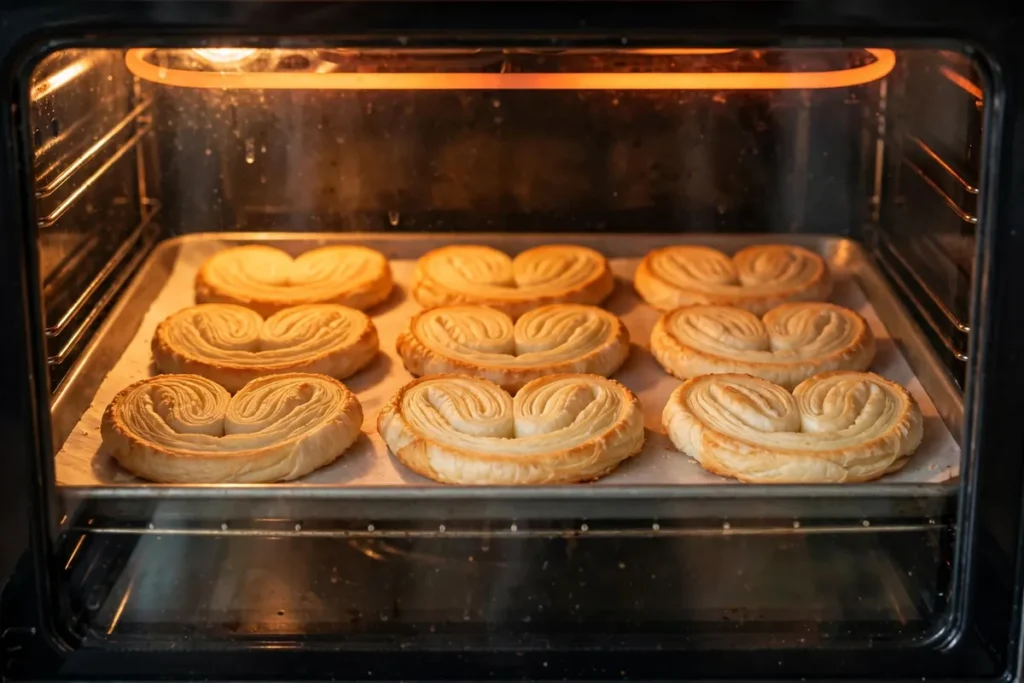
    tray of palmiers mid-bake through the oven window — visibly risen and separated layers

    6. Store-bought pastry was mishandled

    Most home puff failures involve commercial pastry, and the mistakes happen before baking: thawed at room temperature until limp, re-rolled aggressively (destroying the factory lamination), or left sitting out while the oven preheated.

    How to tell: The pastry was soft, sticky, or floppy when it went into the oven.

    The fix: Thaw overnight in the fridge, never on the counter — you want it just pliable enough to unfold. Handle it minimally: unfold, cut, and bake. If you must re-roll to thin it, one light pass only. And keep the shaped pieces refrigerated until the moment they go into the fully preheated oven; cold pastry hitting hot air is the entire mechanism.

    FAQ

    Is flat puff pastry safe to eat?
    Yes — it’s fully baked dough and butter, just without the lift. It will taste rich and buttery, closer to a cracker or shortbread. The failure is textural, not a safety issue. Repurpose it: flat puff makes excellent tart bases and cheese straws where height doesn’t matter.

    Can I re-bake puff pastry to make it puff?
    No — once the butter has melted out and the structure has set, the steam mechanism is spent. Puff is a one-shot process. The rescue is repurposing (see above), not re-baking.

    Why did my puff pastry leak butter all over the tray?
    Butter leaked because it melted before steam pressure could trap it — the classic signature of too-cool oven or butter that was already too warm going in. A little weeping is normal; a pooled lake means revisit causes #1 and #5.

    How many layers does puff pastry actually have?
    A standard six-turn single-fold puff has 729 layers (3^6). Blitz/rough puff, where butter is folded in chunks rather than as a sheet, has far fewer but still puffs respectably — it’s the honest shortcut I recommend to beginners before attempting classic puff.

    Can I make puff pastry without a stand mixer?
    Absolutely — the dough (détrempe) is just flour, water, salt, and a little butter, mixed by hand in minutes. Lamination is all rolling pin work. No special equipment is needed beyond a rolling pin, parchment, and patience between turns.

    Does humidity affect puff pastry?
    Yes, on two fronts: humid air softens butter faster (work colder, chill more often), and flour absorbs ambient moisture, which can make the détrempe sticky. On very humid days, hold back a tablespoon of water from the dough and add only if needed.

    Related troubleshooting: Pie Crust Shrinking in the Oven · Why Do My Cookies Spread Flat? · Soggy Bottom Pie: How to Get a Crisp Base Every Time