Author: Ali Ramzan

  • Why Did My Basque Cheesecake Burn? (High-Heat Cheesecake Fixes)

    Why Did My Basque Cheesecake Burn? (High-Heat Cheesecake Fixes)

    That near-black top on your Basque cheesecake is probably not a mistake — it’s the entire point of the dessert. Basque cheesecake bakes deliberately hot so the surface caramelizes deep and dark while the center stays soft and custardy. The real question isn’t whether it’s dark, but whether it’s caramelized (bitter-sweet, delicious) or carbonized (acrid, ashy, actually burnt).

    Quick diagnosis: A deeply browned, almost-black top is normal and correct — taste it before panicking. Truly burnt (bitter, ashy) comes from an oven running hot, a rack too close to the top element, or baking too long. If only the surface is overdone, shave it off with a serrated knife — the inside is almost always fine.

    Tested baseline: 900g (2 lb) full-fat cream cheese at room temperature, 300g sugar, 6 large eggs, 480ml heavy cream, 30g flour, 1 tsp vanilla, 1 tsp fine salt. 10-inch springform lined with pleated parchment sticking above the rim. Baked at 425°F (220°C), middle rack, 55 minutes — deeply browned top, a 2–3 inch jiggle in the center. Cooled 1 hour, chilled 6 hours before slicing.

    1. The dark top is the recipe — don’t confuse caramelized with burnt

    This is the number-one “problem” with Basque cheesecake, and it isn’t one. The dessert was born in San Sebastián baked at fierce heat; the scorched-looking top is its signature, with bitter caramel notes balancing the sweet, creamy interior. If yours looks like crème brûlée’s darker cousin, you nailed it.

    How to tell: Caramelized tops smell like toffee and taste pleasantly bitter-sweet. The color is uneven — mahogany in spots, near-black in others. Truly burnt tops smell acrid, taste ashy, and the blackness is uniform and dull.

    The fix: Taste the top before doing anything drastic. Bitter-sweet and delicious means serving it proudly. Genuinely ashy means shaving off the blackened 2–3mm with a long serrated knife — what’s underneath is almost always perfect.

    2. Your oven runs hot — the most common real cause

    Home ovens routinely run 25–50°F (15–30°C) hotter than the dial says, and at 425°F (220°C) that margin is the difference between caramelized and carbonized. A cheesecake that was perfect at a friend’s house can scorch in your oven from this alone.

    How to tell: Everything you bake browns faster than recipes say; the top went from golden to black in the last 10 minutes.

    The fix: Put an oven thermometer on the middle rack and trust it, not the dial. If yours runs hot, set 400°F (200°C) instead and add 5–10 minutes. Start checking color at 40 minutes — you can always add time, but you can’t un-burn a top.

    3. The rack was too high — the top element scorched it

    Most ovens heat from the top element during baking, and Basque cheesecake rises dramatically — the domed top can end up inches from the element even from a safe starting position.

    How to tell: The very center of the top is darkest; sides and bottom are fine; the rise brought the surface up toward the heat.

    The fix: Bake on the middle rack or one notch below, never the top third. If the top colors too fast mid-bake, lay a loose sheet of foil over it — tented, not touching — for the remaining time. Same rescue as overbaked cakes.

    4. You baked too long chasing a set center — the jiggle is correct

    The classic Basque error: the center still wobbles at 55 minutes, so you give it “just 15 more” — and the top goes from dark to destroyed. The center should jiggle like set gelatin when you pull it; it finishes setting during 4–6 hours of chilling. A fully firm center out of the oven means a dry, overbaked cheesecake.

    How to tell: You baked past 70 minutes; the top is black and the texture is firm and cakey rather than creamy.

    The fix: Pull it when a 2–3 inch circle in the center still jiggles and the edges are puffed and set. Chill 6 hours minimum, overnight if you can. A properly baked Basque slices like a firm custard.
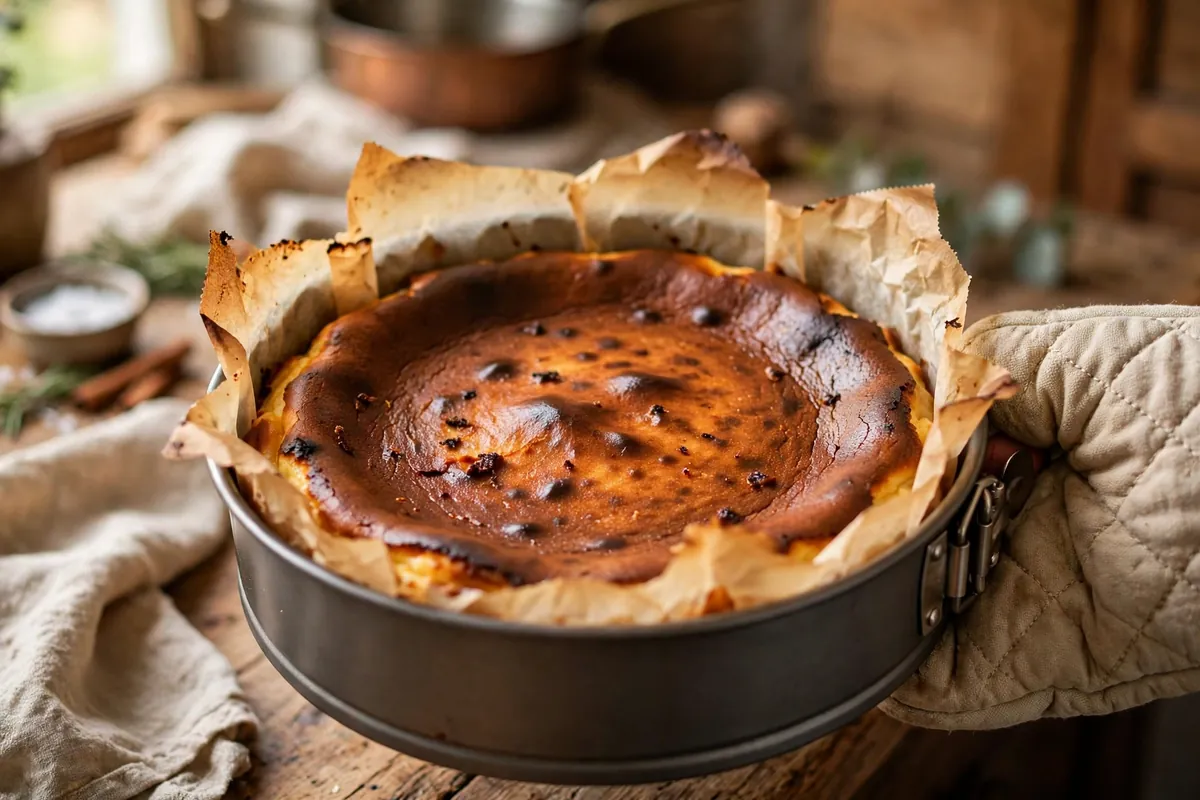
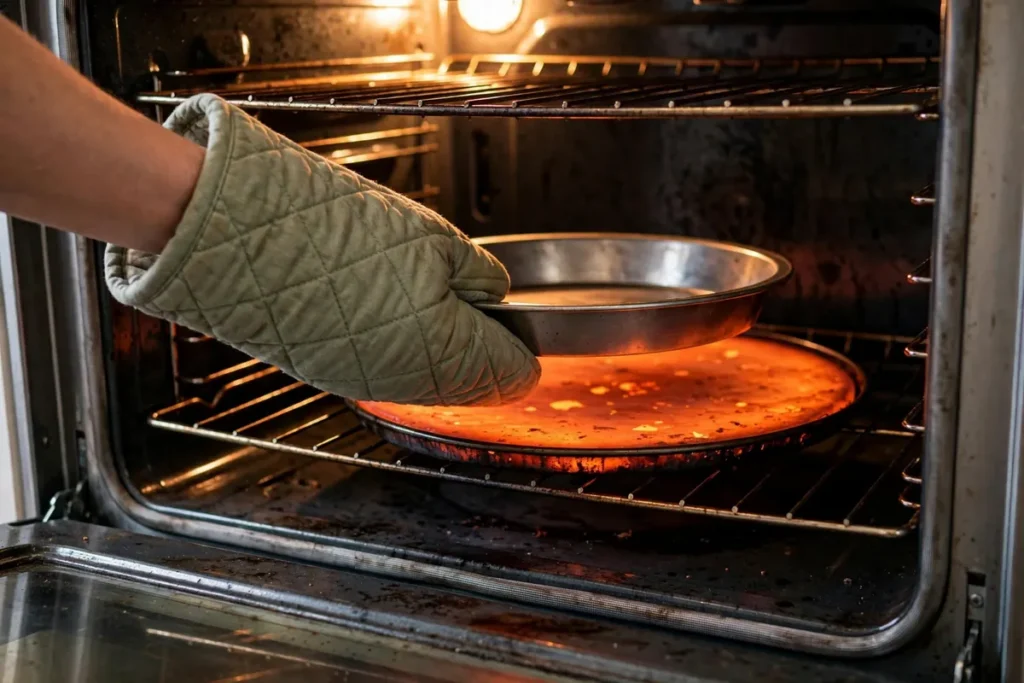
    oven-mitted hand pulling a Basque cheesecake from the oven showing a dark top with a visibly jiggly center
    oven-mitted hand pulling a Basque cheesecake from the oven showing a dark top with a visibly jiggly center

    5. A dark pan or sugared top accelerated the browning

    Dark nonstick pans absorb and radiate more heat than light aluminum — the same batter browns 10–15 minutes faster. Extra sugar on the surface (some recipes call for it) caramelizes harder and crosses into burnt sooner.

    How to tell: Bottom and edges are darker than the interior too; the recipe had you sprinkle sugar on top.

    The fix: Use a light-colored pan, or drop the temperature 25°F (15°C) with dark nonstick. Skip surface sugar — the batter has plenty. Always line with parchment: it insulates slightly and makes the tall, rustic sides easy.

    6. You used the broiler for color and walked away

    Some recipes suggest a minute under the broiler for extra char. A broiler takes a cheesecake top from perfect to cremated in under 60 seconds — the fastest way to genuinely burn one.

    How to tell: The burn happened in the final moments; the top is black but the interior is underdone.

    The fix: Skip the broiler — 425°F (220°C) gives all the color you need. If you must, watch without blinking, door cracked, 60–90 seconds max. The broiler isn’t worth the risk.

    Can you fix a burnt Basque cheesecake after the fact?

    Usually, yes. Cool it completely, then shave the blackened layer off with a serrated knife — the creamy interior underneath is almost always untouched. Taste as you go; stop when the bitterness is gone. Serve at room temperature (cold mutes the creamy texture) with something that complements the caramel notes: macerated berries or good coffee. If the whole cheesecake tastes ashy through and through, it can’t be saved — but that’s rare; surface burning is the norm.
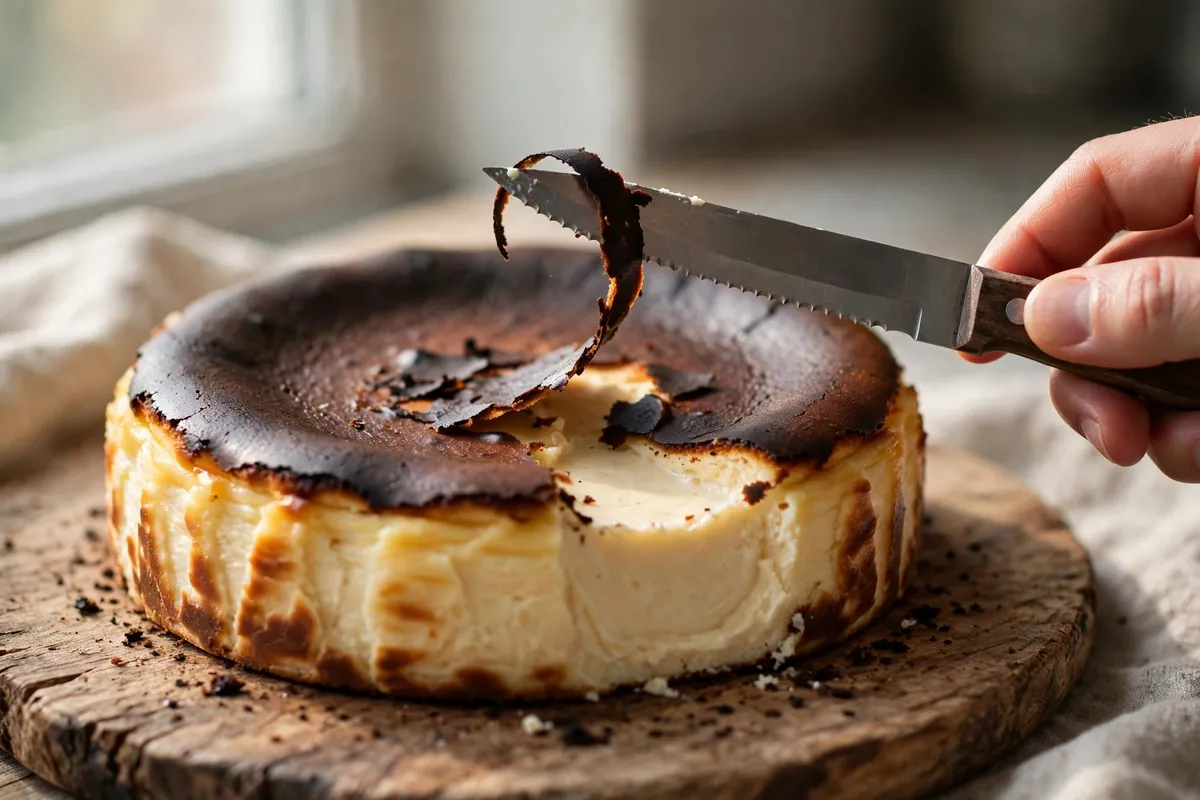
    serrated knife shaving a thin blackened layer off the top of a cooled Basque cheesecake
    serrated knife shaving a thin blackened layer off the top of a cooled Basque cheesecake

    FAQ

    Is a burnt-looking top on Basque cheesecake safe to eat?
    Yes. The dark top is caramelized sugar and milk proteins — the intended flavor, not anything harmful. Only discard it if it tastes acrid throughout, which is a flavor problem, not a safety one.

    Why is my Basque cheesecake burnt on top but raw inside?
    Too much heat from above — rack too high or oven too hot. The top scorched before the interior set. Use the middle rack, verify temperature with a thermometer, and tent with foil if the top darkens early.

    Should the center of Basque cheesecake jiggle?
    Yes — a 2–3 inch wobble is exactly right out of the oven. It sets during chilling. A fully firm center means overbaked and dry rather than custardy.

    Can I prevent the top from getting too dark?
    Tent loosely with foil once it reaches your preferred color, bake at 400°F (200°C) instead of 425°F (220°C), and use the middle rack. But don’t aim for pale — deep color is where the flavor lives.

    How long should Basque cheesecake chill before serving?
    Minimum 4–6 hours, ideally overnight, for the custardy center to set sliceable. Serve at room temperature — take it out 30 minutes before slicing.

    Why did my Basque cheesecake sink in the middle?
    Some settling is normal — it puffs dramatically and falls as it cools. A dramatic crater means underbaked; give it 5 more minutes next time.

    Related troubleshooting: Why Did My Cheesecake Crack? (And the Water Bath Fix) · Overbaked Cake? 5 Rescue Methods That Actually Work · Panna Cotta Troubleshooting: Won’t Set, Rubbery
  • Why Is My Pound Cake Gummy? Dense Butter Cake Fixes

    Why Is My Pound Cake Gummy? Dense Butter Cake Fixes

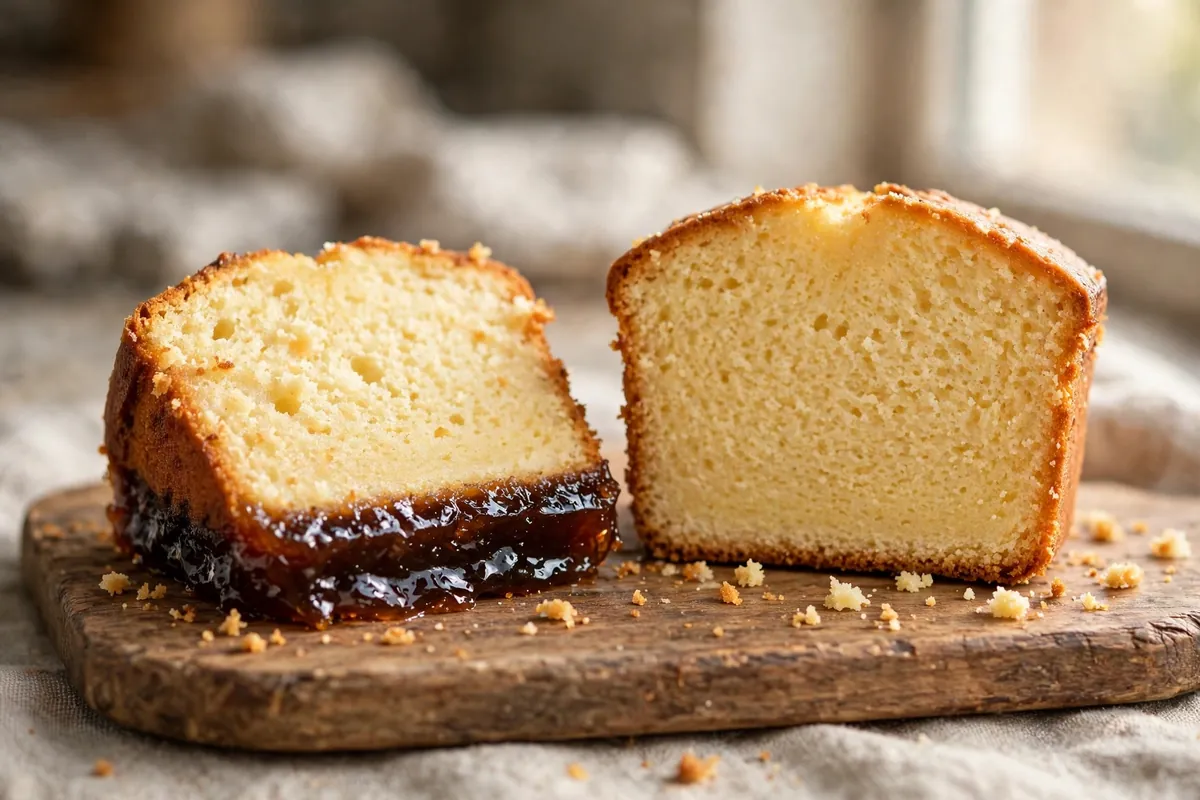
    A perfect pound cake crumb is fine, even, velvety — slicing cleanly, feeling light for its richness. Gummy pound cake is the opposite: wet streaks, a gluey band near the bottom, a crumb that clumps. It almost always traces to one of six causes — most commonly a center that never finished baking, hidden by a browned crust. (Top splitting, not texture? Why Did My Pound Cake Crack on Top? Rich Batter Fixes.)

    Quick diagnosis: The center underbaked — dense batter insulates, so the crust browns long before the middle sets. Or you overmixed after adding flour (gluten = gumminess), used too deep a pan, or sliced it warm. Bake to 200–210°F (93–99°C) internal, mix flour in gently, cool fully before slicing.

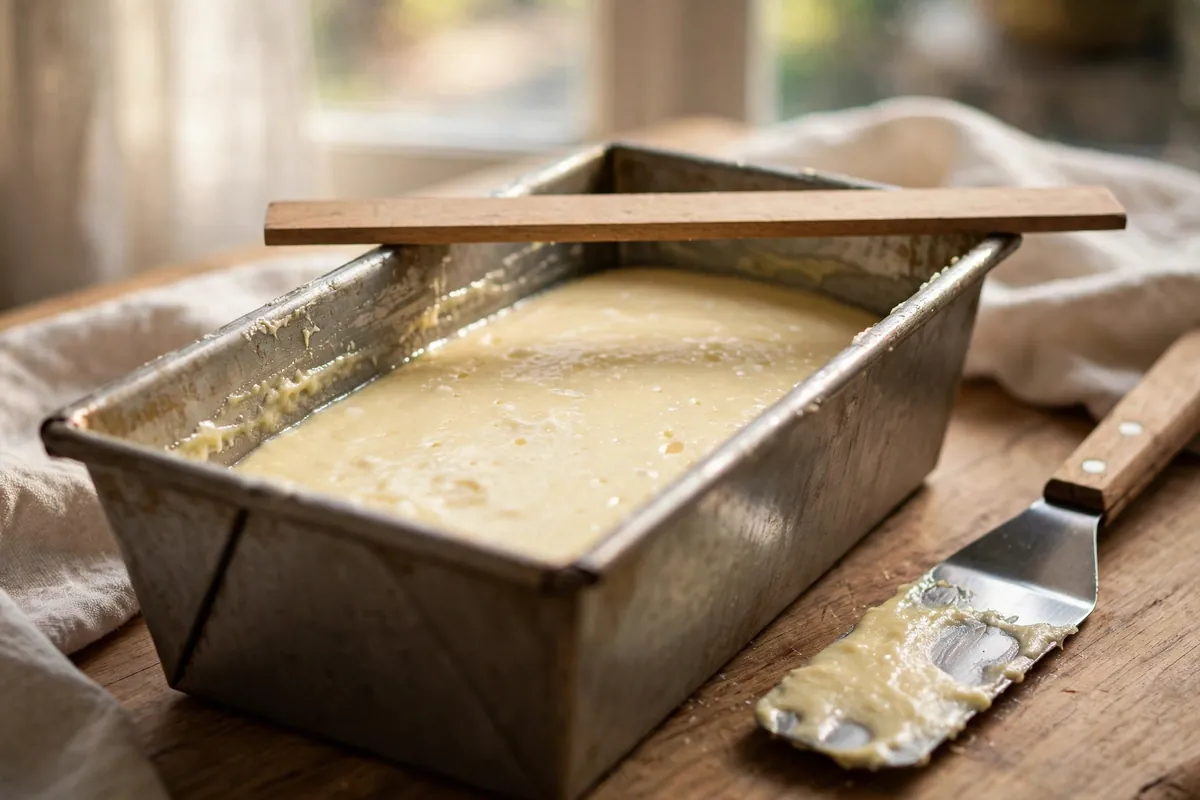
    My tested baseline: 250g each of unsalted butter, sugar, eggs (about 5), and all-purpose flour — the classic equal-weight pound — plus 1 tsp baking powder, ½ tsp salt, 1 tsp vanilla, 2 tbsp milk. Cream butter and sugar 4–5 minutes until pale. 9×5-inch loaf pan, greased and floured, filled no more than ⅔. Bake at 325°F (165°C) for 60–75 minutes.

    1. The center never finished baking — dense batter lies about doneness

    The cause behind most gummy pound cakes. Pound batter is heavy, and it insulates its own center: the crust sets and browns at 45 minutes while the middle is still a slow-cooking custard. Pull it when the top “looks done” and the interior collapses into a gummy layer as it cools.

    How to tell: Wet, translucent streak through the middle or bottom; crumb sticks to the knife; center tastes doughy while edges are fine.

    The fix: Bake by temperature, not color: a center probe should read 200–210°F (93–99°C), and the skewer should come out truly clean and dry. Start checking at 60 minutes but expect 70–75. Top browning early? Tent with foil and keep baking — color is not doneness. (Also the classic cause of Why Did My Cake Sink in the Middle? 7 Causes, Tested Fixes.)

    2. You overmixed after the flour went in — gluten makes gumminess

    Pound cake wants long, vigorous creaming of butter and sugar — but the moment flour enters, the rules flip. Every extra stroke develops gluten, and gluten in rich batter doesn’t make it chewy; it makes it tough and gluey, reading exactly like underbaking even in a fully baked cake.

    How to tell: Uniformly dense and slightly rubbery edge to edge, not streaky-wet in the center.

    The fix: Add flour in three additions, alternating with the milk, on the lowest speed just until each disappears — then stop. Finish with a spatula. The batter should look slightly uneven rather than perfectly smooth; perfectly smooth means overmixed. (Same gluten discipline as Why Is My Banana Cake Gummy? Mixing and Moisture Fixes.)

    3. Your pan was the wrong size — batter too deep never sets

    A 9×5-inch pan filled ⅔ bakes through in about 70 minutes. The same batter in an 8×4-inch pan sits significantly deeper, and the center can stay 20°F cooler than the crust at normal pull time. Too deep, and no reasonable bake time fixes it without burning the outside.

    How to tell: Gummy band at the very bottom center; excessive doming; long bake with a still-pale top when you pulled it.

    The fix: Use the pan the recipe was built for — usually 9×5-inch, filled no more than ⅔, batter at least an inch below the rim. With only a smaller pan, split the batter between two pans rather than overfilling one. (Pan geometry changes everything — see Glass vs Metal vs Dark Pans: What Changes in Your Bake.)

    pound cake batter in a 9x5 loaf pan filled to two-thirds, with a ruler or finger showing the fill line
    pound cake batter in a 9×5 loaf pan filled to two-thirds, with a ruler or finger showing the fill line

    4. The oven ran hot — the crust set before the interior could

    The mirror image: an oven running 25°F hot browns the crust fast, sealing the loaf while the center is still raw batter. Steam gets trapped, the interior effectively steams instead of baking, and you get a gummy core under a perfect crust. Dark pans make it worse.

    How to tell: Deep brown crust at 50 minutes with a raw, wet center; the top cracked hard and early.

    The fix: Verify a true 325°F (165°C) with an oven thermometer — pound cake wants gentle heat. If your oven runs hot, drop to 315°F (160°C) and extend the time. Light-colored metal browns slowest and gives the center the most time; in dark or glass pans, reduce 25°F as standard.

    5. Too much liquid for the flour — the ratios drifted

    The traditional pound is equal weights of butter, sugar, eggs, and flour — engineered so the structure supports the fat. Every “moist pound cake” addition — extra milk, a cup of sour cream, another egg — tips that balance. A little enrichment is fine; a lot overwhelms the flour, and the excess moisture never bakes out.

    How to tell: Generous wet additions beyond the classic four; batter looked thin or pourable rather than thick and scoopable; uniformly damp crumb, not streaky.

    The fix: Weigh the four core ingredients and keep them close to equal. Added sour cream or yogurt? Keep it to 60–80g and reduce the milk. Pound batter should plop off the spatula in thick ribbons, not pour. Rich batter forgives fat but not water — butter is fine, extra milk is the risk.

    6. You sliced it warm — the crumb hadn’t set yet

    Fresh from the oven, the crumb is fragile — starches gelatinized but not set, steam still migrating out. Slice at 20 minutes and the knife drags through semi-set crumb, compressing it into a gummy smear that looks exactly like underbaking. The cake was fine; the slicing wasn’t.

    How to tell: First slices looked gummy but the loaf improved as it sat; damage at the cut faces, not through the crumb.

    The fix: Cool in the pan 15 minutes, turn out, and cool at least 1 hour — fully room temperature — before slicing. Use a long serrated knife with a gentle sawing motion, not a chef’s knife pressed straight down.

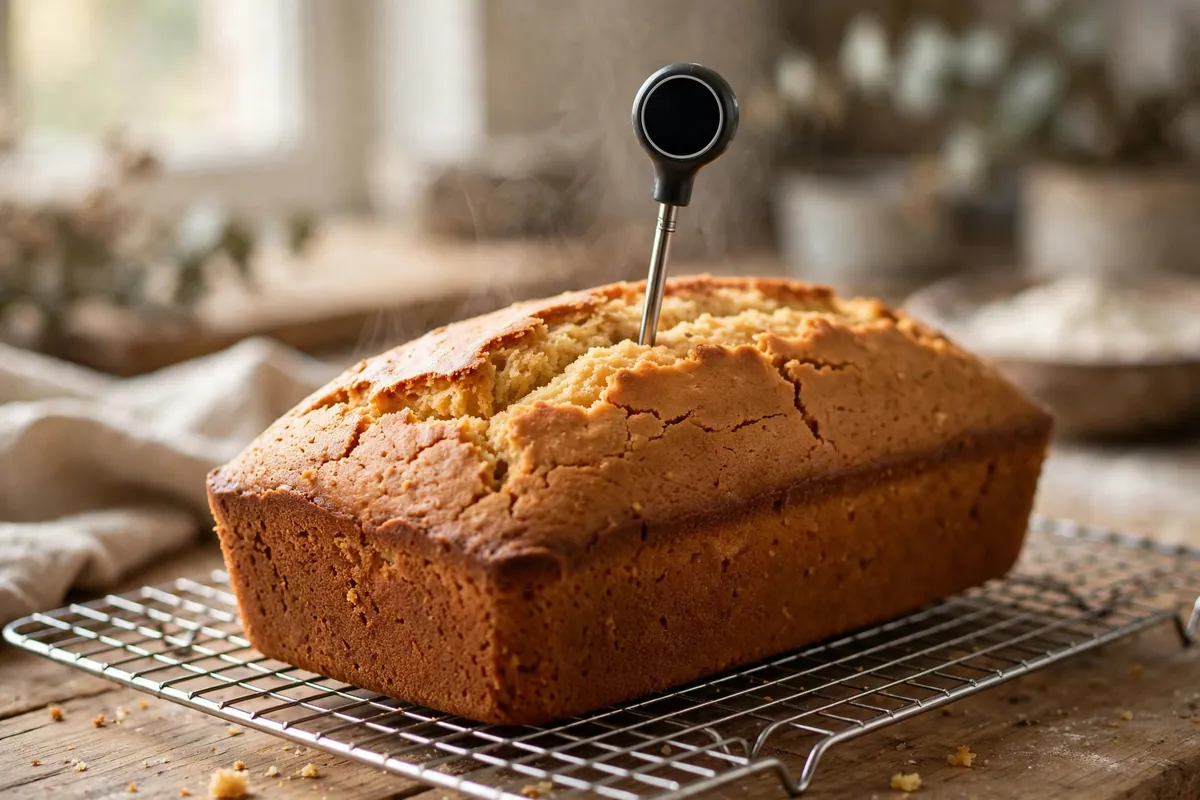
    a probe thermometer reading the center of a golden pound cake loaf, steam rising, on a cooling rack
    a probe thermometer reading the center of a golden pound cake loaf, steam rising, on a cooling rack

    Frequently asked questions

    Is gummy pound cake safe to eat?
    If the center baked through — no raw streaks, just dense and moist — yes, completely safe. Raw, doughy pockets? Toast the slices to golden; they’re safe and genuinely delicious.

    Can I fix a gummy pound cake after baking?
    You can’t re-bake it — the oven dries the outside without fixing the inside. But repurpose it: toast thick slices in butter until crisp-edged, cube it for trifle, or make pound cake bread pudding.

    Why is only the bottom of my pound cake gummy?
    The classic underbake-plus-deep-pan signature: the bottom center is the last place heat reaches. Verify pan size, bake to 200–210°F (93–99°C) internal, and center the oven rack so heat circulates underneath.

    How do I know pound cake is done without a thermometer?
    Three checks together: a skewer comes out clean and dry, the top springs back when lightly pressed, and the edges just start pulling from the pan. Any one alone can lie; all three rarely do.

    Can I freeze pound cake?
    Yes — up to 2 months. Cool completely, wrap tightly in plastic then foil, thaw unwrapped at room temperature. Freeze unsliced for best texture, or pre-slice with parchment between slices.

    Related troubleshooting: Why Did My Pound Cake Crack on Top? Rich Batter Fixes · Why Is My Banana Cake Gummy? Mixing and Moisture Fixes · Why Did My Cake Sink in the Middle? 7 Causes, Tested Fixes

  • Why Did My Cinnamon Rolls Unravel? Shaping and Proofing Fixes

    Why Did My Cinnamon Rolls Unravel? Shaping and Proofing Fixes

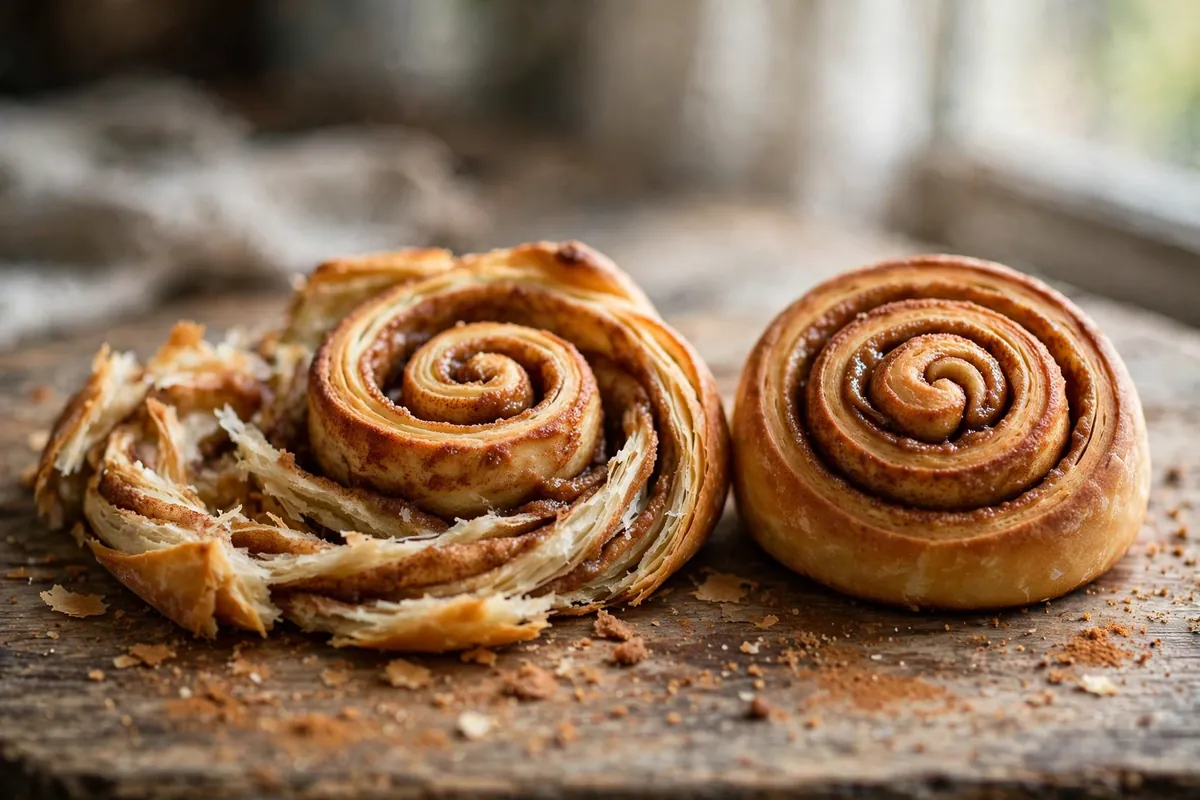
    Opening the oven to find your cinnamon rolls sprung open like uncoiling party favors — the spiral gaping, filling oozing — is a special heartbreak. The fix is almost entirely in the shaping: unraveling is a mechanical failure, not a recipe failure. The spiral has to be rolled tight, sealed shut, and proofed correctly, and each of those steps has a specific technique.

    Quick diagnosis: Unraveling comes down to loose rolling (cause #1) or a bad seam seal (cause #2) more than anything else. If the rolls opened during baking with the filling leaking out, you rolled too loosely. If they popped open at the seam specifically, the seal failed. Over-proofing (cause #3) makes both worse.

    Why spirals unravel (the mechanics)

    A cinnamon roll is a rolled sheet of enriched dough with a fat-sugar layer inside. During proofing and baking, the dough expands — and expanding dough pushes outward in every direction, including along the spiral. Three things resist it: roll tightness (tension holds layers together), the sealed seam (outer edge glued shut), and snug pan neighbors (adjacent rolls brace each other). Unraveling means at least one failed — work through them in order.

    1. You rolled too loosely — the spiral had no tension

    This is the number one cause. A proper cinnamon roll is rolled with firm, even tension — each turn of the spiral pulled snug against the last, like rolling a sleeping bag. Most home bakers roll gently, afraid of squeezing out the filling or tearing the dough, and the result is a loose spiral with air gaps between layers. Those gaps are where unraveling starts: expanding dough follows the path of least resistance, and a loose spiral gives it room to spring open.

    How to tell: Wide gaps between spiral layers with filling leaked into them — the roll looks puffy and separated rather than compact.

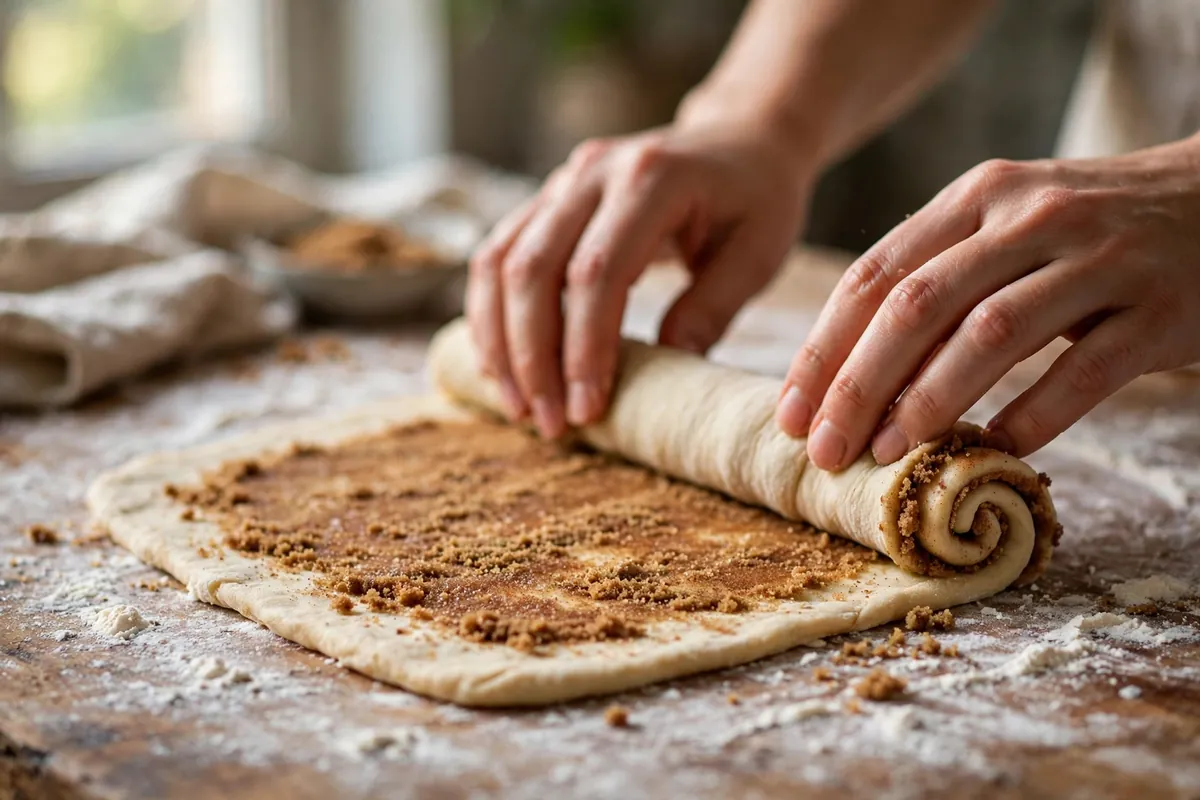
    The fix: Roll with confidence. After spreading the filling (leaving a 1-inch / 2.5cm border clean along the far edge), start from the edge nearest you and roll away, pulling each turn taut against the roll — firm enough that you feel resistance, not so hard the dough tears. Tuck the roll toward you slightly with each turn to build tension. When I stopped being gentle and started rolling like I meant it, unraveling stopped. Enriched dough is stronger than you think.

    2. The seam wasn’t sealed — the outer edge let go

    Even a tightly rolled log will uncoil if the final edge isn’t glued down. Dough edges don’t stick to dough on their own — flour on the surface actively prevents sticking. An unsealed seam is a zipper waiting to be pulled, and oven spring pulls it.

    How to tell: The rolls opened along one line — the outer seam — with the “flap” of the outer layer visibly lifted.

    The fix: Seal deliberately. Brush the clean border with water or beaten egg, finish the roll, and press the seam firmly shut. Place every roll seam-side down — gravity becomes your backup seal. I use egg wash on the border for sweet rolls; it’s stickier than water and the seal survives even aggressive oven spring.

    3. Over-proofed — the structure gave up before baking

    Proofing matters as much as shaping. An over-proofed roll has exhausted its yeast energy and its gluten structure is stretched to the limit — in the oven, instead of a controlled spring, the weakened structure slumps and the layers separate. Over-proofed rolls also tend to be the ones that uncoil most dramatically, because the dough is at its most fragile exactly when oven spring hits hardest.

    How to tell: The rolls looked huge and puffy going in — more than doubled, pillowy, fragile — and may have merged, then collapsed or separated in the heat.

    The fix: Proof to about 1.5 times their original size, not doubled — roughly 45–60 minutes in a warm spot for most enriched doughs. Poke-test it: a slow, partial spring-back means ready; no spring-back means over-proofed — bake immediately and accept a flatter batch. Slightly under-proofed beats over-proofed: oven spring finishes the job. (Same principle behind collapsed enriched breads — see Why Didn’t My Bread Rise?.)

    4. Too much filling — the roll couldn’t grip itself

    There’s a filling sweet spot, and exceeding it causes unraveling two ways: the excess fat lubricates the layers so they slide instead of gripping, and the bulk of the filling physically prevents tight rolling. If your filling layer is a quarter-inch thick, no amount of rolling tension will hold it.

    How to tell: Filling oozed out during rolling, the log felt slippery, and pools of melted cinnamon-sugar surround the baked rolls.

    The fix: Measure the filling. For a standard 12-roll batch (dough rolled to roughly 12×16 inches / 30×40cm), use about 75g soft butter, 100g brown sugar, and 1 tablespoon cinnamon — a thin, even layer, not a thick schmear. Use soft butter, not melted — melted butter lubricates instead of gripping. And keep the sealing border clean; filling on it guarantees seal failure.

    5. The pan was too big — no neighbors to brace against

    Cinnamon rolls are team players: packed snugly in the pan, each roll braces its neighbors, and that mutual support physically prevents uncoiling. Rolls baked with an inch of space between them have nothing holding them in — they’re free to spring open in every direction.

    How to tell: Visible gaps between rolls in the pan, or space around each on a sheet tray — the rolls spread outward and unraveled into the empty space.

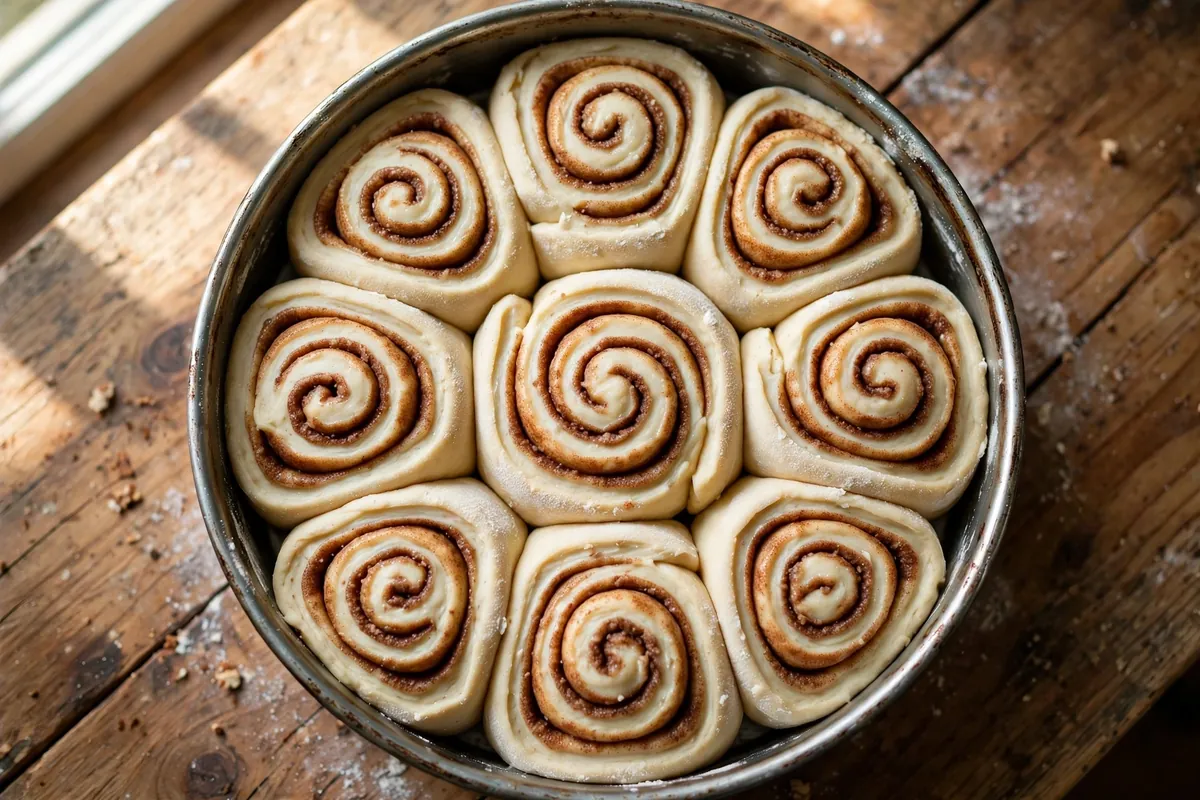
    The fix: Pack them touching. A 9×13-inch (23×33cm) pan fits 12 standard rolls with the sides just kissing — that’s the arrangement that holds. They should look slightly crowded going in — they’ll proof into each other and bake as one connected pull-apart batch. That’s the design, not a flaw.

    hands rolling cinnamon roll dough into a tight log, filling visible
    hands rolling cinnamon roll dough into a tight log, filling visible

    6. Slicing crushed the log — use floss, not a knife

    A bonus failure that mimics unraveling: sawing the log with a knife compresses and drags the spiral, loosening layers before baking. The damaged spiral separates in the oven.

    How to tell: The spiral looked distorted or squashed right after slicing, before proofing.

    The fix: Slide unflavored dental floss under the log, cross the ends over the top, and pull — a clean cut with zero compression. It’s the professional bakery method and it takes ten seconds to learn. A sharp serrated knife with a single firm press (no sawing) is the backup option.

    overhead of snugly packed cinnamon rolls in a pan before baking, rolls touching
    overhead of snugly packed cinnamon rolls in a pan before baking, rolls touching

    Frequently asked questions

    Can I fix unraveled cinnamon rolls after baking?
    Not structurally — but serve warm with extra glaze, which covers a multitude of sins. Nobody complains about a messy cinnamon roll that tastes right.

    Why do my cinnamon rolls fall apart when I pick them up?
    Underbaked centers or over-proofing. Center rolls need the full bake — check 190°F (88°C) in the middle; a paring knife into the center roll tells the truth.

    Is it safe to eat underbaked cinnamon rolls?
    Doughy centers should go back in the oven — raw enriched dough isn’t ideal. Fully baked but unraveled rolls are perfectly safe; it’s purely cosmetic.

    Should the filling go edge to edge?
    No — leave a 1-inch (2.5cm) clean border on the far edge for the seal, plus small side borders. Edge-to-edge filling guarantees leaks.

    Can I prepare cinnamon rolls the night before?
    Yes — assemble, slice, pan snugly, cover tightly, refrigerate overnight. Bake from the fridge with 10–15 extra minutes. The cold retard improves flavor. (Overnight method details: Make-Ahead Bread Dough.)

    Why did my rolls rise in the oven and then collapse?
    Over-proofed, or the oven wasn’t fully preheated — the weak structure couldn’t hold the spring. Proof less, preheat fully.

    Related troubleshooting: Why Didn’t My Bread Rise? · Fix Over-Salted Dough · Make-Ahead Bread Dough

  • Why Is My Pie Filling Runny? Thickeners Compared (Flour vs Cornstarch vs Tapioca)

    Why Is My Pie Filling Runny? Thickeners Compared (Flour vs Cornstarch vs Tapioca)

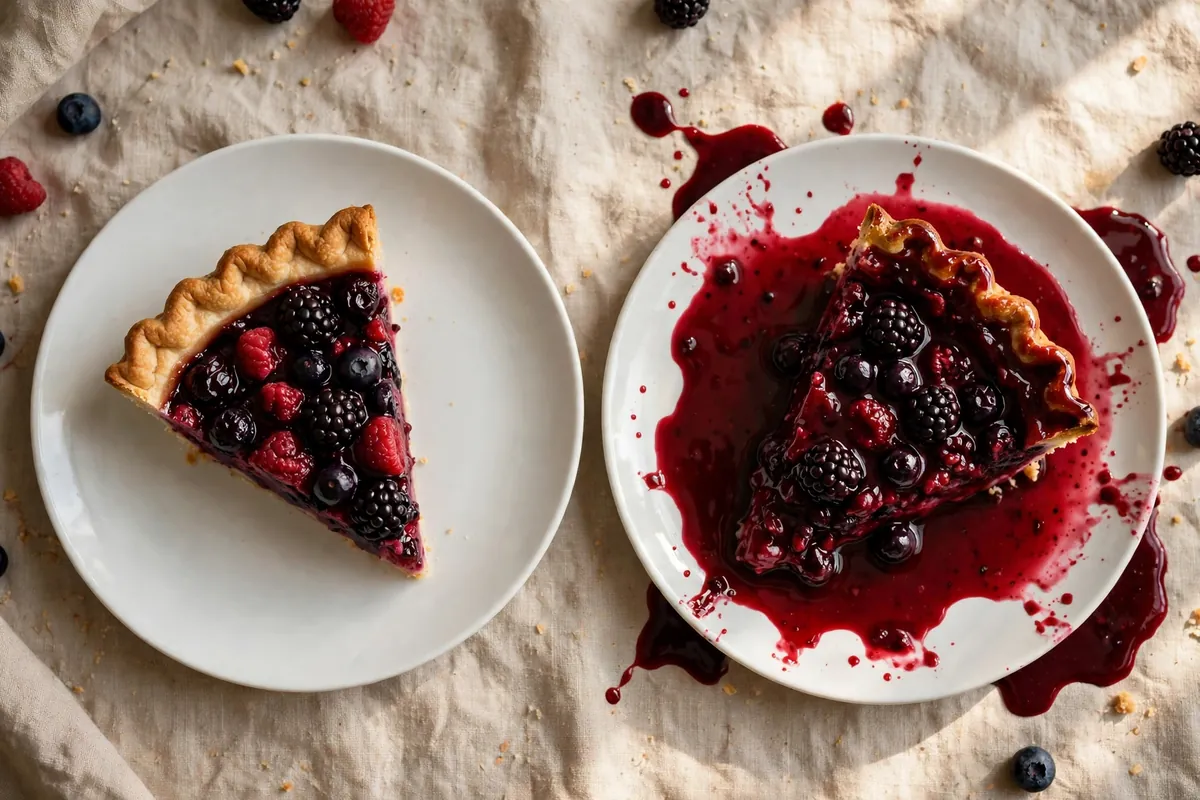
    You baked the perfect crust, the kitchen smells incredible, you cut the first slice — and fruit soup floods the plate. I’ve served that pie. Runny filling is a thickener problem, a cooling problem, or both — and once you understand how the three common thickeners actually work, the problem doesn’t come back.

    Quick diagnosis: Runny filling comes down to two things in nearly every case: the wrong thickener (or too little of it) for the fruit, and slicing before the pie cooled completely. If you used flour with very juicy berries and cut the pie warm, start with fixes #1 and #5.

    Fruit releases juice as it bakes. A thickener’s job is to trap that juice in a gel. No thickener, wrong thickener, or too little — and physics wins.

    1. You used the wrong thickener for the fruit

    Not all thickeners behave the same, and fruit isn’t interchangeable. Here’s the honest comparison from years of testing:

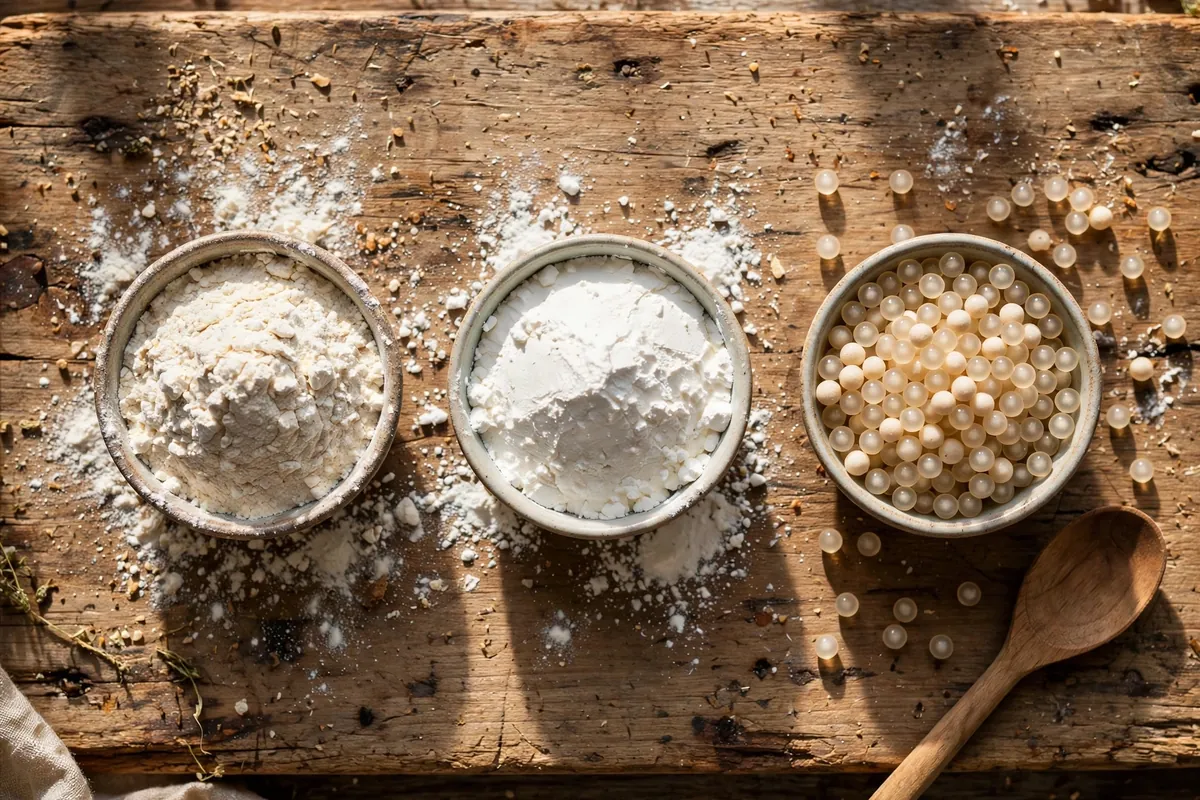
    All-purpose flour — 2–3 tablespoons per 9-inch pie. The old-fashioned choice. Pros: always on hand, stable under long bakes. Cons: thickens opaquely — the filling looks cloudy — and needs a full, hot bake to cook out its raw taste. Best for: apple and pear pies, where the filling is naturally less juicy and opacity doesn’t matter.

    Cornstarch — 2–4 tablespoons per 9-inch pie (higher end for very juicy fruit). Pros: sets into a clear, glossy gel; twice the thickening power of flour by volume. Cons: can thin out under very long, hot bakes or with highly acidic fruit, and needs a full boil inside the pie to activate. Best for: berry and cherry pies baked hot and fully.

    Quick-cooking tapioca — 2–3 tablespoons per 9-inch pie, ground finer if the pearls are large. Pros: the best of both — clear gel like cornstarch, stable like flour, no starchy taste. Cons: the pearls need about 15 minutes of rest with the fruit before baking to hydrate. Best for: the juiciest pies — fresh berry, rhubarb, peach — where you want a clear set that holds for days.

    My default: tapioca for juicy fruit, flour for apples. Cornstarch when I want that glossy look and I’m sure of a hot, full bake.

    How to tell: Match your fruit to the list. Juicy berries thickened with flour, or any pie thickened with cornstarch that came out pale — that’s your answer.

    2. You didn’t use enough thickener

    Thickener amounts aren’t suggestions — they’re calibrated to the fruit’s juice. The mistake I see most: using the apple-pie amount of thickener in a berry pie. Berries release dramatically more juice than apples, and stone fruit sits in between. A flat 2 tablespoons across all fruits under-thickens the wet ones every time.

    How to tell: The filling tastes right but flows — the flavor is there, the structure isn’t. That’s under-thickening, not a technique failure.

    The fix: Scale to the fruit. Per 9-inch pie with ~6 cups fruit: apples 2 tablespoons flour; peaches/plums 3 tablespoons tapioca or flour; berries/cherries 3–4 tablespoons tapioca or cornstarch. When in doubt, go one tablespoon heavier — slightly firm beats soupy. (For the crust side — juicy filling also attacks the base — see Soggy Bottom Pie.)

    three small bowls showing flour, cornstarch, and tapioca pearls side by side with a spoon
    three small bowls showing flour, cornstarch, and tapioca pearls side by side with a spoon

    3. The filling never got hot enough

    Thickeners activate at specific temperatures — starch granules swell and burst, trapping liquid, only when they get hot enough. Cornstarch needs a genuine boil: the filling must bubble visibly through the vents. A pie pulled when “the crust looks done” but the filling never bubbled has inactive thickener and a guaranteed flood.

    How to tell: The crust is golden but you never saw the filling bubble, or only the edges did. The juices look thin and watery rather than syrupy.

    The fix: Bake until the filling bubbles in the center — not just the edges — for several minutes. An instant-read thermometer through a vent reading 200°F (93°C) confirms it. Shield the crust edges with foil if they’re browning faster than the filling is bubbling.

    4. You didn’t pre-treat very juicy fruit

    Some fruit is simply too wet for thickener alone. Fresh berries, rhubarb, and ripe peaches can release a startling volume of juice — more than any reasonable amount of starch can trap without turning the filling gummy.

    How to tell: The fruit was very ripe, very fresh, or a known juice-bomb (raspberries, blackberries, rhubarb).

    The fix: Macerate. Toss the sliced fruit with the sugar and a pinch of salt 30–60 minutes before assembling. Drain off the pooled juice, simmer it until reduced by half into a syrup, cool, and pour it back over the fruit with your thickener. You keep all the flavor, lose the flood. This single technique fixed my raspberry pies permanently.

    5. You sliced it warm

    This is the cruelest cause because the pie was actually fine. Fruit fillings thicken as they cool — pectin and starch gels firm up dramatically between oven-hot and room temperature. A pie sliced 30 minutes out of the oven will always look runnier than the same pie sliced at 3 hours. I know the wait is agony. It’s also non-negotiable.

    How to tell: The filling looked thick and bubbly in the oven, flowed when cut warm, and — telltale sign — the leftover pie the next day slices cleanly.

    The fix: Cool the pie on a rack a full 3–4 hours before slicing — 4 for berry pies. The filling needs to drop below about 100°F (38°C) for the gel to set. If you must serve warm pie, serve it in bowls as a rustic dessert and own it.

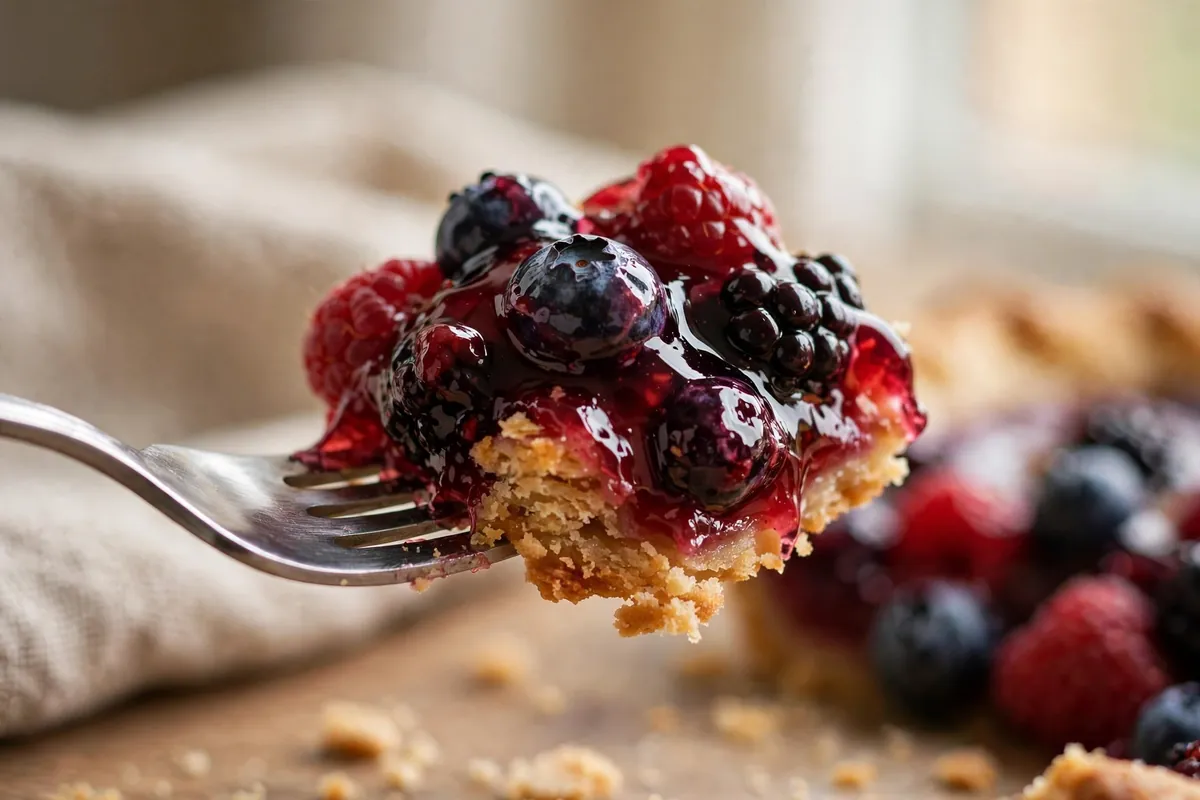
    a slice of berry pie on a fork showing the filling holding its gelled shape
    a slice of berry pie on a fork showing the filling holding its gelled shape
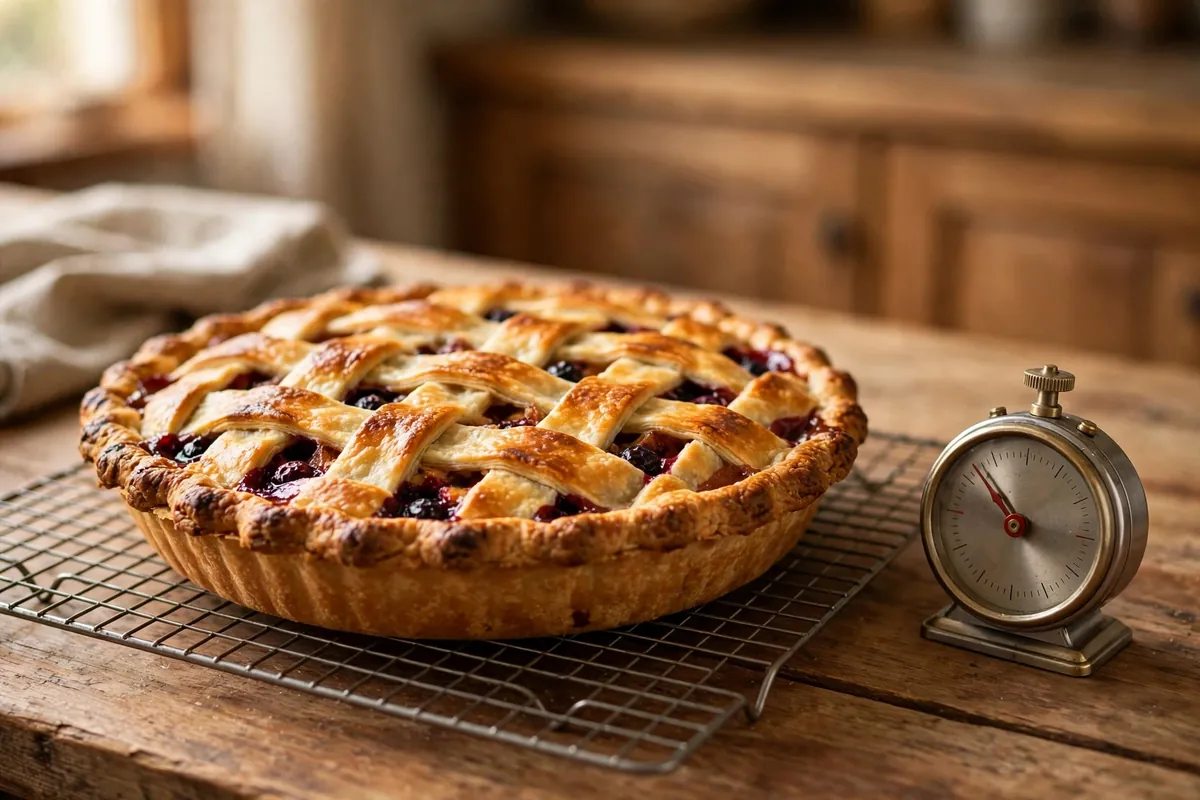
    a whole pie cooling on a wire rack with a visible "do not cut" sticky note, kitchen timer beside it
    a whole pie cooling on a wire rack with a visible "do not cut" sticky note, kitchen timer beside it

    6. Rescue: fixing today’s runny pie

    Already baked, already runny? Rebake: return the pie to a 375°F (190°C) oven until the filling bubbles — then cool fully this time. Stovetop: scoop the filling into a saucepan, whisk in a cornstarch slurry (1 tablespoon cornstarch + 2 tablespoons cold water per cup of filling), simmer 2 minutes until glossy, and reassemble — or serve it over ice cream as a compote.

    Frequently Asked Questions

    Which thickener is best for apple pie?
    Flour — 2–3 tablespoons. Apple filling is low-juice and opaque anyway, so flour’s cloudiness doesn’t matter, and its heat stability suits the long bake.

    Why did my berry pie turn out runny when I used cornstarch?
    Two culprits: the filling never reached a full boil (cornstarch needs active bubbling), or you used the apple-pie amount for berry-level juice. Next time: 3–4 tablespoons, bake until the center bubbles, cool 4 full hours.

    Can I use tapioca pearls straight from the jar?
    Roughly — but grind them first. Whole pearls can survive as gelatinous beads; a few pulses in a spice grinder gives you a powder that disappears while keeping tapioca’s holding power.

    Is runny pie filling safe to eat?
    Completely — it’s a texture problem, not a safety one. Undercooked flour thickener can taste pasty, but nothing in a baked fruit pie is unsafe.

    Can I fix a runny pie after it’s baked?
    Yes — rebake until the filling bubbles (activating the thickener properly), then cool the full 3–4 hours. Or scoop out the filling, thicken it on the stovetop with a cornstarch slurry, and reassemble. Both work; the stovetop method is faster.

    Does sugar make filling runnier?
    Sugar draws juice out of fruit, which is why juicy fruit needs the maceration pre-treatment. But don’t cut the sugar — it helps the gel set. Manage the juice; keep the sugar.

    Related troubleshooting: Soggy Bottom Pie · Pie Crust Shrinking in the Oven · Why Did My Cheesecake Crack?

  • Soggy Bottom Pie: How to Get a Crisp Base Every Time

    Soggy Bottom Pie: How to Get a Crisp Base Every Time

    Quick diagnosis: A soggy bottom means the lower crust never got hot enough, fast enough. The fix order is: blind-bake the shell, bake on a preheated steel or stone on the oven’s bottom third, and thicken wet fillings before they go in. Those three together never fail — skip any one and the bottom stays pale.

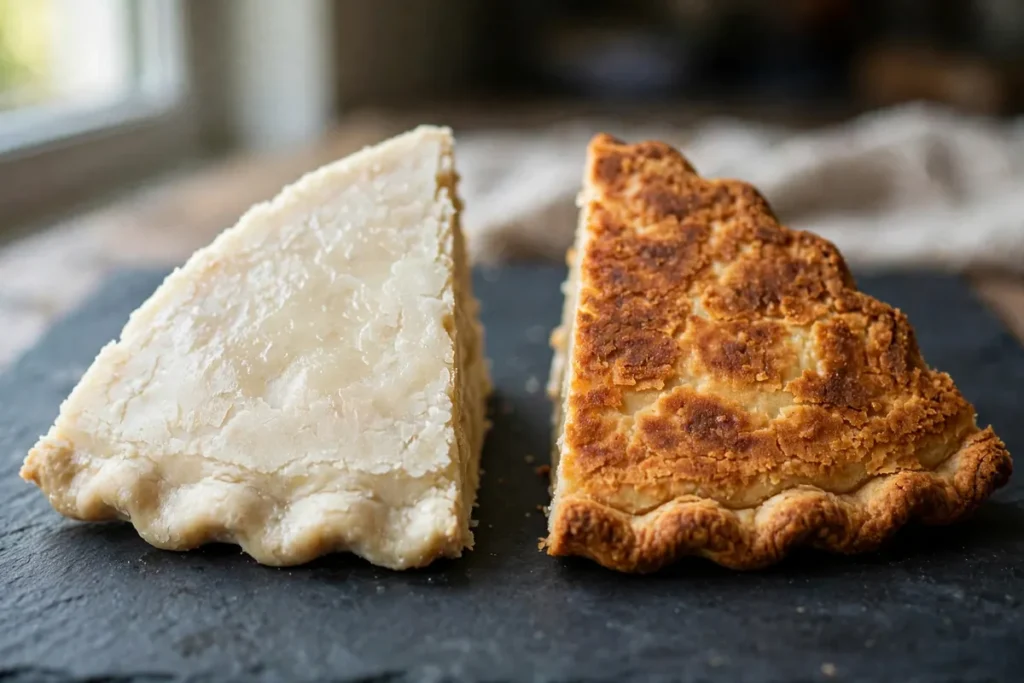
    underside of two pie slices — one with a pale soggy bottom, one golden and crisp

    The top of a pie lives in the oven’s hot air. The bottom lives pressed against a pan, insulated by filling, with steam rising from below. It’s the hardest part of the pie to bake — and the filling is actively working against it, releasing juice as it heats. Getting a crisp base means attacking from both sides: drive more heat into the bottom, and put less free liquid against it.

    1. The shell wasn’t blind-baked

    For any wet filling — custard, pumpkin, fruit — an unbaked raw shell has almost no chance. The filling’s moisture soaks the raw dough before the oven heat can set it, and from that point the bottom is steaming, not baking. Blind baking (pre-baking the empty shell) sets the crust’s structure first, so it meets the filling as a barrier, not a sponge.

    How to tell: The filling recipe said “pour into unbaked pie shell” and the bottom came out gummy while the top browned perfectly.

    The fix: For wet fillings, blind-bake the chilled shell at 400°F (200°C) — 15–20 minutes with pie weights, then 5–10 minutes unweighted until the bottom looks dry and just starting to color. For custard pies, a full blind bake (bottom completely set and lightly golden) is the standard; the filled pie then only needs enough oven time to set the custard. (Blind-baking technique in detail: Pie Crust Shrinking in the Oven.)

    2. Nothing hot was under the pan

    Oven air heats the top; the bottom needs conduction — direct contact with something hot. A pie set on a room-temperature tray on the middle rack gets gentle, indirect bottom heat. That’s not enough to crisp pastry through a layer of wet filling.

    How to tell: The bottom is uniformly pale rather than patchy — a heat problem, not a filling problem.

    The fix: Preheat a baking steel, pizza stone, or heavy inverted sheet pan on the oven’s bottom third for a full 45 minutes, and bake the pie directly on it. The stored heat blasts the bottom crust the moment the pan lands. When I switched from a middle-rack tray to a preheated steel, bottom browning went from nonexistent to deep golden on the same recipe. Metal pie pans beat glass here too — metal conducts heat to the bottom faster, while glass insulates slightly.

    pie going onto a preheated baking steel on the oven's lower rack, with oven mitt visible

    3. The filling released too much free juice

    Fruit fillings can be half water by weight. As the pie heats, cell walls break and juice floods out — far more liquid than the bottom crust can handle, especially before thickeners activate. A filling that tastes perfect raw can drown the base.

    How to tell: There’s a visible pool of liquid under the fruit, or the slice weeps juice onto the plate after cutting.

    The fix: Macerate and drain. Toss sliced fruit with the sugar and let it sit 30–60 minutes, then drain off the exuded juice — you’ll be shocked how much there is. Reduce that juice in a saucepan to a syrup and add it back (concentrated flavor, minimal water), then thicken: 2–3 tablespoons of cornstarch per 9-inch fruit pie, tossed with the fruit. The filling must reach a full bubble in the center — 212°F (100°C) — for starch thickeners to activate; a filling that never bubbled never thickened, no matter how much cornstarch you used.

    4. The bottom wasn’t sealed

    Even a blind-baked shell is porous. Hot filling finds every microscopic gap. An egg wash seal — brushed on and briefly set with heat — waterproofs the base the way varnish seals wood.

    How to tell: Sogginess is worst directly under the wettest part of the filling, in patches rather than uniformly — liquid penetrating, not just underbaking.

    The fix: After blind baking, brush the hot bottom with beaten egg white and return to the oven 3–5 minutes until the wash looks dry and glossy. For fruit pies, a thin dusting of fine breadcrumbs or ground almonds under the filling also works — they absorb stray juice and vanish into the finished slice. I use the egg-white seal on every custard pie without exception.

    5. The top crust trapped the steam

    Steam has to escape. A sealed double crust with no vents turns the pie into a pressure cooker — moisture condenses on the underside of the top crust and rains back down onto the filling and bottom. Lattice tops exist partly for this reason.

    How to tell: The top crust is puffy and pale underneath, with visible condensation, while the filling looks soupy.

    The fix: Cut generous vents — at least four 1-inch slashes, or go lattice. Vents should go all the way through the top crust, opened slightly so they don’t seal shut in the oven. For single-crust pies this isn’t a factor, which is one reason custard and single-crust fruit pies are more forgiving on bottoms.

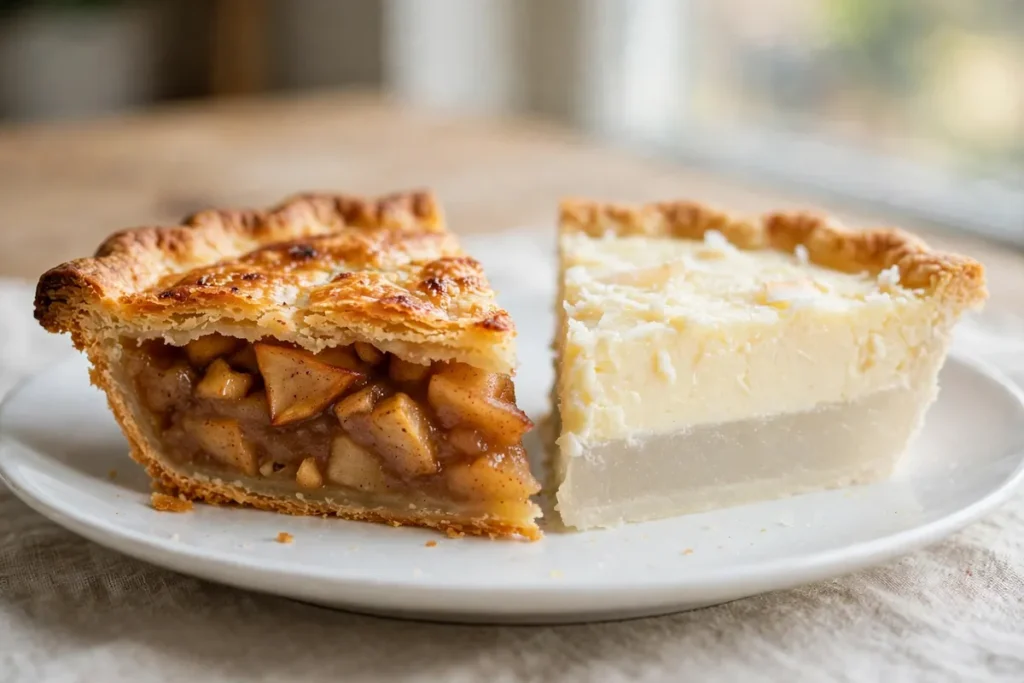
    cross-section of a pie slice showing distinct crisp bottom crust layers vs a gummy indistinct one

    6. The pie was sliced too soon (or cooled wrong)

    A pie continues to set as it cools — starches firm up, juices redistribute. Slice a fruit pie hot and the still-fluid filling floods the cut faces, making even a well-baked bottom eat soggy. And cooling flat on the counter traps steam underneath the pan.

    How to tell: The bottom looked fine out of the oven but turned gummy by serving time, or slices wept on the plate.

    The fix: Cool fruit pies on a wire rack (airflow underneath carries steam away) for at least 3–4 hours — yes, really; the filling needs that long to fully set. Custard pies need 2 hours at room temperature then refrigeration. The wait is structural, not optional. I know it’s hard. It’s still structural.

    FAQ

    Is a soggy bottom safe to eat?
    Yes — it’s a texture defect, not a safety issue, as long as the pie reached proper temperatures (fruit fillings bubbling, custards set). The one exception is a raw-flour concern: if the bottom crust is truly raw and doughy rather than just soft, give it more oven time rather than serving it.

    Can I fix a soggy bottom after baking?
    Partially. Return the pie (or individual slices) to a hot oven — 375°F (190°C) on a preheated steel — for 10–15 minutes to drive off moisture and re-crisp the base. It won’t match a properly blind-baked bottom, but it meaningfully improves a disappointing one. This rescue works once; don’t re-bake repeatedly.

    Do I need a special pan to avoid soggy bottoms?
    No, but pan choice helps. Light-colored metal pans give the best bottom browning through conduction. Glass works but browns bottoms more slowly — if you use glass, add 5 minutes and drop to the bottom rack. Dark nonstick browns fast but can overdo the edges; shield with foil if needed.

    Should I use cornstarch, flour, or tapioca to thicken?
    Cornstarch gives the clearest, glossiest set — 2–3 tablespoons per 9-inch pie. Flour (¼ cup) works but clouds the juices. Instant tapioca (3 tablespoons) is excellent and never gets gummy, but needs the full bubble to activate. All three fail identically if the filling never reaches 212°F (100°C) in the center.

    Why is my pumpkin pie bottom soggy but the top perfect?
    Custard fillings are the worst offenders: they’re essentially liquid when they go in, and they insulate the bottom while the top sets quickly. Pumpkin pie demands a fully blind-baked shell — no exceptions — plus the preheated steel underneath. It’s the highest-difficulty bottom in pie baking.

    Can I blind-bake with the filling already planned the same day?
    Yes — blind baking adds about 30 minutes, and the shell can cool while you make the filling. The shell must be at least warm (not fridge-cold) when filling goes in, or the cold pastry will shock the filling’s timing. Room-temperature shell, filling in, straight into the hot oven.

    Related troubleshooting: Pie Crust Shrinking in the Oven · Puff Pastry Not Puffing: Lamination Mistakes to Avoid · Why Did My Cake Sink in the Middle?

  • Why Did My Millionaire’s Shortbread Layers Separate? (Layer Adhesion)

    Why Did My Millionaire’s Shortbread Layers Separate? (Layer Adhesion)

    Millionaire’s shortbread fails at the joints. Each layer is easy alone, but stacked, physics takes over: smooth shortbread gives caramel nothing to grip, soft caramel slides under chocolate, a thick chocolate cap shears off. Separated bars were assembled, not bonded.

    Quick diagnosis: The caramel was undercooked (too soft to grip — most common), the shortbread surface was too smooth and glassy, or you skipped the chill between layers. Fix: cook the caramel to 240°F (115°C), prick and slightly roughen the shortbread, and chill 30 minutes between every layer.

    My tested baseline: shortbread — 225g flour, 150g cold butter, 75g sugar, baked 20–25 minutes at 350°F (175°C) in a 20cm lined pan until golden at the edges. Caramel — 175g butter, 150g light brown sugar, 1 can (397g) sweetened condensed milk, cooked to 240°F (115°C). Chocolate — 200g dark chocolate + 1 tablespoon neutral oil, spread thin. Chill 30 minutes between layers; cut with a hot dry knife.

    1. The caramel was undercooked — soft caramel is a lubricant

    This is the number-one cause of separating layers. At 225–230°F (107–110°C), caramel is a flowing sauce — great on ice cream, useless as glue. Under the chocolate it migrates and layers hydroplane apart. At firm-ball stage, 240–245°F (115–118°C), caramel bonds: firm enough to hold, soft enough to bite.

    How to tell: The caramel oozes when you cut; bars slump sideways in the pan; the caramel layer looks glossy and fluid rather than matte and set.

    The fix: Cook to 240°F (115°C), stirring constantly — 8–12 minutes at a steady bubble. No thermometer? Cold-water test: a spoonful should form a firm, pliable ball that holds shape but flattens when pressed. Undercooked caramel can’t be fixed once layered.

    2. The shortbread surface was too smooth — the caramel had nothing to grip

    A smooth, glassy shortbread top is beautiful and structurally useless — caramel bonds mechanically and needs texture to key into. I roughen the surface deliberately now; base-layer separation dropped to zero.

    How to tell: The caramel lifts off the shortbread in one clean sheet; the shortbread top is smooth and shiny where the caramel sat.

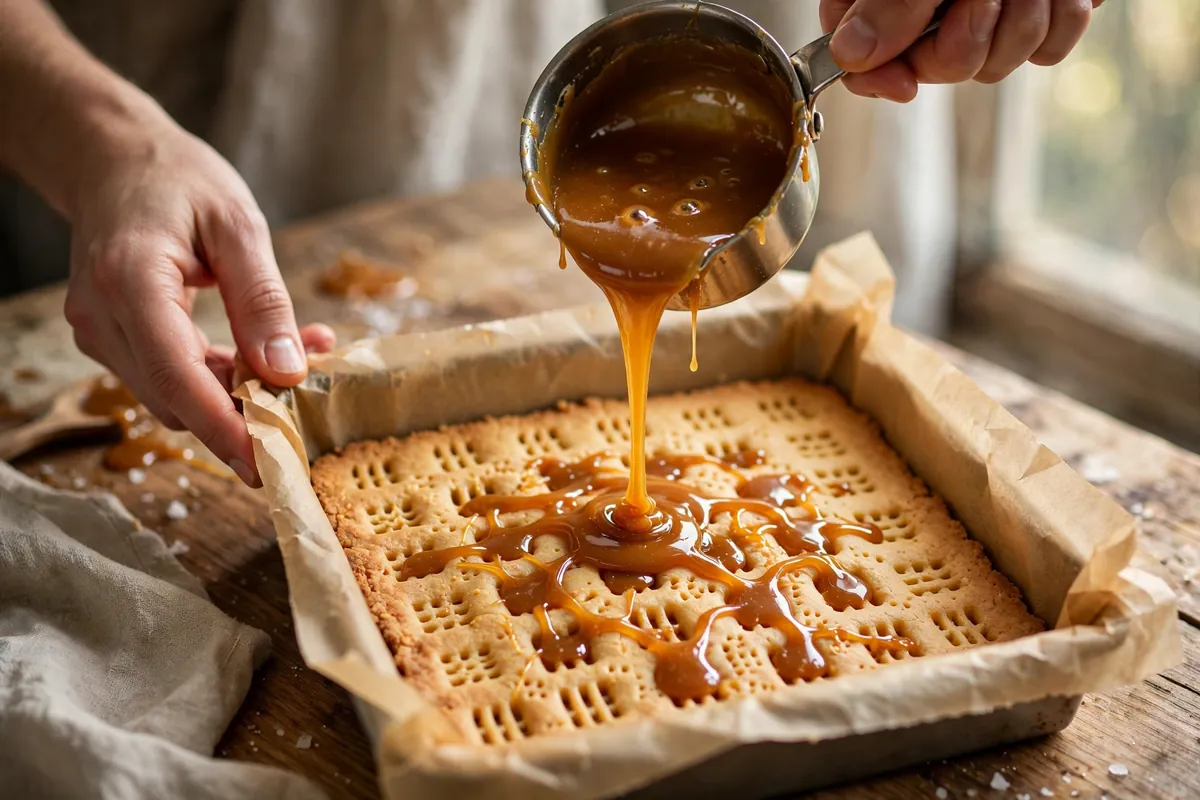
    The fix: While the shortbread is still warm from the oven, prick it all over with a fork (docking also prevents puffing) and lightly score the surface with the fork tines. Pour the hot caramel over the warm — not cold — shortbread; warmth on both sides helps the layers meld. Some bakers brush the warm shortbread with a whisper of the hot caramel first as a “primer” — it works.

    3. You skipped the chill between layers — warm layers never bond

    Each layer must set before the next goes on. Chocolate over warm caramel softens it further; the boundary never forms cleanly and shears later. Chill 30 minutes after caramel (firm to a light touch), 20–30 after chocolate.

    How to tell: The layers look marbled or blended at the boundary rather than distinct; the chocolate slid while you were spreading it.

    The fix: Caramel layer: refrigerate 30 minutes until it dents but doesn’t stick when pressed lightly. Then pour the melted chocolate (cooled to about 90°F / 32°C, just warm) and spread gently — don’t press down. Refrigerate again 30+ minutes until the chocolate is fully set. Distinct, clean boundaries in the finished bar mean the chills worked.

    hands pouring glossy hot caramel over warm pricked shortbread in a lined square pan, caramel flowing into the fork holes
    hands pouring glossy hot caramel over warm pricked shortbread in a lined square pan, caramel flowing into the fork holes

    4. The chocolate layer is too thick — a heavy cap shears off

    300g+ of chocolate on a 20cm pan contracts into a rigid plate with no flex; the slightest pressure pops it off in one sheet. 150–200g flexes with the bar instead of fighting it. This is the same plate-shear failure as a too-thick glaze on opera cake.

    How to tell: The chocolate comes off in large clean shards; the underside of the chocolate is perfectly smooth with no caramel clinging to it.

    The fix: Use 150–200g chocolate for a 20cm pan, spread to 2–3mm. Add 1 tablespoon of neutral oil or butter per 200g chocolate — it keeps the chocolate slightly pliable and less snap-prone. Score the chocolate lightly with a knife 10 minutes into the final chill (when it’s set but not hard) to guide clean cuts later.

    5. You cut the bars cold and straight from the fridge — thermal shock splits layers

    Fridge-cold chocolate is brittle; a room-temperature knife fractures the cap along the caramel boundary. The layers were bonded — the cutting broke them. I ruined a perfect batch before learning the hot knife.

    How to tell: The bars looked perfect in the pan but separated during cutting; the breaks are clean fractures, not slides.

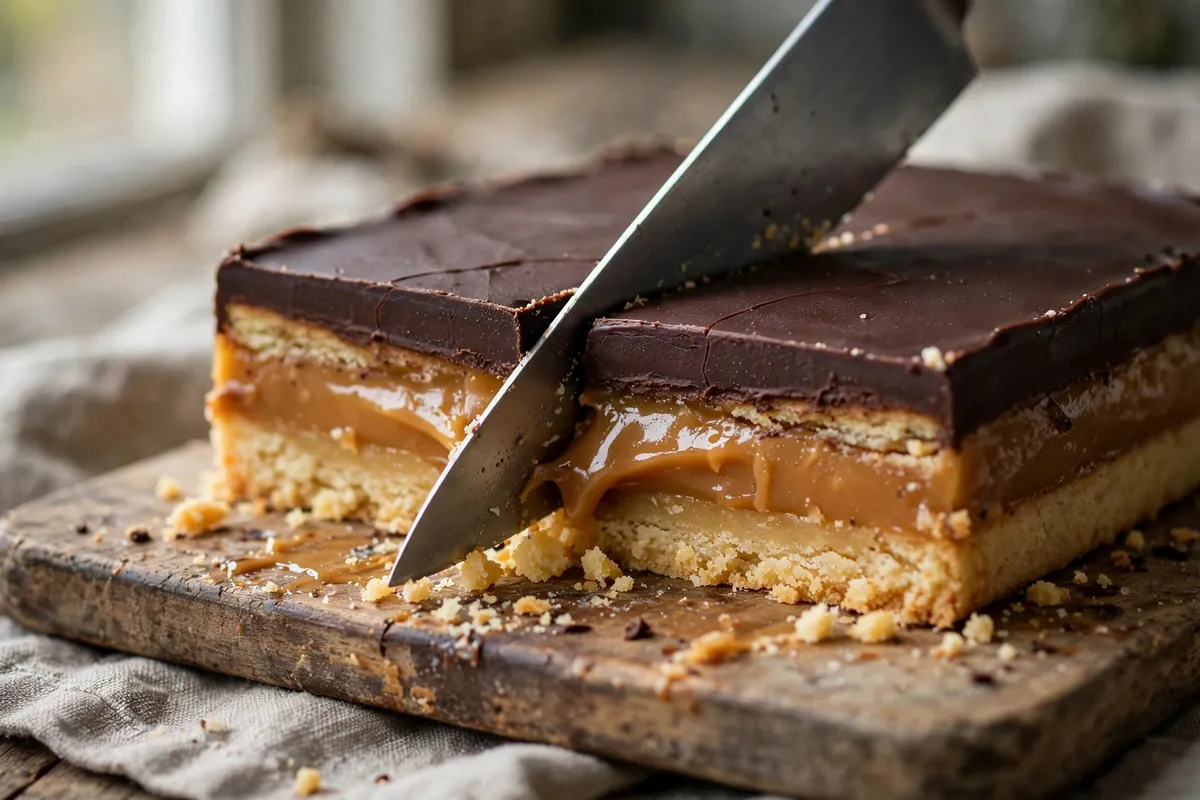
    The fix: Let the slab sit 10 minutes at room temperature, then cut with a long sharp knife dipped in hot water and wiped dry between every cut. Press straight down — no sawing. The hot blade melts through the chocolate instead of fracturing it, and the brief tempering keeps the caramel from cracking.

    6. The shortbread was underbaked — a soft base can’t anchor anything

    Underbaked shortbread is pale, soft, and slightly steamy inside. Caramel poured over it sinks into the damp crumb instead of sitting on top, and the whole base layer turns to flavored mush that releases the caramel as it cools. The bar separates from the bottom up.

    How to tell: The shortbread layer is pale and soft rather than golden and crisp; it crumbles damply instead of snapping; the base tastes slightly raw.

    The fix: Bake the shortbread until the edges are golden and the center looks set and matte — 20–25 minutes at 350°F (175°C) for a 20cm pan. It firms as it cools, so pull it when the center still looks a touch soft but the edges are clearly golden. A crisp base is a structural member, not just a flavor layer.

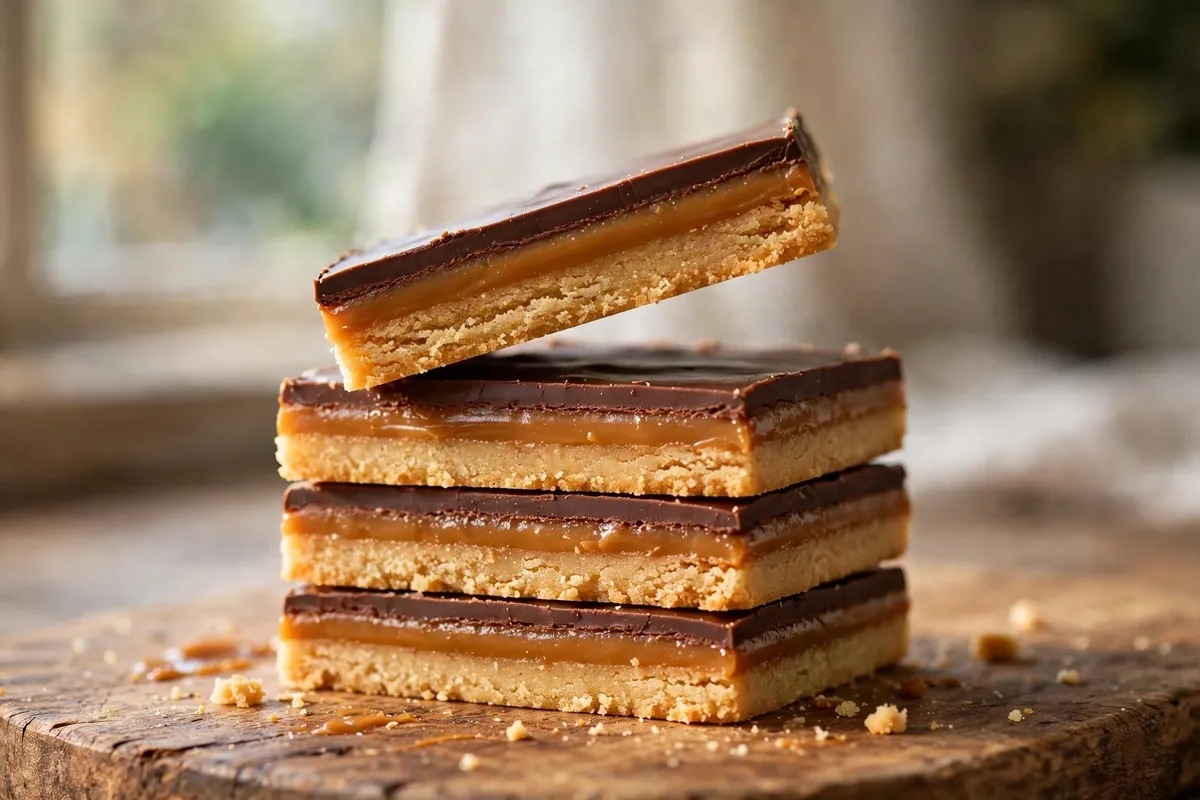
    a hot knife slicing cleanly through a chilled slab of millionaire's shortbread, showing three distinct bonded layers in the cut face
    a hot knife slicing cleanly through a chilled slab of millionaire's shortbread, showing three distinct bonded layers in the cut face

    FAQ

    Is it safe to eat separated millionaire’s shortbread?
    Completely — this is a texture and structure issue, not a food safety one. The layers taste exactly as intended; serve the pieces as-is or crumble them over ice cream.

    Can I re-stick layers that separated?
    Not really — cut layers won’t re-bond. Salvage it: warm pieces slightly, press together, re-chill. They’ll hold for serving.

    Why is my caramel grainy instead of smooth?
    The sugar crystallized — from stirring too early or crystals on the pan walls. Wash sides down with a wet brush, don’t stir until fully boiling. A tablespoon of golden syrup also inhibits it.

    Can I use store-bought caramel or dulce de leche?
    Dulce de leche works as a shortcut but it’s softer than proper 240°F caramel — expect slightly less structural hold. If you use it, cook it down a few minutes to thicken, or accept softer bars and chill them well.

    How long do millionaire’s shortbread bars keep?
    5–7 days airtight at cool room temperature; 2 weeks refrigerated. Fridge bloom (white streaks) is harmless. Don’t freeze — caramel texture suffers on thawing.

    Can I make these gluten-free?
    Yes — swap the flour for a 1:1 gluten-free blend in the shortbread and bake 2–3 minutes longer. The caramel and chocolate layers are naturally gluten-free. The adhesion fixes above apply identically.

    Related troubleshooting: Why Did My Opera Cake Layers Slide? · Fixing Grainy Fudge · Fixing Seized Chocolate

  • How to Fix Icing That’s Too Thin (Glaze Consistency Guide)

    How to Fix Icing That’s Too Thin (Glaze Consistency Guide)

    Thin icing is a special frustration: it looked fine in the bowl, then slid straight off the cake into a puddle on the plate. The good news is that runny icing is one of the easiest baking failures to fix — you almost never start over. Whatever the type, it comes down to the sugar-to-liquid ratio and the temperature of everything involved.

    Quick diagnosis: Too much liquid for the sugar. For a basic glaze, start with 1 cup (120g) powdered sugar and add liquid one teaspoon at a time — you can always thin it, but thickening takes much more sugar. If it’s buttercream, the butter was too warm: chill the bowl 15–20 minutes and rewhip. Never add liquid by the tablespoon.

    My tested baseline for a pourable glaze: 120g (1 cup) sifted powdered sugar, 1 tablespoon milk, then liquid added 1 teaspoon at a time until it ribbons off the spoon. For spreadable frosting: 230g (2 cups) powdered sugar, 115g soft butter, 1–2 tablespoons milk. Humidity and ingredient temperature move these around — the spoon test overrules the numbers.

    1. Your sugar-to-liquid ratio was off — measure the liquid, not the sugar

    Nearly every thin glaze comes from dumping in the liquid. Powdered sugar forgives in one direction only: too little liquid needs a few more drops, but too much liquid demands a disproportionate amount of sugar to recover. Two extra tablespoons of milk can need half a cup of additional sugar to balance.

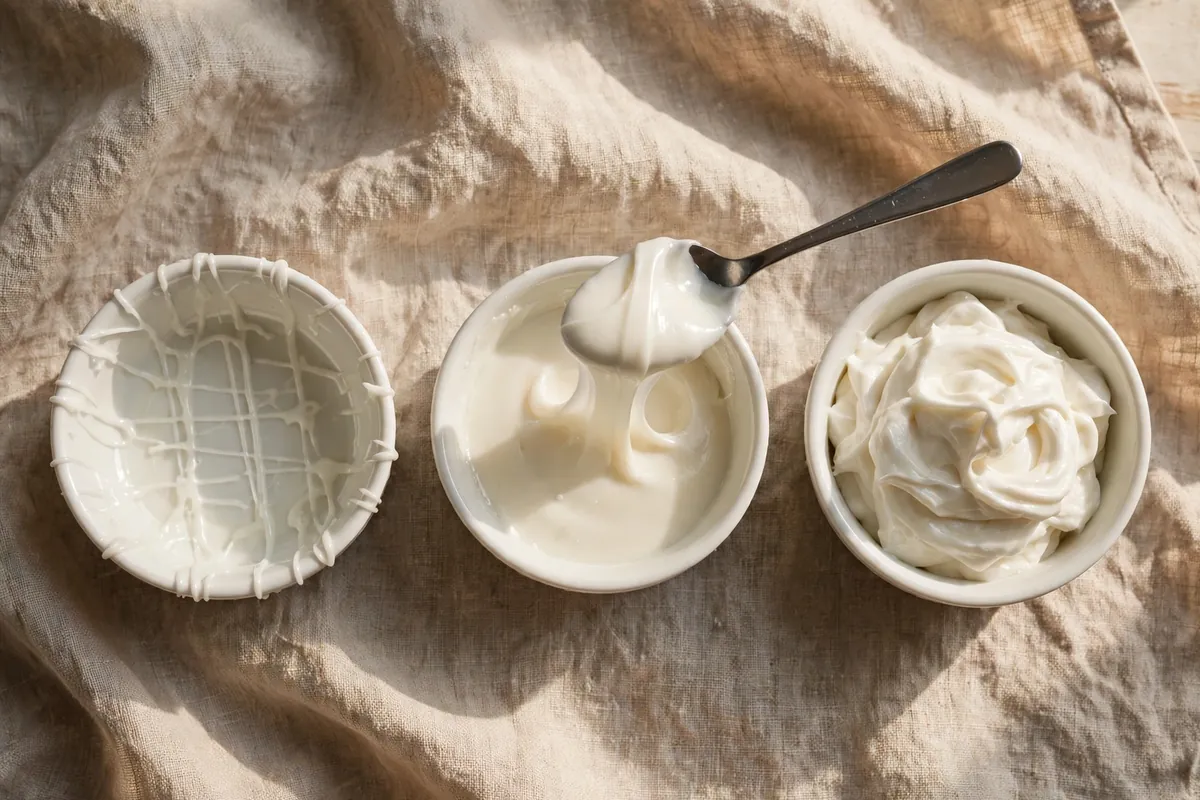
    How to tell: The glaze runs off a spoon in a fast stream instead of a slow ribbon; it pools flat on a plate within seconds.

    The fix: Sugar in the bowl first, then liquid one teaspoon at a time, whisking between additions. Stop when a drizzled spoonful holds its shape 2–3 seconds before melting in. Already too thin? Whisk in powdered sugar one tablespoon at a time — sifted, to avoid lumps. Expect to add more than feels reasonable; that’s normal.

    2. You used the wrong sugar — granulated can’t do this job

    Powdered (confectioners’) sugar dissolves into a smooth suspension because it’s ground ultra-fine with a little cornstarch. Granulated sugar stays gritty no matter how long you stir, and weeps liquid as it sits — the glaze looks thin because the sugar never joined the liquid.

    How to tell: Gritty texture, a watery layer separating on top after minutes, sweetness that tastes “separate” from the liquid.

    The fix: Powdered sugar only — and sift it. Unsifted lumps read as thickness in the bowl, then dissolve on the cake and release trapped air, and the icing thins mysteriously after application. Sifting takes 30 seconds and removes a whole category of surprise.

    3. Your buttercream was too warm, not too thin — chill it, don’t sugar it

    Soft, soupy buttercream tempts you to add more powdered sugar, which makes it sweeter and stiffer without fixing the real problem: butter too warm to hold air. Over-sugared warm buttercream tastes like sweet grease. The fix is temperature.

    How to tell: Glossy, slightly separated, sliding rather than spreading; the bowl feels room-temperature or warm rather than cool.

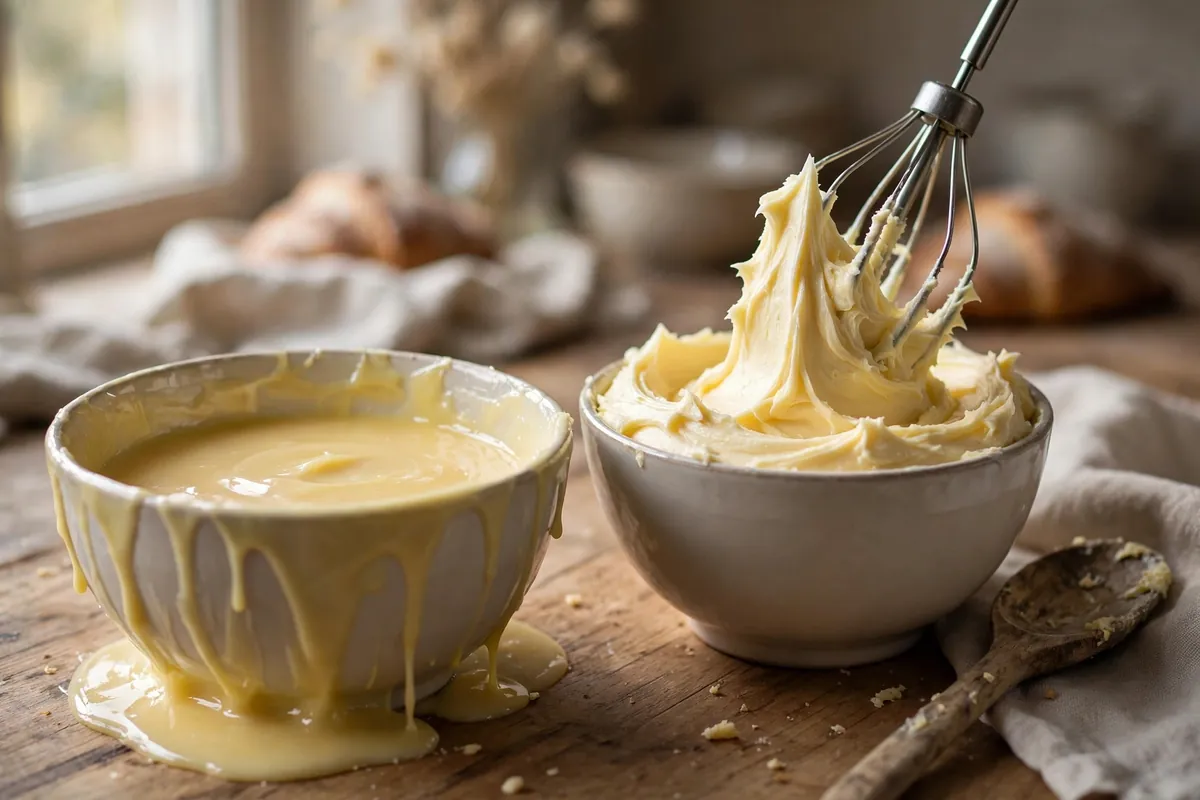
    The fix: Refrigerate 15–20 minutes until the edges look matte and firm, then rewhip 1–2 minutes — it comes back thick, smooth, and pale. Truly broken (curdled, split) is a different failure: How to Fix Broken Buttercream (Curdled, Soupy, Too Sweet). If the balance tastes off at the right texture, see Why Does My Frosting Taste Like Butter? Fixing Buttercream Balance.

    a bowl of soupy buttercream next to the same buttercream after chilling and rewhipping, beater lifted showing stiff peaks
    a bowl of soupy buttercream next to the same buttercream after chilling and rewhipping, beater lifted showing stiff peaks

    4. Cream cheese icing turned to soup — cold cheese, minimal beating

    The runniest offender in the icing family, always the same two mistakes: low-fat or tub-style cream cheese (too much water), and overbeating, which warms and loosens the cheese until the bowl slumps.

    How to tell: It was thick when you started and got thinner the longer you beat it; tastes fine but won’t hold a swirl.

    The fix: Full-fat block cream cheese, cold from the fridge — never the spreadable tub. Beat butter and sugar first, add the cold cream cheese last, and beat only until just combined, 30–45 seconds. Already soupy? Chill 30 minutes, then whisk in powdered sugar 2 tablespoons at a time. A teaspoon of cornstarch per cup of powdered sugar stabilizes it without much sweetness change.

    5. You glazed a warm cake — heat thins everything

    A perfect-bowl glaze turns into a translucent slide on a warm cake. Residual heat melts the sugar’s structure on contact; the icing runs off before it sets, leaving a sticky plate and a nearly naked cake. Buttercream melts on anything above room temperature too.

    How to tell: The icing looked right in the bowl but turned watery within a minute of touching the cake; it pooled at the base.

    The fix: Cool the cake completely — to the touch all the way through, not “mostly cool.” For layer cakes, 2 hours at room temperature or 30 minutes in the fridge after crumb-coating. Test the glaze on a cool plate first: drizzle a spoonful and watch 30 seconds. If it holds, the cake was the variable, not the glaze.

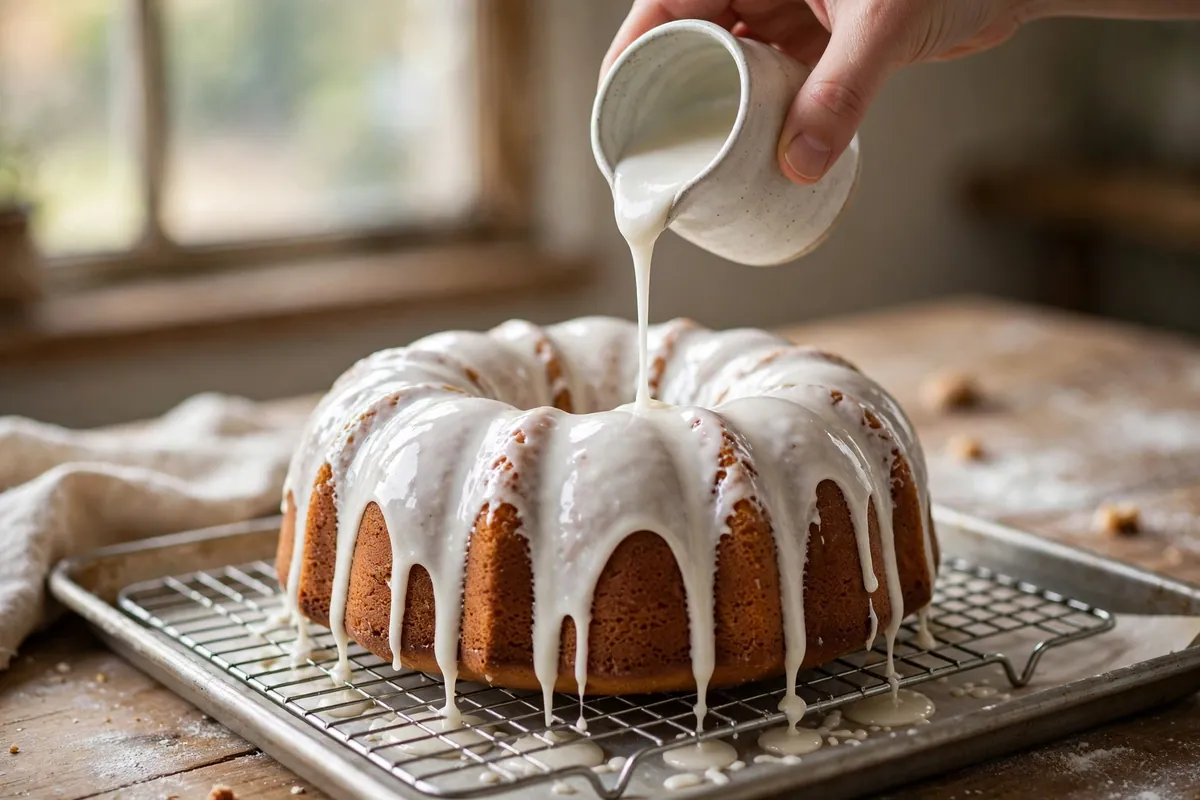
    glaze being poured over a fully cooled bundt cake, coating thickly and setting with clean drips at the edges
    glaze being poured over a fully cooled bundt cake, coating thickly and setting with clean drips at the edges

    6. Match the consistency to the job — “too thin” depends on the use

    Sometimes the icing isn’t wrong; the expectation is. A drip glaze should flow. A pipeable frosting should hold a stiff peak. Judge against the job: drizzle coats the back of a spoon thinly; spreadable holds soft peaks; pipeable stands in firm peaks.

    How to tell: It works for one purpose but fails at another — great for drizzling, useless for piping.

    The fix: Decide the job first. Drips: thin is correct — spoon at the rim and let gravity work. Spreading: the ribbon stage. Piping: chill 20 minutes after mixing; cold firms butter-based icings dramatically. Write down the ratio that worked — humidity shifts it batch to batch, and your notes are the real recipe.

    Frequently asked questions

    Is thin icing safe to eat?
    Yes — purely a texture and appearance issue. The only caution is storage: cream cheese or butter-based icings still need refrigeration, thin or not.

    Can I fix icing that’s already on the cake?
    Yes. Chill the cake 30 minutes to set what’s there, then apply a second, thicker coat — the chilled base gives the new layer grip. For pooled glaze at the bottom, let it set, then drizzle a thicker batch over the top.

    Can I thicken icing with cornstarch instead of more sugar?
    In small amounts — 1 teaspoon per cup of powdered sugar firms a glaze without adding sweetness. More tastes chalky and sets matte. For buttercream, extra powdered sugar is still the better fix.

    How long does glaze take to set?
    15–30 minutes at room temperature; humidity can double that. It’s set when the surface is dry to a light touch. Don’t refrigerate to speed it — condensation makes it weep.

    Can I save leftover thinned glaze?
    Yes — refrigerate up to a week sealed. It thickens cold; rewhisk at room temperature and adjust with drops of liquid. If separated, whisk 30 seconds before judging — it usually comes back.

    Related troubleshooting: How to Fix Broken Buttercream (Curdled, Soupy, Too Sweet) · Why Does My Frosting Taste Like Butter? Fixing Buttercream Balance · Dairy-Free Frosting That Holds Its Shape

  • Rye Bread Troubleshooting: Dense, Gummy, or Bitter — Fixed

    Rye Bread Troubleshooting: Dense, Gummy, or Bitter — Fixed

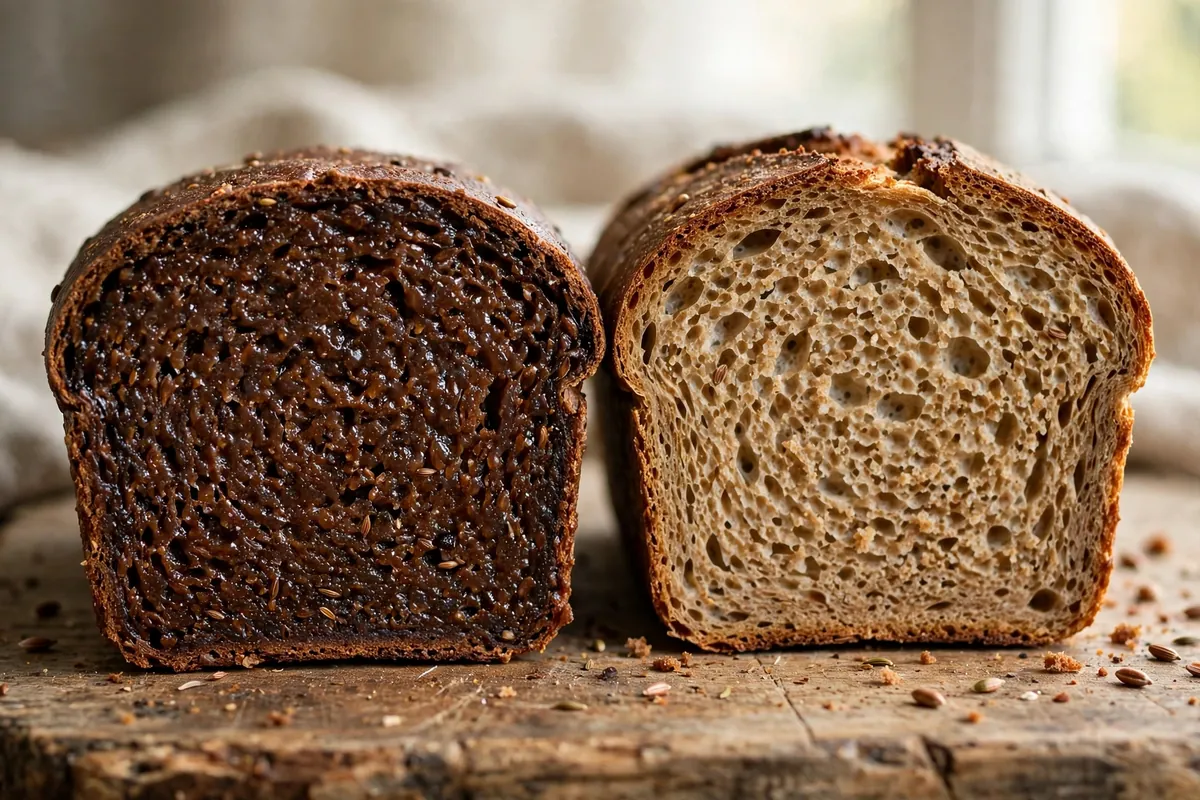
    Rye plays by different rules — that’s why it fails in ways wheat bread never does. If white-bread instincts gave you a dense brick, gummy interior, or bitter aftertaste, nothing is wrong with your instincts; they’re just the wrong ones for this grain. Rye has almost no gluten. Instead, its structure comes from pentosans (gummy carbohydrates that absorb enormous amounts of water), and its starches are attacked by unusually aggressive amylase enzymes.

    Quick diagnosis: Gummy rye is almost always sliced too soon or underbaked (rye needs far longer to set than wheat — causes #1 and #2). Dense rye usually means too high a rye percentage (cause #3). Bitterness: overbaked dark rye or stale flour (cause #5).

    Why rye is weird (the chemistry you need)

    Wheat bread’s structure is gluten; rye flour has very little gluten-forming protein. Instead, rye relies on pentosans, which absorb up to 8 times their weight in water and form a viscous gel. That gel holds the loaf together — and it’s why rye dough feels sticky and the crumb can turn gummy: you’re managing a gel, not gluten.

    Second quirk: rye is loaded with amylase enzymes that chop starches into sugars. Unchecked, they liquefy the crumb’s starch structure during baking — the infamous gummy, pasty interior. The traditional defense is acidity — sourdough fermentation or added acids inhibit amylase. Real rye bread is sour because the sourness is structural engineering, not just flavor.

    1. Gummy crumb — you sliced it too soon

    The number one rye complaint and the easiest fix: rye’s pentosan gel needs many hours to set after baking — far longer than wheat. Slice warm and the crumb turns wet, gummy, and pasty even in a perfectly baked loaf. It isn’t underbaked; it’s unfinished.

    How to tell: Crust and shape look right and the full bake time elapsed, but the interior is damp and gummy when sliced within hours of baking.

    The fix: Wait. A full 12–24 hours before slicing — I know, it’s agonizing. Wrap the cooled loaf in a clean towel or paper bag (not plastic, which softens the crust) and leave it overnight — the crumb firms up and the gumminess resolves into the moist, even texture rye should have. Wait a full day and the “gummy rye problem” vanishes.

    2. Gummy crumb — underbaked, because rye lies about doneness

    Rye underbakes easily: the dark color makes visual cues useless — it looks “done” long before it is — and the dense crumb conducts heat slowly. It needs 205–210°F (96–99°C) internally, hotter than most wheat breads.

    How to tell: Heavy and damp even after a full day’s rest, with a wet (not just moist) center that never firms up.

    The fix: Bake longer and hotter than your instincts say. For a 1.5-pound (700g) rye loaf, expect 50–65 minutes at 400–425°F (200–220°C) to reach 205–210°F (96–99°C) in the center. Combine with the full rest from cause #1 — both are required. (General doneness principles: How to Tell When Bread Is Done.)

    3. Dense brick — too much rye for the structure

    100% rye is a legitimate traditional style (think German vollkornbrot), but dense by design — no gluten means no open crumb, ever. If you expected a light sandwich loaf, the recipe didn’t fail; the expectation did. For beginners, anything above 60–70% rye gets progressively denser and harder to handle.

    How to tell: Uniformly dense with a tight crumb — not gummy, just heavy. You used mostly or entirely rye flour.

    The fix: A 40–50% rye / 50–60% bread-flour blend gives real rye flavor with a genuinely light crumb — my recommended starting point. Wheat supplies the gluten network; rye supplies flavor and moisture. Raise the rye percentage gradually as you learn the sticky dough. Handle gently: no windowpane test, no kneading — mix until combined, shape with wet hands, proof only until slightly risen (rye over-proofs fast).

    4. Dense and pasty — the amylase ran wild (not enough acidity)

    Without enough acidity, rye’s amylases stay active deep into the bake, liquefying starches into gummy paste instead of set crumb. Traditional rye breads are sourdoughs for exactly this reason — fermentation acids shut the amylases down.

    How to tell: The crumb is dense AND wet-pasty with a sticky mouthfeel even after full cooling — and you used commercial yeast with no added acid.

    The fix: The authentic route: a rye sourdough starter — even a hybrid (starter for acidity, commercial yeast for lift) transforms the crumb. The quick route: 1 tablespoon vinegar or a quarter teaspoon citric acid per 500g flour — it inhibits amylase exactly like fermentation acids do. My straight-yeast rye went from pasty to properly set with that one tablespoon.

    5. Bitter aftertaste — overbaked dark rye or stale flour

    A pleasant tang is one thing; outright bitterness has two usual sources. First, dark rye baked too hot or too long — the bran over-caramelizes (dark rye browns faster than you expect). Second, old rye flour: its natural oils go rancid faster than wheat’s, tasting bitter and cardboard-like no matter how well you bake.

    How to tell: Bitterness in the crust only means overbaking; throughout the loaf means the flour. Rancid rye smells sharp and stale rather than sweet and grainy — check age and smell.

    The fix: For overbaking: drop 25°F and tent with foil if the crust darkens early — rye’s color lies about doneness (cause #2). Buy rye flour you’ll use within 2–3 months, store airtight and cool (fridge for whole rye), and smell before baking — fresh rye smells faintly sweet and earthy. Check caraway too: over 1 tablespoon per loaf turns bitter-medicinal, and old ground caraway goes harsh.

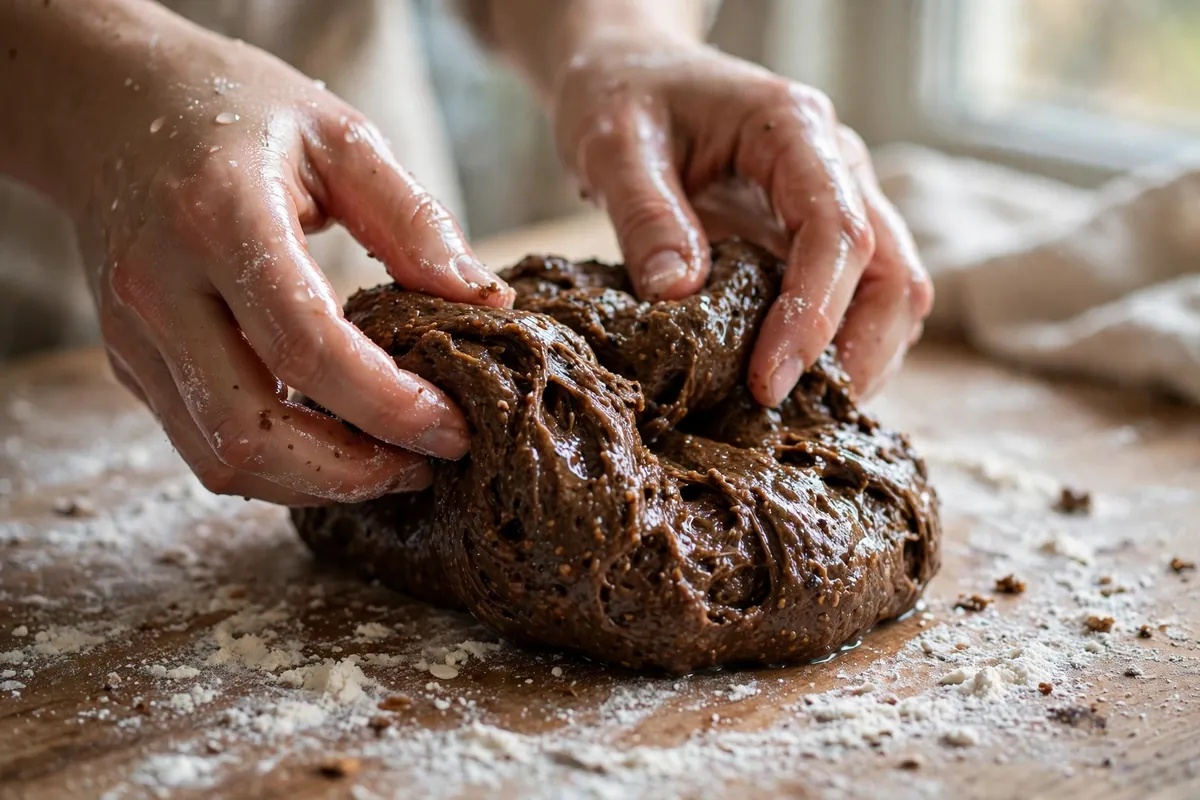
    hands shaping sticky rye dough with wet hands on a floured surface
    hands shaping sticky rye dough with wet hands on a floured surface

    6. The loaf spread into a pancake — shaping and proofing

    Without gluten, rye dough can’t hold a tall shape — high-percentage rye loaves naturally bake flatter and wider. A true pancake means over-proofing or too much water. Rye ferments fast (those amylase-liberated sugars feed yeast quickly) and over-proofed rye collapses rather than springing.

    How to tell: The dough rose then flattened in the oven or spread sideways proofing, with a dense crumb and sour-alcoholic smell (over-fermented).

    The fix: Proof rye by time discipline, not by doubling — 60–75% rise is plenty for high-rye doughs. Use a loaf pan above 60% rye — the pan supplies the structure missing gluten can’t. Keep hydration moderate: rye feels wetter than same-hydration wheat dough because pentosans hold water differently — trust the recipe’s numbers over your wheat-trained hands.

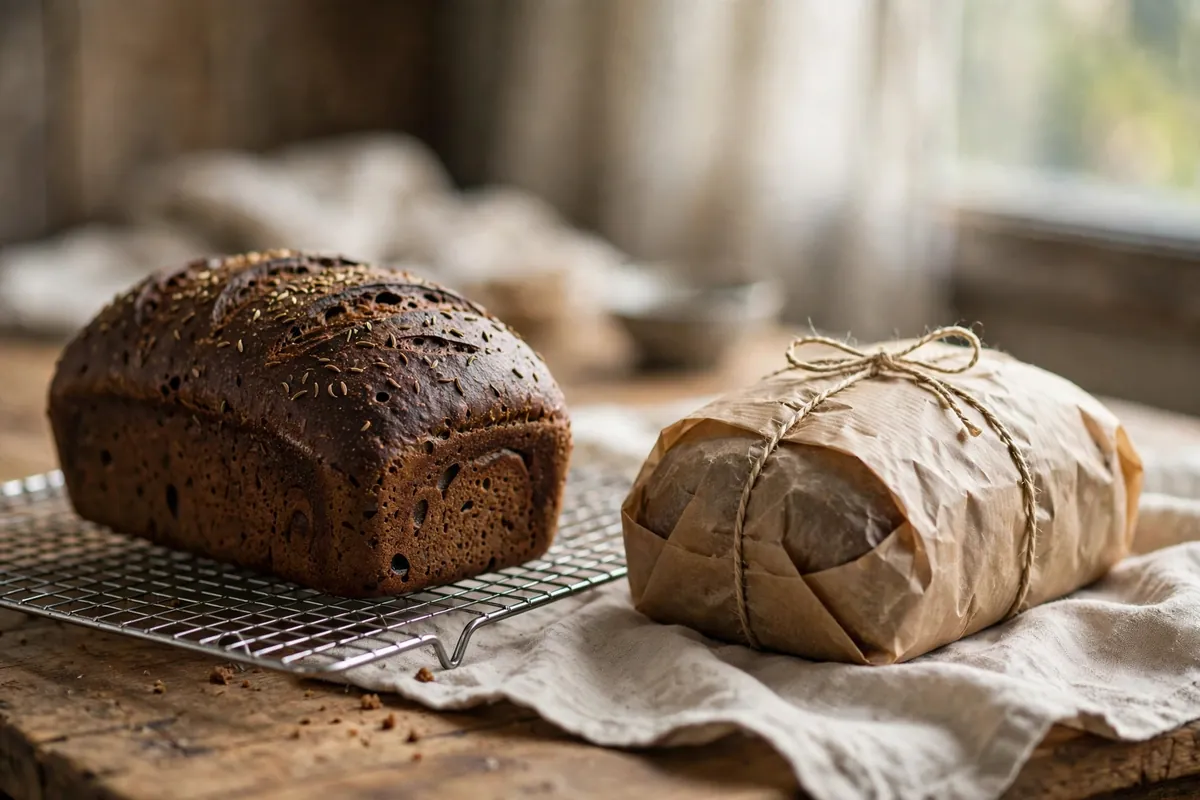
    rye loaf cooling on a wire rack, wrapped loaf resting overnight beside it
    rye loaf cooling on a wire rack, wrapped loaf resting overnight beside it

    Frequently asked questions

    Can I fix gummy rye bread after baking?
    If just sliced too soon, yes — wrap it and wait the full 12–24 hours. Underbaked rye can go back in (whole loaf, 350°F / 175°C, 10–15 minutes). Amylase-damaged crumb can’t be fixed, but it toasts well.

    Why does rye bread need sourdough?
    Not strictly — but acidity inhibits rye’s aggressive amylases, preventing gummy crumb. Sourdough is traditional; vinegar or citric acid works the same chemically.

    Is dense rye bread safe to eat?
    Yes — as long as the loaf hit 205–210°F (96–99°C) internally. Density is texture, not safety; gummy-but-baked rye is safe, just unpleasant.

    Can I use bread flour techniques like stretch-and-fold on rye?
    No — there’s almost no gluten to develop, so kneading and folding accomplish nothing. Mix until combined and leave it alone. Over-handling just makes rye dough stickier.

    Why is my rye bread sour even without sourdough starter?
    Mild tang is normal — rye produces some acidity in any ferment. Strong sourness means a long or warm ferment; shorten or cool it for milder flavor.

    How long does rye bread keep?
    5–7 days at room temperature — better than wheat bread, thanks to acidity and moisture retention. Freezes excellently for 3 months. (Storage basics: How to Store Homemade Bread.)

    Related troubleshooting: Why Is My Bread Dense? · Why Didn’t My Bread Rise? · How to Tell When Bread Is Done

  • Why Does My Frosting Taste Like Butter? Fixing Buttercream Balance

    Why Does My Frosting Taste Like Butter? Fixing Buttercream Balance

    You followed the recipe exactly — butter, powdered sugar, a splash of milk — and the result tastes like sweetened butter rather than frosting. The problem isn’t your palate. It’s a balance problem, and buttercream balance is fixable with a short list of adjustments that professionals use every day.

    Quick diagnosis: Butter-forward frosting comes down to three things in nearly every case: the butter-to-sugar ratio skewed buttery, no salt to frame the sweetness, and butter that was too warm when mixed. If you used equal parts butter and sugar by volume, skipped the salt, and the butter was soft and shiny — start with fixes #1, #2, and #3.

    Buttercream is an emulsion of fat, sugar, and a little liquid. When the fat shouts and the sugar whispers, you taste butter. Every fix below turns down the fat’s volume or turns up everything else.

    1. The ratio skewed buttery

    American buttercream lives or dies on ratio. The classic working ratio is roughly 1 part butter to 2 parts powdered sugar by weight — for example, 225g (2 sticks / 1 cup) butter to 450g (about 3¾ cups spooned) powdered sugar. Many home recipes drift buttery: “1 cup butter, 2 cups sugar” by volume is far less sugar than it sounds, because powdered sugar is light — 2 volume cups is only about 250g. That’s nearly 1:1 by weight, and at 1:1 you taste butter with sugar in it, not frosting.

    How to tell: Compare your recipe by weight, not volume. If butter and sugar are close to equal in grams, the ratio is the problem.

    The fix: Rebalance to 1:2 by weight. If the frosting is already made, beat in sifted powdered sugar ¼ cup at a time until the butter recedes — taste after each addition. You’re done when sweetness leads and butter supports.

    2. You skipped the salt

    Salt doesn’t make frosting salty — at the right dose, it makes frosting taste more like itself. A pinch of salt suppresses the flat, fatty perception of butter and sharpens sweetness, the same way salted caramel reads sweeter than plain caramel. Unsalted butter plus no added salt is the double fault behind most butter-bomb frostings.

    How to tell: The frosting tastes rich and coating but oddly bland — buttery without brightness.

    The fix: Add ¼ teaspoon fine salt per batch (per ~450g sugar), beat 30 seconds, and taste. The change is immediate: the butter steps back, the vanilla and sweetness step forward. If you used salted butter, skip this — but most recipes (correctly) call for unsalted.

    3. The butter was too warm

    Butter at 65–68°F (18–20°C) creams into a fluffy, aerated base. Butter that’s soft, shiny, or greasy — 75°F+ (24°C+) — can’t hold air. It mixes into a dense, slick paste that coats the tongue with fat instead of melting into sweetness. Warm-butter frosting always tastes more buttery because, physically, more of it is liquid fat on your palate.

    How to tell: The butter looked glossy or slumped before mixing, and the finished frosting feels greasy rather than fluffy.

    The fix: If it’s already made, chill the bowl 15–20 minutes, then re-whip — cold firms the fat and whipping re-aerates it. Next time, use butter that’s cool to the touch and holds its shape when pressed. (The same temperature discipline that keeps cookies from spreading flat keeps frosting fluffy.)

    butter at the right temperature — firm cube holding its shape with a slight give
    butter at the right temperature — firm cube holding its shape with a slight give

    4. Not enough liquid or flavoring

    Buttercream needs a small amount of liquid — 1–2 tablespoons of heavy cream or milk per batch — and real flavoring. Without them, there’s nothing in the bowl except butter and sugar, and butter wins that fight. Vanilla extract (1–2 teaspoons) doesn’t just add vanilla notes; its alcohol carries aroma and its flavor complexity distracts from pure fat.

    How to tell: The ingredient list is three lines long and the frosting tastes one-dimensional.

    The fix: Beat in 1 tablespoon heavy cream and 1 teaspoon vanilla, then taste. Cream adds milk solids and water that lighten the fat’s grip; vanilla adds the aromatic top notes your nose reads as “frosting.” Cocoa powder works the same way for chocolate buttercream — ¼ to ½ cup sifted cocoa transforms the balance entirely, which is why chocolate frosting rarely has this problem.

    5. It wasn’t beaten long enough

    Under-beaten buttercream is dense, and dense reads as fatty. Proper beating — 3–5 minutes after the sugar is incorporated, on medium-high — whips microscopic air into the emulsion. Air is flavorless, which is exactly the point: it dilutes the butter’s presence on the tongue and turns the texture from paste to cloud.

    How to tell: The frosting is smooth but heavy, with no lightness when you lift the beater.

    The fix: Beat it longer. Seriously — most home bakers stop a full two minutes early. The frosting should visibly lighten in color (pale ivory, not yellow) and hold soft, billowy peaks. If it was made with warm butter, chill first (fix #3), then beat.

    side-by-side swirls of American buttercream and Swiss meringue buttercream on a plate
    side-by-side swirls of American buttercream and Swiss meringue buttercream on a plate

    6. Consider a less buttery style

    If you’ve fixed the ratio, salt, temperature, and beating and it still tastes too buttery for your liking, the issue may be the style itself. American buttercream is the most butter-forward frosting in existence by design. Two alternatives:

    • Swiss meringue buttercream: egg whites and sugar heated to 160°F (71°C), whipped to meringue, then butter beaten in. The meringue structure means less butter per bite and a silkier, less fatty mouthfeel. More work, completely different eating experience.
    • Cream cheese frosting: the tang of cream cheese cuts through butterfat like nothing else. For anyone who finds plain buttercream cloying, this is usually the real answer — which is also why dairy-free frosting recipes lean on tangy or chocolate bases rather than pure fat.

    Frequently Asked Questions

    Can I fix frosting that’s already made and tastes like butter?
    Yes — beat in sifted powdered sugar ¼ cup at a time, add ¼ teaspoon salt and 1 teaspoon vanilla, and re-whip for 2–3 minutes. If it was made with warm butter, chill the bowl 15–20 minutes first. These three moves rescue nearly every butter-bomb batch.

    Does using less butter and more sugar make it too sweet?
    It can, which is why salt matters so much — salt lets you carry more sugar without the frosting reading as cloying. The 1:2 butter-to-sugar ratio by weight with ¼ teaspoon salt is the tested sweet spot: sweet-led, buttery-supported, not saccharine.

    Why does my frosting taste buttery even though I followed the recipe?
    Most likely the recipe measured by volume, where “1 cup butter, 2 cups sugar” is nearly 1:1 by weight — far more butter-forward than it looks on paper. Convert to weight (225g butter : 450g sugar) and the problem usually disappears.

    Is European-style butter worse for frosting?
    It has more butterfat (82–86% vs ~80%), so yes — it tastes more buttery in American buttercream. It’s wonderful for flavor in cakes and pastry, but for frosting where butter is already the risk, standard butter gives you more control.

    Should frosting be served cold or room temperature?
    Room temperature, always. Cold firms the butterfat, which mutes sweetness and emphasizes the fatty mouthfeel — the exact problem you’re fixing. Pull the frosted cake from the fridge 30–60 minutes before serving.

    Can I just use all shortening instead of butter?
    You can, and it eliminates butter flavor entirely — but shortening has its own waxy mouthfeel and no flavor of its own, so the frosting tastes purely of sugar. A half-butter, half-shortening split is the common compromise: butter flavor present but restrained, with better heat stability.

    Related troubleshooting: Dairy-Free Frosting That Holds Its Shape · Why Are My Cookies Cakey Instead of Chewy? · Why Does My Frosting Taste Like Butter?

  • Pie Crust Shrinking in the Oven — Gluten and Resting Fixes

    Pie Crust Shrinking in the Oven — Gluten and Resting Fixes

    Quick diagnosis: Shrinking is gluten snapping back like a rubber band. It comes from three things in order: dough that was overworked, dough that wasn’t rested, and dough that was stretched — not eased — into the pan. Rest the dough a full hour, chill the shaped shell 20 minutes before baking, and never stretch it to fit. That trio fixes nearly every shrinking crust.

    a shrunken blind-baked shell pulled away from the pan sides next to a properly fitted shell

    Pie dough has a memory. Every minute of handling develops gluten — the elastic protein network that also makes bread chewy — and gluten’s whole job is to spring back to its original shape. Roll it, stretch it, then heat it, and it contracts exactly the way a stretched rubber band does when released. The fixes are all about relaxing that network before it ever sees the oven.

    1. The dough was overworked

    Gluten develops with handling: every fold, press, and re-roll builds more elasticity. A dough that’s been kneaded like bread, rolled three times to “get it right,” or pressed aggressively into every flute has a gluten network strong enough to visibly retract in the heat.

    How to tell: The dough fought you — it kept springing back while rolling, shrank as you lifted it, or felt elastic and bouncy rather than supple. Tough, leathery baked texture alongside the shrink confirms it.

    The fix: Handle it as little as possible. Cut the fat in with a pastry blender or your fingertips, add ice water a tablespoon at a time, and stop the moment it holds together when squeezed. Use the fraisage technique for stubborn bits: smear small sections across the counter with the heel of your hand once or twice — it combines without kneading. When I timed myself, my best crusts came together in under 90 seconds of actual handling.

    2. The dough wasn’t rested

    Resting lets gluten relax and flour fully hydrate. An unrested dough goes into the pan tense, like a flexed muscle, and the oven heat is what finally lets it release — by contracting. This is the single most skipped step in home pie-making.

    How to tell: You mixed, rolled, and filled in one continuous session with no waiting. The dough may also have cracked at the edges while rolling (under-hydrated flour alongside tense gluten).

    The fix: Rest twice. First, wrap the mixed dough and refrigerate at least 1 hour (overnight is ideal — flavor improves too). Second, after shaping the shell in the pan, chill it 20–30 minutes before baking. That second chill is the one most recipes underplay; in my testing it cut shrinkage roughly in half on its own, because the gluten relaxes in its final shape.

    hands easing — not stretching — pie dough into a pan, with visible slack around the edges

    3. The dough was stretched into the pan

    This is the mechanical cause, and it compounds the gluten problem. When you pull dough to reach the pan’s edges, you’re pre-loading it like a stretched rubber band. Heat releases the tension, and the dough snaps back toward the center — sides slump, the rim drops, and fluting disappears.

    How to tell: The sides slumped most where you tugged hardest, and decorative crimping melted into a smooth low rim.

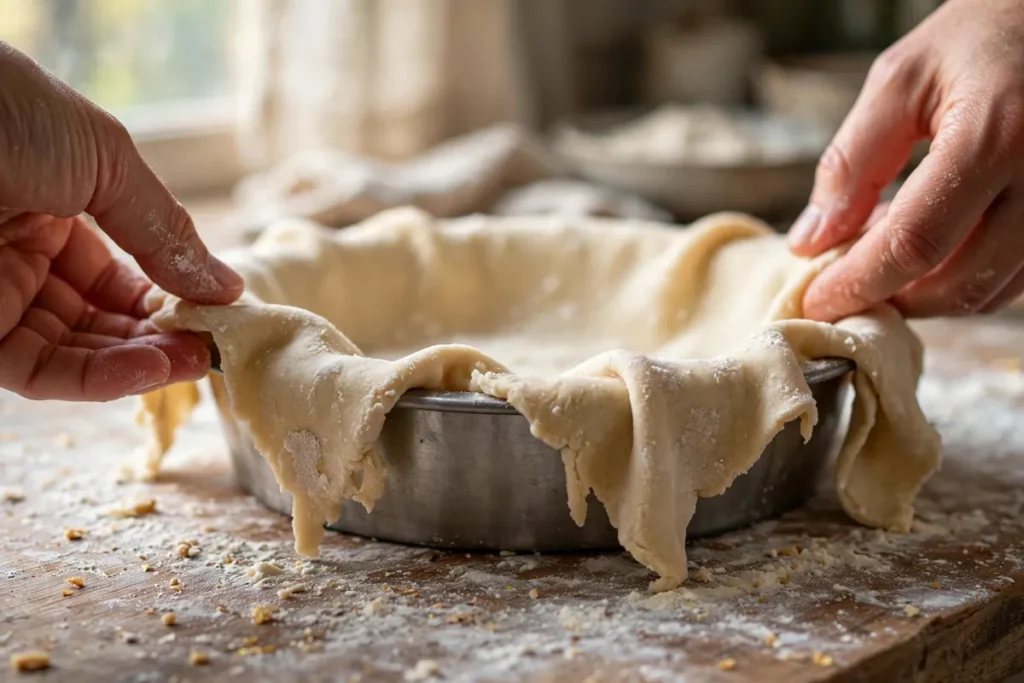
    The fix: Roll the dough 2 inches wider than the pan all around, then lift and ease it in — let it settle under its own weight, nudging gently, never pulling. Leave a full 1-inch overhang; trim only after blind baking (or fold the overhang under for a thick edge before crimping). Excess dough is your insurance: it gives the crust somewhere to contract without pulling away from the pan.

    4. The fat got too warm

    Warm fat melts into the flour instead of staying in distinct pea-sized pieces, and melted-into dough behaves more like a cracker dough — it also means you probably over-handled it trying to compensate for the greasy texture, which loops back to cause #1. Cold fat is structural: those solid pieces create the flaky layers and the dough stays relaxed.

    How to tell: The dough felt greasy or soft at room temperature, butter visibly smeared rather than staying in chunks, and the baked crust was tough rather than flaky.

    The fix: Keep everything cold — freeze the cubed butter 15 minutes before starting, use ice water (with actual cubes in it), and if the kitchen is warm, chill the flour too. You should see distinct butter pieces the size of peas throughout the mixed dough. If the dough softens while you work, stop and refrigerate 15 minutes; there’s no penalty for pausing.

    5. The oven wasn’t hot enough at the start

    Pastry needs a blast of initial heat to set its structure before the fat fully melts and the gluten starts contracting. A lukewarm oven lets the dough sit in the danger zone — soft, melty, and free to shrink — for far too long.

    How to tell: The crust looks pale and slumped rather than golden and defined; it took longer than expected to show any color.

    The fix: Blind-bake at 400–425°F (200–220°C), fully preheated. The hot start sets the exterior fast, locking the shape before contraction can take hold. Verify with an oven thermometer — this is the same 15–25°F cool-oven problem that ruins cookies (see Why Do My Cookies Spread Flat?).

    pie weights (ceramic beans) filling a parchment-lined shell, ready for the oven

    6. No pie weights (for blind-baked shells)

    Weights don’t stop gluten contraction directly, but they pin the dough against the pan while the structure sets — physically preventing the slump while causes #1–5 are being fixed at the source. An unweighted shell has nothing holding it in place during the critical first minutes.

    How to tell: The bottom puffed up and the sides slid down into it — classic unweighted blind bake.

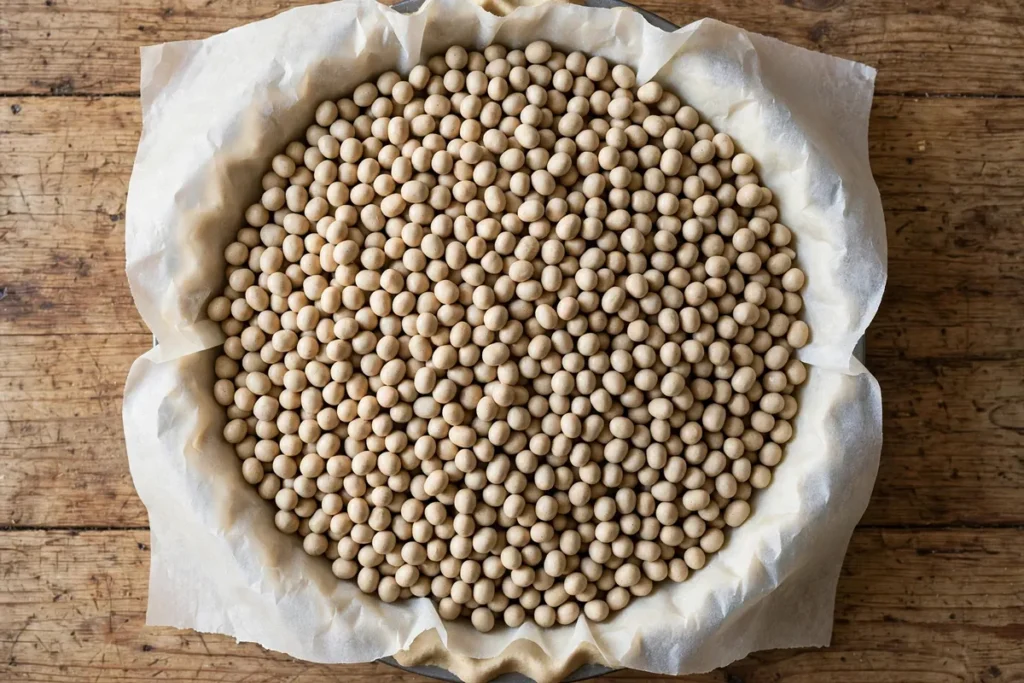
    The fix: Line the chilled shell with parchment and fill completely to the rim with pie weights, dried beans, or even sugar (granulated sugar as a weight is my favorite trick — it toasts lightly and is reusable). Bake 15–20 minutes until the edges set, then remove weights and bake 5–10 minutes more to brown the bottom.

    FAQ

    Can I still use a shrunken pie shell?
    Usually yes. If it shrank but held together, fill it anyway — custard and cream fillings hide a multitude of sins, and it will taste fine. Only start over if the sides collapsed so far that filling would overflow. Shrinkage is cosmetic far more often than structural.

    Is it safe to eat pie dough that was left out during resting?
    Countertop resting is fine for the short shaping rests (20–30 minutes). But the long hydrating rest must be refrigerated — dough with butter sitting out for hours is a food-safety risk. When in doubt, the fridge is always the right call.

    Can I fix shrinkage after the crust is baked?
    No — once baked, the shape is permanent. Prevention is the entire game here, which is why the double rest (dough + shaped shell) matters so much. Build it into your timeline: pie day starts the night before.

    Does vodka really make better pie crust?
    It helps with tenderness, not shrinkage directly. Replacing half the water with cold vodka adds liquid for easy rolling but develops less gluten (gluten needs water, and vodka is only 60% water). It’s a legitimate trick for tender crusts — just keep it ice cold and don’t expect it to fix an overworked dough.

    Why did my fluted edge disappear?
    The fluting was stretched thin during crimping, then contracted in the heat. Fix: make the edge thick — fold the overhang under itself before crimping so the rim is double-layered — and chill the shaped shell well. A thick, cold edge holds its decoration.

    Should I trim the overhang before or after baking?
    After, for blind-baked shells. Trimming before baking removes the insurance policy — the excess gives the crust room to contract without pulling away from the pan. For double-crust pies, trim and crimp before baking since the top crust anchors the edge.

    Related troubleshooting: Soggy Bottom Pie: How to Get a Crisp Base Every Time · Puff Pastry Not Puffing: Lamination Mistakes to Avoid · Why Do My Cookies Spread Flat?