Author: Ali Ramzan

  • How to Fix Frosting That’s Too Sweet (Rebalancing Guide)

    How to Fix Frosting That’s Too Sweet (Rebalancing Guide)

    Too-sweet frosting isn’t failed — it’s unbalanced. Sweetness is perception, and perception shifts: salt suppresses sweet receptors, acid brightens, fat rounds the edges, cold mutes sweetness outright. You don’t need to start over; you need to rebalance.

    Quick diagnosis: Your butter-to-sugar ratio is off, or you’re tasting it warm. First, chill the frosting 20 minutes and taste again. Then add ¼ teaspoon fine salt per 3 cups of frosting, a teaspoon of lemon juice, or 2–3 tablespoons of cream cheese — taste after each addition and stop when it balances.

    My tested baseline: 225g (2 sticks) unsalted butter beaten 3–4 minutes until pale; 360g (3 cups) powdered sugar in three additions; 2 tablespoons cream; 1 teaspoon vanilla; ¼ teaspoon fine salt. Roughly 1:1.6 butter-to-sugar — noticeably less sweet than the classic 1:2.

    1. Add salt — the single fastest fix

    Salt doesn’t make frosting salty at these levels; it suppresses your sweetness receptors. Most too-sweet frostings were simply under-salted. I add ¼ teaspoon of fine sea salt per 3 cups of finished frosting as standard, and for an already-sweet batch, that’s the first thing I reach for.

    How to tell: The frosting tastes flat and one-dimensionally sweet, with no other flavor note; the recipe called for “a pinch” of salt or none at all.

    The fix: Beat in ¼ teaspoon fine salt, taste, and repeat once if needed — but stop at ½ teaspoon total per batch, past which salt becomes its own flavor. Use fine salt, not flaky: it dissolves instantly into the fat. If you used salted butter, you still likely need more — salted butter only carries about ¼ teaspoon per stick.

    2. Add acid — lemon juice or a splash of vinegar

    Acid is the other great sweetness counterweight. A teaspoon of fresh lemon juice per 3 cups of frosting brightens the whole batch; the sourness gives your palate something to do besides register sugar. In chocolate frosting, a teaspoon of white vinegar or instant espresso works the same way without a lemony note.

    How to tell: The frosting tastes sweet and slightly heavy or cloying; it coats the mouth without any lift.

    The fix: Beat in 1 teaspoon lemon juice (vanilla) or white vinegar / instant espresso dissolved in the cream (chocolate). Taste and repeat once. Acid thins frosting slightly — if yours is already soft, add a tablespoon of powdered sugar to compensate; the acid’s work is done.

    3. Beat in cream cheese or mascarpone — tang plus fat

    Two to three tablespoons of full-fat cream cheese does double duty: lactic tang cuts sweetness, extra fat rounds texture. It’s my favorite rescue — the frosting tastes more expensive. Mascarpone works the same, milder.

    How to tell: You want the frosting less sweet but don’t want to change its character much; the batch is large enough to absorb extra volume.

    The fix: Beat 2–3 tablespoons of room-temperature cream cheese into the finished frosting until completely smooth. Don’t add more than 4 tablespoons per 3 cups — beyond that you’re making cream cheese frosting, which is softer and needs refrigeration. Note the finished frosting now needs to stay refrigerated, like any cream cheese frosting.
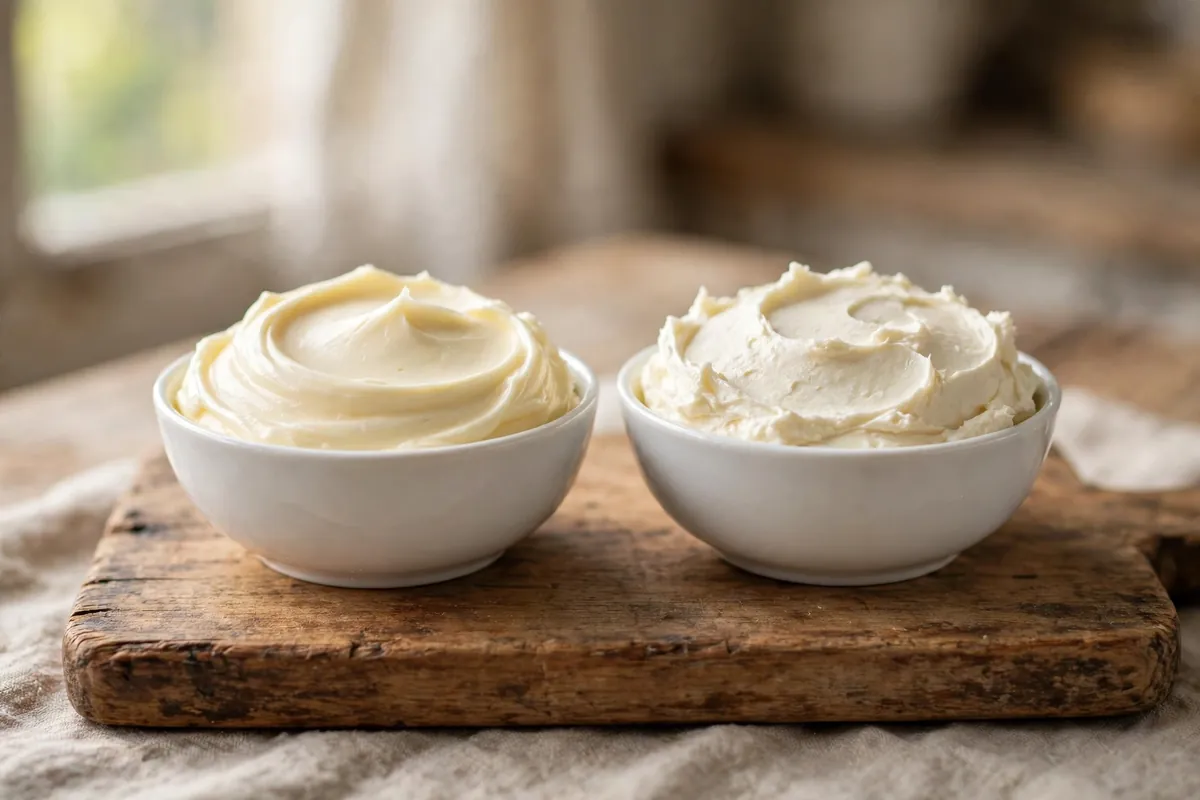
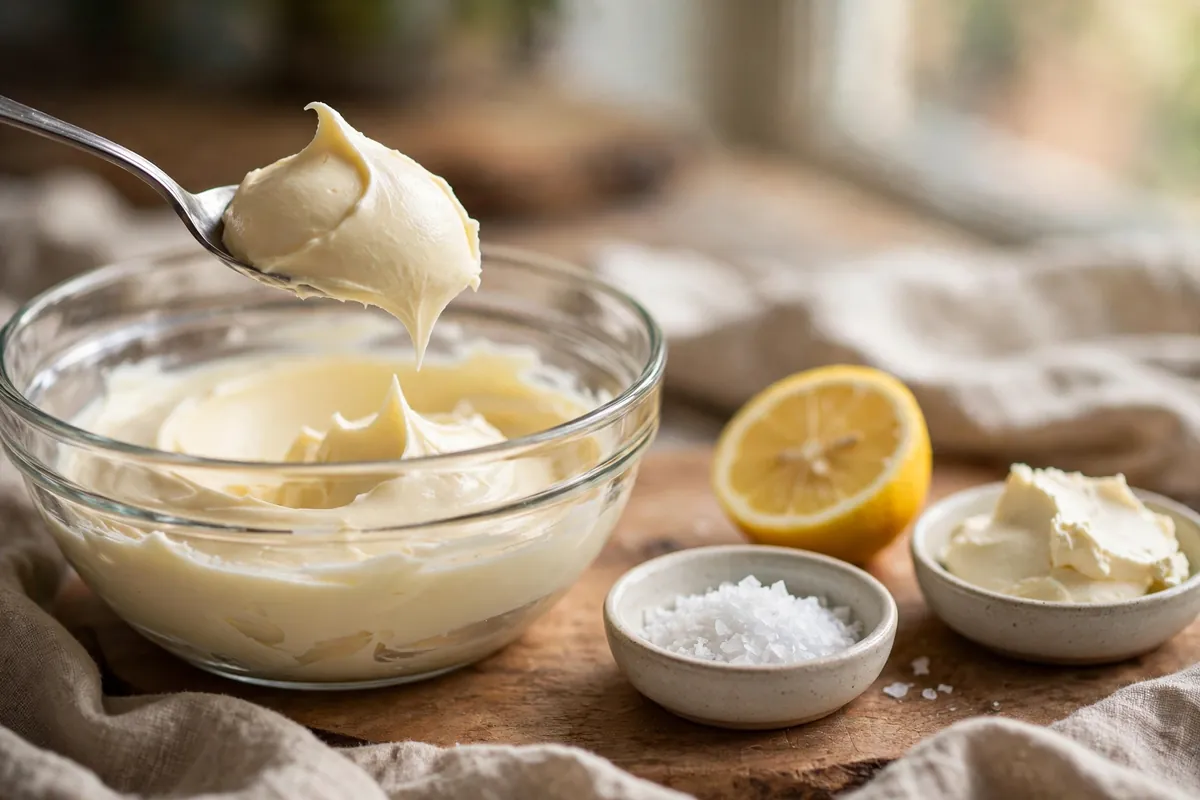
    two small bowls of buttercream side by side, one plain pale, one with cream cheese beaten in, showing the slightly tangier matte finish
    two small bowls of buttercream side by side, one plain pale, one with cream cheese beaten in, showing the slightly tangier matte finish

    4. Add more butter — dilute the sugar

    The bluntest fix: at 1 part butter to 2+ parts sugar, the frosting is candy with butter in it. Adding 2–4 tablespoons of soft butter dilutes the sugar and adds fat your palate reads as richness, not raw sweetness. This is distinct from the frosting that tastes like butter problem — there, the butter flavor dominates; here, sugar dominates and butter is the diluent.

    How to tell: The frosting is gritty-sweet, almost like eating powdered sugar with a spoon; the recipe used 4+ cups of sugar to 1 cup of butter.

    The fix: Beat in 2–4 tablespoons of soft (not melted) unsalted butter, one tablespoon at a time, tasting as you go. The frosting will get softer — if it’s for piping, chill 20 minutes afterward to firm it back up. This also works beautifully combined with the salt fix: salt plus extra butter together rebalance most American buttercreams.

    5. You’re tasting it warm — chill it first

    Sweetness perception drops with temperature. Buttercream at 72°F (22°C) from the mixing bowl always reads sweeter than the same frosting on a chilled cake. Before “fixing” anything, refrigerate 20 minutes and taste cold.

    How to tell: The frosting seemed fine in your head but overwhelming on the spoon; the kitchen is warm; the batch was just mixed.

    The fix: Chill the bowl 20 minutes, then taste. If it still needs help, apply fixes 1–4. And remember this at serving time: frosted cakes taste less sweet served cool (60–65°F / 16–18°C) than at full room temperature. For very sweet frostings, I deliberately serve the cake slightly cool.

    6. Change the frosting type next time — the ratio is the recipe

    If every batch fights you, the recipe is the problem. American buttercream is the sweetest style by construction. Swiss meringue — whites and sugar heated to 160°F (71°C), whipped, then butter beaten in — uses roughly half the sugar. German (pastry cream + butter) and ermine (flour-milk roux + butter) are even less sweet.

    How to tell: Every batch of this recipe tastes too sweet no matter what you adjust; you’ve added salt and acid and it’s still candy.

    The fix: For the current batch, use fixes 1–5. For the next cake, switch styles: Swiss meringue buttercream needs about 200g sugar for 225g butter versus 400g+ in American — the single biggest sweetness lever available. My broken buttercream rescue covers the technique if the meringue base intimidates you.
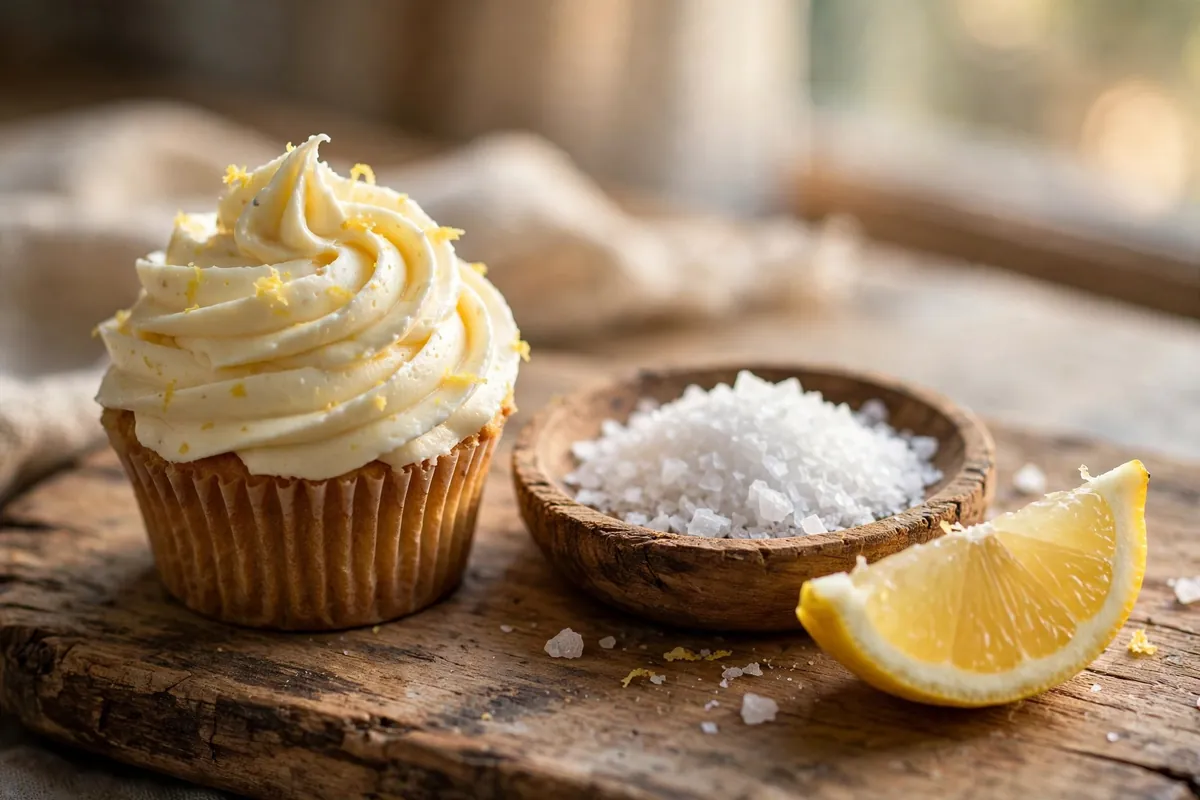
    a cupcake frosted with swirled buttercream next to an identical cupcake, one labeled in the scene by a lemon wedge and salt dish to suggest the fix
    a cupcake frosted with swirled buttercream next to an identical cupcake, one labeled in the scene by a lemon wedge and salt dish to suggest the fix

    FAQ

    Can I fix too-sweet frosting without changing the flavor?
    Salt — ¼ teaspoon per 3 cups suppresses sweetness with no identifiable flavor. Extra butter dilutes sweetness while keeping the flavor profile.

    How much salt can I add to frosting before it tastes salty?
    Up to ½ teaspoon of fine salt per 3 cups of frosting stays in the “balanced” zone for most palates. Past that, salt becomes a distinct flavor. Add in ¼-teaspoon increments and taste each time.

    Does powdered sugar vs granulated sugar change sweetness?
    Same sweetness, but powdered sugar’s cornstarch adds a raw, chalky note. Sift it and beat a full 3–4 minutes to reduce that edge.

    Is it safe to eat frosting with raw egg whites?
    American buttercream has no eggs, so there’s no concern. If you switch to Swiss or Italian meringue buttercream, the whites are heated to 160°F (71°C), which makes them food-safe.

    Can I reduce the sugar in American buttercream directly?
    Cut up to 25% before structure suffers — below that it won’t hold piping. For more, switch to Swiss meringue or ermine.

    Why does store-bought frosting taste less sweet than mine?
    Commercial frostings use shortening plus calibrated salt, acids, and flavorings. The salt and acid fixes above get homemade close — no shortening needed.

    Related troubleshooting: Why Does My Frosting Taste Like Butter? · How to Fix Broken Buttercream · Fixing Thin Icing
  • Kouign-Amann Troubleshooting: Leaked Butter and Burnt Sugar, Fixed

    Kouign-Amann Troubleshooting: Leaked Butter and Burnt Sugar, Fixed

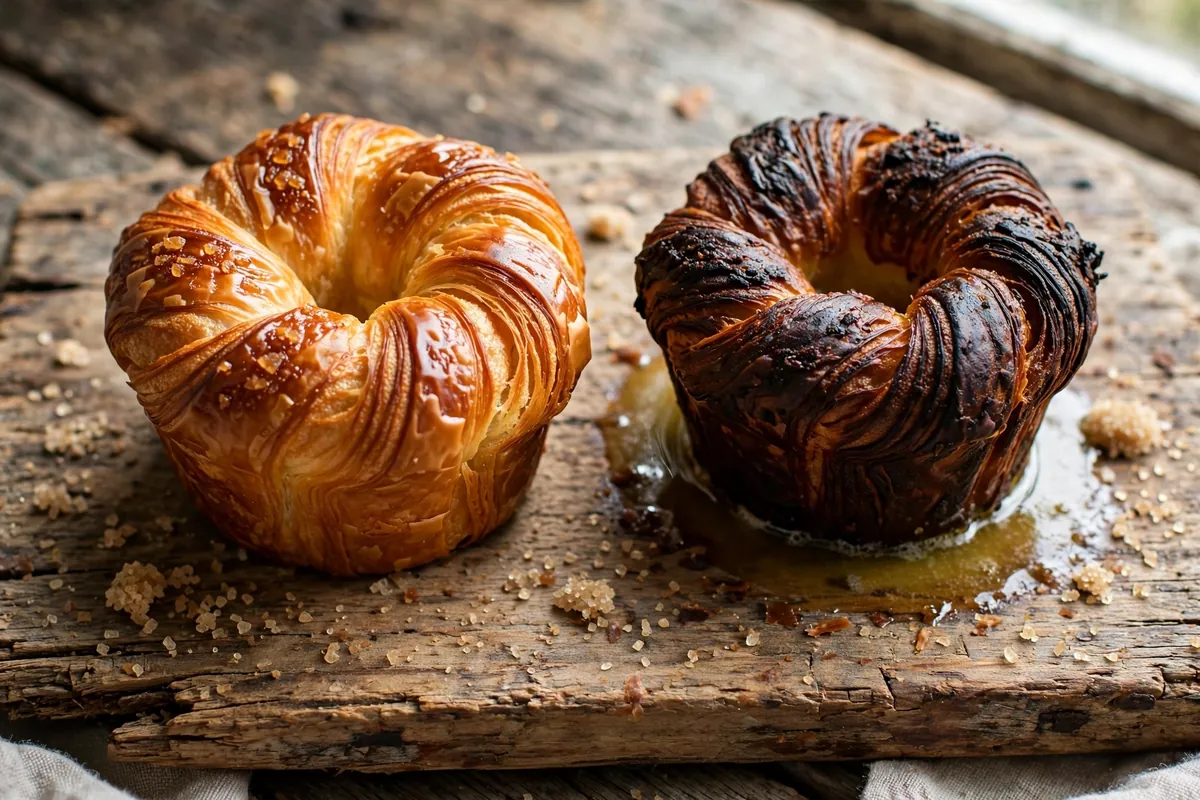
    Kouign-amann is croissant dough’s reckless cousin: the same laminated layers, but with sugar folded in and baked until deeply caramelized. When it works, it’s shattering, buttery, burnished. When it fails, it fails two ways — butter floods out and fries the pastry instead of flaking it, and sugar goes from caramel to charcoal before the center finishes. Both look catastrophic; both come from the same temperature mistakes.

    Quick diagnosis: Your kouign-amann leaked butter because the dough or butter got too warm during folding — the butter melted into the dough instead of staying in layers. It burned because the oven was too hot for sugared dough, or it baked too long. Keep everything at 60–65°F (16–18°C) during lamination, bake at 400–425°F (200–220°C) in snug muffin tins, pull at deep amber — not black.

    My tested baseline: 250g bread flour, 175ml water, 5g salt, 5g instant yeast, kneaded smooth and chilled. Butter block: 225g European-style butter (82% fat) beaten with 25g flour into a pliable slab. One letter fold, chill 45 minutes, second letter fold, chill 45 minutes. Roll to ¼ inch, sprinkle 150g sugar, fold in thirds, roll once more, cut squares, shape into sugared muffin tins. Proof 45–60 minutes cool — barely puffy, not doubled. Bake at 400°F (200°C) 25–30 minutes.

    1. Your lamination was too warm — melted butter can’t make layers

    The master cause behind nearly every kouign-amann failure. Lamination needs butter in distinct, pliable sheets between dough layers. The moment it melts — warm kitchen, rushed folds, hot hands — it absorbs into the dough. No layers, no flakiness, and the absorbed butter floods out in the oven, frying the pastry instead of steaming it apart.

    How to tell: Dense, greasy pastry with no visible layering in the cross-section; a pool of butter in the pan; dough that felt soft and sticky during folding rather than firm and cool.

    The fix: Work at 60–65°F (16–18°C) — butter should bend without cracking or feeling greasy. Chill 45–60 minutes between folds, not 20. In a warm kitchen, chill the dough 15 minutes halfway through rolling. Finger test: the butter should dent cleanly, not smear. (Same temperature discipline as Why Did My Croissants Come Out Dense? Lamination Fixes.)

    2. The sugar did what sugar does — it melted and ran

    Some leaking is normal: sugar liquefies, some escapes, caramelizing into the signature crisp shell. The failure is one of degree — under-chilled dough or overloaded sugar turns runoff into a flood; the pastry sits in boiling syrup, bottom burning while the top stays pale.

    How to tell: A thick pool of dark syrup in the pan; black bottoms with blonde tops; bitter rather than caramel-sweet taste.

    The fix: Sugar the tin, not just the dough — a spoonful in each buttered muffin cup gives the caramelized exterior without overloading the layers. Between folds, use a moderate sprinkle, not a blizzard; 150g total is plenty. Accept a tablespoon of caramel per cup as success. Use light-colored heavy tins — dark tins scorch sugar on contact. (Pan choice matters here — see Glass vs Metal vs Dark Pans: What Changes in Your Bake.)

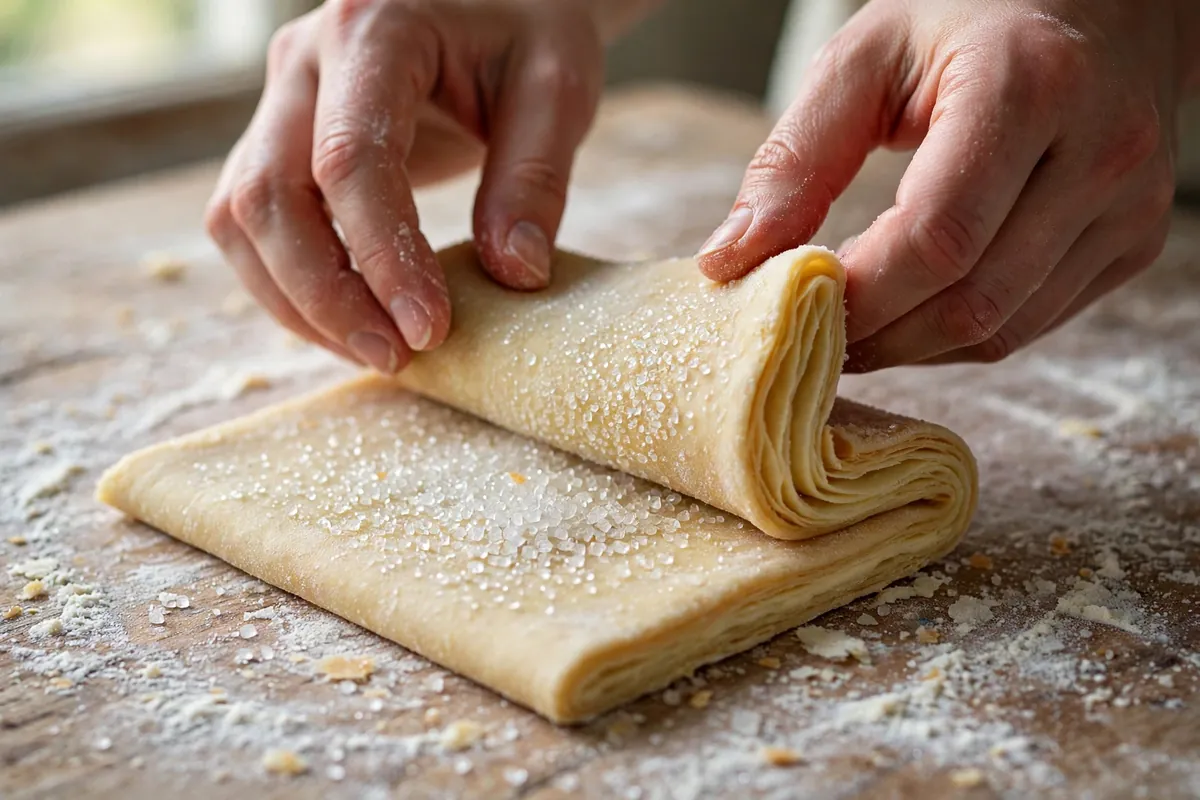
    hands folding sugared laminated dough, butter layers visible at the edge
    hands folding sugared laminated dough, butter layers visible at the edge

    3. Your oven was too hot — sugar burns before dough finishes

    Sugar caramelizes beautifully around 340°F (170°C) and turns bitter-black not far above. Kouign-amann needs a hot oven for steam between the layers, but above 425°F (220°C) the exterior sugar burns before the interior sets: charcoal outside, raw dough inside. Hot-running home ovens are especially punishing — there’s no frosting to hide behind.

    How to tell: Deep brown-to-black exterior at 20 minutes with a doughy center; bitter, acrid taste; smoke from burning sugar runoff.

    The fix: Verify with an oven thermometer and bake at a true 400°F (200°C) — 425°F (220°C) only if your oven runs cool. Start checking at 22 minutes: deep amber, the color of dark honey, not mahogany. If tops race ahead, tent with foil for the last 8–10 minutes. Pull by color, not the clock.

    4. You baked on a flat sheet — they need the hug of a muffin tin

    Traditional kouign-amann bakes as individual rounds in a heavy muffin tin, and the tin does structural work: it contains the melting butter and sugar so they caramelize around the pastry, and its walls support the layers as they rise. On a flat sheet, butter escapes in every direction — the pastry slumps into the runoff and you get greasy discs instead of tall, layered rounds.

    How to tell: Pastries spread wide and flat; butter pooled across the whole sheet; bottoms fried-crisp and greasy rather than caramelized.

    The fix: Use a standard 12-cup muffin tin, buttered and sugared. Fold the corners of each sugared square to the center and place folded-side down — the folds open upward into the classic crown. With only a sheet pan, use muffin rings or ramekins as containment. Never bake one large round unless the recipe was built for it.

    kouign-amann rising in a sugared muffin tin, half baked to show caramelization
    kouign-amann rising in a sugared muffin tin, half baked to show caramelization

    5. You underbaked the center — pale is raw in laminated dough

    The sugared exterior looks done at golden-brown while the interior is still a gummy mass of unseparated dough. Laminated dough needs a full, confident bake to drive moisture from between the layers — pull early and the layers never set, collapsing into doughiness as it cools. Fear of burning causes more underbaking than anything else.

    How to tell: Cross-section shows compressed, doughy layers with no air gaps; raw-flour taste in the center; the pastry deflates minutes after leaving the oven.

    The fix: Bake to deep amber — darker than instinct suggests, lighter than burnt. It should feel light for its size and sound faintly hollow tapped on the bottom. Cool in the tin only 5 minutes — longer and the caramel glues them in — then turn out immediately. Pale bottoms with dark tops? Move to a lower rack next time.

    Frequently asked questions

    Can I still eat kouign-amann that leaked all its butter?
    Yes — safe, just denser and greasier, more like buttery shortbread than laminated pastry. Drain on a rack, dust with sugar to refresh the exterior, serve warm. The flavor is still good; only the texture missed.

    Why did my kouign-amann stick to the pan?
    Caramelized sugar is candy — it glues to bare metal as it cools. Turn them out 5 minutes after baking, while the caramel is fluid. Already stuck? Return the tin to a warm oven 2–3 minutes to re-melt the caramel, then twist each free.

    Can I make kouign-amann dough ahead?
    Yes — laminated dough before sugaring keeps 24 hours refrigerated or a month frozen. Thaw frozen dough overnight in the fridge, then roll, sugar, shape, bake. Don’t shape and hold: the sugar draws moisture and turns layers gummy.

    Is kouign-amann just a sugared croissant?
    Close, but the differences matter: croissant dough has less sugar and more, thinner layers; kouign-amann uses leaner dough, fewer folds, sugar laminated directly in, baked hotter for caramelization. Croissant dough approximates it in a pinch, but the sugar-in-the-folds technique is the real thing.

    Why is my kouign-amann tough instead of flaky?
    Overworked dough. Aggressive kneading of the base or re-rolling scraps built too much gluten and destroyed layer definition. The base dough needs only enough kneading to come together smoothly. (Lamination fundamentals: Puff Pastry Not Puffing: Lamination Mistakes to Avoid.)

    Can I use regular butter instead of European-style?
    You can, but European-style (82%+ fat) laminates better: less water, more pliable, less cracking. With standard butter, work a few degrees cooler and expect slightly less flakiness.

    Related troubleshooting: Why Did My Croissants Come Out Dense? Lamination Fixes · Why Did My Whoopie Pies Spread? Batter and Pan Fixes

  • Why Did My Scones Come Out Hard? Tender Scone Science

    Why Did My Scones Come Out Hard? Tender Scone Science

    You wanted tall, tender, flaky scones. Instead you got hockey pucks — hard, dense, dry, demanding a full cup of tea just to get through. Hard scones are one of the most diagnosable failures in baking: toughness always comes from gluten development, moisture loss, or both, and each has a specific fingerprint.

    Quick diagnosis: Hard scones are almost always overworked dough (cause #1) or overbaked (cause #2): tough and chewy means too much gluten; dry and crumbly-hard means too long in the oven.

    A tender scone is a study in restraint. Unlike bread, where you develop gluten deliberately, scone dough wants barely any gluten at all. The flakiness comes from cold butter melting in a hot oven and leaving pockets behind. Every one of the five causes below is a place where that restraint broke down.

    1. You overworked the dough — gluten did the damage

    This is the number one cause, and it happens earlier than most bakers realize. Scone dough should come together in about 30 seconds of mixing — shaggy, rough, barely holding together, with visible dry patches you pat into submission rather than stir away. The moment you knead, stir vigorously, or re-roll scraps multiple times, you’re building the same gluten network that makes bread chewy. Chewy is wonderful in bread. It’s a death sentence in scones.

    How to tell: The raw dough felt smooth and elastic rather than rough and shaggy. The baked scones are tough and chewy rather than crumbly — they bend or resist when you bite instead of breaking apart tenderly.

    The fix: Mix until it just comes together, then stop. Use a light hand and a fork or your fingertips, never a mixer on high speed. Pat the dough out once — re-roll scraps exactly once and eat those warm, when tenderness matters less. Treat scone dough like it’s fragile and the texture improves overnight. (The same gluten-tension principle sinks pie crusts — see Pie Crust Shrinking in the Oven.)

    2. They overbaked — even five minutes too long dries them out

    Scones are small and lean, which means they go from done to dry fast. Five extra minutes that would barely matter on a loaf will turn scones to rocks. Most recipes say 15–20 minutes at 400–425°F (200–220°C), but ovens vary, and scones are done when they’re golden on top and the bottoms sound hollow when tapped — not when the timer says so.

    How to tell: The scones are uniformly hard and dry all the way through, with dark bottoms and deeply colored tops — and they were in the oven 20+ minutes.

    The fix: Start checking at 12 minutes. Pull them when the tops are golden and a toothpick comes out clean — the centers will feel slightly soft and set fully as they cool (carryover cooking is real in scones). Use an oven thermometer — most home ovens run 15–25°F off, and a hot oven is a scone killer. My sweet spot is 15 minutes at a true 400°F (200°C).

    3. The butter was too warm — no flakes, no tenderness

    Flaky scones need cold butter in pea-sized pieces distributed through the flour. In a hot oven, each butter piece melts and releases steam, prying the dough apart into layers. If the butter was soft or melted when it went in — warm kitchen, warm hands, butter left out too long — it just soaks into the flour. No pockets, no flakes, no tenderness. You get a dense, hard crumb instead.

    How to tell: The dough felt soft and greasy rather than cool and firm, and the baked scones show a uniform tight crumb with no flaky layers.

    The fix: Keep everything cold. Cut the butter into cubes and freeze them for 15 minutes before mixing. If your kitchen is above 75°F (24°C), chill the mixed dough for 20 minutes before cutting and baking. And work fast — warm hands melt butter. I grate frozen butter on a box grater straight into the flour now — it distributes evenly and stays cold.

    4. Too much flour — measured by the cup, doomed by the scoop

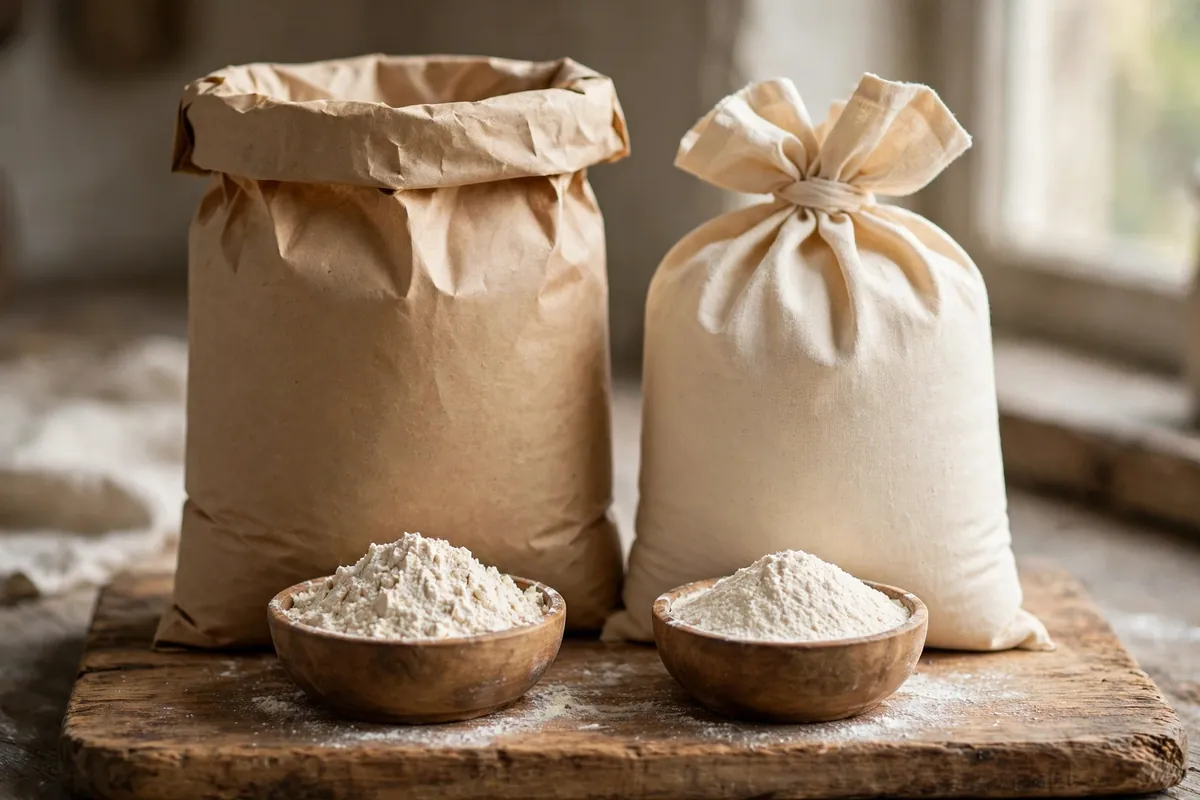
    This one is quiet but deadly. Scooping flour straight from the bag with a measuring cup packs it down and can add 30% more flour than the recipe intends. Extra flour means a drier dough, and dry dough bakes up hard no matter how gently you handle it.

    How to tell: The dough felt dry and stiff, needed extra liquid to come together, or cracked badly when you patted it out. The baked scones are dry and floury-tasting.

    The fix: Weigh your flour: a cup of all-purpose should be 120–125g, but scooped cups routinely hit 150g+. No scale? Spoon flour into the cup and level off — never scoop. This single change fixes more “hard scone” complaints than any technique tweak. (Flour measurement is the same silent killer in cookies — see Why Are My Cookies Cakey Instead of Chewy?.)

    5. The leavening was dead — old baking powder can’t lift

    Scones rely on chemical leavening for their rise — typically 1 tablespoon of baking powder per 2 cups (250g) of flour. Baking powder loses potency within 6–12 months of opening. Dead leavening means no lift, and no lift means a dense, hard puck instead of a tall tender scone.

    How to tell: The scones barely rose — they spread outward instead of upward and stayed squat. Everything else about your technique was fine.

    The fix: Test your baking powder: drop half a teaspoon into hot water. If it fizzes vigorously, it’s alive; if it barely bubbles, replace it. Write the opening date on the can. Measure accurately — too little gives no lift, too much leaves a bitter taste and can collapse the crumb.

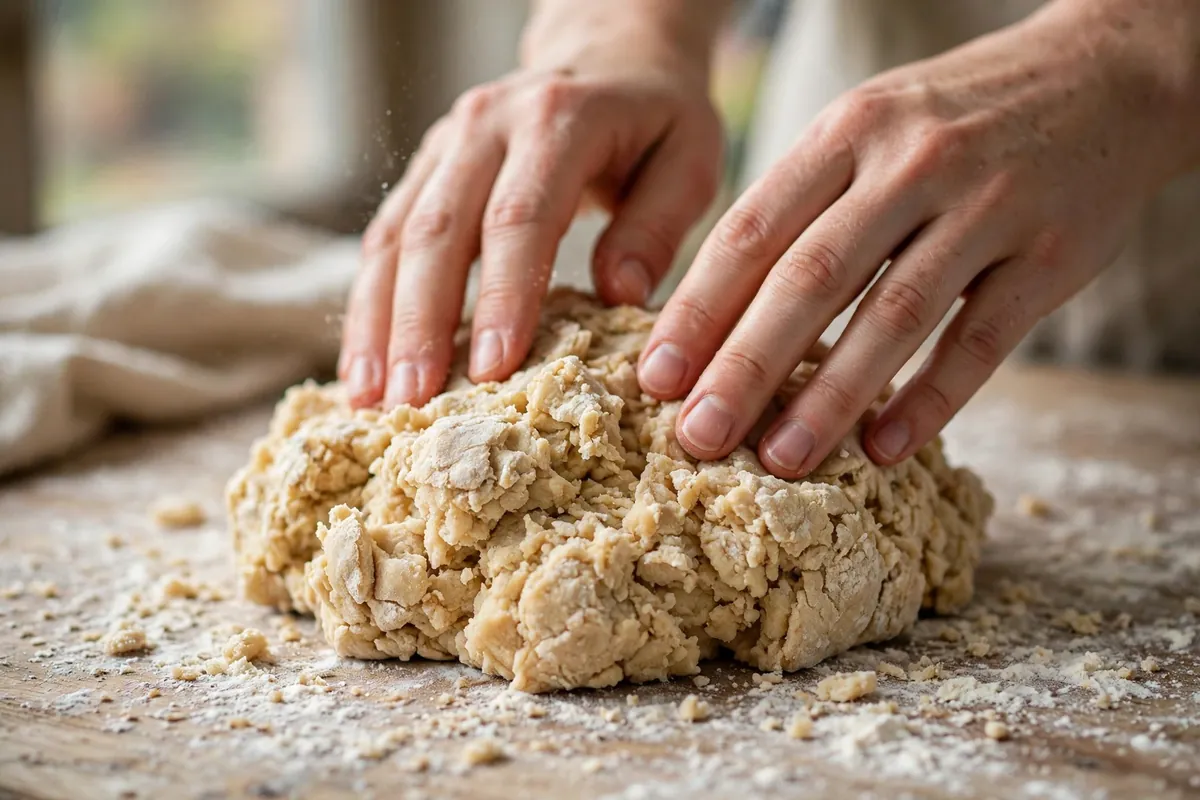
    hands patting shaggy scone dough on a floured surface, rough texture visible
    hands patting shaggy scone dough on a floured surface, rough texture visible

    The tender-scone formula that actually works

    After all the failure analysis, here’s what I do now, every time: 250g all-purpose flour (spooned or weighed), 1 tablespoon fresh baking powder, 50g cold butter grated from frozen, 150ml cold heavy cream or buttermilk, one egg, 50g sugar for sweet scones. Mix dry, toss in butter, stir in liquids until just combined, pat once, cut straight down without twisting (twisting seals the edges and kills the rise), bake 14–15 minutes at 400°F (200°C).

    tall golden scones on a baking sheet fresh from the oven, steam rising
    tall golden scones on a baking sheet fresh from the oven, steam rising

    Frequently asked questions

    Can I fix hard scones after baking?
    You can’t un-bake them, but split and toast them — heat softens the crumb — or warm them and serve with clotted cream and jam. Rock-hard ones make excellent bread-pudding base: cube and soak in custard.

    Why are my scones hard on the outside but raw inside?
    Your oven was too hot. The outside set and browned before the inside finished baking. Drop the temperature 25°F and bake a few minutes longer, and verify with an oven thermometer.

    Should scone dough be wet or dry?
    Slightly sticky and shaggy — wetter than you think. A dry, firm dough always bakes up hard; add liquid a tablespoon at a time until it just holds together.

    Is it safe to eat underbaked scones?
    Doughy, wet centers need more time — raw flour isn’t ideal. Fully baked but hard scones are perfectly safe; hardness is texture, not safety.

    Can I make scones ahead and bake later?
    Yes — freeze cut scones on a tray, then bag them; bake from frozen, adding 2–3 minutes. The cold butter gives better flakiness. (Same principle as Can I Freeze Cookie Dough?.)

    Why do my scones spread instead of rising tall?
    Warm butter or a twisted cutter. Keep the butter cold, cut straight down without twisting, and chill cut scones 15 minutes before baking.

    Related troubleshooting: Pie Crust Shrinking in the Oven · Why Are My Cookies Cakey Instead of Chewy? · Why Did My Muffins Turn Out Tough?

  • Why Is My Meringue Weeping? Sugar, Humidity, and Heat Fixes

    Why Is My Meringue Weeping? Sugar, Humidity, and Heat Fixes

    You pulled a gorgeous lemon meringue pie from the oven — tall golden peaks — and an hour later it’s crying amber tears onto the filling. I’ve watched it happen in real time and it’s maddening. The good news: weeping has exactly three root causes, and all three are controllable. Here’s the full breakdown.

    Quick diagnosis: Weeping is almost always undissolved sugar, humidity, or both. If you added the sugar all at once and baked on a humid day, those two explain it. Rub a bit of the raw meringue between your fingers next time — any grit means the sugar wasn’t dissolved, and grit always weeps.

    Weeping (technically syneresis) is sugar syrup escaping the foam. Meringue is a sugar-stabilized protein foam; anything that destabilizes the sugar or the foam lets liquid go. The five causes below cover every case.

    1. The sugar never fully dissolved

    The number one cause. Undissolved sugar crystals sit in the foam like tiny time bombs — in the oven’s heat they melt and leak out as syrup beads. This is why dumping all the sugar in at once is the classic mistake.

    How to tell: The weeping started as the pie cooled. You added sugar quickly, or used coarse granulated sugar straight from the bag.

    The fix: Add sugar one tablespoon at a time, beating 20–30 seconds between additions. Use superfine (caster) sugar — it dissolves dramatically faster. The test: rub a dab of meringue between thumb and forefinger. Perfectly smooth with zero grit? Ready. Any graininess? Keep beating. This single habit eliminates most weeping.

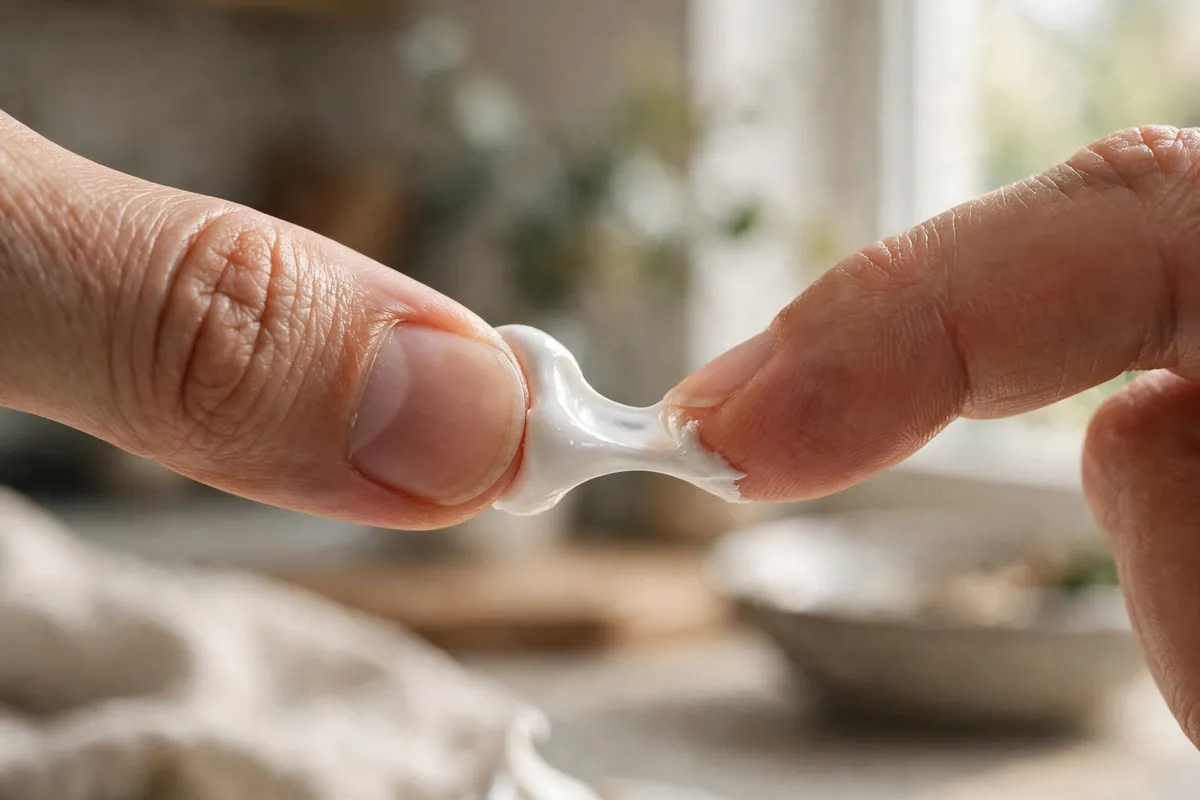
    fingers rubbing a dab of meringue, showing the texture test
    fingers rubbing a dab of meringue, showing the texture test

    2. Humidity got to it

    Sugar is hygroscopic — it pulls moisture straight out of the air. On a humid or rainy day, the meringue absorbs ambient moisture faster than the oven can drive it off, and the surface weeps. This is also why refrigerating a meringue pie uncovered is a mistake: fridge air is humid.

    How to tell: It was a rainy or muggy day. Or the pie went into the fridge uncovered and came out beaded.

    The fix: Don’t bake meringue on high-humidity days if you can avoid it — check the forecast the way you’d check it for candy-making. Cool the pie away from steam and drafts. If you must refrigerate, do it only after the pie is fully cool, and even then, serve within hours. Meringue pies are same-day desserts; the fridge is a holding cell, not storage.

    3. It was underbaked

    An underbaked meringue never fully sets its structure — the interior stays soft and unstable, and liquid migrates out as it sits. Pale, soft peaks that look barely kissed by heat are the giveaway.

    How to tell: The meringue was white or barely golden, soft to the touch, and weeping started within the hour.

    The fix: Bake at 350°F (175°C) for 12–15 minutes, until the peaks are genuinely golden-brown — color is structure. The tips should feel dry and crisp, not soft. Don’t fear browning; fear paleness.

    4. The meringue went onto cold filling (and wasn’t sealed)

    Two related errors. Spreading meringue onto a cold filling traps condensation underneath — liquid forms between the layers as the pie bakes. And meringue that doesn’t touch the crust edge shrinks back as it cools, leaving a gap that fills with syrup.

    How to tell: The liquid pooled under the meringue rather than beading on top, or there’s a visible gap between meringue and crust.

    The fix: Spread the meringue over hot filling — straight from the stove, still steaming. And seal it: push the meringue all the way to the crust edge so it touches pastry all around, with no gaps. The seal anchors the meringue against shrinkage. Make small decorative peaks with the back of a spoon while you’re at it — they brown beautifully.

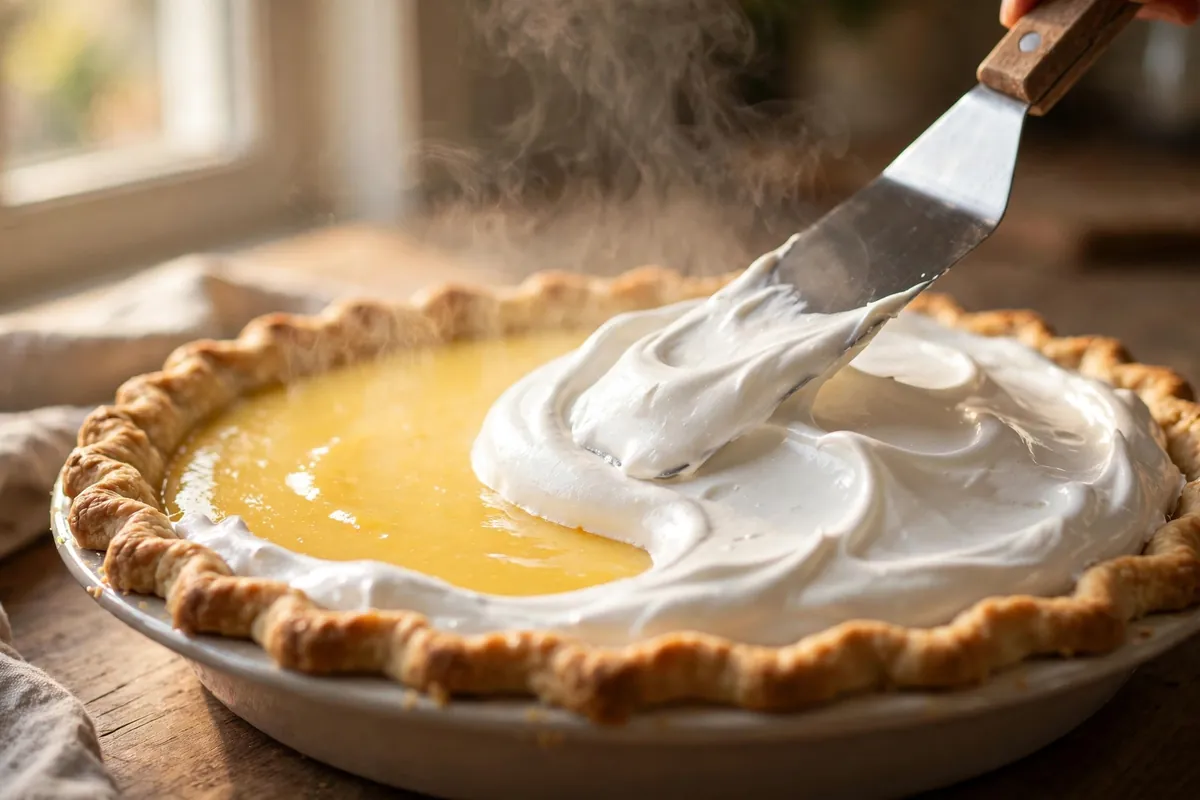
    spreading meringue over steaming-hot lemon filling, sealing it to the crust edge
    spreading meringue over steaming-hot lemon filling, sealing it to the crust edge

    5. It sat too long

    Even a perfect meringue is a short-lived structure. After several hours — and certainly overnight — the foam gradually relaxes and releases moisture. An overnight meringue pie is a weeping meringue pie; that’s physics, not failure.

    How to tell: It looked perfect for hours, then wept by the next day.

    The fix: Time your bake so the pie is served within 4–6 hours. For next-level stability, use Swiss meringue (whites + sugar heated to 160°F / 71°C over simmering water, then whipped) — the pre-dissolved sugar and cooked proteins hold significantly longer. A teaspoon of cream of tartar per 3 whites (or a tablespoon of cornstarch) added during whipping also strengthens the foam against weeping.

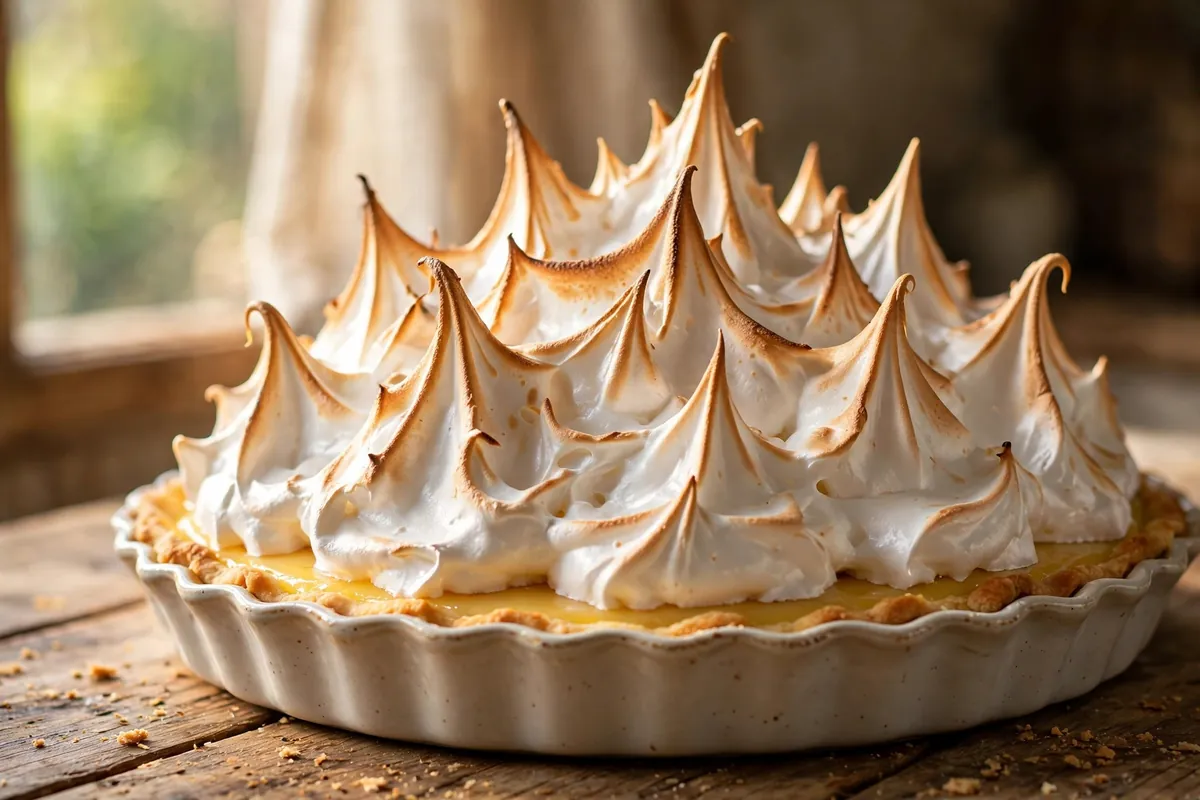
    tall stable meringue peaks on a pie, golden-brown tips, no weeping
    tall stable meringue peaks on a pie, golden-brown tips, no weeping

    Frequently asked questions

    Is weeping meringue safe to eat?
    Yes — the beads are just sugar syrup, completely harmless. It’s a cosmetic and textural issue, not a safety one. Blot the beads gently with a paper towel if they bother you, but the pie underneath is fine.

    Can I fix weeping after it happens?
    Mostly no — once the syrup has escaped, you can’t push it back in. You can blot the surface and return the pie to a 350°F (175°C) oven for a few minutes to dry it slightly, but prevention (dissolved sugar, low humidity, proper bake) is the real fix. Next time, start dry.

    Does cream of tartar actually prevent weeping?
    It helps meaningfully. Cream of tartar (about 1/4 teaspoon per egg white) acidifies the foam, which strengthens the protein network and makes it more resistant to collapsing and releasing liquid. It’s cheap insurance — I use it in every meringue destined for a pie.

    Why did my meringue shrink away from the crust?
    It wasn’t sealed to the edge, and possibly cooled in a draft. Meringue contracts as it cools; if it’s anchored to the crust all the way around, it has nowhere to go. Seal it fully and cool away from open windows and AC vents.

    Can I make meringue pie a day ahead?
    I don’t recommend it. Even a well-made meringue degrades overnight — slight weeping, softening peaks. If you must, Swiss meringue holds best. But the honest answer: meringue pies are bake-and-serve-day desserts, which is why they’re in the “day of” column of my Thanksgiving timeline.

    Aquafaba meringue — does it weep too?
    Yes, and often worse — chickpea liquid foams beautifully but the foam is less stable than egg-white foam. Same rules apply, more strictly: superfine sugar, full dissolution, serve fast. See Eggless Cake That Actually Works for the aquafaba technique.

    Related troubleshooting: Make-Ahead Thanksgiving Desserts: A Baker’s Timeline · Eggless Cake That Actually Works: Tested Replacements

  • Why Did My Cupcakes Overflow? Batter Fill Levels Explained

    Why Did My Cupcakes Overflow? Batter Fill Levels Explained

    Why Did My Cupcakes Overflow? Batter Fill Levels Explained

    Quick diagnosis: Overflowed cupcakes are almost always overfilled cups — more than two-thirds full gives the batter nowhere to go but over the rim. Fill standard cups two-thirds max (half for flat tops), check your leavening, and keep the oven at a true 350°F (175°C).

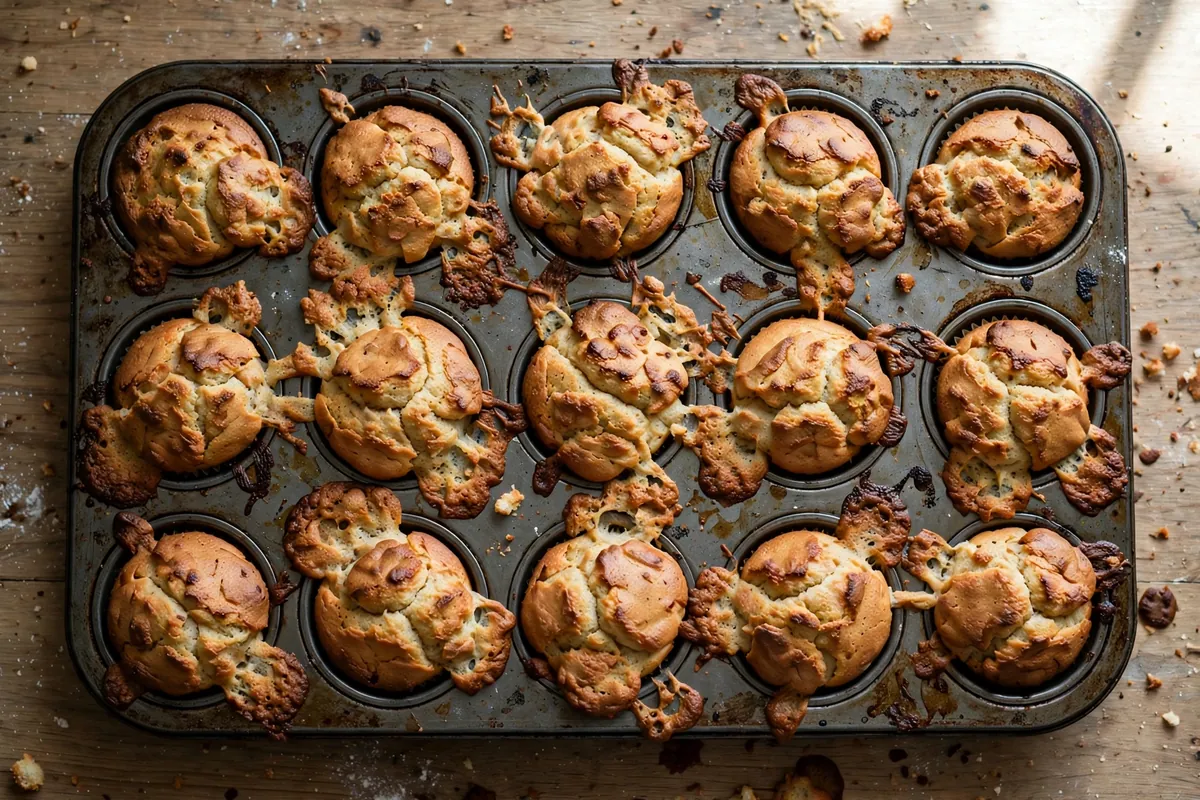
    Overflowed muffin tin with spilled batter and mushroomed tops
    a muffin tin of overflowed cupcakes with batter spilled over rims and fused tops

    A cupcake is a tiny cake in a paper cup — and that paper cup is doing structural work. As batter heats, leavening gases expand it upward; the liner contains the rise and shapes the signature dome. Overfill the cup and the rising batter crests the rim, spills onto the hot tin, and fuses neighboring cupcakes into one inseparable slab. The fixes are all about giving the rise somewhere legal to go.

    1. The cups were overfilled

    The cause in the great majority of cases. Standard guidance exists for a reason: fill cups two-thirds full. That leaves exactly the headroom a properly leavened batter needs to rise into a dome without breaching the rim. Eyeballing “almost full” routinely lands at 85–90% — and 90% full plus oven spring equals overflow, every time.

    How to tell: The batter was near the top of the liners before baking, and the overflow looks like the cupcakes simply outgrew their cups.

    The fix: Two-thirds full for classic domed tops; one-half full for flat tops (better for piping tall frosting swirls). Use a scoop for consistency — a #20 disher holds about 3 tablespoons, the perfect amount for a standard cupcake. No scoop? Fill, then remove a spoonful from each cup. When I switched from eyeballing to a scoop, my batches went from chaotic to uniform overnight.

    2. Too much leavening

    Excess baking powder or soda supercharges the rise. The batter doesn’t just dome — it erupts. This is the same over-leavening behind sunken cake centers (see Why Did My Cake Sink in the Middle?) — in a full-size cake it collapses, in a tiny cup it escapes over the rim first.

    How to tell: The rise was violent — batter fountained rather than domed — and the crumb has a coarse, open texture with a faintly soapy taste.

    The fix: About 1 teaspoon baking powder per cup (120g) of flour, leveled with real measuring spoons. Check the tin’s age — dead leavening tempts over-measuring, and old-plus-extra is the worst combination.

    3. The oven was too hot

    High heat makes leavening react fast and hard before the crumb structure sets — a rapid, uncontrolled rise that breaches the liner before the batter firms up enough to hold its shape. The same hot-oven mechanism that domes and cracks full cakes (see Cake Domed and Cracked on Top) turns cupcakes into volcanoes.

    How to tell: The cupcakes rose dramatically in the first 10 minutes, browned fast on top, and spilled — while the centers may still be soft.

    The fix: A true 350°F (175°C) on the center rack, verified with an oven thermometer. For fan/convection ovens, drop to 325°F (163°C). Cupcakes are small and bake fast — most are done in 18–22 minutes, and a hot oven compresses that window past the point of control.

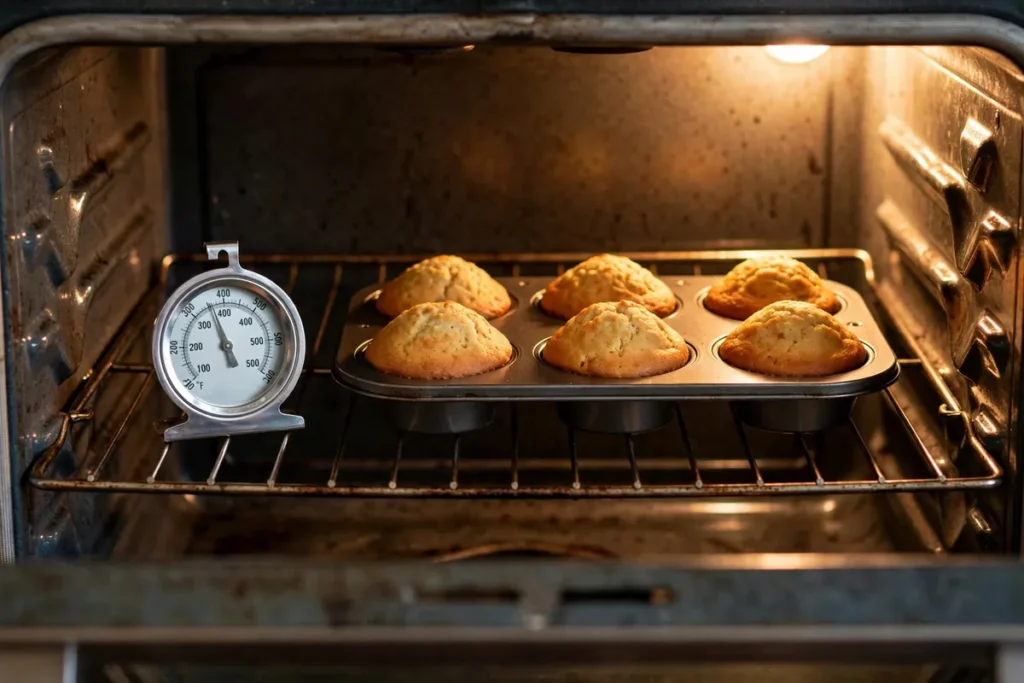
    Oven thermometer on a rack next to a muffin tin
    oven thermometer on the middle rack next to a muffin tin, reading visible

    4. The batter was too thin

    Thin, wet batter has further to rise and less structure to contain it — it behaves more like a liquid boiling over than a dough rising. Over-measured milk, extra eggs, or melted-butter batters thinned beyond the recipe’s intent all push toward overflow.

    How to tell: The batter poured like heavy cream rather than plopping like thick pancake batter, and the baked crumb is dense at the base where overflowed batter pooled.

    The fix: Respect liquid ratios — measure milk and eggs rather than eyeballing. Standard cupcake batter should fall from the spoon in thick ribbons, not run. If you’ve already thinned it, whisk in flour a tablespoon at a time until it ribbons.

    5. Inconsistent scooping

    Twelve cups filled by eye means twelve different fill levels — the fullest three overflow while the emptiest barely dome. Inconsistent batter depth also means inconsistent bake times: the full cups are still raw inside when the shallow ones are done.

    How to tell: Some cupcakes overflowed, some are perfect, some are flat — all from the same tin.

    The fix: The #20 scoop (3 tablespoons) for standard cupcakes; a #40 (about 1½ tablespoons) for minis. For jumbo tins, fill two-thirds by depth and weigh the first cup, then match the rest. Uniformity is free quality.

    6. The tin was jostled or the door slammed

    A sharp jolt mid-bake sloshes semi-set batter over rims that were borderline full. Slamming the oven door sends a pressure wave through the oven — enough to collapse a delicate rise or slosh a full cup over the edge.

    How to tell: The overflow is on one side of the tin, or it happened right after you checked and closed the door hard.

    The fix: Slide the tin in gently, close the door softly, and don’t move it until the three-quarter mark. If you must rotate, do it once, quickly and smoothly.

    Fill-level guide by cupcake size

    Tin size Fill level Approx. batter Bake time at 350°F (175°C)
    Mini ⅔ full ~1½ Tbsp 10–12 min
    Standard ⅔ full (domed) / ½ full (flat) ~3 Tbsp 18–22 min
    Jumbo ⅔ full ~⅓ cup 25–30 min

    Flat tops (half fill) are the decorator’s choice — more room for frosting architecture. Domed tops (two-thirds) are the classic bakery look. Both are correct; over the rim is the only wrong answer.

    Salvaging overflowed cupcakes

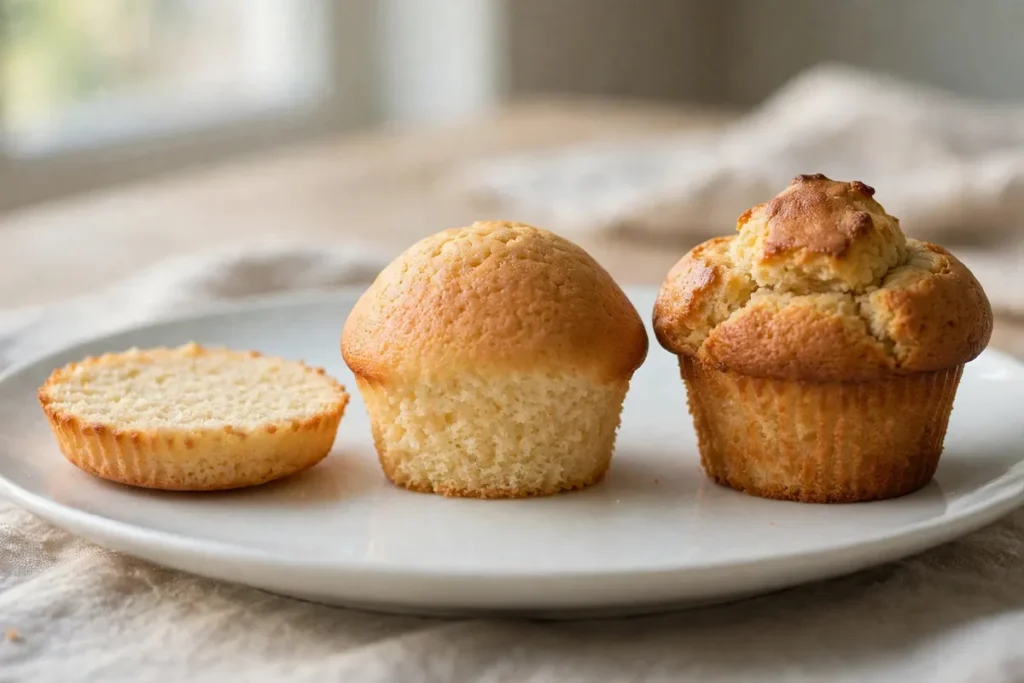
    Three cupcakes sliced open — flat, domed, and mushroomed
    three cupcakes showing half fill (flat), two-thirds fill (domed), and overfilled (mushroomed) side by side

    They’re still perfectly edible — trim the mushroomed tops flat with a serrated knife (the trimmings are cook’s treats), and frost generously. For fused-together neighbors, run a knife between them while warm. Next batch, drop to two-thirds and the problem disappears.

    Frequently asked questions

    Are overflowed cupcakes safe to eat?
    Yes — overflow is cosmetic. The spilled batter baked on the hot tin is fully cooked. Trim, frost, and serve; the flavor is identical to a perfect cupcake.

    Should cupcake liners be filled half or two-thirds?
    Two-thirds for classic domed tops, one-half for flat tops meant for tall frosting. Both work. The only wrong answer is fuller than two-thirds.

    Why do my cupcakes overflow but the recipe says the same fill?
    Ovens and leavening vary — your oven may run hot (fast, violent rise) or your baking powder may be extra fresh and strong. Drop the fill to one-half as a test batch; if those come out perfect, your setup runs hot and half-fill is your standard.

    Can I stop cupcakes from mushrooming?
    The mushroom shape is overflow plus continued rising — the spilled batter sets into a brim. Prevent it with correct fill levels and true 350°F (175°C) heat. Once mushroomed, trim the brim off; it won’t un-mushroom.

    Do silicone cups prevent overflow?
    No — silicone changes release, not rise physics. An overfilled silicone cup overflows exactly like paper. Use the same two-thirds rule regardless of liner material.

    Related troubleshooting: Why Did My Cake Sink in the Middle? · Cake Domed and Cracked on Top · Why Didn’t My Bread Rise?

    Perfect uniform batch of cupcakes in a clean tin
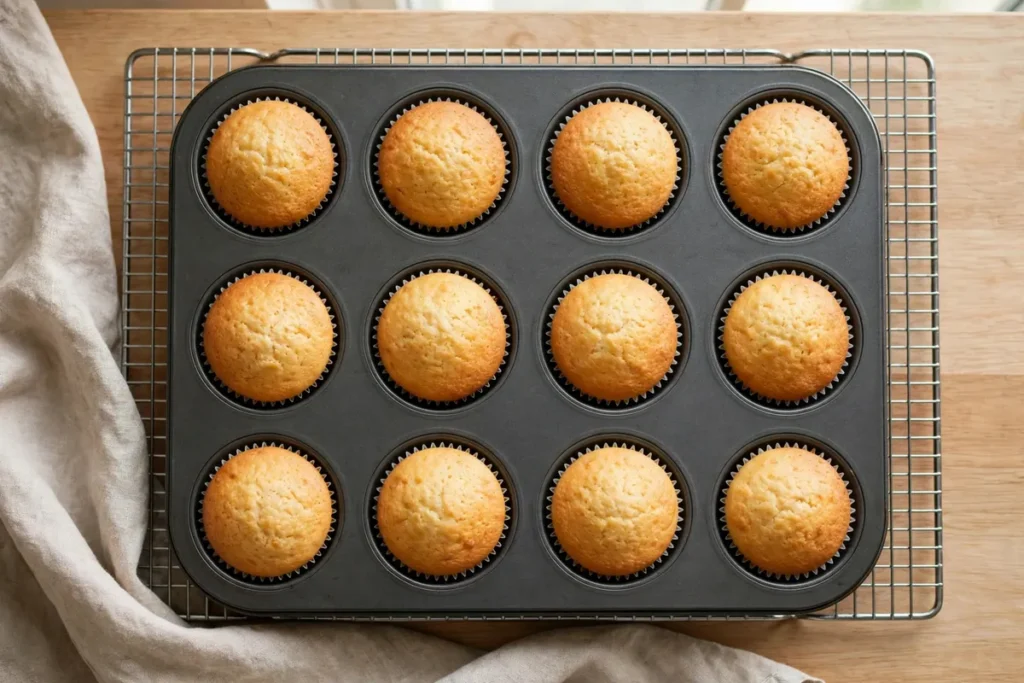
    a perfect batch — uniform domed cupcakes with clean liners, no spill on the tin
  • Why Did My Tiramisu Turn Watery? (Mascarpone Fixes)

    Why Did My Tiramisu Turn Watery? (Mascarpone Fixes)

    Watery tiramisu is almost never about the coffee. It’s the mascarpone filling — a delicate emulsion that turns to soup the moment it’s overworked, under-chilled, or layered over drowning-wet ladyfingers. The causes are few, and once you know them, tiramisu becomes one of the most reliable desserts you make.

    Quick diagnosis: You overmixed the mascarpone (most common — it breaks and weeps), soaked the ladyfingers too long, or served it before the filling had time to set. Fix: stir mascarpone gently by hand, dip ladyfingers 1–2 seconds per side, and chill the finished tiramisu a full 8–12 hours before serving.

    My tested baseline: 4 large egg yolks beaten with 100g sugar over a bain-marie to 160°F (71°C) until thick and pale. 500g mascarpone (cold, full-fat), loosened with a spoon — never beaten. 300ml heavy cream whipped to soft peaks. Ladyfingers (savoiardi) dipped 1–2 seconds per side in 250ml strong espresso cooled to room temperature, mixed with 2 tbsp coffee liqueur. Assembled in a 20cm dish, chilled overnight.

    1. You overmixed the mascarpone — it’s broken, not beaten

    This is the number-one cause of watery tiramisu, and it happens in seconds. Mascarpone is roughly 40%+ butterfat with almost no stabilizers. Beat it with an electric mixer — especially once it’s warmed up — and the fat emulsion shears: grainy, then liquid, and no amount of chilling brings it back. Two minutes with a hand mixer once turned 500g of mine from silk to cottage-cheese soup.

    How to tell: The filling looks curdled or grainy before you even assemble; liquid pools around the edges of the bowl; the mascarpone seemed thin the moment you mixed it.

    The fix: Work the mascarpone by hand with a spatula or whisk, gently, just until smooth — 30 seconds, no more. Add it to the cooled yolk base in two additions, folding rather than beating. Cold mascarpone straight from the fridge is actually safer here; it holds its structure longer than room-temperature cheese.

    2. The ladyfingers soaked too long — they became sponges of espresso

    Savoiardi are designed to absorb liquid fast. A full dunk — even three or four seconds — loads each ladyfinger with far more espresso than the filling can absorb, and that excess coffee migrates out during chilling, pooling at the bottom of the dish. I time my dips now: one second per side, in and out, like developing a photograph.

    How to tell: Liquid at the bottom of the dish is brown (coffee), not white (filling); the ladyfinger layer is mushy and falling apart while the cream layer looks fine.

    The fix: Dip each ladyfinger 1–2 seconds per side in room-temperature espresso — never hot. They should feel firm going into the dish; they finish softening in the fridge. Soft, cake-like savoiardi get a single quick second.

    3. You served it too soon — the filling needs 8–12 hours to set

    Tiramisu straight from assembly is always soft. The filling firms through chilling: the whipped cream, egg yolk foam, and mascarpone need hours at fridge temperature to knit into a sliceable structure. Four hours gives you a spoonable dessert; eight to twelve gives you clean slices.

    How to tell: The tiramisu tastes right but collapses when you try to lift a portion; there’s no graininess, no excess coffee, just softness.

    The fix: Chill a minimum of 8 hours, ideally overnight (10–12 hours). Press plastic wrap onto the surface for the first few hours if your fridge runs humid — condensation dripping onto the top is a sneaky extra water source. Keep it refrigerated until the moment you serve.

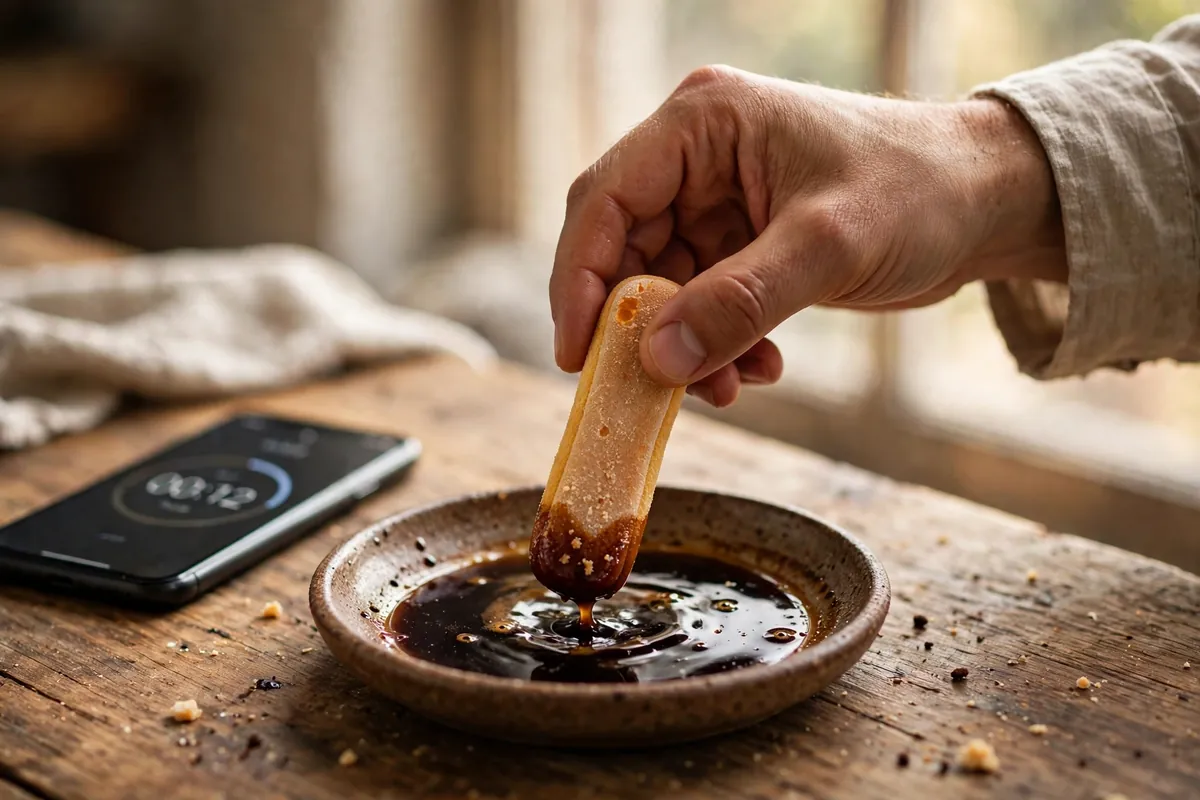
    hands quickly dipping a ladyfinger into a shallow dish of espresso, one side only, with a timer visible on a phone nearby
    hands quickly dipping a ladyfinger into a shallow dish of espresso, one side only, with a timer visible on a phone nearby

    4. The cream was overwhipped — stiff peaks weep

    Whipped cream taken past soft peaks starts to separate: the fat clumps into butter granules and the liquid (whey) squeezes out. Folded into mascarpone, those granules read as graininess and the released whey reads as wateriness. This is the same failure mode as overwhipped cream, just hidden inside a dessert.

    How to tell: The filling has tiny buttery lumps; it looked fine at assembly but wept overnight in the fridge.

    The fix: Whip the cream only to soft peaks — the whisk leaves a trail but the peak flops over when you lift it. Stop the mixer early — you can always add five seconds, but you can’t un-whip. Fold into the mascarpone in three additions until just combined, no white streaks.

    5. Your mascarpone was low-fat or warm — both are structural risks

    “Light” mascarpone and mascarpone-style spreads have less fat and more water by design — they simply can’t hold the structure that full-fat mascarpone (40%+ fat) gives. And mascarpone left on the counter for an hour before you start is already halfway to broken; warm fat emulsions shear under the slightest agitation.

    How to tell: The filling was thin from the very first stir, before any cream was added; the cheese container says “light” or lists gums and starches high in the ingredients.

    The fix: Buy full-fat mascarpone and use it cold. Real mascarpone lists cream and citric acid, not a paragraph of stabilizers. With a softer brand, whip the cream to medium peaks and chill a full 12 hours.

    6. The yolk base was undercooked or warm when combined

    The zabaglione-style yolk base does structural work: properly cooked to 160°F (71°C), the yolks thicken into a stable foam that supports the mascarpone. Undercooked yolks stay thin and add free liquid. Worse, a warm yolk base melts the cold mascarpone on contact — the emulsion breaks before assembly even starts.

    How to tell: The yolk-sugar mixture was pourable rather than ribbon-thick; or it felt warm to the touch when you added the mascarpone.

    The fix: Whisk yolks and sugar over simmering water until the mixture reaches 160°F (71°C) and falls from the whisk in thick ribbons — about 5–7 minutes. Cool to room temperature — about 20 minutes, stirring occasionally — before the mascarpone goes near it. It should feel neutral to the touch.

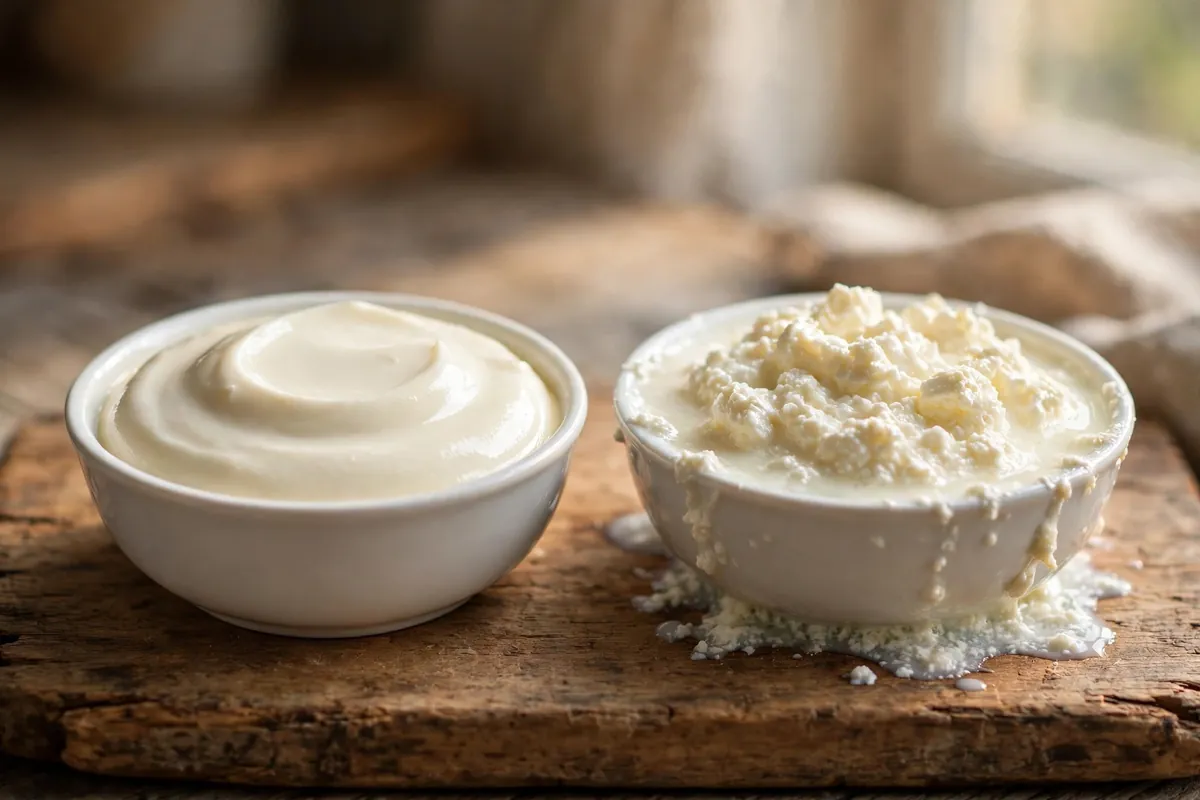
    side-by-side comparison of two small bowls of mascarpone filling, one smooth and glossy, one grainy and weeping liquid
    side-by-side comparison of two small bowls of mascarpone filling, one smooth and glossy, one grainy and weeping liquid

    Can you fix watery tiramisu after it’s assembled?

    Barely. Drain off pooled liquid, chill uncovered for the full 12 hours, and serve in glasses as a trifle-style dessert — it tastes fine even when it won’t slice. The real fix is the next batch: gentle mascarpone, quick dips, overnight chill. Prevention is the entire game here.

    FAQ

    Is watery tiramisu safe to eat?
    Yes, if refrigerated throughout. The liquid is coffee or whey, not spoilage. But it contains eggs and dairy, so never leave it out more than 2 hours and eat within 3 days.

    Can I use gelatin to make tiramisu firmer?
    Yes — 1 teaspoon powdered gelatin bloomed in 2 tablespoons cold water, melted into the warm yolk base, gives insurance-level firmness. Useful for tall molded tiramisu or hot climates.

    Why is my tiramisu grainy?
    The mascarpone broke — overmixed, too warm, or hit with a warm yolk base. Next time stir cold mascarpone by hand for 30 seconds max, with everything else at room temperature or colder.

    Can I make tiramisu without raw eggs?
    Yes — yolks cooked to 160°F (71°C) are food-safe with classic texture. Or skip yolks: mascarpone, whipped cream, and a little sweetened condensed milk, though less rich.

    How long does tiramisu need to chill before serving?
    Minimum 8 hours; 10–12 overnight is ideal for clean slices. Keeps 3 days refrigerated — the flavor deepens on day two.

    Can I freeze tiramisu?
    Yes, up to a month airtight. Thaw overnight in the fridge. Freeze before dusting with cocoa; add it after thawing.

    Related troubleshooting: Why Did My Cheesecake Crack? · Fixing Overwhipped Cream · Why Is My Meringue Weeping?

  • Why Is My Banana Cake Gummy? Mixing and Moisture Fixes

    Why Is My Banana Cake Gummy? Mixing and Moisture Fixes

    Banana cake should be tender, moist, and light enough to layer — the refined cousin of banana bread, not its twin. But it goes gummy with depressing ease: a dense wet streak through the middle, a gluey bottom layer, a crumb that sticks to your teeth. Unlike bread, where density is forgiving, cake is a creamed batter — gumminess means something structural went wrong. It comes down to three things: overmixed batter, too much banana, or an underbaked center.

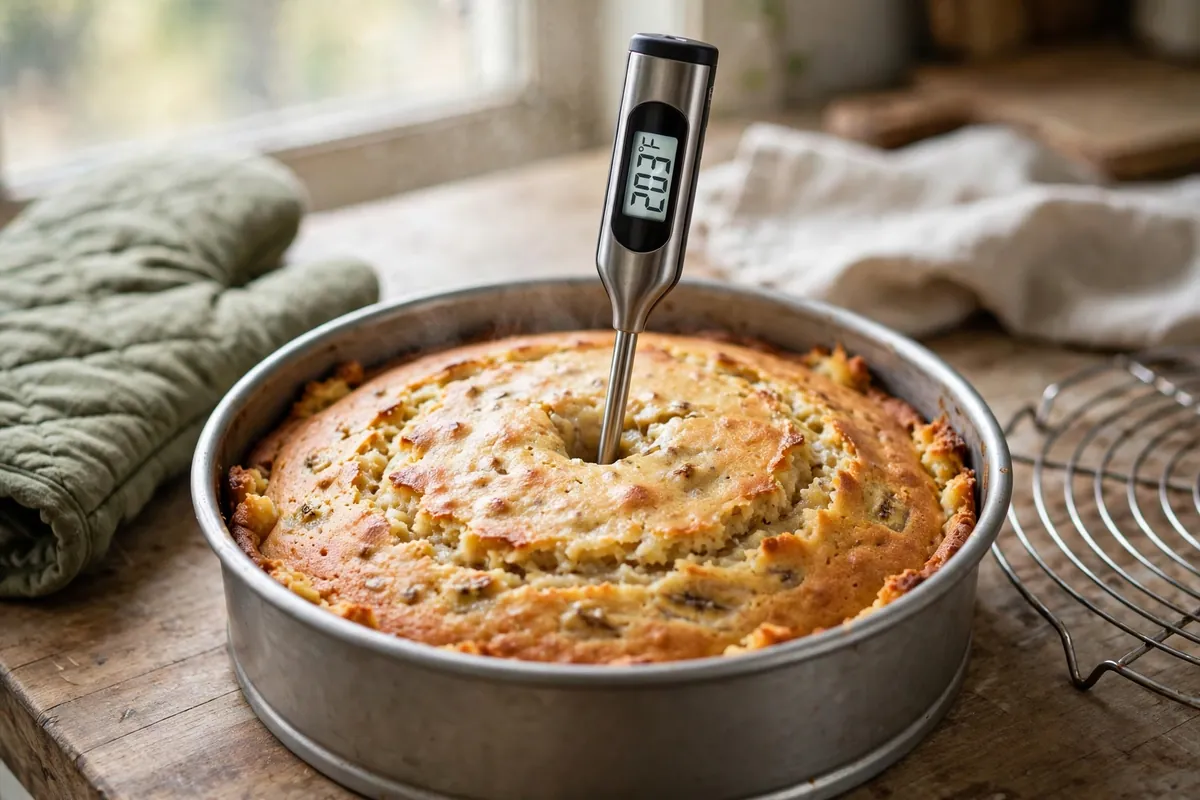
    Quick diagnosis: Your banana cake is gummy from excess gluten (overmixed after the flour went in), too much banana (bananas are 75% water), or an underbaked center. Mix just until the flour disappears, use no more than 1 to 1½ cups mashed banana for a two-layer cake, and bake to 200–205°F (93–96°C) internal.

    My tested baseline, two 9-inch (23 cm) layers: 340g (2¾ cups) flour, 1½ tsp baking soda, 1 tsp baking powder, 1 tsp salt, 1 tsp cinnamon; 170g (¾ cup) cool-room-temp butter, 300g (1½ cups) granulated + 100g (½ cup) brown sugar; 3 eggs; 240g (1 cup) well-mashed very ripe banana (2–3); 120ml (½ cup) buttermilk; 2 tsp vanilla. Cream butter and sugars 3–4 minutes until pale and fluffy, beat in eggs one at a time, mix in banana, add dries in three additions alternating with buttermilk — start and end with dry, low speed, just until each disappears. Bake at 350°F (175°C) 28–32 minutes.

    1. You overmixed the batter — gluten is the #1 gumminess maker

    In bread you want gluten; in cake, developed gluten kills tenderness. The moment flour meets liquid, gluten forms, and every extra mixer revolution tightens it. Overmixed banana cake doesn’t just toughen — the wet banana amplifies it into that gummy, gluey texture, worst where the batter was worked most.

    How to tell: Dense, slightly elastic crumb rather than crumbly-tender; pale gummy streaks or tunnels; the cake feels wet though a toothpick came out clean.

    The fix: Once flour goes in, mixer on low, stop the instant the last streak vanishes — finish with three or four spatula folds. Sift lumps out before dries meet batter, never beat them out after. (Same gluten discipline as Why Are My Muffins Tough? The Muffin Method Explained.)

    2. You used too much banana — it’s three-quarters water

    This is the trap separating banana cake from banana bread. In bread, an extra banana just adds moisture. In cake — a balanced emulsion — 2 cups of banana where the formula expects 1 adds half a cup of unaccounted water the flour and eggs can’t structure. The excess settles into a gummy bottom layer.

    How to tell: The recipe said “3–4 bananas” without a cup measure (a large banana can be ¾ cup mashed); the batter looked thin before baking; gumminess worst at the bottom.

    The fix: Measure, don’t count: 1 to 1½ cups (240–360g) mashed for a two-layer 9-inch cake. Use heavily speckled to black bananas — sweeter, smoother, incorporating evenly instead of leaving wet pockets.

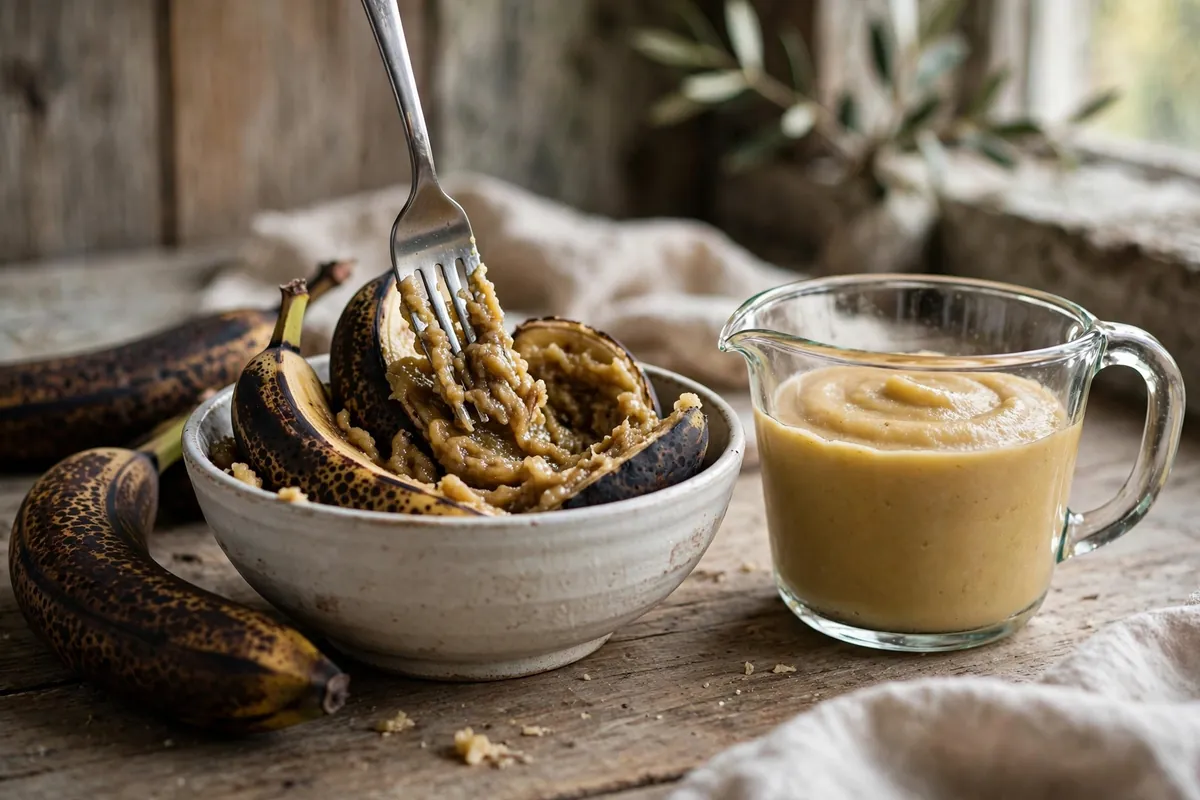
    hands mashing ripe bananas in a bowl next to a measuring cup of mashed banana
    hands mashing ripe bananas in a bowl next to a measuring cup of mashed banana

    3. The center was underbaked — the toothpick lied to you

    Banana batter is wet and heavy, setting from the outside in more slowly than plain cake. The toothpick test is treacherous: clean from the outer two-thirds while the center is a degree from set — and that last degree is the difference between tender and gummy. Underbaked banana cake doesn’t look raw; it just eats wet.

    How to tell: Gumminess concentrated in the center, fading toward the edges; slight sink as it cooled; the center feels cool-damp at room temperature.

    The fix: Bake to temperature, not time: 200–205°F (93–96°C) center. Top springs back when pressed, edges just pulling from the pan. Top browning early? Tent with foil the last 10 minutes. Cool in the pan only 10 minutes — longer and trapped steam sogs the bottom. (Same doneness discipline as Why Did My Cake Sink in the Middle? 7 Causes, Tested Fixes.)

    4. Oil vs. butter isn’t the cause — but it changes the margin of error

    Neither fat causes gumminess, but they forgive different mistakes. Oil coats flour proteins and inhibits gluten — harder to overmix into gumminess. Butter gives better flavor and a finer crumb, but an overmixed butter cake goes gummy faster as the collapsed creamed structure turns dense.

    How to tell: Gummy with oil? The banana quantity or the bake is your problem, not the mixing. Gummy with butter? Check whether you actually creamed a full 3–4 minutes — under-creamed butter never built the aeration that keeps the crumb open.

    The fix: For oil: whisk oil, sugars, eggs, banana, fold in dries gently — simple and forgiving. For butter: cream 3–4 minutes until pale and fluffy, then don’t overmix the flour. I use butter for flavor, oil when baking with kids or in a hurry. (Fat-ratio science: Why Did My Brownies Turn Out Cakey? Fudgy vs Cakey Science.)

    5. The pan was too small or too deep — geometry matters

    Batter for two 9-inch layers, baked in one deep 9×13 or a loaf pan, can’t bake through before the outside over-sets. Exterior looks done, center stays wet — the classic gummy middle, amplified by banana batter’s moisture. Dark pans worsen it by over-browning the outside early.

    How to tell: Edges and top well-browned or dry while the center is gummy; you baked in a different pan than specified.

    The fix: Match pan to recipe. In a 9×13, expect 35–40 minutes; check temperature, not color. In dark or glass pans, drop 25°F (to 325°F / 165°C) so the exterior doesn’t race ahead. (See Glass vs Metal vs Dark Pans: What Changes in Your Bake.)

    thermometer probe in the center of a banana cake layer fresh from the oven
    thermometer probe in the center of a banana cake layer fresh from the oven

    Frequently asked questions

    Can I fix a banana cake that’s already gummy?
    Not structurally — but repurpose it: cube, toast at 325°F (165°C) for 15–20 minutes into croutons, and layer into a trifle with whipped cream and caramel. Toasting drives off the excess moisture and the complaint disappears under cream.

    Is gummy banana cake safe to eat?
    Yes, if fully baked — gumminess is texture, not raw batter. If the center tastes of raw flour or egg, it was underbaked; 200°F (93°C) or above on the thermometer means it’s cooked.

    How is banana cake different from banana bread, really?
    Banana bread is a quick bread: muffin method, no creaming, loaf format, density acceptable. Banana cake is a creamed cake: aerated fat and sugar, layered, frosted, expected light and tender. Different recipes sharing a fruit. (Bread version: Why Is My Banana Bread Dense? Quick Bread Fixes.)

    Can I reduce the sugar to fix gumminess?
    Sugar isn’t the cause, and cutting it backfires — sugar tenderizes by interfering with gluten. Under-sugared banana cake is tougher, not less gummy. Fix the mixing, banana quantity, and bake; leave the sugar alone.

    Why does my banana cake have tunnels?
    Tunnels are the signature of overmixing plus too much leavening — the gluten network trapped large gas bubbles that tunneled upward. Same fix as gumminess: gentle mixing, measured leavening, correct banana quantity.

    Should I use baking powder, baking soda, or both?
    Banana batter is acidic, so baking soda is essential — 1 to 1½ teaspoons for a two-layer cake. A little baking powder (about 1 teaspoon) adds insurance lift. Too much of either gives a soapy taste and a fragile crumb that collapses into gumminess.

    Related troubleshooting: Why Is My Banana Bread Dense? Quick Bread Fixes · Why Did My Tres Leches Turn Soggy? Soak Ratios That Work

  • Bread Flour vs All-Purpose: When It Actually Matters

    Bread Flour vs All-Purpose: When It Actually Matters

    Walk into any baking aisle and the flour choice looks simple: bread flour for bread, all-purpose for everything else. But every experienced baker has a story of the “wrong” flour working fine — chewy cookies from bread flour, perfectly good loaves from all-purpose. So when does it actually matter? The same recipes with both flours, side by side, give the honest answer: it matters enormously in some bakes, barely at all in others, and knowing which is which saves you both money and disappointment.

    Quick diagnosis: The difference is protein: bread flour runs 12–14%, all-purpose 10–12%. More protein = more gluten = chewier, stronger structure. It matters most in lean yeast breads and pizza (use bread flour), matters least in cookies and quick breads (all-purpose is fine), and reverses for cakes (all-purpose beats bread flour — never use bread flour for cake).

    What the numbers actually mean

    Protein percentage is the whole story. When flour meets water, two proteins (glutenin and gliadin) link into gluten — the elastic network that traps gas in bread and gives chew to pizza. More protein means more gluten potential:

    Flour Protein Best for
    Bread flour 12–14% Lean breads, pizza, bagels — maximum chew and structure
    All-purpose flour 10–12% The middle ground — works for most things, ideal for few
    Cake flour 7–9% Tender cakes — minimal gluten by design
    Whole wheat ~13–14% Hearty flavor, but bran cuts gluten strands (behaves weaker than its number)

    Note the overlap: a strong all-purpose at 11.5% (like King Arthur’s) is closer to bread flour than to a soft Southern all-purpose at 9%. Brand matters as much as label — check the nutrition panel: protein grams per 30g serving × 3.33 ≈ protein percentage.

    When bread flour wins (use it here)

    Lean yeast breads and sourdough. This is bread flour’s home turf. At 70%+ hydration, the dough needs maximum gluten strength to hold its shape and trap gas — all-purpose at high hydration goes slack and spreads (the focaccia problem: Why Is My Focaccia Flat?). For bagels, which need extreme chew, bread flour isn’t optional, it’s the recipe (see Why Do My Bagels Deflate?).

    Pizza dough. Chew is the entire point of good pizza crust — that pull, that char-spotted cornicione. Bread flour’s extra gluten gives you the extensibility for thin stretching without tearing and the chew after a hot bake. All-purpose pizza is fine; bread-flour pizza is better in a way you can taste.

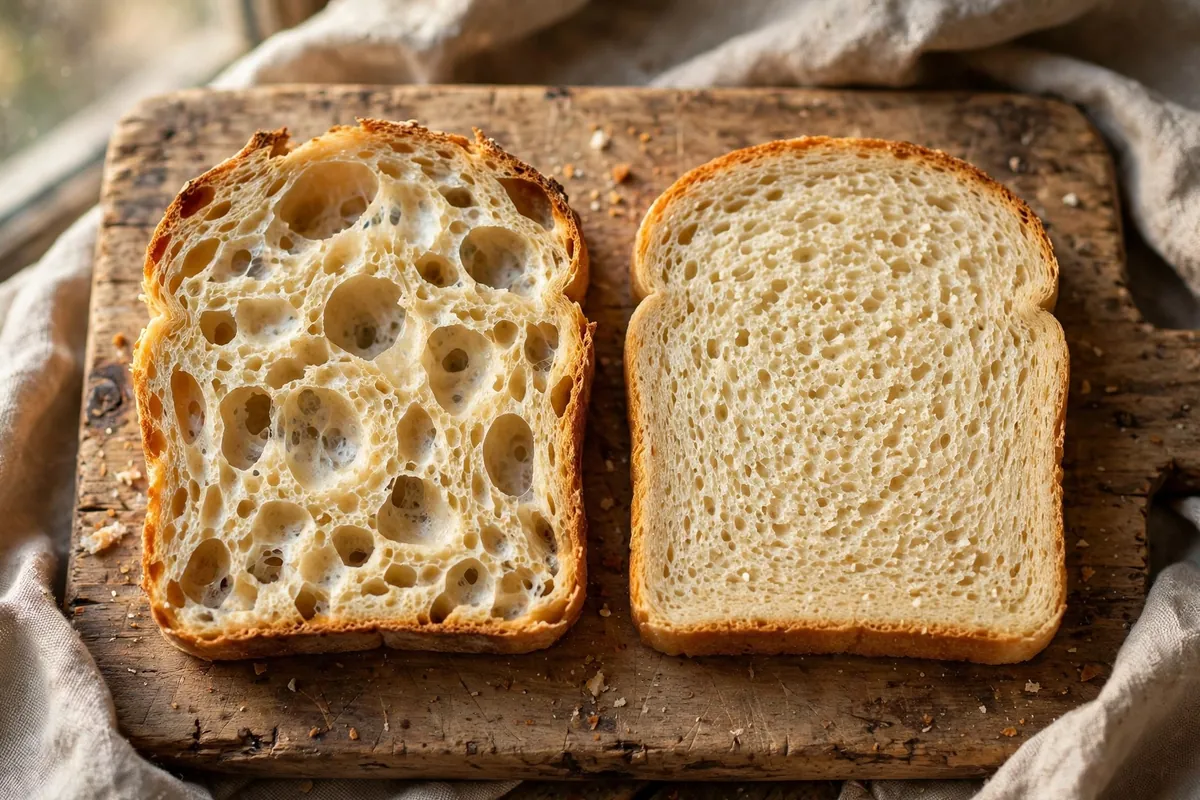
    Why it works: more gluten = stronger gas-trapping net = taller rise, chewier crumb, better structure. In my side-by-side sourdough tests, the bread-flour loaf consistently rose 15–20% higher with a more open crumb than the identical all-purpose loaf.

    When all-purpose wins (bread flour hurts here)

    Cakes. This is the big reversal. Cake wants tenderness — minimal gluten. Bread flour in cake builds a strong, elastic network that reads as tough, rubbery, dry crumb. It’s the fastest way to ruin a cake’s texture. Use all-purpose (or cake flour for the most delicate cakes). Never use bread flour for cake — there is no recipe where it’s the right call. (Tough crumb has many causes beyond flour: Why Is My Cake Dry?.)

    Pie crust and biscuits. Flaky pastry wants gluten development kept to a minimum — that’s the whole game of cutting in cold fat and handling gently. Bread flour fights you: tougher dough, less flake, more shrinkage. All-purpose is correct here, full stop.

    How to tell you’ve used the wrong one: the crumb is tough and bready in something meant to be tender, or the dough fought back excessively during gentle handling.

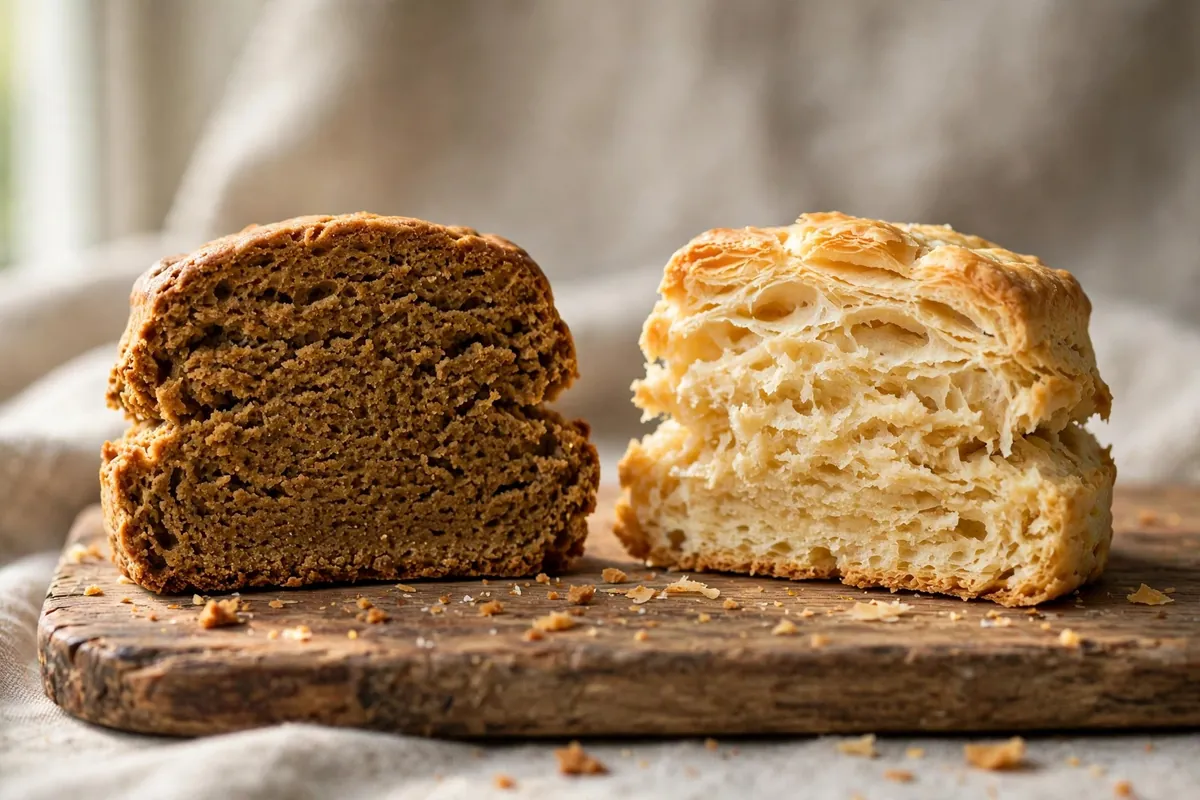
    cross-section comparison — chewy open bread crumb from bread flour vs tighter crumb from all-purpose, same recipe
    cross-section comparison — chewy open bread crumb from bread flour vs tighter crumb from all-purpose, same recipe

    When it barely matters (save your money)

    Cookies. Most cookie recipes are low-moisture, high-fat, short-mix affairs — there’s barely enough gluten development for the flour choice to register. In blind tests, bread-flour vs all-purpose chocolate chip cookies are distinguishable (the bread-flour version is slightly chewier) but both are delicious. If chew is your goal, bread flour is actually a legitimate cookie hack — many “chewy cookie” recipes specify it deliberately.

    Quick breads and muffins. Banana bread, zucchini bread, muffins — the batter is mixed briefly, the fat is high, and the texture goal is tender-moist, not chewy. All-purpose is the default and bread flour gains you nothing (arguably risks toughness if overmixed — but the mixing, not the flour, is the real variable: Why Are My Muffins Tough?).

    Pancakes and waffles. Same logic: minimal gluten development, high fat/liquid. All-purpose always.

    The substitution rules

    All-purpose → bread flour (need chew, have AP): works in most bread recipes with slightly less rise and chew. For pizza and lean breads, expect ~10–15% less volume. Bump hydration down 1–2% if the dough feels slack.

    Bread flour → all-purpose (recipe calls for bread flour): the most common real-world swap. Works fine for enriched breads (brioche, sandwich loaves), rolls, and no-knead bread (the long ferment compensates). For bagels and high-hydration sourdough, expect a real quality drop — this is where buying the right bag matters.

    The vital wheat gluten trick: 1 tablespoon of vital wheat gluten per cup of all-purpose flour ≈ converts it to bread flour (adds ~2–3% protein). If you bake bread occasionally and don’t want a second bag, this is the economical answer. Mix it thoroughly into the dry flour before adding liquid. Worked example: 3 cups all-purpose flour (360g) + 3 tablespoons vital wheat gluten gives you roughly the protein of bread flour — close enough for sandwich loaves, pizza, and no-knead bread. For bagels, still buy the real thing.

    What about “00” flour? Italian “00” refers to grind fineness, not protein — 00 pizza flour (like Caputo) is typically 12–13% protein and excellent for pizza; 00 pastry flour is low-protein. Read the protein, not the 00.

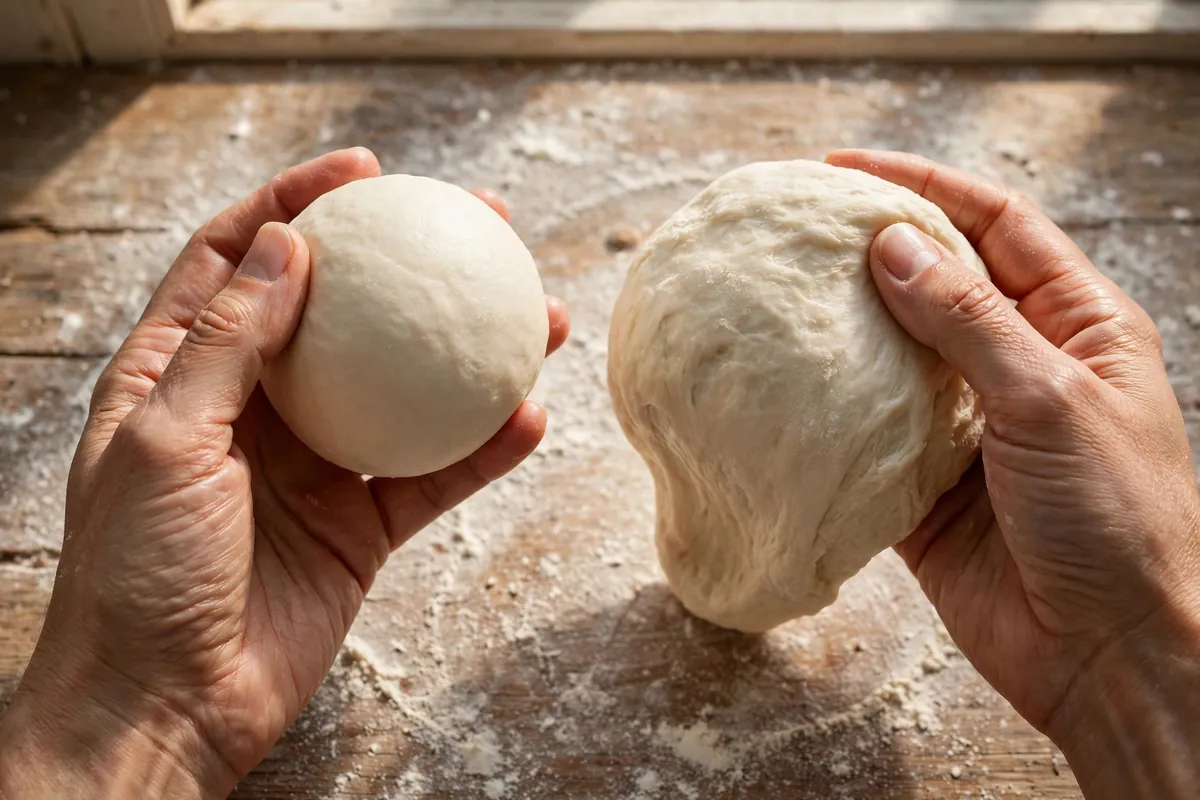
    hands holding two dough balls — one smooth elastic bread-flour dough, one softer all-purpose dough — showing the texture difference
    hands holding two dough balls — one smooth elastic bread-flour dough, one softer all-purpose dough — showing the texture difference

    Frequently asked questions

    Can I use bread flour for cookies?
    Yes — and for chewy-style cookies it’s arguably better. Expect slightly thicker, chewier results. For crisp thin cookies, stick with all-purpose. Either way, measure by weight (120g per cup).

    Why did my bread-flour cake turn out tough?
    The extra protein built too much gluten — exactly what bread flour is designed to do, and exactly wrong for cake. There’s no fix after baking; for next time, use all-purpose or cake flour. (More cake texture rescue: Overbaked Cake? 5 Rescue Methods.)

    Is King Arthur all-purpose basically bread flour?
    Close — at 11.7% protein it’s the strongest widely available AP and performs near bread-flour level in most breads. Many bakers use it as their only flour. But true bread flour (12.7%+) still wins for bagels and high-hydration sourdough.

    Does flour go bad? Which should I store?
    White flour keeps 6–8 months at cool room temperature, a year+ in the freezer. Whole wheat goes rancid faster (3 months room temp — the oils in the bran oxidize). If you bake bread weekly, keep bread flour; if occasionally, keep all-purpose + a bag of vital wheat gluten.

    Can I mix bread flour and all-purpose?
    Absolutely — a 50/50 blend gives you ~11.5–12% protein, a fine middle ground for everyday bread. Many bakeries blend for specific products. There’s no rule against it.

    Is it safe to eat raw flour?
    No — raw flour can carry bacteria (it’s the reason cookie-dough warnings exist as much as the eggs). Heat-treat flour for edible cookie dough: microwave to 165°F (74°C) or bake 5 minutes at 350°F (175°C).

    Related troubleshooting: Why Is My Bread Dense? · Why Do My Cookies Spread Flat? · Why Is My Focaccia Flat?

  • Make-Ahead Thanksgiving Desserts: A Baker’s Timeline

    Make-Ahead Thanksgiving Desserts: A Baker’s Timeline

    Thanksgiving dessert is a logistics problem disguised as baking. The oven is occupied by a turkey for hours, the fridge is full, and everything needs to land on the table Thursday afternoon looking effortless. I’ve hosted enough Thanksgivings to know the real secret: almost everything can be made ahead — if you know what holds, what fades, and what’s genuinely unsafe to leave out. Here’s the timeline I use.

    Quick plan: One week out: freeze pie dough, make cranberry sauce. Three days out: bake pecan pie and cheesecake. Two days out: bake pumpkin pie (refrigerate — it’s custard). One day out: bake apple pie, stabilize the whipped cream. Day of: reheat, whip, serve. Meringue toppings and unstabilized whipped cream are day-of only.

    The rules of make-ahead (read before you plan)

    Three principles govern everything below:

    1. Custard is a refrigerator food. Pumpkin pie, custard tarts, anything egg-and-dairy-set must be refrigerated within 2 hours of baking and kept cold. Never leave pumpkin pie out overnight. This is food safety, not preference.
    2. Crisp and creamy age differently. Fruit pies (apple, pecan) hold at room temperature for 2 days. Custards need the fridge. Meringue weeps within hours — always day-of.
    3. The freezer is your best prep cook. Unbaked pie dough freezes for 3 months. Baked fruit pies freeze well. Cheesecake freezes beautifully. Use it.

    One week ahead: dough and cranberry sauce

    Pie dough: Make your full batch, divide into discs, wrap tightly in two layers of plastic wrap, and freeze. It keeps 3 months. Move it to the fridge the night before you need it — slow thawing keeps the butter layers intact for flakiness.

    Cranberry sauce: It keeps 2 weeks refrigerated (sugar and acid are natural preservatives). Make it now and forget it.

    Toast nuts: Toast pecans and walnuts for pies and toppings, cool completely, and freeze in zip-top bags. Toasting now saves oven time later.

    wrapped discs of pie dough labeled with dates in the freezer
    wrapped discs of pie dough labeled with dates in the freezer

    Three days ahead (Monday): pecan pie + cheesecake

    Pecan pie is the best make-ahead pie in the Thanksgiving canon. The sugary filling is a preservative environment — it holds at room temperature for 2 days or refrigerated for 4–5. Bake it Monday, cool completely, and refrigerate.

    Cheesecake needs a full 24 hours of chilling to set properly anyway, so baking early isn’t a compromise — it’s the recipe working as designed. Bake Monday (water bath, staged cooling — see Why Did My Cheesecake Crack?), refrigerate, and don’t even slice until Thursday. Cheesecake also freezes for 2–3 months if you want to go earlier: freeze unsliced, thaw overnight in the fridge.

    Two days ahead (Tuesday): pumpkin pie

    Pumpkin pie is custard, so it bakes Tuesday and lives in the fridge — never the counter overnight. The good news: pumpkin pie genuinely improves with a day or two of chilling. The spices meld, the filling firms to a clean slice, and you’re not fighting oven space on Thursday.

    The food-safety line: refrigerate within 2 hours of leaving the oven. A pumpkin pie left on the counter overnight is a discard, not a serve — custard is a bacterial playground at room temperature.

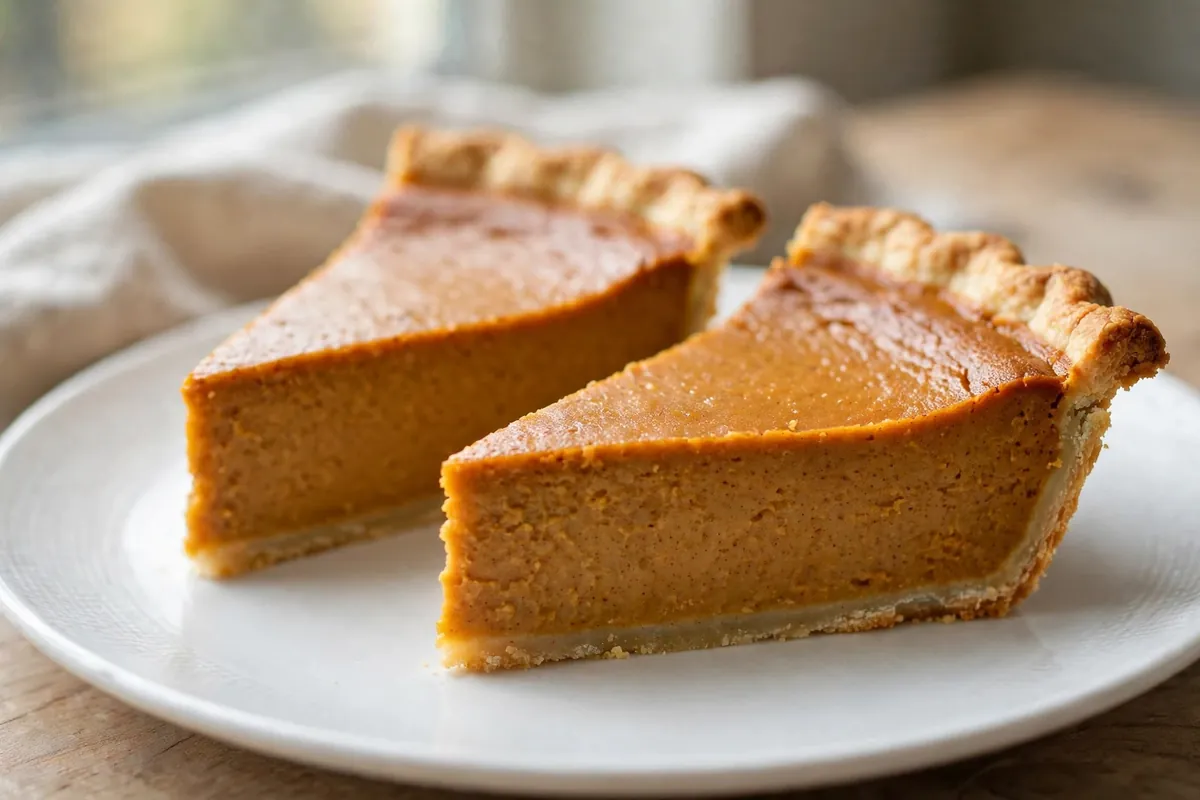
    sliced pumpkin pie showing clean firm slices on a plate
    sliced pumpkin pie showing clean firm slices on a plate

    One day ahead (Wednesday): apple pie + whipped cream base

    Apple pie is the most forgiving pie on the table: fruit filling, no custard, happy at room temperature for 2 days. Bake it Wednesday. If you want that fresh-baked warmth Thursday, reheat slices at 350°F (175°C) for 10 minutes — or bake it Thursday morning if your oven schedule allows.

    Whipped cream: Plain whipped cream deflates within hours. For make-ahead, stabilize it: whip 1 cup heavy cream with 2 tablespoons powdered sugar and 1 tablespoon mascarpone (or 1 teaspoon gelatin bloomed in 1 tablespoon cold water, then melted). Stabilized cream holds its shape 24 hours refrigerated. Make it Wednesday evening, dollop Thursday.

    Day of (Thursday): reheat and serve

    Your only jobs: move the cheesecake from fridge to counter 30–45 minutes before serving (cold cheesecake mutes flavor), reheat apple pie slices if desired, and whip any last-minute cream. Everything else is done. This is the payoff of the timeline — you actually get to enjoy the meal.

    Thursday oven schedule (the other half of the plan)

    Dessert timing means nothing if the oven is hostage to the turkey. Work backward from serving time: the turkey needs 30–45 minutes of resting after roasting — that’s your dessert window. Reheat apple pie slices during the rest (350°F / 175°C, 10 minutes). If anything needs a hot oven Thursday morning, bake it before the turkey goes in; most ovens recover temperature in 15 minutes, so a 9 AM pie bake and an 11 AM turkey start coexist fine. Write the schedule on paper and tape it to the fridge — Thanksgiving is no time for mental math.

    handwritten oven schedule taped to a fridge door
    handwritten oven schedule taped to a fridge door

    What NOT to make ahead

    • Meringue toppings (lemon meringue pie, baked Alaska): meringue weeps and shrinks within hours. Always day-of — see Why Is My Meringue Weeping?.
    • Unstabilized whipped cream: hours, not days.
    • Anything meant to be served warm from the oven: plan the oven schedule, not the calendar.
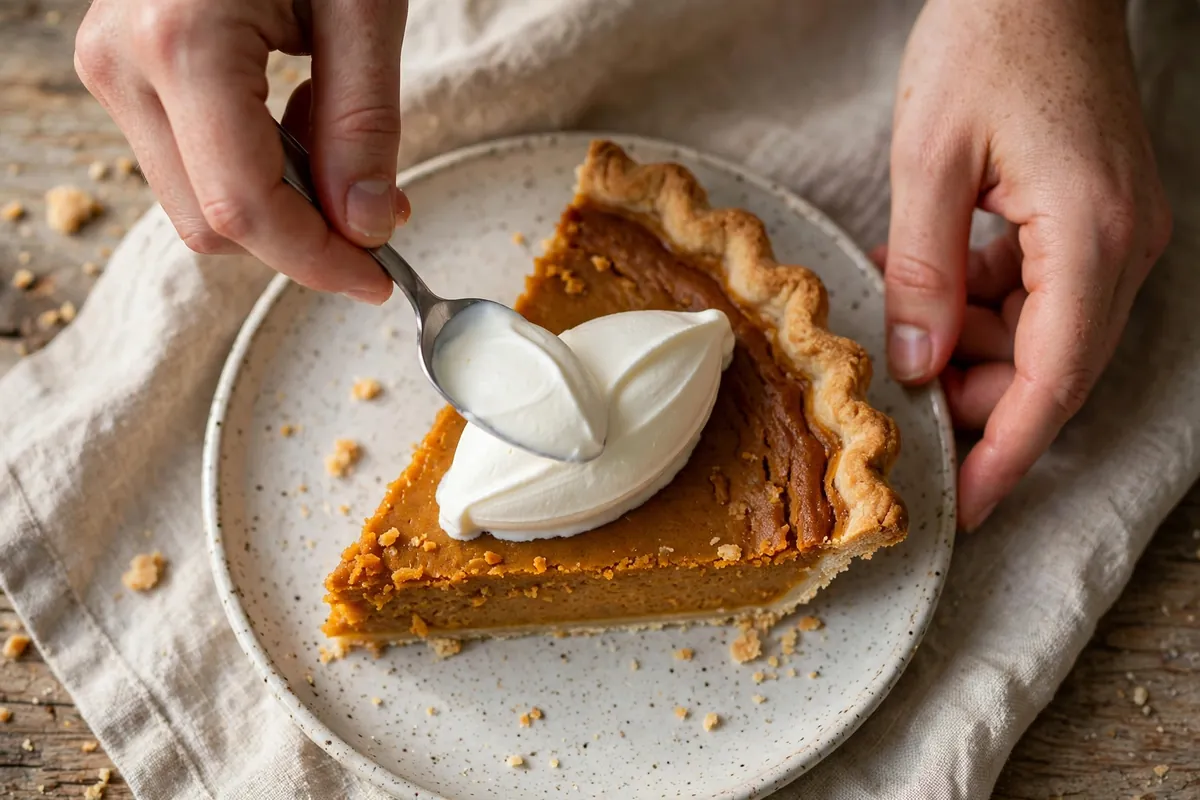
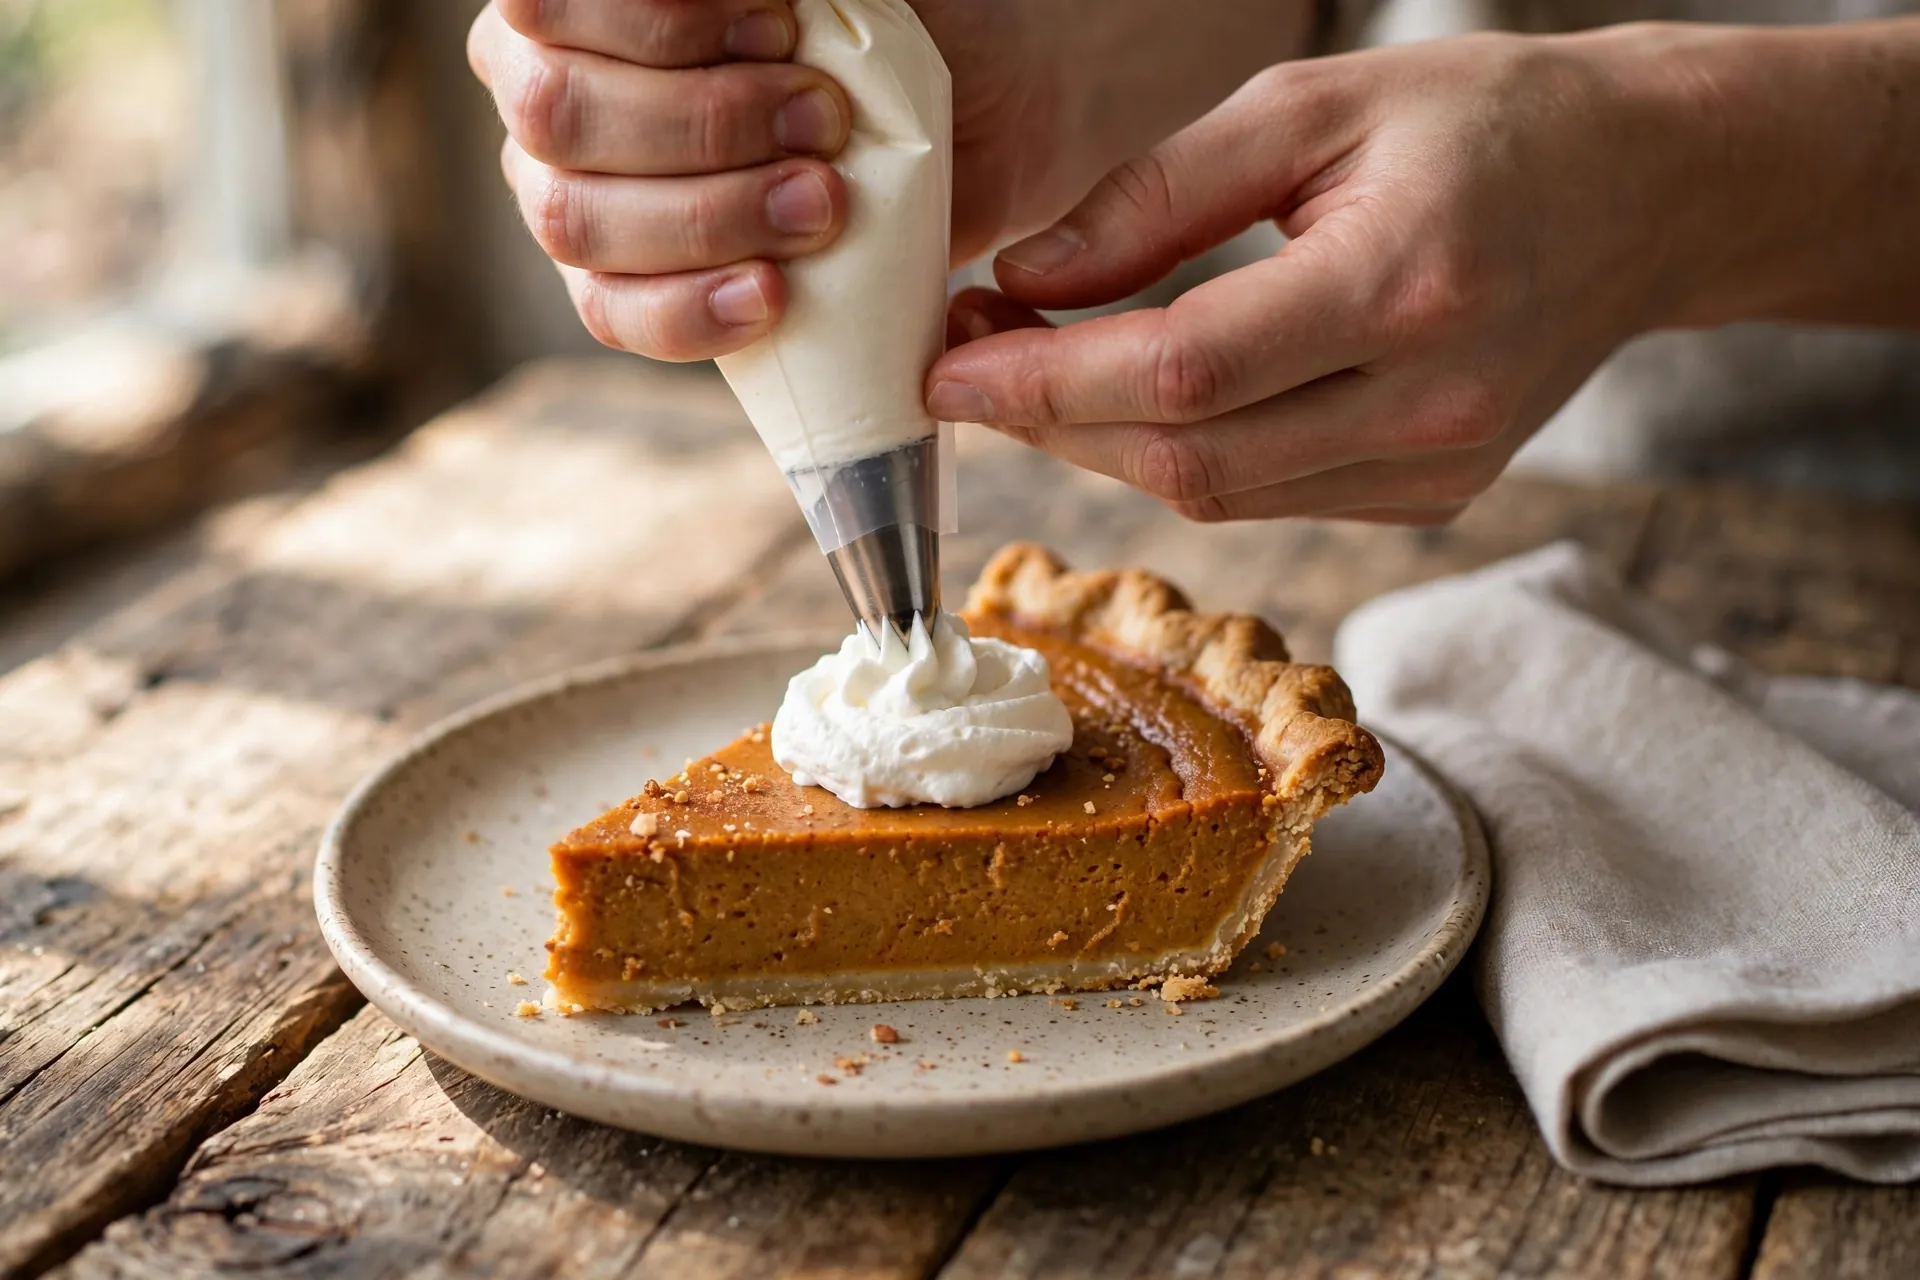
    hands dolloping stabilized whipped cream onto a slice of pie
    hands dolloping stabilized whipped cream onto a slice of pie

    Frequently asked questions

    Can I freeze pumpkin pie?
    Technically yes, but I don’t recommend it — custard fillings weep and turn grainy when thawed. The fridge gives you 3–4 days of perfect quality, which covers any Thanksgiving timeline. Freeze the unbaked dough instead and bake fresh.

    How long does pecan pie keep?
    2 days at room temperature (cool, covered), 4–5 days refrigerated. The high-sugar filling is inhospitable to bacteria, which is why it’s the most make-ahead-friendly pie on the table.

    Can I make pie dough further ahead?
    Yes — 3 months in the freezer, wrapped airtight. Thaw overnight in the fridge, never on the counter (the butter layers melt and you lose flakiness).

    Is it really unsafe to leave pumpkin pie out overnight?
    Yes. Pumpkin pie is an egg-and-dairy custard. The food-safety rule is 2 hours at room temperature, then refrigerate. An overnight counter pie goes in the bin, however painful that feels.

    Can I freeze cheesecake?
    Beautifully — up to 2–3 months. Freeze it unsliced on a board, then wrap tightly in two layers of plastic plus foil. Thaw overnight in the fridge, never on the counter. The texture is essentially identical to fresh.

    What about dinner rolls and bread?
    Different post, same principle: par-bake rolls ahead and finish Thursday, or bake fully Wednesday and refresh in a hot oven. See Make-Ahead Bread Dough for the full method.

    Related troubleshooting: Why Did My Cheesecake Crack? (And the Water Bath Fix) · Soggy Bottom Pie: How to Get a Crisp Base

  • Why Did My Cake Stick to the Pan? Release Methods That Work

    Why Did My Cake Stick to the Pan? Release Methods That Work

    Why Did My Cake Stick to the Pan? Release Methods That Work

    Quick diagnosis: Cake sticks for one of three reasons: the pan wasn’t prepped (no grease/flour or parchment), it was unmolded at the wrong moment (too hot = falls apart, too cool = steams itself stuck), or the pan’s nonstick coating is worn out. Parchment paper rounds eliminate the problem entirely — they’re the single most reliable fix.

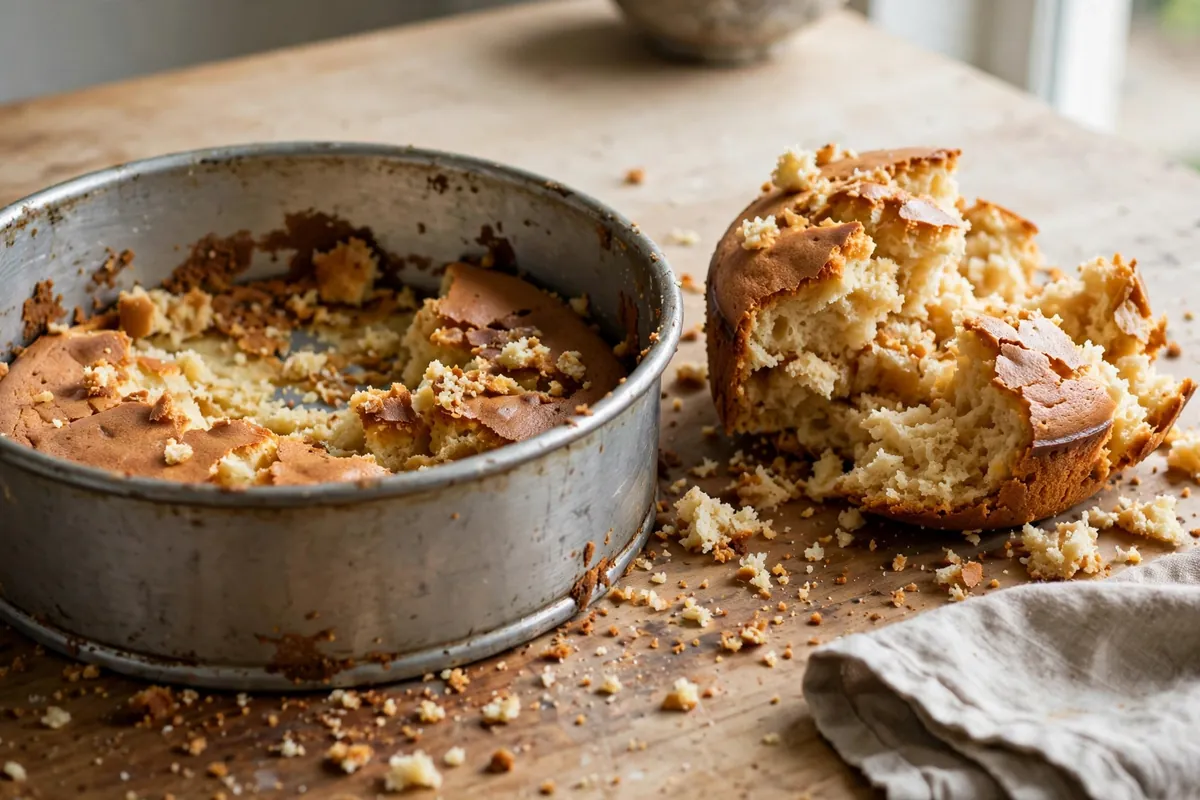
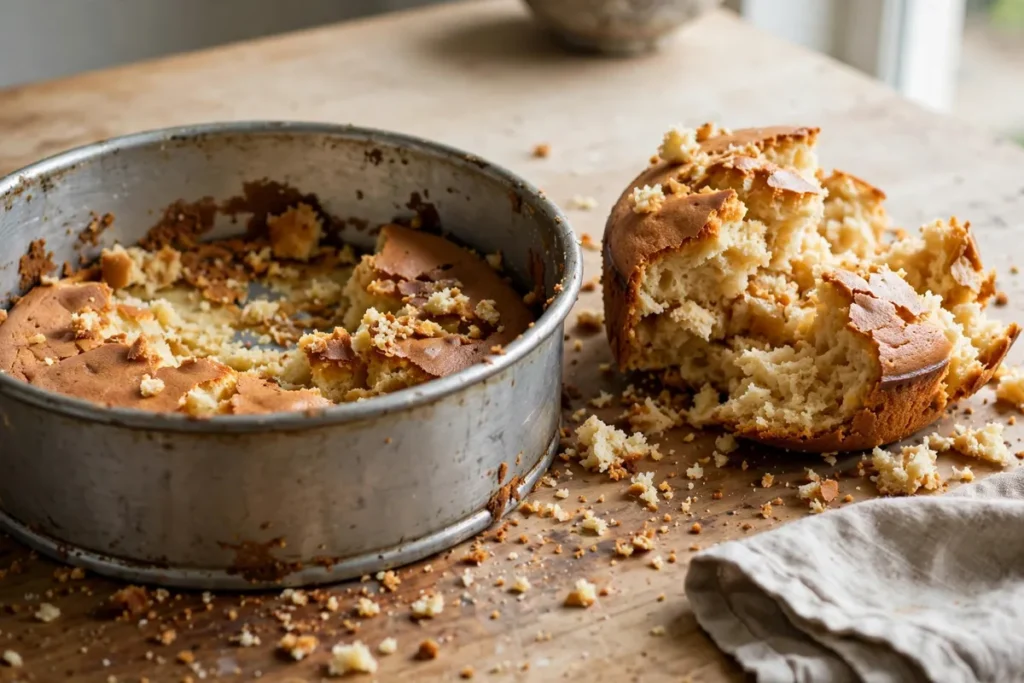
    Torn cake stuck to the pan
    a cake torn apart from sticking, half still in the pan

    A baked cake releases when there’s a barrier between batter and metal. Without one, the cake’s proteins and sugars bond directly to the pan as they set — and sugar, when hot, is essentially glue. Every method below is a version of building that barrier, plus the timing that makes it work.

    1. The pan wasn’t prepped properly

    The classic failure: a quick spritz of oil or nothing at all. A thin oil film isn’t a barrier — it fries into the crumb and bonds. The method that actually works has two layers: fat, then a dry coating.

    How to tell: The cake bonded across the whole bottom and sides, and you greased lightly or not at all.

    The fix: The full prep, every time: coat the pan with softened butter or shortening (get into the corners), then dust with flour and tap out the excess — you want a thin, even film, not clumps. For chocolate cakes, dust with cocoa powder instead of flour so there’s no white residue. This two-layer barrier is what bakeries use, and it has never failed me.

    2. No parchment paper

    Grease-and-flour handles the sides; parchment handles the bottom — the surface with the most contact and the most tearing. A parchment round is cut to fit the pan base exactly, so the cake’s largest surface never touches metal at all.

    How to tell: The sides released fine but the bottom tore off and stayed in the pan.

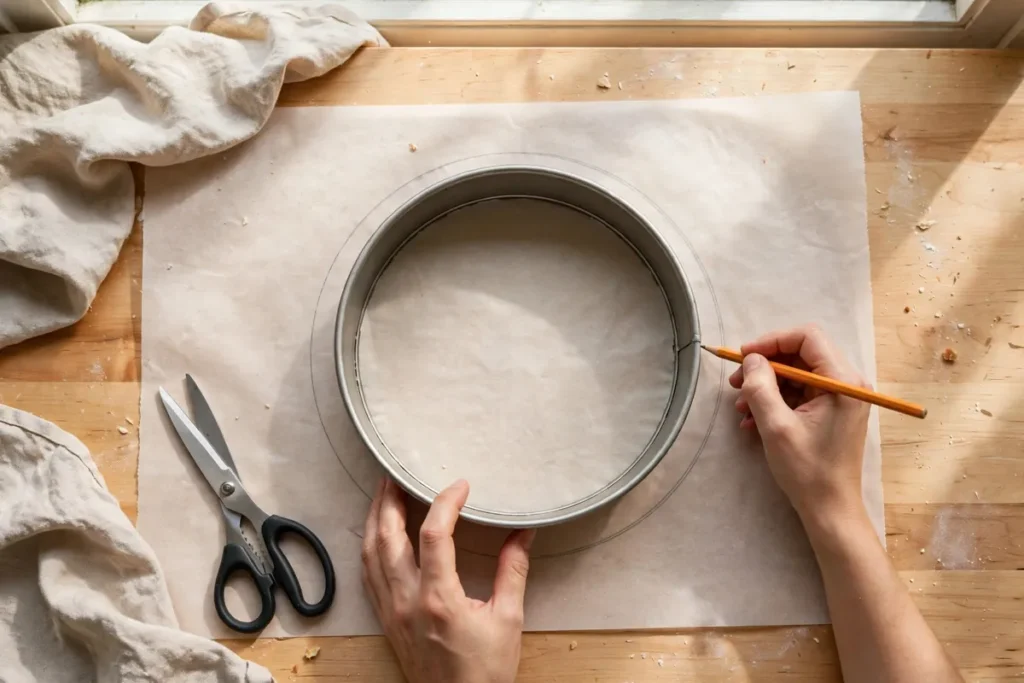
    The fix: Trace the pan on parchment, cut just inside the line, and lay the round in the greased pan (a dab of butter underneath holds it in place). Grease and flour over the parchment too — belt and suspenders. Pre-cut rounds are cheap; keep a stack in every pan size.

    Tracing a cake pan on parchment with a pencil
    tracing a pan on parchment paper with a pencil, scissors beside

    3. It was unmolded too hot — or too cold

    Timing is the second half of release. Invert a cake straight from the oven and the crumb is still fragile steam-held foam — it breaks apart under its own weight. Wait too long and the opposite happens: as the cake cools in the pan, escaping steam condenses between cake and metal, and sugars re-bond to the surface. The window is 10–15 minutes on a wire rack.

    How to tell: It shattered coming out (too hot), or it released from the sides but the bottom vacuum-sealed itself to the pan (too cold — it sat 30+ minutes).

    The fix: Cool in the pan on a rack for 10–15 minutes — no more. Run a thin knife or offset spatula around the edge, place the rack over the pan, and flip confidently in one motion. If it resists, don’t force it: set the pan on a warm damp towel for a minute to loosen, then try again.

    4. The nonstick coating is worn out

    Nonstick isn’t forever. Scratched, overheated, or decade-old coatings lose their release — and the failure is sneaky because the pan looks fine. Metal utensils, abrasive scrubbers, and dishwasher heat all shorten the life. A worn pan sticks worse than bare aluminum because the damaged coating grabs unevenly.

    How to tell: The pan is old, visibly scratched, or food has started sticking in it generally — not just cake.

    The fix: Retire it for baking, or commit to full parchment lining every time (parchment doesn’t care about the coating). When replacing, light-colored aluminum with a parchment round outlasts and outperforms cheap nonstick for cakes.

    5. High-sugar batters need more than grease

    Caramel-like batters — sticky toffee, heavy fruit cakes, anything with melted sugar or honey — laugh at grease-and-flour. Hot sugar bonds to metal at a molecular level; flour just becomes part of the glue.

    How to tell: The recipe is very high in sugar, honey, or syrup, and the stuck layer is glossy and caramelized where it bonded.

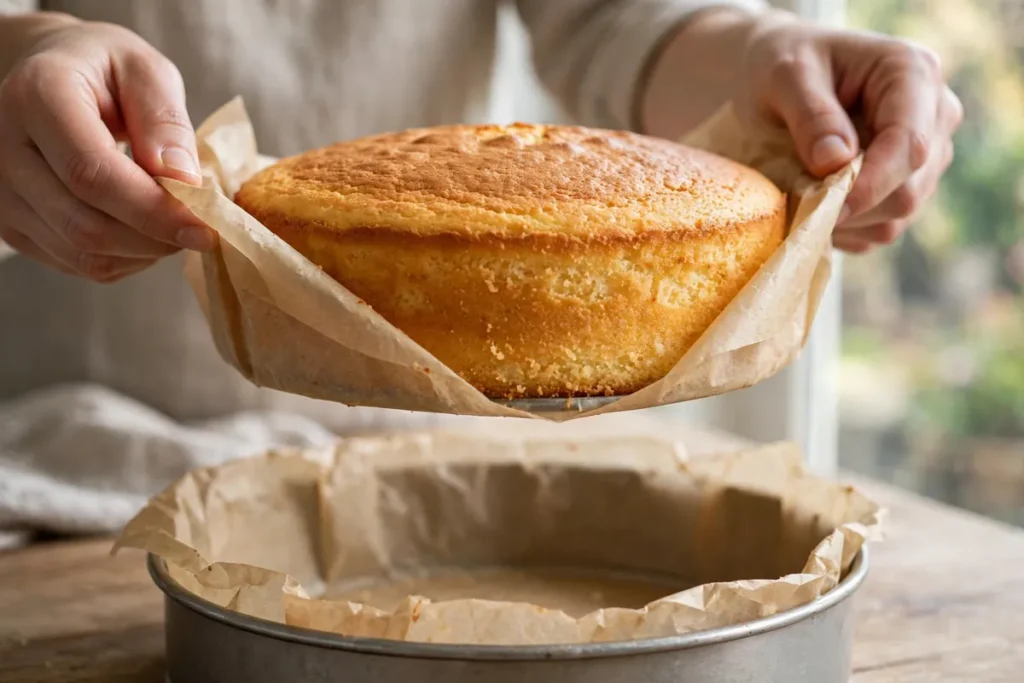
    The fix: Full parchment lining — bottom AND sides (cut a strip for the wall, or use a parchment collar). Grease under and over the parchment. For extreme cases (sticky toffee pudding in particular), this is the only method I trust.

    Cake lifting cleanly from the pan with a parchment sling
    a sticky cake lifting cleanly out of a fully parchment-lined pan

    6. Bundt and shaped pans need crevice-by-crevice prep

    Intricate pans have dozens of tiny ridges where batter locks in mechanically. A spray-and-pray approach misses crevices, and the cake tears at exactly those points.

    How to tell: A Bundt or shaped cake released mostly but tore at the detailed sections.

    The fix: Brush every crevice with melted butter using a pastry brush — don’t spray and hope — then dust thoroughly with flour (or a 50/50 flour-sugar mix, which releases even better on sweet cakes). Tap the pan firmly upside down to remove all excess. Use baking spray WITH flour (not plain oil spray, which polymerizes into a sticky varnish over time). Cool the full 15 minutes before inverting; Bundts are heavy and need the structure.

    Rescue: the cake is stuck right now

    Don’t panic and don’t pry. Run a thin, flexible knife around the entire edge, pressing against the pan. Set the pan on a warm, damp towel for 2–3 minutes — gentle heat softens the sugar bonds. Invert onto the rack and give the pan a firm tap; if it holds, tap the bottom sharply once more. Torn anyway? Frosting is structural spackle: patch tears with a crumb coat, chill 20 minutes, then frost normally. A patched cake under frosting is indistinguishable from a perfect one.

    Offset spatula smoothing frosting over a patched tear
    a torn cake being patched with frosting, the repair invisible after smoothing

    Frequently asked questions

    Can I still use a cake that stuck and tore?
    Yes — this is purely cosmetic. Patch tears with frosting (crumb coat, chill, final coat) and nobody will know. Badly torn layers become trifle, cake pops, or an icebox cake. The flavor is completely unaffected.

    Is butter or baking spray better for greasing pans?
    Baking spray that contains flour is the most foolproof for everyday cakes — one step, even coverage. For shaped pans, brushed melted butter plus flour gets into crevices better. Plain oil spray without flour is the worst option; it can bake into a sticky layer.

    Do I need to grease parchment paper?
    Greasing the pan under the parchment holds it in place; a light grease over the parchment guarantees release. It’s thirty seconds of insurance — I always do both.

    Why did my cake stick even though I greased the pan?
    Usually one of three things: the grease layer was too thin or missed spots, there was no flour/parchment second layer, or the cake cooled too long in the pan and steamed itself stuck. The full method — grease, flour, parchment round, 10–15 minute cool — fails so rarely it’s effectively foolproof.

    Can I fix a stuck cake without tearing it?
    Try the warm damp towel trick: 2–3 minutes of gentle heat under the pan softens sugar bonds. Then the confident single flip. Hesitation and partial lifts cause more tearing than one decisive inversion.

    Related troubleshooting: Why Did My Cake Sink in the Middle? · Cake Domed and Cracked on Top · Why Is My Bread Dense?