Category: Cookies & Pastry

  • How to Fix Overbaked Cookies (And Stop Doing It)

    How to Fix Overbaked Cookies (And Stop Doing It)

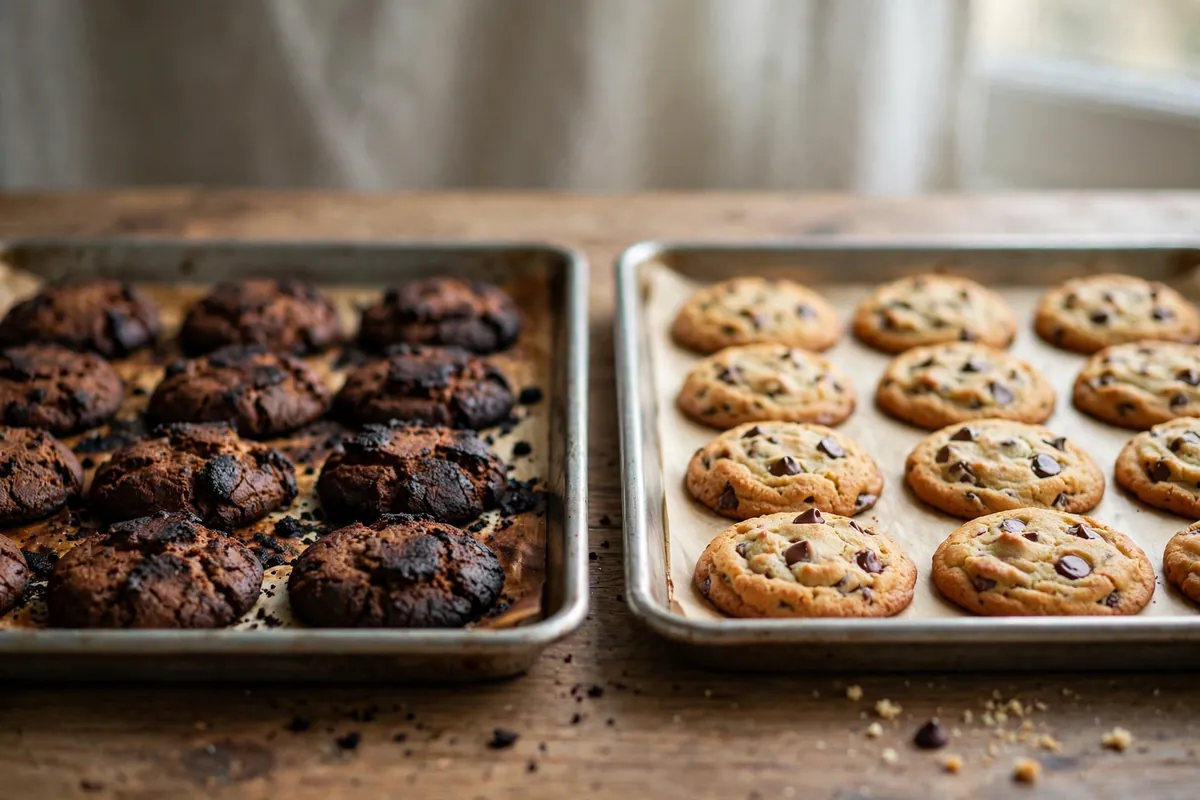
    You turned around for one minute — or the timer lied, or the recipe lied — and now the tray is full of cookies that went too far. Too crisp. Too dark. Edges like charcoal, centers like crackers. The first thing to know: you cannot un-bake a cookie. But you can absolutely salvage most batches, and the prevention side is one of the easiest fixes in all of baking, because overbaked cookies are almost never the recipe’s fault. They’re a timing and temperature problem, and both are fixable tonight.

    Quick diagnosis: Overbaked cookies are a carryover-cooking problem more than anything: cookies keep baking on the hot tray for 3–5 minutes after you pull them. If your cookies look “done” in the oven, they’re already overdone. Pull them when the edges are set but the centers still look slightly underdone (cause #1). If they’re burnt on the bottom only, your pan or oven rack position is the culprit (cause #4).

    What you can actually salvage (and what you can’t)

    Let’s be honest about the physics first. Once the sugars have caramelized past the point of no return and the moisture has baked out, no trick puts softness back into the crumb. A cookie that’s merely too crisp is salvageable. A cookie that’s genuinely burnt — black, bitter, acrid-smelling — is not. Taste one first: if the flavor is bitter rather than just dry, skip to repurposing — that batch is an ingredient now, not a cookie.

    Rescue 1: The bread-slice trick (for too-crisp, not burnt)

    This is the classic for a reason: it works. Place the cooled cookies in an airtight container with a slice of fresh bread (or half an apple) and seal it overnight. The cookies absorb moisture from the bread through the enclosed air, and by morning a too-crisp cookie is noticeably softer. It won’t fix a burnt cookie — moisture can’t un-bitter carbon — but for the “I left them in 3 minutes too long” batch, this is genuine rescue. (The same principle keeps Christmas Cookies Fresh for Weeks.)

    Rescue 2: Repurpose the batch — crumbs are an ingredient

    Cookies that are too far gone to serve whole are still perfectly good raw material. Pulse them into crumbs in a food processor and you have: pie and cheesecake crust base (mix with melted butter, press into a pan — nobody will ever know), ice cream topping, trifle layers, or cookie truffles (crumbs + a spoonful of cream cheese or frosting, rolled and dipped in chocolate). A batch of overbaked chocolate chip cookies makes a spectacular icebox-cake layer, because the filling’s moisture softens them overnight. The batch isn’t a failure anymore; it’s a component.

    Rescue 3: Serve them warm with something wet

    A too-crisp cookie served warm with ice cream, or dunked in coffee, stops being a problem — heat softens the crumb and the moisture does the rest. Ten seconds in the microwave, a scoop on top, and nobody is diagnosing your bake time.

    Prevention 1: Pull them early — carryover cooking is the real timer

    Here’s the rule that fixes 80% of overbaked-cookie complaints: cookies are done when the edges are set and lightly golden but the centers still look slightly soft and underdone. They will finish setting on the hot tray as they cool — this carryover cooking takes 3–5 minutes and it’s doing real baking work. If a cookie looks perfectly done through the oven door, it’s going to be overdone by the time it cools. Pull trays a full 2 minutes before you think they’re ready and overbaking all but disappears.

    The sensory test: Nudge a cookie gently with a spatula. The edge should hold its shape; the center can look pale and soft. That’s done. If the whole cookie is uniformly golden and firm in the oven, you’ve overshot.

    Prevention 2: Your oven is lying about its temperature

    Most home ovens run 15–25°F off the dial, and cookies — thin, sugary, fast-baking — punish temperature errors harder than almost anything else. A 25°F-hot oven turns a 12-minute bake into a 9-minute bake, and if you’re still timing for 12, every batch burns. An oven thermometer costs less than one ruined batch of butter and tells you the truth. Preheat fully — a full 15–20 minutes past the beep — because cookies dropped into a half-heated oven spread before they set (a whole separate failure; see Why Do My Cookies Spread Flat?).

    Prevention 3: Know your pan — dark pans bake faster

    Dark, thin baking sheets absorb more radiant heat and can overbake cookie bottoms while the tops still look pale — the classic “burnt bottom, raw-looking top” complaint. If your cookies consistently burn underneath, the pan is the prime suspect, not the recipe.

    The fix: Switch to light-colored, heavy aluminum half-sheet pans. Line with parchment (it insulates slightly and prevents sticking). Bake one rack above center, never on the bottom rack. And never put a fresh batch on a hot tray — the residual heat starts baking the bottoms before the oven does. Cool the tray between batches, or rotate two trays.

    Prevention 4: Chill the dough, watch the sugar

    Two subtler contributors. Warm, soft dough spreads fast and thin, and thin cookies overbake in the time a thick cookie needs — chilling dough 30 minutes before baking gives you thicker cookies with more margin for error. And sugar content matters: high-sugar doughs brown faster (sugar caramelizes), so a recipe heavy on brown sugar needs a watchful eye in the last 2 minutes. Set a timer for 2 minutes under the recipe time and check from there — you can always add time, but you can’t subtract it.
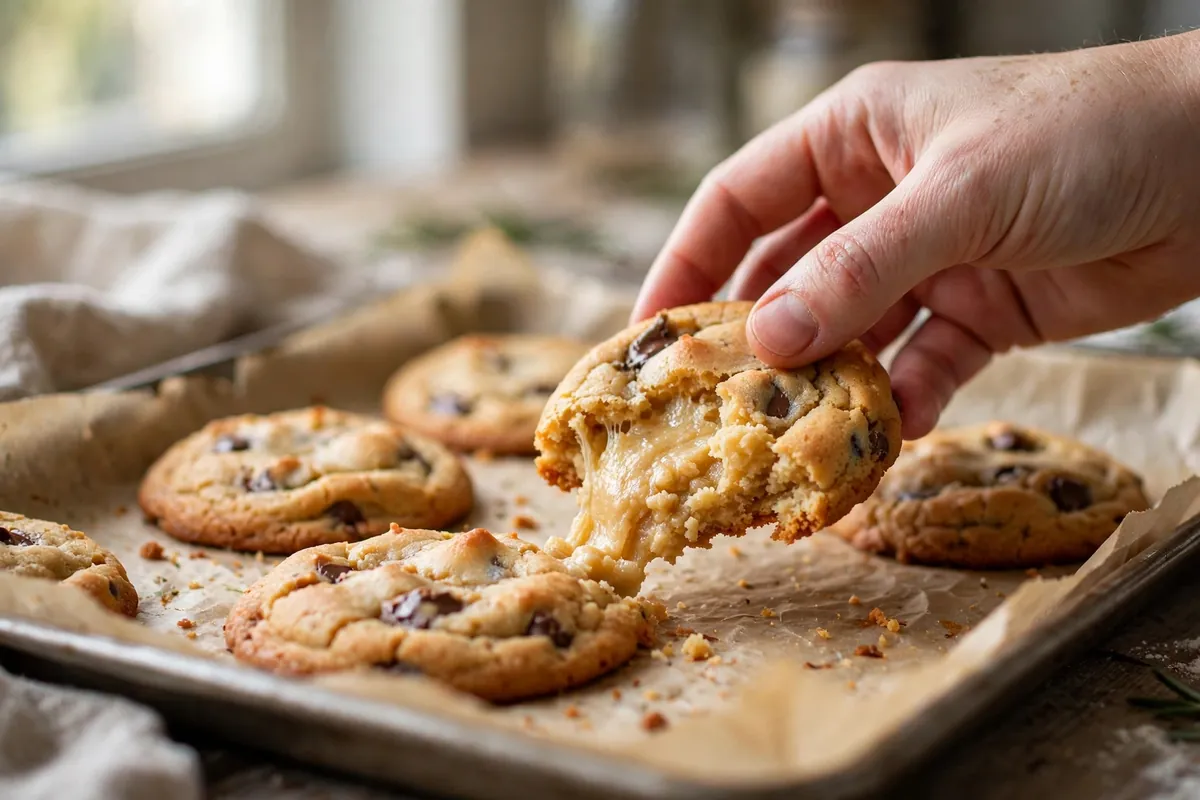
    hand lifting a cookie from a parchment-lined tray, center still soft
    hand lifting a cookie from a parchment-lined tray, center still soft

    The timing cheat sheet I actually use

    For a standard drop cookie at a true 350°F (175°C) on a light aluminum pan: start checking at 10 minutes regardless of what the recipe says. Look for set edges, pale centers. Pull at 11–12 minutes for chewy, 13–14 for crisp — but always 1–2 minutes before they look “done.” Cool on the tray 5 minutes (this is still baking), then move to a rack. Write your oven’s behavior on the recipe card — “mine runs 15°F hot, pull at 11 min” — and the next batch is automatic.
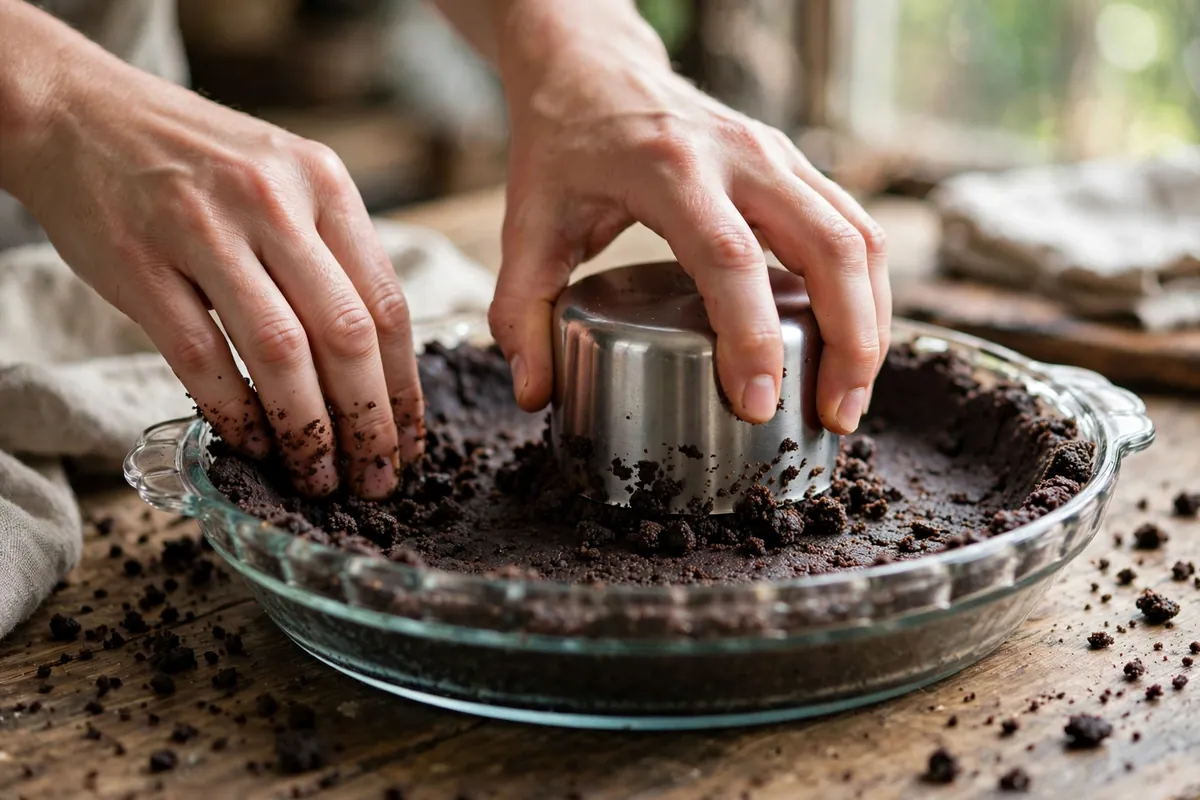
    overbaked cookie crumbs being pressed into a pie dish as crust
    overbaked cookie crumbs being pressed into a pie dish as crust

    Frequently asked questions

    Can I fix burnt cookies?
    Not really. You can scrape off badly burnt bottoms with a grater, which helps mildly burnt cookies, but bitter, blackened cookies can’t be saved as cookies — crumb them and repurpose as crust or topping, where the bitterness gets diluted.

    Why do my cookies burn on the bottom but look raw on top?
    Dark pan, bottom rack position, or an oven with a fierce lower element. Move to a light-colored pan, bake on the center or upper-center rack, and line with parchment.

    Is it safe to eat underbaked cookies?
    Slightly soft centers that set as they cool are fine and intended. Truly raw, wet dough centers should go back in — raw flour and egg aren’t ideal. The “pull early” advice means soft-set, not raw.

    Can I re-soften cookies that went hard days later?
    Yes — the bread-slice trick works on stale cookies too, not just overbaked ones. Airtight container, fresh bread slice, overnight. It restores softness remarkably well.

    Should I trust the recipe’s bake time?
    Recipe times assume a calibrated oven, a specific pan, and a specific dough temperature — you likely differ on at least one. Always check 2 minutes early.

    Do convection/fan ovens change cookie timing?
    Yes — drop the temperature 25°F (about 15°C) for fan ovens, and check even earlier. Forced air browns cookie surfaces fast.

    Related troubleshooting: Why Do My Cookies Spread Flat? · Why Are My Cookies Cakey Instead of Chewy? · How to Rescue an Overbaked Cake

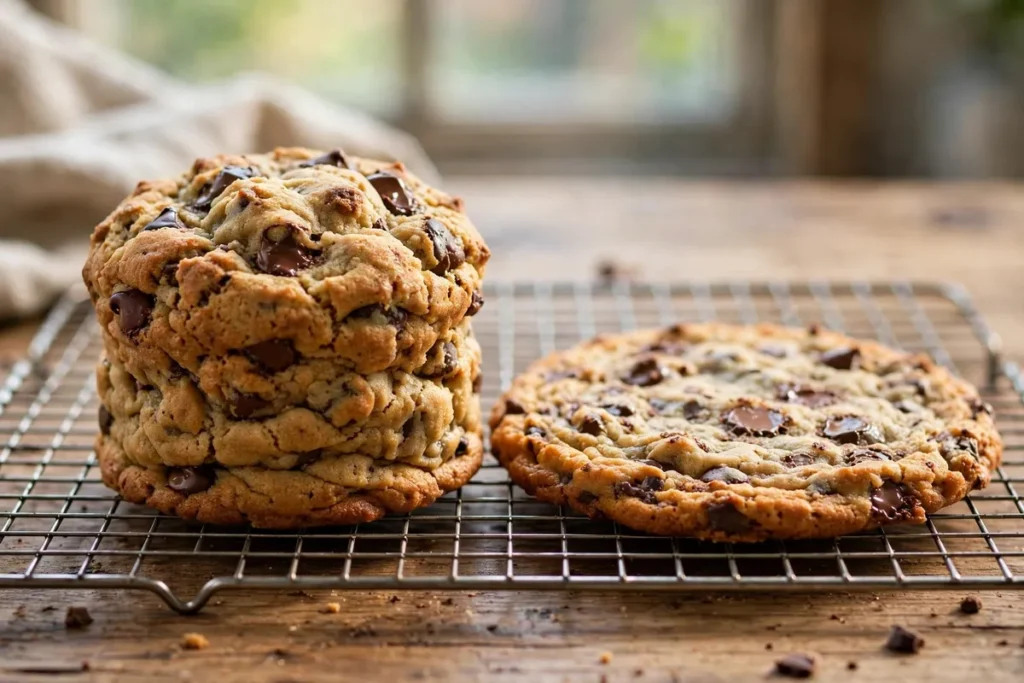
  • Why Do My Cookies Spread Flat? Butter, Sugar, and Chill Time

    Why Do My Cookies Spread Flat? Butter, Sugar, and Chill Time

    Why Do My Cookies Spread Flat? Butter, Sugar, and Chill Time

    Quick diagnosis: Flat cookies almost always trace to two things: butter that was too warm and dough that went into the oven unchilled. If your butter looked shiny or greasy before mixing and you skipped the chill, those two alone explain the pancake. Fix them first — they solve 8 out of 10 flat-cookie cases.

    side-by-side of one thick cookie and one flat spread cookie on a cooling rack
    side-by-side of one thick cookie and one flat spread cookie on a cooling rack

    Cookie spread is a race: fat melts and sugar liquefies, pushing the dough outward, while heat sets the structure and stops the flow. A thick cookie is simply dough whose structure set before it could travel far. Every cause below is a lever on that race — slow the melt, speed the set, and your cookies stay tall.

    1. The butter was too warm (or melted)

    The number one cause, and the one I see most in reader photos. Butter for cookies should be softened — cool to the touch at 65–68°F (18–20°C), holding its shape but giving slightly when pressed. Melted or greasy-warm butter is already liquid, so it starts flowing the second the dough hits the oven, long before the structure sets.

    How to tell: Think back to mixing. Did the butter look shiny, slump in the bowl, or leave a grease slick? Did the creamed mixture look more like a batter than a fluffy paste? That’s too-warm butter.

    The fix: Cut cold butter into cubes and let it sit 30–45 minutes — no microwaving, no warm spots. Cream it with sugar 2–3 minutes until light and fluffy, not soupy. When I deliberately baked one batch with melted butter against a properly creamed control, the melted-butter batch spread nearly twice as wide.

    2. Too much white sugar (wrong sugar ratio)

    White sugar melts cleanly and encourages spread. Brown sugar contains molasses, which is hygroscopic — it holds onto moisture — so it spreads less and bakes up chewier and thicker. A recipe heavy on white sugar will always spread more than one leaning on brown.

    How to tell: Compare your recipe’s sugar ratio. If it’s all white sugar, or white outnumbers brown two-to-one, sugar is contributing to the spread.

    The fix: Shift the ratio toward brown sugar — try replacing a quarter to half of the white sugar with packed brown sugar. You’ll get thicker cookies with chewier centers and a deeper flavor. This is also the single biggest lever if you want chewy rather than crisp cookies (more on that in Why Are My Cookies Cakey Instead of Chewy?).

    3. The dough wasn’t chilled

    Chilling firms the butterfat back up so it melts slowly in the oven instead of all at once. It also hydrates the flour, which means less free moisture and better flavor. Skipping the chill is the fastest way to turn a good recipe flat.

    How to tell: Did the scooped dough feel soft and room-temp when it went onto the tray? That’s unchilled dough.

    The fix: Chill scooped dough balls at least 30 minutes; an hour is better, and overnight develops noticeably deeper flavor. Keep a tray of portioned dough in the fridge and bake straight from cold — the difference in height is dramatic. If you’re in a hurry, 20 minutes in the freezer works as an emergency chill.

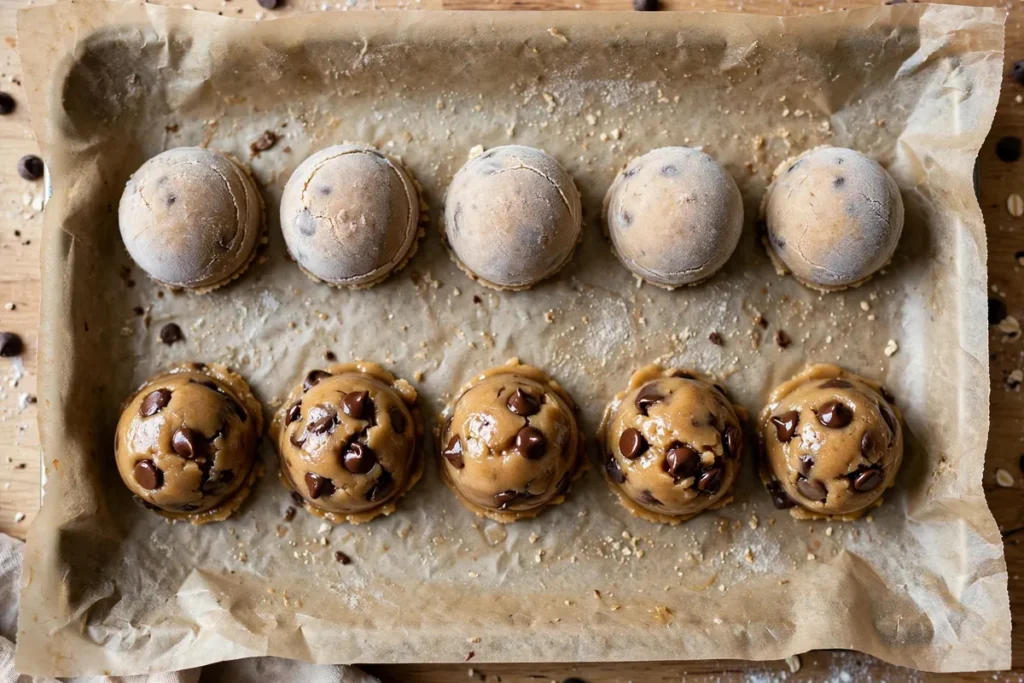
    scooped dough balls on a tray, half labeled chilled (firm, matte) vs room-temp (soft, glossy)
    scooped dough balls on a tray, half labeled chilled (firm, matte) vs room-temp (soft, glossy)

    4. The oven ran too cool

    Spread happens while the fat is melting but the structure hasn’t set. A cool oven stretches that window — the fat liquefies fully while the proteins and starches are still catching up, so the dough flows outward for longer. Most home ovens run 15–25°F off, usually cool.

    How to tell: Cookies took longer than the recipe’s time range and still look pale, or everything you bake seems to need “a few more minutes.”

    The fix: Verify with an oven thermometer — they’re cheap and every serious baker owns one. Most drop cookies want 350°F (175°C); for extra-thick cookies, 375°F (190°C) sets the edges faster. Preheat fully, a full 15–20 minutes past the beep.

    5. The baking sheet was warm (or greased)

    Dough placed on a warm tray starts melting on contact — the bottoms liquefy before the oven heat even reaches the tops. And greasing the sheet, an old habit from the shortening era, actively encourages spread. Modern nonstick or parchment-lined sheets need no grease at all.

    How to tell: The first tray spread fine but the second batch — scooped onto the still-warm tray — went flat. Or you greased the pan “just in case.”

    The fix: Cool trays completely between batches (run cool water over the back, dry thoroughly), and line with parchment instead of greasing. Use light-colored aluminum sheets; dark pans absorb more heat and over-brown bottoms while encouraging spread.

    6. Too little flour went in

    Flour is the structure that stops the flow. Under-measure it and there’s nothing to hold the dough’s shape. The classic error is scooping the cup straight from the bag, which compacts flour — except here the danger is the reverse: a hurried, heaped-then-shaken scoop that actually delivers less than a proper measure, or a recipe developed with weighed flour that you cup-measured loosely.

    How to tell: The dough felt slack, sticky, or batter-like rather than a firm scoopable dough.

    The fix: Weigh flour — 120g per cup, spooned and leveled if you must use cups. If the dough seems slack, add flour one tablespoon at a time until scoops hold a clean dome. Don’t overdo it; past the right point you trade spread for dryness.

    7. Too much baking soda

    Baking soda is alkaline. It raises dough pH, which weakens gluten slightly, speeds browning, and — crucially — encourages spread. A heavy hand with soda gives thin, lacy cookies with a soapy aftertaste. (Baking powder, which contains its own acid, puffs upward instead — that’s why cakey-cookie recipes lean on powder.)

    How to tell: Cookies spread excessively AND taste faintly soapy or metallic, with very dark, lacy edges.

    The fix: Measure soda precisely — most drop-cookie doughs use about 1 teaspoon per 2¼ cups of flour. Level the spoon. If your recipe already spreads well, don’t “add a little extra for lift”; extra soda buys spread, not height.

    three cookies from the same dough — one baked from warm dough, one chilled 30 min, one chilled overnight
    three cookies from the same dough — one baked from warm dough, one chilled 30 min, one chilled overnight

    Can I rescue the flat batch?

    Yes — the cookie scoot. While the cookies are still hot and pliable on the tray, take a round cookie cutter slightly larger than the cookie, place it over each cookie, and swirl gently. The cutter tucks the spread edges back under, and as the cookie cools it holds a thicker, rounder shape. It won’t fix the texture completely, but it turns pancakes into presentable cookies. I use this on every imperfect batch.

    FAQ

    Are flat cookies safe to eat?
    Yes, completely. Spread is a texture issue, not a safety one. As long as the centers are set — no wet, raw-looking dough — flat cookies are fine to eat. They’ll be crisper and more caramelized than intended, which some people actually prefer.

    Can I fix cookies that already spread too much?
    While they’re hot, yes: use the cookie scoot described above — a round cutter swirled around each warm cookie pulls the edges back in. Once fully cooled and set, the shape is permanent, so work fast, within 2–3 minutes of leaving the oven.

    Does chilling the dough really make that much difference?
    More than any other single step. In side-by-side tests, chilled dough bakes up visibly thicker with better flavor (the resting flour hydrates fully). Thirty minutes is the minimum useful chill; overnight is the gold standard. It’s the highest-return habit in cookie baking.

    Should I use melted or softened butter for thick cookies?
    Softened, always, for thick cookies. Melted butter is a legitimate choice when you want thin, chewy, toffee-edged cookies — many excellent recipes use it deliberately. But if your goal is height, melted butter works against you from the first minute.

    Why did my second tray spread when the first was fine?
    The tray was still warm. Dough hitting a hot sheet starts melting on contact. Cool the sheet completely between batches, or rotate between two sheets so one is always cooling while the other bakes.

    Do silicone baking mats cause more spreading?
    Slightly, sometimes — silicone insulates, so bottoms set a touch slower. The effect is small compared to butter temperature and chilling. Parchment on a light aluminum sheet is the most predictable setup; if you love your mat, add 5 extra minutes of chill to compensate.

    Related troubleshooting: Why Are My Cookies Cakey Instead of Chewy? · Puff Pastry Not Puffing: Lamination Mistakes to Avoid

  • Kouign-Amann Troubleshooting: Leaked Butter and Burnt Sugar, Fixed

    Kouign-Amann Troubleshooting: Leaked Butter and Burnt Sugar, Fixed

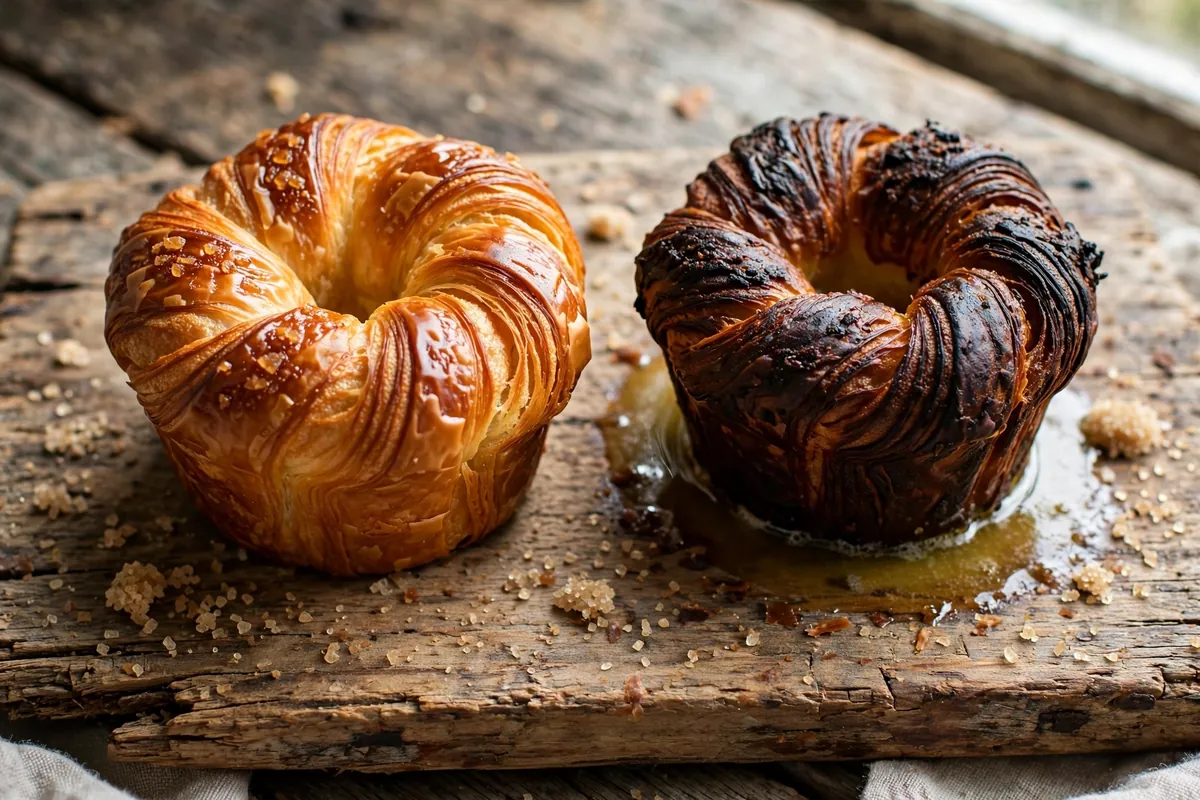
    Kouign-amann is croissant dough’s reckless cousin: the same laminated layers, but with sugar folded in and baked until deeply caramelized. When it works, it’s shattering, buttery, burnished. When it fails, it fails two ways — butter floods out and fries the pastry instead of flaking it, and sugar goes from caramel to charcoal before the center finishes. Both look catastrophic; both come from the same temperature mistakes.

    Quick diagnosis: Your kouign-amann leaked butter because the dough or butter got too warm during folding — the butter melted into the dough instead of staying in layers. It burned because the oven was too hot for sugared dough, or it baked too long. Keep everything at 60–65°F (16–18°C) during lamination, bake at 400–425°F (200–220°C) in snug muffin tins, pull at deep amber — not black.

    My tested baseline: 250g bread flour, 175ml water, 5g salt, 5g instant yeast, kneaded smooth and chilled. Butter block: 225g European-style butter (82% fat) beaten with 25g flour into a pliable slab. One letter fold, chill 45 minutes, second letter fold, chill 45 minutes. Roll to ¼ inch, sprinkle 150g sugar, fold in thirds, roll once more, cut squares, shape into sugared muffin tins. Proof 45–60 minutes cool — barely puffy, not doubled. Bake at 400°F (200°C) 25–30 minutes.

    1. Your lamination was too warm — melted butter can’t make layers

    The master cause behind nearly every kouign-amann failure. Lamination needs butter in distinct, pliable sheets between dough layers. The moment it melts — warm kitchen, rushed folds, hot hands — it absorbs into the dough. No layers, no flakiness, and the absorbed butter floods out in the oven, frying the pastry instead of steaming it apart.

    How to tell: Dense, greasy pastry with no visible layering in the cross-section; a pool of butter in the pan; dough that felt soft and sticky during folding rather than firm and cool.

    The fix: Work at 60–65°F (16–18°C) — butter should bend without cracking or feeling greasy. Chill 45–60 minutes between folds, not 20. In a warm kitchen, chill the dough 15 minutes halfway through rolling. Finger test: the butter should dent cleanly, not smear. (Same temperature discipline as Why Did My Croissants Come Out Dense? Lamination Fixes.)

    2. The sugar did what sugar does — it melted and ran

    Some leaking is normal: sugar liquefies, some escapes, caramelizing into the signature crisp shell. The failure is one of degree — under-chilled dough or overloaded sugar turns runoff into a flood; the pastry sits in boiling syrup, bottom burning while the top stays pale.

    How to tell: A thick pool of dark syrup in the pan; black bottoms with blonde tops; bitter rather than caramel-sweet taste.

    The fix: Sugar the tin, not just the dough — a spoonful in each buttered muffin cup gives the caramelized exterior without overloading the layers. Between folds, use a moderate sprinkle, not a blizzard; 150g total is plenty. Accept a tablespoon of caramel per cup as success. Use light-colored heavy tins — dark tins scorch sugar on contact. (Pan choice matters here — see Glass vs Metal vs Dark Pans: What Changes in Your Bake.)

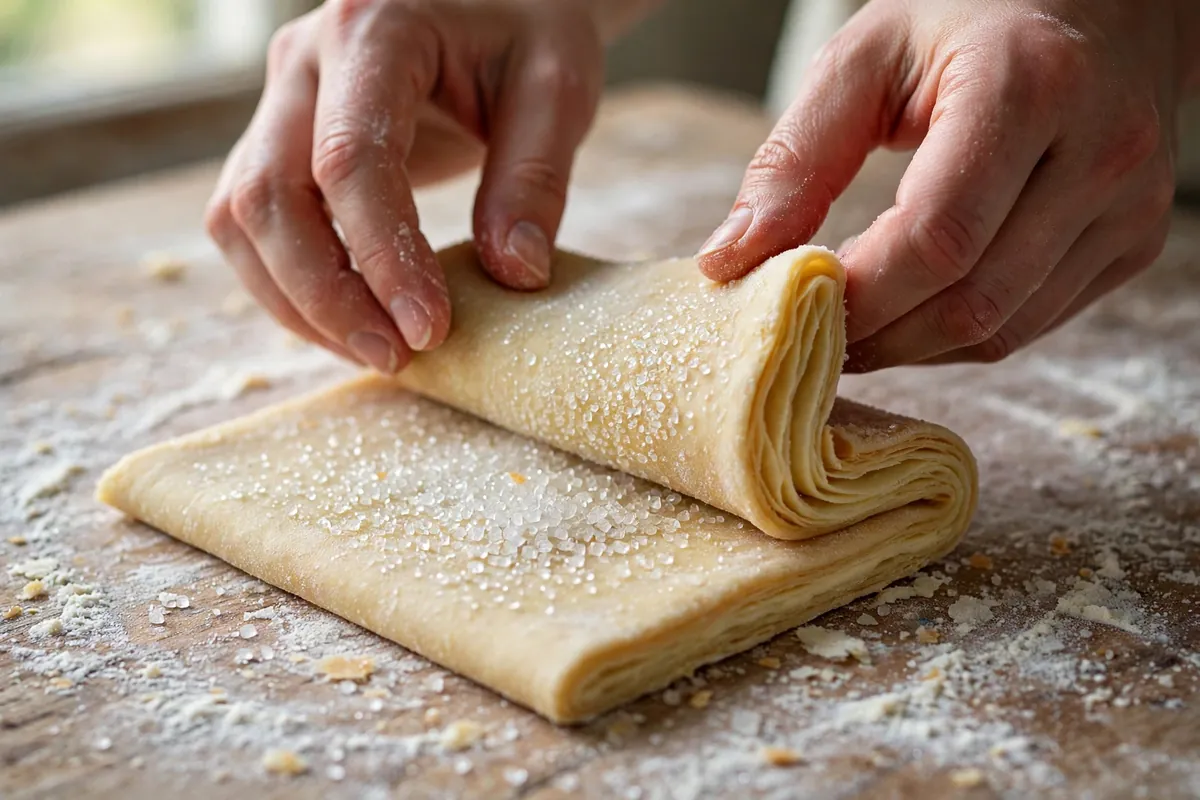
    hands folding sugared laminated dough, butter layers visible at the edge
    hands folding sugared laminated dough, butter layers visible at the edge

    3. Your oven was too hot — sugar burns before dough finishes

    Sugar caramelizes beautifully around 340°F (170°C) and turns bitter-black not far above. Kouign-amann needs a hot oven for steam between the layers, but above 425°F (220°C) the exterior sugar burns before the interior sets: charcoal outside, raw dough inside. Hot-running home ovens are especially punishing — there’s no frosting to hide behind.

    How to tell: Deep brown-to-black exterior at 20 minutes with a doughy center; bitter, acrid taste; smoke from burning sugar runoff.

    The fix: Verify with an oven thermometer and bake at a true 400°F (200°C) — 425°F (220°C) only if your oven runs cool. Start checking at 22 minutes: deep amber, the color of dark honey, not mahogany. If tops race ahead, tent with foil for the last 8–10 minutes. Pull by color, not the clock.

    4. You baked on a flat sheet — they need the hug of a muffin tin

    Traditional kouign-amann bakes as individual rounds in a heavy muffin tin, and the tin does structural work: it contains the melting butter and sugar so they caramelize around the pastry, and its walls support the layers as they rise. On a flat sheet, butter escapes in every direction — the pastry slumps into the runoff and you get greasy discs instead of tall, layered rounds.

    How to tell: Pastries spread wide and flat; butter pooled across the whole sheet; bottoms fried-crisp and greasy rather than caramelized.

    The fix: Use a standard 12-cup muffin tin, buttered and sugared. Fold the corners of each sugared square to the center and place folded-side down — the folds open upward into the classic crown. With only a sheet pan, use muffin rings or ramekins as containment. Never bake one large round unless the recipe was built for it.

    kouign-amann rising in a sugared muffin tin, half baked to show caramelization
    kouign-amann rising in a sugared muffin tin, half baked to show caramelization

    5. You underbaked the center — pale is raw in laminated dough

    The sugared exterior looks done at golden-brown while the interior is still a gummy mass of unseparated dough. Laminated dough needs a full, confident bake to drive moisture from between the layers — pull early and the layers never set, collapsing into doughiness as it cools. Fear of burning causes more underbaking than anything else.

    How to tell: Cross-section shows compressed, doughy layers with no air gaps; raw-flour taste in the center; the pastry deflates minutes after leaving the oven.

    The fix: Bake to deep amber — darker than instinct suggests, lighter than burnt. It should feel light for its size and sound faintly hollow tapped on the bottom. Cool in the tin only 5 minutes — longer and the caramel glues them in — then turn out immediately. Pale bottoms with dark tops? Move to a lower rack next time.

    Frequently asked questions

    Can I still eat kouign-amann that leaked all its butter?
    Yes — safe, just denser and greasier, more like buttery shortbread than laminated pastry. Drain on a rack, dust with sugar to refresh the exterior, serve warm. The flavor is still good; only the texture missed.

    Why did my kouign-amann stick to the pan?
    Caramelized sugar is candy — it glues to bare metal as it cools. Turn them out 5 minutes after baking, while the caramel is fluid. Already stuck? Return the tin to a warm oven 2–3 minutes to re-melt the caramel, then twist each free.

    Can I make kouign-amann dough ahead?
    Yes — laminated dough before sugaring keeps 24 hours refrigerated or a month frozen. Thaw frozen dough overnight in the fridge, then roll, sugar, shape, bake. Don’t shape and hold: the sugar draws moisture and turns layers gummy.

    Is kouign-amann just a sugared croissant?
    Close, but the differences matter: croissant dough has less sugar and more, thinner layers; kouign-amann uses leaner dough, fewer folds, sugar laminated directly in, baked hotter for caramelization. Croissant dough approximates it in a pinch, but the sugar-in-the-folds technique is the real thing.

    Why is my kouign-amann tough instead of flaky?
    Overworked dough. Aggressive kneading of the base or re-rolling scraps built too much gluten and destroyed layer definition. The base dough needs only enough kneading to come together smoothly. (Lamination fundamentals: Puff Pastry Not Puffing: Lamination Mistakes to Avoid.)

    Can I use regular butter instead of European-style?
    You can, but European-style (82%+ fat) laminates better: less water, more pliable, less cracking. With standard butter, work a few degrees cooler and expect slightly less flakiness.

    Related troubleshooting: Why Did My Croissants Come Out Dense? Lamination Fixes · Why Did My Whoopie Pies Spread? Batter and Pan Fixes

  • Why Did My Scones Come Out Hard? Tender Scone Science

    Why Did My Scones Come Out Hard? Tender Scone Science

    You wanted tall, tender, flaky scones. Instead you got hockey pucks — hard, dense, dry, demanding a full cup of tea just to get through. Hard scones are one of the most diagnosable failures in baking: toughness always comes from gluten development, moisture loss, or both, and each has a specific fingerprint.

    Quick diagnosis: Hard scones are almost always overworked dough (cause #1) or overbaked (cause #2): tough and chewy means too much gluten; dry and crumbly-hard means too long in the oven.

    A tender scone is a study in restraint. Unlike bread, where you develop gluten deliberately, scone dough wants barely any gluten at all. The flakiness comes from cold butter melting in a hot oven and leaving pockets behind. Every one of the five causes below is a place where that restraint broke down.

    1. You overworked the dough — gluten did the damage

    This is the number one cause, and it happens earlier than most bakers realize. Scone dough should come together in about 30 seconds of mixing — shaggy, rough, barely holding together, with visible dry patches you pat into submission rather than stir away. The moment you knead, stir vigorously, or re-roll scraps multiple times, you’re building the same gluten network that makes bread chewy. Chewy is wonderful in bread. It’s a death sentence in scones.

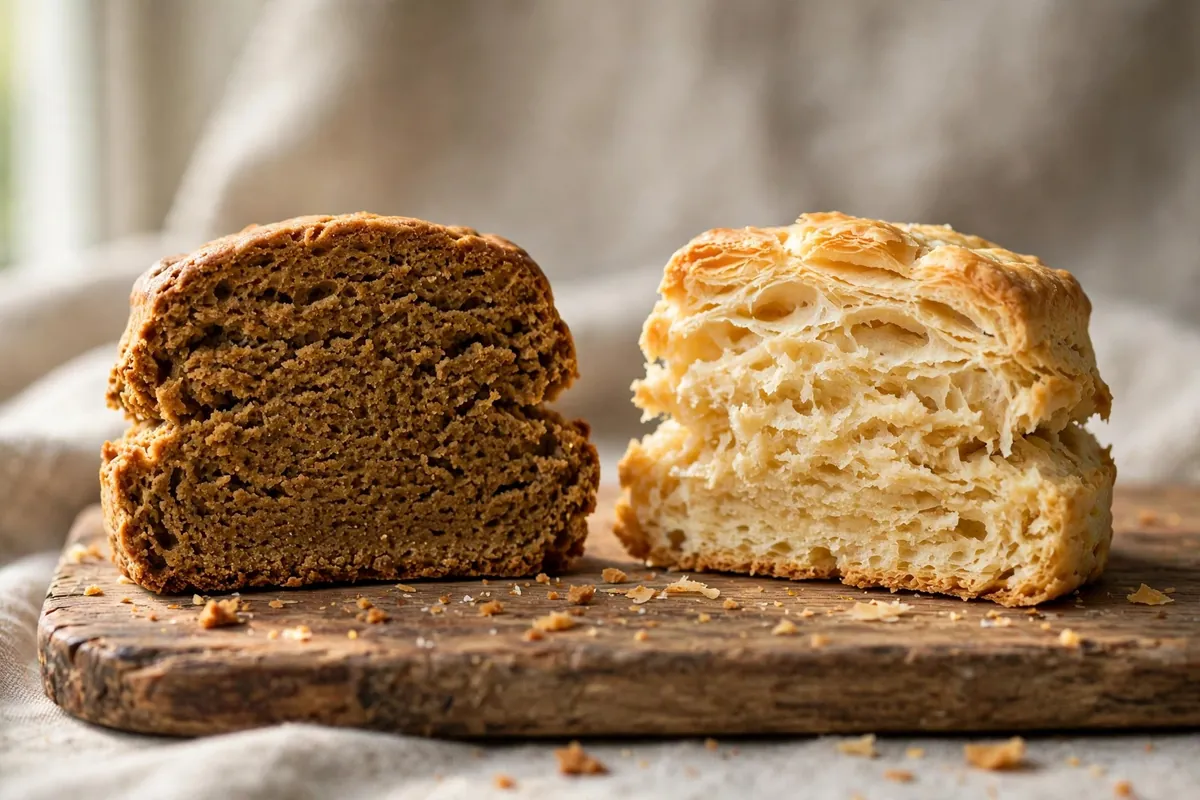
    How to tell: The raw dough felt smooth and elastic rather than rough and shaggy. The baked scones are tough and chewy rather than crumbly — they bend or resist when you bite instead of breaking apart tenderly.

    The fix: Mix until it just comes together, then stop. Use a light hand and a fork or your fingertips, never a mixer on high speed. Pat the dough out once — re-roll scraps exactly once and eat those warm, when tenderness matters less. Treat scone dough like it’s fragile and the texture improves overnight. (The same gluten-tension principle sinks pie crusts — see Pie Crust Shrinking in the Oven.)

    2. They overbaked — even five minutes too long dries them out

    Scones are small and lean, which means they go from done to dry fast. Five extra minutes that would barely matter on a loaf will turn scones to rocks. Most recipes say 15–20 minutes at 400–425°F (200–220°C), but ovens vary, and scones are done when they’re golden on top and the bottoms sound hollow when tapped — not when the timer says so.

    How to tell: The scones are uniformly hard and dry all the way through, with dark bottoms and deeply colored tops — and they were in the oven 20+ minutes.

    The fix: Start checking at 12 minutes. Pull them when the tops are golden and a toothpick comes out clean — the centers will feel slightly soft and set fully as they cool (carryover cooking is real in scones). Use an oven thermometer — most home ovens run 15–25°F off, and a hot oven is a scone killer. My sweet spot is 15 minutes at a true 400°F (200°C).

    3. The butter was too warm — no flakes, no tenderness

    Flaky scones need cold butter in pea-sized pieces distributed through the flour. In a hot oven, each butter piece melts and releases steam, prying the dough apart into layers. If the butter was soft or melted when it went in — warm kitchen, warm hands, butter left out too long — it just soaks into the flour. No pockets, no flakes, no tenderness. You get a dense, hard crumb instead.

    How to tell: The dough felt soft and greasy rather than cool and firm, and the baked scones show a uniform tight crumb with no flaky layers.

    The fix: Keep everything cold. Cut the butter into cubes and freeze them for 15 minutes before mixing. If your kitchen is above 75°F (24°C), chill the mixed dough for 20 minutes before cutting and baking. And work fast — warm hands melt butter. I grate frozen butter on a box grater straight into the flour now — it distributes evenly and stays cold.

    4. Too much flour — measured by the cup, doomed by the scoop

    This one is quiet but deadly. Scooping flour straight from the bag with a measuring cup packs it down and can add 30% more flour than the recipe intends. Extra flour means a drier dough, and dry dough bakes up hard no matter how gently you handle it.

    How to tell: The dough felt dry and stiff, needed extra liquid to come together, or cracked badly when you patted it out. The baked scones are dry and floury-tasting.

    The fix: Weigh your flour: a cup of all-purpose should be 120–125g, but scooped cups routinely hit 150g+. No scale? Spoon flour into the cup and level off — never scoop. This single change fixes more “hard scone” complaints than any technique tweak. (Flour measurement is the same silent killer in cookies — see Why Are My Cookies Cakey Instead of Chewy?.)

    5. The leavening was dead — old baking powder can’t lift

    Scones rely on chemical leavening for their rise — typically 1 tablespoon of baking powder per 2 cups (250g) of flour. Baking powder loses potency within 6–12 months of opening. Dead leavening means no lift, and no lift means a dense, hard puck instead of a tall tender scone.

    How to tell: The scones barely rose — they spread outward instead of upward and stayed squat. Everything else about your technique was fine.

    The fix: Test your baking powder: drop half a teaspoon into hot water. If it fizzes vigorously, it’s alive; if it barely bubbles, replace it. Write the opening date on the can. Measure accurately — too little gives no lift, too much leaves a bitter taste and can collapse the crumb.

    hands patting shaggy scone dough on a floured surface, rough texture visible
    hands patting shaggy scone dough on a floured surface, rough texture visible

    The tender-scone formula that actually works

    After all the failure analysis, here’s what I do now, every time: 250g all-purpose flour (spooned or weighed), 1 tablespoon fresh baking powder, 50g cold butter grated from frozen, 150ml cold heavy cream or buttermilk, one egg, 50g sugar for sweet scones. Mix dry, toss in butter, stir in liquids until just combined, pat once, cut straight down without twisting (twisting seals the edges and kills the rise), bake 14–15 minutes at 400°F (200°C).

    tall golden scones on a baking sheet fresh from the oven, steam rising
    tall golden scones on a baking sheet fresh from the oven, steam rising

    Frequently asked questions

    Can I fix hard scones after baking?
    You can’t un-bake them, but split and toast them — heat softens the crumb — or warm them and serve with clotted cream and jam. Rock-hard ones make excellent bread-pudding base: cube and soak in custard.

    Why are my scones hard on the outside but raw inside?
    Your oven was too hot. The outside set and browned before the inside finished baking. Drop the temperature 25°F and bake a few minutes longer, and verify with an oven thermometer.

    Should scone dough be wet or dry?
    Slightly sticky and shaggy — wetter than you think. A dry, firm dough always bakes up hard; add liquid a tablespoon at a time until it just holds together.

    Is it safe to eat underbaked scones?
    Doughy, wet centers need more time — raw flour isn’t ideal. Fully baked but hard scones are perfectly safe; hardness is texture, not safety.

    Can I make scones ahead and bake later?
    Yes — freeze cut scones on a tray, then bag them; bake from frozen, adding 2–3 minutes. The cold butter gives better flakiness. (Same principle as Can I Freeze Cookie Dough?.)

    Why do my scones spread instead of rising tall?
    Warm butter or a twisted cutter. Keep the butter cold, cut straight down without twisting, and chill cut scones 15 minutes before baking.

    Related troubleshooting: Pie Crust Shrinking in the Oven · Why Are My Cookies Cakey Instead of Chewy? · Why Did My Muffins Turn Out Tough?

  • Why Did My Financiers Come Out Dry? (Brown Butter + Almond Flour Fixes)

    Why Did My Financiers Come Out Dry? (Brown Butter + Almond Flour Fixes)

    Financiers should be the opposite of dry: tiny, buttery, with a moist almond crumb and crisp browned edges. When they come out dry, it’s always a short list of culprits — and the fixes are precise, because there’s nowhere for errors to hide in something this small.

    Quick diagnosis: You overbaked them (most common — they’re small and go from perfect to dry in 2 minutes). Bake at 400–425°F (200–220°C) for just 10–12 minutes until the edges are golden and the centers spring back. Rest the batter at least 1 hour (overnight is better) so the almond flour hydrates, keep the almond-to-flour ratio high, and don’t cook your brown butter into oblivion.

    My tested baseline: 150g almond flour, 150g powdered sugar, 50g all-purpose flour, 5 egg whites (about 150g) at room temperature, 150g amber brown butter, pinch of salt, ½ tsp vanilla. Whisk dries, stir in unwhipped whites, then the brown butter. Rest refrigerated overnight. Bake in buttered molds at 425°F (220°C) for 10–12 minutes.

    1. You overbaked — two minutes is the whole margin

    Financiers are small — a standard mold holds about 40g of batter — which means they bake through fast and dry out faster. The window between “set and moist” and “dry” is roughly two minutes. Most home bakers, nervous about raw centers, give them 15–18 minutes, and by then the crumb’s moisture is gone.

    How to tell: The financiers are uniformly firm with no spring; tops deeply browned rather than golden; they feel light for their size — the moisture baked out.

    The fix: Bake at 425°F (220°C) — hot and fast — and start checking at 10 minutes. Done = edges golden-brown, tops spring back when lightly pressed, tester comes out with moist crumbs. Pull at the first sign; carryover heat finishes the centers. The same pull-it-early discipline saves Madeleines, their small-cake cousins.

    2. You skipped the batter rest — the almond flour never hydrated

    Almond flour is coarse and fatty; it needs time to absorb the egg whites and brown butter. Unrested batter bakes up gritty and dry — rested batter (overnight refrigerated is traditional) bakes up moister, more tender, and more flavorful.

    How to tell: The crumb tastes gritty and dry rather than smooth and moist; the financiers were mixed and baked immediately; the flavor is flat, missing that deep nutty richness.

    The fix: Rest the batter refrigerated at least 1 hour, ideally overnight (up to 24 hours). It will thicken as the almond flour hydrates — that’s the point. Spoon it cold into the molds; cold batter hitting a hot oven gives better rise and crisper edges.

    3. Your almond-to-flour ratio was off — too much wheat flour dries the crumb

    Classic financiers are mostly almond: my baseline uses three times as much almond flour as wheat flour (150g to 50g). Some recipes creep the wheat flour up for structure, but every extra spoonful of all-purpose flour is extra starch competing for moisture — and almond flour’s natural fats are what keep the crumb tender.

    How to tell: The crumb tastes more like a plain butter cake than an almond cake; the texture is bready-dry rather than rich-dry; the recipe used equal or near-equal flour and almond flour.

    The fix: Keep wheat flour at no more than one-third the weight of the almond flour. And use fine almond flour, not coarse meal — coarse particles hydrate poorly and bake up gritty no matter how long you rest.

    4. You overcooked the brown butter — amber, not black

    Beurre noisette is the soul of the financier, but there’s a line between nutty-amber and burnt, and burnt butter brings bitterness plus evaporated water that throws off the batter’s moisture. Butter is about 15% water; browning drives some off, which is fine — but if you take it to dark brown or black, you’ve lost significant moisture and gained bitter milk solids.

    How to tell: The butter smelled acrid rather than nutty; the milk solids at the bottom of the pan are dark brown or black instead of toasted-amber; the financiers taste bitter underneath the dryness.

    The fix: Brown over medium heat, swirling, until it smells like hazelnuts and the milk solids turn toasted-amber — pull it the moment it gets there, since it keeps cooking off the heat. Measure 150g of browned butter into the batter; if a lot evaporated, top up with plain melted butter. Strain out the darkest solids if you overshot slightly.

    brown butter at the perfect amber stage with hazelnut-colored milk solids
    brown butter at the perfect amber stage with hazelnut-colored milk solids

    5. You whipped the egg whites — financiers want them flat

    Some bakers whip the whites “for lightness,” but financiers aren’t foam cakes — their tenderness comes from almond fat and brown butter, not air. Whipped whites bake up airy then collapse into dryness.

    How to tell: The financiers rose high then sank; the crumb is full of large holes and tastes dry and foamy rather than dense-moist; the tops cracked.

    The fix: Stir the whites in unwhipped — lightly beaten with a fork to break them up. Room-temperature whites incorporate more smoothly. Any lift comes from cold batter hitting a hot oven — another reason the overnight rest and hot oven work as a pair.

    6. Wrong pan, wrong heat distribution — dark tins and deep molds

    Financier molds are shallow for a reason: maximum crust, quick bake. Baked in deep muffin tins, the same batter needs longer to set the center, and the extra minutes dry out the crumb. Dark nonstick tins run hotter than light metal and overbrown the bottoms before the centers finish — the classic “burnt bottom, dry middle” financier.

    How to tell: Bottoms are dark brown while tops are pale; centers needed 18+ minutes; the financiers stick or the edges overbaked.

    The fix: Use shallow financier molds; a mini-muffin tin is the closest substitute (check a minute early). Butter molds thoroughly even if nonstick. Fill two-thirds full — overfilled financiers dome, then the domes overbake while centers catch up, the small-cake version of the Tough Muffins problem.

    financiers baking in shallow molds, golden edges just setting
    financiers baking in shallow molds, golden edges just setting

    Frequently asked questions

    Are dry financiers safe to eat?
    Yes — dryness is a texture defect. Just confirm they’re baked through, not browned outside and raw inside (a tester with wet batter means more time — that’s underbaking, a different problem).

    Can I rescue financiers that already baked up dry?
    Yes: brush them while warm with light simple syrup (equal parts sugar and water, boiled and cooled, optionally with rum or orange blossom water). The crumb drinks it up. Serve within a day — syrup-brushed financiers don’t keep as long.

    Why don’t my financiers have the hump like madeleines?
    They shouldn’t — the hump is a madeleine trait. Financiers bake flat with a crisp top crust. If yours domed, the oven was too hot or the molds overfilled. Flat is correct here.

    Can I freeze financiers?
    Beautifully — cool completely, wrap tightly, freeze up to 2 months. Refresh 5 minutes in a 350°F (175°C) oven; the edges re-crisp and they’re nearly as good as fresh.

    Can I make financiers without browning the butter?
    You can, but you lose the defining flavor — at that point it’s a small almond cake, not a financier. The brown butter takes five minutes. Don’t skip the soul of the cake.

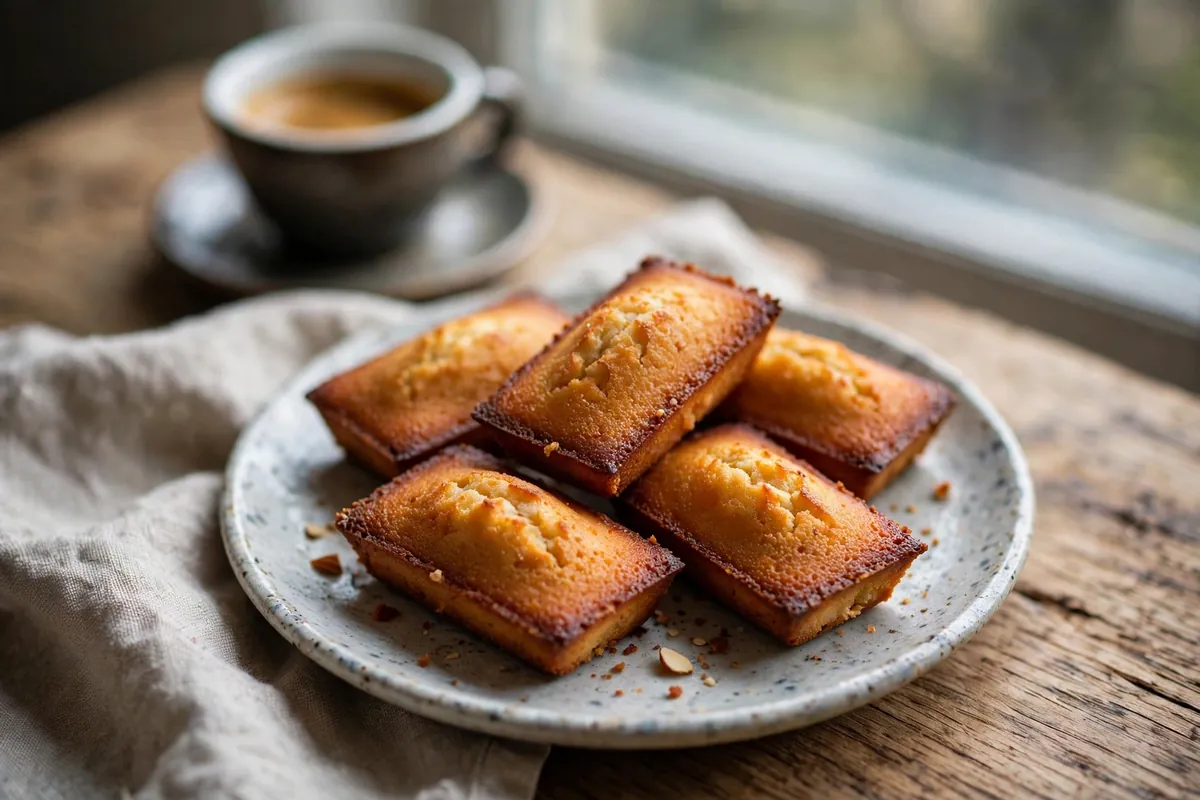
    a plate of perfect financiers with crisp browned edges and golden tops
    a plate of perfect financiers with crisp browned edges and golden tops

    Related troubleshooting: Madeleines Lost Their Hump · Why Are My Muffins Tough? · Why Did My Pound Cake Crack?

  • Why Did My Éclairs Collapse? Choux Pastry Science

    Why Did My Éclairs Collapse? Choux Pastry Science

    Choux pastry is the great heartbreaker of baking: it asks for nothing but water, butter, flour, and eggs, it puffs like a miracle in the oven — and then it collapses into a sad, flat strip if any single step was wrong. I’ve watched perfect-looking éclairs deflate on the cooling rack, and every collapse traces back to the same science. Understand how choux actually works and the failures become predictable — and preventable.

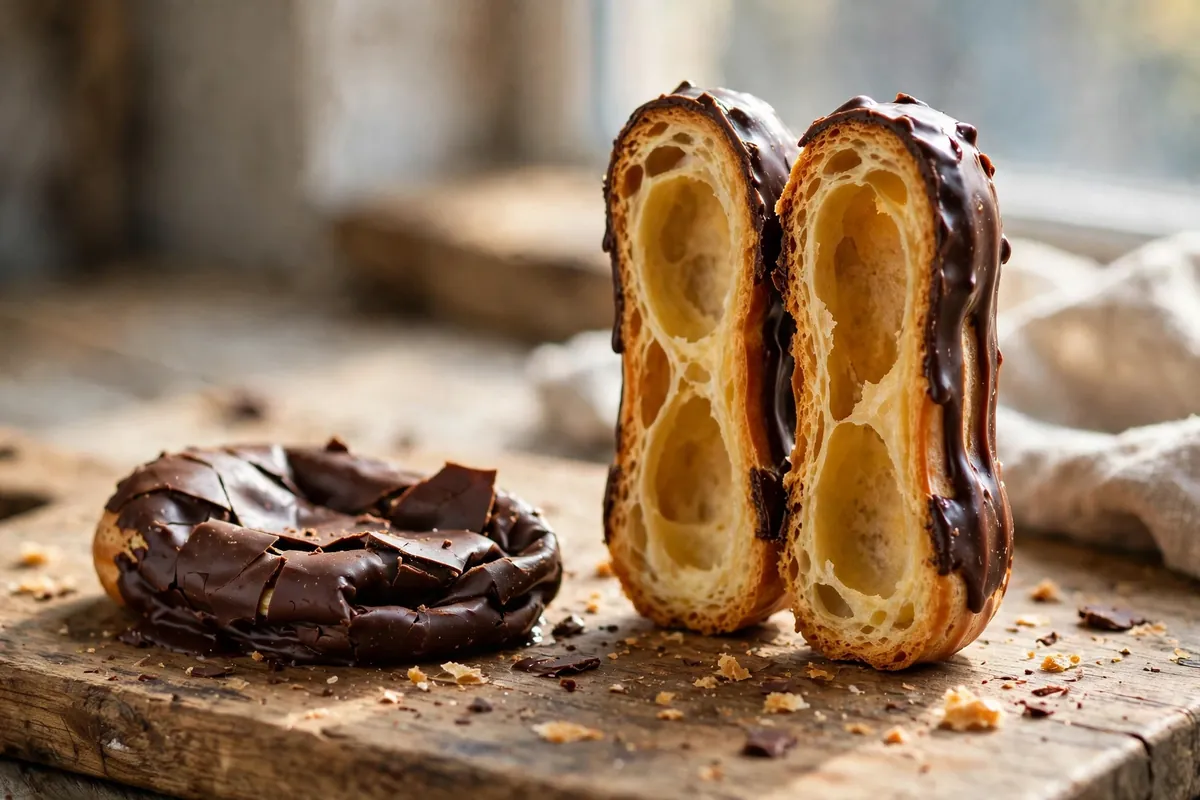
    Quick diagnosis: Collapsed éclairs were underbaked 9 times out of 10. Choux must bake until fully dried and deeply golden — pull them when they “look done” and the steam trapped inside condenses as they cool, collapsing the shell. If your éclairs were pale gold and soft when you pulled them, start with cause #1.

    Here’s the science in one paragraph: choux has no chemical leavener and no yeast. The rise is pure steam — water in the dough vaporizes in a hot oven and inflates the paste like a balloon, while egg proteins coagulate and starches gelatinize into a rigid shell. The shell must be FULLY set and dried before you take it out. Pull early and the steam condenses as it cools, the wet walls cave in, collapse.

    1. Underbaked — pulled before the shell was dry

    The number one cause, and it’s not close. Choux looks done before it is done: golden outside, puffed and proud — but inside, the walls are still moist and flexible. Out of the oven’s heat, the trapped steam cools and condenses, the wet walls can’t hold their shape, and down it comes. This is the collapse most bakers experience.

    How to tell: The éclairs were pale-to-medium gold rather than deep golden brown, felt light but slightly soft (not crisp and firm), and may have deflated within minutes of leaving the oven. If you broke one open, the interior walls looked moist or eggy rather than dry.

    The fix: Bake longer and hotter than feels safe. Full-size éclairs need 30–35 minutes at 400–425°F (200–220°C) — until deeply golden brown all over and firm to the touch. The color is your doneness signal: pale gold = wet inside; deep amber = dry and set. When you think they’re done, give them 5 more minutes. Then turn the oven OFF, crack the door, and let them dry 10 minutes in the cooling oven — this finishes the interior without over-browning. A properly baked éclair sounds hollow when tapped on the bottom, like a good loaf of bread (same principle: How to Tell When Bread Is Done).

    2. Opened the oven door too early

    Every peek costs you. Opening the door in the first 20 minutes drops the oven temperature by 25–50°F and — worse — releases the steam that’s actively inflating the shells. The structure sags mid-build and never recovers; even if it re-puffs slightly, the walls are compromised.

    How to tell: You checked on them “just once” around the 15-minute mark and they looked slightly deflated afterward, or never reached full height.

    The fix: Don’t open the door for the first 25 minutes, full stop. Use the oven light and the window. Choux is one of the few pastries where peeking genuinely ruins the result — the steam environment is structural, not incidental.

    3. Too much egg — the batter was too wet

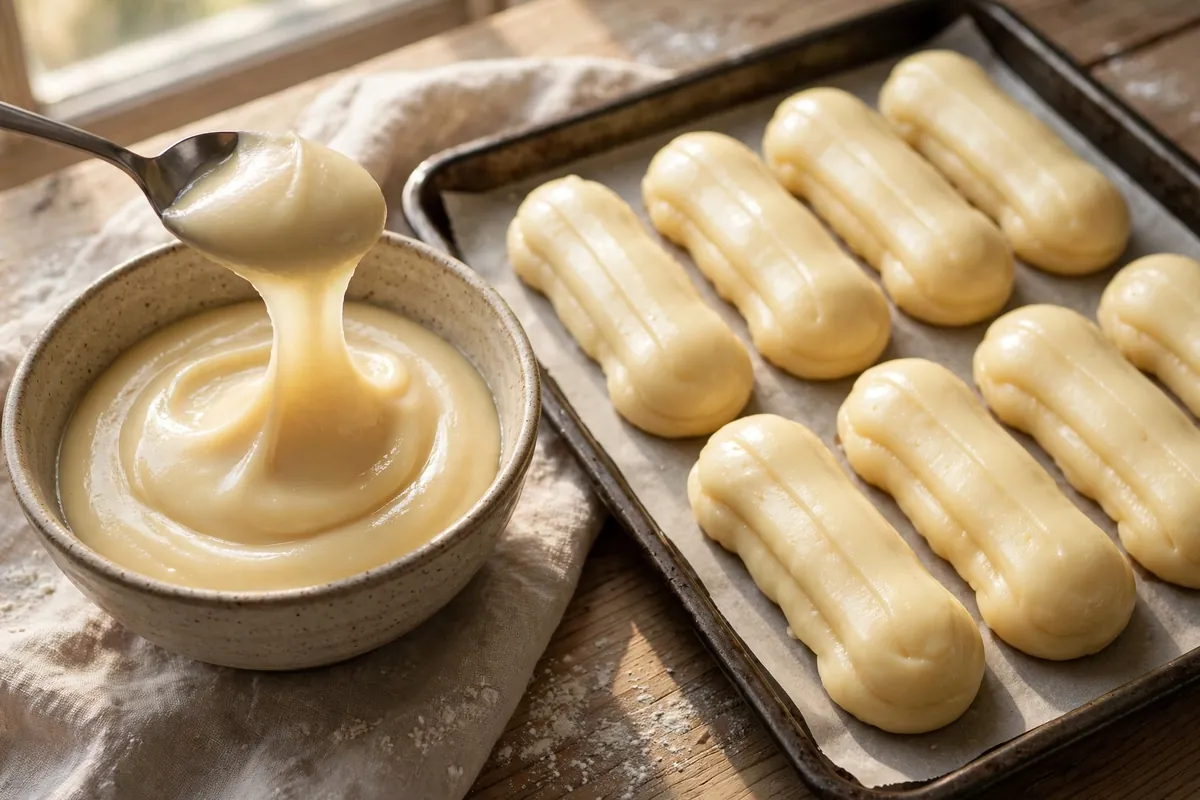
    Choux paste should be smooth, glossy, and pipeable — it should hold a soft peak that slowly folds over (the classic “V” shape when you lift the spoon). Too much egg makes a slack, runny batter that spreads instead of piping tall, and the excess moisture means even more steam to drive off — extending the bake past what the structure can survive.

    How to tell: The piped logs spread wide and flat on the tray instead of holding plump finger shapes. The batter looked more like thick pancake batter than paste.

    The fix: Add the eggs gradually — beaten, in 3–4 additions — and stop when the paste reaches the right consistency, even if you have egg left over. Egg sizes vary and flour absorbs differently; the recipe’s “4 eggs” is approximate, but the V-shape test is exact. This is the single most important choux skill: judge the batter, not the egg count. (Eggs do four jobs in batter — structure, leavening, moisture, flavor — and choux leans on all of them: Eggless Cake That Actually Works explains the framework.)

    choux paste piped into éclair logs on a tray, showing the V-shape test with a lifted spoon
    choux paste piped into éclair logs on a tray, showing the V-shape test with a lifted spoon

    4. Too little egg — not enough steam or structure

    The mirror failure. Too little egg means too little water to convert to steam (weak puff) and too little protein to build strong walls (fragile shell). The result: éclairs that rise half-heartedly and collapse even when fully baked, because the walls were never strong enough.

    How to tell: The batter was stiff, dry, and hard to pipe — it tore or held rigid peaks instead of flowing. The baked shells are thick-walled and dense rather than thin and crisp.

    The fix: Same discipline as cause #3 from the other direction: add beaten egg gradually until the V-shape. If you’ve already piped a too-stiff batch, you can actually rescue it — scrape it back into the bowl, beat in more egg a tablespoon at a time until the consistency is right, and re-pipe. Choux is forgiving before it hits the oven.

    5. Didn’t pierce to release steam

    Even perfectly baked choux traps residual steam inside the hollow shell. As it cools, that steam condenses — and the resulting moisture softens the interior walls from the inside out. Crisp out of the oven, soggy and collapsed an hour later: that’s trapped steam.

    How to tell: The éclairs looked magnificent coming out, then softened and sagged as they cooled. The interiors feel damp.

    The fix: Pierce each shell as soon as it’s out of the oven — a small slit or hole in the side or bottom with a paring knife or skewer lets the steam escape. Then return them to the turned-off oven with the door cracked for 10 minutes to finish drying. This two-step (pierce + dry) is what professional bakeries do, and it’s the difference between éclairs that stay crisp for hours and ones that go limp.

    6. The panade was undercooked — the flour never properly gelatinized

    Before the eggs go in, choux starts as a panade: water/milk and butter brought to a boil, flour dumped in and stirred over heat until it forms a smooth ball that pulls away from the pan with a thin film on the bottom. That cooking step gelatinizes the starch — pre-swollen starch absorbs the eggs properly and builds stronger walls. An undercooked panade (pulled off heat the second it came together) makes a weaker paste.

    How to tell: The paste looked slightly lumpy or the eggs seemed to “slide” rather than absorb when you beat them in. You cooked the flour mixture less than 2 minutes.

    The fix: Cook the panade 2–3 minutes over medium heat, stirring constantly, until it forms a cohesive ball and leaves a distinct starchy film on the pan bottom. That film is your visual proof of gelatinization. Then — critical — let it cool 5 minutes before adding eggs, or the heat scrambles them (bits of cooked egg in choux = weak spots in the walls).

    choux paste ball in a saucepan with the starchy film visible on the pan bottom
    choux paste ball in a saucepan with the starchy film visible on the pan bottom

    Frequently asked questions

    Can I re-bake collapsed éclairs?
    Sometimes. If you catch it within minutes, return them to a hot oven (400°F / 200°C) for 5–10 minutes — residual moisture may re-steam them. Once fully cooled and set flat, no: split them, fill anyway, and call them éclairs au plat.

    Why are my éclairs hollow but soggy inside?
    Under-dried, not under-risen. Pierce + oven-dry (cause #5), bake to deep golden, and fill within a few hours of serving — not the night before.

    Can I make choux ahead of time?
    The baked shells: yes — freeze unfilled shells up to a month, re-crisp 5 minutes at 350°F (175°C) from frozen. The raw paste: pipe and freeze on the tray, then bake from frozen adding 5–8 minutes. Don’t refrigerate raw piped choux overnight — the surface dries and cracks.

    Is it safe to eat slightly underbaked éclairs?
    Yes — the eggs are fully cooked by the time the exterior sets. The issue is structural (and a wet interior tastes unpleasant), not safety.

    Why did my cream puffs work but my éclairs collapse?
    Same paste, different geometry. Éclairs are long with more surface area and thinner walls relative to their volume — they dry faster outside but trap more interior moisture, so they’re less forgiving of underbaking. If your puffs work, bake éclairs 5 minutes longer than you think.

    Can I use a different flour?
    Bread flour makes slightly sturdier, chewier shells (more protein = stronger walls); all-purpose is the standard and gives the classic crisp-tender shell. Don’t use cake flour — too little protein for the walls. (When flour choice matters most: Bread Flour vs All-Purpose: When It Actually Matters.)

    Related troubleshooting: Why Did My Cake Sink in the Middle? · Puff Pastry Not Puffing · How to Tell When Bread Is Done

  • Cannoli Troubleshooting: Soggy Shells, Leaky Filling

    Cannoli Troubleshooting: Soggy Shells, Leaky Filling

    Cannoli has exactly one unforgiving rule, and it explains nearly every failure: the shell and the filling are enemies until the moment of serving. The shell wants to stay shatteringly crisp; the filling is wet and shares its moisture with everything it touches.

    Quick diagnosis: Fill cannoli to order — never more than 1–2 hours before serving (most common fix). Drain whole-milk ricotta 8–24 hours in the fridge until it holds its shape on a spoon, fry shells at 360°F (182°C) until deeply golden, and store shells airtight at room temperature completely separate from the filling.

    My tested baseline: shells from 250g flour, 30g sugar, 30g cold butter, 1 egg, 60ml Marsala, pinch of salt — rested 1 hour, rolled to 2mm, wrapped on tubes, fried at 360°F (182°C) about 2 minutes until golden. Filling: 500g whole-milk ricotta drained overnight, 100g powdered sugar, vanilla, cinnamon, 60g mini chocolate chips. Fill from both ends just before serving.

    1. You filled them too early — moisture migration is relentless

    This is the number one cannoli failure worldwide. Ricotta filling is roughly 70% water, and the moment it touches the shell, osmosis starts: water moves into the crisp pastry, starch softens, and within 2–3 hours your shattering shell is chewy. Refrigeration slows it but doesn’t stop it — and the fridge’s humidity attacks the shell from the outside too.

    How to tell: The cannoli were crisp when filled and soft by serving time; the shell bends instead of cracking; the filling looks fine but the pastry is leathery.

    The fix: Fill to order — pipe the filling in no more than 1–2 hours before serving; 30 minutes is ideal. In Sicilian pasticcerie, shells sit in the case and get filled while you watch. That’s not theater, it’s engineering.

    2. The shells weren’t crisp enough to start with — frying temperature and thickness

    A shell that’s pale, thick, or under-fried starts its short life already halfway to soggy. Proper cannoli shells are rolled thin (about 2mm — you should almost see through the dough), fried at a true 360°F (182°C), and come out deeply golden with a blistered surface. That blistered, fully-dehydrated crust is what resists moisture.

    How to tell: The shells were never shatteringly crisp even fresh from the fryer; they’re pale blonde rather than golden; they feel thick and bready when you bite them.

    The fix: Roll thinner than feels safe — the dough puffs and blisters in the oil. Keep the oil at a true 360°F (182°C) and fry 2–3 shells at a time so the temperature doesn’t crash (the same discipline as Churros, where oil heat makes or breaks the crust). Drain upright on a rack, not on paper towels where steam gets trapped.

    3. Your ricotta wasn’t drained — the filling was water from the start

    Supermarket ricotta sits in whey, and even “drained” tubs weep liquid. Undrained ricotta makes a filling that’s soupy enough to leak out the ends and soak the shell from the inside in minutes. No shell, however perfectly fried, survives a wet filling.

    How to tell: Liquid pools in the filling bowl; the filling slumps off a spoon instead of holding a peak; whey leaks from the cannoli ends onto the plate.

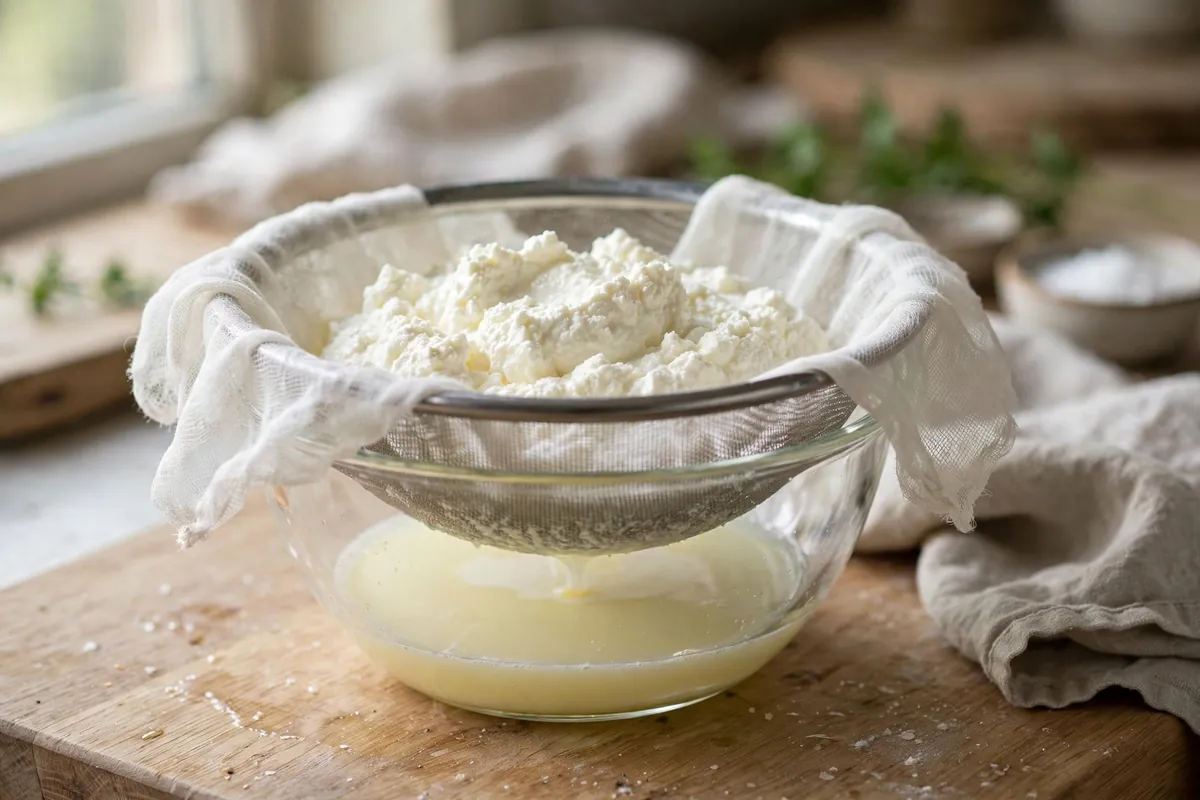
    The fix: Drain 500g of whole-milk ricotta in a cheesecloth-lined sieve over a bowl, refrigerated, 8–24 hours. You’ll be shocked how much whey comes out — often 100ml+. The drained ricotta should hold its shape on a spoon. Then beat in powdered sugar, not granulated: it dissolves completely and its cornstarch absorbs residual moisture.

    ricotta draining in a cheesecloth-lined sieve over a bowl with collected whey
    ricotta draining in a cheesecloth-lined sieve over a bowl with collected whey

    4. The filling broke or wept — overmixed or over-sugared

    Ricotta filling can go from thick to weepy if it’s beaten aggressively (the curds break and release whey) or if granulated sugar is used (it draws water out of the ricotta over time — the same osmosis that softens the shell). A filling that was perfect at noon can be leaking by dinner.

    How to tell: The filling looked good when made but wept liquid after sitting; it’s grainy and wet rather than smooth and thick.

    The fix: Fold, don’t beat. Stir the sugar, vanilla, and cinnamon into the drained ricotta gently, just until combined, then fold in the chips. Make the filling the day you serve it and keep it refrigerated. Fill the shell completely from both ends — air pockets inside become soggy spots.

    5. You stored them assembled — the overnight cannoli mistake

    Filled cannoli do not keep — overnight in the fridge, the shell absorbs moisture from the filling inside and the humid air outside. By morning you have a soft tube of sweet cheese. Same moisture-barrier lesson as Soggy Bottom Pie.

    How to tell: Yesterday’s crisp cannoli are today’s sad, soft ones; the shells taste stale-damp rather than fried-crisp.

    The fix: Store components separately, always. Shells: airtight at room temperature, up to 5 days. Filling: refrigerated, sealed, up to 3 days. Assemble within 2 hours of serving.

    6. The chocolate lining — the professional defense

    If you need filled cannoli to survive a long party, brush the inside of each cooled shell with melted dark chocolate and let it set — a moisture barrier that buys hours of crispness (and tastes excellent). Melt it carefully using the dry-kitchen protocol in How to Fix Seized Chocolate — one drop of water in the brush bowl would be an ironic disaster.

    How to tell you need this: Even fill-to-order cannoli soften within the hour; you live somewhere humid; you’re serving outdoors.

    The fix: The chocolate lining adds 10 minutes of work and transforms the holding time. Use dark chocolate, thin coat, fully set before filling. Your guests will think it’s just delicious — which it is.

    hands brushing melted chocolate inside a cooled cannoli shell
    hands brushing melted chocolate inside a cooled cannoli shell

    Frequently asked questions

    Are soggy cannoli safe to eat?
    Yes — sogginess is a texture failure. The one safety note: ricotta filling is perishable, so filled cannoli shouldn’t sit at room temperature more than 2 hours.

    Can I re-crisp cannoli shells that went soft?
    Empty shells, yes: 10 minutes in a 300°F (150°C) oven on a rack drives the moisture out. Filled cannoli, no — re-crisp the shells, then fill and serve immediately.

    Can I bake cannoli shells instead of frying?
    You can, but they won’t be cannoli shells — more like crisp pastry tubes. The blistered, shattering texture comes from deep frying. If you bake them, the fill-to-order rule matters even more.

    Why did my shells blister unevenly or burn on one side?
    The oil temperature was off or the shells weren’t fully submerged and turned. Keep it at 360°F (182°C), don’t crowd the pot, and turn each shell once. Dark spots also come from sugar in the dough caramelizing — that’s flavor, not failure, as long as it’s golden-brown, not bitter-black.

    Sheep’s milk vs. cow’s milk ricotta — does it matter?
    Enormously, and it’s the single biggest upgrade available. Sheep’s milk ricotta is naturally thicker, drier, sweeter, and richer — it’s what Sicilian pasticcerie use, and it needs far less draining. If you can find it, use it; your filling problems mostly disappear.

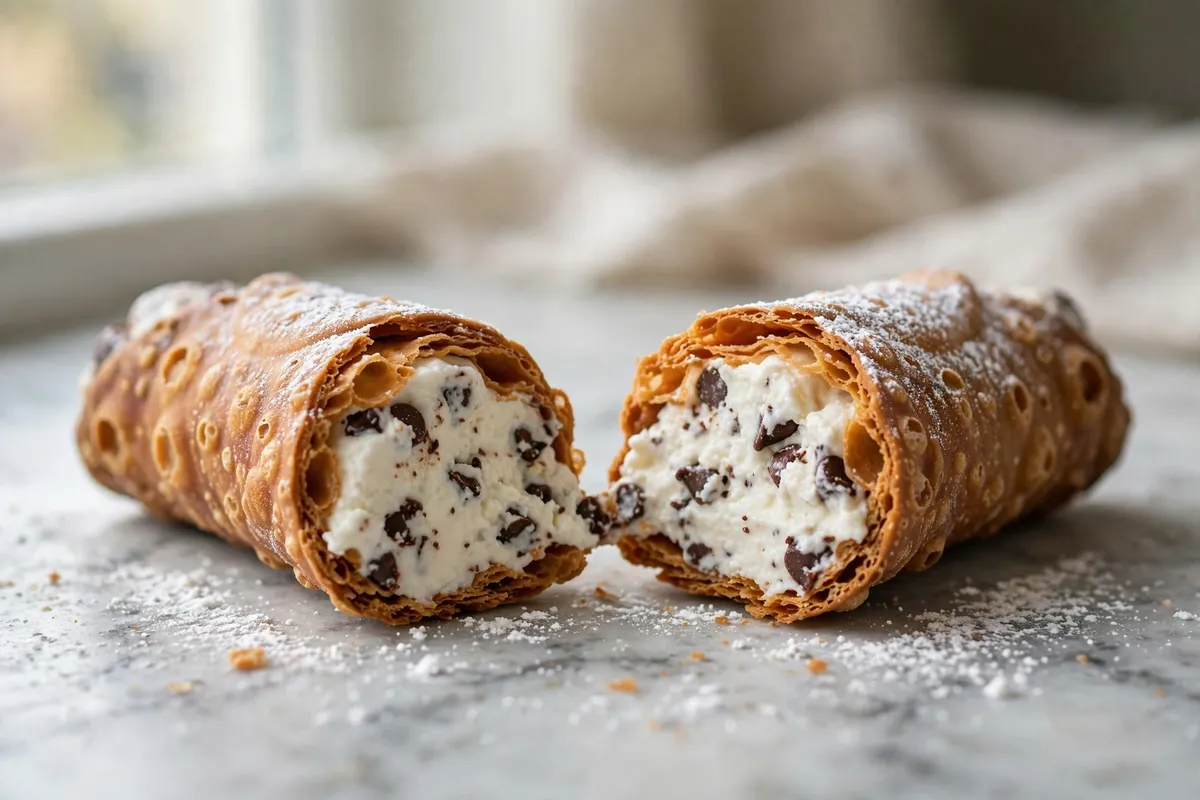
    a platter of freshly filled cannoli with pistachio-dipped ends
    a platter of freshly filled cannoli with pistachio-dipped ends

    Related troubleshooting: Soggy Bottom Pie: Causes and Fixes · Churros Troubleshooting · Choux Pastry Collapse: Why Your Éclairs Fell

  • Why Did My Rugelach Unravel? Cream Cheese Dough Fixes

    Why Did My Rugelach Unravel? Cream Cheese Dough Fixes

    Neat crescents went in; flat open spirals with oozing filling came out. Unravelling is temperature and tension: dough too warm, filling too wet, or roll too loose. All three are fixable, and the fixes stack.

    Quick diagnosis: Rugelach unravels because the dough got too warm (chill discipline is everything), the filling was too wet, or the crescents were rolled too loosely. Chill the dough 2+ hours, chill shaped rugelach 15–20 minutes before baking, roll tight, and bake seam-side down.

    My baseline: 225g unsalted butter and 225g full-fat cream cheese (both cool room temp), 250g flour, ¼ teaspoon salt, tablespoon of sugar optional. Mix just until combined — overmixing develops gluten that fights your rolling. Divide into 3–4 disks, wrap, chill at least 2 hours or overnight. That chill is the cookie’s structural foundation.

    1. The dough was too warm — chill discipline is everything

    Cream cheese dough is roughly half butter and cream cheese — both soften fast at room temperature. Warm dough is slack: it stretches instead of rolling, won’t hold a spiral, and the fat melts in the oven before the flour sets — the crescent relaxes and lies flat.

    How to tell: Dough felt soft and floppy while rolling, stuck to the counter; baked cookies spread flat, spiral opened like a party blower.

    The fix: Chill disks 2 hours minimum; overnight is better. Work one disk at a time. Above 75°F (24°C), chill the filled log 15 minutes before slicing — and chill the shaped crescents on the tray 15–20 minutes before baking. Cold fat hitting hot heat sets the structure before it melts. (Same principle as Why Did My Scones Come Out Hard?.)

    2. The filling was too wet — steam is a crowbar

    Wet filling turns to steam, and steam pressure pushes the spiral open from inside. Thick jam is the classic offender — mostly water and sugar, it liquefies at baking temperature and floods the layers apart. Chocolate spread does the same.

    How to tell: Filling leaked in sticky puddles, cookies taste fine but look exploded, layers separated with gaps.

    The fix: Thin filling is the golden rule. Jam: a translucent layer, 2–3mm max, thick jam not runny preserve. Cinnamon-sugar: 1–2 teaspoons melted butter per disk, light sprinkle. Chocolate: chopped chocolate or mini chips, not spread — they melt in place. Always leave a ½-inch clean border; that bare strip seals the roll.

    3. The roll was too loose — tension is structure

    Loose rolling leaves air gaps between layers — that’s where unravelling starts. Heat expands the trapped air, soft fat lubricates, the spiral unwinds. Tight rolling eliminates gaps so layers bake into each other.

    How to tell: Baked cookies show separated layers with visible space between them, like a loosely wound cinnamon roll.

    The fix: Roll wide-end to point with gentle constant tension — like a yoga mat. Dab the point with water or beaten egg, tuck it under, place seam-side down. Slice with a sharp knife or floss; a dull blade loosens the roll.

    4. The oven was too cool — the fat melted before the structure set

    Rugelach needs 350°F (175°C), verified. In a cool oven, butter and cream cheese melt while the flour is still soft — the crescent slumps before the starches set. The quiet cause that gets blamed on rolling.

    How to tell: Cookies spread wide and flat, pale bottoms, full 25 minutes without real color.

    The fix: Verify 350°F (175°C) — many ovens run 15–25°F cool, exactly the margin that ruins rugelach. Bake middle rack 20–25 minutes until deeply golden; pale means underbaked and unset. Don’t open the door for the first 15 minutes.

    5. The dough was overworked — gluten springs back

    Mixing past “just combined” develops gluten — and gluten is elastic. It resists rolling, springs back during shaping, and unwinds itself in the oven. Overworked dough feels bouncy, not pliable.

    How to tell: Dough kept shrinking back as you rolled, felt elastic; baked cookies tough as well as unravelled.

    The fix: Mix only until no dry flour remains. If the dough fights rolling, chill 20 minutes — cold relaxes gluten. Re-roll scraps once. If it’s springing back, it needs rest, not force. (See Why Did My Pie Crust Shrink?.)

    hands tightly rolling a rugelach wedge from the wide end toward the point, filling visible
    hands tightly rolling a rugelach wedge from the wide end toward the point, filling visible
    shaped rugelach crescents chilling on a parchment-lined tray, about to go into the oven
    shaped rugelach crescents chilling on a parchment-lined tray, about to go into the oven

    The shape-and-bake sequence that doesn’t unravel

    The full sequence: cold dough, thin filling, tight roll, point tucked under, seam-side down, chill shaped tray 15–20 minutes, bake at verified 350°F (175°C) 20–25 minutes until deeply golden. Egg wash and coarse sugar optional. Miss one step and you might survive; miss two and the oven tells on you.

    Frequently asked questions

    Can I fix rugelach that already unravelled?
    Not after baking — but serve them anyway; it’s purely cosmetic. Call them “rustic.” Next batch: the chill-and-tight-roll sequence above.

    Can I freeze rugelach?
    Yes, at two stages. Freeze the dough disks up to a month (thaw overnight in the fridge). Or freeze the shaped, unbaked crescents on a tray, then bag them — bake from frozen at 350°F (175°C), adding 3–5 minutes. The frozen state actually helps them hold their shape. (Same freeze-first advantage as Can I Freeze Cookie Dough?.)

    Why is my rugelach dough so sticky?
    Warm kitchen, over-softened butter/cream cheese, or too little flour. Chill 30 minutes, dust lightly when rolling. Work in a tablespoon of flour max if still sticky.

    Can I use low-fat cream cheese?
    Don’t. Low-fat cream cheese has more water and stabilizers, which makes the dough sticky, wet, and prone to spreading — exactly the unravelling you’re trying to fix. Full-fat block cream cheese only, never the tubbed spreadable kind.

    Why did all the filling leak out?
    Too much or too wet filling, no sealed border. Thin layer, thick jam, ½-inch border, tight roll, seam down. Trick: stir a teaspoon of cornstarch into ¼ cup jam and warm until thickened.

    How do I get the classic crescent shape?
    Cut each dough disk into 12 wedges like a pizza. Place a small mound of filling (not a spread layer) near the wide end of each wedge, roll toward the point, then curve the ends slightly inward as you set it seam-side down. Chilling before baking locks the curve.

    Related troubleshooting: Why Did My Cinnamon Rolls Unravel? · Why Is My Puff Pastry Not Puffing? · Why Did My Pie Crust Shrink in the Oven?

  • Why Did My Croissants Come Out Dense? Lamination Fixes

    Why Did My Croissants Come Out Dense? Lamination Fixes

    You did the folds. You waited through the rests. You shaped those crescents with real hope — and out of the oven came something closer to a dinner roll than a croissant. Dense, bready, no shattering layers, no honeycomb inside. The fix is almost always in the lamination: croissants are an engineering project, and dense crumb means the butter layers stopped being layers somewhere along the way.

    Quick diagnosis: Dense croissants come down to butter temperature more than anything else. Butter that was too cold shattered into shards instead of sheeting into layers; butter that was too warm melted straight into the dough. If your butter cracked and broke during roll-out, start with cause #1. If the dough felt greasy and soft, start with cause #2.

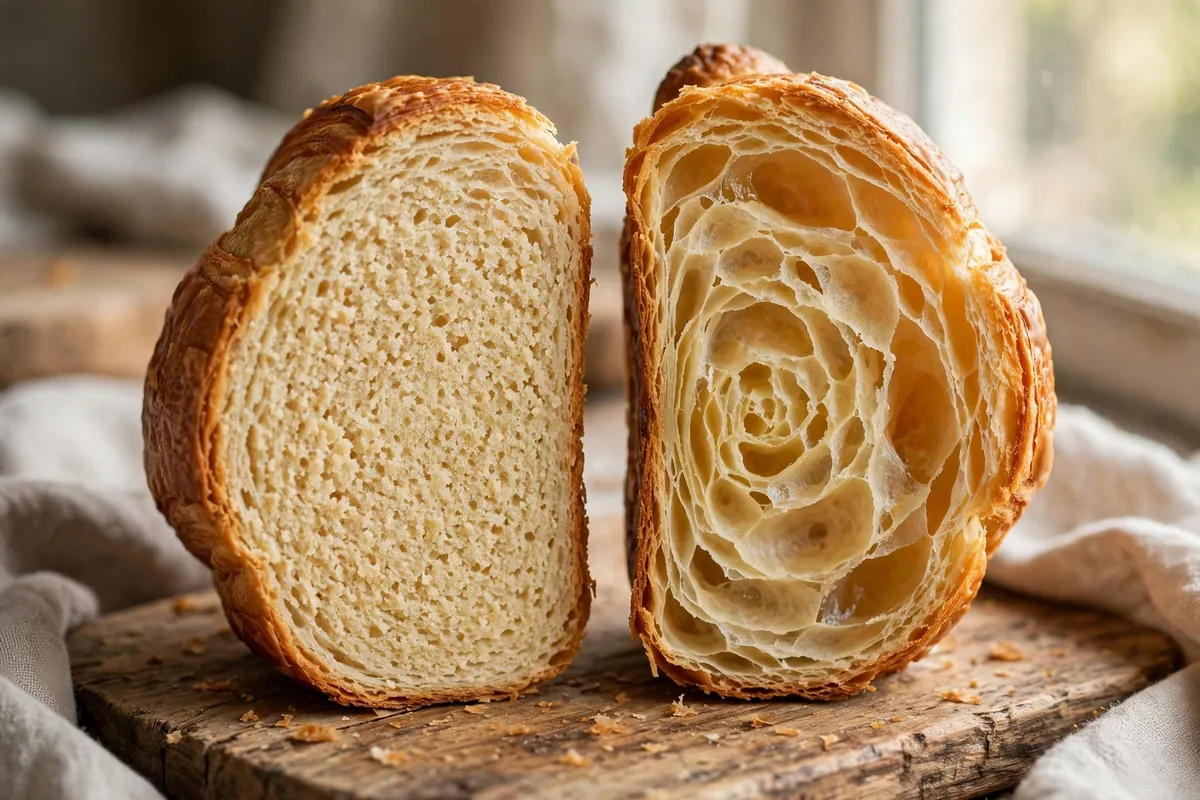
    A croissant is 27 (or more) alternating sheets of dough and butter. In a hot oven, water in the butter flashes to steam and each butter layer pries the dough sheets apart — that’s the flake. Density means those layers merged into one mass before the steam ever got its chance.

    1. The butter was too cold — it shattered instead of sheeting

    This is the number one killer, and it’s counterintuitive: you’d think cold butter is safe butter. But lamination needs the butter to roll out with the dough as one pliable sheet. Butter straight from the fridge (around 38°F / 3°C) is brittle — under the rolling pin it cracks into shards and chunks instead of spreading into a continuous layer. Those shards poke through the dough, the layers never form properly, and you get bready density.

    How to tell: During the lock-in or the folds, you heard cracking, and you could see or feel hard lumps of butter through the dough. The dough surface looked lumpy rather than smooth.

    The fix: Condition the butter block first. Take cold butter, place it between parchment, and beat it with a rolling pin until it’s pliable — it should bend without snapping, around 60°F (16°C), cool to the touch but flexible like modeling clay. It must match the dough’s consistency: if the dough is soft and the butter is a brick (or vice versa), they won’t roll together. Temper the butter block properly and the layer count visibly improves on the very next batch.

    2. The butter melted into the dough — too warm at some stage

    The mirror image. If the butter gets too warm at any point — during a fold, during shaping, during proofing — it melts and absorbs into the dough. Once butterfat soaks into the flour, there are no layers left to separate; you’ve made enriched bread dough, and enriched bread dough bakes up dense. This is the greasy-dough failure.

    How to tell: The dough felt soft, slack, and greasy rather than firm and cool. Butter may have visibly oozed during rolling or proofing. The baked croissants taste rich but have no flake.

    The fix: Keep everything cool between active steps. Rest the dough 30–60 minutes in the fridge between each turn — not the freezer (which sets the outside while the center stays warm), the fridge. If your kitchen is above 75°F (24°C), work in shorter bursts and chill more often. And proof at 75–80°F (24–27°C) max: warmer proofing melts the butter before the oven ever sees it. A proofing box or an oven with just the light on is ideal; a hot summer kitchen is croissant enemy number one.

    3. You skipped (or shortened) the rests — the gluten fought back

    Each fold stretches the gluten network. Roll again immediately and the gluten is still tense — it springs back, resists, and tears instead of extending smoothly. Torn dough means torn layers, and torn layers mean the butter squeezes out through the rips instead of staying in its sheet.

    How to tell: The dough kept shrinking back as you rolled, fought you at every pass, or tore visibly. You may have rolled harder to compensate, which only made it worse.

    The fix: Respect the rests: 30 minutes minimum in the fridge between turns, 60 is better. Three single (letter) folds is the standard home formula — that gives 27 layers, plenty. If the dough resists at any point, stop, wrap, chill 20 minutes, and come back. Patience here is structural, not optional. (The same gluten-tension principle ruins pie crusts — see Pie Crust Shrinking in the Oven.)

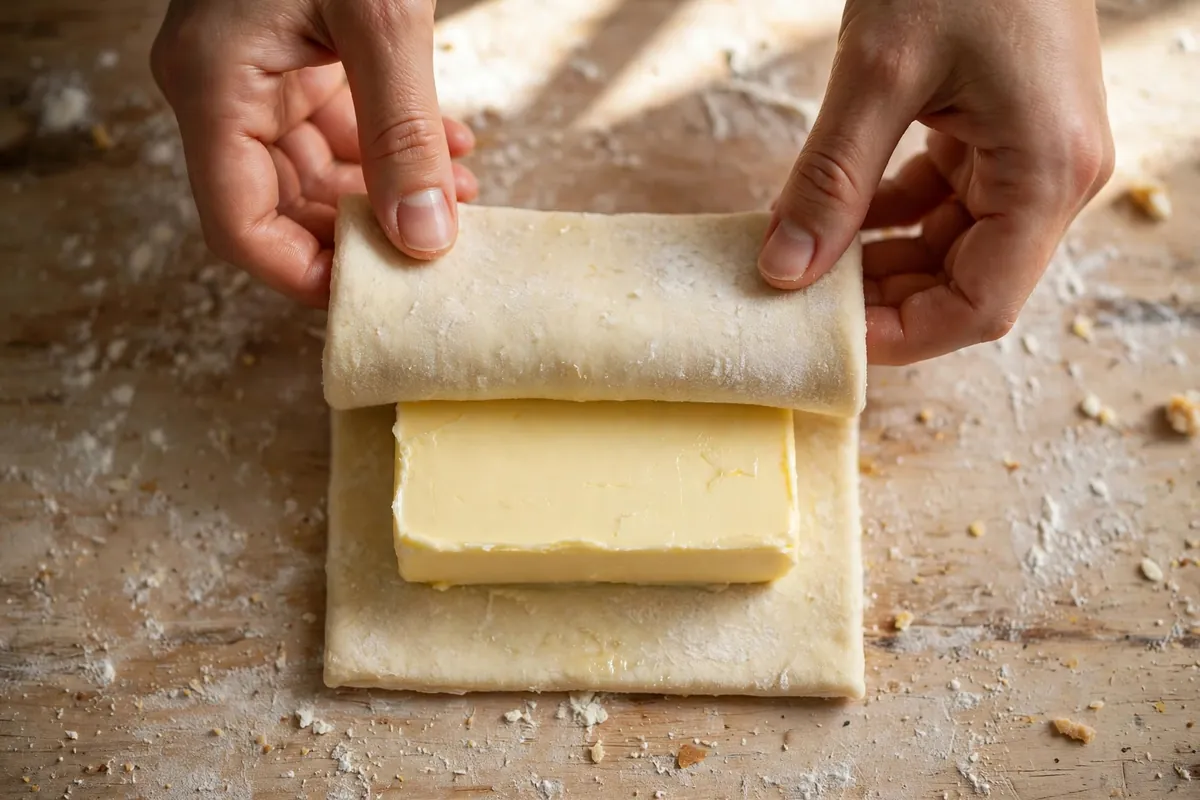
    hands folding dough in a letter fold over a visible butter layer
    hands folding dough in a letter fold over a visible butter layer

    4. Under-proofed — the oven spring never happened

    Croissants need a full final proof: 2–3 hours at 75–80°F (24–27°C), until the layers are visibly separated, the croissant jiggles like jelly when you nudge the tray, and the dough feels airy, not firm. Bake too early and the yeast hasn’t produced enough gas — the crumb sets dense before it ever opens up.

    How to tell: The shaped croissants looked basically the same size going into the oven as when you shaped them. Properly proofed croissants are nearly doubled and the layer lines are visibly puffy and separated.

    The fix: Proof by look and feel, not the clock. The jiggle test is the truth: nudge the baking sheet and the croissant should wobble like set custard. In a cool kitchen this can take 3+ hours — that’s normal. Don’t rush it with extra heat (see cause #2: warm proofing melts butter). If you’re unsure whether they’re ready, give them another 30 minutes; slightly over-proofed beats under-proofed for croissants.

    5. The oven wasn’t hot enough

    Lamination needs a blast of heat: 400–425°F (200–220°C) for the first 10–15 minutes. That initial shock does two things — it sets the outside structure fast, and it flash-converts the butter’s water to steam before the butterfat can melt out. A cool oven gives you slow melt instead of explosive steam: the butter oozes, the layers fuse, density results.

    How to tell: The croissants took longer than expected, browned slowly and evenly rather than puffing dramatically in the first minutes, and butter pooled on the tray.

    The fix: Preheat fully — a full 20 minutes past the beep — and verify with an oven thermometer. Most home ovens run 15–25°F cool. Bake at a true 400°F (200°C) minimum; start at 425°F (220°C) for 10 minutes, then drop to 375°F (190°C) to finish without over-browning. And never open the door in the first 15 minutes: the steam burst is doing the structural work.

    6. Dull cuts sealed the layers shut

    This one hides in plain sight. Croissant triangles must be cut with a sharp blade or pizza wheel. A dull knife drags and compresses the dough’s cut edges, pinching the 27 layers together along the sides. Sealed edges can’t separate — the interior steams, but the sides stay fused, and the crumb reads dense.

    How to tell: The cut edges looked smeared or compressed rather than showing clean alternating stripes of dough and butter.

    The fix: Sharpen up. A pizza wheel is ideal — one firm rolling cut, no sawing. You should see distinct stripes on every cut face.

    7. Too much dusting flour worked into the dough

    A little flour on the bench is necessary; a blizzard of it becomes part of the dough. Every fold picks up the bench flour, and by the third turn you’ve added measurably more flour — drier dough, tougher gluten, tighter crumb. It also dulls flavor.

    How to tell: You floured heavily at every turn and the dough felt progressively drier and stiffer.

    The fix: Flour the bench, not the dough — a whisper, brushed off before each fold. Use a pastry brush to sweep excess off the dough surface. If the dough is sticking, it’s usually too warm (back to cause #2), not under-floured.

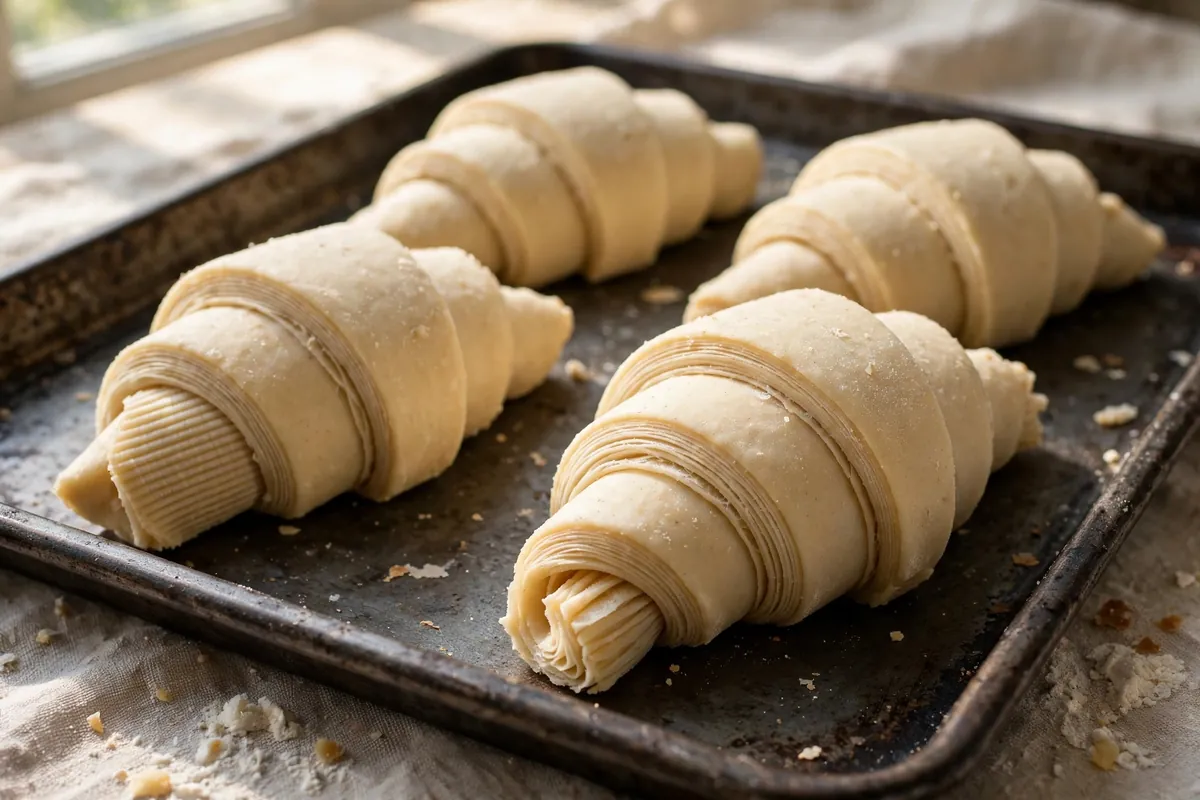
    unbaked croissant triangles on a tray showing visible layer stripes on the cut edges
    unbaked croissant triangles on a tray showing visible layer stripes on the cut edges

    Frequently asked questions

    Can I fix dense croissants after baking?
    Not really — density is structural, set during the bake. But they aren’t wasted: split and toast them, or turn them into bread pudding. Custard soaks into dense crumb beautifully.

    Why is there no honeycomb inside, just solid crumb?
    The layers merged before steaming — butter too warm at some stage (cause #2) or too few distinct layers from shattering (cause #1). No steam separation, no honeycomb.

    Can I use all-purpose flour instead of bread flour for croissants?
    Yes, with a trade-off. Bread flour (12–14% protein) holds layers well; all-purpose (10–12%) gives a more tender, delicate croissant. Either works — don’t use cake flour.

    Is it safe to eat under-proofed croissants?
    Yes — fully baked means fully safe. Under-proofed just means dense.

    How do I know the butter is the right temperature?
    The bend test: it should flex without cracking and feel cool but not hard — about 60°F (16°C). Press a finger in: it should give like firm clay, not shatter like cold butter or smear like soft butter.

    Can I freeze croissants and bake later?
    Yes — freeze after shaping, before proofing. Thaw overnight in the fridge, then proof at room temperature (it’ll take longer, 3–4 hours). Some bakeries do their entire production this way.

    Related troubleshooting: Puff Pastry Not Puffing · Why Is My Bread Dense? · Why Didn’t My Bread Rise?

  • Why Did My Macarons Hollow? Feet, Hollows, and the Fixes

    Why Did My Macarons Hollow? Feet, Hollows, and the Fixes

    Hollow macarons are the cruelest macaron failure because everything else can look right: smooth tops, pretty feet, lovely colors — and then you bite in and there’s an air pocket where chewy shell should be. The causes live in three places: how you mixed, how you rested, and how you baked.

    Quick diagnosis: You under-mixed the batter (most common) — thick batter traps big air pockets that bake into hollows. Macaronage until the batter flows like lava and a ribbon dissolves in 10 seconds, bang the tray hard to release air, rest until the shells are dry to the touch, and bake at a true 300–315°F (150–160°C) until fully set.

    My tested baseline: 100g aged egg whites (about 3 large), 125g fine almond flour, 200g powdered sugar, 25g granulated sugar, pinch of salt. Sift almond flour + powdered sugar twice. Whip whites to firm glossy peaks with the granulated sugar. Pipe 1½-inch rounds, bang the tray firmly 3–4 times, pop surface bubbles with a toothpick, rest 30–60 minutes until matte and dry to the touch. Bake at 310°F (155°C) for 14–16 minutes, until shells lift cleanly off the parchment. Cool fully before filling.

    1. You under-mixed — thick batter traps the air that becomes hollows

    The number one cause, and the hardest to judge. Under-macaronaged batter is thick, holds stiff peaks of its own, and is full of trapped air from the meringue that never got folded out. In the oven, those air pockets expand, the top sets around them, and you’re left with shells that are all dome and no interior.

    How to tell: Batter was thick and held its shape instead of flowing; piped rounds kept tall peaks (“kisses” that never settled); shells came out lumpy, tall, and hollow; feet were minimal or absent.

    The fix: Learn the ribbon test and trust it over counting folds. Lift the spatula: the batter should fall in a thick ribbon that melts back into the surface within about 10 seconds. (Macaronage is the same deflation judgment as Meringue Weeping: Why Your Peaks Leak — know your foam’s limits.)

    2. You didn’t bang out the air — the pockets stayed in

    Even perfectly macaronaged batter holds air bubbles from piping. Left in the shell, they expand into hollows in the oven’s heat.

    How to tell: Hollows concentrated near the top of the shell; visible bubbles on the surface before baking; shells with a rough or pockmarked top after baking.

    The fix: Bang the tray flat on the counter 3–4 times, hard — from 3–4 inches up, not a gentle tap. Then go over the surface with a toothpick or scribe and pop every remaining visible bubble, smoothing the surface. This also settles the batter into even rounds and helps feet form uniformly.

    3. You skipped or rushed the rest — no skin, no structure

    Resting forms the dry skin that does two jobs: it lets the shell rise upward into feet instead of spreading outward, and it gives the top structural integrity so it doesn’t dome up over expanding interior air.

    How to tell: Shells spread wider than piped, tops cracked, feet spread outward instead of rising, hollow gap directly under the top shell.

    The fix: Rest piped shells until they’re matte and completely dry to a light fingertip touch — 30–60 minutes at normal humidity, longer on humid days (up to 2 hours; a fan helps). They should look dull, not shiny, and your finger should come away clean. In very dry climates 20–30 minutes can be enough — judge by touch, not the clock.

    4. Your oven ran too hot — the top set before the inside finished

    An oven running at 340°F when it claims 315°F will set the shell’s exterior in minutes while the interior is still expanding batter. The rigid top can’t settle back down as the interior finishes, so a gap opens and stays.

    How to tell: Shells browned, tops domed high, feet looked good but the interior gaped; one side of the tray hollowed while the other didn’t.

    The fix: An oven thermometer is non-negotiable for macarons — most home ovens run 15–25°F off. Target a true 300–315°F (150–160°C). If your oven has hot spots, rotate the tray once at the halfway mark.

    hands performing the ribbon test, batter falling in a thick lava-like ribbon from a spatula
    hands performing the ribbon test, batter falling in a thick lava-like ribbon from a spatula

    5. You underbaked them — the interior never set

    Hollows also come from pulling shells too early. An underbaked shell’s interior is still soft batter when it leaves the oven; as it cools, the unset center contracts and pulls away from the top, opening a gap. The shell looks done — feet, color, smooth top — but the structure inside never finished.

    How to tell: Shells stuck slightly to the parchment, bottoms looked wet or shiny, shells felt fragile and cracked when lifted, hollows appeared as they cooled rather than in the oven.

    The fix: Bake until the shells lift cleanly off the parchment with no sticking — that’s the doneness test that overrules the clock. If the first test shell sticks, give the tray 2 more minutes. A fully baked macaron shell is sturdy; if yours feel delicate, they needed more time.

    6. Your meringue and dry ingredients weren’t right — the foundation

    Hollows start before macaronage if the components are off.

    How to tell: Batter never looked smooth no matter how much you folded; shells were speckled with dark almond bits; meringue looked soft or weepy before you even started folding.

    The fix: Age egg whites 24–48 hours in the fridge (covered), then bring to room temperature before whipping — aged whites whip to a stabler, more elastic meringue. Sift the almond flour and powdered sugar together twice. Whip to firm, glossy peaks — not dry and clumpy (over-whipped meringue folds out unevenly and leaves pockets).

    perfect macaron shells on a tray showing even ruffled feet, one shell lifted to show the bottom
    perfect macaron shells on a tray showing even ruffled feet, one shell lifted to show the bottom

    Frequently asked questions

    Are hollow macarons safe to eat?
    Yes — hollows are a texture defect, not a safety issue, as long as the shells are fully baked. Fill them generously; a good ganache or buttercream filling hides a multitude of hollows and the sandwich still tastes like a macaron.

    Can I fix hollow macarons after baking?
    Not the shells themselves — the structure is set. But the classic fix is the “maturing” step: fill them and refrigerate 24 hours. The filling’s moisture migrates into the shells, softening them slightly and making small hollows far less noticeable. Matured macarons taste better anyway.

    Why do my macarons have no feet AND are hollow?
    Under-mixed batter plus no rest — the double fault. The thick batter couldn’t rise properly (no feet) and trapped air became hollows. Fix the macaronage first (ribbon test), then the rest (dry to touch), and both problems usually resolve together.

    Can humidity cause hollow macarons?
    Indirectly, yes. High humidity extends the resting time needed to form a skin — shells that feel dry in 30 minutes on a dry day can take 2 hours when it’s humid. If you bake on skinless shells in humid weather, you get spreading, cracking, and hollows. Run a fan and be patient.

    Related troubleshooting: Meringue Weeping: Why Your Peaks Leak · Why Did My Pavlovas Crack? · Choux Pastry Collapse: Why Your Éclairs Fell